
Basic White Bread with Milk: The Secret to Extra Softness


Welcome to BakeWithEase, your kitchen companion on your baking journey! Ever wondered how to achieve that irresistibly soft, pillowy texture in homemade bread? Uncover the secrets in our article below, where we reveal our step-by-step guide to a perfect soft milk white bread recipe. Prepare to be amazed at how simple ingredients and techniques can transform your baking and leave you craving more! Intrigued? Let's get baking!
- Soft Milk White Bread Recipe: The Secret to Extra Softness
- Introduction: Discover the Magic of Milk Bread
- Understanding the Science Behind Soft Bread
- Soft Milk White Bread Recipe: Ingredients and Equipment
-
Step-by-Step Guide to Baking Soft Milk White Bread
- Step 1: Preparing the Milk and Yeast Mixture
- Step 2: Combining Dry Ingredients and Creating the Dough
- Step 3: Kneading the Dough for Optimal Gluten Development
- Step 4: First Rise: Letting the Dough Double in Size
- Step 5: Shaping the Dough for a Beautiful Loaf
- Step 6: Second Rise: Achieving Light and Airy Texture
- Step 7: Baking the Bread to Golden Perfection
- Step 8: Cooling and Slicing Your Soft Milk White Bread
- Tips and Tricks for the Best Soft Milk White Bread
- Storing Your Homemade Soft Milk White Bread
- Soft Milk White Bread Recipe: Detailed Recipe Card
- Enjoy Your Delicious Homemade Soft Milk White Bread!
- Frequently Asked Questions
- Final Reflection: The Enduring Allure of Simple Perfection
- Unlock the Secret to Perfectly Soft Bread!
Soft Milk White Bread Recipe: The Secret to Extra Softness
Introduction: Discover the Magic of Milk Bread
Why Choose This Soft Milk White Bread Recipe?
Choosing a soft milk white bread recipe offers a distinct advantage over traditional water-based loaves: unparalleled tenderness and a finer crumb. The addition of milk introduces fats and sugars that interfere with gluten development just enough to prevent toughness, while also contributing to a richer flavor and a beautifully golden crust.
This specific recipe is designed to be forgiving, making it an excellent starting point for beginners or a reliable go-to for experienced bakers seeking consistently soft results. Unlike some dense, dry white bread variations, this version promises a melt-in-your-mouth texture that's perfect for sandwiches, toast, or simply enjoying warm with butter.
Furthermore, mastering this soft milk white bread recipe provides a fundamental skill set applicable to many other enriched doughs, such as dinner rolls or sweet buns. The principles of working with a slightly richer dough, understanding its hydration, and managing its rise times are key takeaways. Many bakers report that their first successful attempt at a truly soft loaf was with a milk-based recipe, often citing the forgiving nature of the dough and the gratifying outcome. It’s a recipe that truly delivers on its promise of extra softness, transforming simple ingredients into a staple everyone will love.
BakeWithEase's Guide to Perfect Homemade Bread
At BakeWithEase, our mission is to demystify baking and empower you to create delicious treats right in your own kitchen. This guide to baking the perfect soft milk white bread recipe embodies that philosophy. We break down each step, explaining not just what to do, but why you're doing it, helping you build confidence and intuition as a baker.
From selecting the right ingredients to understanding the subtle cues of a perfectly proofed dough, we walk you through the entire process. Our approach focuses on simple techniques and readily available ingredients, ensuring that anyone, regardless of prior baking experience, can achieve fantastic results.
This comprehensive guide is part of our broader Basic White Bread Guide series, designed to lay a solid foundation in bread baking. We cover essential concepts like yeast activation, kneading techniques, and proofing, all through the lens of this incredibly rewarding soft milk white bread recipe.
Think of this as your friendly, step-by-step mentor, helping you avoid common pitfalls and celebrate your successes. We believe that baking bread should be a joyful and accessible experience, and this recipe is a perfect example of how simple steps can lead to truly spectacular homemade bread that tastes infinitely better than anything store-bought.
Understanding the Science Behind Soft Bread
The Role of Milk in Bread Softness
Milk plays a crucial role in creating the signature softness of this soft milk white bread recipe. Unlike water, milk contains fat, sugar (lactose), and protein. The fat molecules coat the gluten strands as they develop during kneading, effectively shortening them. This interference results in a less rigid gluten network, leading to a more tender crumb structure. Imagine gluten as a network of tiny springs; in water dough, these springs are long and tightly coiled, providing chewiness. In milk dough, the fat molecules break up these springs, making the network looser and softer.
Beyond fat, the lactose sugar in milk doesn't get consumed by yeast during fermentation, unlike sucrose or glucose. This residual sugar contributes to the bread's sweetness and helps the crust brown more beautifully during baking via the Maillard reaction. The proteins in milk also contribute to the overall structure and richness of the dough.
Using whole milk typically yields the softest results due to its higher fat content (around 3.25%), although 2% milk (around 2%) will still produce a significantly softer loaf than water. Even powdered milk, when reconstituted, provides these benefits, making it a versatile ingredient for achieving a wonderful soft milk white bread recipe.
Gluten Development and Dough Texture: Key Factors
Gluten development is absolutely fundamental to the texture of any bread, including a soft milk white bread recipe. Gluten is formed when two proteins found in wheat flour, glutenin and gliadin, are hydrated and worked through kneading. Glutenin provides elasticity, allowing the dough to stretch, while gliadin provides extensibility, allowing it to expand. A well-developed gluten network creates a strong, elastic structure that can trap the carbon dioxide gas produced by the yeast during fermentation and rising. This trapped gas is what causes the bread to rise and develop an open, airy texture.
However, for a soft bread, you don't want an overly developed, tough gluten network. This is where the fat and sugar from the milk come into play, as discussed earlier. The key is to knead just enough to build sufficient structure to hold the rise, but not so much that the dough becomes excessively elastic or tough. The texture of the dough is your best indicator of gluten development.
Properly kneaded dough for this soft milk white bread recipe should feel smooth, elastic, and only slightly sticky. It should be able to stretch into a thin membrane without tearing easily (the "windowpane test"). Achieving this balance is crucial for that coveted soft crumb.
Soft Milk White Bread Recipe: Ingredients and Equipment
Essential Ingredients for Extra Soft White Bread
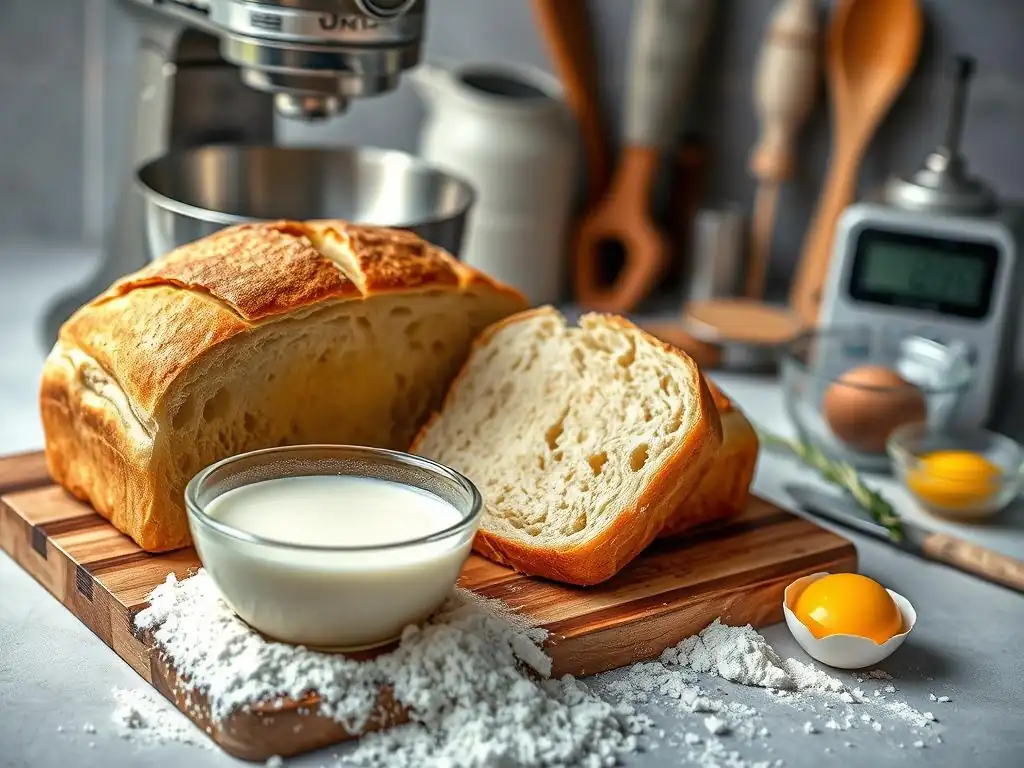
To bake a truly exceptional soft milk white bread recipe, selecting the right ingredients is key. You'll need high-quality bread flour, which typically has a protein content of 12-14%, providing the necessary gluten structure. Active dry yeast or instant yeast will be your leavening agent; ensuring your yeast is fresh is paramount for a good rise. Granulated sugar not only feeds the yeast but also contributes to softness and browning. Salt is essential for flavor and controlling yeast activity.
The star ingredient for softness is milk. Using whole milk is recommended for maximum richness and tenderizing effect due to its higher fat content (around 3.25%). Ensure the milk is warmed to the correct temperature (typically between 105°F and 115°F for active dry yeast) to activate the yeast effectively.
A small amount of butter or oil also enhances softness and flavor; unsalted butter is preferred for controlling the salt level in the recipe. Some recipes might call for a touch of milk powder or even a tangzhong (a cooked milk and flour paste) for ultimate softness and moisture retention – variations we'll touch on later.
Must-Have Baking Equipment for Perfect Bread
Having the right tools makes the process of baking this soft milk white bread recipe much smoother and more successful. A large mixing bowl is essential for combining ingredients and allowing the dough to rise. If you're using a stand mixer, ensure you have a dough hook attachment. For hand kneading, a clean, sturdy surface is necessary. Measuring cups and spoons are critical for accurate ingredient quantities – precision helps ensure consistent results.
A digital kitchen scale is highly recommended for weighing flour and other ingredients, as measuring by volume can be inconsistent (a cup of flour can vary by as much as 20% depending on how it's scooped). A thermometer, either instant-read or a dedicated baking thermometer, is crucial for checking the temperature of the milk to properly activate the yeast. A proofing container or bowl, often lightly oiled, is needed for the dough's rises.
Finally, a loaf pan (typically 9x5 inches for this soft milk white bread recipe) is required for shaping and baking the loaf. Parchment paper can be helpful for lining the pan for easy removal.
Step-by-Step Guide to Baking Soft Milk White Bread
Step 1: Preparing the Milk and Yeast Mixture
The first step in creating this delightful soft milk white bread recipe is activating your yeast. Begin by warming the milk. Gently heat the milk on the stovetop or in the microwave until it reaches the ideal temperature for yeast activity, typically between 105°F and 115°F (40°C-46°C) for active dry yeast. If using instant yeast, the temperature range is more flexible, but warm milk still helps speed things along. Avoid making the milk too hot, as temperatures above 130°F (54°C) can kill the yeast.
Once the milk is warm, pour it into a small bowl. Stir in the sugar from the recipe – this provides food for the yeast to get started. Sprinkle the yeast over the surface of the milk/sugar mixture. If using active dry yeast, let this mixture sit for 5-10 minutes.
You should see foam or bubbles forming on the surface, indicating the yeast is alive and active. If nothing happens, your yeast may be old or the milk was too hot/cold, and you'll need to start this step over with new yeast. Instant yeast doesn't strictly require this proofing step, but doing it confirms viability.
Step 2: Combining Dry Ingredients and Creating the Dough
In a large mixing bowl, whisk together the bread flour and salt. Ensure they are evenly distributed throughout the flour. In a separate bowl (or the bowl of your stand mixer), combine the activated yeast mixture with any other wet ingredients specified in your soft milk white bread recipe, such as melted butter or oil, and perhaps an egg if the recipe calls for it for added richness.
Gradually add the dry ingredients to the wet ingredients, mixing with a wooden spoon or a stand mixer fitted with the dough hook on low speed. Mix until the flour is just incorporated and a shaggy dough forms. At this stage, the dough will likely be quite sticky. Scrape down the sides of the bowl to gather all the ingredients. This initial mixing step ensures everything is roughly combined before the kneading process begins.
Step 3: Kneading the Dough for Optimal Gluten Development
Kneading is where the magic of gluten development happens, essential for the structure of our soft milk white bread recipe. If using a stand mixer, switch to medium-low speed and let the dough hook work the dough for about 8-10 minutes. The dough should become smoother, more elastic, and start to pull away from the sides of the bowl. It might still stick a little to the bottom.
If kneading by hand, turn the shaggy dough out onto a lightly floured surface. Knead by folding the dough over on itself, pressing down with the heel of your hand, rotating, and repeating. Continue kneading for 10-15 minutes. The dough will initially be sticky but will become smoother and less sticky as you work it. You'll know the dough is sufficiently kneaded when it is smooth, elastic, and passes the windowpane test: gently stretch a small piece of dough; if you can stretch it thin enough to see light through it without it tearing, the gluten is well-developed.
Step 4: First Rise: Letting the Dough Double in Size
The first rise, or bulk fermentation, is crucial for flavor development and achieving a light texture in your soft milk white bread recipe. Lightly grease a clean bowl with a neutral oil (like vegetable or canola oil) or cooking spray. Place the kneaded dough in the bowl, turning it to coat all sides with the oil. This prevents the dough from drying out and sticking to the bowl as it rises.
Cover the bowl tightly with plastic wrap or a damp kitchen towel. Place the bowl in a warm, draft-free place. An oven with the light on (but the oven turned off) is an ideal spot, maintaining a temperature around 75°F-80°F (24°C-27°C). Let the dough rise until it has doubled in size. This typically takes 60-90 minutes, but the exact time can vary depending on the room temperature and the activity of your yeast. Don't rush this step; allowing the dough to double fully is key to a good rise in the oven.
Step 5: Shaping the Dough for a Beautiful Loaf
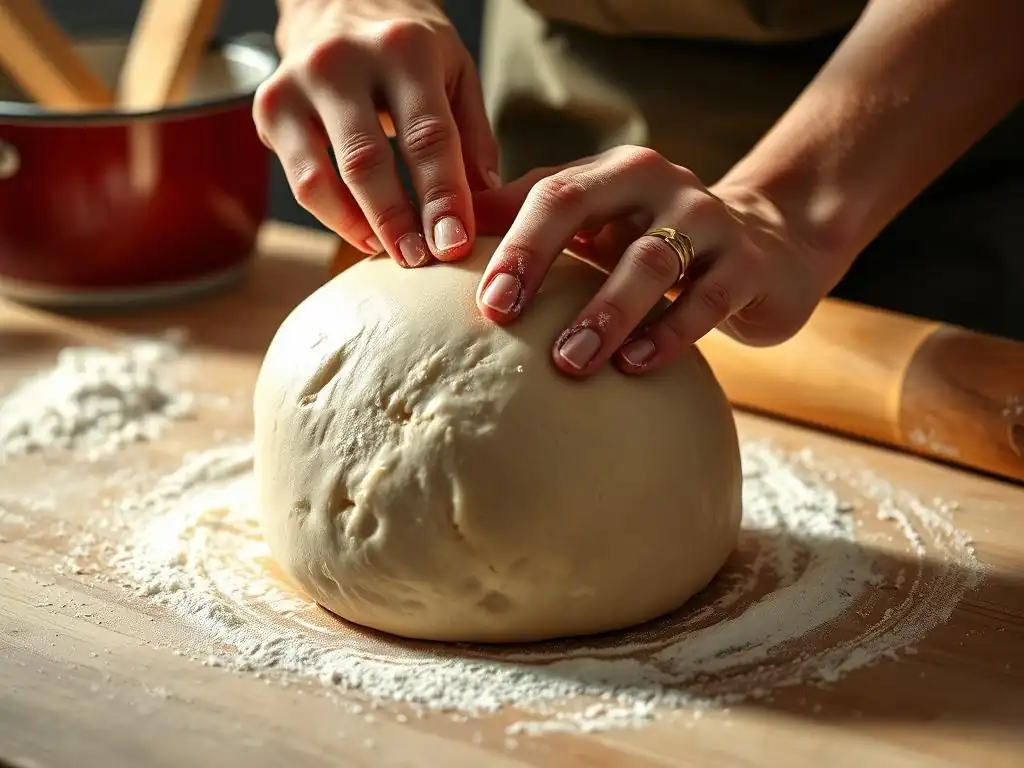
Once the dough has doubled, gently punch it down to release the accumulated gases. Turn the dough out onto a lightly floured surface. For a standard loaf pan, you want to shape the dough into a log. There are several methods for shaping, but a simple and effective one for this soft milk white bread recipe is to flatten the dough into a rectangle roughly the width of your loaf pan.
Fold the top edge of the rectangle down to the center, pressing gently to seal. Then, fold the bottom edge up over the folded top edge, creating a log shape. Pinch the seam closed tightly along the bottom and tuck the ends under. This creates surface tension, which helps the loaf hold its shape and rise upwards in the pan. Ensure the loaf is roughly the length of your loaf pan.
Step 6: Second Rise: Achieving Light and Airy Texture
The second rise, or proofing, is when the shaped loaf expands again before baking, contributing significantly to the final texture of your soft milk white bread recipe. Lightly grease your loaf pan or line it with parchment paper. Carefully transfer the shaped dough log into the prepared pan, seam-side down.
Cover the loaf pan loosely with plastic wrap or a clean kitchen towel. Place the pan back in a warm, draft-free spot for the second rise. Let the dough rise until it has nearly doubled in size and the top of the loaf is about 1 inch above the rim of the pan. This second rise usually takes 30-60 minutes, often shorter than the first rise.
To check if it's ready, gently poke the dough with a finger; if the indentation springs back slowly and partially, it's ready to bake. If it springs back completely, it needs more time. If it doesn't spring back at all, it may be over-proofed.
Step 7: Baking the Bread to Golden Perfection
Preheating your oven is crucial for achieving a good oven spring (the final burst of rising in the oven) and a beautiful crust on your soft milk white bread recipe. Preheat your oven to 375°F (190°C) about 15-20 minutes before the end of the second rise. This ensures the oven is fully up to temperature when the bread goes in.
Once the oven is preheated and the loaf is properly proofed, place the loaf pan on the center rack of the oven. Bake for 25-35 minutes. The exact baking time will vary depending on your oven. The bread is done when the crust is golden brown and the internal temperature reaches 190°F-200°F (88°C-93°C) when measured with an instant-read thermometer inserted into the center of the loaf. If the top is browning too quickly, you can loosely tent the loaf with aluminum foil during the last 10-15 minutes of baking.
Step 8: Cooling and Slicing Your Soft Milk White Bread
Patience is key in this final step, even though you'll be eager to taste your homemade soft milk white bread recipe! As soon as the bread comes out of the oven, carefully remove it from the loaf pan and place it on a wire cooling rack. Leaving it in the pan can cause the bottom and sides to steam and become soggy.
Allow the bread to cool completely on the wire rack before slicing. This can take 1.5 to 2 hours. Cooling allows the internal structure to set and the steam to dissipate properly. Slicing hot bread can result in a gummy texture and can be difficult to do cleanly. Resist the urge! Once fully cooled, use a serrated bread knife to slice your incredibly soft, delicious homemade milk white bread.
Tips and Tricks for the Best Soft Milk White Bread
Achieve Maximum Softness: Pro Baking Tips
To ensure your soft milk white bread recipe reaches its peak softness, consider a few pro tips. Firstly, use whole milk if possible; the extra fat content significantly contributes to tenderness. Secondly, ensure you don't add too much flour during kneading. A slightly sticky dough is preferable to a stiff one, as excess flour can lead to a dry loaf. Use just enough flour on your surface or hands to prevent sticking, rather than incorporating it into the dough.
Another excellent technique for enhancing softness and moisture retention is using a tangzhong or yudane. These are Asian methods where a small portion of the flour and liquid (milk or water) from the recipe are cooked into a thick paste before being added to the main dough. This gelatinizes the starches, allowing them to hold significantly more moisture.
Incorporating a tangzhong can result in a bread that stays soft for several days longer than a standard loaf. For instance, cooking 5% of the total flour with 25% of the total liquid until thick can dramatically improve the outcome of your soft milk white bread recipe.
Troubleshooting Common Bread Baking Problems
Even with a reliable soft milk white bread recipe, issues can arise. If your bread didn't rise well, check your yeast. Was it fresh? Was the milk temperature correct? Too hot kills it, too cold leaves it sluggish. Ensure your rising environment is warm and draft-free. If the crust is too hard, you might be baking at too high a temperature or for too long. Try reducing the oven temperature slightly or tenting the loaf with foil.
A dense, heavy loaf often indicates insufficient kneading or under-proofing. Make sure you kneaded long enough to develop gluten (check with the windowpane test) and allowed the dough to double fully during both rises. If the dough is too sticky and hard to handle, resist adding excessive amounts of flour; sometimes a little oil on your hands helps more than flour. Over-proofing is also a risk; if the dough rises too much and then collapses before or during baking, it will result in a dense texture. Look for the slow spring-back test in the second rise.
Variations: Adding Flavor to Your Milk Bread
While a classic soft milk white bread recipe is delicious on its own, it's also a fantastic base for variations. For a touch of sweetness, you can add 1-2 tablespoons of honey or maple syrup along with the sugar. For a richer flavor profile, try substituting a portion of the milk with buttermilk, which adds a slight tang and can further tenderize the crumb.
Incorporating herbs like dried rosemary or thyme (about 1-2 teaspoons) during the dry ingredient stage can transform it into a savory loaf perfect for pairing with soups. For a cheesy variation, add about 1/2 cup of shredded cheddar or Parmesan cheese during the final minutes of kneading. You could also experiment with adding a small amount of whole wheat flour (substituting up to 1/4 of the white flour) for a slightly nuttier flavor while still maintaining much of the softness.
Storing Your Homemade Soft Milk White Bread
Keeping Your Bread Fresh for Longer
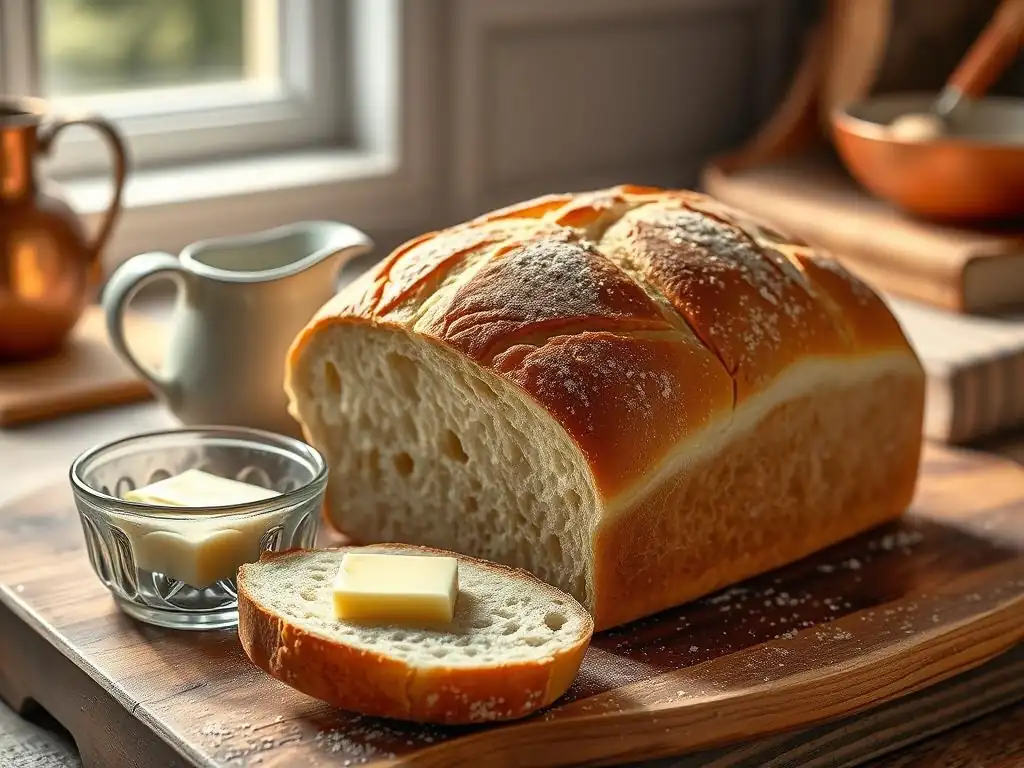
To enjoy the wonderful softness of your homemade soft milk white bread recipe for as long as possible, proper storage is essential. Once the bread has completely cooled (this is critical! ), store it at room temperature. Avoid refrigerating it, as this can actually cause the starches to crystallize faster, making the bread stale much quicker than if left at room temperature.
The best way to store the loaf is in a bread box, a clean plastic bag, or wrapped tightly in plastic wrap or beeswax wraps. Sliced bread tends to dry out faster because more surface area is exposed to the air. If you've sliced the loaf, consider storing it in an airtight container or bag. Properly stored at room temperature, your soft milk white bread recipe should remain wonderfully soft for 2-3 days.
Freezing and Reheating Tips
If you won't finish your soft milk white bread recipe within a few days, freezing is an excellent option to preserve its freshness and softness. Ensure the bread is completely cooled before freezing. For best results, freeze the loaf whole or sliced. If freezing sliced, you can place a small piece of parchment paper between slices for easy separation.
Wrap the bread tightly in plastic wrap, then place it in a freezer-safe bag or wrap it again in aluminum foil. This double layer helps prevent freezer burn. Frozen bread can be stored for up to 3 months.
To thaw a whole loaf, unwrap it and let it sit at room temperature for several hours. To thaw slices, you can simply take them out as needed; they will thaw in about 15-30 minutes at room temperature, or you can pop them directly into a toaster or oven. Reheating slices briefly in a toaster or oven (around 350°F/175°C for 5-10 minutes) can help restore some of that initial softness and warmth.
Soft Milk White Bread Recipe: Detailed Recipe Card
Ingredients List
- Warm Whole Milk: ~1.5 cups (105-115°F / 40-46°C)
- Granulated Sugar: ~1/4 cup
- Active Dry Yeast: 2 1/4 teaspoons (one standard packet)
- Bread Flour: ~3.5 to 4 cups (plus more for dusting)
- Salt: 1.5 teaspoons
- Unsalted Butter, melted and slightly cooled: 3 tablespoons
Instructions
- Activate Yeast: In a small bowl, combine the warm milk, sugar, and yeast. Stir gently. Let stand for 5-10 minutes until foamy.
- Combine Wet & Dry: In a large mixing bowl, whisk together 3.5 cups of the bread flour and the salt. Add the activated yeast mixture and melted butter to the dry ingredients.
- Mix Dough: Stir with a wooden spoon or use a stand mixer with a dough hook on low speed until a shaggy dough forms and all flour is incorporated.
- Knead: Turn the dough out onto a lightly floured surface (or continue using the stand mixer). Knead for 10-15 minutes by hand (8-10 minutes by mixer) until the dough is smooth, elastic, and passes the windowpane test. Add the remaining flour only if the dough is excessively sticky.
- First Rise: Lightly grease a clean bowl. Place the dough in the bowl, turning to coat. Cover with plastic wrap and let rise in a warm place until doubled in size, typically 60-90 minutes.
- Shape: Punch down the dough. Turn it onto a lightly floured surface. Shape the dough into a log appropriate for your 9x5 inch loaf pan (see Step 5 instructions above).
- Second Rise: Grease your loaf pan or line with parchment paper. Place the shaped dough in the pan. Cover loosely with plastic wrap and let rise in a warm place until nearly doubled and the top is about 1 inch above the rim, typically 30-60 minutes.
- Bake: Preheat oven to 375°F (190°C). Bake for 25-35 minutes, or until golden brown and the internal temperature is 190-200°F (88-93°C).
- Cool: Immediately remove bread from the pan and place on a wire rack to cool completely before slicing (1.5-2 hours).
Notes and Variations
- For an even softer loaf, substitute 1/4 cup of the milk with an egg.
- Using a tangzhong (cook 3 tbsp milk + 1 tbsp flour until thick, cool, then add to wet ingredients) will significantly increase softness and shelf life.
- Ensure your oven temperature is accurate; consider using an oven thermometer.
- Task List for Next Bake:
- [ ] Check yeast expiration date.
- [ ] Calibrate oven thermometer.
- [ ] Prepare tangzhong ahead of time.
- [ ] Note rise times for future reference.
- [ ] Try adding a sprinkle of sesame seeds to the top before baking.
Enjoy Your Delicious Homemade Soft Milk White Bread!
Frequently Asked Questions
What makes this white bread recipe "extra soft"?
The secret lies in using milk as a key ingredient. Milk adds moisture and fat, resulting in a softer crumb compared to recipes using only water.
Is this recipe suitable for baking beginners?
Yes, absolutely! We've designed this recipe with simplicity in mind. The steps are clearly explained, and the ingredients are easy to find.
Can I use a stand mixer for this recipe?
Yes, you can! Using a stand mixer will make the kneading process easier and faster. Just be sure to watch the dough and avoid over-kneading.
What type of flour is best for this soft milk white bread?
We recommend using bread flour for the best results. Bread flour has a higher protein content, which helps to develop gluten and create a chewy and soft texture.
How do I know when the bread is fully baked?
The bread is done when it's golden brown and sounds hollow when tapped on the bottom. An internal temperature of 190-200°F (88-93°C) is also a good indicator.
Final Reflection: The Enduring Allure of Simple Perfection
The seemingly simple act of baking a loaf of white bread with milk remains surprisingly relevant today, a testament to the enduring power of comfort food and the timeless appeal of perfectly soft bread. In a world obsessed with complex flavors and gourmet ingredients, the humble white loaf, made even softer with the addition of milk, offers a comforting return to basics, a reminder of simpler times and the satisfaction of homemade goodness. This isn't just about a recipe; it's about connection, tradition, and the joy of creating something delicious from scratch.
The influence of this seemingly simple recipe extends far beyond the kitchen table. It speaks to a deeper cultural yearning for authenticity and connection, a desire to reclaim lost skills and create something meaningful with our own hands. The best things in life are simple.
This quote perfectly encapsulates the essence of this recipe and its enduring appeal. It's a reminder that sometimes, the most profound experiences come from the simplest of acts, fostering a sense of accomplishment and a connection to something larger than ourselves. The aroma of freshly baked bread, soft and warm from the oven, evokes powerful memories and emotions, bridging generations and cultures.
Now, I invite you to consider the power of this simple recipe in your own life. Don't just bake a loaf; bake a connection. Share the warm, soft bread with loved ones, savor the process, and appreciate the simple pleasure of creating something delicious and comforting. Let this recipe be a reminder that sometimes, the most rewarding experiences are found not in complexity, but in the quiet joy of mastering a fundamental skill and sharing its fruits with those you cherish. The softest bread is often the one shared with the warmest hearts.
Unlock the Secret to Perfectly Soft Bread!
Thanks for joining us on this baking journey! We hope you now feel confident in creating wonderfully soft, pillowy white bread. Ready to take your baking skills to the next level?
- Bake a loaf today! Use our recipe as a springboard – experiment with different flours, add-ins, or even try shaping your loaves creatively. Let your imagination run wild!
- Share your baking triumph! Snap a picture of your freshly baked bread and share it on social media using #BakeWithEaseSoftBread. We'd love to see your creations!
- Explore other delicious bread recipes on BakeWithEase.com – we have a whole library waiting for you!
What unique twist will you add to your next loaf of perfectly soft bread?