
Why Your Enriched Dough Won't Rise Like It Should


Welcome to BakeWithEase, where we unravel the mysteries of baking! Are you battling a stubborn enriched dough that just won't rise? You're not alone! Discover the secrets behind achieving that perfect, airy texture in our latest article. We'll explore common pitfalls and provide simple solutions to get your dough rising like a pro. Get ready to transform your bread baking experience – let's get started!
- Why Your Enriched Dough Won't Rise Like It Should: A BakeWithEase Guide
- Understanding Enriched Dough and Its Rising Challenges
- Common Reasons for Enriched Dough Rising Problems
- Troubleshooting Your Enriched Dough: Step-by-Step Solutions
- Tips for Consistently Perfect Enriched Dough Rises
- Common Enriched Dough Recipes and Troubleshooting
- Conclusion: Achieving the Perfect Enriched Dough Rise with BakeWithEase
-
Frequently Asked Questions
- Why is my enriched dough not rising, even though I used yeast?
- Could the temperature of my ingredients be affecting the rise of my enriched dough?
- I've added a lot of butter and eggs; is that the reason my enriched dough won't rise?
- What's the best way to proof enriched dough to encourage a good rise?
- How long should I expect enriched dough to take to rise compared to a lean dough?
- Final Reflection: The Unsung Secrets of a Perfect Rise
- Unlock Your Baking Potential: Troubleshooting Dough Rise!
Why Your Enriched Dough Won't Rise Like It Should: A BakeWithEase Guide
Understanding Enriched Dough and Its Rising Challenges
What is Enriched Dough? Key Ingredients and Characteristics
Enriched dough stands apart from lean doughs like baguettes or pizza crusts because of its luxurious additions. Beyond the standard flour, water, yeast, and salt, enriched dough incorporates ingredients such as butter, milk, eggs, and sugar. These components contribute significantly to the dough's texture, flavor, and shelf life, resulting in soft, tender, and often slightly sweet baked goods like brioche, challah, dinner rolls, and cinnamon buns. The presence of these enriching ingredients fundamentally alters the dough's structure and behavior during the baking process, particularly impacting how it rises.
The key characteristics of enriched dough stem directly from these added ingredients. Butter and eggs contribute fat and richness, while milk provides moisture and lactose (a sugar). Sugar not only adds sweetness but also helps with browning and moisture retention. These elements interact with the gluten structure and yeast activity in ways that lean doughs do not experience. For instance, fat can coat gluten strands, potentially inhibiting their full development, while sugar can affect yeast's access to water. Understanding these basic properties is the first step in diagnosing why your enriched dough won't rise as expected.
Why Enriched Dough Rises Differently Than Lean Doughs
The rising process in any yeast dough relies on the yeast consuming sugars and producing carbon dioxide gas, which gets trapped by the gluten network, causing the dough to expand. In lean dough, this process is relatively straightforward, resulting in a vigorous, often airy rise. However, when dealing with enriched dough, several factors introduced by the extra ingredients complicate this process.
The added fat, sugar, and sometimes eggs increase the overall weight and density of the dough. This extra weight acts as a physical barrier, making it harder for the delicate gas bubbles produced by the yeast to lift the dough mass.
Furthermore, the high sugar content in many enriched doughs can actually draw water away from the yeast cells through osmosis, slowing down their metabolic activity. Fat, while contributing wonderful flavor and tenderness, can interfere with the formation of a strong, continuous gluten network necessary to capture gas effectively. Imagine trying to blow up a balloon made of slightly greasy material – it's harder to inflate and hold its shape.
Similarly, the fat in enriched dough can make it more challenging for the gluten to stretch and hold the gas. Consequently, enriched dough typically requires longer proofing times and may not double or triple in size as dramatically as a lean dough, which is important to remember when troubleshooting why your enriched dough won't rise.
Common Reasons for Enriched Dough Rising Problems
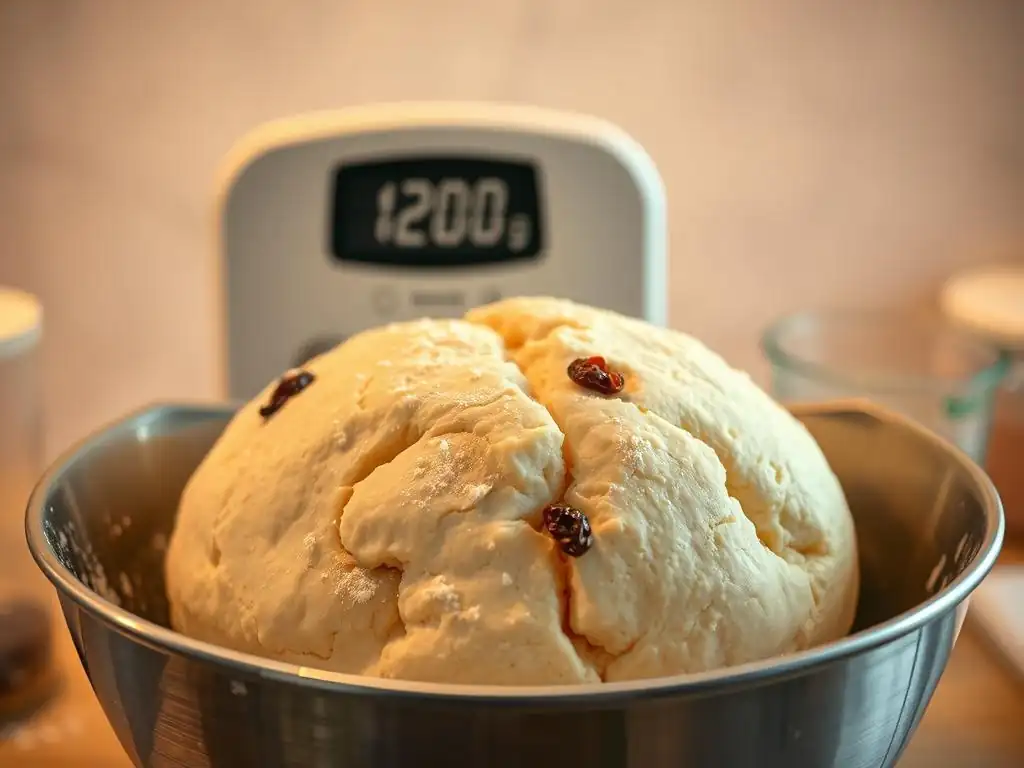
1. Yeast Issues: The Foundation of a Good Rise
Expired or Inactive Yeast: Testing and Troubleshooting
Yeast is a living organism, and like all living things, it has a shelf life and specific conditions it needs to thrive. Using yeast that is old or has been improperly stored (e.g., left open in a warm pantry) can result in little to no activity, leading to a flat, dense enriched dough that won't rise.
Active dry yeast, for example, typically lasts for about 1-2 years when stored unopened in a cool, dry place, but once opened, it's best used within 4 months if stored in the refrigerator. Instant yeast is often more forgiving but still benefits from proper storage.
To test if your yeast is still active, you can perform a simple proofing test. In a small bowl, combine about 1/4 cup of warm water (around 105-115°F or 40-46°C) with 1 teaspoon of sugar and 2 1/4 teaspoons (one standard packet) of active dry yeast. Stir gently and let it sit for 5-10 minutes. If the mixture becomes foamy and doubles in volume, your yeast is active and ready to use.
If nothing happens, your yeast is likely dead or inactive, and this is a primary reason your enriched dough won't rise. Discard it and use fresh yeast. For instant yeast, this test isn't strictly necessary as it can be mixed directly with dry ingredients, but the same principle applies – if your dough isn't rising, the yeast's viability is the first suspect.
Incorrect Yeast Type: Choosing the Right Yeast for Enriched Dough
While active dry and instant yeast can often be substituted for one another (usually with a slight adjustment in quantity and method), using the wrong type or misunderstanding its requirements can hinder your enriched dough's rise. Active dry yeast needs to be dissolved in warm liquid before being added to the dry ingredients, a process called proofing, which activates it. Instant yeast, on the other hand, is designed to be mixed directly with the flour and other dry ingredients and is often more vigorous and faster-acting.
Some recipes, particularly traditional ones, might call for fresh yeast (also known as cake yeast). Fresh yeast is highly perishable and must be stored in the refrigerator, ideally used within a week or two of purchase. It has a soft, crumbly texture.
If a recipe specifically calls for fresh yeast and you substitute active dry or instant without adjusting the quantity (typically 1 part active dry or instant to 3 parts fresh yeast by weight) or activation method, it can lead to an insufficient rise. Ensuring you use the yeast type specified or make the correct conversion is crucial when your enriched dough won't rise.
Yeast Quantity: Ensuring Enough Leavening Power
The amount of yeast required for an enriched dough can sometimes be slightly higher than for a lean dough recipe, precisely because of the inhibitory effects of fat and sugar. A typical lean dough recipe might use 1-2% yeast relative to the flour weight, but an enriched dough, especially one high in sugar (over 10-15% of flour weight) or fat, might benefit from slightly more yeast to overcome these challenges and ensure a good rise.
For example, a standard loaf of lean bread using 500g flour might use 7g of active dry yeast, while a rich brioche with 500g flour, significant butter, and sugar might perform better with 8-10g of yeast, or even more depending on the recipe's richness.
Using too little yeast for the amount of flour and enriching ingredients is a common reason why enriched dough won't rise sufficiently or takes an excessively long time. Always follow the recipe's specifications for yeast quantity carefully.
If adapting a recipe, consider the richness level; a dough with minimal enrichment won't need much adjustment, but a very rich dough might need a slight increase in yeast quantity to achieve the desired rise within a reasonable timeframe. Conversely, using too much yeast can lead to an overly rapid rise, potentially resulting in a coarse texture and an off-flavor ("yeasty" taste), so finding the correct balance is important.
2. Fat Content: Too Much Can Inhibit Rising
The Role of Fat in Enriched Dough: Flavor vs. Structure
Fat, typically in the form of butter, is a cornerstone of enriched dough, contributing significantly to its luxurious flavor, tenderness, and moist crumb. It shortens the gluten strands, which is why enriched doughs are often described as "short" or tender. This is highly desirable for texture in cakes, pastries, and certain breads. However, while fat enhances flavor and tenderness, it also plays a complex role in the dough's structure and ability to rise.
When fat is incorporated into the dough, it coats the flour particles and developing gluten network. This coating action can interfere with the gluten strands' ability to connect and form a strong, elastic network. A robust gluten network is essential for trapping the carbon dioxide gas produced by the yeast, allowing the dough to expand and hold its shape during proofing and baking.
While some fat is necessary for the characteristic texture of enriched dough, excessive amounts can significantly weaken the gluten structure, making it difficult for the dough to trap gas effectively. This weakened structure is a frequent culprit when enriched dough won't rise properly, resulting in a dense final product.
Balancing Fat and Flour: Achieving the Right Ratio
The ratio of fat to flour is critical in determining how an enriched dough behaves, including its ability to rise. Lean doughs contain virtually no added fat (other than what might be naturally present in the flour). Standard enriched doughs might contain fat ranging from 5% to 20% of the flour weight. Highly enriched doughs, like traditional brioche recipes, can contain fat levels as high as 50%, 75%, or even 100% of the flour weight (meaning the weight of butter is equal to or greater than the weight of the flour).
As the percentage of fat increases relative to the flour, the dough becomes richer, more tender, but also heavier and more challenging to handle. A dough with 50% fat will inherently rise slower and less dramatically than a dough with 10% fat. If your enriched dough won't rise sufficiently, evaluate the recipe's fat-to-flour ratio.
If it's exceptionally high, understand that a slower, less voluminous rise is normal. However, if the ratio seems standard but the rise is poor, it might indicate that the fat wasn't incorporated correctly, or combined with other factors, it's hindering the gluten development needed to support the fat's weight. Ensuring the fat is properly creamed with sugar or incorporated gradually into the dough can help mitigate some of its inhibitory effects on gluten.
Types of Fats: Butter, Oil, and Their Impact on Dough Rise
The type of fat used also impacts the dough structure and rise. Butter, commonly used in enriched doughs, is a solid fat at room temperature due to its saturated fat content. It also contains water (typically around 15-18%) and milk solids. When butter is incorporated into dough, especially if it's cold, it forms discrete pockets within the dough. As the dough bakes, these pockets melt, creating layers and contributing to flakiness and tenderness. However, cold or hard butter can be challenging to incorporate smoothly and might interfere more with initial gluten development if not handled properly.
Liquid fats like oil behave differently. Oil coats flour particles more thoroughly and can more aggressively inhibit gluten development compared to solid fats like butter or shortening. While some enriched doughs use oil (like some challah recipes), butter is preferred in many for its flavor and the specific texture it provides.
Using oil in a recipe designed for butter, or using too much oil, could potentially lead to a dough with weaker gluten and a poorer rise. Shortening, another solid fat, is pure fat with no water, which gives it different properties than butter. Understanding the specific fat called for in your recipe and its characteristics is important if your enriched dough won't rise as expected after substituting fats.
3. Sugar Levels: Finding the Sweet Spot
Sugar's Influence on Yeast Activity: A Delicate Balance
Sugar plays a dual role in yeast doughs. In small quantities (typically 1-5% of the flour weight), sugar acts as readily available food for the yeast, giving it a boost of energy at the beginning of the fermentation process. This can help kickstart the rise. Yeast consumes these simple sugars (glucose and fructose) and produces carbon dioxide and alcohol. This initial feeding helps the yeast population grow and become active, setting the stage for a good rise.
However, as the amount of sugar increases beyond this small percentage, its effect on the yeast becomes more complex and can turn inhibitory. Yeast also feeds on complex sugars in the flour (like maltose), but high levels of added simple sugars present a different challenge. The presence of a high concentration of sugar in the dough's liquid phase creates an environment with high osmotic pressure.
Water is drawn out of the yeast cells towards the higher sugar concentration in the surrounding dough, essentially dehydrating the yeast. This osmotic stress significantly slows down or even halts yeast activity, which is a major reason why enriched dough won't rise properly when it contains a lot of sugar.
Too Much Sugar: Inhibiting Yeast Growth
Recipes for very sweet enriched doughs, such as those for sweet rolls, doughnuts, or some types of brioche, often contain sugar levels exceeding 10%, sometimes even reaching 20% or more of the flour weight. At these high concentrations, the osmotic effect becomes pronounced. The yeast struggles to absorb water and nutrients, leading to sluggish fermentation. The rise will be significantly slower, and the final volume may be less than a less sweet dough, even under ideal conditions.
If your enriched dough won't rise and the recipe calls for a substantial amount of sugar, the sugar itself might be the primary inhibitor. It's crucial to be patient with highly sweetened doughs; they will take longer to rise than less sweet ones. Some recipes compensate for high sugar by using a special osmotolerant yeast (often labeled for use in sweet doughs), which is more resistant to high sugar concentrations. If you are using standard yeast in a very sweet dough and it's not rising, consider if osmotolerant yeast would be a better choice for that specific recipe.
Using Honey or Molasses: Adjusting for Different Sugar Types
Recipes for enriched dough might call for alternative sweeteners like honey, molasses, maple syrup, or brown sugar instead of granulated white sugar. While these are all sources of sugar that yeast can consume, they also contain varying amounts of water, minerals, and other compounds that can affect dough behavior. Honey and molasses, for instance, are liquid sweeteners that add moisture to the dough, which needs to be accounted for in the overall liquid balance.
Molasses contains minerals and other compounds that can slightly alter yeast activity or dough pH. Honey is primarily fructose and glucose, which are easily digestible by yeast, but it also contains enzymes and antibacterial properties which, in large quantities, could theoretically have a minor impact, though this is less common as a primary cause of failure than simple osmotic pressure from high sugar.
When substituting sweeteners, be mindful of their moisture content and adjust other liquids accordingly. Also, remember that the total amount of sugar, regardless of type, is the main factor influencing osmotic stress on the yeast when your enriched dough won't rise.
4. Liquid Temperature: Creating the Ideal Environment
Water or Milk Temperature: Activating Yeast Effectively
Yeast is a living organism that requires specific temperature conditions to become active and multiply efficiently. The temperature of the liquid used to hydrate the yeast or mix into the dough is one of the most critical factors for successful rising. For active dry yeast, the ideal liquid temperature for proofing (dissolving the yeast before adding it to dry ingredients) is typically between 105°F and 115°F (40°C and 46°C). This range is warm enough to wake up the dormant yeast cells and encourage them to start consuming the sugar and producing gas.
When using instant yeast, which is often mixed directly with the flour, the liquid temperature can be slightly warmer, sometimes up to 120°F to 130°F (49°C to 54°C), as the surrounding dry ingredients help buffer the temperature. However, it's still crucial not to exceed temperatures that could harm the yeast. Milk is often used as the liquid in enriched doughs, contributing to tenderness and richness. Whether using water or milk, ensuring it's within the correct temperature range before combining it with the yeast is fundamental to avoid the problem of your enriched dough won't rise.
Too Hot or Too Cold: Killing or Slowing Down Yeast
Using liquid that is too hot is a common mistake that directly leads to a failed rise. Yeast cells are delicate and will be killed at temperatures above approximately 140°F (60°C). If you mix your yeast with liquid that is too hot, you are effectively rendering the yeast inactive before it even gets a chance to ferment the dough. This results in a heavy, lifeless dough that will not rise, regardless of other factors.
Conversely, using liquid that is too cold will not kill the yeast, but it will significantly slow down its activity. Yeast functions optimally within a certain temperature range, and cold temperatures (below 70°F or 21°C) put the yeast into a dormant state. While fermentation will eventually occur in a cold environment (like a cold proof in the refrigerator), it will be very slow.
If you're expecting your enriched dough to rise at room temperature and the liquid you used was too cold, the initial fermentation will be sluggish, potentially leading you to believe your enriched dough won't rise at all when it's just rising very, very slowly. Checking and using a thermometer for your liquid is a simple step that can prevent many rising failures.
5. Kneading Techniques: Developing Gluten Strength
The Importance of Proper Kneading for Enriched Dough
Kneading is the process of developing the gluten network within the dough. Gluten, formed when proteins in flour (glutenin and gliadin) combine with water and are manipulated, creates an elastic web that is capable of trapping the carbon dioxide gas produced by the yeast. This trapped gas is what causes the dough to rise and gives bread its structure.
For enriched dough, proper gluten development is particularly important because the added fats, sugars, and eggs can interfere with gluten formation. A strong gluten network is needed to support the weight of these additions and still allow the dough to expand.
Adequate kneading ensures that the gluten strands are properly aligned and strengthened, creating a dough that is elastic and extensible – meaning it can be stretched thin without tearing. This elasticity is what allows the dough to inflate like a balloon during proofing. If the dough is not kneaded enough, the gluten network will be weak and underdeveloped. The gas produced by the yeast will escape, and the dough will not rise properly, leading to a dense, heavy texture. This is a key reason why your enriched dough won't rise if the kneading step is rushed or skipped.
Over-Kneading vs. Under-Kneading: Identifying the Issues
Both under-kneading and over-kneading can cause problems with your enriched dough's rise, though under-kneading is a more common issue for home bakers. Under-kneaded dough will feel shaggy, possibly sticky, and will tear easily when stretched. It lacks elasticity and structure. When you try to shape it, it won't hold its form well. If your enriched dough won't rise and feels dense and heavy after the first proof, under-kneading during the initial mixing and development phase is a likely cause.
Over-kneading, while less common, can also damage the gluten structure. Dough that has been over-kneaded will feel very tight and resistant, possibly even tearing and becoming sticky or mushy as the gluten strands break down. This is more likely to happen when using a stand mixer on high speed for too long. While enriched doughs generally require thorough kneading to handle the extra ingredients, watching for visual and tactile cues is important. A properly kneaded enriched dough should feel smooth, elastic, and slightly tacky, but not sticky.
Windowpane Test: Assessing Gluten Development
A reliable way to check if your enriched dough has been kneaded sufficiently is the windowpane test. After kneading for the time recommended in the recipe (or when the dough looks smooth), pinch off a small piece of dough, about the size of a golf ball. Gently stretch and pull this piece of dough between your fingers. The goal is to stretch it thin enough so that light can pass through the center, forming a translucent "windowpane," without the dough tearing.
If the dough tears easily before you can stretch it thin, it needs more kneading. If it stretches into a thin, translucent membrane, the gluten is well-developed, and the dough is ready for proofing. This test is particularly useful for enriched doughs, as it provides a visual confirmation that the gluten network is strong enough to support the added ingredients and capture gas for a proper rise. If your enriched dough won't rise and it failed the windowpane test after kneading, it likely needs more development.
6. Proofing Environment: Creating the Perfect Rise
Temperature and Humidity: Ideal Conditions for Proofing Enriched Dough
Once your enriched dough is kneaded, it needs the right environment to rise (proof). Yeast is most active in warm, humid conditions. An ideal proofing temperature for enriched dough is typically between 75°F and 85°F (24°C to 29°C). Temperatures below this range will slow fermentation significantly, while temperatures above 95°F (35°C) can accelerate fermentation too much, potentially leading to off-flavors or the dough collapsing if over-proofed.
Humidity also plays a role. A humid environment prevents the surface of the dough from drying out and forming a skin.
A dry skin restricts the dough's ability to expand smoothly and can cause it to crack or limit its rise. Covering the dough bowl with plastic wrap, a damp tea towel, or placing it in a slightly warm, humid spot (like a turned-off oven with a pan of hot water on the rack below) helps maintain the necessary moisture and temperature, creating the perfect microclimate for the yeast to work effectively and ensure your enriched dough won't just sit there, but rises beautifully.
Cold Drafts: Protecting Your Dough from Unfavorable Conditions
Just as warmth encourages yeast activity, cold temperatures and drafts can dramatically slow it down or even stop it. Placing your dough bowl in a drafty spot, near an open window, or on a cold countertop can shock the yeast and significantly impede the rising process. Even small fluctuations in temperature can affect the rate of fermentation.
If your kitchen is particularly cool, finding a consistently warm spot is crucial. Options include:
- The top of the refrigerator (heat rises).
- Inside a microwave or turned-off oven (ensure it's not hot! ).
- A proofing box, if you have one.
- Near a warm appliance, but not so close that it gets too hot.
- Using a proofer setting on your oven, if available.
Protecting your enriched dough from cold drafts by covering it well and placing it in a stable, warm location is a simple step that often makes a big difference when troubleshooting why your enriched dough won't rise.
Proofing Time: Understanding the Visual Cues
Recipes provide estimated proofing times, but these are just guidelines. The actual time required for your enriched dough to rise depends heavily on the dough's temperature, the ambient temperature of the room, the activity of your yeast, and the richness of the dough. Enriched doughs, being heavier and often sweeter, will generally take longer to rise than lean doughs under the same conditions. A lean dough might double in size in 60-90 minutes, while an enriched dough might take 2-3 hours or even longer for the first rise.
Instead of relying solely on the clock, learn to recognize the visual cues that indicate your enriched dough is properly proofed. For the first rise (bulk fermentation), the dough should look significantly increased in volume, typically doubled or almost doubled, depending on the recipe and desired outcome. It should look puffy and feel soft and airy. For the second rise (final proof after shaping), the dough should look visibly expanded and feel light and airy. A common test is the "poke test": gently press your finger into the dough about half an inch deep.
If the indentation springs back very slowly or only partially, the dough is likely ready. If it springs back immediately, it needs more time. If it collapses, it is likely over-proofed. Patience and observation are key when your enriched dough won't rise on the clock's schedule.
Troubleshooting Your Enriched Dough: Step-by-Step Solutions
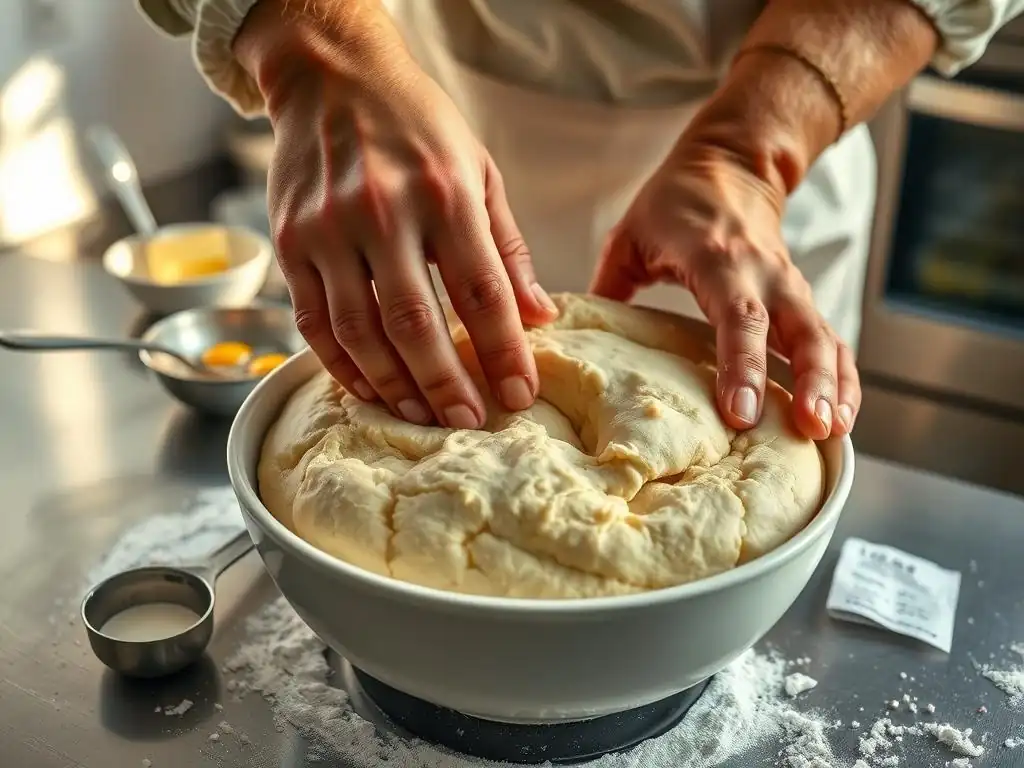
Checking Yeast Activity: A Quick Test
If your enriched dough won't rise at all, the very first thing to check is the yeast's viability. As detailed earlier, perform the yeast proofing test: dissolve 1 tsp sugar and 2 1/4 tsp active dry yeast (or the amount specified in your recipe) in 1/4 cup warm water (105-115°F / 40-46°C). Let it sit for 5-10 minutes. If it doesn't get foamy and bubbly, your yeast is dead.
- Solution: Discard the dough you've made. There's no way to revive dead yeast in a finished dough. Start over with fresh yeast. If you used instant yeast mixed directly into the flour and the dough isn't rising after an hour or two in a warm spot, it's highly probable the yeast was inactive. Again, you'll need to start fresh with new yeast.
Adjusting Liquid Temperature: Getting it Right
If your yeast is active but your enriched dough won't rise or is rising very slowly, the temperature of the liquid you used might have been off.
- Solution: If the liquid was too hot and killed the yeast, you must start over with fresh yeast and correctly tempered liquid. If the liquid was too cold and is just slowing things down, you can try warming the dough gently. Place the covered dough bowl in a warmer spot (like a turned-off oven with the light on, or a proofing box around 75-85°F). Be patient, it will likely take longer than the recipe states because the yeast is starting from a colder state. Avoid sudden high heat, which could kill the yeast.
Revising Kneading Techniques: Mastering Gluten Development
An under-kneaded enriched dough won't rise well because the gluten network isn't strong enough to trap the gas. You'll notice this if the dough feels slack and tears easily.
- Solution: If your dough is still early in the process (e.g., just finished initial mixing and kneading), you can try kneading it more. If using a stand mixer, knead for an additional 5-10 minutes on medium speed, checking the windowpane test periodically. If kneading by hand, continue kneading until the dough feels smooth, elastic, and passes the windowpane test. Be careful not to over-knead, especially with a mixer. If the dough has already gone through a long, failed first proof, it might be challenging to salvage completely, but extra kneading might improve the second rise slightly.
Creating a Suitable Proofing Environment: Maximizing Rise Potential
A cold, drafty, or dry environment is a common reason why enriched dough won't rise properly, even if everything else was perfect.
- Solution: Find a consistently warm spot for your dough, ideally between 75-85°F (24-29°C). Cover the dough bowl tightly with plastic wrap or place it in a large, clean plastic bag to trap humidity and prevent a dry skin from forming. If your kitchen is cold, create a makeshift proofing box: turn off your oven, place the dough bowl inside, and place a pan of hot (not boiling) water on the rack below. The steam will create a warm, humid environment. Patience is key; adjust proofing time based on visual cues (doubled size, poke test) rather than the clock, especially in cooler conditions.
Tips for Consistently Perfect Enriched Dough Rises
Measuring Ingredients Accurately: Precision is Key
Baking is often described as a science, and accuracy in measuring ingredients is paramount, especially with the delicate balance required for enriched dough. The ratio of flour to liquids, fats, and sugars directly impacts the dough's consistency and how yeast behaves. Using too much flour, too little liquid, or an incorrect amount of yeast, sugar, or fat can all hinder the rise. For example, just 20-30 grams of extra flour in a 500g flour recipe can significantly change the dough's hydration and tightness, making it harder for the yeast to expand.
Weighing your ingredients, particularly flour and liquids, is far more accurate than using volume measurements (cups). A cup of flour can vary in weight by 20% or more depending on how it's scooped and whether it's sifted. Using a digital kitchen scale ensures you are using the exact quantities specified in the recipe, removing a major variable that could cause your enriched dough won't rise correctly. This precision helps maintain the intended balance of ingredients, giving your yeast the best chance to perform its job effectively.
Using High-Quality Ingredients: The Difference It Makes
The quality of your ingredients can subtly influence the outcome of your enriched dough. Fresh, high-quality flour, active yeast, good butter, and fresh eggs contribute to better flavor, texture, and performance. For instance, using expired yeast, as discussed, is a direct path to failure. Flour that is very old or has been improperly stored might have less protein quality for gluten development or fewer natural sugars for the yeast to initially feed on.
While you don't need the most expensive ingredients, ensuring they are fresh and stored correctly is important. Keep yeast in the refrigerator or freezer once opened. Store flour in an airtight container away from heat and moisture. Using fresh butter and eggs will not only improve the taste but can also contribute to the dough's structure and richness as intended by the recipe. Consistent results in your enriched dough's rise often start with reliable, quality ingredients.
Adjusting Recipes for Your Environment: Adapting to Humidity and Temperature
Environmental factors like ambient temperature and humidity significantly affect baking. Flour absorbs moisture from the air, meaning you might need slightly less liquid on a humid day and slightly more on a dry day to achieve the same dough consistency. Yeast activity is also directly impacted by temperature, as discussed earlier regarding proofing.
If you live in a very humid climate, your flour might already contain more moisture, requiring a slight reduction in the liquid called for in the recipe. Conversely, in a very dry climate, you might need a tablespoon or two extra liquid.
Similarly, if your kitchen is consistently cooler or warmer than the ideal proofing temperature (75-85°F), you'll need to adjust your proofing times accordingly. Learning to read your dough – how it feels, its consistency, and how it's rising – allows you to make minor adjustments on the fly, rather than strictly adhering to a recipe designed for a different environment, which can help prevent issues where your enriched dough won't rise as expected.
Recording Your Results: Learning from Experience
Becoming a better baker, especially with challenging doughs like enriched ones, involves learning from each attempt. Keeping a baking journal or simple notes can be incredibly helpful in diagnosing issues and reproducing successes. Record details like:
- Date and ambient temperature/humidity.
- Specific ingredients used (brand of flour, type/brand of yeast, type of fat).
- Liquid temperature used.
- Actual kneading time and dough feel (passed windowpane test? ).
- Proofing temperature and actual time for each rise.
- Observations about the dough's behavior (sticky, tight, rose slowly, etc. ).
- Outcome (good rise, flat, dense, etc. ).
Reviewing these notes when your enriched dough won't rise allows you to identify patterns. Did you use the same batch of yeast when you had problems? Was the kitchen colder that day? Did you rush the kneading? This systematic approach helps you pinpoint the cause of failure and make targeted adjustments for your next bake, leading to more consistent and successful results over time.
Common Enriched Dough Recipes and Troubleshooting
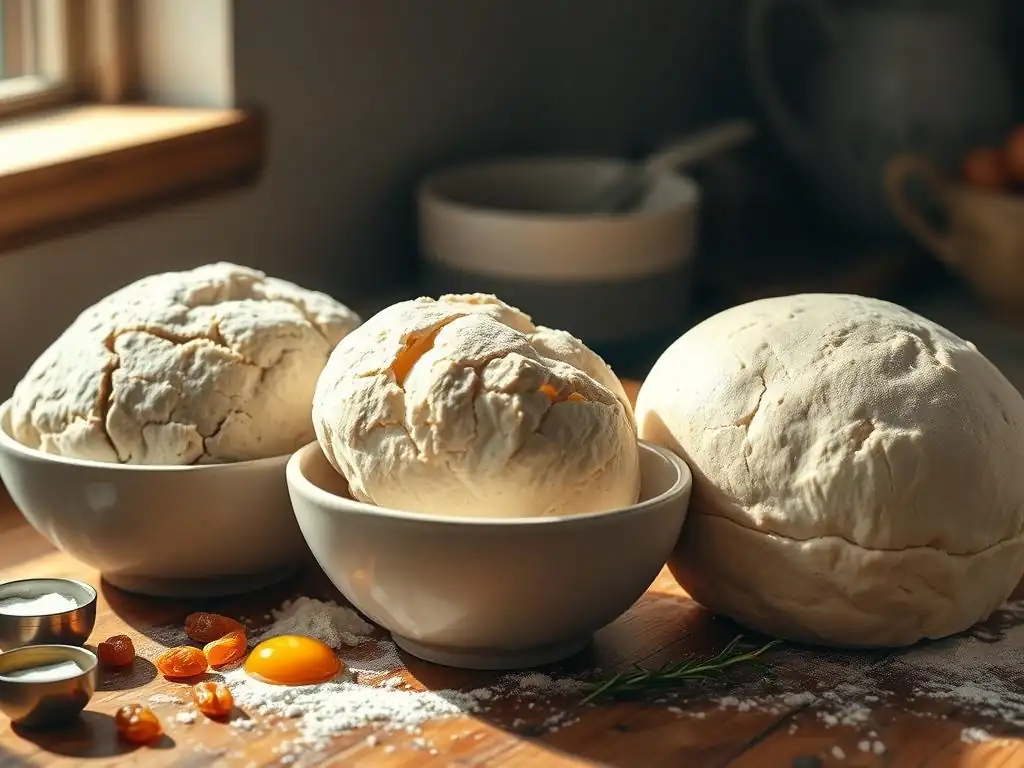
Brioche Dough Rising Problems and Solutions
Brioche is perhaps the quintessential enriched dough, often containing high percentages of butter and eggs. Its richness is both its glory and its challenge when it comes to rising. Common issues with brioche include a very slow rise, a dense texture, or the dough collapsing. This is frequently due to the high fat content inhibiting gluten and the sheer weight of the dough.
- Troubleshooting: Ensure your yeast is very active; some bakers even use slightly more yeast than a standard recipe. Make sure your butter is incorporated gradually and thoroughly after the gluten has started to develop (often added piece by piece to the dough while mixing). Knead the dough very well; brioche requires significant kneading to build a strong enough gluten network to support the heavy load of butter and eggs – aim for a strong windowpane. Proof in a warm, consistent environment (75-80°F) and be patient; brioche will take longer to rise than almost any other dough, often 3-4 hours or more for the first rise. If your brioche enriched dough won't rise, check yeast, kneading, and proofing temperature/time.
Challah Dough Rising Problems and Solutions
Challah is another popular enriched bread, typically containing eggs, oil (or butter), sugar, and sometimes honey. It's less rich than brioche but still presents unique challenges, often related to stickiness or a sluggish rise.
- Troubleshooting: The eggs and sugar make challah dough softer and stickier than lean doughs. Resist the urge to add excessive amounts of flour during kneading; a slightly sticky dough is normal and desirable for a soft crumb. Ensure you're using the correct amount of yeast for the sugar level – if it's a very sweet challah, yeast can be inhibited. Knead until the dough is smooth and elastic, passing the windowpane test. Proofing temperature is key; ensure it's warm enough (75-85°F) and humidified to prevent a skin from forming on the dough, which can restrict expansion. If your challah enriched dough won't rise, review your liquid temperature, yeast quantity, and kneading.
Sweet Roll Dough Rising Problems and Solutions
Sweet roll dough (like for cinnamon rolls or sticky buns) is characterized by significant sugar and fat, often with additional heavy fillings. The high sugar content is a primary factor inhibiting yeast activity.
- Troubleshooting: Use active yeast and consider if an osmotolerant yeast is better suited for very sweet doughs. Ensure liquid temperature is correct to give the yeast a good start. Knead the dough well enough to handle the fat and sugar, but be mindful not to over-knead, which can make it tough. The sugar will slow the rise, so expect longer proofing times. Ensure the proofing environment is warm and humid. If your sweet roll enriched dough won't rise, check yeast type/activity, sugar level's impact, and proofing conditions. Also, ensure the filling isn't too heavy or unevenly distributed, which can physically weigh down the dough.
Conclusion: Achieving the Perfect Enriched Dough Rise with BakeWithEase
Troubleshooting why your enriched dough won't rise can be frustrating, but by understanding the unique characteristics of these rich doughs and systematically checking the potential culprits – your yeast's activity, the temperature of your liquids, the balance of fats and sugars, the strength of your gluten development through kneading, and the conditions of your proofing environment – you can significantly improve your success rate.
Remember that enriched doughs inherently rise slower and differently than lean doughs. Patience is your friend! By paying attention to detail, using accurate measurements, and observing your dough's behavior rather than just the clock, you'll be well on your way to consistently achieving beautifully risen, tender, and delicious enriched baked goods. Keep practicing, learning from each batch, and soon you'll master the art of the perfect enriched dough rise right here with BakeWithEase!
Frequently Asked Questions
Why is my enriched dough not rising, even though I used yeast?
Enriched doughs, which contain fats and sugars, can inhibit yeast activity. Make sure your yeast is fresh and active, and give the dough extra time to rise.
Could the temperature of my ingredients be affecting the rise of my enriched dough?
Yes, absolutely! Cold ingredients can significantly slow down yeast activity. Ensure your liquids are lukewarm and your butter is at room temperature for optimal rising.
I've added a lot of butter and eggs; is that the reason my enriched dough won't rise?
Too much fat or sugar can actually weaken the gluten structure and inhibit yeast activity. Try reducing the amounts slightly in your next batch.
What's the best way to proof enriched dough to encourage a good rise?
A warm, draft-free environment is crucial. You can use a proofing drawer, a slightly warmed oven, or even just a covered bowl in a warm spot in your kitchen.
How long should I expect enriched dough to take to rise compared to a lean dough?
Enriched doughs typically take longer to rise than lean doughs. Be patient, and allow for double the rise time or even longer, depending on the recipe and environment.
Final Reflection: The Unsung Secrets of a Perfect Rise
The seemingly simple act of bread rising is, in reality, a delicate dance of ingredients and technique. A perfectly risen loaf, light and airy, is a testament to understanding this intricate process. Failing to achieve that perfect rise can be incredibly frustrating, highlighting the often-overlooked nuances of enriched dough.
The quest for the perfect rise has shaped baking traditions for centuries, influencing not only the texture and taste of our bread but also the very fabric of our culinary heritage. The subtle shifts in techniques, the careful balancing of fats and sugars, all contribute to the story of breadmaking. Bread is the staff of life,
a simple phrase that belies the complex history and artistry involved in its creation. This journey of understanding enriched dough, its challenges, and its triumphs, reminds us of the importance of patience, precision, and the enduring power of a perfectly risen loaf.
Now, consider your own baking journey. What have you learned from this exploration of enriched dough? Take the time to reflect on the subtle details, the small adjustments that can make all the difference. Don't be discouraged by imperfect rises; instead, view them as opportunities to refine your technique and deepen your understanding. The next time you knead, let the knowledge gained here guide you, and may your loaves rise to new heights!
Unlock Your Baking Potential: Troubleshooting Dough Rise!
Thanks for taking the time to explore the secrets of achieving a perfect dough rise! We hope you've gained valuable insights into why your enriched dough might not be performing as expected. Now it's time to put that knowledge into practice.
- Dive into our exclusive troubleshooting guide: We've created a detailed, step-by-step resource to help you identify the exact issue in your baking process and resolve it. This is your first and most important next step!
- Share your baking triumphs (and challenges!): Join our vibrant baking community on social media and share your experiences. Let’s learn from each other!
- Try a new enriched dough recipe: Challenge yourself with a recipe you haven't attempted before, applying what you’ve learned. You might be pleasantly surprised by the results!
So, what new enriched dough recipe are you ready to conquer today?