
Your First Perfect Whole Wheat Loaf: A Beginner's Guide

Welcome to BakeWithEase!
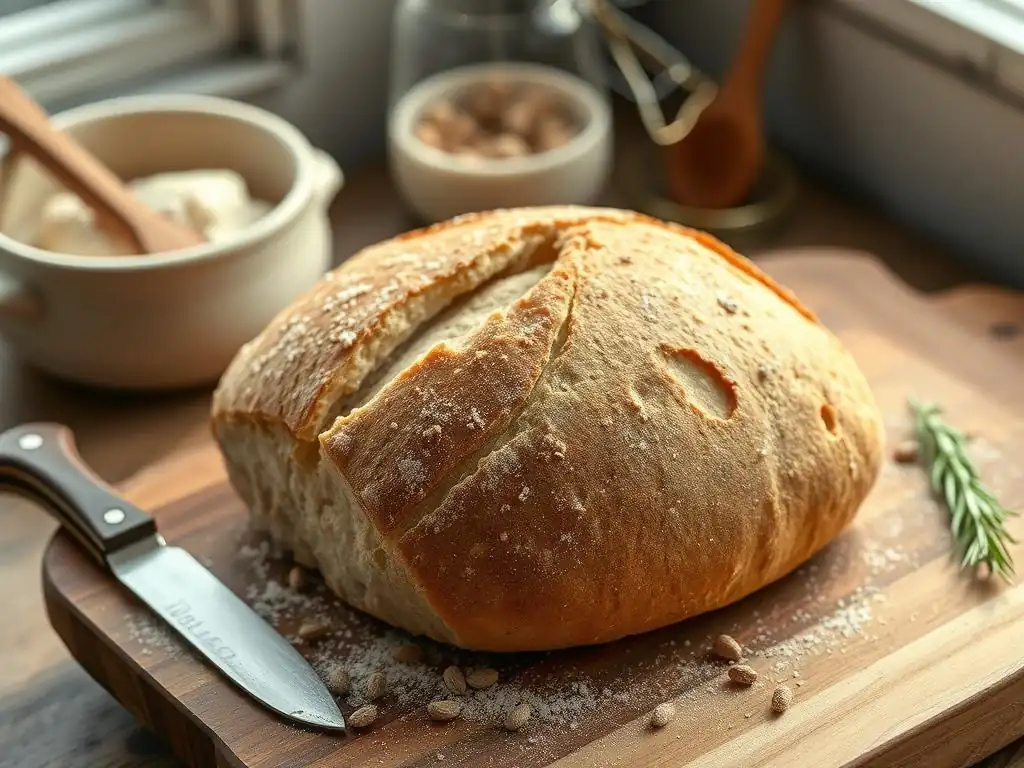
Ready to transform simple ingredients into a perfectly wholesome and delicious loaf of bread? You've come to the right place. Discover the secrets to baking your very first whole wheat loaf, even if you're a complete beginner. We'll guide you through each step with clear instructions and helpful tips. What makes this recipe so easy and what kind of texture can you expect? Keep reading to unlock the secrets!
- Introduction: The Art of Sourdough
- Essential Equipment for Sourdough Baking
- Ingredients for a Classic Sourdough Loaf
-
Step-by-Step: Baking a Sourdough Loaf
- Step 1: Preparing the Levain - Feeding the Starter
- Step 2: Autolyse - Hydrating the Flour
- Step 3: Mixing and Kneading - Developing Gluten
- Step 4: Bulk Fermentation - The First Rise
- Step 5: Shaping the Dough - Building Tension
- Step 6: Cold Proofing - Developing Flavor
- Step 7: Baking the Sourdough Loaf
- Step 8: Cooling and Slicing - Patience Pays Off
- Troubleshooting Common Sourdough Baking Problems
- Tips and Tricks for Baking Exceptional Sourdough
- Enjoying Your Homemade Sourdough Bread
- Conclusion: Mastering the Art of Sourdough
-
Frequently Asked Questions
- What makes this whole wheat loaf recipe ideal for beginners?
- Can I substitute any of the ingredients in this whole wheat loaf recipe?
- How do I know when my whole wheat loaf is properly proofed?
- What's the best way to store my whole wheat loaf to keep it fresh?
- My whole wheat loaf is dense and heavy. What could I have done wrong?
- Final Reflection: The Humble Rise of the Perfect Whole Wheat Loaf
- Unleash Your Inner Baker: Craft Your Perfect Loaf!
Introduction: The Art of Sourdough
The History and Culture of Sourdough Bread
Sourdough bread boasts a history stretching back thousands of years, predating the use of commercial yeast. Its origins are often traced to ancient Egypt, around 1500 BC, where bakers discovered that simply leaving dough exposed to air could capture wild yeasts and bacteria, causing it to rise. This natural fermentation process not only leavened the bread but also imparted a unique flavor profile and improved its digestibility.
For centuries, sourdough was the primary method for making leavened bread across the globe, a staple food woven into the fabric of daily life and culinary traditions. Different regions developed their own distinct sourdough cultures, influenced by local grains and environmental microbes, leading to a vast diversity of bread styles.
The culture surrounding sourdough is one of patience, care, and connection to a time-honored craft. Unlike modern baking with predictable commercial yeast, sourdough relies on a living ecosystem within the starter, requiring regular feeding and attention. This relationship with the starter becomes a rewarding part of the baking process.
Historically, families would pass down portions of their starter through generations, a tangible link to their culinary heritage. Even today, many bakers feel a deep connection to their starters, naming them and nurturing them like pets. The slow fermentation process, which can take 12 to 24 hours or even longer, allows for complex flavors to develop – tangy, slightly acidic, and deeply satisfying, a stark contrast to the often bland taste of fast-risen loaves.
Understanding the Sourdough Starter
At the heart of every sourdough loaf is the starter, a symbiotic culture of wild yeasts and lactic acid bacteria (LAB) living in a simple mixture of flour and water. The wild yeasts, naturally present in flour and the environment, are responsible for producing carbon dioxide gas, which causes the bread to rise, much like commercial yeast. However, they also contribute unique flavor compounds.
The LAB produce lactic and acetic acids, giving sourdough its characteristic tangy flavor. The balance between these two groups of microorganisms is crucial for a healthy, active starter. A well-maintained starter, fed regularly, becomes a robust leavening agent capable of consistently lifting a heavy whole wheat loaf or a light white boule.
Creating a sourdough starter from scratch is a straightforward process, typically involving mixing equal parts flour (often a mix of all-purpose and whole wheat flour works well) and water and leaving it at room temperature. Over several days, wild microbes colonize the mixture. Daily "feedings," which involve discarding a portion and adding fresh flour and water, help cultivate a strong, active culture by providing fresh food and managing the population.
After about 7-14 days, the starter should become consistently bubbly, double in size within a few hours after feeding, and smell pleasantly tangy, indicating it's ready to bake with. Maintaining this living culture requires ongoing commitment, but the reward is access to a natural, flavorful leavening agent unlike any other, perfect for achieving that classic sourdough texture and taste.
This Guide: Your Journey to Baking Artisan Sourdough
Embarking on the journey of baking artisan sourdough might seem daunting at first glance, especially when aiming for that perfect, airy crumb and crisp crust seen in bakeries. Many beginners wonder if they can truly achieve bakery-quality results at home. This guide is designed to demystify the process, breaking down each step into manageable parts, making it accessible even if you've never baked bread before.
We will walk you through everything from understanding your starter's behavior to mastering shaping techniques and achieving optimal baking conditions. Our goal at BakeWithEase is to empower you with the knowledge and confidence needed to bake delicious sourdough bread consistently, transforming the seemingly complex into a rewarding and enjoyable experience.
Whether your aspiration is to bake a simple, rustic loaf or a beautiful whole wheat loaf with a pronounced tang, this comprehensive guide provides the foundation you need. We will cover essential equipment, explain the role of each ingredient, and detail the entire baking process from feeding your starter to cooling your finished loaf. By focusing on understanding the 'why' behind each step, you'll gain the intuition needed to troubleshoot common issues and adapt recipes.
Consider this your step-by-step roadmap to becoming a confident sourdough baker, capable of producing impressive, flavorful loaves right in your own kitchen. Get ready to experience the incredible satisfaction of pulling your first homemade sourdough bread from the oven!
Essential Equipment for Sourdough Baking
Dutch Oven: The Key to Oven Spring
A Dutch oven is arguably the most crucial piece of equipment for achieving a professional-quality sourdough loaf at home, particularly for beginners. This heavy, lidded pot creates a sealed environment around the dough during the initial phase of baking. When the dough is placed inside the preheated Dutch oven, the trapped steam released from the dough's high water content has nowhere to escape.
This steam keeps the surface of the loaf moist and pliable, preventing a crust from forming too quickly. This allows the dough to expand rapidly in the intense heat, a phenomenon known as "oven spring." Without sufficient steam and delayed crust formation, the loaf's expansion would be restricted, resulting in a denser bread.
The heavy cast iron or enameled cast iron of a Dutch oven also excels at retaining and distributing heat evenly. When preheated thoroughly (often to 450-500°F or 230-260°C), it provides a consistent, high temperature that is ideal for baking sourdough.
The lid is typically kept on for the first 20-30 minutes of baking to maximize steam and oven spring, then removed for the final 15-25 minutes to allow the crust to brown and crisp up beautifully. This two-stage baking process, easily achieved with a Dutch oven, is fundamental to developing both the airy interior (crumb) and the signature crackly crust of artisan sourdough bread.
Kitchen Scale: Precision for Consistent Results
In bread baking, especially sourdough, precision in ingredient measurements is paramount, and a digital kitchen scale is the most reliable tool for this. Unlike volume measurements (cups and spoons), which can vary wildly depending on how ingredients are scooped and leveled (e.g., a cup of flour can weigh anywhere from 120g to 160g), weighing ingredients ensures accuracy every time.
Recipes often use baker's percentages, which are based on the weight of the flour, making a scale essential for understanding hydration levels and scaling recipes up or down. For instance, a recipe calling for 500g of flour and 350g of water has a hydration of 70% (350/500 * 100).
Consistent results are the hallmark of successful baking, and a kitchen scale is the key to achieving them. By weighing your flour, water, salt, and starter precisely, you eliminate a major variable that can lead to unpredictable outcomes. This is particularly important for sourdough, where the hydration level significantly impacts dough handling and the final crumb structure.
A difference of just 20-30 grams of flour or water in a 500g recipe can dramatically change the dough's consistency. Investing in an accurate digital scale, typically costing between $20 and $40, is one of the best steps a beginner can take to improve their sourdough baking success rate and learn to consistently produce a beautiful whole wheat loaf or other variations.
Banneton Basket: Shaping and Proofing
A banneton basket, also known as a proofing basket, is a baker's tool used during the final rise (proofing) of shaped bread dough. Traditionally made from rattan cane, though plastic and wood pulp versions are also common, these baskets are typically floured generously before the shaped dough is placed inside, seam-side up.
The basket supports the dough as it expands, helping it maintain its shape and structure during the critical proofing stage, especially for wetter, higher-hydration doughs that might otherwise spread out. The spiral pattern often found in rattan bannetons also imparts a rustic, attractive pattern on the surface of the loaf after baking.
Beyond simply holding the shape, banneton baskets also help manage the dough's moisture level during proofing. The porous material allows the surface of the dough to dry slightly, which can contribute to a better crust formation during baking. This slight drying helps prevent the loaf from sticking to the basket and makes scoring easier.
Bannetons come in various shapes and sizes (round for boules, oval for bâtards), allowing bakers to choose the right one for their desired loaf shape. Using a banneton is a simple yet effective technique that significantly improves the final appearance and structure of your homemade sourdough bread.
Dough Scraper: Handling Sticky Dough
Dough scrapers are indispensable tools in the sourdough baker's arsenal, particularly when working with sticky, high-hydration doughs. There are generally two types: a bench scraper (rigid, rectangular metal or plastic blade with a handle) and a bowl scraper (flexible plastic or silicone). A bench scraper is invaluable for dividing dough, lifting it from the work surface without tearing, and cleaning up sticky residue. Its straight edge allows you to effectively scrape dough off your counter, minimizing waste and making cleanup much easier after mixing or shaping.
A flexible bowl scraper is perfect for getting every last bit of dough out of a mixing bowl. Its curved edge conforms to the shape of the bowl, allowing you to efficiently gather the dough. Both types of scrapers are also useful during the kneading process, especially for techniques like stretch and folds or slap and fold, where the dough is quite wet and sticky.
They help you manage the dough, fold it over, and keep your hands cleaner. For a beginner tackling their first whole wheat loaf or sourdough, having a good set of dough scrapers makes handling the often-tacky dough a much less frustrating experience.
Ingredients for a Classic Sourdough Loaf
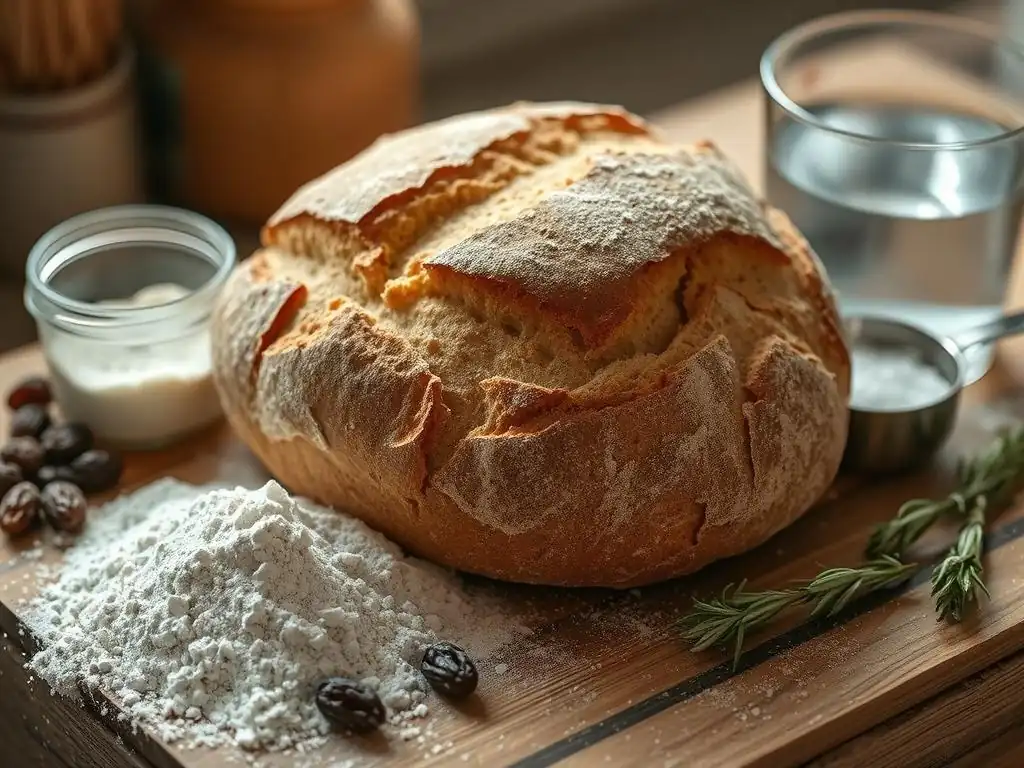
Bread Flour: High Protein for Structure
Bread flour is a cornerstone ingredient in sourdough baking, primarily due to its high protein content, specifically gluten-forming proteins like glutenin and gliadin. These proteins, when hydrated with water and worked through mixing or kneading, develop into a strong, elastic network called gluten. The gluten network is crucial because it traps the carbon dioxide gas produced by the sourdough starter, allowing the dough to rise and create that desirable open, airy crumb structure.
Standard all-purpose flour typically has a protein content around 10-12%, while bread flour usually ranges from 12-14% or even higher. This extra protein makes a significant difference in the dough's ability to develop strength and hold its shape during the long fermentation times characteristic of sourdough.
Using bread flour provides the necessary structural integrity to support the rise of a sourdough loaf. It allows the dough to be stretched and folded repeatedly during bulk fermentation without collapsing, building tension that helps the loaf hold its shape during baking.
While you can bake sourdough with all-purpose flour, achieving optimal volume and an open crumb is generally easier with bread flour due to its superior gluten-forming potential. For beginners working on their first sourdough loaf, starting with a good quality bread flour is highly recommended to ensure the dough has the best chance to develop the strength required for a successful bake.
Whole Wheat Flour: Adding Flavor and Texture
Incorporating whole wheat flour into a sourdough recipe introduces wonderful depth of flavor, appealing texture, and nutritional benefits. Unlike refined white flour, whole wheat flour includes the bran and germ of the wheat kernel along with the endosperm. The bran contributes fiber and a slightly chewy texture, while the germ adds healthy fats and nutrients.
These components also impart a richer, nuttier, and more complex flavor profile compared to bread made solely with white flour. While a 100% whole wheat loaf can be challenging for beginners due to the bran interfering with gluten development, using a percentage of whole wheat flour (e.g., 10-30%) in a recipe is a great way to add these desirable characteristics without making the dough too difficult to handle.
Using whole wheat flour also affects the hydration of the dough. The bran and germ absorb more water than just the endosperm found in white flour, so recipes incorporating whole wheat often require slightly more water to achieve a similar dough consistency. This added hydration, combined with the structure from bread flour, can contribute to a moist and tender crumb.
Many sourdough bakers love the earthy notes that whole wheat flour brings, especially when paired with the tang of the sourdough culture. For anyone looking to bake a flavorful and slightly heartier whole wheat loaf using the sourdough method, adding a portion of whole wheat flour is an excellent choice.
Water: Hydration for Fermentation
Water is far more than just a liquid binder in sourdough baking; it plays several critical roles. Firstly, water is essential for hydrating the flour, allowing the gluten-forming proteins to link together and create the gluten network. Without sufficient water, the dough will be stiff, difficult to work with, and won't develop the necessary elasticity and extensibility for a good rise.
Secondly, water is the medium in which the wild yeasts and bacteria in the sourdough starter live and move. They need water to access the starches and sugars in the flour that they consume for energy and fermentation. The hydration level of the dough (the ratio of water to flour by weight) significantly impacts the dough's handling characteristics and the final crumb structure.
The temperature of the water can also influence fermentation speed. Warmer water (around 75-80°F or 24-27°C) can help kickstart fermentation, while colder water (around 60-65°F or 15-18°C) will slow it down. Using filtered water is often recommended, as chlorine present in tap water can potentially inhibit the activity of the delicate microorganisms in the starter and dough.
The amount of water used relative to the flour weight determines the dough's hydration level, typically ranging from 60% for a drier dough to over 80% for a very wet dough. Higher hydration doughs can yield a more open crumb but are stickier and require more practice to handle, making a moderately hydrated dough (65-75%) ideal for a beginner's whole wheat loaf or first sourdough attempt.
Salt: Controlling Fermentation and Enhancing Flavor
Salt is a vital, non-negotiable ingredient in sourdough bread, serving two primary functions: flavor enhancement and fermentation control. From a flavor perspective, salt doesn't just make the bread taste "salty"; it significantly enhances all the other flavors developed during the long fermentation process, including the subtle tang from the sourdough starter and the nutty notes from the flour. A loaf baked without salt will taste bland and flat, lacking the depth and complexity expected of artisan bread. The typical salt percentage in sourdough bread is around 1.8% to 2.2% of the total flour weight.
Beyond flavor, salt plays a crucial role in regulating the activity of the yeast and bacteria in the sourdough starter. Salt slows down fermentation by drawing water out of the microbial cells, making them less active. This controlled slowing is beneficial because it allows for a longer fermentation period, which in turn leads to better flavor development and a stronger gluten structure.
Without salt, fermentation can happen too quickly, potentially leading to over-proofing and a dough that collapses. Salt also strengthens the gluten network, making the dough easier to handle and contributing to a better crumb structure and crust. It's important to add salt after the initial mixing of flour and water (autolyse) because salt can interfere with the initial hydration and gluten development during that phase.
Sourdough Starter: The Heart of Sourdough
The sourdough starter is the living, breathing soul of sourdough bread. It's a self-sustaining culture of wild yeast and lactic acid bacteria that acts as the sole leavening agent. Unlike commercial yeast, which provides a quick, predictable rise, a sourdough starter works more slowly, but in doing so, it imparts complex flavors and creates a unique texture.
The wild yeasts consume sugars in the flour and produce carbon dioxide gas, causing the dough to rise, and also contribute aromatic compounds. The lactic acid bacteria produce lactic and acetic acids, giving sourdough its characteristic tang and contributing to the bread's shelf life and improved digestibility. A healthy, active starter is the single most important factor for successful sourdough baking.
Maintaining a starter involves regular feeding with fresh flour and water. This provides the microbes with food and helps maintain a balanced population. A starter is typically considered ready to bake with when it is active and bubbly, having at least doubled in size a few hours after its last feeding, and passes the "float test" (a small dollop floats in water). The starter's activity level directly impacts the dough's fermentation time and rise.
A weak or inactive starter will result in a flat, dense loaf. Conversely, a very vigorous starter might require shorter fermentation times. Learning to read your starter – its smell, texture, and how it behaves after feeding – is a fundamental skill for any aspiring sourdough baker, ensuring you can consistently produce a well-risen, flavorful whole wheat loaf or any other sourdough creation.
Step-by-Step: Baking a Sourdough Loaf
Step 1: Preparing the Levain - Feeding the Starter
Assessing Starter Activity: The Float Test
Before you even think about mixing your dough, the very first step in baking sourdough is ensuring your starter is active and ready to perform. This involves feeding your mature starter to create a "levain," which is essentially a portion of your starter specifically prepared for the bake.
A key way to assess if your starter (or the levain you just mixed) is sufficiently active is the float test. Approximately 4-8 hours after its last feeding (depending on room temperature and starter vigor), take a very small amount (a teaspoon or less) of the bubbly, peak or near-peak starter and gently drop it into a glass of room-temperature water.
If the starter floats on the surface, it indicates that it is light and airy, filled with enough carbon dioxide gas produced by active yeast to be buoyant. This is a good sign that your starter is strong and ready to leaven your dough effectively. If the starter sinks to the bottom, it may not be active enough yet.
This could mean it needs more time to ferment after feeding, or perhaps your main starter needs more regular feeding to become stronger. While not foolproof, the float test is a widely used and simple method to get a quick visual confirmation of your starter's readiness before committing to a full batch of dough.
Mixing the Levain: Flour, Water, and Starter
The levain (sometimes called a preferment or leaven) is the portion of your active sourdough starter that you will use to inoculate your main dough. You create the levain by taking a small amount of your mature, "mother" starter and feeding it with a specific ratio of fresh flour and water, as dictated by your recipe. A common ratio is 1:2:2 (1 part starter, 2 parts water, 2 parts flour by weight), or 1:5:5 for a smaller, stiffer levain.
For example, using a 1:2:2 ratio, you might mix 20g of mother starter with 40g of water and 40g of flour. This mixture is then left at room temperature for several hours until it becomes bubbly, active, and ideally doubles or triples in size.
The purpose of mixing a specific levain for each bake, rather than using the mother starter directly, is to ensure you are using the starter when it is at its peak activity. Feeding the starter in a specific ratio for the levain allows you to control the amount of leavening power added to your dough and ensures you don't deplete your entire mother starter.
The type of flour used for the levain (e.g., all-purpose, bread flour, or a mix including whole wheat flour) can influence the flavor and speed of fermentation. Mix the ingredients thoroughly in a clean jar or container, cover loosely, and monitor its activity, waiting until it reaches its peak before proceeding to the next step of mixing the main dough.
Step 2: Autolyse - Hydrating the Flour
Combining Flour and Water: Enhancing Dough Development
Autolyse (pronounced auto-lees) is a simple but powerful technique in bread making, involving the initial mixing of just flour and water from the recipe, excluding the salt and starter (or levain). The mixture is brought together just enough to ensure all the flour is hydrated – it doesn't need to be smooth or fully developed at this stage.
The dough will look shaggy and possibly uneven. This step is based on the work of French baking professor Raymond Calvel and is particularly beneficial for sourdough and doughs using higher percentages of whole wheat flour, where the bran can hinder initial hydration.
The primary benefit of autolyse is allowing the flour to fully absorb the water without the interference of salt, which tightens gluten, or the starter, which begins fermentation immediately. During this resting period, enzymes naturally present in the flour, primarily proteases and amylases, begin their work.
Proteases help break down proteins, making the gluten network more extensible, while amylases convert starches into sugars, providing food for the yeast later on. This initial hydration and enzymatic activity significantly improve dough handling, making it less sticky and easier to develop gluten later, ultimately contributing to a better crumb structure and oven spring in your final whole wheat loaf or white boule.
Resting the Dough: Allowing Enzymes to Work
After combining the flour and water for the autolyse, the mixture is left to rest for a period, typically ranging from 20 minutes to several hours, depending on the recipe and the type of flour used. For doughs with a significant portion of whole wheat flour, a longer autolyse (60-90 minutes) can be particularly helpful because the bran requires more time to soften and absorb water. During this resting phase, you'll notice the dough visibly transforming. It will become smoother, more pliable, and less shaggy than when you first mixed it.
This resting period allows the enzymes activated by the water to work on the flour's components. The gluten network begins to form passively through hydration alone, without any mechanical effort. This means less kneading is required later to achieve a strong dough structure. For a beginner working with a whole wheat loaf beginner recipe using sourdough, the autolyse step makes the subsequent mixing and handling much easier, reducing the likelihood of a tough or underdeveloped dough. It's a simple step that yields significant benefits in terms of dough quality and the final bread's texture.
Step 3: Mixing and Kneading - Developing Gluten
Incorporating the Levain and Salt
After the autolyse period is complete, it's time to incorporate the remaining ingredients: the active levain and the salt. The levain is added first. Gently dimple the surface of the autolysed dough with wet fingers or a spatula, then spread the levain over the surface. The dough will feel smoother and more extensible than it did before the autolyse. Work the levain into the dough until it is mostly incorporated. The dough might look messy and uneven at this stage, which is perfectly normal.
Once the levain is roughly mixed in, add the salt. Salt is added last because, as mentioned before, it can interfere with the initial hydration and enzymatic activity of the autolyse. Now, the process of developing the gluten network begins in earnest. You can use various techniques to mix and knead the dough, ensuring the levain and salt are evenly distributed and the gluten structure is built. This stage is crucial for creating a dough that can trap gases and rise properly during fermentation and baking, leading to a well-structured whole wheat loaf.
Kneading Techniques: Stretch and Folds vs. Traditional Kneading
There are several ways to develop gluten in sourdough dough after the levain and salt are added. Traditional kneading on a floured surface involves repeatedly folding and pushing the dough, which builds strength and elasticity. While effective, this can be quite messy with high-hydration sourdough doughs. A more common and often preferred method for sourdough, especially for beginners, is the "stretch and fold" technique.
This is done in the bowl or on a lightly wet surface. You wet your hand, grab one edge of the dough, stretch it gently upwards, and fold it over the rest of the dough. Rotate the bowl and repeat this action 3-4 times (completing one "set" of folds).
These sets of stretch and folds are typically performed intermittently during the first few hours of bulk fermentation, usually every 30-60 minutes. This gentle handling develops gluten progressively without the need for vigorous kneading. Another technique for wetter doughs is the "slap and fold" (or French fold), where the dough is lifted, slapped onto the surface, and folded over itself repeatedly.
This technique is more active and builds strength quickly but can be challenging for beginners. For a beginner's whole wheat loaf, starting with stretch and folds is often the easiest and most effective way to develop sufficient gluten strength. Choose the technique you are most comfortable with, but ensure the dough develops tension and elasticity over the mixing/kneading period.
Step 4: Bulk Fermentation - The First Rise
Monitoring Dough Temperature and Time
Bulk fermentation, also known as the first rise, is the crucial period between mixing the dough and shaping it. During this time, the sourdough starter's yeast and bacteria are actively working, fermenting the sugars in the flour, producing carbon dioxide gas (which makes the dough rise) and organic acids (which contribute to flavor and dough strength).
The duration of bulk fermentation is highly variable and depends primarily on the ambient temperature and the activity of your starter. It can range from 3-4 hours in a warm kitchen (around 78-80°F or 25-27°C) to 8-12 hours or even longer in a cooler environment (around 68-72°F or 20-22°C).
Monitoring both time and dough temperature is essential for successful bulk fermentation. Using a probe thermometer to check the internal dough temperature gives you a more accurate idea of how quickly fermentation is progressing than relying solely on ambient air temperature. A target dough temperature of around 75-78°F (24-26°C) is often ideal for moderate fermentation speed.
You are looking for specific visual cues: the dough should increase significantly in volume (typically 30-60%, depending on the recipe and desired outcome), become noticeably more airy and bubbly, and feel light and puffy. Don't rely solely on doubling; sourdough often doesn't fully double during bulk fermentation. Under-fermenting will result in a dense crumb, while over-fermenting can lead to a dough that collapses during shaping or baking.
Performing Stretch and Folds: Strengthening the Dough
During the first 2-3 hours of bulk fermentation, it is common practice to perform a series of stretch and folds. As described earlier, this involves gently stretching and folding the dough over on itself within its container. Typically, 3-5 sets of folds are performed, spaced 30-60 minutes apart. The purpose of these intermittent folds is to build strength and structure in the dough by aligning the developing gluten strands and incorporating air. Each set of folds helps the dough become smoother, more elastic, and better able to hold its shape.
These stretch and folds are particularly important for wetter doughs and those containing whole wheat flour, which can sometimes struggle to develop sufficient strength on their own. By the end of the stretch and fold series, the dough should feel significantly stronger, more cohesive, and should resist stretching, holding its shape better. After the final set of folds, the dough is left undisturbed to finish the bulk fermentation until it has reached the desired volume increase and feels sufficiently airy. Proper execution of stretch and folds is key to achieving a well-structured crumb in your final whole wheat loaf.
Step 5: Shaping the Dough - Building Tension

Pre-Shaping: Creating a Round
Once bulk fermentation is complete, the dough is gently turned out onto a lightly floured or wet surface. The first step in shaping is often pre-shaping. This involves gently coaxing the dough into a rough round or oval shape, depending on whether you plan to bake a boule (round) or a bâtard (oval). The goal here is not to create the final shape but to build initial surface tension and create a more manageable piece of dough for the final shaping. Avoid degassing the dough too much; handle it gently to retain the air bubbles created during fermentation.
To pre-shape a boule, gently fold the edges of the dough towards the center to create a rough ball. Then, using a dough scraper or your hands, gently cup the dough and rotate it on the surface, pulling it towards you slightly to create tension on the underside. For a bâtard, fold the dough into a rough rectangle or log.
The pre-shaped dough is then left to rest for 20-30 minutes, uncovered, on the counter. This short rest period allows the gluten to relax after handling, making the dough easier to shape into its final form without tearing. This relaxation is crucial before the final shaping step, especially for a dough that includes whole wheat flour.
Final Shaping: Forming the Loaf
After the short rest, the dough is ready for final shaping. The goal of final shaping is to build significant surface tension, which helps the loaf hold its structure in the proofing basket and contributes to a strong oven spring. The technique varies slightly depending on whether you are making a boule or a bâtard.
For a boule, gently flatten the pre-shaped round, then fold the top down to the center, the bottom up to the center, and then fold the dough in half, tucking the seam underneath. Alternatively, gently fold the dough over on itself from one side, then roll it into a tight ball while building tension against the surface.
For a bâtard, gently flatten the pre-shaped oval/rectangle, fold one side two-thirds of the way across, then fold the other side over the top, creating a seam. Then, starting from the top, roll the dough down tightly towards you, sealing the seam with your fingers as you go. Regardless of the shape, the key is to create a taut surface.
The shaped dough is then placed seam-side up into a well-floured banneton basket. The flouring of the banneton is crucial to prevent the dough from sticking during the cold proofing phase. A combination of rice flour and bread flour (50/50) works exceptionally well to prevent sticking.
Step 6: Cold Proofing - Developing Flavor
Retarding Fermentation in the Refrigerator
Cold proofing, also known as retarding, involves placing the shaped dough in its banneton basket into the refrigerator for an extended period, typically 8 to 24 hours, or even longer. This step significantly slows down the fermentation process due to the cold temperature (usually 38-40°F or 3-4°C). While the yeast activity is greatly reduced, the lactic acid bacteria continue to work, albeit slowly. This prolonged, slow fermentation is key to developing the deep, complex flavors and characteristic tang of sourdough bread. It also contributes to a better crust development during baking.
Beyond flavor, cold proofing offers practical benefits. It makes high-hydration doughs much easier to handle and score because they firm up in the cold. It also provides flexibility in your baking schedule; you can mix the dough one day and bake it the next.
The dough will continue to rise slowly in the fridge, gaining structure and flavor. Monitoring the dough is still important; it should look slightly increased in volume but not overly puffy or ready to spill out of the basket. Proper cold proofing is a technique that elevates a simple whole wheat loaf beginner recipe using sourdough into a truly artisan bread.
Scoring the Dough: Controlling Oven Spring
Scoring is the act of cutting the surface of the shaped dough just before it is placed in the oven. This is done with a sharp blade, typically a baker's lame (pronounced "lahm"), razor blade, or very sharp knife. Scoring serves two main purposes: it allows the baker to control exactly where the loaf expands during oven spring, preventing uncontrolled splitting, and it provides an opportunity to create beautiful, artistic designs on the crust. Without scoring, the crust would likely tear randomly as the dough expands in the heat, often resulting in a less attractive and less voluminous loaf.
The cuts you make dictate how the loaf will open up. A single, deep slash down the side of an oval loaf (bâtard) will encourage it to expand lengthwise and create an "ear" (a desirable flap of crust). Multiple shallow cuts on a round loaf (boule) can create intricate patterns and allow for even expansion.
The depth and angle of the score are important; a deep cut allows for maximum expansion, while shallow cuts are more for decoration. Scoring cold dough straight from the refrigerator is much easier and yields cleaner cuts than scoring dough at room temperature, as the surface is firmer. Mastering scoring takes practice but is a rewarding step that transforms a simple whole wheat loaf into a visually stunning bake.
Step 7: Baking the Sourdough Loaf
Preheating the Dutch Oven
Baking sourdough in a preheated Dutch oven is the method recommended for beginners and widely used by home bakers to mimic professional oven conditions. The Dutch oven needs to be preheated thoroughly to a very high temperature, typically 450-500°F (230-260°C), for at least 30-60 minutes. This ensures that when the dough is placed inside, the initial burst of heat is intense, providing maximum oven spring. Place the empty Dutch oven (base and lid) in the oven as it preheats. Extreme caution is needed when handling a very hot Dutch oven.
The high temperature achieved by preheating the Dutch oven helps set the crust quickly while the steam trapped inside allows the interior to expand. This combination of intense radiant heat from the pot and trapped steam is what produces a well-risen loaf with a thin, crisp crust and an open crumb. Skipping or shortening the preheating step will result in less oven spring and a denser loaf with a thicker, tougher crust. Ensure your oven is fully preheated to the target temperature before carefully transferring the scored dough into the hot Dutch oven.
Baking with the Lid On and Off: Controlling Crust
Baking sourdough in a Dutch oven typically involves two distinct phases: baking with the lid on and baking with the lid off. The first phase, with the lid on, usually lasts for the first 20-30 minutes at a high temperature (e.g., 450°F or 230°C). During this time, the lid traps the steam released by the baking dough.
This humid environment keeps the surface of the loaf moist and flexible, allowing it to expand fully during oven spring without forming a hard crust too early. The steam also helps gelatinize the starches on the surface, contributing to a thin, crispy crust later.
After the initial phase, the lid is carefully removed, and the oven temperature may be slightly reduced (e.g., to 425°F or 220°C). This second phase, lasting another 15-25 minutes, allows the steam to escape, and the dry heat of the oven can now directly brown and crisp the crust. The loaf finishes baking through during this time.
The duration of each phase can be adjusted based on your oven and desired crust color. Baking with the lid on and off is a simple yet incredibly effective technique for controlling both the loaf's rise and the development of that signature sourdough crust, whether you're baking a standard loaf or a whole wheat loaf beginner recipe.
Step 8: Cooling and Slicing - Patience Pays Off
Allowing the Loaf to Cool Completely
Once the sourdough loaf is baked to a deep golden-brown color and sounds hollow when tapped on the bottom, it's crucial to resist the urge to slice into it immediately. The loaf must cool completely on a wire rack. This cooling period, which can take anywhere from 2 to 4 hours depending on the size of the loaf, is not just about preventing you from burning your mouth. It's a critical part of the baking process where important internal changes continue to happen.
During cooling, residual heat continues to cook the interior of the loaf, and moisture redistributes evenly throughout the crumb. Slicing into a hot loaf will result in a gummy, dense texture because the starches haven't fully set and the moisture hasn't stabilized. Allowing it to cool completely ensures the crumb structure firms up properly and the flavors fully develop. Placing the loaf on a wire rack allows air circulation on all sides, preventing the bottom crust from becoming soggy. Patience during this final step is truly rewarded with the best possible texture and flavor from your homemade sourdough bread.
Assessing the Crumb: Openness and Texture
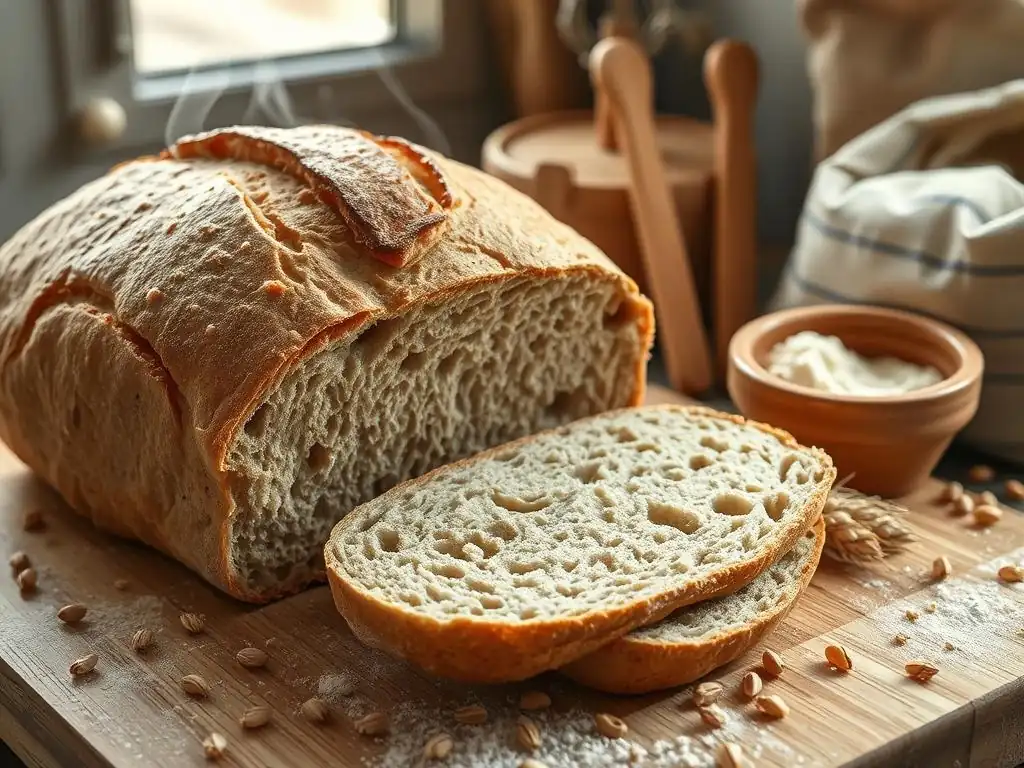
After the loaf has cooled completely, you can finally slice into it and admire the result of your hard work: the crumb. The crumb refers to the interior structure of the bread – the size and distribution of the air pockets (alveoli) and the texture of the bread itself. A well-baked sourdough loaf typically has an open, irregular crumb with varying sizes of holes, indicating a strong gluten structure and successful fermentation and oven spring. A dense crumb with small, uniform holes might suggest issues like under-proofing, insufficient gluten development, or slicing the loaf too early.
Examining the crumb provides valuable feedback on your baking process. Is it light and airy? Is it moist and tender? Is the texture consistent? The color of the crumb also indicates proper baking; it should be evenly baked through, without dense, uncooked spots. For a whole wheat loaf, the crumb will naturally be less open than a white loaf due to the bran, but it should still show signs of good aeration. Assessing the crumb helps you understand what went right and what could be improved for your next bake, guiding you on your journey to mastering sourdough.
Troubleshooting Common Sourdough Baking Problems
Flat Loaf: Under-Proofing or Weak Starter
One of the most disheartening outcomes for a sourdough baker is a flat loaf that spreads rather than rises in the oven. This is a common problem, especially for beginners, and is usually attributable to either under-proofing or a weak sourdough starter. Under-proofing means the dough hasn't fermented long enough during bulk fermentation or cold proofing. The yeast hasn't produced enough gas to adequately inflate the gluten structure, resulting in a dough that lacks the necessary strength and airiness to hold its shape and achieve good oven spring. The dough might feel dense and heavy.
Alternatively, a flat loaf can be a symptom of a weak or inactive starter. If your starter isn't consistently doubling or tripling after feeding and doesn't pass the float test, it may not have enough active yeast to leaven the dough properly. Factors like inconsistent feeding, using chlorinated water, or incorrect feeding ratios can weaken a starter.
Ensure your starter is vigorous and used at its peak. To combat under-proofing, try extending your bulk fermentation or cold proofing time, paying attention to dough temperature and visual cues (like a 30-60% volume increase and puffiness) rather than strict adherence to time alone. Using a strong starter is fundamental to preventing flat loaves.
Dense Crumb: Insufficient Gluten Development or Over-Proofing
A dense crumb with small, uniform holes (or very few holes at all) is another frequent issue. This can stem from two main, sometimes related, causes: insufficient gluten development or over-proofing. If the gluten network isn't adequately developed during mixing and bulk fermentation, it won't be strong enough to trap the gases produced by the yeast. This can happen if the dough wasn't mixed or stretched and folded enough, or if using flour with low protein content. The dough might feel weak and tear easily when stretched.
Conversely, a dense crumb can also result from over-proofing, particularly during the final proofing stage. If the dough proofs for too long, the yeast can consume all the available sugars, and the gluten structure can begin to break down. The dough becomes fragile, loses tension, and may even start to deflate. When baked, it lacks the elasticity to expand properly, leading to a heavy, dense interior.
Recognizing the signs of a properly proofed dough (puffy, airy, but still holding tension) is key. If you suspect insufficient gluten, try adding more stretch and folds during bulk fermentation. If over-proofing is the issue, shorten the final proofing time or use a colder temperature for retarding.
Gummy Texture: Under-Baking or Poor Hydration
A gummy or wet-feeling crumb, even after the loaf has cooled, is often a sign of under-baking. While the crust may look done, the interior hasn't reached a high enough temperature to fully set the starches and evaporate excess moisture. The internal temperature of a fully baked sourdough loaf should ideally reach 205-210°F (96-99°C). Using a probe thermometer is the best way to confirm doneness. If your loaf is consistently gummy, try increasing the baking time, particularly the portion with the lid off to ensure the interior gets sufficient heat.
Another contributing factor to a gummy texture can be poor hydration management or slicing the loaf before it's fully cooled. If the dough was mixed with too much water relative to the flour's absorption capacity, the interior can struggle to dry out properly during baking. Ensure you measure ingredients accurately by weight using a kitchen scale. As mentioned earlier, slicing a hot loaf traps steam inside and results in a gummy texture as the starches haven't solidified. Always allow the loaf to cool completely on a wire rack before slicing.
Sour Taste: Over-Fermentation or Old Starter
While a characteristic tang is desirable in sourdough, an excessively sour or vinegary taste can be off-putting. This is typically caused by over-fermentation, particularly an imbalance in the microbial activity favoring the production of acetic acid (which tastes more like vinegar) over lactic acid (which tastes more like yogurt). This often happens when the dough undergoes a very long, warm fermentation, or if the starter itself is very acidic, perhaps from infrequent feeding or being kept too warm.
An old, unfed starter stored in the refrigerator can become quite acidic. Using a large proportion of this overly sour starter in your levain or dough will transfer that strong acidity to your bread. To mitigate excessive sourness, try adjusting your fermentation process.
Use a slightly cooler bulk fermentation temperature, shorten the fermentation time, or use a younger levain (one that has peaked but hasn't started to fall significantly). Feeding your main starter more frequently or keeping it at a cooler temperature can also help produce a milder starter that yields a less aggressively sour loaf. Using a higher percentage of whole wheat flour can also contribute to a tangier flavor, as whole wheat often encourages more acetic acid production.
Tips and Tricks for Baking Exceptional Sourdough
Maintaining a Healthy Starter: Feeding Schedules and Storage
A vibrant, healthy sourdough starter is the cornerstone of great sourdough bread. Its strength and activity directly impact your loaf's rise, flavor, and texture. Maintaining your starter requires regular feeding with fresh flour and water to keep the yeast and bacteria thriving. If you bake frequently (several times a week), you can keep your starter at room temperature and feed it once or twice daily. Use a consistent ratio (e.g., 1:1:1 or 1:2:2 starter:water:flour by weight) and feed it when it shows signs of peaking or starting to fall after its previous feeding.
For less frequent bakers, storing your starter in the refrigerator is the best option. The cold temperature dramatically slows down microbial activity, allowing you to feed it less often – typically once a week is sufficient. When you want to bake, take the starter out of the fridge, discard most of it (keeping a small amount), and feed it 1-3 times at room temperature until it becomes active and bubbly again, reliably doubling or tripling in size.
This process "wakes up" the starter and ensures it has the necessary vigor to leaven your dough. Always use a clean jar and filtered water if your tap water is heavily chlorinated. A well-maintained starter is your most valuable asset in baking a consistently good whole wheat loaf or any sourdough creation.
Adjusting Hydration: Adapting to Different Flours
Hydration, the ratio of water to flour by weight, is a critical factor in sourdough baking that affects dough handling, crumb structure, and crust. However, not all flours absorb water equally. Whole wheat flour, for example, absorbs significantly more water than white bread flour due to the presence of bran and germ. This means a recipe calling for a specific hydration percentage might feel much drier if you substitute some white flour with whole wheat flour without adjusting the water. Similarly, different brands of the same type of flour can have varying absorption rates.
Learning to adjust hydration based on the flour you are using and how the dough feels is an important skill. A beginner's whole wheat loaf recipe might start with a moderate hydration (e.g., 70-75%). If your dough feels too stiff and dry after mixing, you can add a little more water (a tablespoon or two at a time) during the stretch and folds until it feels pliable but still manageable.
Conversely, if the dough feels too wet and slack, you might slightly reduce the water in your next bake or add a small amount of extra flour during the initial mixing. Pay attention to how the dough behaves; does it feel elastic and extensible, or is it tearing easily? Over time, you'll develop an intuition for the right hydration level for your flours and desired dough consistency.
Scoring Techniques: Creating Beautiful Designs
Scoring is the final artistic touch before your sourdough loaf goes into the oven, and it's an opportunity to personalize your bread while ensuring proper expansion. While a simple deep slash is perfectly functional, learning different scoring techniques can transform your loaf into a work of art. For a round loaf (boule), common patterns include a cross, a square, or multiple parallel slashes. For an oval loaf (bâtard), a single long, curved slash down the side is classic and often produces a beautiful "ear."
Using a sharp blade held at a shallow angle (around 30-45 degrees) to the dough's surface for deep cuts helps create that desirable ear. For decorative cuts, the blade is held almost perpendicular to the surface, making shallow incisions. Practice on scrap dough or even just on paper first to get a feel for the blade.
You can find countless examples of intricate scoring patterns online, from wheat stalks to elaborate geometric designs. While decorative scoring is secondary to functional scoring (allowing for oven spring), mastering a few simple patterns adds immense satisfaction to the baking process and makes your homemade whole wheat loaf or sourdough creation even more impressive.
Enjoying Your Homemade Sourdough Bread
Serving Suggestions and Pairing Ideas
Your freshly baked sourdough loaf, with its crisp crust and tangy, airy interior, is a versatile canvas for countless culinary delights. Enjoying it simply with good quality butter is a classic and deeply satisfying experience, allowing the bread's complex flavors to shine. For breakfast or brunch, thick slices are perfect for toast, topped with avocado, poached eggs, or your favorite jam. The sturdy structure also makes it ideal for open-faced sandwiches or crostini, holding up well under various toppings like roasted vegetables, cheeses, or cured meats.
Sourdough is a superb accompaniment to soups and stews, its crust providing a pleasing contrast in texture and its tang cutting through rich flavors. Use it to make the ultimate grilled cheese sandwich or as the base for bruschetta. Stale sourdough can be transformed into flavorful croutons for salads or used to make panzanella, an Italian bread salad. Even the "ear" and crispy edges are treats to be savored. Whether accompanying a meal or enjoyed on its own, your homemade whole wheat loaf or sourdough creation is sure to be a highlight.
Sourdough Discard Recipes: Pancakes, Crackers, and More
Maintaining a sourdough starter, especially if you're not baking every day, inevitably generates "discard" – the portion of the starter that is removed before feeding. Instead of throwing this away, it can be a fantastic ingredient in a variety of recipes! Unlike active starter, discard is used for flavor and moisture rather than leavening. Its tanginess adds a wonderful depth to baked goods that don't rely solely on the starter for their rise.
Popular sourdough discard recipes include pancakes or waffles, adding a subtle tang and fluffy texture. Discard crackers are incredibly easy to make and yield crispy, flavorful snacks. You can also use discard in muffins, quick breads, biscuits, pizza dough, or even pasta.
Many discard recipes incorporate baking soda or powder for leavening, using the discard primarily for its unique flavor profile and to reduce waste. Exploring discard recipes is a delicious way to make the most of your sourdough journey and adds another dimension to your baking repertoire, ensuring no part of your whole wheat loaf beginner recipe starter goes to waste.
Conclusion: Mastering the Art of Sourdough
Celebrate Your Baking Accomplishments.
Baking your first perfect sourdough loaf is a significant achievement, a culmination of nurturing your starter, learning new techniques, and exercising patience. Take a moment to appreciate the beautiful crust, the intricate scoring, and the anticipation of slicing into the airy interior. You've successfully navigated the process from feeding a living culture to transforming simple ingredients into a complex and delicious bread. This initial success is just the beginning of your sourdough journey.
Each loaf you bake will teach you something new – how your starter behaves in different temperatures, how to adjust hydration for a new type of flour like whole wheat, or how subtle changes in technique impact the final result. Don't be discouraged by loaves that don't turn out exactly as planned; every bake is a learning opportunity. With practice and attention to detail, you will develop the intuition needed to consistently bake exceptional sourdough bread. Celebrate your successes, learn from your challenges, and enjoy the rewarding process of mastering the art of sourdough baking right here with BakeWithEase.
Frequently Asked Questions
What makes this whole wheat loaf recipe ideal for beginners?
This recipe is designed for beginners because it uses simple ingredients and includes step-by-step instructions with clear explanations. You'll also find helpful tips to avoid common pitfalls.
Can I substitute any of the ingredients in this whole wheat loaf recipe?
While substitutions are possible, they may affect the final texture and flavor. It's recommended to follow the recipe as written for the best results, especially when starting out.
How do I know when my whole wheat loaf is properly proofed?
The dough should have nearly doubled in size and feel light and airy. A gentle poke should leave a slight indentation that slowly springs back.
What's the best way to store my whole wheat loaf to keep it fresh?
Store your cooled loaf in an airtight container or wrapped tightly in plastic wrap at room temperature. This helps to prevent it from drying out.
My whole wheat loaf is dense and heavy. What could I have done wrong?
Possible causes include over-mixing the dough, not proofing it long enough, or using old or inactive yeast. Make sure your yeast is fresh and follow the proofing instructions carefully.
Final Reflection: The Humble Rise of the Perfect Whole Wheat Loaf
Baking your first perfect whole wheat loaf is more than just achieving a culinary feat; it's a journey of connection—to the ingredients, the process, and ultimately, to yourself. The seemingly simple act of transforming flour, water, and yeast into a nourishing, fragrant loaf holds a power that transcends the kitchen. This guide aimed to demystify the process, providing a beginner-friendly path to baking success, and the overwhelmingly positive response confirms the widespread desire for accessible, wholesome baking.
The enduring appeal of homemade bread, particularly whole wheat, speaks volumes about our yearning for authenticity and connection to simpler times. It's a tangible representation of nurturing and care, a far cry from the mass-produced alternatives. The satisfaction derived from crafting something beautiful and delicious with your own hands is immeasurable. As the poet Mary Oliver so eloquently put it: Tell me, what is it you plan to do with your one wild and precious life?
Baking a perfect whole wheat loaf, in its own small way, is a powerful answer to that question.
Now, I invite you to take what you've learned and embark on your own baking adventures. Don't be afraid to experiment, to adjust the recipe to your taste, and to embrace the occasional imperfection. The journey of mastering the art of bread-making is a lifelong one, filled with delicious discoveries and the profound satisfaction of creating something truly special. So, gather your ingredients, preheat your oven, and let the aroma of freshly baked whole wheat bread fill your home – and your heart.
Unleash Your Inner Baker: Craft Your Perfect Loaf!
Thanks for joining us on this bread-baking journey! We hope you've gained the confidence to tackle whole wheat bread like a pro. Ready to take the next step?
- Bake your own masterpiece: Use the recipe and tips from this article to create your first delicious whole wheat loaf. Share a photo of your creation with us – we’d love to see it!
- Experiment with different flours: Try substituting a portion of the whole wheat flour with rye or spelt for a unique flavour profile.
- Join our baking community: Share your experiences, ask questions, and connect with fellow bread enthusiasts in the comments below!
What unique twist will you add to your perfect whole wheat loaf?