
Baking Hearty Vegan Whole Wheat Bread


Welcome to BakeWithEase, your haven for all things baking! Ever dreamt of effortlessly creating a loaf that's both wholesome and delicious? This week, we're diving deep into the world of bread baking with a focus on the perfect vegan whole wheat bread recipe. Unlock the secrets to a hearty, flavorful loaf that's surprisingly simple to make. Curious about how to achieve the ideal texture and rise, completely plant-based? Let's get started!
- Baking Hearty Vegan Whole Wheat Bread: A BakeWithEase Guide
- Introduction to Vegan Whole Wheat Bread Baking
- The Ultimate Vegan Whole Wheat Bread Recipe
-
Step-by-Step: Baking Your Vegan Whole Wheat Bread
- Step 1: Activating the Yeast for Optimal Results
- Step 2: Combining the Dry Ingredients
- Step 3: Mixing the Wet Ingredients and Forming the Dough
- Step 4: Kneading the Vegan Whole Wheat Dough to Perfection
- Step 5: First Proofing: Allowing the Dough to Rise
- Step 6: Shaping the Dough and Preparing the Loaf
- Step 7: Second Proofing: The Final Rise
- Step 8: Baking Your Vegan Whole Wheat Bread to Golden Perfection
- Step 9: Cooling and Slicing: The Final Touches
- Tips and Tricks for Baking the Best Vegan Whole Wheat Bread
- Storing Your Vegan Whole Wheat Bread
- Enjoying Your Homemade Vegan Whole Wheat Bread
-
Frequently Asked Questions
- What ingredients are needed for the vegan whole wheat bread recipe?
- How long does it take to bake the vegan whole wheat bread?
- Can I substitute whole wheat flour with another type of flour?
- Is the vegan whole wheat bread recipe suitable for beginners?
- How do I store the vegan whole wheat bread after baking?
- Final Reflection: The Humble Loaf, A Testament to Transformation
- Unleash Your Inner Baker: Craft the Perfect Loaf!
Baking Hearty Vegan Whole Wheat Bread: A BakeWithEase Guide
Introduction to Vegan Whole Wheat Bread Baking
Why Choose Vegan Whole Wheat Bread? Health Benefits and Flavor
Choosing to bake vegan whole wheat bread offers a fantastic combination of health benefits and rich, satisfying flavor. Whole wheat flour retains the germ and bran of the wheat kernel, providing significantly more fiber, vitamins (like B vitamins), and minerals (such as iron and magnesium) compared to refined white flour.
For instance, a slice of whole wheat bread can contain about 2-3 grams of fiber, contributing significantly to daily fiber intake recommendations, which are around 25-30 grams for adults. This higher fiber content aids digestion, helps regulate blood sugar levels, and contributes to a feeling of fullness, making it a smart choice for a balanced diet.
Beyond the nutritional advantages, vegan whole wheat bread boasts a distinct, earthy flavor and a heartier texture that many people find deeply appealing. The natural oils and compounds in the whole grain contribute to a nuttier, more complex taste profile than bread made solely with white flour.
When baked properly, this bread develops a lovely crust and a dense yet tender crumb. Opting for a vegan whole wheat bread recipe also means avoiding animal products like dairy and eggs, which is beneficial for those with dietary restrictions, allergies, or ethical preferences, while still achieving a delicious, substantial loaf perfect for sandwiches, toast, or alongside soups.
BakeWithEase: Your Guide to Perfect Vegan Bread
At BakeWithEase, we believe that baking delicious bread, including a fantastic vegan whole wheat bread recipe, should be accessible and enjoyable for everyone, regardless of their experience level. Our mission is to demystify the baking process, breaking down complex techniques into simple, actionable steps. We provide clear instructions, helpful tips, and explanations of why certain steps are important, empowering you to bake with confidence and achieve consistent, satisfying results right in your own kitchen.
This guide to baking vegan whole wheat bread is crafted with our signature BakeWithEase approach. We'll walk you through selecting the right ingredients, understanding the role of each component in a vegan loaf, and mastering the techniques like kneading and proofing that are crucial for a good rise and texture.
Whether this is your first attempt at baking whole wheat bread or you're looking to perfect your existing vegan whole wheat bread recipe, our detailed step-by-step instructions and troubleshooting tips are designed to help you succeed and enjoy the rewarding experience of pulling a warm, fragrant loaf from your oven.
The Ultimate Vegan Whole Wheat Bread Recipe
Recipe Overview: Simple Steps to Delicious Bread
This ultimate vegan whole wheat bread recipe is designed to be straightforward, guiding you from basic ingredients to a beautifully baked loaf with minimal fuss. The process involves a few key stages: activating the yeast, combining ingredients to form the dough, kneading to develop gluten, allowing the dough to rise (proofing) twice, shaping the loaf, and finally, baking it to golden perfection. Each stage is crucial for achieving the desired texture and flavor, but none are overly complicated, making this recipe suitable even for novice bakers.
Following this recipe will result in one hearty loaf of vegan whole wheat bread. The total active time for this recipe is approximately 30-40 minutes, spread across mixing, kneading, and shaping. The passive time, involving proofing and baking, will take longer, roughly 2.5 to 3 hours in total. This balance of active and passive time makes it a manageable project for a weekend afternoon or even a focused weeknight bake, culminating in a warm, homemade loaf that far surpasses store-bought alternatives in both taste and satisfaction.
Ingredients for Your Vegan Whole Wheat Loaf
Gathering the right ingredients is the first step to baking a successful vegan whole wheat bread recipe. You'll need whole wheat flour, a leavening agent (typically active dry or instant yeast), a liquid (warm water or non-dairy milk), a sweetener (like maple syrup or agave), a small amount of oil or vegan butter for richness and texture, and salt for flavor balance. Unlike traditional bread recipes, this vegan version omits eggs and dairy, relying on plant-based alternatives or the inherent properties of the other ingredients to achieve structure and tenderness.
The quality of your ingredients can significantly impact the final outcome of your vegan whole wheat bread. Using fresh yeast, high-quality whole wheat flour, and good-tasting oil or vegan butter will contribute to a better rise, texture, and flavor. Pay attention to the temperature of your liquids, as this is critical for yeast activation. Having all your ingredients measured and ready before you begin mixing will streamline the process and help ensure you follow the vegan whole wheat bread recipe accurately.
Whole Wheat Flour: The Foundation of Flavor
Whole wheat flour is the star ingredient in this vegan whole wheat bread recipe, providing its characteristic flavor, color, and nutritional benefits. Unlike all-purpose flour, which removes the bran and germ, whole wheat flour includes all parts of the wheat kernel.
This inclusion results in a flour that is higher in fiber and protein, typically containing around 13-14 grams of protein per cup, compared to 10-12 grams in all-purpose flour. This higher protein content is important for gluten development, which gives bread its structure, though whole wheat gluten behaves a little differently than white flour gluten due to the presence of bran particles.
Because of the bran, whole wheat flour absorbs more liquid than white flour and can sometimes result in a denser loaf if not handled correctly. Using a good quality stone-ground or finely milled whole wheat flour can help improve the texture.
Some bakers also like to use a blend of whole wheat and bread flour (which is high in protein but refined) or all-purpose flour to achieve a lighter crumb while still retaining much of the whole wheat flavor and nutrition. For this specific vegan whole wheat bread recipe, we focus on using 100% whole wheat for maximum health benefits and a truly hearty loaf.
Vegan Yeast Activation: Ensuring a Good Rise
Yeast is the living organism responsible for making your vegan whole wheat bread rise, producing carbon dioxide gas as it consumes sugars. Activating the yeast correctly is a critical first step. For active dry yeast, this typically involves dissolving it in warm liquid (around 105-115°F or 40-46°C) with a pinch of sugar or sweetener. Within 5-10 minutes, the mixture should become foamy or bubbly, indicating the yeast is alive and active. If it doesn't foam, your yeast may be dead, or the water temperature was incorrect (too hot can kill it, too cold won't activate it).
Instant yeast, on the other hand, can often be mixed directly with the dry ingredients without prior activation. However, even with instant yeast, many bakers prefer to activate it first in warm liquid to confirm its viability before committing to the rest of the ingredients. A standard packet of yeast (about 2.25 teaspoons or 7 grams) is usually sufficient to leaven one loaf of bread made with 3-4 cups of flour. Ensuring your yeast is active is the single most important factor in preventing a dense, flat loaf when baking your vegan whole wheat bread.
Sweeteners: Maple Syrup vs. Agave for Bread
Sweeteners in bread, like maple syrup or agave nectar used in a vegan whole wheat bread recipe, serve multiple purposes beyond just adding a touch of sweetness. They provide food for the yeast, helping it to activate and produce gas for rising. They also contribute to the browning of the crust during baking through the Maillard reaction and caramelization, giving the loaf a more appealing color and flavor. While sugar is often used, liquid vegan sweeteners are excellent alternatives.
Maple syrup offers a distinct, warm flavor that pairs beautifully with whole wheat. Agave nectar has a more neutral taste and a lower glycemic index than sugar, which some bakers prefer. Both are effective liquid sweeteners for yeast activation. Typically, a recipe might call for 1-2 tablespoons of sweetener per loaf. Using too much can make the bread overly sweet and can sometimes inhibit yeast activity, while too little might result in less browning and a slower rise. Experimenting with the amount within that range can help you find the perfect balance for your vegan whole wheat bread.
Binding Agents: Replacing Eggs in Vegan Bread
Traditional bread recipes sometimes include eggs for richness, binding, and structure. In a vegan whole wheat bread recipe, these functions are achieved through other means. The gluten developed during kneading provides the primary structure. For added binding and a slightly softer crumb, various plant-based alternatives can be used, though often none are strictly necessary in a simple lean bread recipe.
One common vegan binding agent is a "flax egg," made by mixing 1 tablespoon of ground flaxseed with 3 tablespoons of water and letting it sit for 5-10 minutes until it forms a gel-like consistency. This mimics some of the binding properties of an egg.
Another option is aquafaba, the liquid from a can of chickpeas, which can provide some binding and even help with lightness when whipped. For a basic hearty whole wheat loaf, relying on the gluten in the flour and perhaps a bit of oil for tenderness is often sufficient, keeping the vegan whole wheat bread recipe simple and letting the whole grain flavor shine.
Equipment Needed for Successful Vegan Bread Baking
Having the right tools can make the process of baking your vegan whole wheat bread recipe much smoother and more enjoyable. You don't need a professional bakery setup, but a few essential items will greatly improve your results. These range from basic measuring tools to specific items for kneading and baking.
Ensuring your equipment is clean and ready before you start is also important. Residue from previous bakes or cleaning agents can sometimes negatively affect yeast activity or the texture of your dough. Investing in durable, reliable equipment will serve you well for countless loaves of delicious vegan whole wheat bread and other baked goods.
Essential Tools for Kneading and Baking
For kneading your vegan whole wheat bread dough, you'll primarily need a clean, spacious surface. This could be a kitchen counter, a large wooden board, or even a dedicated pastry mat. If you prefer using a stand mixer, ensure you have a dough hook attachment. A bench scraper is incredibly useful for handling sticky dough, dividing it, and cleaning your work surface. For measuring, accurate measuring cups and spoons are essential, and a digital kitchen scale is highly recommended for precise flour measurements, which is crucial for consistent bread baking.
For the baking phase, an oven thermometer is a must-have to ensure your oven is heating accurately, as oven temperatures can vary significantly from the dial setting (sometimes by as much as 25-50°F). You'll also need proofing bowls – large bowls (glass, ceramic, or plastic) that can be lightly oiled to prevent the dough from sticking as it rises. Covering the dough during proofing can be done with plastic wrap, a damp kitchen towel, or a reusable bowl cover.
Choosing the Right Bread Pan
Selecting the correct bread pan is important for achieving the classic loaf shape for your vegan whole wheat bread. A standard loaf pan typically measures around 9x5 inches (approx. 23x13 cm). This size is ideal for a recipe using about 3-4 cups of flour, providing enough space for the dough to rise properly during the second proofing and baking without spilling over. Using a pan that is too large can result in a flatter, less shapely loaf, while one that is too small will cause the dough to overflow.
Loaf pans are available in various materials, including metal (aluminum, steel), glass, and ceramic. Metal pans, especially those made of aluminized steel, are excellent heat conductors, promoting even browning of the crust. Glass pans also conduct heat well but can sometimes cause the bottom crust to brown faster than the top. Regardless of material, lightly greasing the pan with oil or vegan butter and dusting it with flour (or using parchment paper) is essential to prevent your beautiful vegan whole wheat bread from sticking.
Step-by-Step: Baking Your Vegan Whole Wheat Bread
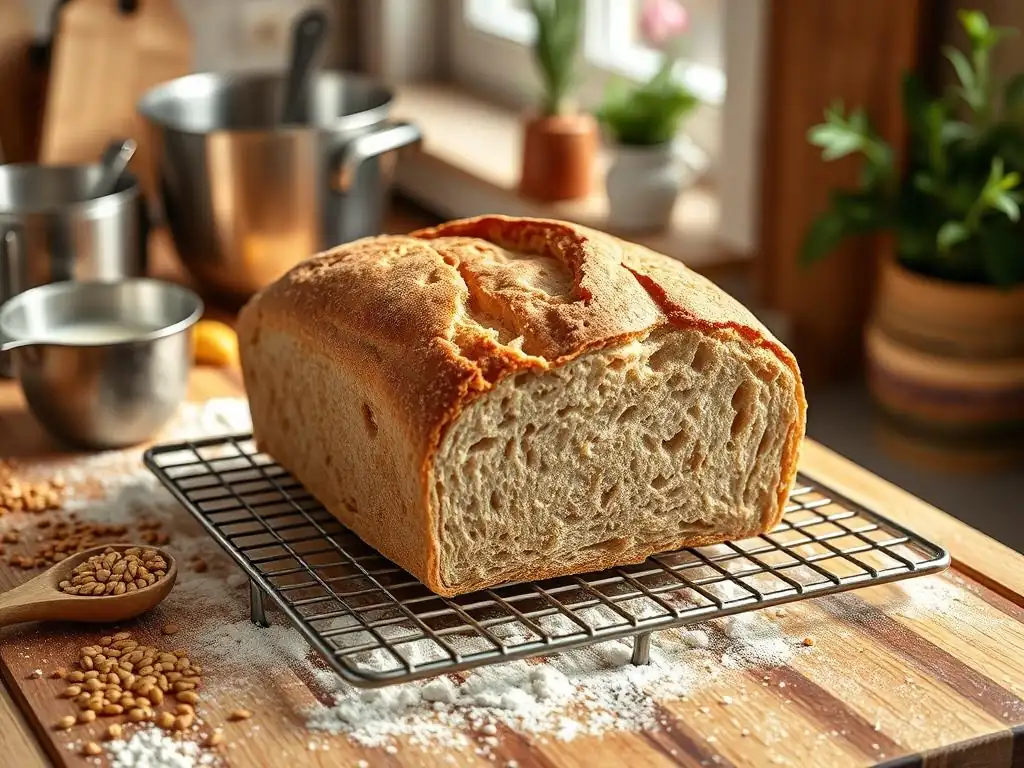
Step 1: Activating the Yeast for Optimal Results
The very first step in our vegan whole wheat bread recipe is ensuring your yeast is alive and ready to work. Measure the warm water or non-dairy milk into a small bowl. The temperature is key here; aim for a range of 105-115°F (40-46°C), which is warm to the touch but not hot. If using active dry yeast, sprinkle it over the warm liquid along with the sweetener (maple syrup or agave). Stir gently and let it sit undisturbed.
Observe the mixture over the next 5 to 10 minutes. You should see a noticeable layer of foam or bubbles forming on the surface. This indicates that the yeast is actively feeding on the sugar and releasing carbon dioxide. If you don't see this activity, the yeast may be expired or the liquid temperature was off. It's best to discard this mixture and start again with fresh yeast and correctly tempered liquid rather than proceeding with inactive yeast, which would result in a flat loaf of vegan whole wheat bread.
Step 2: Combining the Dry Ingredients
While the yeast is activating, measure your whole wheat flour, salt, and any other dry ingredients (like herbs or spices, if using) into a large mixing bowl. Using a kitchen scale to weigh your flour is recommended for accuracy; for this recipe, approximately 450-500 grams of whole wheat flour is a good starting point for a standard loaf. Whisk these dry ingredients together thoroughly.
Whisking helps to evenly distribute the salt and any other additions throughout the flour. It also helps to aerate the flour slightly. Ensure the salt is well mixed, as direct contact with yeast can sometimes inhibit its activity. Having the dry ingredients ready in a separate bowl makes it easy to combine them with the wet ingredients once the yeast is properly activated for your vegan whole wheat bread.
Step 3: Mixing the Wet Ingredients and Forming the Dough
Once your yeast mixture is foamy and active, it's time to combine the wet and dry ingredients for your vegan whole wheat bread. If you're using oil or melted vegan butter, add it to the activated yeast mixture. Pour the entire wet mixture into the bowl with the dry ingredients.
Using a sturdy spoon or a dough whisk, begin to mix everything together. Start from the center and work your way outwards, incorporating the flour into the liquid. Continue mixing until most of the dry flour is incorporated and a shaggy, sticky dough begins to form. Don't worry if it looks messy at this stage; the dough will come together during kneading.
Step 4: Kneading the Vegan Whole Wheat Dough to Perfection
Kneading is a crucial step for developing the gluten structure in your vegan whole wheat bread, which provides elasticity and allows the bread to hold its shape and trap the gases produced by the yeast. Turn the shaggy dough out onto a lightly floured surface. If using a stand mixer with a dough hook, transfer the dough to the mixer bowl.
Knead the dough for about 8-10 minutes by hand, or 6-8 minutes in a stand mixer on medium-low speed. The dough will initially be sticky, but as you knead, it will become smoother, more elastic, and less sticky. Resist the urge to add too much extra flour, as this can make the bread dense. Add just enough flour to prevent excessive sticking to your hands or the work surface.
Kneading Techniques for Vegan Bread
When kneading your vegan whole wheat bread dough by hand, a common technique is the push-and-fold method. Flatten the dough slightly, then fold the far edge towards you. Using the heel of your hand, push down and away from you. Give the dough a quarter turn and repeat the process. Continue this rhythm, incorporating any sticky edges towards the center. The motion helps align the gluten strands.
If using a stand mixer, let the dough hook do the work. Start on a low speed until the ingredients are combined, then increase to medium-low. Watch the dough; it should slap against the sides of the bowl and gather around the hook. The dough is ready when it is smooth, elastic, and passes the "windowpane test" – taking a small piece of dough and gently stretching it thin enough to see light through it without tearing. This indicates good gluten development.
Achieving the Right Dough Consistency
The ideal consistency for your vegan whole wheat bread dough after kneading is smooth, elastic, and slightly tacky to the touch. It should not be overly sticky, clinging stubbornly to your hands, nor should it be dry and crumbly. If the dough is too dry, add a tablespoon of warm water or non-dairy milk at a time and continue kneading until it reaches the right consistency.
Conversely, if the dough is too wet and unmanageable after several minutes of kneading, add a tablespoon of whole wheat flour at a time, kneading after each addition, until it becomes manageable. Remember that whole wheat flour absorbs liquid more slowly than white flour, so be patient and avoid adding too much flour too quickly. The goal is a dough that is supple and responsive, ready for its first rise.
Step 5: First Proofing: Allowing the Dough to Rise
The first proofing, also known as the bulk fermentation, is where the yeast does the majority of its work, causing the vegan whole wheat bread dough to rise and develop flavor. Lightly grease a large bowl with oil or vegan butter. Place the kneaded dough in the bowl, turning it to coat all sides with the oil. This prevents a dry skin from forming.
Cover the bowl tightly with plastic wrap, a damp kitchen towel, or a reusable cover to prevent the dough from drying out. Place the bowl in a warm, draft-free place. An ideal temperature range for proofing is typically 75-85°F (24-30°C). The dough needs to rise until it has roughly doubled in size. This usually takes about 60-90 minutes, but the time can vary significantly depending on the ambient temperature and the activity of your yeast.
Creating the Ideal Proofing Environment
Finding a warm, draft-free spot for your vegan whole wheat bread dough to rise is essential for a successful first proof. Avoid placing the dough near open windows, vents, or in cold areas. Some good options include:
- Inside a slightly warm oven that has been turned off. You can warm the oven briefly (to about 150°F/65°C), then turn it off before putting the dough inside.
- On top of your refrigerator, where it's often slightly warmer due to the motor.
- In a microwave oven (turned off), which is a good draft-free box.
- If your kitchen is cool, you can create a makeshift proofing box by placing the covered bowl in a cooler with a bowl of hot water next to it.
The dough is ready when it has doubled in size and passes the "poke test" – gently pressing two fingers into the dough should leave an indentation that springs back slowly, not immediately.
Step 6: Shaping the Dough and Preparing the Loaf
Once the dough has doubled in size during the first proof, it's time to shape it into a loaf for your vegan whole wheat bread. Gently turn the dough out onto a lightly floured surface. The goal is to handle the dough carefully to avoid deflating it completely while still removing excess gas. Pat the dough gently into a rough rectangle or square.
There are several ways to shape a loaf, but a common method for a standard loaf pan is to gently flatten the dough into a rectangle about the width of your loaf pan. Fold the top third of the rectangle down to the center, then fold the bottom third up over the top fold, like a letter. Pinch the seam closed.
Then, gently roll the dough seam-side down into a log shape that fits the length of your prepared loaf pan. This process creates tension on the surface, which helps the loaf hold its shape and rise upwards during the second proof and baking.
Different Bread Shaping Techniques
While the simple roll-up method is effective for a loaf pan, you can explore other shaping techniques for your vegan whole wheat bread. For a round loaf (boule) baked on a baking sheet or in a Dutch oven, you would typically shape the dough by folding the edges into the center several times to create a taut surface, then flipping it seam-side down and gently rotating it against the counter to create surface tension.
Another technique for loaves, often used after the letter-fold, involves gently pulling the sides of the dough underneath itself to create a smooth, tight surface. This tension is what gives the bread its structure. Regardless of the specific technique, the aim is to create a loaf with enough surface tension to support its rise during the second proofing and baking, ensuring a well-formed final vegan whole wheat bread.
Step 7: Second Proofing: The Final Rise
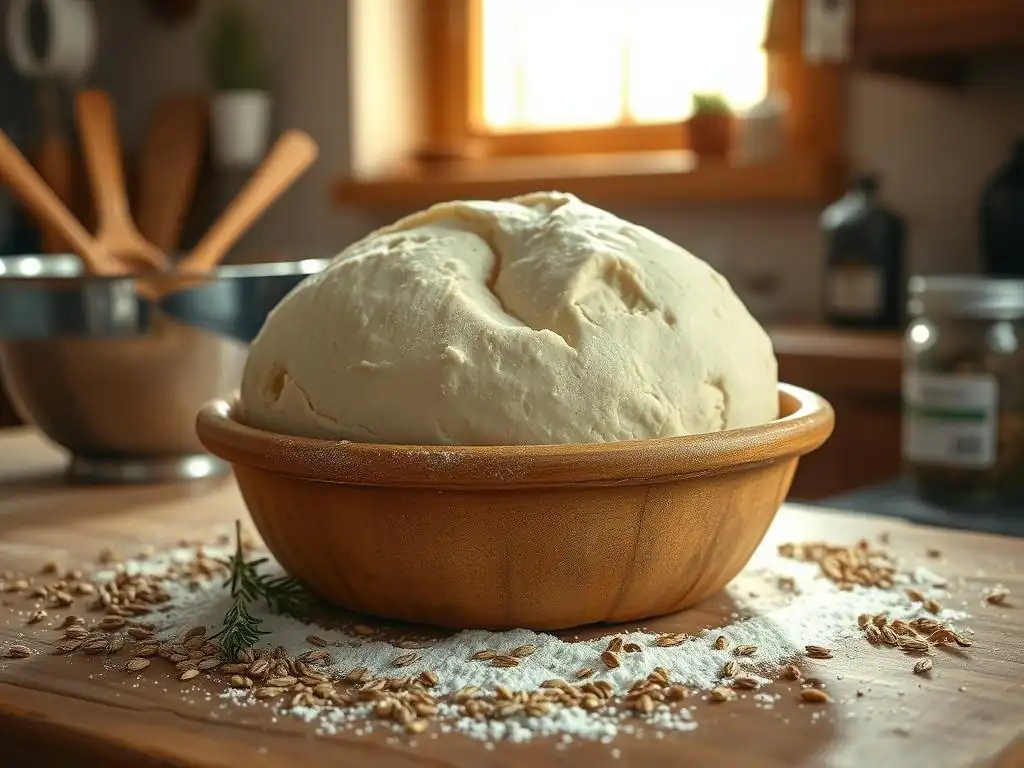
After shaping, the vegan whole wheat bread loaf needs a second proofing, also called the final rise or 'proofing in the pan'. Carefully place the shaped dough seam-side down into your prepared loaf pan. Cover the pan loosely with plastic wrap or a light kitchen towel.
Place the covered loaf pan back in a warm, draft-free location, similar to the first proofing. This second rise is typically shorter than the first, usually taking about 30-45 minutes. The dough should expand significantly, rising to about 1 inch (2.5 cm) above the rim of the loaf pan. This rise is crucial for achieving a light texture and good volume in your baked vegan whole wheat bread.
Step 8: Baking Your Vegan Whole Wheat Bread to Golden Perfection
Preheat your oven towards the end of the second proofing so it is fully heated when the bread is ready to bake. For a standard loaf of vegan whole wheat bread, a common baking temperature is around 375-400°F (190-200°C). Ensure your oven has been preheating for at least 15-20 minutes to reach and stabilize at the target temperature.
Carefully place the loaf pan in the preheated oven, preferably on the middle rack. Bake for approximately 30-40 minutes. The bread is done when the crust is a deep golden brown, and it sounds hollow when tapped on the bottom. For the most accurate measure of doneness, use an instant-read thermometer; the internal temperature of the bread should register between 190-200°F (88-93°C).
Oven Temperature and Baking Time
The exact baking time and temperature for your vegan whole wheat bread can vary depending on your oven and the size of your loaf. Starting at a higher temperature like 400°F (200°C) for the first 10-15 minutes can help promote a good oven spring (the final burst of rising in the oven) and develop a nice crust, then reducing the temperature to 375°F (190°C) for the remainder of the baking time can help prevent the crust from burning before the interior is fully cooked.
Monitoring the bread visually is important. If the top crust is browning too quickly, you can loosely tent the loaf with aluminum foil for the last 10-15 minutes of baking. Using an oven thermometer is highly recommended to verify your oven's actual temperature, as discrepancies can significantly impact baking time and results for your vegan whole wheat bread.
Achieving a Crispy Crust
A good crust is a hallmark of delicious homemade bread, including vegan whole wheat bread. While a standard loaf pan bake might not produce the thick, crackly crust of a hearth loaf, you can still achieve a satisfying texture. One method is to create steam in your oven at the beginning of the bake.
You can do this by placing a shallow oven-safe pan on the bottom rack while the oven preheats and carefully pouring about a cup of hot water into it just as you place the bread in the oven. Close the oven door quickly to trap the steam.
The steam helps keep the surface of the dough moist initially, allowing the loaf to expand fully before the crust hardens. After about 10-15 minutes, the water will have evaporated, and the drier heat will allow the crust to crisp up. Another tip for a slightly crispier crust on your vegan whole wheat bread is to remove the loaf from the pan for the last 5-10 minutes of baking and place it directly on the oven rack, allowing air to circulate around all sides.
Step 9: Cooling and Slicing: The Final Touches
Once your vegan whole wheat bread is baked to perfection, remove it from the oven. Immediately turn the loaf out of the pan and place it on a wire cooling rack. Cooling bread properly is just as important as baking it correctly.
Allow the bread to cool completely on the wire rack before slicing. This takes at least 1-2 hours, sometimes longer for a dense whole wheat loaf. While it's tempting to slice into a warm loaf, cooling allows the internal structure to set and the moisture to redistribute evenly throughout the crumb. Slicing warm bread can result in a gummy texture. Patience at this stage will ensure you enjoy the best possible texture from your homemade vegan whole wheat bread.
Tips and Tricks for Baking the Best Vegan Whole Wheat Bread
Troubleshooting Common Vegan Bread Baking Issues
Even with a reliable vegan whole wheat bread recipe, baking can sometimes present challenges. Don't be discouraged if your first loaf isn't absolutely perfect. Understanding common issues and how to fix them is part of the learning process and will improve your results over time.
Many problems, such as a poor rise or a dense crumb, can often be traced back to a few key areas: yeast activity, dough consistency, or proofing conditions. By paying close attention to these steps and knowing how to troubleshoot, you can rescue a struggling loaf or ensure your next attempt is even better. Mastering a vegan whole wheat bread recipe involves learning to read the dough and respond accordingly.
Dense Bread? Finding the Solution
A dense loaf is a common frustration when baking vegan whole wheat bread. This can happen for several reasons. One primary cause is insufficient gluten development; the dough wasn't kneaded long enough or vigorously enough to build a strong structure. Ensure you are kneading for the full recommended time, or until the dough passes the windowpane test. Using a stand mixer can sometimes be more effective for developing gluten, especially with heavier flours like whole wheat.
Another culprit is insufficient proofing. If the dough didn't rise enough during either the first or second proof, it won't have the necessary airy structure. Ensure your yeast is active (Step 1) and that your proofing environment is warm and draft-free (Step 5 & 7). Also, avoid adding too much extra flour during kneading, as excessive flour can make the dough stiff and dense.
Bread Not Rising? Yeast Activation Tips
If your vegan whole wheat bread dough isn't rising, the most likely issue is inactive yeast. Always start by activating your yeast in warm liquid with a pinch of sugar (Step 1). The water temperature is critical – too cold slows the yeast, too hot kills it. Use a thermometer to aim for 105-115°F (40-46°C).
Check the expiration date on your yeast packet or jar. Old yeast loses its potency. Store yeast in an airtight container in the refrigerator or freezer to prolong its life. If your yeast mixture doesn't foam after 5-10 minutes, discard it and start over with a new packet of yeast. Ensuring vigorous yeast activity from the outset is fundamental to a well-risen loaf of vegan whole wheat bread.
Variations and Add-ins for Your Vegan Whole Wheat Bread
Once you've mastered the basic vegan whole wheat bread recipe, feel free to experiment with variations and add-ins to customize your loaf. Incorporating seeds, nuts, spices, or even dried fruits can add extra layers of flavor, texture, and nutritional value, making your homemade bread even more exciting.
These additions can be mixed into the dough during the final stages of kneading or folded in gently after the first proofing. Consider the moisture content of your additions; for example, soaking dried fruit briefly can prevent it from drawing moisture out of the dough. Have fun personalizing your vegan whole wheat bread!
Adding Seeds and Nuts for Texture
Incorporating seeds and nuts is a popular way to enhance the texture and nutritional profile of vegan whole wheat bread. You can add sunflower seeds, pumpkin seeds, sesame seeds, flax seeds, chia seeds, chopped walnuts, or pecans. A good starting point is to add about 1/2 cup to 1 cup of total seeds and/or nuts per loaf.
Seeds like flax or chia seeds can also absorb moisture, so you might need a tiny bit more liquid in the recipe if using a significant amount. Larger nuts should be roughly chopped. You can mix them directly into the dough during the last minute or two of kneading, ensuring they are evenly distributed. Adding seeds to the exterior of the loaf before the second proofing or baking (spritz the loaf with water first to help them stick) also adds a lovely visual and textural element to your vegan whole wheat bread.
Exploring Different Flavors: Spices and Herbs
Adding spices and herbs can transform the flavor profile of your vegan whole wheat bread, making it suitable for different uses. For a slightly savory bread, consider adding 1-2 teaspoons of dried rosemary, thyme, or oregano to the dry ingredients. A pinch of black pepper or garlic powder can also be interesting additions.
For a warmer, slightly sweeter loaf that pairs well with breakfast or desserts, try adding ground cinnamon, nutmeg, or cardamom (about 1 teaspoon total). These spices complement the natural nuttiness of the whole wheat flour beautifully. Experiment with small amounts initially (e.g., 1/2 teaspoon) and adjust in future bakes based on your preference. These simple additions can elevate a basic vegan whole wheat bread recipe into something truly special.
Storing Your Vegan Whole Wheat Bread
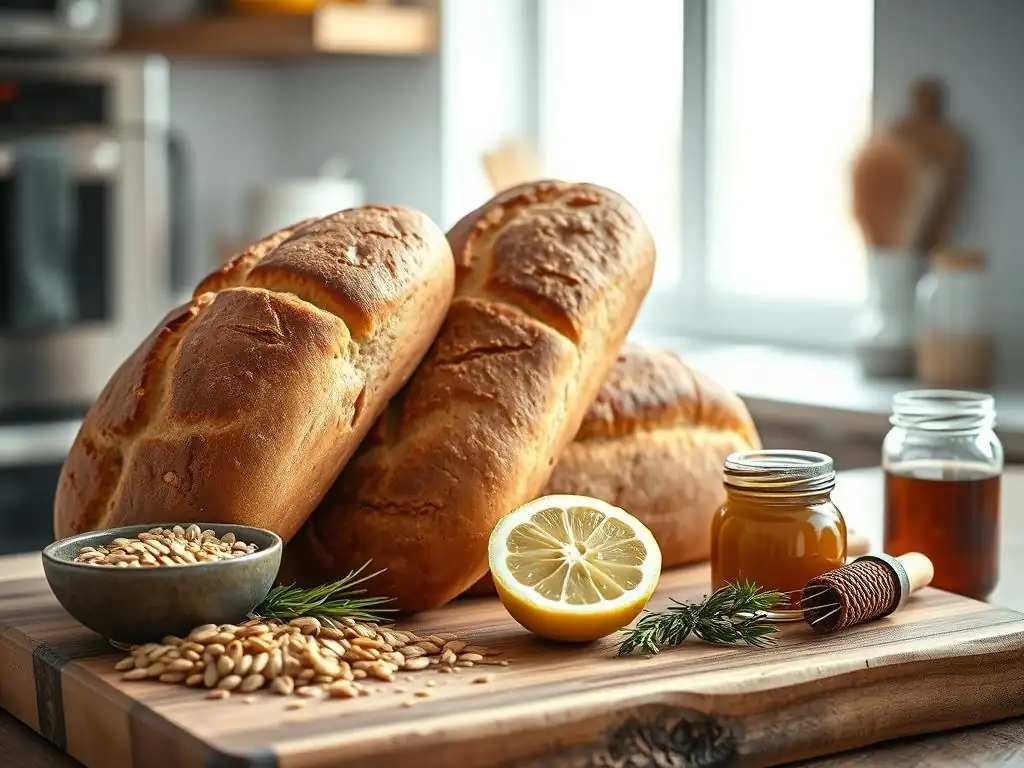
Properly storing your homemade vegan whole wheat bread is key to maintaining its freshness and texture for as long as possible. Unlike commercial breads which often contain preservatives, homemade bread is best enjoyed within a few days of baking.
Understanding how to store your loaf will help prevent it from drying out or becoming stale too quickly. Choosing the right storage method depends on how soon you plan to eat the bread. With the right technique, you can enjoy your delicious vegan whole wheat bread for almost a week or save it for much longer.
Keeping Your Bread Fresh Longer
To keep your vegan whole wheat bread fresh at room temperature, it's best to store it in a bread box, a clean paper bag, or a cloth bread bag. These options allow the crust to breathe somewhat, preventing it from becoming soggy, while still offering some protection against drying out. Avoid storing homemade bread in plastic bags at room temperature for extended periods, as this can trap moisture and potentially lead to mold growth, especially in humid environments.
If you slice the bread, store it cut-side down on a cutting board, or place the cut surface against the side of the bread box or bag to minimize exposure to air. For optimal freshness, aim to consume the bread within 3-4 days when stored at room temperature.
Freezing Vegan Whole Wheat Bread for Later
If you won't be able to eat your entire loaf of vegan whole wheat bread within a few days, freezing is an excellent option to preserve its quality. Ensure the bread is completely cooled before freezing. You can freeze the loaf whole, in halves, or pre-sliced. Freezing slices allows you to thaw only what you need.
Wrap the bread tightly in plastic wrap, ensuring no air pockets, then wrap it again in aluminum foil or place it in a freezer-safe bag. This double layer of protection helps prevent freezer burn. Properly wrapped vegan whole wheat bread can be stored in the freezer for up to 3-4 months. To thaw, simply leave it wrapped on the counter at room temperature for several hours, or pop slices directly into a toaster.
Enjoying Your Homemade Vegan Whole Wheat Bread
After putting in the effort to bake a beautiful loaf of vegan whole wheat bread, the best part is finally getting to enjoy it! The aroma of fresh bread filling your kitchen is a reward in itself, but tasting that first slice is truly satisfying.
Whether you prefer it warm from the oven (after cooling slightly, of course!) or toasted the next day, there are countless ways to savor your homemade creation. This hearty loaf is versatile and delicious on its own or paired with various toppings and meals.
Serving Suggestions and Pairing Ideas
Your homemade vegan whole wheat bread is incredibly versatile. Enjoy a slice simply toasted with vegan butter or a drizzle of olive oil. It makes a fantastic base for open-faced sandwiches or hearty grilled sandwiches filled with your favorite vegan ingredients like hummus, avocado, grilled vegetables, or plant-based deli slices.
This bread also pairs wonderfully with soups and stews, perfect for dipping. Consider serving it alongside a lentil soup or a hearty vegetable stew. For a sweeter take, top toasted slices with nut butter, jam, or sliced fruit. The robust flavor of the whole wheat stands up well to both savory and sweet accompaniments, making your vegan whole wheat bread a staple for any meal.
Vegan Whole Wheat Bread: A Healthy and Delicious Choice
Baking your own vegan whole wheat bread using this recipe is more than just a fun kitchen project; it's a choice for a healthier and more delicious diet. You have full control over the ingredients, ensuring there are no unwanted additives or preservatives. The use of 100% whole wheat flour provides essential fiber, vitamins, and minerals that contribute to overall well-being.
This hearty loaf offers a satisfying texture and rich flavor that store-bought options often lack. It's a testament to the fact that vegan baking can be incredibly flavorful and nourishing. By mastering this vegan whole wheat bread recipe, you gain the ability to consistently produce wholesome, delicious bread right in your home, ready to be enjoyed in countless ways.
Frequently Asked Questions
What ingredients are needed for the vegan whole wheat bread recipe?
To make vegan whole wheat bread, you'll need whole wheat flour, water, yeast, salt, and a sweetener like maple syrup or agave nectar. These simple ingredients can be easily found at your local store.
How long does it take to bake the vegan whole wheat bread?
The total time to bake vegan whole wheat bread is approximately 2 hours, including mixing, rising, and baking. This allows for proper fermentation and ensures a hearty texture.
Can I substitute whole wheat flour with another type of flour?
Yes, you can substitute whole wheat flour with other flours, but for best results, use white whole wheat flour or a blend. This maintains the nutritional benefits while altering the flavor and texture.
Is the vegan whole wheat bread recipe suitable for beginners?
Absolutely! The vegan whole wheat bread recipe is designed for bakers of all levels, including beginners. The step-by-step guides make it easy to follow along.
How do I store the vegan whole wheat bread after baking?
To keep your vegan whole wheat bread fresh, store it in an airtight container at room temperature for up to 3 days, or freeze it for longer storage. This will help maintain its moisture and flavor.
Final Reflection: The Humble Loaf, A Testament to Transformation
The resurgence of interest in homemade bread, particularly vegan and whole wheat varieties, speaks volumes about our growing awareness of food's impact on our health and the planet. This simple act of baking, once a commonplace task, has become a powerful symbol of self-sufficiency and mindful consumption. We are rediscovering the satisfaction of creating something nourishing from scratch, and the delicious results are only part of the reward.
Baking this hearty vegan whole wheat bread wasn't just about following a recipe; it was about connecting with a tradition, a process, and a deeper understanding of food. The kneading, the rising, the aroma filling the kitchen – these are sensory experiences that remind us of the time and care that goes into creating something truly wholesome. Bread is the staff of life,
they say, and in this case, it's a staff built on compassion for animals and respect for the earth. This recipe, in its simplicity, embodies that philosophy.
Now, I invite you to take this recipe and make it your own. Experiment with different seeds, herbs, or even add-ins like dried fruits. Most importantly, savor the process. Feel the dough between your fingers, smell the baking bread, and share the results with loved ones. This isn't just about making a loaf of bread; it's about nurturing yourself, your community, and a more sustainable future, one delicious slice at a time.
Unleash Your Inner Baker: Craft the Perfect Loaf!
Thanks for joining us on this baking journey! We hope you've gained the confidence to tackle hearty, delicious vegan whole wheat bread. Ready to take your baking skills to the next level?
- Bake your own loaf today! Use the recipe from the article as your guide – you might be surprised how easy it is.
- Share your baking triumphs (or challenges!) with our community on social media using #BakeWithEaseVeganBread. Let's inspire each other!
- Explore other vegan bread recipes on BakeWithEase.com – we've got plenty more where that came from!
What unique twist will you add to your next vegan whole wheat loaf? Let us know in the comments!