
Rye Bread with a Starter (Not Sourdough): A Different Method

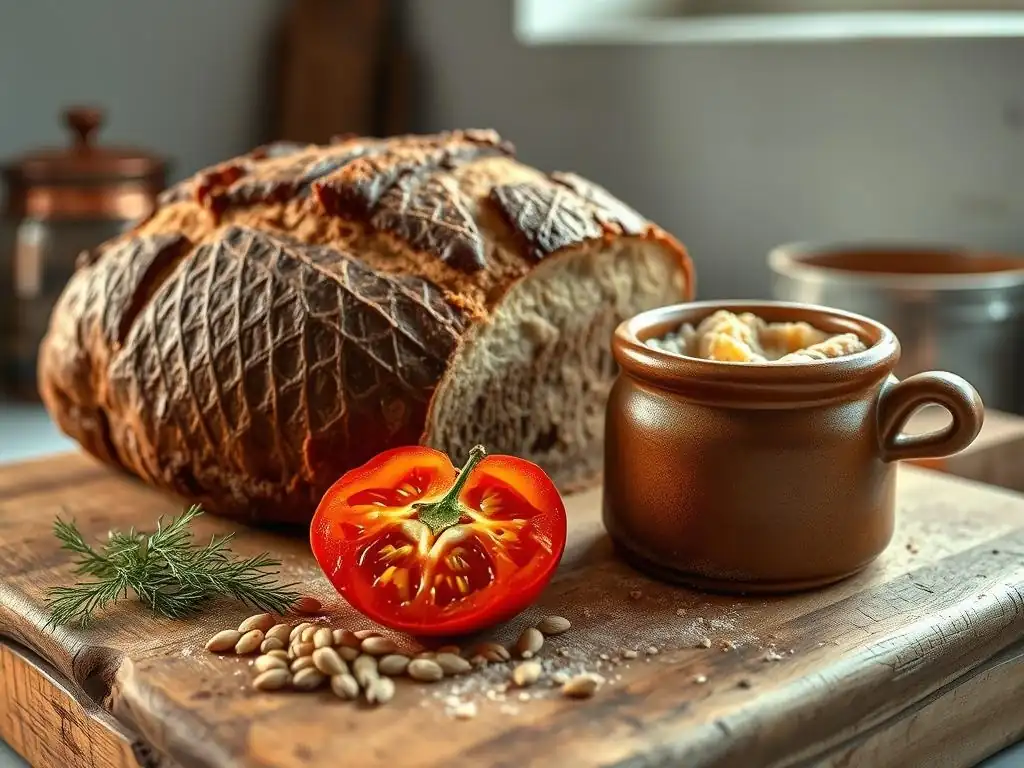
Welcome to BakeWithEase, your haven for all things baking! Ever wondered if you could bake a flavorful, rustic rye bread without the complexities of a traditional sourdough? Our Rye Bread Starter recipe offers a unique and surprisingly simple approach. Discover how this method unlocks a depth of flavor you won't believe, and prepare to be amazed at the delicious results. Intrigued? Let's get baking!
- Pumpernickel Bread with a Rye Sourdough Starter: A Deep Dive - BakeWithEase
- Introduction to Pumpernickel Baking with a Sourdough Starter
- Understanding Rye Flour and Its Characteristics in Pumpernickel
- The Rye Sourdough Starter: A Detailed Guide
- Pumpernickel Bread Recipe: Using Your Active Sourdough Starter
- Baking the Pumpernickel Bread: Achieving Perfection
- Cooling and Storing Your Homemade Pumpernickel Bread
- Troubleshooting Common Pumpernickel Bread Baking Issues
- Variations and Adaptations for Your Pumpernickel Bread Recipe
- Enjoying Your Homemade Pumpernickel Bread
- Conclusion: Mastering Pumpernickel Bread Baking with a Sourdough Starter
-
Frequently Asked Questions
- What is the difference between this rye bread recipe and a typical sourdough rye bread?
- Why would I choose this rye bread recipe over a traditional sourdough rye?
- What kind of rye flour should I use for this recipe?
- Can I adapt this recipe to be fully sourdough, without commercial yeast?
- How do I store leftover rye bread?
- Final Reflection: The Humble Starter, A Gateway to Flavor
- Unleash Your Inner Baker: Craft Your Own Rye Loaf!
Pumpernickel Bread with a Rye Sourdough Starter: A Deep Dive - BakeWithEase
Introduction to Pumpernickel Baking with a Sourdough Starter
Discover the Art of Baking Authentic Pumpernickel Bread
Baking authentic pumpernickel bread is a rewarding journey into the world of traditional rye baking. Unlike many store-bought versions that rely on caramel coloring and commercial yeast, true pumpernickel achieves its signature dark hue and deep, complex flavor through a combination of specific rye flours, long cooking times at low temperatures, and the magic of fermentation. It's a dense, moist loaf that offers a unique texture and a taste profile that hints at sweetness, earthiness, and a subtle tang.
Mastering this bread requires patience, understanding the nuances of rye flour, and embracing the slow process that yields its distinctive character. This deep dive will guide you through creating a pumpernickel loaf that honors its rich heritage.
Achieving the hallmark characteristics of pumpernickel bread, such as its incredibly dark color and moist crumb, is less about adding artificial ingredients and more about harnessing natural processes. The Maillard reaction and caramelization occur extensively during the prolonged, low-temperature baking, transforming the sugars in the rye flour and any added sweeteners like molasses. Traditional methods often involve baking for 12 hours or even longer in sealed environments, sometimes even overnight.
This slow conversion is key to developing the bread's unique aroma and flavor profile, which is far more nuanced than breads baked quickly at high temperatures. The result is a loaf that is not just food, but a piece of edible history, perfect for pairing with hearty meals or simple, flavorful spreads.
Why Choose a Sourdough Starter for Pumpernickel Bread?
Opting for a sourdough starter, specifically a rye sourdough starter recipe, for your pumpernickel bread introduces layers of complexity and benefits that active dry yeast simply cannot replicate. Sourdough fermentation breaks down the phytic acid in rye, making nutrients more bioavailable and improving digestibility.
Furthermore, the lactic and acetic acids produced by the wild yeast and bacteria in the starter contribute significantly to the bread's characteristic tang and depth of flavor, complementing the inherent earthiness of the rye. This slow fermentation also helps develop gluten structure in rye, which is notoriously challenging compared to wheat, resulting in a better texture.
Beyond flavor and digestibility, using a sourdough starter for pumpernickel bread enhances its keeping qualities. The acidity created during fermentation acts as a natural preservative, inhibiting mold growth and extending the bread's shelf life considerably. A well-made pumpernickel loaf baked with a robust rye bread starter recipe can often be stored at room temperature for a week or more, and it freezes beautifully.
This makes it an excellent candidate for baking larger batches. The living culture in the starter brings a unique variability to each loaf, influenced by ambient temperature, hydration levels, and the specific microbial balance of your starter, making every bake a unique experience.
Understanding Rye Flour and Its Characteristics in Pumpernickel
Different Types of Rye Flour for Pumpernickel Baking (Coarse vs. Fine)
Rye flour comes in various grinds, and the choice significantly impacts the texture and structure of your pumpernickel bread. Light rye flour, with most of the bran and germ removed, behaves somewhat similarly to wheat flour but still requires careful handling due to its lower gluten potential. Medium rye flour contains more of the outer layers, offering a richer flavor and darker color.
Dark rye flour, often used heavily in pumpernickel, includes a substantial portion of the bran and germ, contributing intense flavor, color, and a denser crumb. Pumpernickel flour specifically is a very coarse-ground rye flour, sometimes cracked or chopped, designed for the long, slow bake.
The distinction between coarse and fine rye flour is crucial for pumpernickel. Fine rye flour (like dark rye) absorbs liquid quickly and contributes to a smoother, albeit still dense, crumb. Coarse rye flour or pumpernickel meal absorbs liquid more slowly and unevenly, requiring longer hydration and often a more prolonged fermentation and baking process to soften fully.
A classic pumpernickel recipe often calls for a blend, perhaps using dark rye flour for structure and flavor alongside coarse pumpernickel meal for texture and authenticity. Understanding how these different grinds interact with water and fermentation is key to controlling the final outcome of your rye bread starter recipe.
The Importance of Rye Flour in Pumpernickel Bread's Unique Flavor
Rye flour is the soul of pumpernickel bread, providing its foundational flavor profile. Unlike wheat, rye contains pentosans, complex carbohydrates that play a significant role in water absorption and dough structure. These compounds contribute to the sticky nature of rye dough but also help retain moisture, resulting in the characteristically moist crumb of pumpernickel. The natural sugars in rye flour, combined with the long, slow baking process, undergo extensive caramelization and Maillard reactions, developing deep, slightly sweet, malty, and earthy notes that are distinct to this bread.
Furthermore, the inherent flavor compounds in rye flour interact with the acids produced by the sourdough starter. The lactic acid enhances the malty sweetness, while acetic acid adds a subtle tang that balances the richness. The bran and germ present in darker rye flours contribute complex, slightly bitter or grassy undertones that add to the bread's depth. A rye bread starter recipe built on robust rye flour amplifies these characteristics, ensuring that the final pumpernickel loaf is not just dark and dense, but bursting with the authentic, multilayered flavor that defines this traditional bread.
The Rye Sourdough Starter: A Detailed Guide
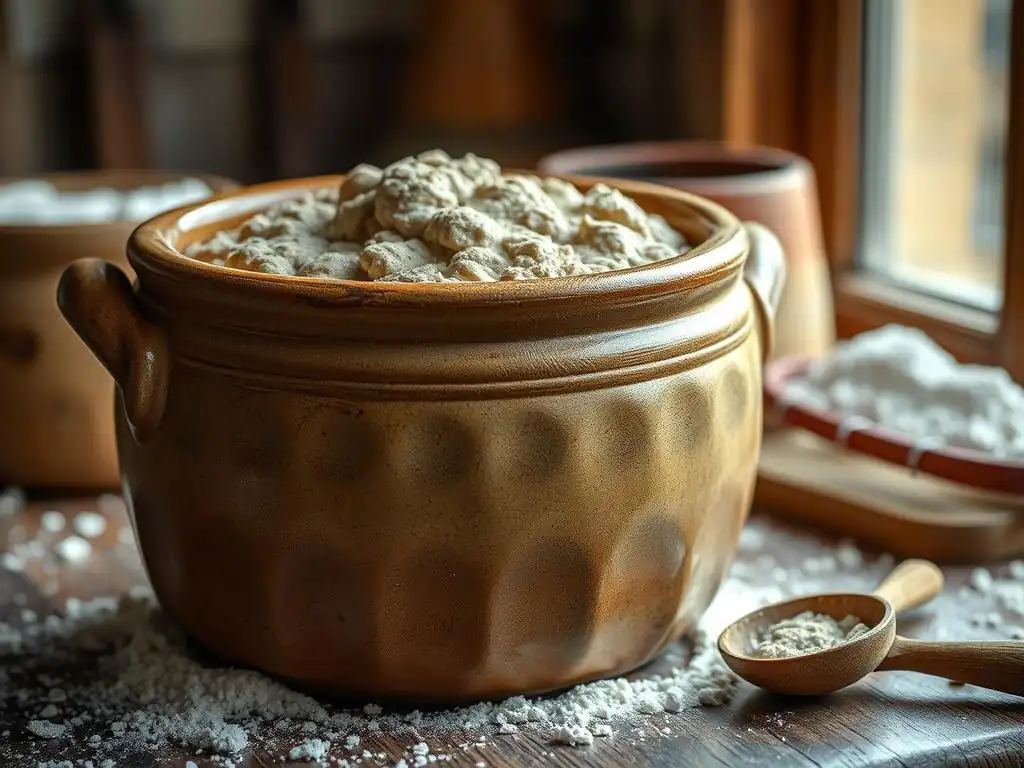
What is a Rye Sourdough Starter?
A rye sourdough starter is a living culture created from a simple mixture of rye flour and water. It harbors naturally occurring wild yeasts and lactic acid bacteria present in the flour and the environment. When fed regularly, these microorganisms ferment the sugars in the flour, producing carbon dioxide (which leavens the bread) and organic acids (which provide flavor and improve texture).
Using rye flour for the starter provides a particularly hospitable environment for these microbes, as rye is rich in nutrients and enzymes that aid fermentation. A healthy rye starter is typically more active and ferments faster than a wheat starter, making it ideal for dense rye loaves like pumpernickel.
Developing a robust rye bread starter recipe is the first step to mastering authentic pumpernickel. This starter acts as the sole leavening agent, eliminating the need for commercial yeast. Over time, a well-maintained rye starter develops a stable microbial ecosystem that imparts unique characteristics to your bread, influenced by the flour used and your local environment. It should smell pleasantly tangy, perhaps slightly alcoholic, and show consistent activity – bubbling, rising, and fallingpredictably between feedings. Building and maintaining this living culture connects you directly to the ancient art of bread baking.
Ingredients for the Rye Sourdough Starter Recipe
Creating a basic rye sourdough starter is remarkably simple, requiring just two fundamental ingredients: rye flour and water. For best results, use unbleached organic rye flour, as it is more likely to contain the active wild yeasts and bacteria needed to kickstart fermentation. Dark rye flour or whole-grain rye flour is often preferred for starters due to its higher nutrient content, which fuels the microbes. Ensure the flour is fresh and hasn't been sitting on the shelf for too long.
The second ingredient is water. Unchlorinated water is strongly recommended because chlorine can inhibit microbial activity. Filtered water, bottled spring water, or even tap water that has been left out for 24 hours to allow the chlorine to dissipate are good options. The temperature of the water can also influence starter development; lukewarm water (around 75-80°F or 24-27°C) is often ideal for getting things started. The initial ratio of flour to water is usually 1:1 by weight, creating a "hydration" level of 100%, which is common for rye starters.
Step-by-Step Instructions: Making Your Rye Sourdough Starter
Day 1: Initial Mixing of Rye Flour and Water
To begin your rye bread starter recipe journey, you'll create the initial mix. In a clean jar or container, combine 50 grams of dark rye flour with 50 grams of lukewarm, unchlorinated water. Stir thoroughly with a spoon or spatula until there are no dry clumps of flour remaining. The mixture will be thick and pasty. Scrape down the sides of the container to keep it tidy.
Loosely cover the container – an airtight lid can cause pressure to build up, so a piece of plastic wrap secured with a rubber band or just the lid resting gently on top is perfect. This allows air exchange while preventing the starter from drying out. Place the jar in a warm spot, ideally between 70-80°F (21-27°C). A kitchen counter away from direct sunlight or inside a turned-off oven with the light on (monitor temperature to ensure it doesn't get too hot) are good locations. Leave it undisturbed for 24 hours.
Day 2-7: Feeding and Observing the Starter's Fermentation
Starting on Day 2, you will begin a feeding schedule, typically once every 24 hours initially. Discard about half of the starter (around 50 grams) to manage the volume and ensure the remaining culture has enough fresh food. Then, add 50 grams of fresh rye flour and 50 grams of fresh lukewarm water to the remaining starter. Mix well until fully combined, scrape down the sides, and loosely cover.
Observe the starter each day before feeding. In the first few days, you might see little activity, perhaps just a few small bubbles. Around Day 3 or 4, you should start noticing more significant bubbling, a slight rise, and possibly a tangy or yeasty smell.
You might even see a thin layer of liquid on top, called "hooch," which indicates the starter is hungry. Don't be discouraged by periods of inactivity or strange smells (like acetone) early on; this is normal as the microbial community establishes itself. Consistent feeding is key during this phase of your rye bread starter recipe development.
Day 8-14: Maintaining Starter Activity for Optimal Baking
By Day 8, your rye sourdough starter should be showing consistent, predictable activity. It should typically double or even triple in volume within 6-12 hours after feeding, be full of bubbles, and smell pleasantly sour and yeasty. At this point, you can transition to feeding it once every 12 hours if you want to accelerate its strength, or continue with daily feedings if the activity is robust. Continue discarding about half the starter before each feeding (e.g., keep 50g, feed with 50g flour and 50g water).
Once your starter reliably doubles in volume within 6-8 hours after a feeding, it is considered active and ready to use in your pumpernickel bread recipe. This usually takes between 7 to 14 days, sometimes longer depending on ambient temperature and flour quality. To maintain it for regular baking, you can store it in the refrigerator and feed it once a week. A few days before you plan to bake, take it out and feed it daily (or twice daily) at room temperature until it is vigorous and active again, following your established rye bread starter recipe feeding routine.
Pumpernickel Bread Recipe: Using Your Active Sourdough Starter
Recipe Overview: Classic German Pumpernickel Bread
This classic German pumpernickel bread recipe utilizes a rye sourdough starter and focuses on the traditional long, low-temperature baking process to develop its signature color and flavor. It's a dense, moist loaf that relies heavily on dark rye flour and coarse pumpernickel meal, often enhanced with molasses or other sweeteners and sometimes a bit of coffee for color and depth. The process involves mixing the dough, a very long bulk fermentation (sometimes 12-24 hours), shaping, a second rise, and then an exceptionally long bake at a relatively low temperature, often between 225°F and 300°F (107°C and 150°C).
Unlike quick breads or even standard sourdough loaves, pumpernickel baking is a test of patience. The long fermentation allows the sourdough culture to work extensively on the rye flour, breaking down complex starches. The extended, low-heat baking isn't just about cooking; it's a slow transformation process where the Maillard reaction and caramelization reactions occur over many hours, deepening the color from brown to nearly black and developing those characteristic sweet, earthy, and malty flavors. A typical bake time might range from 8 to 16 hours, often in a sealed container to retain moisture.
Ingredients for the Pumpernickel Bread Dough
Creating the dough for this pumpernickel bread requires a specific combination of ingredients to achieve the correct texture, color, and flavor. You will need a significant amount of active rye sourdough starter, perhaps around 200-300 grams, depending on the recipe's scale and desired fermentation time. The primary flour components will be dark rye flour (around 300-400 grams) and coarse pumpernickel meal (around 200-300 grams). Some recipes might include a small amount of high-gluten wheat flour (50-100 grams) to aid structure, though traditional versions are often 100% rye.
Other key ingredients contribute to pumpernickel's unique profile. Water is essential for hydration, typically needed in a relatively high proportion due to rye's thirstiness (around 400-500 grams). A sweetener like dark molasses, blackstrap molasses, or even carob molasses (50-100 grams) is crucial for color and flavor development during the long bake. Salt (around 10-15 grams) balances the sweetness and enhances flavor. Some recipes also include instant coffee or cocoa powder (10-20 grams) for deeper color and a subtle bitter note that complements the rye. You might also consider additions like caraway seeds for classic flavor.
Preparing the Pumpernickel Bread Dough with the Starter
Mixing the Ingredients, Including Molasses and Coffee
Begin by combining your active rye sourdough starter with the water in a large mixing bowl. Stir to disperse the starter. In a separate bowl, whisk together the dark rye flour, coarse pumpernickel meal, salt, and any optional dry ingredients like instant coffee or cocoa powder. Add the molasses (and any other liquid sweeteners) to the wet ingredients.
Pour the dry ingredients into the wet ingredients. Using a sturdy spoon or a stand mixer with a dough hook, mix everything together until a shaggy, sticky dough forms. Rye dough is different from wheat dough; it will not develop a smooth, elastic gluten structure in the same way. Mix only until all the ingredients are fully incorporated and there are no dry pockets of flour. Overmixing rye dough can actually degrade its structure. The consistency will be very sticky and dense.
Bulk Fermentation: The Long, Slow First Rise
This is perhaps the most critical stage for developing pumpernickel's flavor and texture when using a rye bread starter recipe. After mixing, cover the bowl tightly with plastic wrap or a damp towel. Place the dough in a warm spot for the bulk fermentation. Unlike wheat bread which might double in size, rye dough will expand much less, maybe only by 20-50%. The purpose of this long fermentation is primarily flavor development and souring, not just volume increase.
The duration of the bulk fermentation can vary dramatically, from 12 hours at room temperature (around 70-75°F) to 24 hours or even longer, especially if fermenting at cooler temperatures. Some traditional recipes even call for fermenting for 48 hours. During this time, the sourdough culture works slowly on the rye flour, breaking down starches and producing acids. You'll notice bubbles forming on the surface and the dough will become slightly more airy. Monitor the dough for signs of fermentation – it should look gassy and smell pleasantly sour.
Shaping the Pumpernickel Loaf (or using a Pullman Pan)
Due to its dense and sticky nature, pumpernickel dough is often shaped into a simple loaf or, more traditionally, baked in a lidded pan like a Pullman pan. A Pullman pan is particularly well-suited as it supports the heavy dough and helps create a uniform, square slice perfect for traditional open-faced sandwiches. Lightly oil or grease your chosen pan generously.
If using a Pullman pan, simply scrape the dough into the prepared pan and press it down evenly with wet hands or a wet spatula to fill the corners and create a relatively flat top. If shaping a freestanding loaf, lightly flour your work surface and hands with rye flour (or wet your hands). Gently shape the dough into a log or round. Avoid excessive handling, as this can degas the dough too much. Place the shaped loaf onto parchment paper or into a proofing basket lined with a floured cloth.
Proofing: The Second Rise in a Warm Environment
After shaping, the dough needs a second rise, or proofing. This stage is generally shorter than the bulk fermentation. Place the loaf in a warm, humid environment. If using a Pullman pan, put the lid on. If using a proofing basket or baking on parchment, cover the dough loosely with plastic wrap or a damp towel to prevent a skin from forming.
Proofing time for pumpernickel is typically 1-3 hours, depending on the temperature and the activity of your rye bread starter recipe. The dough will rise modestly, perhaps increasing in volume by 20-30%. You can test if it's ready by gently pressing a wet finger into the dough; if the indentation slowly springs back halfway, it's usually ready for baking. Be careful not to overproof, as the dense rye structure can collapse.
Baking the Pumpernickel Bread: Achieving Perfection
Oven Temperature and Baking Time (Low and Slow Baking)
Achieving the characteristic dark color and moist crumb of pumpernickel bread requires a very specific baking approach: low and slow. Preheat your oven to a relatively low temperature, typically between 225°F and 300°F (107°C and 150°C). This low heat facilitates the long cooking time needed for the Maillard reaction and caramelization to occur without burning the exterior.
The baking time is exceptionally long, often ranging from 8 to 16 hours, sometimes even longer in traditional recipes. The precise time depends on the loaf size, pan used, and oven temperature. Baking in a sealed container, like a lidded Pullman pan or a Dutch oven with a tightly fitting lid, is crucial. This traps moisture, preventing the bread from drying out during the extended bake and promoting a moist crumb. The bread is essentially steamed and slow-cooked.
Scoring the Loaf: Optional, Depending on Loaf Style
Scoring, or making cuts on the surface of the dough before baking, is a common practice in bread baking to control oven spring and guide expansion. However, for traditional pumpernickel baked in a lidded pan, scoring is often unnecessary. The pan's structure supports the loaf, and the minimal oven spring of dense rye dough means controlled expansion isn't as critical.
If you are baking a freestanding pumpernickel loaf or simply prefer the aesthetic, you can score the dough just before placing it in the oven. Use a sharp knife or razor blade (lame) dipped in water to make shallow cuts. Be mindful that rye dough is sticky and less elastic than wheat dough, so scoring requires a delicate touch. For a loaf baked in a Pullman pan, the lid prevents a crust from forming during the initial bake, rendering scoring completely optional or even counterproductive.
Achieving a Dark, Moist Crust: Steam Baking Techniques and Long Baking Times
The deep, dark color and moist crust of pumpernickel are achieved through a combination of the ingredients (dark rye, molasses, coffee) and the prolonged, low-temperature baking in a humid environment. Baking in a sealed pan, like a lidded Pullman pan or Dutch oven, is the most effective way to create the necessary steam. The moisture released from the dough itself is trapped inside the pan, bathing the loaf in steam for many hours.
This extended steaming process at low heat prevents a hard crust from forming prematurely, allowing the interior to cook thoroughly and the color to develop deeply throughout the loaf, not just on the surface. After the initial long, covered bake (e.g., 8-12 hours), some recipes suggest removing the lid for the final hour or two to allow a slightly firmer crust to develop, though traditional pumpernickel often has a very soft, almost non-existent crust. The key is the extended time at low heat, which facilitates complex chemical reactions that produce the signature dark color and rich flavor without burning.
Cooling and Storing Your Homemade Pumpernickel Bread
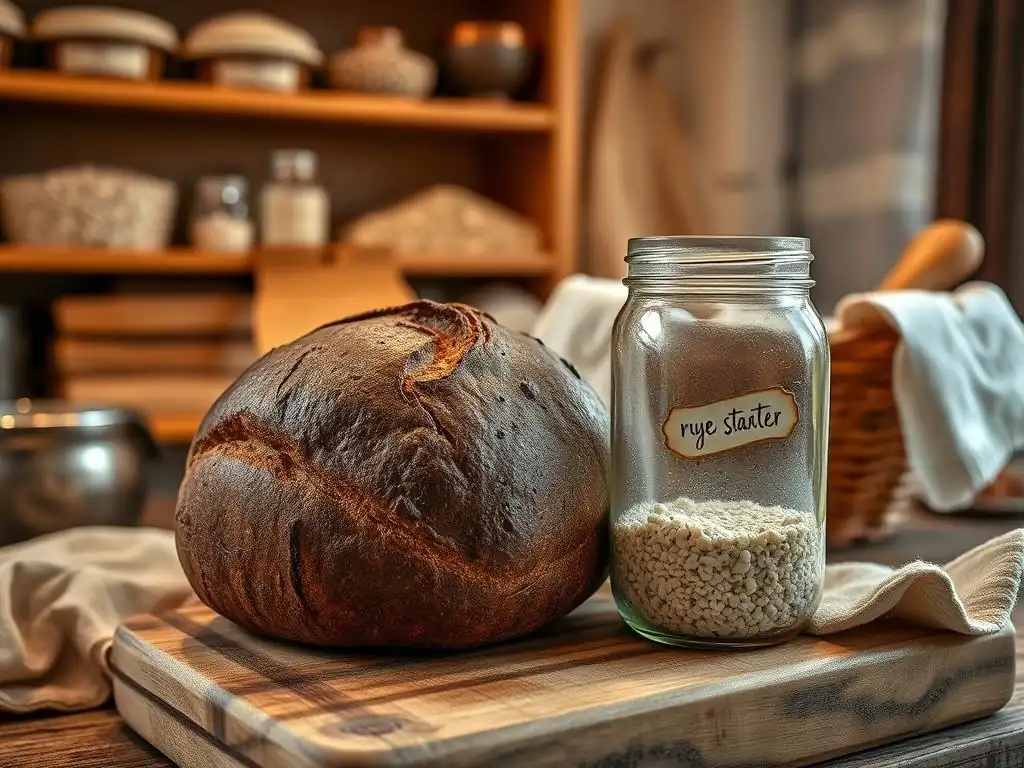
Cooling Process: Allowing the Bread to Mature
Pumpernickel bread is unlike most other breads in that it requires a significant cooling and resting period before being sliced and eaten. Immediately after removing the bread from the oven (and the pan, if used), it will be very moist and fragile. Resist the urge to slice into it right away! Place the loaf on a wire rack and allow it to cool completely at room temperature. This initial cooling might take several hours.
However, for optimal flavor and texture, pumpernickel benefits greatly from a maturation period. After it has cooled completely, wrap the loaf tightly in plastic wrap or beeswax wrap, then perhaps again in foil or placed in a sealed bag. Store it at room temperature for at least 24 hours, and ideally 48-72 hours, before slicing. During this resting period, the internal moisture redistributes evenly, the flavors meld and deepen, and the crumb structure stabilizes, resulting in the best possible pumpernickel experience derived from your rye bread starter recipe.
Storing Pumpernickel Bread for Optimal Flavor Development
Proper storage is key to enjoying your homemade pumpernickel bread and allowing its flavors to fully develop. Once the initial maturation period (24-72 hours) is complete, keep the bread tightly wrapped to prevent it from drying out. Storing it at room temperature in a cool, dry place is generally best for up to a week. Avoid the refrigerator, as this can actually cause the starches to stale faster.
For longer storage, pumpernickel freezes exceptionally well. Slice the cooled and matured loaf before freezing for convenience. Wrap individual slices or small portions tightly in plastic wrap, then place them in a freezer-safe bag or container. Frozen pumpernickel can last for several months. To enjoy, simply thaw slices at room temperature or gently toast them directly from frozen. The dense, moist nature of the bread helps it retain quality during freezing and thawing.
Troubleshooting Common Pumpernickel Bread Baking Issues
Dense Pumpernickel Bread: Potential Causes and Solutions (Under-fermentation)
A common issue when baking pumpernickel, especially for those new to a rye bread starter recipe, is ending up with a loaf that is too dense, almost like a brick. While pumpernickel is naturally dense, excessive density often points to under-fermentation. Rye dough relies heavily on the sourdough starter for leavening and structure development, as its gluten potential is low. If the starter isn't active enough or the fermentation times (bulk rise and proofing) are too short, the dough won't develop sufficient gas to create even a moderately open crumb structure.
To address under-fermentation, ensure your rye sourdough starter is vigorous and active before baking – it should reliably double within 6-8 hours after feeding. Increase the bulk fermentation time, especially if working in a cooler environment; watch the dough for signs of fermentation (some bubbles, slight increase in volume, sour smell) rather than relying solely on time. Similarly, allow adequate proofing time, checking for the 'half-spring back' test.
Increasing the hydration slightly can also sometimes help with density, but be cautious as very wet rye dough is hard to handle. Ensure your rye bread starter recipe is healthy and performing optimally.
Sticky Dough: Handling High-Rye Dough
Rye dough is inherently sticky due to the high concentration of pentosans, which absorb large amounts of water and create a gel-like consistency. This stickiness can be challenging to work with compared to wheat dough. Trying to handle it like wheat dough will likely result in frustration and a sticky mess.
The best approach to managing sticky rye dough is to minimize handling and use water instead of flour on your hands and tools. When shaping, wet your hands and spatula or bench scraper instead of flouring them. If using a stand mixer, accept that the dough will likely stick to the hook and the sides of the bowl more than wheat dough.
For the long fermentation, simply cover the bowl tightly. When transferring to the baking pan, use a wet spatula to scrape the dough in. Embrace the stickiness as a characteristic of high-rye dough, not a flaw, and use water as your lubricant.
Weak Pumpernickel Flavor: Enhancing the Taste with Molasses and Coffee
If your homemade pumpernickel lacks the deep, complex, and slightly sweet flavor you expect, several factors might be at play. The primary flavor comes from the rye flour itself, the long fermentation by the rye bread starter recipe, and the Maillard reaction/caramelization during the extended low-temperature bake. If the flavor is weak, your starter might not be mature or active enough to develop sufficient acids, or your fermentation times might be too short.
Ensure your rye sourdough starter is mature and vigorous, allowing it to ferment for longer periods (12-24+ hours for bulk fermentation) to maximize flavor development. Check your baking time and temperature – is it truly low and slow enough for long enough (8-16 hours)? Increasing the amount of molasses or using blackstrap molasses will significantly deepen the color and add a more intense sweet-bitter note.
Adding instant coffee or cocoa powder can also enhance the dark color and contribute subtle bitter undertones that complement the rye flavor. Ensure you are using dark rye flour and coarse pumpernickel meal for the strongest rye flavor base.
Variations and Adaptations for Your Pumpernickel Bread Recipe
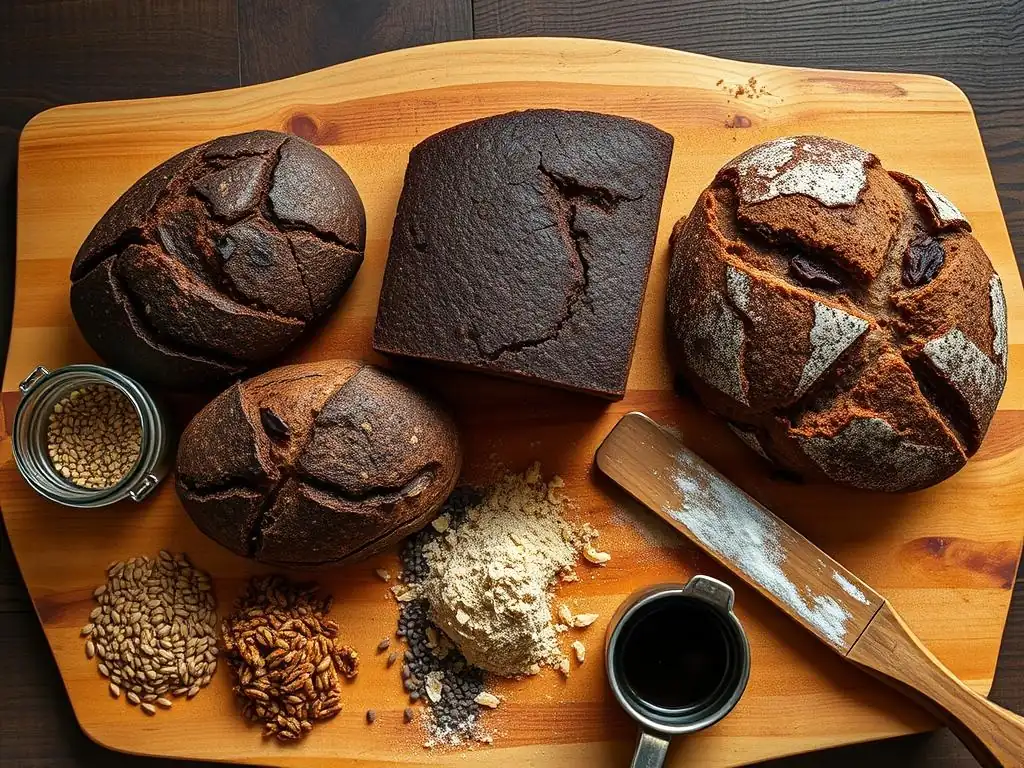
Adding Seeds, Grains, and Spices for Complexity
While classic pumpernickel is often unadorned, adding seeds, grains, or spices can introduce delightful layers of texture and flavor. Caraway seeds are a traditional addition, lending a distinct aromatic note that pairs wonderfully with rye. You can add 1-2 tablespoons of whole or crushed caraway seeds to the dough during the initial mixing.
Other additions might include toasted sunflower seeds, pumpkin seeds (pepitas), or even cracked rye berries for added chewiness and nutty flavor. Consider spices like ground fennel, coriander, or even a pinch of ground cloves or allspice for a warmer, more complex profile. If adding whole grains or seeds, you might need to slightly increase the water in your rye bread starter recipe to ensure adequate hydration for the additions. Incorporate these during the initial mixing phase.
Exploring Different Pumpernickel Styles: Westphalian vs. American
There are variations in pumpernickel style, notably between traditional German Westphalian pumpernickel and the more common American versions. Westphalian pumpernickel is typically made solely with coarse rye meal and water, sometimes with a small amount of starter, and baked for very long periods (16-24 hours or more) at extremely low temperatures in sealed containers. It's incredibly dense, very dark, and has a pronounced sweet, malty flavor due to the extensive breakdown of starches during the long cook.
American-style pumpernickel often uses a mix of dark rye flour and sometimes wheat flour, includes molasses and cocoa or coffee for color, and is baked at slightly higher temperatures for shorter times (e.g., 4-8 hours at 250-300°F). It tends to be less dense and slightly lighter in color than its German counterpart. Understanding these differences allows you to adapt your rye bread starter recipe and baking method to achieve the style you prefer.
Adjusting the Recipe for Different Rye Flours and Starter Hydrations
Your rye bread starter recipe and the main bread dough recipe can be adapted based on the specific types of rye flour you have access to and the hydration of your starter. If using only fine dark rye flour instead of a mix including coarse meal, the dough will be less textured and may require slightly less water. If using lighter rye flour, the flavor will be milder, and you might need to increase molasses or coffee for color and depth.
The hydration level of your rye sourdough starter (the ratio of water to flour by weight) can also influence the final dough. A 100% hydration starter (equal parts flour and water) is common, but some bakers prefer stiffer (lower hydration) or wetter (higher hydration) starters. If your starter is significantly different from 100% hydration, you may need to adjust the amount of water added to the main dough to achieve the correct overall hydration for the pumpernickel. Pay close attention to the dough consistency, which should be very sticky but manageable with wet hands.
Enjoying Your Homemade Pumpernickel Bread
Serving Suggestions and Pairings
Once your pumpernickel bread has cooled and matured, it's time to enjoy the fruits of your labor! This dense, flavorful bread stands up well to rich and savory toppings. It's traditionally served thinly sliced.
Classic pairings: Cream cheese, liverwurst, pickles, mustard
Classic German pairings include spreading slices with cream cheese or butter, topping with liverwurst or other patés, smoked salmon, or various cured meats. Slices are often served alongside pickles, pickled herring, or sharp cheeses. The slightly sweet and earthy flavor of the pumpernickel, enhanced by your rye bread starter recipe, provides a wonderful contrast to salty, tangy, or creamy toppings. Don't forget a smear of strong mustard; its pungency is a perfect match for the bread's depth.
Conclusion: Mastering Pumpernickel Bread Baking with a Sourdough Starter
Recap of the Pumpernickel Bread Recipe Method
Baking authentic pumpernickel bread with a rye sourdough starter is a process that rewards patience and attention to detail. It begins with cultivating a strong rye bread starter recipe, then mixing a dense dough primarily from dark rye flour and coarse meal, often enhanced with molasses and coffee. The dough undergoes a long bulk fermentation, followed by shaping (preferably in a lidded pan) and a shorter proof.
The key to its unique character lies in the exceptionally long, low-temperature bake, often 8-16 hours, in a humid environment created by a sealed pan, which develops the deep color and rich flavor through caramelization and the Maillard reaction. Finally, a crucial maturation period of 24-72 hours after baking allows the flavors and texture to fully develop.
Further Exploration of Rye Bread Baking Techniques on BakeWithEase.com
Mastering pumpernickel is just one step in exploring the diverse world of rye bread baking. Rye behaves differently than wheat, presenting unique challenges and rewards. Understanding your rye bread starter recipe's behavior, the properties of different rye flours, and the importance of long, slow fermentation and baking are skills applicable to many other delicious rye loaves, such as traditional sourdough rye, seeded rye breads, and more. Continue your baking journey by exploring other rye bread recipes and techniques available here on BakeWithEase.com, deepening your understanding and expanding your repertoire of these hearty, flavorful breads.
Frequently Asked Questions
What is the difference between this rye bread recipe and a typical sourdough rye bread?
This recipe uses a rye bread starter that doesn't rely on purely wild yeasts like sourdough. Instead, it often incorporates commercial yeast for a more predictable rise and flavor. It's a faster alternative.
Why would I choose this rye bread recipe over a traditional sourdough rye?
This recipe offers a shorter fermentation time and a more consistent result, especially for bakers new to rye bread. It's also a good option if you prefer a less tangy flavor.
What kind of rye flour should I use for this recipe?
The recipe works well with light, medium, or dark rye flour. The type you choose will affect the color and intensity of the rye flavor. Dark rye flour will give the most robust flavor.
Can I adapt this recipe to be fully sourdough, without commercial yeast?
Yes, you can. You'll need to adjust the fermentation time significantly to allow the sourdough starter to fully leaven the dough. Monitor the dough closely and look for signs of proper fermentation.
How do I store leftover rye bread?
Store leftover rye bread in an airtight container at room temperature for up to 3 days. For longer storage, wrap it tightly and freeze it. You can then thaw it at room temperature before slicing and enjoying.
Final Reflection: The Humble Starter, A Gateway to Flavor
The quest for perfect rye bread often begins, and arguably ends, with the starter. This seemingly simple element—a living culture of yeast and bacteria—is the heart and soul of truly exceptional rye. Understanding its nuances, as explored in this article, unlocks a world of flavor and texture far beyond what commercially available yeasts can offer.
The journey of cultivating a rye starter, while requiring patience and attention, is a deeply rewarding one. It's a connection to a long tradition of bread-making, a tangible link to the past that resonates in every loaf. The subtle shifts in aroma and texture, the daily observation of its growth, all contribute to a profound sense of accomplishment. Bread making is a craft, a science, and an art. It is a journey of discovery and a celebration of life.
This quote, while not directly about starters, perfectly encapsulates the experience of nurturing this living ingredient.
Now, consider your own kitchen. Imagine the possibilities: the rich, complex taste of homemade rye bread, crafted with your own hands, using a starter you nurtured from scratch. This isn't just about baking; it's about connecting with the process, understanding the ingredients, and savoring the results. Take the leap. Start your own rye starter today. The journey to delicious, authentic rye bread awaits.
Unleash Your Inner Baker: Craft Your Own Rye Loaf!
Thanks for taking the time to explore this unique approach to rye bread baking! You've now discovered a delicious alternative to traditional sourdough, and we're excited for you to put your new skills to the test. Ready to get baking?
- Bake your own rye masterpiece: Follow the recipe again, experimenting with different additions like seeds or herbs. This time, try documenting your process with photos!
- Share your rye bread journey: Post your baking results on social media and tag #BakeWithEaseRye. Let's inspire others!
- Consider starting a baking journal: Keep track of your starter's activity, recipe variations, and baking notes to refine your technique over time. This is a surprisingly rewarding practice!
What unique twist will you add to your next rye bread creation? Let's hear your ideas in the comments!