
Foolproof Steps to Baking Incredible Vegan Bread

Welcome to BakeWithEase, your guide to unlocking the secrets of delicious baking! Are you ready to rise to the challenge and create incredible, plant-based loaves? This week, we're diving deep into vegan bread baking tips. Discover the foolproof steps to achieving perfect texture and flavor, even without eggs or dairy. Curious about the secret ingredient that will revolutionize your vegan bread? Read on to find out!
- Introduction to Vegan Bread Baking: A Beginner's Guide
-
Step-by-Step Guide: Mastering Vegan Bread Baking
- Step 1: Gathering Your Ingredients - Vegan Bread Essentials
- Step 2: Preparing the Dough - Achieving the Perfect Consistency
- Step 3: First Rise - Allowing the Dough to Develop Flavor
- Step 4: Shaping Your Vegan Bread Loaf
- Step 5: Second Rise - The Final Proof
- Step 6: Baking Your Vegan Bread to Perfection
- Step 7: Cooling and Slicing Your Homemade Vegan Bread
- Vegan Bread Baking Tips and Tricks for Consistent Results
- Exploring Vegan Bread Recipes: From Simple to Spectacular
- Conclusion: Elevate Your Baking with Vegan Bread
-
Frequently Asked Questions
- What are some common ingredients used in vegan bread baking?
- Can I use any flour for vegan bread, or are there specific types that work best?
- How can I achieve a good rise in my vegan bread without using eggs?
- What are some alternatives to honey or sugar that can be used as sweeteners in vegan bread?
- What are some tips for preventing vegan bread from becoming too dense or dry?
- Final Reflection: The Joy of Yeast, the Triumph of Vegan Baking
- Unleash Your Inner Baker: Craft the Perfect Vegan Loaf!
Introduction to Vegan Bread Baking: A Beginner's Guide
Welcome to the wonderful world of vegan bread baking! Whether you're new to baking entirely or just embarking on your first vegan loaf, this guide is designed to make the process simple, enjoyable, and ultimately rewarding. Vegan bread eliminates traditional animal products like eggs, milk, and butter, relying on plant-based alternatives to achieve delicious results. Mastering the fundamental techniques and understanding your ingredients are key to success.
Embarking on vegan bread baking is an accessible journey for anyone looking to enjoy freshly baked goods without animal products. With just a few basic ingredients and tools, you can create everything from rustic sourdough to soft sandwich loaves right in your own kitchen. We'll walk you through the essential steps, offering practical vegan bread baking tips every step of the way to ensure your loaves turn out perfectly every time.
Why Choose Vegan Bread? Benefits and Considerations
Choosing to bake vegan bread comes with a variety of benefits, appealing to a wide range of dietary preferences and ethical considerations. For those following a vegan lifestyle, it's a necessity, but it also caters to individuals with dairy or egg allergies. Furthermore, many find that vegan bread recipes can be surprisingly simple, often requiring fewer ingredients than their traditional counterparts, making them an excellent entry point into baking.
Beyond dietary needs, there are environmental considerations associated with plant-based baking. Opting for ingredients like plant-based milks and oils typically has a lower environmental footprint compared to dairy or butter production. While the core process of vegan bread baking is similar to traditional methods, understanding how vegan ingredients interact, particularly how plant milks and fats affect texture and crumb, is crucial for achieving optimal results. These are valuable vegan bread baking tips to keep in mind.
Essential Equipment for Vegan Bread Baking Success
Having the right tools can significantly simplify the vegan bread baking process and improve your results. A reliable kitchen scale is indispensable for accurate ingredient measurements, especially flour, as volume can vary greatly. A large mixing bowl, preferably ceramic or glass, provides ample space for kneading and proofing the dough. For shaping, a bench scraper is incredibly useful for handling sticky dough and portioning loaves.
Other helpful items include proofing baskets (bannetons) for shaping and providing support during the final rise, a sharp lame or razor blade for scoring the dough before baking, and a baking stone or steel for achieving a crispier crust. While not strictly essential for every recipe, a Dutch oven or a baking sheet with a lid can create steam in the oven, which is a fantastic vegan bread baking tip for promoting oven spring and a beautiful crust.
Step-by-Step Guide: Mastering Vegan Bread Baking
Baking incredible vegan bread follows a series of logical steps, from gathering your ingredients to the final cooling. Each stage plays a vital role in the outcome, and understanding the purpose of each step is key to mastering the craft. By approaching it systematically and paying attention to detail, you can consistently produce delicious loaves.
This step-by-step guide breaks down the process, offering essential vegan bread baking tips at each stage. We'll cover everything from activating your yeast correctly to knowing when your bread is perfectly baked. Following these steps will set you on the path to becoming a confident vegan bread baker.
Step 1: Gathering Your Ingredients - Vegan Bread Essentials
The foundation of great vegan bread lies in quality ingredients. While the list is often simple, understanding the role of each component is crucial. You'll typically need flour, a liquid (usually water or plant milk), yeast, a sweetener (like sugar or maple syrup), and salt. Vegan recipes often include a fat source like oil or vegan butter for tenderness and flavor.
Ensuring your ingredients are fresh is one of the most important vegan bread baking tips. Yeast, in particular, must be active to leaven the bread properly. Checking the expiration date on your yeast and flour is a simple but vital step. Having all your ingredients measured out and ready before you begin mixing will also make the process much smoother.
Understanding Vegan Flour Options: Wheat, Spelt, and More
All-purpose flour is a common starting point for many vegan bread recipes due to its balanced protein content (around 10-12%), which develops gluten effectively. However, exploring other flours can add unique flavors and textures. Whole wheat flour, for example, adds a nutty depth and fiber, though it absorbs more liquid and results in a denser loaf.
Spelt flour, an ancient grain, offers a slightly sweeter flavor and a more tender crumb than modern wheat. It has a different gluten structure that is often easier to digest for some people. Rye flour adds a distinctive tangy flavor and dense texture, often used in combination with wheat flour. Experimenting with different flour blends is a fun way to discover new favorites, and understanding their properties is a key vegan bread baking tip.
Vegan Alternatives to Traditional Baking Ingredients (Eggs, Milk, Butter)
In vegan bread, plant-based milks replace dairy milk. Soy milk, almond milk, oat milk, and cashew milk all work well, providing liquid and contributing to browning. Soy milk is often preferred for its protein content, which can mimic some of the functions of dairy milk. Using plant milk instead of water can result in a richer crust and a slightly softer crumb.
Instead of butter, vegan bread recipes typically use vegetable oils like olive oil, canola oil, or melted vegan butter. Oil contributes tenderness and moisture to the crumb. For a richer flavor, melted vegan butter is an excellent substitute. Eggs, while common in enriched breads, are usually omitted in basic vegan loaves. Their function (binding, richness, leavening support) is often compensated for by specific techniques or the inclusion of a small amount of fat.
Step 2: Preparing the Dough - Achieving the Perfect Consistency
Mixing the ingredients is where the magic begins. Start by activating your yeast (if using active dry yeast) with warm liquid and a pinch of sugar. Once foamy, combine it with the rest of the liquid, sweetener, and salt in your mixing bowl. Gradually add the flour, mixing until a shaggy dough forms.
The goal is to achieve a dough that is cohesive but still slightly sticky. Over-mixing can lead to a tough loaf, while under-mixing won't develop enough gluten. This stage is critical for gluten development, which provides the structure for your bread. Pay attention to the dough's feel – this is a crucial vegan bread baking tip learned through practice.
Activating the Yeast for Vegan Bread
Yeast is a living organism that needs warmth and food (sugar) to produce carbon dioxide gas, which makes the bread rise. For active dry yeast, dissolve it in warm water or plant milk (around 105-115°F or 40-46°C) with a pinch of sugar. Let it sit for 5-10 minutes. If it becomes foamy and bubbly, your yeast is active and ready. If not, it's likely dead, and you'll need new yeast.
Instant yeast can often be mixed directly with the dry ingredients, but proofing it first ensures it's alive. Using the correct temperature is vital; water that is too hot will kill the yeast, while water that is too cold won't activate it effectively. This simple step is one of the most important vegan bread baking tips for ensuring your loaf rises properly.
Kneading Techniques for Vegan Bread Dough (by Hand or Machine)
Kneading develops the gluten network in the dough, creating strength and elasticity. By hand, this involves repeatedly folding and pushing the dough until it becomes smooth and elastic. This typically takes 8-12 minutes for a standard loaf. The dough should spring back slowly when gently poked.
Using a stand mixer with a dough hook attachment significantly reduces the effort. Knead on a low to medium speed for 6-8 minutes. The dough should eventually pull away from the sides of the bowl, forming a smooth ball. Over-kneading in a machine is possible, so watch the dough's texture carefully. Proper kneading is a core vegan bread baking tip for a good crumb structure.
Step 3: First Rise - Allowing the Dough to Develop Flavor
After kneading, the dough needs time to ferment and rise. This first rise, also known as bulk fermentation, is crucial for developing flavor and texture. Place the dough in a lightly oiled bowl, turning to coat, then cover it with plastic wrap or a damp tea towel.
The dough should rise in a warm, draft-free place until it has roughly doubled in size. This can take anywhere from 1 to 2 hours depending on the temperature of your kitchen and the activity of your yeast. During this time, the yeast produces alcohol and organic acids, contributing to the bread's complex flavor profile. This patient waiting is a key part of effective vegan bread baking tips.
Creating the Ideal Environment for Dough Proofing
A warm environment is key to successful proofing. An oven with the light on (creating a temperature around 80-90°F or 27-32°C) is an ideal spot. Alternatively, you can place the covered bowl in a warm room or even in a microwave (turned off) with a cup of hot water beside it to create a steamy, warm microclimate.
Avoid placing the dough in a location that is too hot (above 120°F or 50°C), as this can kill the yeast. Conversely, a cold environment will slow down the rise considerably, potentially taking many hours. Patience is a virtue here; letting the dough take its time is a crucial vegan bread baking tip for flavor development.
Step 4: Shaping Your Vegan Bread Loaf
Once the dough has doubled, gently punch it down to deflate the air. This redistributes the yeast and equalizes the temperature. Turn the dough out onto a lightly floured surface. The way you shape the dough influences the final structure and appearance of your loaf.
For a standard loaf pan, shape the dough into a rectangle roughly the width of the pan, then roll it up tightly like a log, pinching the seam closed. For a boule (round loaf), gently pull the edges of the dough towards the center, then flip it over and cup your hands around the dough, rotating it against the surface to create tension on the surface. Proper shaping is one of the vital vegan bread baking tips for an even rise and attractive loaf.
Different Bread Shapes and Techniques
Beyond the basic loaf and boule, you can shape vegan dough into various forms like baguettes, rolls, or even braided loaves. Baguettes require gentle handling to maintain their elongated shape. Rolls are simply smaller portions of dough shaped into balls. Braiding involves dividing the dough into strands and weaving them together.
Each shape requires slightly different handling to maintain tension and structure. For instance, shaping a boule often involves creating a taut surface, which helps the loaf hold its shape as it rises and bakes. Practicing different shaping techniques will improve your overall vegan bread baking skills.
Step 5: Second Rise - The Final Proof
After shaping, the dough needs a second rise, often called the final proof or proofing. Place the shaped dough in its final baking vessel (like a loaf pan) or on a baking sheet/in a proofing basket. Cover it loosely to prevent drying out.
This rise is shorter than the first, typically 30-60 minutes, depending on the temperature. The dough should increase in size again, becoming visibly puffier. It should look light and airy but not overly inflated. This stage is critical for achieving a light crumb structure in your finished vegan bread.
Ensuring a Light and Airy Texture
Proper proofing is key to a light and airy texture. The dough is ready for baking when it has increased significantly in size and passes the "poke test." Gently press a finger into the dough; if the indentation springs back slowly, leaving a slight mark, it's ready. If it springs back immediately, it needs more time. If it collapses, it's over-proofed.
Over-proofing is a common issue that can lead to a dense loaf. It happens when the yeast runs out of food before baking. Paying close attention to the dough's appearance and the poke test is one of the most important vegan bread baking tips for avoiding a dense crumb.
Step 6: Baking Your Vegan Bread to Perfection
Baking is the final transformation, turning proofed dough into a golden-brown loaf. Preheat your oven thoroughly to the specified temperature, usually between 375°F and 450°F (190°C and 230°C), depending on the recipe and loaf size. A hot oven provides the initial burst of heat needed for "oven spring," the rapid expansion of the dough before the crust sets.
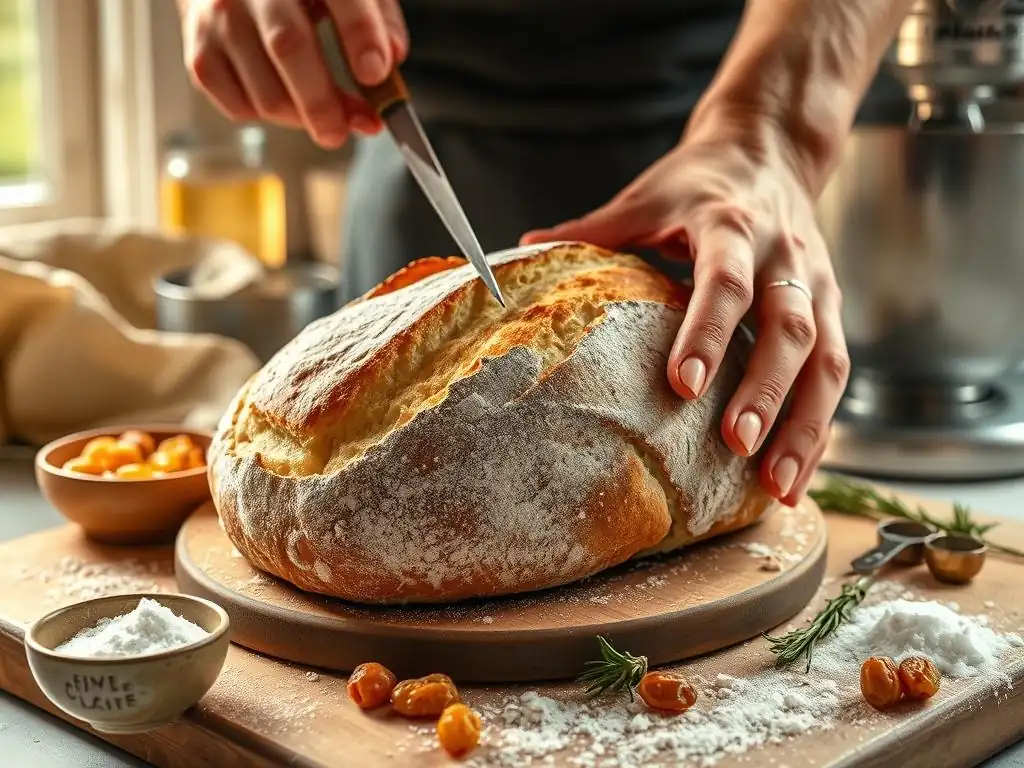
Scoring the dough just before baking allows for controlled expansion and prevents the loaf from bursting unpredictably. Use a sharp blade to make shallow cuts on the surface. Baking time varies by loaf size, but a standard loaf might take 30-45 minutes. Learning to recognize when your bread is done is a vital vegan bread baking tip.
Oven Temperature and Baking Time Guidelines
Most standard vegan bread recipes call for baking at temperatures between 375°F (190°C) and 425°F (220°C). Higher temperatures are often used initially (for the first 10-15 minutes) to maximize oven spring, then lowered to ensure the interior bakes through without the crust burning. For example, you might bake at 425°F for 15 minutes, then reduce to 375°F for the remaining 20-30 minutes.
Baking time is determined by the size and density of the loaf. A reliable indicator of doneness is the internal temperature, which should reach 200-210°F (93-99°C). Another classic test is tapping the bottom of the loaf – it should sound hollow. Don't rely solely on visual cues; an underbaked loaf will be gummy inside.
Achieving a Golden-Brown Crust
A beautiful, golden-brown crust isn't just for looks; it contributes significantly to the bread's flavor and texture. Steam in the oven during the initial baking phase helps keep the crust supple, allowing the loaf to expand fully. You can create steam by placing a tray of hot water on the bottom rack of the oven when you preheat it, or by baking the bread in a preheated Dutch oven with the lid on for the first part of the bake.
Removing the lid or the steam source partway through the bake allows the crust to dry out and brown. Baking directly on a preheated baking stone or steel also helps transfer heat efficiently to the bottom of the loaf, promoting a good bottom crust. These are excellent vegan bread baking tips for crust development.
Step 7: Cooling and Slicing Your Homemade Vegan Bread
Once your loaf is baked to perfection, the hardest part is waiting! Immediately transfer the bread from the pan or baking surface to a wire cooling rack. This allows air to circulate around the loaf, preventing the bottom crust from becoming soggy from trapped steam.
Allowing the bread to cool completely is non-negotiable. As the bread cools, starches gelatinize and set, firming up the crumb structure. Slicing into a hot loaf will result in a gummy, doughy texture inside, even if it's fully baked. Patience during this cooling phase is one of the most overlooked but crucial vegan bread baking tips.
The Importance of Proper Cooling
Cooling bread on a wire rack for at least 1-2 hours (or longer for larger loaves) is essential. During this time, residual heat finishes the cooking process inside the loaf, and moisture is redistributed. The internal temperature drops, allowing the crumb to stabilize.
Cutting into bread too early traps steam, leading to that unpleasant gummy layer just beneath the crust. A fully cooled loaf will slice cleanly and have the intended texture. Resist the temptation to cut into it too soon – your patience will be rewarded with a much better loaf.
Vegan Bread Baking Tips and Tricks for Consistent Results
Achieving consistent results is the mark of a confident baker. While following a recipe precisely is important, understanding the underlying principles and having a few extra tricks up your sleeve can make a significant difference. These vegan bread baking tips are gathered from experience and common baking wisdom.
From troubleshooting common issues to adding extra flavor, these tips will help you refine your technique and elevate your loaves. Baking is as much an art as a science, and learning these nuances will improve your success rate and confidence.
Secret to a Fluffy Vegan Bread: Key Techniques
Several factors contribute to a fluffy vegan bread. Proper gluten development through adequate kneading is fundamental; a strong gluten network traps the gases produced by the yeast, allowing the bread to rise high. Using the right amount of liquid is also key; a slightly wetter dough often results in a more open and tender crumb.
Proofing in a warm, humid environment helps the dough rise optimally. Ensuring the dough is not over-proofed before baking prevents collapse in the oven. Finally, introducing steam during the initial baking phase allows the crust to remain pliable, enabling the loaf to achieve maximum volume before the crust sets, leading to a lighter interior. These simple techniques are powerful vegan bread baking tips for achieving that desired fluffiness.
Troubleshooting Common Vegan Bread Baking Problems
Even experienced bakers encounter issues sometimes. Understanding why problems occur is the first step to fixing them. Common complaints include dense loaves, gummy texture, or loaves that don't rise. Often, these issues are related to yeast activity, proofing times, or baking temperatures.
Keeping a baking journal can be incredibly helpful. Note down the ingredients used, temperatures, times, and observations about the dough and final loaf. This allows you to identify patterns and make adjustments based on your specific environment and ingredients. This systematic approach is one of the best long-term vegan bread baking tips.
Addressing Dense Bread
Dense bread is often caused by inactive yeast, insufficient kneading, or under-proofing. Ensure your yeast is fresh and activated properly. Knead the dough until it passes the windowpane test (stretching a small piece thinly without tearing). Give the dough sufficient time to rise fully during both the first and second proofs, checking with the poke test.
Another cause can be using too much flour during mixing or kneading, resulting in a stiff dough that can't expand easily. Measure flour accurately, preferably by weight, and use a light touch with dusting flour during kneading and shaping. These are critical vegan bread baking tips for preventing a heavy loaf.
Preventing a Gummy Texture
A gummy texture is almost always a sign of underbaking or slicing the bread before it has cooled completely. Ensure your oven is accurately calibrated and preheated properly. Bake the bread until it reaches the correct internal temperature (200-210°F or 93-99°C) and sounds hollow when tapped on the bottom.
Most importantly, allow the bread to cool fully on a wire rack before slicing. This cooling period is essential for the internal structure to set. Cutting into a hot loaf releases steam prematurely and disrupts the starch structure, leading to that unpleasant gummy layer. Patience here is a vital vegan bread baking tip.
Adding Flavor: Incorporating Seeds, Herbs, and Spices into Vegan Bread
Elevating your vegan bread goes beyond the basic recipe by adding flavor enhancers. Seeds like sesame, poppy, sunflower, or flax seeds can be incorporated into the dough for added texture and nutrition, or sprinkled on top before baking. About 1/4 to 1/2 cup of seeds per standard loaf is a good starting point.
Fresh or dried herbs such as rosemary, thyme, or dill add wonderful savory notes. Mix 1-2 tablespoons of chopped fresh herbs or 1-2 teaspoons of dried herbs into the dough during the final stages of kneading. Spices like garlic powder, onion powder, or even a pinch of smoked paprika can also add depth. Experimenting with these additions is a fun way to personalize your vegan bread baking.
Exploring Vegan Bread Recipes: From Simple to Spectacular
Once you've mastered the basic techniques, a world of vegan bread recipes opens up. From everyday sandwich loaves to artisanal sourdoughs and gluten-free options, there's a recipe for every occasion and skill level. Start with simpler recipes to build confidence before tackling more complex ones.
Exploring different recipes allows you to learn new techniques and work with various flours and ingredients. Remember that the fundamental vegan bread baking tips discussed earlier apply across most recipes, providing a solid foundation for your culinary adventures.
Easy Vegan Sandwich Bread Recipe for Beginners
An easy vegan sandwich bread is a perfect starting point. It typically uses all-purpose or bread flour, warm water or plant milk, yeast, a little sugar or maple syrup, salt, and a neutral oil like canola or sunflower. The process involves mixing, a single rise, shaping, a second rise in a loaf pan, and baking.
A simple recipe might call for 3 cups (about 360g) of flour, 1.5 cups (360ml) of warm water, 2.25 teaspoons (7g) of active dry yeast, 1 tablespoon of sugar, 1 teaspoon of salt, and 2 tablespoons of oil. This type of recipe is forgiving and provides excellent practice for the fundamental vegan bread baking tips like kneading and proofing.
Delicious Vegan Sourdough Bread Recipe
Venturing into vegan sourdough requires a bit more patience and a sourdough starter. A vegan sourdough starter is simply a culture of wild yeast and bacteria living in a flour and water mixture, fed regularly. Once active, it replaces commercial yeast for leavening.
Vegan sourdough recipes follow a similar process but often involve longer fermentation times (cold proofing in the refrigerator can take 12-24 hours) to develop the characteristic tangy flavor and chewy texture. While more challenging, mastering vegan sourdough is a rewarding achievement for any baker. Essential vegan bread baking tips for sourdough include maintaining a healthy starter and understanding bulk fermentation.
Vegan Gluten-Free Bread Baking: A Special Guide
Vegan and gluten-free bread baking presents unique challenges because gluten-free flours lack the protein network that gives wheat bread its structure. These recipes rely on a blend of gluten-free flours (like rice, oat, or buckwheat) and binders such as xanthan gum, psyllium husk, or ground flaxseed to provide structure.
The dough consistency is often more like a thick batter than a kneadable dough. Mixing is done by hand or mixer, but kneading is generally not required. Proofing times can vary, and baking often occurs in a loaf pan to provide support. While different from traditional vegan bread, these recipes allow those with gluten sensitivities to enjoy homemade loaves. Specific vegan bread baking tips apply here, focusing on hydration and binder usage.
Conclusion: Elevate Your Baking with Vegan Bread
You've now explored the fundamental steps and essential vegan bread baking tips to create incredible loaves without animal products. From understanding the role of each ingredient to mastering kneading and proofing, you have the knowledge to begin your baking journey or improve your existing skills.
Remember that baking is a skill that improves with practice. Don't be discouraged by imperfect loaves; each bake is an opportunity to learn. Pay attention to the feel of the dough, the temperature of your kitchen, and the signals your bread gives you. These are invaluable vegan bread baking tips you'll gain over time.
Enjoying Your Delicious Homemade Vegan Bread
There's nothing quite like the aroma of freshly baked bread filling your home. Once your vegan loaf is cooled, slice it thickly and enjoy it simply with vegan butter, use it for sandwiches, make toast, or turn it into croutons. Sharing your homemade creation with friends and family is one of the great joys of baking.
Celebrate your accomplishment! You've taken simple plant-based ingredients and transformed them into something truly wonderful. The satisfaction of pulling a perfectly baked vegan loaf from the oven is immense.
Further Resources for Vegan Bread Baking Enthusiasts
To continue your vegan bread baking journey, explore dedicated vegan baking blogs, cookbooks focused on vegan bread, and online forums where bakers share tips and troubleshoot. Watching videos of techniques like kneading and shaping can also be incredibly helpful.
Many resources offer specific vegan bread baking tips for different types of flour, yeast alternatives, and advanced techniques like preferments (like poolish or biga) which can further enhance flavor and texture. Keep experimenting, keep learning, and most importantly, keep baking!
Frequently Asked Questions
What are some common ingredients used in vegan bread baking?
Vegan bread baking typically relies on ingredients like plant-based milk, oil or vegan butter, and yeast or a sourdough starter to replace traditional dairy and eggs.
Can I use any flour for vegan bread, or are there specific types that work best?
While you can use various flours, bread flour is often preferred for its higher gluten content, which creates a better structure. Whole wheat flour is also a popular and nutritious choice.
How can I achieve a good rise in my vegan bread without using eggs?
Proper hydration of the dough is crucial, along with using active and healthy yeast. Gluten development through kneading is also essential for a good rise.
What are some alternatives to honey or sugar that can be used as sweeteners in vegan bread?
Popular vegan sweeteners include maple syrup, agave nectar, and date syrup. These can add sweetness and moisture to the bread.
What are some tips for preventing vegan bread from becoming too dense or dry?
Ensure you're not over-baking the bread. Adding healthy fats like olive oil, and achieving proper hydration will help prevent a dry or dense loaf.
Final Reflection: The Joy of Yeast, the Triumph of Vegan Baking
The accessibility of delicious, homemade vegan bread is no longer a distant dream; it's a reality within reach. This article has outlined foolproof steps, demystifying the process and empowering anyone, regardless of their baking experience, to create incredible vegan loaves. The rise in plant-based diets coupled with a growing appreciation for homemade goods makes mastering vegan bread baking more relevant than ever.
The journey of crafting a perfect vegan loaf is more than just following a recipe; it's a testament to the power of creativity and resourcefulness. It's about understanding the nuances of yeast, the importance of hydration, and the subtle magic that unfolds when simple ingredients transform into something truly extraordinary. The best bread is made with love, and a little bit of patience.
This sentiment, though not specifically about vegan baking, perfectly encapsulates the heart of the process, regardless of dietary restrictions. The impact of vegan baking extends beyond the plate; it's a contribution to a more sustainable and compassionate food system.
Now, I invite you to roll up your sleeves, gather your ingredients, and embark on your own vegan bread-baking adventure. Don't be afraid to experiment, to adapt, and to embrace the occasional imperfection. The true reward lies not just in the perfectly risen loaf, but in the journey of discovery, the satisfaction of creation, and the joy of sharing your delicious, homemade vegan bread with those you love. Let this article be your guide, your inspiration, and the first step towards a world filled with the warm, comforting aroma of freshly baked vegan goodness.
Unleash Your Inner Baker: Craft the Perfect Vegan Loaf!
Thanks for joining us on this delicious journey into the world of vegan baking! We hope you’ve gained the confidence to create truly incredible bread, even without eggs or dairy. Ready to take your baking skills to the next level?
- Bake your own masterpiece: Grab those ingredients and try out one of the recipes from the article – you might be surprised at how easy it is! Let your creativity flow and experiment with different flours and flavors.
- Share your success: Post a picture of your freshly baked vegan loaf on social media and tag us! We'd love to see your creations and share your success with our community. Use #BakeWithEaseVeganBread.
- Dive deeper into vegan baking: Explore other recipes and resources on our website – we've got plenty more delicious ideas waiting for you!
What unique twist will you add to your next vegan bread creation? Let us know in the comments!