
Baking Whole Wheat Bread in a Loaf Pan: Foolproof Method

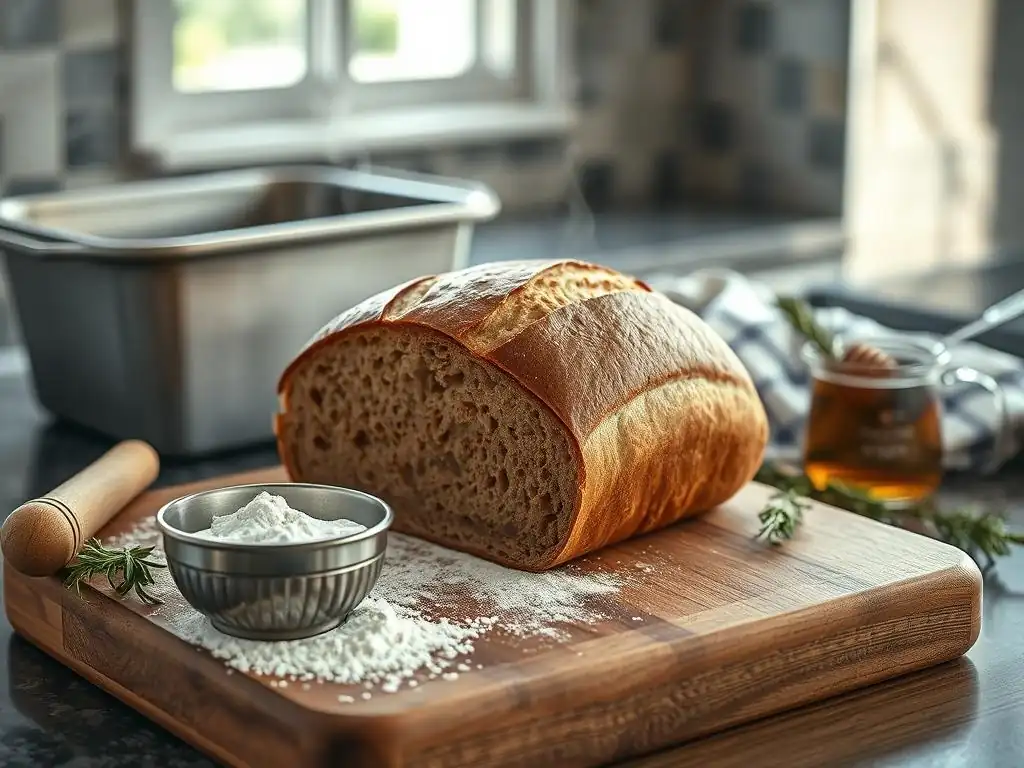
Welcome to BakeWithEase, your companion in the delightful world of baking! Are you ready to unlock the secrets to baking a perfectly textured and flavorful loaf? Dive in and discover our foolproof method for creating an easy whole wheat loaf bread that will transform your kitchen into a haven of warm, comforting aromas. But what makes this recipe truly special? Keep reading to unveil the secrets to achieving bakery-quality results, even if you're new to bread baking!
- Baking Easy Whole Wheat Loaf Bread: A Foolproof Method for BakeWithEase
- Introduction to Baking Whole Wheat Bread at Home
- Essential Equipment for Baking Whole Wheat Bread
- Easy Whole Wheat Loaf Bread Recipe: Ingredients and Measurements
-
Step-by-Step Guide to Baking Perfect Whole Wheat Bread
- Step 1: Preparing the Dough for Your Whole Wheat Loaf
- Step 2: First Rise – Letting the Dough Develop Flavor
- Step 3: Shaping the Dough and Preparing the Loaf Pan
- Step 4: Second Rise – Proofing in the Loaf Pan
- Step 5: Baking Your Whole Wheat Bread to Golden Perfection
- Step 6: Cooling and Slicing Your Homemade Whole Wheat Bread
- Tips for a Successful Whole Wheat Loaf
- Storing Your Homemade Whole Wheat Bread
- Enjoying Your Freshly Baked Whole Wheat Loaf
- Conclusion: Mastering the Art of Whole Wheat Bread Baking with Ease
-
Frequently Asked Questions
- How is baking whole wheat bread in a loaf pan different from baking white bread?
- What are the key ingredients for an easy whole wheat loaf bread recipe?
- What makes the BakeWithEase method "foolproof" for whole wheat loaf bread?
- Can I substitute other flours in the BakeWithEase easy whole wheat loaf bread recipe?
- How do I store my freshly baked whole wheat loaf bread to keep it fresh?
- Final Reflection: The Simple Joy of a Perfect Whole Wheat Loaf
- Unleash Your Inner Baker: Bake a Perfect Loaf Today!
Baking Easy Whole Wheat Loaf Bread: A Foolproof Method for BakeWithEase
Introduction to Baking Whole Wheat Bread at Home
Why Bake Your Own Whole Wheat Loaf?
Baking your own easy whole wheat loaf bread at home offers a deeply satisfying experience that goes beyond simply having fresh bread. There's the incredible aroma that fills your kitchen as it bakes, creating a cozy and inviting atmosphere. More practically, baking at home gives you complete control over the ingredients used. You can select high-quality flours, avoid preservatives often found in store-bought loaves, and tailor the recipe to your dietary needs or preferences, such as adjusting salt or sugar levels.
Economically, baking your own whole wheat loaf can also be quite cost-effective over time. While initial investment in basic tools might be needed, the cost of ingredients for a single loaf is typically significantly less than purchasing a comparable artisan whole wheat bread from a bakery or supermarket. For example, a quality store-bought whole wheat loaf might cost upwards of $4-6, whereas the flour, yeast, water, and salt for a homemade loaf could be around $1-2, depending on ingredient quality and bulk purchasing. This makes enjoying fresh, wholesome bread regularly much more accessible.
The BakeWithEase Approach to Simple Bread Baking
At BakeWithEase, we believe that baking delicious bread, including a hearty easy whole wheat loaf bread, shouldn't be complicated or intimidating. Our philosophy centers on breaking down recipes into clear, manageable steps that anyone, regardless of their baking experience, can follow successfully. We focus on providing straightforward instructions, explaining the 'why' behind key techniques, and offering helpful tips to navigate common challenges.
This guide to baking an easy whole wheat loaf bread in a loaf pan is designed with simplicity and reliability in mind. We'll walk you through each stage, from selecting ingredients to the final cooling, ensuring you understand what to look for and how to react. Our aim is to empower you to bake a beautiful, tasty, and healthy whole wheat loaf with confidence, making homemade bread a regular part of your kitchen routine, not a daunting weekend project.
Essential Equipment for Baking Whole Wheat Bread
Gathering Your Baking Tools for Success
Having the right tools ready before you start is crucial for a smooth and successful baking process, especially when making an easy whole wheat loaf bread. You don't need a professional kitchen setup, but a few essential items will make a significant difference. A large mixing bowl (at least 4-quart capacity) is necessary to comfortably mix and knead the dough and allow for expansion during the first rise. Accurate measuring tools are also non-negotiable: dry measuring cups and spoons for flour, salt, and yeast, and a liquid measuring cup for water or milk.
While not strictly essential for a basic recipe, a kitchen scale is highly recommended for measuring flour and other dry ingredients by weight rather than volume. Measuring by weight (grams or ounces) is much more precise and consistent than using cups, which can vary depending on how the flour is scooped and leveled. Using a scale helps ensure you add the correct amount of flour, a common pitfall that can lead to dense or dry bread. A rubber spatula or wooden spoon is also useful for initial mixing before kneading begins.
The Importance of a Good Loaf Pan for Whole Wheat Bread
The loaf pan is perhaps the most critical piece of equipment specifically for this easy whole wheat loaf bread recipe. A standard loaf pan, typically measuring 9x5 inches (approximately 23x13 cm), is the ideal size for most standard bread recipes yielding a single loaf. Using the correct size pan ensures your bread rises properly and achieves the classic loaf shape. A pan that is too large will result in a flatter, wider loaf, while one that is too small can cause the dough to spill over the sides during the second rise or baking.
The material of the loaf pan also plays a role. Metal pans, particularly those made of aluminum or aluminized steel, are generally preferred for even heat distribution and good browning of the crust.
Dark-colored pans absorb more heat and can lead to faster browning, so you might need to adjust baking time or temperature slightly compared to lighter pans. Glass or ceramic pans conduct heat differently and may require a slightly lower oven temperature (around 25°F or 15°C less) and potentially longer baking time to achieve the desired internal temperature and crust development for your easy whole wheat loaf bread.
Easy Whole Wheat Loaf Bread Recipe: Ingredients and Measurements
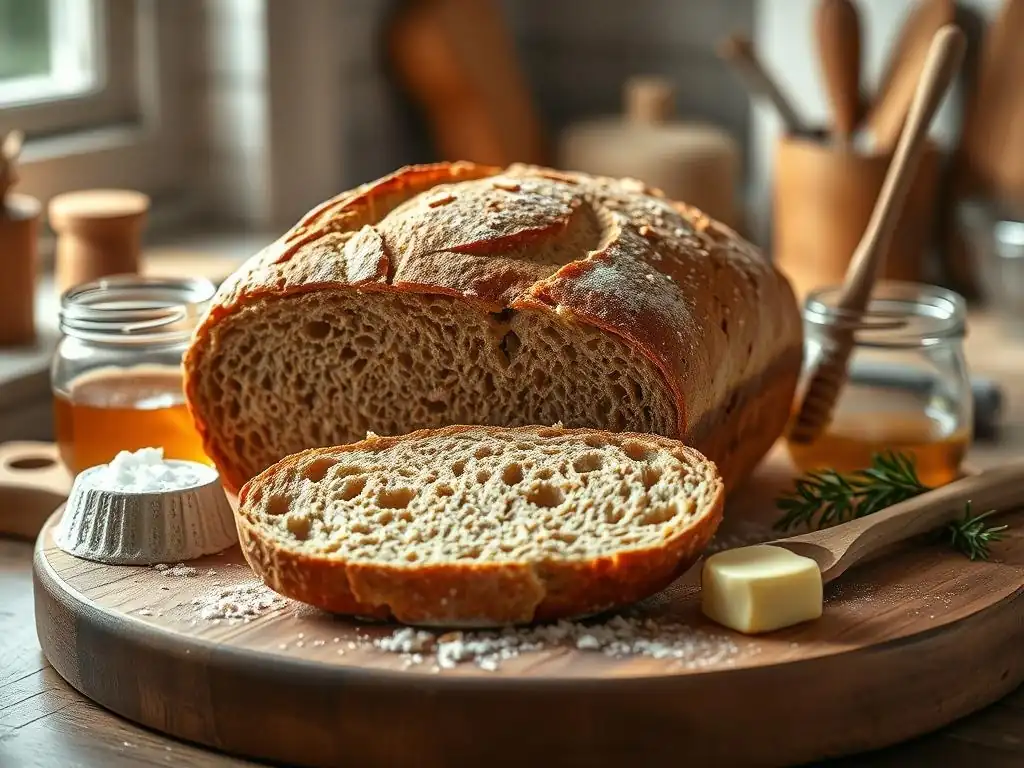
Choosing the Right Whole Wheat Flour
The type of whole wheat flour you choose significantly impacts the outcome of your easy whole wheat loaf bread. "Whole wheat flour" typically refers to flour ground from hard red wheat, which has a higher protein content (around 13-14%) compared to all-purpose flour (around 10-12%). This higher protein is essential for developing gluten, the network that gives bread its structure and elasticity. Look for stone-ground or finely milled whole wheat flour for better texture and nutrient retention.
Some recipes might call for "white whole wheat flour," which is milled from hard white wheat. This flour has a similar nutritional profile and protein content to traditional whole wheat but results in a lighter-colored crumb and a milder flavor, which some bakers prefer, especially when starting out with an easy whole wheat loaf bread recipe. Ensure your flour is fresh; whole wheat flour contains germ and bran, which can turn rancid faster than refined flour, so store it in a cool, dark place or the refrigerator/freezer.
Understanding the Role of Each Ingredient in Whole Wheat Bread
Each ingredient in your easy whole wheat loaf bread recipe plays a specific and vital role. Whole Wheat Flour provides the structure and nutrients, forming the gluten network when hydrated and kneaded. Yeast (active dry or instant) is the leavening agent; it consumes sugars in the dough and produces carbon dioxide gas, which makes the bread rise and creates its airy texture. The type of yeast affects proofing time; instant yeast can often be mixed directly with dry ingredients, while active dry yeast usually needs to be proofed in warm liquid first.
Water is crucial for hydrating the flour, activating the yeast, and enabling gluten development. The temperature of the water is important – typically warm (around 105-115°F or 40-46°C) for active dry yeast, or lukewarm (around 90-100°F or 32-38°C) for instant yeast when mixed directly with dry ingredients. Salt is not just for flavor; it controls the yeast activity, preventing the dough from rising too quickly, and strengthens the gluten structure, leading to better volume and crumb texture.
A small amount of sweetener (like honey, maple syrup, or sugar) provides food for the yeast and can contribute to crust browning and flavor, although some recipes omit it or use minimal amounts. Fat (like oil or butter), if included, can tenderize the crumb and improve moisture retention, extending the bread's shelf life slightly.
Step-by-Step Guide to Baking Perfect Whole Wheat Bread
Step 1: Preparing the Dough for Your Whole Wheat Loaf
Mixing the Ingredients
The first step in creating your easy whole wheat loaf bread is accurately measuring and mixing the ingredients. Begin by activating your yeast if using active dry: combine the warm water (105-115°F) with a pinch of the sweetener (if using) and the yeast in your mixing bowl. Let it sit for 5-10 minutes until it becomes foamy; this indicates the yeast is active. If it doesn't foam, your yeast may be dead, and you'll need to start with a fresh batch. If using instant yeast, you can typically skip this step and mix it directly with the dry ingredients.
Next, add the remaining liquid (if any), sweetener, salt, and any fat to the bowl. Gradually add the whole wheat flour, one cup or a measured weight at a time, mixing with a spoon or spatula until a shaggy dough forms. The exact amount of flour can vary depending on humidity and the flour itself, so add the last portion gradually until the dough just starts to pull away from the sides of the bowl. It will likely still be quite sticky, which is normal for whole wheat dough.
Kneading the Whole Wheat Dough: Tips and Techniques
Kneading is essential for developing the gluten structure needed for a well-risen easy whole wheat loaf bread. Once your dough is mixed, turn it out onto a lightly floured surface. Whole wheat dough can be stickier than white dough, so resist the urge to add too much extra flour, which can result in a dry loaf. A bench scraper can be helpful for managing sticky dough. Knead the dough by folding it over on itself and pushing down and away with the heel of your hand, then rotating the dough and repeating.
Knead for about 8-10 minutes by hand, or 6-8 minutes in a stand mixer with a dough hook on medium-low speed. The dough should become smoother and more elastic. A simple test for sufficient kneading is the "windowpane test": pinch a small piece of dough and gently stretch it.
If you can stretch it thin enough to see light through it without it tearing immediately, the gluten is well-developed. Don't worry if it's not perfect; whole wheat dough often won't pass the windowpane test as cleanly as white dough due to the bran particles, but it should still show some elasticity.
Step 2: First Rise – Letting the Dough Develop Flavor
Creating the Ideal Environment for Dough Proofing
The first rise, also known as bulk fermentation, allows the yeast to produce gas and the dough to develop flavor. The ideal environment for proofing your easy whole wheat loaf dough is warm and draft-free, typically between 75°F and 85°F (24°C and 30°C). To create this environment, lightly grease your mixing bowl with oil, place the kneaded dough inside, and turn it to coat. Cover the bowl tightly with plastic wrap or a damp kitchen towel to prevent the dough from drying out.
You can place the covered bowl in a slightly warm oven (turned off, but maybe preheated briefly to a low temperature and then turned off), on top of the refrigerator, or simply on a counter in a warm spot in your kitchen. Avoid placing it in a location with direct sunlight or cold drafts. The duration of the first rise will vary depending on the ambient temperature and the yeast activity, but it typically takes 1 to 1.5 hours for an easy whole wheat loaf bread dough.
Recognizing When Your Dough is Ready
Knowing when your whole wheat dough has completed its first rise is key to achieving good volume in your final loaf. The dough should approximately double in size. Visually, it will look significantly larger and puffier than when you started. To confirm it's ready, perform the "poke test": gently press two fingers about half an inch into the dough. If the indentations remain and don't spring back immediately, the dough is properly proofed.
If the indentations spring back quickly, the dough needs more time to rise. If the dough deflates completely when poked, it may be over-proofed, meaning the yeast has exhausted its food supply and the gluten structure has weakened. While slightly over-proofed dough can sometimes be salvaged by gently re-kneading and proofing again (though the final texture may be slightly different), ideally, you want to catch it when it's perfectly proofed to ensure the best outcome for your easy whole wheat loaf bread.
Step 3: Shaping the Dough and Preparing the Loaf Pan
Gently Shaping the Dough for a Uniform Loaf
Once the first rise is complete, gently turn the dough out onto a lightly floured surface. The goal now is to shape the dough into a log that fits neatly into your prepared loaf pan, while also creating some tension on the surface to encourage a good oven spring (the final burst of rising in the oven). Avoid deflating the dough completely; handle it gently to preserve some of the gas bubbles created during the first rise.
There are several ways to shape a loaf, but a simple method for an easy whole wheat loaf bread is to flatten the dough into a rectangle, about the width of your loaf pan. Fold the top third of the rectangle down towards the center, then fold the bottom third up and over the folded top edge, pressing the seam gently. Now, starting from one end, roll the dough log towards the other end, creating a tight cylinder.
Pinch the final seam and the ends closed to create a smooth, taut surface on top. This tension helps the loaf hold its shape as it rises and bakes.
Preparing Your Loaf Pan to Prevent Sticking
Properly preparing your loaf pan is essential to ensure your beautiful easy whole wheat loaf bread doesn't stick after baking. The most common method is to grease the pan thoroughly. You can use softened butter, shortening, or cooking oil (like vegetable or canola oil). Use a pastry brush or paper towel to spread the fat evenly across the bottom and up the sides of the pan, getting into the corners.
For extra insurance, especially with whole wheat dough which can sometimes be prone to sticking, you can also flour the greased pan. After greasing, add a tablespoon or two of flour to the pan, tilt and tap it to coat all the greased surfaces, then tap out any excess flour. Alternatively, you can line the pan with parchment paper.
Cut a piece of parchment paper to fit the length of the pan and hang over the sides; this creates "handles" that make lifting the baked loaf out incredibly easy and guarantees no sticking. For an easy whole wheat loaf bread, either method works well, but parchment paper offers the most foolproof release.
Step 4: Second Rise – Proofing in the Loaf Pan
Achieving the Perfect Rise in the Pan
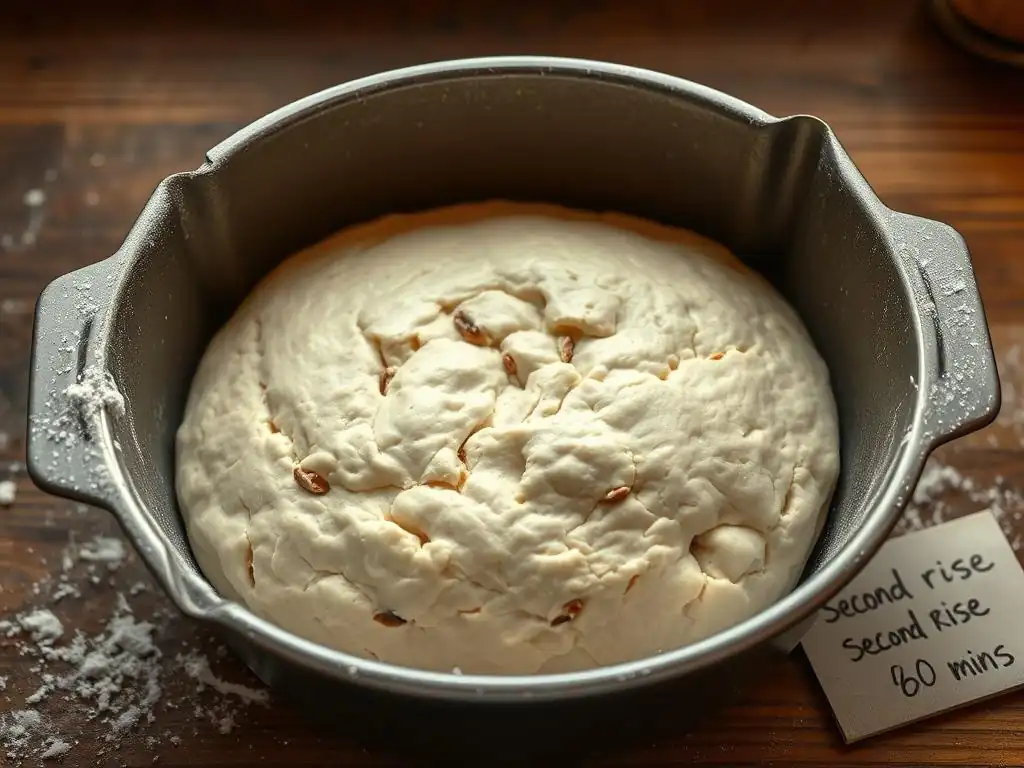
The second rise, or proofing, takes place after the dough has been shaped and placed into the loaf pan. This is when the dough rises into the final shape it will have before baking. Carefully place the shaped dough log, seam-side down, into your prepared loaf pan. Cover the pan loosely with plastic wrap or a clean kitchen towel to prevent a skin from forming on the surface, which can restrict the rise and cause the crust to crack unevenly.
Place the covered loaf pan in the same warm, draft-free spot you used for the first rise. The second rise is usually shorter than the first, typically taking 30 to 45 minutes. During this time, the dough should rise significantly, filling out the pan and rising above the rim by about 1 inch (2-3 cm). The goal is to let it rise enough to achieve good volume, but not so much that the gluten structure becomes too weak to support the loaf during baking.
Avoiding Over-Proofing
Over-proofing during the second rise is a common issue that can lead to a collapsed or dense loaf. If the dough rises too high and the gluten becomes overstretched, it won't have the strength to hold its shape in the hot oven and may sink. To check if your easy whole wheat loaf dough is ready for baking, use the poke test again, but be very gentle this time. Lightly press a finger into the side of the risen dough.
If the indentation springs back slowly and only partially, leaving a slight mark, the dough is perfectly proofed and ready for the oven. If the indentation springs back quickly and completely, it needs a little more time. If the indentation remains completely and the dough looks puffy and fragile, it is likely over-proofed. Baking slightly under-proofed dough is generally preferable to baking significantly over-proofed dough when making an easy whole wheat loaf bread, as it will still get a good oven spring.
Step 5: Baking Your Whole Wheat Bread to Golden Perfection
Oven Temperature and Baking Time
Preheating your oven properly is a critical step for successful bread baking. For an easy whole wheat loaf bread, a common baking temperature range is between 375°F and 400°F (190°C and 200°C). Preheat your oven for at least 20-30 minutes after it indicates it has reached the set temperature, as the internal temperature can fluctuate. This ensures the oven walls and racks are fully heated, providing consistent heat for the loaf.
Carefully place the proofed loaf pan on the center rack of the preheated oven. The baking time for a standard 9x5 inch loaf of whole wheat bread is typically between 30 and 40 minutes. The exact time will depend on your oven, the size of the loaf, and how dense the dough is. You'll know the bread is done when the crust is deep golden brown, and the internal temperature reaches 190-200°F (88-93°C) when measured with an instant-read thermometer inserted into the center of the loaf.
Achieving a Beautiful Crust
A well-baked crust is not just for aesthetics; it contributes to the flavor and texture of your easy whole wheat loaf bread. The heat of the oven causes the Maillard reaction and caramelization on the surface, creating those desirable brown colors and complex flavors. For a crisper crust, you can create steam in your oven.
One simple way is to place an empty metal pan on the bottom rack while preheating. Just before you put the bread in, carefully pour about a cup of hot water into the empty pan (be cautious of the steam!). Close the oven door quickly.
Another method to encourage a good crust and controlled oven spring is to score the top of the loaf just before baking. Using a sharp knife or a bread lame, make one or two shallow cuts (about ½ inch deep) along the top of the loaf. This allows the dough to expand predictably as it bakes, preventing random cracks and often resulting in a more attractive loaf. Without scoring, the loaf might burst open unpredictably during baking.
Step 6: Cooling and Slicing Your Homemade Whole Wheat Bread
The Importance of Cooling Before Slicing
Once your easy whole wheat loaf bread is golden brown and has reached the correct internal temperature, remove it from the oven. Immediately take the loaf out of the pan and place it on a wire cooling rack. Leaving the bread in the hot pan can cause the bottom and sides to become soggy due to trapped steam. Cooling on a wire rack allows air to circulate around the entire loaf, letting moisture escape evenly.
Perhaps the most difficult, yet crucial, step is allowing the bread to cool completely before slicing. This typically takes at least 1 to 2 hours for a standard loaf. While it's incredibly tempting to cut into a warm loaf (and a small end piece for immediate gratification is understandable!
), the bread is still undergoing a process called "carry-over baking" and the internal structure is setting. Slicing too early can result in a gummy, dense texture inside because the starches haven't fully set and the internal moisture hasn't redistributed evenly. Patience is key to a perfect slice of your homemade whole wheat loaf bread.
Tips for Slicing a Perfect Loaf
Once your easy whole wheat loaf bread is fully cooled, you're ready to slice and enjoy! Using the right tool makes a big difference. A serrated bread knife is the best choice for slicing bread, as the teeth grip the crust and slice through the crumb cleanly without squishing the loaf. Avoid using a straight-edged knife, which can easily compress and tear the bread.
Place the loaf on a stable cutting surface. Hold the loaf firmly but gently with one hand and use a sawing motion with the serrated knife, letting the knife do the work rather than pressing down hard. For even slices, you can use a bread slicing guide, which is a simple wooden or plastic guide with slots to help you cut uniform slices. Whether you prefer thick or thin slices, take your time to ensure clean cuts that showcase the beautiful texture of your homemade whole wheat loaf bread.
Tips for a Successful Whole Wheat Loaf
Troubleshooting Common Whole Wheat Bread Baking Problems
Dense Bread Solutions
A dense easy whole wheat loaf bread is a common issue, often stemming from insufficient gluten development or yeast activity. If your bread is heavy and brick-like, consider these potential causes and solutions:
- Not enough kneading: The gluten network wasn't strong enough to trap the gas produced by the yeast. Try kneading for a few more minutes, ensuring the dough passes the windowpane test (or comes close for whole wheat).
- Inactive yeast: If your yeast didn't foam when proofed (if using active dry), or your dough didn't rise significantly during the first rise, your yeast might be expired or killed by too-hot water. Always check the yeast expiration date and use water within the recommended temperature range (105-115°F for active dry, 90-100°F for instant when mixed).
- Too much flour: Adding excessive flour makes the dough stiff and heavy, inhibiting rise. Measure flour accurately, preferably by weight (grams), and add the last portion gradually until the dough is just slightly sticky.
- Under-proofing: If the dough didn't rise enough before baking, it won't expand properly in the oven. Ensure your proofing environment is warm and allow sufficient time for the dough to double in size during the first rise and rise significantly in the pan during the second rise.
Achieving a Softer Texture
Whole wheat bread can sometimes be perceived as drier or tougher than white bread. To achieve a softer easy whole wheat loaf bread:
- Consider adding fat: A small amount of oil or softened butter (e.g., 1-2 tablespoons per loaf) added during mixing can tenderize the crumb and improve moisture retention.
- Use a portion of white bread flour: Some recipes for easy whole wheat loaf bread blend whole wheat flour with a percentage of bread flour or all-purpose flour (e.g., 75% whole wheat, 25% white). The lower bran content of white flour allows for better gluten development and a lighter, softer crumb.
- Avoid over-baking: Baking too long can dry out the loaf. Use an instant-read thermometer to check for the target internal temperature (190-200°F) rather than relying solely on visual cues.
- Ensure proper hydration: Whole wheat flour absorbs more liquid than white flour. Ensure your dough is adequately hydrated; it should be slightly sticky but manageable after kneading.
Avoiding a Gummy Texture
A gummy or wet texture inside your easy whole wheat loaf bread usually indicates it was not baked long enough or not cooled properly.
- Under-baking: The starches inside the bread need sufficient time and temperature to gelatinize and set. If the internal temperature doesn't reach the target 190-200°F, the crumb will remain doughy and wet. Always check the internal temperature with a thermometer.
- Slicing too early: As mentioned earlier, slicing a hot loaf traps steam and interrupts the setting process, leading to a gummy texture. Allow the loaf to cool completely on a wire rack (at least 1-2 hours) before cutting into it.
- Too much moisture in the dough: While hydration is important, excessively wet dough can also contribute to a gummy crumb if not baked thoroughly. Ensure you're measuring liquids and flour accurately according to the recipe.
Variations and Add-Ins for Your Whole Wheat Bread Recipe
Adding Seeds and Grains for Extra Flavor and Texture
Elevate your easy whole wheat loaf bread by incorporating seeds and grains. This not only adds delightful texture and flavor but also boosts nutritional value. Popular additions include:
- Sunflower seeds: Add ½ cup to 1 cup of raw or lightly toasted sunflower seeds during the last minute of kneading.
- Pumpkin seeds (Pepitas): Similar to sunflower seeds, they offer a slightly different flavor and crunch. Use ½ cup to 1 cup.
- Flaxseeds: Ground or whole flaxseeds add fiber and a nutty flavor. Add 2-4 tablespoons during mixing. Ground flax absorbs more liquid, so you might need a tiny splash more water.
- Sesame seeds, Poppy seeds, Chia seeds: Add 1-3 tablespoons during mixing or sprinkle generously on top of the shaped loaf before the second rise.
- Rolled Oats: Incorporating ¼ cup to ½ cup of old-fashioned rolled oats adds chewiness. You can mix them directly into the dough or sprinkle on top.
- Cooked Grains: Pre-cook grains like quinoa, farro, or barley and cool them completely before adding ¼ cup to ½ cup to the dough during kneading. This adds substantial texture and nutrition.
When adding seeds or grains, you might need a tiny bit more liquid (maybe 1-2 tablespoons) as they absorb moisture. For a beautiful finish, you can brush the top of the loaf with water or milk before the second rise and sprinkle with seeds or oats to coat the surface.
Sweetening Your Whole Wheat Bread Naturally
While many easy whole wheat loaf bread recipes use a small amount of sugar or honey, you can explore natural sweeteners for different flavors and characteristics.
- Honey: A classic choice, honey adds moisture, a distinct flavor, and contributes to crust browning. Use the amount specified in your recipe, typically 1-3 tablespoons.
- Maple Syrup: Provides a different kind of sweetness and a subtle maple flavor. It functions similarly to honey in the dough.
- Molasses: Dark molasses adds a robust, slightly malty flavor that pairs wonderfully with whole wheat. It also gives the bread a darker color and helps keep it moist. Start with 1-2 tablespoons, as its flavor is quite strong.
- Date Paste or Puree: For a less refined sugar option, use homemade date paste. Substitute it volume-for-volume or weight-for-weight for other liquid sweeteners, adjusting liquid slightly as needed for dough consistency. Date paste adds natural sweetness and fiber.
Remember that different sweeteners can affect the dough's hydration and yeast activity slightly. If substituting, start with the amount recommended in your original easy whole wheat loaf bread recipe and adjust based on the dough's feel.
Storing Your Homemade Whole Wheat Bread
Keeping Your Bread Fresh Longer
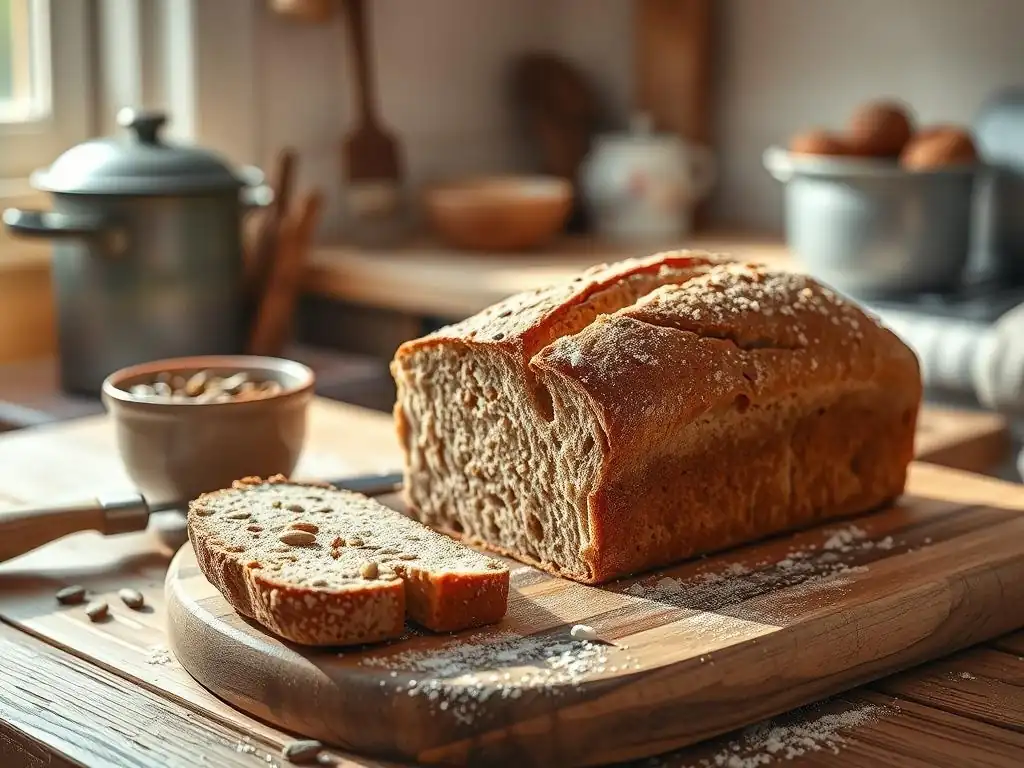
Proper storage is key to enjoying your delicious easy whole wheat loaf bread for as long as possible. Once the loaf has cooled completely, store it at room temperature. Avoid refrigerating bread, as this actually causes it to stale faster due to a process called starch retrogradation, where the starch molecules crystalize more quickly in cold temperatures.
The best way to store your loaf depends on how you prefer your crust. For a softer crust, store the cooled loaf in an airtight container or a resealable plastic bag. This retains moisture but can soften the crust. For a crisper crust, store the bread in a paper bag initially, which allows some air circulation. Once the crust has reached your desired texture, you can transfer it to an airtight container or bag for longer storage. A well-stored homemade easy whole wheat loaf bread will typically stay fresh and delicious for 3-4 days at room temperature.
Freezing Whole Wheat Bread for Later
If you won't finish your easy whole wheat loaf bread within a few days, freezing is an excellent way to preserve its freshness for much longer. Ensure the bread is completely cooled before freezing. You can freeze the entire loaf or slice it first, which makes it convenient to thaw just a few slices at a time.
To freeze, wrap the cooled loaf or slices tightly in plastic wrap, ensuring no surface is exposed to prevent freezer burn. Then, place the wrapped bread in a resealable freezer bag or wrap it again in aluminum foil for an extra layer of protection. Label the package with the date.
Frozen whole wheat bread can maintain its quality for up to 3-6 months. To thaw slices, simply take them out of the freezer and let them sit at room temperature for 15-30 minutes, or pop them directly into a toaster. To thaw a whole loaf, unwrap it and let it sit at room temperature for several hours.
Enjoying Your Freshly Baked Whole Wheat Loaf
Serving Suggestions and Complementary Flavors
Your freshly baked easy whole wheat loaf bread is incredibly versatile and pairs well with a variety of flavors. Its slightly nutty, earthy taste makes it a perfect base for both sweet and savory toppings. Enjoy a slice simply toasted with butter and jam or honey for a classic breakfast or snack. The robust flavor stands up well to strong cheeses, deli meats, and hearty spreads like hummus or avocado.
Consider using your homemade whole wheat loaf bread for open-faced sandwiches piled high with fresh vegetables and protein. It's also excellent for making flavorful croutons for salads or breadcrumbs for cooking. The possibilities are endless, and the satisfaction of using bread you baked yourself adds an extra layer of enjoyment to any meal.
Making Sandwiches and Toast with Your Homemade Bread
Building the perfect sandwich starts with great bread, and your homemade easy whole wheat loaf bread fits the bill perfectly. Its sturdy structure holds up well to various fillings without becoming soggy. Slice the loaf to your preferred thickness – thicker slices are great for substantial sandwiches, while thinner ones work well for lighter fare or tea sandwiches.
For toast, slice the bread and toast to your desired level of crispness. The whole wheat texture provides a satisfying chew and crunch when toasted. Top with anything from simple butter and cinnamon sugar to more elaborate avocado and egg combinations. Toasting also revives slightly stale bread, making it taste fresh again. Your easy whole wheat loaf bread is ready to be the star of your next meal or snack!
Conclusion: Mastering the Art of Whole Wheat Bread Baking with Ease
Frequently Asked Questions
How is baking whole wheat bread in a loaf pan different from baking white bread?
Whole wheat flour contains more bran and germ, which can make the dough denser and require more moisture. You may also need to adjust baking times slightly.
What are the key ingredients for an easy whole wheat loaf bread recipe?
Besides whole wheat flour, you'll need water, yeast, salt, and a sweetener like honey or molasses. A fat source, such as olive oil or butter, is also important for texture.
What makes the BakeWithEase method "foolproof" for whole wheat loaf bread?
Our method focuses on simple, step-by-step instructions, clearly explained techniques for kneading and proofing, and guidance on achieving the ideal texture and rise.
Can I substitute other flours in the BakeWithEase easy whole wheat loaf bread recipe?
Yes, but substitutions will affect the texture and rise. Experiment with small amounts of all-purpose flour or bread flour to improve the bread's lightness if needed.
How do I store my freshly baked whole wheat loaf bread to keep it fresh?
Allow the bread to cool completely before slicing. Store it in an airtight container or bread bag at room temperature. For longer storage, you can freeze it.
Final Reflection: The Simple Joy of a Perfect Whole Wheat Loaf
The ease of baking a delicious, wholesome loaf of whole wheat bread at home is more relevant than ever in a world increasingly focused on health and self-sufficiency. It's a testament to the power of simple ingredients and straightforward techniques to create something truly nourishing and satisfying. This isn't just about baking bread; it's about reclaiming control over our food and finding joy in the process.
The comforting aroma of freshly baked bread, the satisfying weight of a perfectly risen loaf, the simple pleasure of sharing it with loved ones – these are experiences that transcend the recipe itself. They connect us to a richer culinary heritage and remind us of the fundamental human need for connection and sustenance. Bread is the staff of life,
a saying as old as time, perfectly encapsulates this enduring truth. This article aimed to make that staff of life accessible to everyone, regardless of baking experience.
Now, I invite you to take what you've learned and experiment! Don't be afraid to adjust the recipe to your taste, to try different flours, or to add your own creative touches. The journey of baking is as important as the destination, and each loaf you bake will be a testament to your own unique skills and creativity. Embrace the process, savor the results, and share the joy of homemade whole wheat bread with those you love.
Unleash Your Inner Baker: Bake a Perfect Loaf Today!
Thanks for taking the time to explore the art of whole wheat bread baking! You've now got the know-how to create delicious, wholesome loaves right in your own kitchen. Ready to put your new skills to the test?
- Bake your first perfect loaf: Gather your ingredients and follow the recipe again – you’ll be amazed at how much easier it is the second time around!
- Share your baking journey: Post a picture of your finished loaf on social media and tag us @BakeWithEase – we’d love to see your creation!
- Experiment with flavors: Try adding different seeds, nuts, or dried fruits to your next loaf. What unique twist will you discover?
Ready to transform your kitchen into a bakery? What exciting flavor combinations will you try next?