
Master the Art of Sourdough Rye Baking

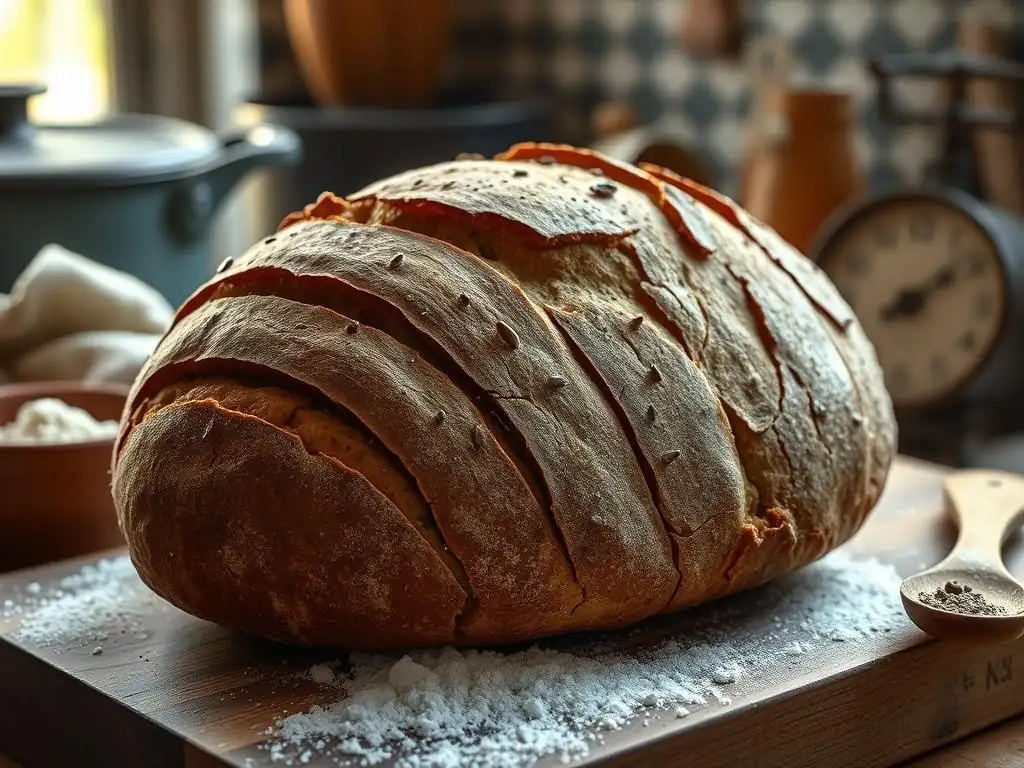
Welcome to BakeWithEase, where baking becomes a joy, not a chore!
Ever dreamt of crafting a perfect, tangy loaf of bread with that distinctive rye flavor? Dive into our comprehensive guide and unlock the secrets to a truly exceptional sourdough rye baking recipe. We'll demystify the process, providing you with the knowledge and confidence to bake delicious, artisanal rye bread right in your own kitchen. Ready to elevate your bread baking game? Let's get started!
- Master the Art of Sourdough Rye Baking: A BakeWithEase Guide
- Introduction to Sourdough Rye Bread Baking
- Essential Equipment for Your Sourdough Rye Baking Journey
- Crafting Your Sourdough Rye Starter for Optimal Results
-
The Ultimate Sourdough Rye Baking Recipe: A Step-by-Step Guide
- Step 1: Mixing the Dough – Achieving the Perfect Consistency
- Step 2: Bulk Fermentation – Developing Flavor and Strength
- Step 3: Shaping the Dough – Techniques for a Beautiful Loaf
- Step 4: Proofing the Dough – Ensuring a Light and Airy Texture
- Step 5: Baking Your Sourdough Rye Bread – Achieving a Crispy Crust and Soft Crumb
- Advanced Sourdough Rye Baking Techniques
- Troubleshooting Common Sourdough Rye Baking Problems
- Storing and Enjoying Your Homemade Sourdough Rye Bread
- Conclusion: Elevate Your Baking with Sourdough Rye Recipes
-
Frequently Asked Questions
- What makes sourdough rye baking different from other types of sourdough baking?
- Where can I find a simple sourdough rye baking recipe on BakeWithEase.com?
- What are some common challenges in sourdough rye baking, and how can I overcome them?
- What ingredients are typically used in a sourdough rye baking recipe?
- How do I know when my sourdough rye bread is properly baked?
- Final Reflection: The Enduring Allure of Sourdough Rye
- Unleash Your Inner Rye Baker!
Master the Art of Sourdough Rye Baking: A BakeWithEase Guide
Introduction to Sourdough Rye Bread Baking
Why Bake Sourdough Rye? Exploring the Unique Flavors and Benefits
Baking sourdough rye bread is a rewarding journey that introduces you to complex flavors and textures distinct from wheat-based loaves. Rye flour, especially dark or medium varieties, contributes a deep, earthy, and slightly tangy profile that pairs beautifully with the natural fermentation of sourdough. Unlike wheat, rye flour has less gluten-forming protein, resulting in a denser, moister crumb that stays fresh longer. This unique structure makes handling rye dough different, but the result is a loaf with incredible depth and character, perfect for savory toppings or enjoyed simply with butter.
Beyond its compelling taste, baking sourdough rye offers nutritional advantages. Rye flour is typically higher in fiber and certain nutrients compared to refined wheat flour. The sourdough fermentation process can also improve the digestibility of grains and make minerals more bioavailable. For many, the satisfaction of mastering a sourdough rye baking recipe is immense, creating a wholesome, flavorful bread right in their own kitchen. It's a staple in many cultures, from the dark pumpernickel of Germany to the lighter rye loaves of Scandinavia, each offering a slightly different expression of this versatile grain.
Understanding the Ingredients: Rye Flour, Sourdough Starter, and More
At the heart of any sourdough rye baking recipe are the ingredients: rye flour, water, salt, and, crucially, an active sourdough starter. Rye flour comes in various forms: light, medium, dark, and pumpernickel (whole grain). The type of rye flour significantly impacts the final loaf's color, flavor intensity, and texture. Using 100% rye yields a very dense bread, while mixing rye with bread flour (a common practice) creates a lighter loaf with better oven spring, thanks to the stronger gluten network from the wheat.
Your sourdough starter, often referred to as the "levain" or "preferment," is a living culture of wild yeast and bacteria. For sourdough rye baking, many bakers prefer a starter fed partly or entirely with rye flour, as rye is known for its ability to cultivate a vigorous and active culture. The starter provides the leavening, giving the bread its rise, and contributes the characteristic tangy flavor through lactic and acetic acid production. The ratio of starter, flour, and water, along with salt for flavor and structure, forms the foundation of your sourdough rye baking recipe.
Essential Equipment for Your Sourdough Rye Baking Journey
The Right Tools for Perfect Sourdough Rye: Scales, Bowls, and Bannetons
Having the correct tools significantly streamlines the sourdough rye baking process and contributes to consistent results. A digital kitchen scale is paramount; precision is key in baking, especially with sourdough and rye, where hydration levels are critical. Measuring ingredients by weight, not volume, ensures accuracy. You'll need sturdy mixing bowls, preferably glass or plastic, as metal can sometimes react with the acidic dough over long fermentation periods, though stainless steel is generally fine. A dough scraper is indispensable for handling the often sticky rye dough.
For shaping and proofing, bannetons (proofing baskets) are highly recommended. These baskets, typically made of cane or wood pulp, support the dough during its final rise and impart a lovely spiral pattern on the crust. Dusting them generously with rice flour prevents sticking, which is particularly important with rye dough's tendency to be less elastic. Other useful tools include a lame or sharp razor blade for scoring the dough before baking, allowing for controlled expansion and a beautiful crust, and parchment paper for easy transfer into the oven.
Temperature Control: Why It Matters in Sourdough Rye Recipes
Temperature plays a vital role throughout the sourdough rye baking process, influencing everything from starter activity to fermentation rates and baking outcomes. An active starter thrives in warm environments, ideally between 75-80°F (24-27°C). Dough temperature during bulk fermentation directly impacts the speed of yeast activity and acid production; warmer temperatures accelerate fermentation, while cooler temperatures slow it down, often resulting in a more complex flavor profile.
For most sourdough rye baking recipes, maintaining a consistent dough temperature during bulk fermentation, typically around 72-78°F (22-26°C), is crucial for predictable results. This can be achieved by using water of a specific temperature during mixing or by proofing the dough in a temperature-controlled environment like an oven with the light on (often around 80-85°F or 27-29°C) or a proofing box. During the final proof, colder temperatures (like in a refrigerator at 38-40°F or 3-4°C) are often used for a slow proof, which deepens flavor and makes the dough easier to handle and score.
Crafting Your Sourdough Rye Starter for Optimal Results
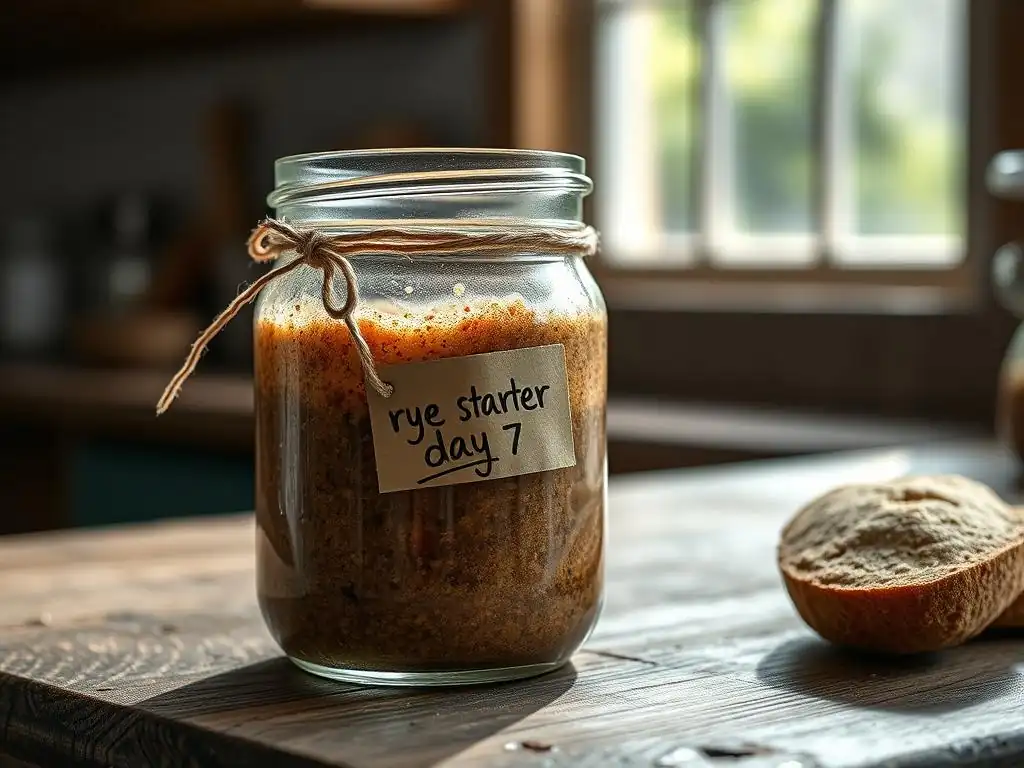
Feeding and Maintaining Your Rye Sourdough Starter: A Step-by-Step Guide
A healthy, active sourdough starter is the bedrock of a successful sourdough rye baking recipe. To maintain a rye starter, regular feeding is essential. This involves discarding a portion of the old starter and feeding the remainder with fresh flour and water. A common feeding ratio is 1:1:1 (starter:flour:water) by weight. For a rye starter, you would typically use rye flour, though some bakers prefer a mix of rye and bread flour (e.g., 50/50).
Here's a basic feeding process:
- Weigh your active starter. Let's say you keep 50 grams.
- Discard or use the rest of your starter.
- Add 50 grams of rye flour (or your preferred mix) to the 50 grams of starter.
- Add 50 grams of water (filtered or non-chlorinated is best).
- Mix thoroughly until no dry flour remains.
- Place the mixture in a clean jar, loosely covered, and let it rise at room temperature (around 70-75°F or 21-24°C) until it doubles or triples in size, which usually takes 4-12 hours depending on temperature and starter activity.
Repeat this feeding process daily if keeping the starter at room temperature for frequent baking. For less frequent baking, you can store the starter in the refrigerator and feed it weekly.
Troubleshooting Your Sourdough Starter: Common Issues and Solutions
Even experienced bakers encounter issues with their sourdough starter. A common problem is a starter that isn't rising vigorously. This could be due to infrequent feeding, cold temperatures, or using chlorinated water.
- Solution: Try feeding more frequently (twice a day) in a warmer spot (75-80°F or 24-27°C) using filtered water. Ensure your flour is fresh.
Another issue is mold growth, typically fuzzy white or colored spots.
- Solution: Unfortunately, moldy starter should be discarded entirely to avoid introducing harmful bacteria into your bread. Start a new one.
A starter that smells strongly of acetone or nail polish remover indicates it's hungry and producing excess acetic acid.
- Solution: Feed it more frequently or increase the feeding ratio (e.g., 1:2:2 or 1:3:3) to provide more food relative to the starter amount. A healthy rye starter should smell pleasantly tangy, slightly sweet, and yeasty. Patience and consistent feeding are key to a robust starter ready for your next sourdough rye baking recipe.
The Ultimate Sourdough Rye Baking Recipe: A Step-by-Step Guide
Step 1: Mixing the Dough – Achieving the Perfect Consistency
Mixing the dough for a sourdough rye baking recipe requires careful attention, as rye behaves differently from wheat. Rye flour absorbs water more slowly initially but holds onto it tightly. A typical recipe might use a high hydration level, perhaps 75-85% hydration relative to the total flour weight. Start by mixing the active sourdough starter with the water and flours (rye and wheat, if using) in a large bowl. Mix until just combined – a shaggy mass with no dry flour pockets. This initial mix is often followed by a rest period called the autolyse, lasting from 20 minutes to an hour.
During the autolyse, the flour hydrates, and enzymatic activity begins, which helps develop the dough structure without kneading, especially beneficial for the weaker gluten in rye. After the autolyse, add the salt. Incorporate the salt thoroughly by mixing, pinching, or folding. The dough will likely feel sticky and less elastic than an all-wheat dough, which is normal for a sourdough rye baking recipe. Avoid the urge to add too much flour; embrace the stickiness.
Step 2: Bulk Fermentation – Developing Flavor and Strength
Bulk fermentation, or the first rise, is where the magic happens in sourdough rye baking. During this period, the wild yeast produces carbon dioxide, causing the dough to rise, while the bacteria produce organic acids that contribute to the sourdough's characteristic flavor and help strengthen the dough structure. The duration of bulk fermentation varies greatly depending on the temperature and the activity of your starter, but it typically ranges from 4 to 8 hours at room temperature (around 70-75°F or 21-24°C).
Throughout bulk fermentation, performing a series of folds helps build strength in the dough. For a rye dough, which is less elastic, fewer folds are usually needed compared to wheat dough. Perhaps 2-3 sets of stretch and folds or coil folds performed every 30-60 minutes during the first couple of hours are sufficient. Observe the dough: it should increase in volume (aim for a 30-50% rise, as rye dough doesn't expand as much as wheat), feel lighter, and show some bubbles. Don't expect it to double like a yeasted dough.
Understanding Bulk Fermentation Time for Sourdough Rye
Bulk fermentation time for a sourdough rye baking recipe is a crucial variable. Factors influencing the duration include room temperature, starter strength, and the percentage of rye flour used. A dough with a higher percentage of rye will generally ferment faster than an all-wheat dough due to the enzymatic activity in rye. For example, a dough with 40% rye flour might reach its peak bulk fermentation in 4-5 hours at 75°F (24°C), while a 100% rye dough might be ready in just 3-4 hours at the same temperature.
Over-fermenting rye dough can lead to a dense, gummy crumb and difficulty shaping. Under-fermentation results in a tight crumb and less flavor development. Learning to read the dough – observing its volume increase, texture, and how it feels – is more important than strictly adhering to a clock. Signs of readiness include a noticeable increase in size, a slightly domed surface, and the dough feeling airy when gently prodded.
Step 3: Shaping the Dough – Techniques for a Beautiful Loaf
Shaping sourdough rye dough requires a gentle touch, as it can be stickier and less forgiving than wheat dough. After bulk fermentation, gently turn the dough out onto a lightly floured surface. Avoid degassing it completely. For a boule (round loaf), gently coax the dough into a round shape using a bench scraper and your hands, creating surface tension. For a batard (oval loaf), shape it into a rectangle, fold the top down, the bottom up, and then roll it tightly, sealing the seam.
The goal is to create enough surface tension to help the loaf hold its shape during proofing and baking, but without tearing the delicate structure. Light dusting of flour on your hands and the work surface is helpful, but too much can prevent the dough from sealing properly. Once shaped, place the dough seam-side up into a well-floured banneton. This allows the dough to expand upwards during the final proof and makes it easy to invert into your baking vessel.
Step 4: Proofing the Dough – Ensuring a Light and Airy Texture
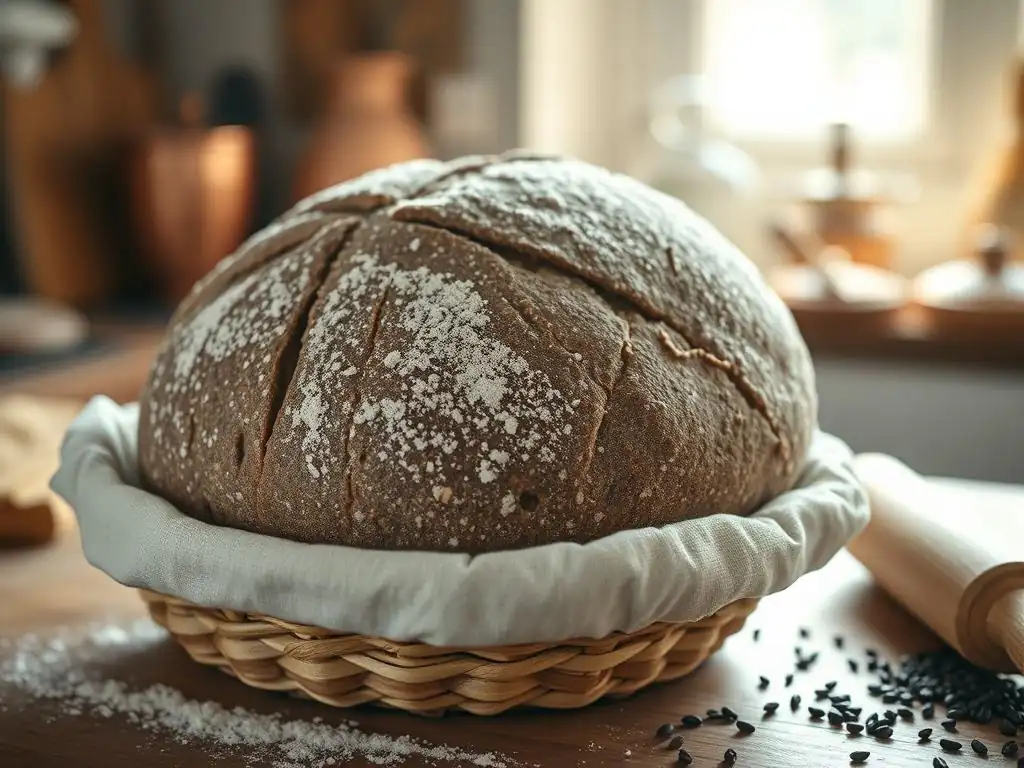
Proofing is the final rise before baking, allowing the dough to lighten and expand further. For sourdough rye baking recipes, proofing can be done at room temperature or in the refrigerator (cold proofing). Room temperature proofing is faster, typically taking 1-3 hours depending on warmth, but requires careful monitoring to prevent over-proofing. The dough should look visibly larger and feel slightly airy, but not so fragile that it collapses when touched. A good indicator is the "poke test": gently poke the dough with a wet finger; if the indentation slowly springs back halfway, it's likely ready.
Cold proofing in the refrigerator (usually 12-24 hours) is a popular technique for sourdough rye.
- Benefits of Cold Proofing:
- Develops deeper, more complex flavors.
- Slows fermentation, making the dough easier to handle and score.
- Allows for more flexible baking schedules.
- Contributes to a better crust.
Rye dough benefits particularly from a cold proof, which can help manage its sticky nature and develop flavor.
Cold Proofing vs. Room Temperature Proofing for Rye Sourdough
Choosing between cold proofing and room temperature proofing impacts both the workflow and the final characteristics of your sourdough rye bread.
- Room Temperature Proofing:
- Pros: Faster turnaround time; good for same-day bakes.
- Cons: Requires constant attention to avoid over-proofing; dough can be stickier and harder to score. Typically results in a tangier loaf due to warmer fermentation.
- Cold Proofing:
- Pros: Superior flavor development; easier handling and scoring; flexible schedule (bake anytime within the proofing window).
- Cons: Requires planning ahead (minimum 12 hours); takes up refrigerator space. Results in a more balanced tang.
For many sourdough rye baking recipes, especially those with higher rye percentages, cold proofing is preferred for its flavor benefits and easier handling of the sticky dough. A typical cold proof might involve proofing in the refrigerator for 12-18 hours, though some bakers go up to 24-48 hours for maximum flavor development.
Step 5: Baking Your Sourdough Rye Bread – Achieving a Crispy Crust and Soft Crumb
Baking is the grand finale of your sourdough rye baking recipe. For the best results, bake in a preheated oven, ideally using a Dutch oven or baking stone with steam. Preheat your oven with the Dutch oven or stone inside to a high temperature, commonly 450-500°F (230-260°C), for at least 30-60 minutes. This ensures the baking vessel and oven are fully saturated with heat.
Carefully invert the proofed dough from the banneton onto parchment paper. Score the loaf quickly but confidently with a sharp blade. Lower the dough into the preheated Dutch oven (if using) or slide it onto the baking stone. If using a stone, create steam by placing a tray of hot water or ice cubes on a lower rack. Bake covered (in a Dutch oven) or with steam for the first 20-25 minutes. This initial period of steam allows the crust to stay pliable, enabling maximum oven spring.
Baking Temperatures and Times for Different Rye Flour Percentages
The ideal baking temperature and time can vary depending on the percentage of rye flour in your sourdough rye baking recipe and the size/shape of the loaf.
- Higher Rye Content (e.g., 70-100% rye): These loaves benefit from slightly lower temperatures and longer baking times to ensure the dense interior cooks through. A common approach is to start at 450°F (230°C) for 15-20 minutes covered, then reduce the temperature to 400-425°F (200-220°C) for another 30-40 minutes uncovered. The internal temperature should reach at least 205°F (96°C).
- Lower Rye Content (e.g., 20-50% rye): These loaves behave more like wheat bread and can handle higher initial temperatures. Bake at 475-500°F (245-260°C) for 20 minutes covered, then reduce to 425-450°F (220-230°C) for 20-25 minutes uncovered, until the crust is deep golden brown and the internal temperature is 205-210°F (96-99°C). Always cool the loaf completely on a wire rack before slicing – this is critical for rye bread to allow the crumb to set properly.
Advanced Sourdough Rye Baking Techniques
Incorporating Seeds and Grains into Your Sourdough Rye
Adding seeds and grains is a popular way to enhance the flavor, texture, and nutritional value of your sourdough rye baking recipe. Common additions include caraway seeds (a classic pairing with rye), sunflower seeds, pumpkin seeds, flax seeds, and whole rye berries or cracked rye. These can be incorporated in several ways: mixed directly into the dough during the initial mixing, added during the final folds, or used as a topping before baking.
For a softer texture and easier digestion, many bakers soak seeds and grains in hot water or buttermilk for several hours or overnight before adding them to the dough. This is known as a soaker or scalding (especially with cracked rye or flour, using boiling water). A typical ratio for a soaker might be equal parts seeds/grains and water by weight. For example, adding 50 grams of soaked sunflower seeds and 50 grams of soaked flax seeds to a standard 500-gram flour recipe adds wonderful complexity and moisture. Ensure the soaker has cooled before adding it to the dough mixture.
Exploring Different Rye Flour Varieties: Light, Medium, and Dark
The world of rye flour offers a spectrum of possibilities for your sourdough rye baking recipe.
- Light Rye Flour: Milled from the inner part of the rye berry, similar to white wheat flour. It has a milder flavor and lighter color, resulting in a less dense crumb than darker rye. It's a good starting point for those new to rye baking or who prefer a less intense flavor.
- Medium Rye Flour: Contains more of the rye berry than light rye, including some of the bran and germ. It offers a more pronounced rye flavor and darker color than light rye but is not as strong as dark rye. Many classic "deli-style" rye breads use medium rye.
- Dark Rye Flour: Milled from the whole rye berry, including a significant portion of the bran and germ. It has the strongest, most robust rye flavor and contributes a deep brown color and denser texture. Pumpernickel flour is a type of very coarse dark rye or whole rye meal.
Experimenting with different percentages and combinations of these flours will significantly alter the outcome of your sourdough rye baking recipe. A blend of bread flour and dark rye (e.g., 60% bread flour, 40% dark rye) yields a loaf with good structure and distinct rye flavor, while a 100% dark rye loaf will be very dense and intensely flavored, often requiring different handling and baking times.
Achieving the Perfect Rye Bread Crumb: Tips and Tricks
Achieving a desirable crumb in sourdough rye bread can be challenging due to rye's low gluten content. A perfect rye crumb is typically dense and moist, unlike the open, airy crumb often sought in wheat sourdough. However, it shouldn't be gummy or heavy.
- Tips for a Great Rye Crumb:
- Proper Hydration: Ensure sufficient water, as rye flour is very thirsty. Hydration levels often exceed 75%.
- Gentle Handling: Avoid aggressive kneading or excessive stretching, which can damage the limited gluten structure.
- Appropriate Fermentation: Don't over-proof, as this can lead to collapse and a dense, gummy texture. Aim for a modest rise (30-50%) during bulk fermentation.
- Thorough Baking: Ensure the loaf is baked through to an internal temperature of at least 205°F (96°C). Under-baked rye is often gummy.
- Complete Cooling: This is non-negotiable. Rye bread's crumb structure continues to set as it cools. Do not cut into a rye loaf until it is completely cool, ideally after several hours or even overnight. Cutting too early results in a gummy interior.
Troubleshooting Common Sourdough Rye Baking Problems
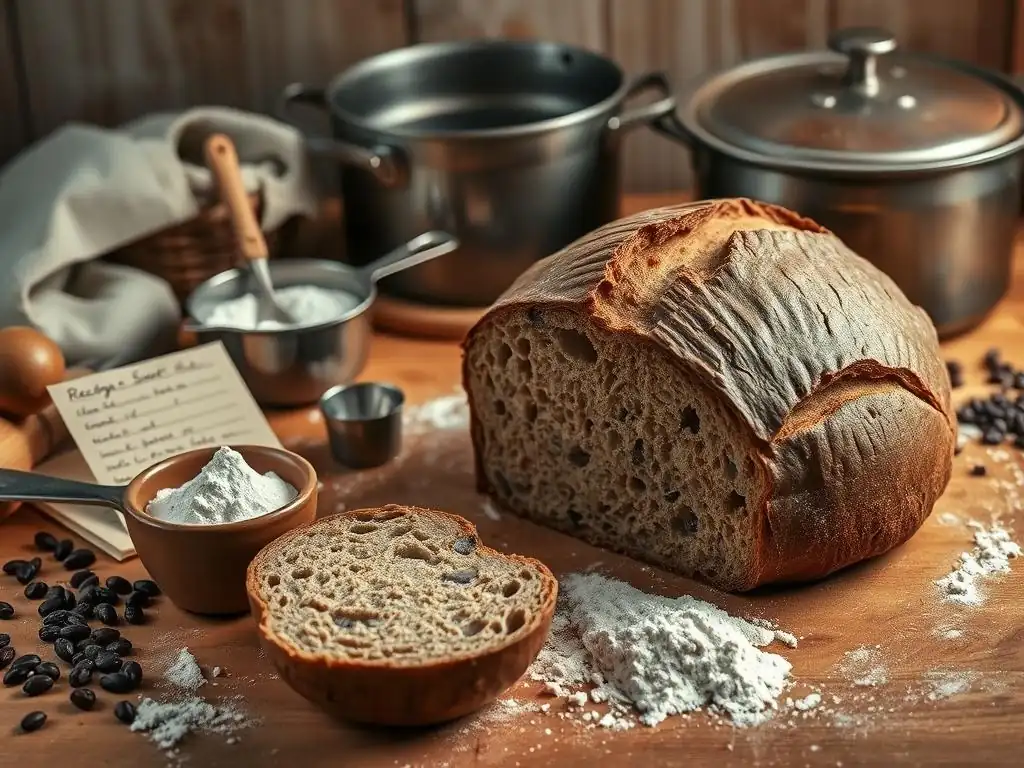
Dense or Gummy Crumb: Identifying and Fixing the Issue
A dense or gummy crumb is perhaps the most common frustration in sourdough rye baking. This issue often stems from one or a combination of factors:
- Under-baking: The most frequent culprit. Ensure the internal temperature reaches at least 205°F (96°C). Baking for longer at a slightly lower temperature after the initial high-heat phase can help.
- Under-proofing: If the dough didn't develop enough during bulk fermentation or final proof, it won't rise adequately in the oven, leading to a dense loaf. Ensure your starter is active and allow sufficient proofing time based on temperature.
- Over-proofing: While less common than under-baking/proofing, severely over-proofed rye dough can collapse and become dense.
- Cutting Too Early: As mentioned, cutting into a warm rye loaf guarantees a gummy texture. Patience is key!
If you consistently get a gummy crumb despite proper baking temperature and cooling, evaluate your starter's activity and fermentation times. Consider slightly reducing hydration in your sourdough rye baking recipe or incorporating a higher percentage of strong bread flour to help with structure.
Flat Loaf: Understanding and Preventing Collapse
A flat loaf, especially one that spreads outwards rather than rising upwards, can be disheartening. Potential causes in sourdough rye baking include:
- Weak Starter: An inactive starter won't produce enough gas to support the loaf's structure during baking. Ensure your starter is active and doubles/triples predictably after feeding.
- Over-proofing: Over-fermented dough loses its structural integrity and the ability to hold shape. The gluten network (weak in rye anyway) breaks down. Pay close attention to the dough's signs of readiness during proofing.
- Insufficient Shaping: Shaping creates surface tension, which helps the loaf maintain its structure. Practice gentle but firm shaping techniques to build tension.
- High Hydration without Support: Very high hydration doughs (e.g., 90%+) are harder to manage and may require baking in a loaf pan rather than freeform to prevent excessive spreading.
To prevent a flat loaf in your sourdough rye baking recipe, ensure your starter is vigorous, avoid over-proofing, practice proper shaping techniques, and consider using a banneton for support during the final proof. Baking in a Dutch oven also provides excellent support for the dough during the initial oven spring.
Sour vs. Mild Flavor: Controlling the Sourdough Tang
The level of tanginess in your sourdough rye bread is largely controllable and depends on the balance of lactic acid (milder, yogurt-like tang) and acetic acid (sharper, vinegar-like tang) produced by the starter's bacteria.
- To Increase Tang:
- Use a stiff starter (lower hydration).
- Ferment at cooler temperatures (below 70°F or 21°C) during bulk fermentation or proofing, which favors acetic acid production.
- Use a longer, colder final proof (e.g., 24+ hours in the refrigerator).
- Feed your starter less frequently between uses (allows acids to build up).
- To Decrease Tang (for a milder flavor):
- Use a liquid starter (higher hydration).
- Ferment at warmer temperatures (75-80°F or 24-27°C) during bulk fermentation, which favors lactic acid production.
- Use a shorter, warmer final proof.
- Feed your starter more frequently (keeps acid levels lower).
- Use a higher percentage of wheat flour in your sourdough rye baking recipe, as rye's enzymatic activity can sometimes contribute to a more pronounced sourness.
Experimenting with starter hydration, fermentation temperatures, and proofing times will help you dial in the perfect level of tang for your preferred sourdough rye baking recipe.
Storing and Enjoying Your Homemade Sourdough Rye Bread
Best Practices for Storing Sourdough Rye to Maintain Freshness
Proper storage is essential to keep your sourdough rye bread delicious and prevent it from drying out or becoming stale too quickly. Remember, you must wait until the loaf is completely cool before storing or slicing – this takes several hours, sometimes even overnight for high-rye loaves.
- Short-term Storage (1-2 days): Store the cooled loaf cut-side down on a cutting board. The cut surface is where moisture loss occurs most rapidly.
- Medium-term Storage (3-5 days): Wrap the cooled loaf in a linen bread bag, a clean tea towel, or a paper bag. Avoid plastic wrap at room temperature, as it traps moisture and can make the crust soft and potentially encourage mold growth.
- Long-term Storage (up to 3 months): Once completely cooled, slice the bread and store the slices in an airtight container or freezer bag in the freezer. This is the best method to preserve freshness. Thaw slices as needed or toast directly from frozen.
Avoid storing rye bread in the refrigerator, as this typically accelerates staling due to a process called starch retrogradation.
Serving Suggestions: Pairing Your Sourdough Rye with Delicious Foods
Sourdough rye bread's robust flavor makes it a fantastic companion to a variety of foods. Its dense, moist crumb stands up well to hearty toppings and spreads.
- Classic Pairings:
- Smoked salmon and cream cheese.
- Sharp cheddar or aged gouda.
- Pickled herring or other pickled vegetables.
- Open-faced sandwiches with cured meats like pastrami or ham.
- Butter and a sprinkle of flaky sea salt.
- Other Ideas:
- Toasted and topped with avocado or eggs.
- Used for grilled cheese sandwiches (especially with strong cheeses).
- As a base for bruschetta with savory toppings.
- Served alongside hearty soups or stews.
The unique tang and texture of bread baked from a sourdough rye baking recipe elevate simple ingredients and make for truly satisfying meals. Enjoy experimenting with different pairings!
Conclusion: Elevate Your Baking with Sourdough Rye Recipes
Mastering the art of sourdough rye baking is a rewarding endeavor that deepens your connection to traditional bread-making. While rye dough presents unique challenges compared to wheat, the resulting loaves offer unparalleled flavor, texture, and keeping quality. From understanding the nuances of rye flour and nurturing a lively starter to mastering fermentation times and achieving a perfect bake, each step in the sourdough rye baking recipe process builds towards creating truly exceptional bread. We hope this guide empowers you to explore the rich world of rye and bake delicious, wholesome loaves with confidence. Happy baking!
Frequently Asked Questions
What makes sourdough rye baking different from other types of sourdough baking?
Sourdough rye baking differs due to rye flour's unique properties. Rye has less gluten than wheat, requiring different handling and often resulting in a denser crumb.
Where can I find a simple sourdough rye baking recipe on BakeWithEase.com?
BakeWithEase.com offers numerous sourdough rye baking recipes, including beginner-friendly options. Look for recipes specifically labeled "Sourdough Rye" in the bread section.
What are some common challenges in sourdough rye baking, and how can I overcome them?
Common challenges include stickiness and a dense texture. Overcoming these involves proper hydration levels, careful mixing, and understanding rye flour.
What ingredients are typically used in a sourdough rye baking recipe?
Besides a sourdough starter, essential ingredients include rye flour, wheat flour (often), water, and salt. Some recipes may also incorporate ingredients like caraway seeds for added flavor.
How do I know when my sourdough rye bread is properly baked?
Look for a deep, dark crust and an internal temperature of around 200-210°F (93-99°C). A hollow sound when tapping the bottom indicates it's fully baked.
Final Reflection: The Enduring Allure of Sourdough Rye
The art of sourdough rye baking, once a niche pursuit, is experiencing a powerful resurgence, fueled by a growing appreciation for handcrafted foods and a desire to connect with traditional techniques. This renewed interest isn't just a fleeting trend; it represents a deeper yearning for authenticity and a mindful approach to food production. The complex flavors and satisfying texture of a perfectly baked sourdough rye loaf offer a sensory experience that transcends mere sustenance.
The journey of mastering sourdough rye, as detailed in this article, is more than just following a recipe; it's a process of discovery, patience, and ultimately, self-discovery. The unpredictable nature of the sourdough starter, the subtle nuances of flour selection, and the delicate balance of hydration all contribute to a unique and rewarding experience. As the renowned baker, Chad Robertson, once said, Baking is a meditation. It's a process of transformation, both of the ingredients and of the baker.
This sentiment perfectly encapsulates the transformative power of this ancient craft.
Now, I invite you to embrace the challenge. Don't be intimidated by the seemingly complex process. Start small, experiment with different flours and techniques, and most importantly, enjoy the journey. The satisfaction of creating a beautiful, flavorful loaf of sourdough rye bread from scratch is an unparalleled reward. The knowledge gained, the skills honed, and the delicious results will enrich your life far beyond the simple act of baking. So, gather your ingredients, embrace the process, and discover the magic of sourdough rye for yourself.
Unleash Your Inner Rye Baker!
Thanks for joining us on this sourdough rye adventure! We hope you gained valuable insights and feel empowered to tackle this delicious and rewarding bread. Now it's time to put your newfound knowledge into practice.
- Bake your first perfect rye loaf: Grab your ingredients, follow your favorite recipe (or try one of ours! ), and experience the satisfaction of a perfectly risen, tangy rye. This is your chance to shine!
- Share your baking journey: Show off your creations and connect with other passionate bakers on our BakeWithEase community forum (instructions are on the site). Let's inspire each other!
- Experiment with different flours and techniques: Try adding caraway seeds, experimenting with different hydration levels, or even crafting your own unique starter. The possibilities are endless!
Ready to transform your kitchen into a rye haven? What unique twist will you add to your first sourdough rye loaf?