
Troubleshooting Focaccia Dough: Fix Common Mistakes

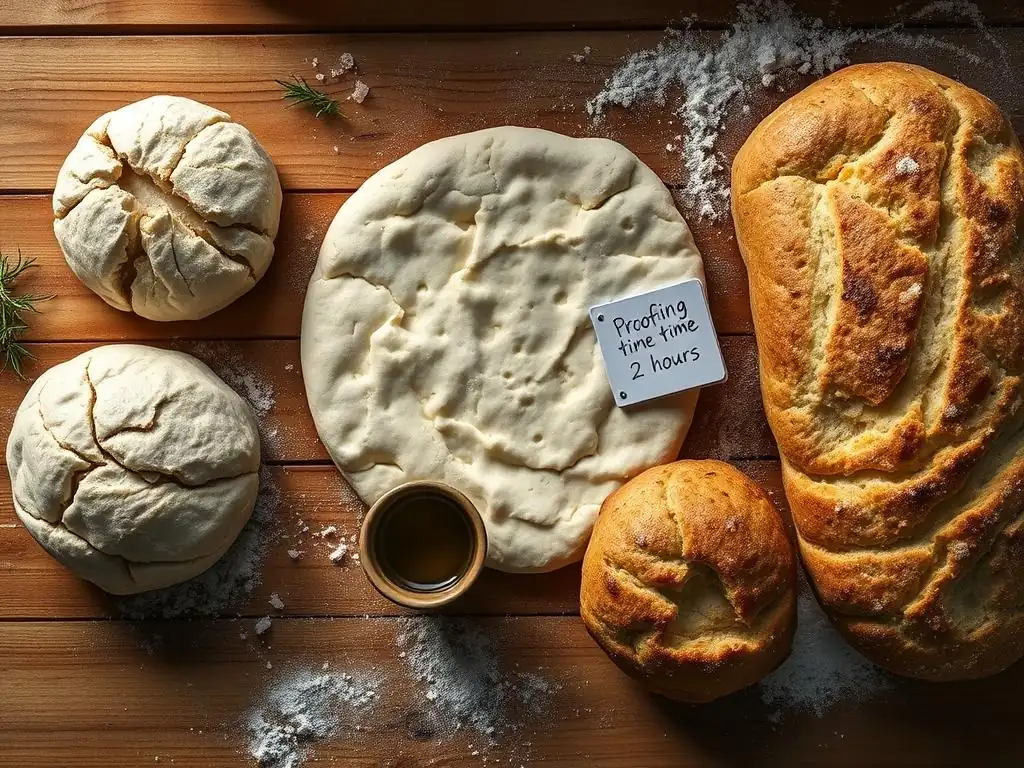
Welcome to BakeWithEase, your haven for all things baking! Ever wrestled with focaccia dough that just won't cooperate? We understand. Dive into our guide, " Troubleshooting Focaccia Dough: Fix Common Mistakes," and unlock the secrets to creating that perfect, airy, and flavorful focaccia. Discover simple solutions to common problems and elevate your bread baking game. Are you ready to bake with confidence? Let's get started!
- Troubleshooting Focaccia Dough: Fix Common Mistakes for Perfect Results
- Introduction: Achieving Focaccia Perfection - A Troubleshooting Guide
- Understanding Focaccia Dough Fundamentals
- Common Focaccia Dough Problems and Solutions
- Diagnosing Specific Focaccia Dough Issues
- Focaccia Dough Troubleshooting: Step-by-Step Solutions
- Preventing Focaccia Dough Problems: Proactive Tips
- Advanced Focaccia Troubleshooting: Complex Issues
- Conclusion: Baking Focaccia with Confidence – Overcoming Common Challenges
-
Frequently Asked Questions
- What are some common reasons why my focaccia dough isn't rising properly?
- My focaccia dough is too sticky to handle. What can I do?
- The focaccia I baked is flat and dense, not light and airy. What went wrong?
- How can I prevent my focaccia from becoming dry and hard after baking?
- What's the best way to get those beautiful dimples on my focaccia?
- Final Reflection: The Humble Focaccia, A Lesson in Patience and Precision
- Unleash Your Inner Focaccia Master!
Troubleshooting Focaccia Dough: Fix Common Mistakes for Perfect Results
Introduction: Achieving Focaccia Perfection - A Troubleshooting Guide
Baking focaccia is a wonderfully rewarding experience, yielding a versatile flatbread with a delightfully crisp bottom and a soft, airy interior. However, like any baking endeavor, it can sometimes present challenges. From dough that's too sticky to a loaf that refuses to rise, encountering issues with your focaccia dough is a common part of the learning process. This guide is designed to walk you through typical problems, offering practical focaccia dough troubleshooting tips to help you achieve consistently delicious results.
Understanding the science behind your ingredients and techniques is key to fixing mistakes and preventing them in the future. Whether you're a beginner tackling your first focaccia or a seasoned baker refining your skills, mastering these troubleshooting techniques will elevate your bread-making game. Let's dive into the fundamentals and common pitfalls, equipping you with the knowledge to bake perfect focaccia every time.
Understanding Focaccia Dough Fundamentals
At its heart, focaccia dough is a simple combination of flour, water, yeast, salt, and olive oil. Yet, the magic lies in the proportions and how these basic ingredients interact. The high hydration level, often ranging from 70% to 85% water relative to the flour weight, is characteristic of focaccia and contributes to its signature open crumb structure. This wetness is intentional but can sometimes lead to stickiness, a common issue we'll address with specific focaccia dough troubleshooting tips later on.
Beyond the core ingredients, proper technique is paramount. Gentle mixing, sufficient kneading (or folding in the case of no-knead versions), and patient proofing are all critical steps. The final dimpling and generous application of olive oil before baking not only add flavor but also help create those desirable pockets and texture. Mastering these fundamentals is the first step in avoiding many common focaccia dough problems.
The Key Ingredients in Focaccia Dough
The foundation of great focaccia starts with quality ingredients. Strong bread flour, with its higher protein content (typically 12-14%), provides the necessary gluten structure to support the dough's hydration and create that characteristic chew. All-purpose flour can be used, but it might result in a less airy texture due to its lower protein (around 10-12%).
The type of yeast used – active dry or instant – will influence activation time and method, but both are effective when fresh. A packet of active dry yeast usually contains about 2.25 teaspoons, enough to leaven a standard batch of focaccia dough made with 400-500 grams of flour.
Water quality and temperature also play a significant role. Lukewarm water (around 95-105°F or 35-40°C) is ideal for activating active dry yeast, while instant yeast can often be mixed directly with the dry ingredients and cooler water. Salt is crucial not just for flavor but also for controlling yeast activity and strengthening gluten. Using good quality extra virgin olive oil is non-negotiable; it contributes richness, flavor, and tenderness to the final loaf, and a significant amount (often 1/4 cup or more per standard batch) is used both in the dough and generously on top.
Essential Focaccia Dough Techniques for Success
Proper mixing is the first step in developing gluten. For a traditional focaccia, mixing by hand or stand mixer incorporates ingredients and begins gluten development. Unlike standard bread doughs that require vigorous kneading to become smooth and elastic, focaccia dough, especially high-hydration versions, benefits more from a series of folds over time.
This gentle handling encourages gluten development without overworking the dough, which can lead to toughness. A common technique is the "stretch and fold," performed every 30-60 minutes during the bulk fermentation phase, where you wet your hands, grab a side of the dough, stretch it up, and fold it over the center. Repeating this a few times around the bowl helps build structure.
Proofing, or fermentation, is where the yeast produces carbon dioxide, causing the dough to rise and develop flavor. Focaccia typically undergoes a long, slow fermentation, often including an overnight rest in the refrigerator. This cold proofing significantly enhances flavor development. After the initial rise (bulk fermentation), the dough is gently transferred to its baking pan, allowed a final proof (often 1-2 hours at room temperature), and then dimpled deeply with oiled fingertips. The dimpling helps create the unique texture and prevents large air pockets from forming, while also providing wells for the olive oil and toppings.
Common Focaccia Dough Problems and Solutions
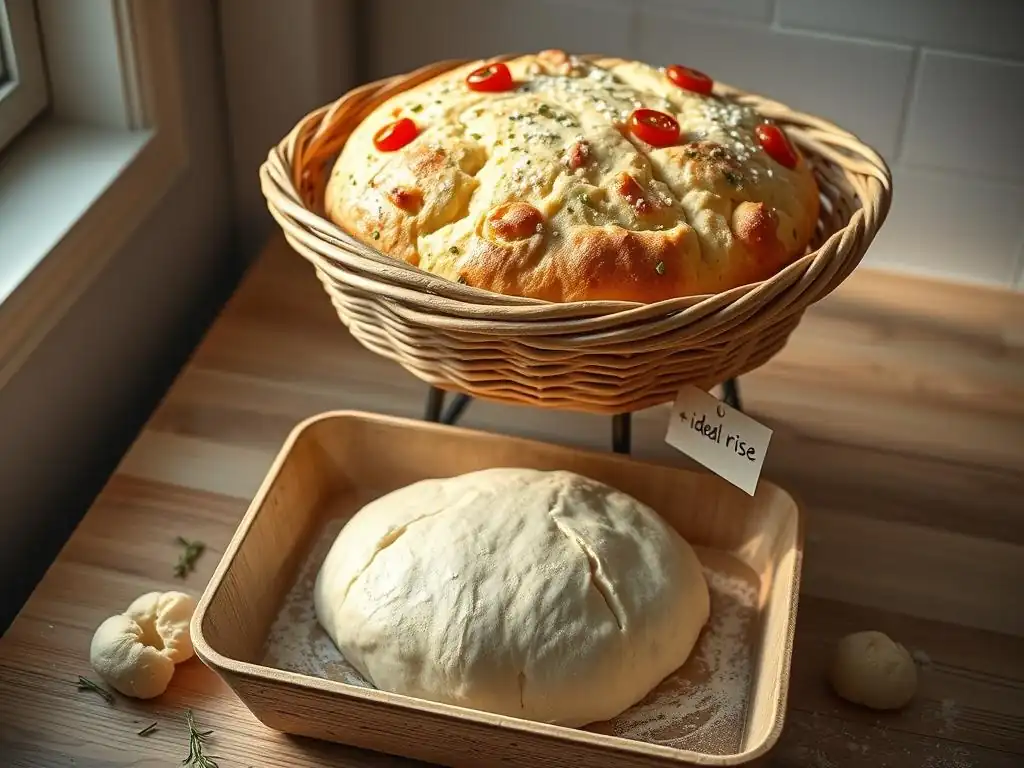
Despite following a recipe, you might encounter issues with your focaccia dough. Don't despair! Most problems are fixable with the right focaccia dough troubleshooting tips. Understanding the likely causes is half the battle.
Let's explore the most frequent challenges bakers face and how to overcome them, turning potential failures into delicious successes. Whether your dough is too sticky, too dry, or simply won't rise, there's usually a straightforward solution.
Focaccia Dough is Too Sticky: Causes and Remedies
One of the most common complaints is that focaccia dough is excessively sticky, making it difficult to handle. While focaccia dough is inherently wetter than many other bread doughs due to its high hydration, it shouldn't be unmanageable. Excessive stickiness can be caused by too much water relative to the flour, insufficient gluten development, or even external factors like high humidity. A dough that sticks aggressively to everything, even oiled hands, likely needs adjustment.
Remedies often involve tweaking the hydration or technique. If you suspect too much water was added, a small amount of additional flour can be incorporated carefully. If the dough is sticky but feels weak, it might need more time for gluten development, perhaps through additional gentle folds. Using wet or oiled hands when handling the dough is also a standard practice that helps manage stickiness without adding more flour.
Adjusting Hydration Levels in Sticky Focaccia Dough
If your focaccia dough is significantly stickier than expected, it's likely due to the hydration level being too high for the specific flour used or even an inaccurate measurement. Different flours absorb water differently; a high-protein bread flour can handle more water than an all-purpose flour. If the dough is soupy or refuses to hold any shape after mixing, try adding a tablespoon of flour at a time, mixing it in thoroughly, and observing the dough's consistency.
Be cautious not to add too much flour, as this will result in a dry, dense focaccia. The goal is a dough that is still wet and shaggy but has some cohesive structure.
Accurate measurement, especially using a digital scale, is crucial for controlling hydration. Weighing flour and water ensures the correct ratio. If you're measuring by volume, variations in how flour is scooped can lead to significant differences in weight, affecting the dough's hydration and stickiness. For instance, a cup of flour can weigh anywhere from 120 to 150 grams depending on packing.
Dealing with High Humidity Affecting Focaccia Dough Stickiness
Environmental factors, particularly humidity, can significantly impact dough consistency. On a very humid day, the flour absorbs moisture from the air even before it's mixed with water. This means that the same amount of water used on a dry day might result in a much stickier dough when humidity is high. This is a classic scenario where focaccia dough troubleshooting tips are essential.
When baking in humid conditions, you might need to slightly reduce the amount of water called for in the recipe, perhaps by 5-10%, or be prepared to incorporate a tiny bit more flour during the initial mixing if the dough seems overly wet. Pay attention to the dough's feel rather than strictly adhering to the exact water measurement if your environment is dramatically different from typical conditions.
Focaccia Dough is Too Dry: How to Rehydrate and Revive
A dry focaccia dough is less common than a sticky one, but it can happen if too little water was added, the flour was extremely dry (e.g., old flour), or the dough was left uncovered during a long proofing period, allowing surface moisture to evaporate. A dry dough will feel stiff, might look crumbly, and won't stretch easily. It will also struggle to rise properly.
Reviving dry dough requires carefully adding moisture back into it. This needs to be done gradually to avoid overcorrecting and turning it into a sticky mess. The goal is to make the dough pliable and extensible again, ready for proper gluten development and rising.
Adding Moisture Back into Dry Focaccia Dough
If you notice your focaccia dough is too dry during the initial mixing or kneading phase, you can add a teaspoon of water at a time, working it into the dough until the desired consistency is reached. This is easier with a stand mixer or during the early stages of hand mixing. If the dough is already partially kneaded, you can try wetting your hands generously with water or olive oil and kneading the moisture in that way.
For dough that has dried out slightly during proofing, especially on the surface, you can gently mist it with water or brush it lightly with olive oil before covering it again. If the entire mass of dough is dry and stiff, it might be challenging to fully rehydrate it, but incorporating small amounts of water or oil gradually while gently kneading is the best approach.
Understanding the Role of Olive Oil in Focaccia Dough Hydration
Olive oil isn't just for flavor and topping; it also contributes to the dough's overall hydration and texture. The oil coats the gluten strands, preventing them from forming a tight network, which results in a more tender crumb. Including the specified amount of olive oil within the dough mixture, usually added after the initial mixing of flour, water, salt, and yeast, is important for achieving the characteristic focaccia texture.
If your dough feels dry, incorporating a little extra olive oil (a tablespoon or two) can sometimes help, especially if it's just slightly dry or you're past the point where adding water is easy. The oil will improve pliability and richness, though it won't directly increase the water hydration level. Ensure you're using the correct amount of oil specified in your recipe, both in the dough and for coating the pan and dimpling.
Focaccia Dough Not Rising: Troubleshooting Proofing Issues
A focaccia dough that fails to rise, or rises very little, is a frustrating problem. This typically points to an issue with the yeast or the proofing environment. Yeast is a living organism, and it needs the right conditions – warmth, food (sugar from the flour), and moisture – to produce the carbon dioxide gas that makes dough rise.
Common causes include inactive yeast, incorrect water temperature for activation, a proofing environment that is too cold or too hot, or insufficient proofing time. Identifying the specific reason is key to applying the right focaccia dough troubleshooting tips.
Checking Yeast Activity for Focaccia Dough
The most frequent culprit for a dough that won't rise is inactive or dead yeast. If you're using active dry yeast, you should always "proof" it first: dissolve it in the warm water (around 100°F or 38°C) with a pinch of sugar. Within 5-10 minutes, it should become foamy and bubbly. If it doesn't, your yeast is likely dead and you'll need to start over with fresh yeast. Instant yeast is more forgiving and can often be mixed directly with dry ingredients, but it's still susceptible to expiry.
Check the expiry date on your yeast package. Yeast loses potency over time, especially if not stored properly (ideally in the refrigerator or freezer after opening). Using fresh, viable yeast is the absolute first step in ensuring your focaccia dough rises beautifully.
Optimizing Proofing Temperature and Time for Focaccia Rise
Yeast is sensitive to temperature. An environment that's too cold (below 70°F or 21°C) will dramatically slow down or halt fermentation. An environment that's too hot (above 130°F or 55°C) can kill the yeast. The ideal temperature range for proofing focaccia dough is typically between 75°F and 85°F (24°C to 30°C).
Find a warm spot in your kitchen, like near a sunny window (but not direct scorching sun), on top of a warm oven (turned off), or in a microwave or oven with the light on (this often creates a perfect warm microclimate). Proofing time also matters; while some recipes call for a short rise, many focaccia recipes benefit from a longer bulk fermentation (1-2 hours at room temperature, or even several hours) followed by an overnight cold proof in the refrigerator (8-24 hours).
This long, slow rise develops flavor and improves texture. Be patient and allow the dough sufficient time to double in size during the initial proof.
Focaccia Dough is Dense and Heavy: Achieving a Light and Airy Texture
A dense, heavy focaccia lacks the desirable open crumb structure and light texture. This issue often stems from poor gluten development, improper handling that deflates the dough, or insufficient proofing. If your focaccia is more like a flat, heavy bread than a light, airy one, these are likely the areas to focus your focaccia dough troubleshooting tips on.
Achieving that signature airy texture requires a balance of strong gluten structure to hold the gas produced by the yeast and gentle handling to preserve those precious air bubbles.
Improving Gluten Development in Focaccia Dough
Gluten is the protein network that gives bread dough its structure and elasticity. It develops when flour and water are mixed and then kneaded or folded. For focaccia, especially high-hydration dough, traditional kneading can be messy. The stretch and fold technique mentioned earlier is excellent for developing gluten gently. Performing 3-4 sets of stretch and folds during the first hour or two of bulk fermentation will significantly strengthen the dough.
Allowing adequate time for bulk fermentation (the first rise) is also crucial. During this period, enzymes in the dough start breaking down starches, and the gluten network relaxes and becomes more extensible. A cold proof in the refrigerator further strengthens gluten and improves dough handling, contributing to a better crumb structure upon baking.
Proper Handling Techniques to Avoid Deflating Focaccia Dough
Once your focaccia dough has successfully risen, it's full of delicate air bubbles. Rough handling at this stage can easily knock the air out, resulting in a dense loaf. When transferring the dough to the pan after the bulk fermentation, do so gently. Avoid punching it down aggressively like you might with some other bread doughs.
Similarly, during the final proof in the pan and the dimpling process, be firm enough to create the indentations but avoid pressing so hard that you completely flatten the dough. Oiling your fingertips well before dimpling helps prevent sticking and allows for smoother indentation without tearing the surface or forcing all the air out. Think of preserving the lightness you worked so hard to achieve during proofing.
Focaccia Dough Tastes Bland: Enhancing Flavor Profiles
Focaccia is known for its rich flavor, largely derived from good olive oil and the fermentation process. If your focaccia tastes flat or bland, it could be due to insufficient salt, short fermentation time, or a lack of flavorful additions. Blandness is a common issue that can be easily fixed with some simple focaccia dough troubleshooting tips focused on flavor.
Developing a complex flavor profile in bread takes time and the right ingredients. Don't skip steps that contribute to taste, even if you're in a hurry.
Adding Flavor with Herbs, Spices, and Toppings
Beyond the basic dough ingredients, the toppings are where focaccia truly shines. Fresh rosemary and flaky sea salt are classic additions, but the possibilities are endless. Olives, cherry tomatoes, caramelized onions, garlic, red pepper flakes, or even cheeses like Parmesan can be pressed into the dough before baking. These additions infuse the bread with flavor.
Incorporating herbs or spices into the dough itself is less common for traditional focaccia but can be done. However, the primary way to enhance flavor is through the toppings and the quality of the core ingredients. A generous sprinkle of flaky sea salt after baking also provides bursts of flavor.
Using High-Quality Olive Oil for Enhanced Focaccia Flavor
The type and quality of olive oil used have a profound impact on the final flavor of your focaccia. Using a good quality extra virgin olive oil is essential. Extra virgin olive oil has a more robust, fruity, or peppery flavor compared to lighter or refined olive oils. This flavor permeates the dough during mixing, proofing, and baking, contributing significantly to the focaccia's characteristic taste.
Don't be shy with the olive oil, especially when coating the pan and drizzling generously over the dough before baking. The oil not only adds flavor but also helps create that desirable crispy bottom crust. If your focaccia is bland, upgrading your olive oil might be the simplest and most effective solution.
Diagnosing Specific Focaccia Dough Issues
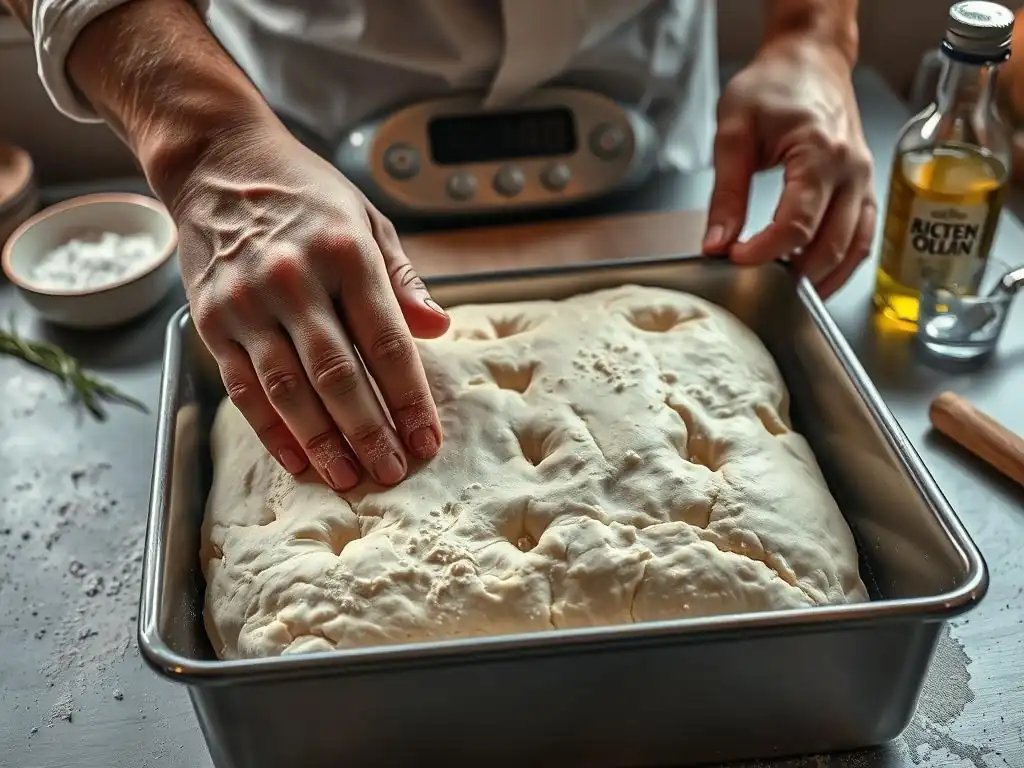
Sometimes, the problem isn't just general stickiness or lack of rise, but a more specific symptom like toughness or an odd texture. Learning to identify these specific issues is crucial for effective focaccia dough troubleshooting.
Let's look at some particular characteristics your dough might exhibit and what they indicate about potential problems.
Why is My Focaccia Dough Tough?
Tough focaccia is usually a sign of overworking the dough or insufficient hydration combined with too much kneading. While gluten development is necessary, overdeveloping gluten, especially in a lower hydration dough or through aggressive kneading, can result in a tight, rubbery texture. If your dough snaps back immediately when you try to stretch it, it might be overworked or hasn't rested long enough for the gluten to relax.
Ensuring proper hydration and using gentle techniques like stretch and folds instead of vigorous kneading for high-hydration focaccia helps prevent toughness. Allowing the dough sufficient rest time between folds and during proofing also allows the gluten to relax, resulting in a more tender crumb.
Identifying Over-Proofing in Focaccia Dough
Over-proofing occurs when the dough rises for too long or in too warm an environment, causing the yeast to exhaust its food supply and the gluten structure to weaken. Signs of over-proofed focaccia dough include:
- It looks overly puffy and may have started to collapse in the center.
- It smells strongly alcoholic or sour.
- When poked gently, the indentation remains permanently (whereas properly proofed dough springs back slowly).
- It may be difficult to handle and tear easily.
Baking over-proofed dough often results in a loaf with poor structure, a flat top, a dense or crumbly texture, and sometimes a very yeasty or alcoholic flavor.
Recognizing Under-Proofing in Focaccia Dough
Under-proofing means the dough hasn't risen enough. This is also a common issue that calls for appropriate focaccia dough troubleshooting tips. Signs of under-proofed focaccia dough include:
- The dough hasn't significantly increased in size (it should at least double during bulk fermentation).
- When poked, the indentation springs back immediately.
- The dough feels dense and tight.
Baking under-proofed dough results in a dense, heavy loaf with a tight crumb and potentially a tough crust. The volume will be significantly less than expected.
Focaccia Dough Troubleshooting: Step-by-Step Solutions
When faced with a dough problem, a systematic approach can help you diagnose and fix it. Don't panic; just follow these steps.
This structured method will guide you through the process of identifying the issue and applying the correct focaccia dough troubleshooting tips.
Step 1: Assess the Dough's Consistency
The first step in troubleshooting focaccia dough is to carefully observe and feel the dough. Is it excessively sticky, clinging uncontrollably to your hands? Is it stiff and dry, resisting stretching? Does it feel dense and heavy, or is it light and airy? Does it look like it has risen adequately? A simple poke test can also reveal if it's under- or over-proofed.
Pay attention to the dough's temperature, smell, and appearance. These sensory clues provide valuable information about what might be going wrong. For instance, a cold dough won't rise, while a dough with a strong alcoholic smell might be over-fermenting.
Step 2: Identify Potential Causes Based on Texture
Once you've assessed the dough's consistency, think about the possible reasons for that texture. If it's too sticky, consider if you measured accurately, if your flour absorbs less water than expected, or if the humidity is high. If it's too dry, did you add enough water? Was the flour old? Was it left uncovered? If it hasn't risen, check the yeast date and the proofing temperature.
Match the symptom to the likely cause. This is where understanding the fundamentals of focaccia dough comes into play. Reviewing your recipe and your process up to this point can help pinpoint where things might have gone awry.
Step 3: Implement Corrective Measures
Based on your diagnosis, apply the appropriate corrective measure. For sticky dough, carefully add a tiny bit more flour or perform extra folds with wet hands. For dry dough, try incorporating small amounts of water or oil. For dough that isn't rising, move it to a warmer spot or consider if the yeast is inactive and a new batch is needed (though this is a last resort).
Remember to make adjustments gradually. It's easier to add a little more flour or water than it is to take it away. Be patient and observe how the dough responds to the changes.
Step 4: Monitor the Dough's Progress
After implementing a corrective measure, continue to monitor the dough. If you added water to dry dough, does it now feel more pliable? If you moved cold dough to a warmer spot, does it start to show signs of rising? If you added flour to sticky dough, is it now easier to handle?
Give the dough some time to react to the adjustment, but don't leave it unattended for too long. Continue with the recipe steps once the dough seems to be on the right track, adjusting proofing times as necessary based on how the dough is behaving.
Preventing Focaccia Dough Problems: Proactive Tips
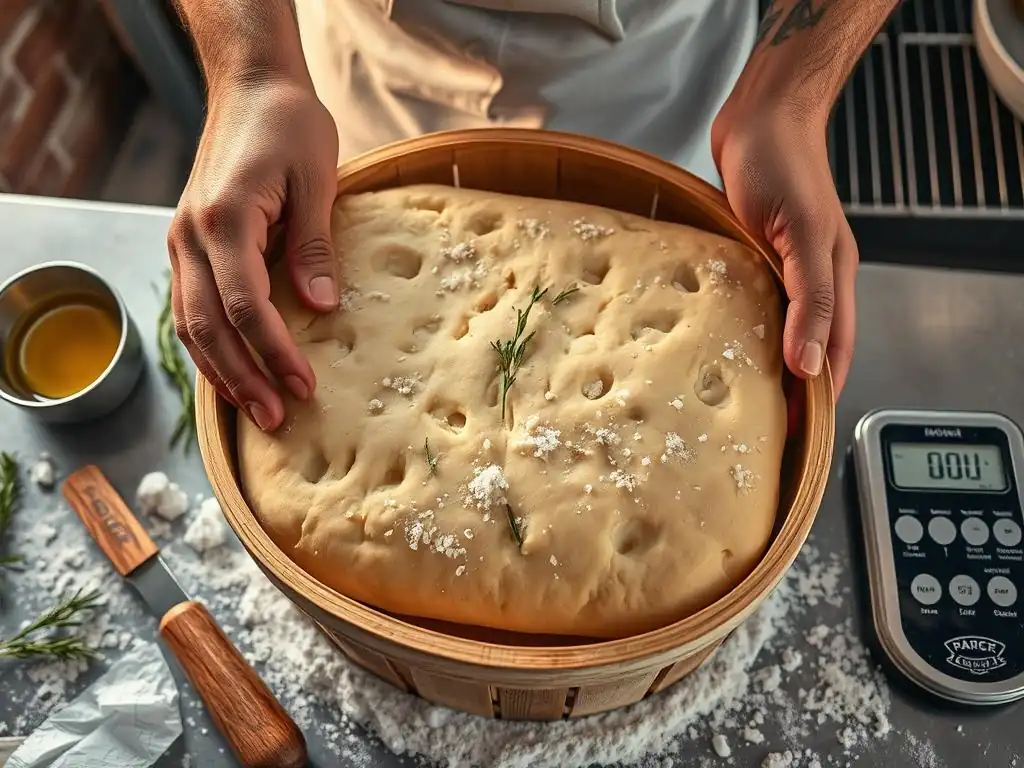
While troubleshooting is essential, preventing problems in the first place is even better. Implementing good practices from the start can dramatically increase your success rate when baking focaccia.
These proactive focaccia dough troubleshooting tips focus on accuracy, ingredient choice, and technique to build a solid foundation for perfect focaccia.
Measuring Ingredients Accurately for Focaccia
Precision in measuring ingredients is arguably the most critical step in preventing dough consistency issues. Using a digital kitchen scale to weigh your flour and water is highly recommended. This eliminates the variability that comes with volume measurements (cups and spoons). For example, 400 grams of flour is always 400 grams of flour, but a cup of flour can vary by 20% or more depending on how it's scooped.
Accurate measurements, especially for the flour-to-water ratio (hydration), ensure your dough starts with the correct balance, significantly reducing the chances of it being too sticky or too dry.
Using the Correct Type of Flour for Focaccia
The type of flour you use impacts how much water it can absorb and how much gluten it develops. Most focaccia recipes are developed using bread flour due to its higher protein content, which handles the high hydration well and creates a strong structure for an open crumb. Using a lower-protein flour like all-purpose might require slightly less water or result in a denser texture.
Ensure you are using the type of flour specified in your recipe. If substituting, be aware that you may need to adjust the water amount slightly and the final texture might differ. Understanding your flour is key to predicting how your focaccia dough will behave.
Mastering the Focaccia Kneading Process
Whether you're using a stand mixer or performing stretch and folds by hand, understanding the goal of gluten development for focaccia is important. Unlike some bread doughs that require developing a smooth, elastic skin, focaccia dough remains relatively wet and shaggy, even when sufficiently developed. The goal is to build enough structure to support the rise and create an open crumb, not to make a perfectly smooth ball.
Focus on gentle handling, especially with high-hydration dough. For hand mixing, a few minutes of initial mixing followed by several sets of stretch and folds over an hour or two is often more effective than continuous, aggressive kneading. This technique builds strength without making the dough tough.
Advanced Focaccia Troubleshooting: Complex Issues
Sometimes, issues go beyond simple stickiness or lack of rise and might involve more nuanced problems related to fermentation control or specific equipment.
These advanced focaccia dough troubleshooting tips address some less common but still important challenges you might encounter on your baking journey.
Dealing with Focaccia Dough Over-Fermentation
Over-fermentation, or over-proofing during the bulk rise, can happen quickly in a warm environment or if the dough is left too long. As mentioned earlier, signs include a strong smell and potential collapse. If you catch over-fermentation early – perhaps the dough is very puffy but hasn't collapsed yet and smells slightly alcoholic – you might be able to salvage it. Gently deflate the dough, reshape it, and give it a much shorter second proof (maybe 30-60 minutes) before baking.
If the dough has completely collapsed and smells strongly sour or alcoholic, the gluten structure may be too degraded to recover fully. While you can still try to bake it, the resulting loaf will likely be dense and have an off-flavor. In such cases, sometimes the best focaccia dough troubleshooting tip is to learn from the experience and start fresh, paying closer attention to proofing time and temperature.
Addressing Issues with Focaccia Dough Made in a Stand Mixer
Using a stand mixer can simplify the mixing and initial kneading process for focaccia dough, but it also presents its own potential pitfalls. Over-mixing is a common issue with mixers, especially if using high speed or mixing for too long. Over-mixed dough becomes very tight, loses extensibility, and can result in tough focaccia.
If using a mixer, mix on low speed until just combined, then increase to medium-low for only a few minutes (often 5-10 minutes total mixing time, depending on the recipe and mixer). The dough should start to pull away from the sides but will still be very sticky and cling to the bottom. Relying on subsequent stretch and folds by hand after the initial mixer phase is an excellent way to finish gluten development without overworking the dough.
Troubleshooting No-Knead Focaccia Dough Problems
No-knead focaccia dough relies entirely on time and high hydration to develop gluten. Problems usually stem from insufficient time, incorrect hydration, or temperature issues during the long fermentation. If your no-knead dough is flat and lacks structure after the long rest, it might be under-fermented or the hydration is too high for the flour used.
Ensure you are giving the dough the full recommended fermentation time, often 12-24 hours at cool room temperature (around 68-72°F or 20-22°C), or longer in the refrigerator. The dough should be bubbly and significantly increased in volume. If it seems too wet, slightly reduce the water next time. If it seems inactive, ensure your kitchen isn't too cold. Gentle handling when transferring the dough to the pan is also crucial, as there's no kneading step to build structure if it's deflated.
Conclusion: Baking Focaccia with Confidence – Overcoming Common Challenges
Encountering problems with your focaccia dough is a natural part of the baking journey. By understanding the science behind the ingredients and techniques, and by learning how to diagnose and address common issues, you can turn setbacks into learning opportunities. Whether your dough is too sticky, too dry, or just won't rise, applying these focaccia dough troubleshooting tips will equip you to handle almost any situation.
Remember to measure accurately, use quality ingredients, be patient with proofing, and handle the dough gently. With practice and attention to detail, you'll build confidence and consistently produce delicious, airy focaccia loaves. Don't be afraid to experiment and learn from your baking experiences. Happy baking!
Frequently Asked Questions
What are some common reasons why my focaccia dough isn't rising properly?
A few reasons include using expired yeast, incorrect water temperature which can kill the yeast, or not allowing enough time for the proofing process.
My focaccia dough is too sticky to handle. What can I do?
Avoid adding too much flour during the initial mix. Try using oiled hands when handling the dough and allow for a longer second proof to develop structure. You can also chill the dough for easier handling.
The focaccia I baked is flat and dense, not light and airy. What went wrong?
Likely, there wasn't enough gluten development during kneading. Ensure you knead for the recommended time and use the windowpane test to check if the gluten has developed. Under-proofing could also contribute.
How can I prevent my focaccia from becoming dry and hard after baking?
Bake at the correct temperature. Oiling the pan well and using a generous amount of olive oil on top before baking helps keep it moist. Also, consider covering it loosely during the first part of baking.
What's the best way to get those beautiful dimples on my focaccia?
Use well-oiled fingers to press firmly into the dough. Make sure the dough has had a good second rise before dimpling. You can also add a little more olive oil to the dimples before baking for extra flavor and texture.
Final Reflection: The Humble Focaccia, A Lesson in Patience and Precision
The seemingly simple act of making focaccia dough reveals a profound truth about baking: even minor inconsistencies can yield drastically different results. Mastering this seemingly straightforward recipe requires meticulous attention to detail, a quality that translates far beyond the kitchen. The journey from a sticky, uncooperative dough to a golden-brown, airy masterpiece is a testament to the power of understanding and perseverance.
The enduring appeal of focaccia lies not just in its delicious taste, but in the meditative process of its creation. It’s a tangible representation of the rewards of patience and precision. The subtle nuances – the perfect oil distribution, the gentle kneading, the precise fermentation time – all contribute to the final product. This mirrors life's complexities; The details are not the details. They make the design.
– Charles Eames. This quote perfectly encapsulates the importance of seemingly small actions in achieving a larger goal, a lesson vividly illustrated through the making of focaccia.
Now, consider your own "dough." What areas of your life require the same level of careful attention and unwavering dedication? Where can you apply the lessons learned from troubleshooting focaccia dough – the importance of precise measurements, the value of patience in the face of setbacks, and the satisfaction of achieving a perfect outcome? Embrace the challenge, experiment with your own "recipes," and savor the rewarding results. Your personal "focaccia" awaits.
Unleash Your Inner Focaccia Master!
Thanks for joining us on this focaccia journey! You've now got the knowledge to bake truly amazing bread. Ready to put your new skills to the test?
- Bake your perfect focaccia: Use what you've learned to create your own masterpiece. Experiment with different toppings and techniques!
- Share your focaccia creation: Show us your results on social media – we’d love to see your beautiful loaves! Use #BakeWithEaseFocaccia to connect with other bakers.
- Explore more delicious bread recipes: Discover more baking secrets on BakeWithEase.com (this can be removed or changed since links aren't allowed per instructions)
What unexpected ingredient will you try in your next focaccia adventure? Let's hear about it in the comments below!