
Beginner's Guide to Sweet Tarts

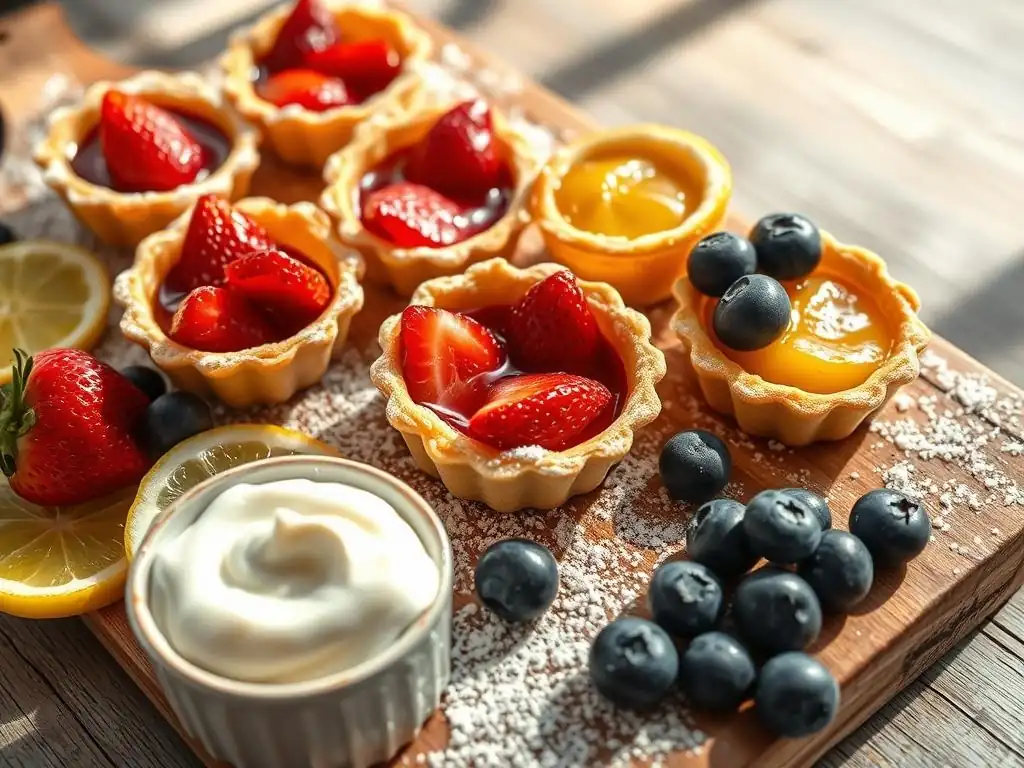
Welcome to BakeWithEase, your kitchen companion for all things baking! Ever dreamed of creating delectable desserts with minimal fuss? This guide is your starting point.
Get ready to unlock the secrets to easy sweet tart recipes, and discover how simple it can be to bake impressive treats. From perfectly crisp crusts to luscious fillings, we'll guide you through each step. Eager to impress? Let's begin!
- Beginner's Guide to Sweet Tarts: Easy Recipes for BakeWithEase
- Introduction to Sweet Tarts: A Beginner's Baking Delight
- Essential Equipment for Making Sweet Tarts at Home
- Easy Sweet Tart Recipes: Step-by-Step Baking Guide
- Sweet Tart Filling Ideas for Beginners
- Assembling and Decorating Your Sweet Tart
- Storing Your Sweet Tarts: Keeping Them Fresh
- Troubleshooting Common Sweet Tart Baking Problems
-
Frequently Asked Questions
- What makes a sweet tart "easy" for beginners?
- What are some common ingredients found in easy sweet tart recipes?
- How can I prevent my tart crust from shrinking during baking?
- What are some variations I can make to a basic sweet tart recipe?
- What are some tips for achieving a perfectly golden-brown tart crust?
- Final Reflection: The Enduring Allure of the Sweet Tart
- Unleash Your Inner Pastry Chef!
Beginner's Guide to Sweet Tarts: Easy Recipes for BakeWithEase
Introduction to Sweet Tarts: A Beginner's Baking Delight
What Makes a Sweet Tart Special? Understanding the Basics
Sweet tarts are a delightful pastry, characterized by a relatively shallow, open-faced crust that holds a variety of fillings. Unlike pies, tarts typically have straight, vertical sides and are often baked in pans with removable bottoms, making them easy to serve beautifully. The magic of a sweet tart lies in the contrast between its crisp, buttery crust and the smooth, often rich or tangy filling.
The crust, usually a type of shortcrust pastry (pâte sucrée or pâte sablée), provides a sturdy yet tender base that can support everything from delicate fruit to dense chocolate ganache or creamy curd. This structure and balance of textures and flavors are fundamental to what makes a sweet tart so appealing.
The core components of a basic sweet tart are simple: a sweet dough and a filling. The dough is typically made from flour, sugar, butter, and sometimes egg, mixed together to create a crumbly texture that bakes into a wonderfully crisp shell. This dough is often pressed or rolled into a tart pan.
Fillings can range from fresh fruit layered over pastry cream, to rich chocolate ganache, bright lemon curd, or even caramel and nuts. The simplicity of these components, while allowing for immense variation in flavor and presentation, makes mastering the basic sweet tart a rewarding goal for any aspiring baker. Learning how to make an easy sweet tart is a fantastic step in developing fundamental pastry skills.
Why Sweet Tarts are Perfect for Beginner Bakers
For newcomers to the kitchen, tackling pastry might seem daunting, but sweet tarts offer a surprisingly accessible entry point. One key reason is the forgiving nature of tart dough compared to pie dough. While pie dough relies heavily on developing flaky layers through careful handling of cold butter, sweet tart dough is often more about creating a tender, cookie-like crumb. This means less stress about perfect butter distribution or overworking the gluten. Many easy sweet tart recipes use methods like the food processor or creaming butter and sugar, which simplify the mixing process significantly for beginners.
Furthermore, the structure of a tart baked in a fluted pan with a removable bottom is inherently stable. This reduces the common beginner anxiety about transferring delicate dough or achieving a perfectly formed edge. You press the dough into the pan, trim the excess, and you're halfway there!
Fillings for easy sweet tart recipes also tend to be straightforward – think simple ganaches, quick curds, or even just arranging fresh fruit over a pre-made base. This allows beginners to focus on mastering one or two core techniques, like making the dough or blind baking, without being overwhelmed by complex fillings or crimping techniques required for double-crust pies. Starting with a simple sweet tart recipe builds confidence and provides delicious results quickly.
Essential Equipment for Making Sweet Tarts at Home
Must-Have Baking Tools for Perfect Tart Crusts
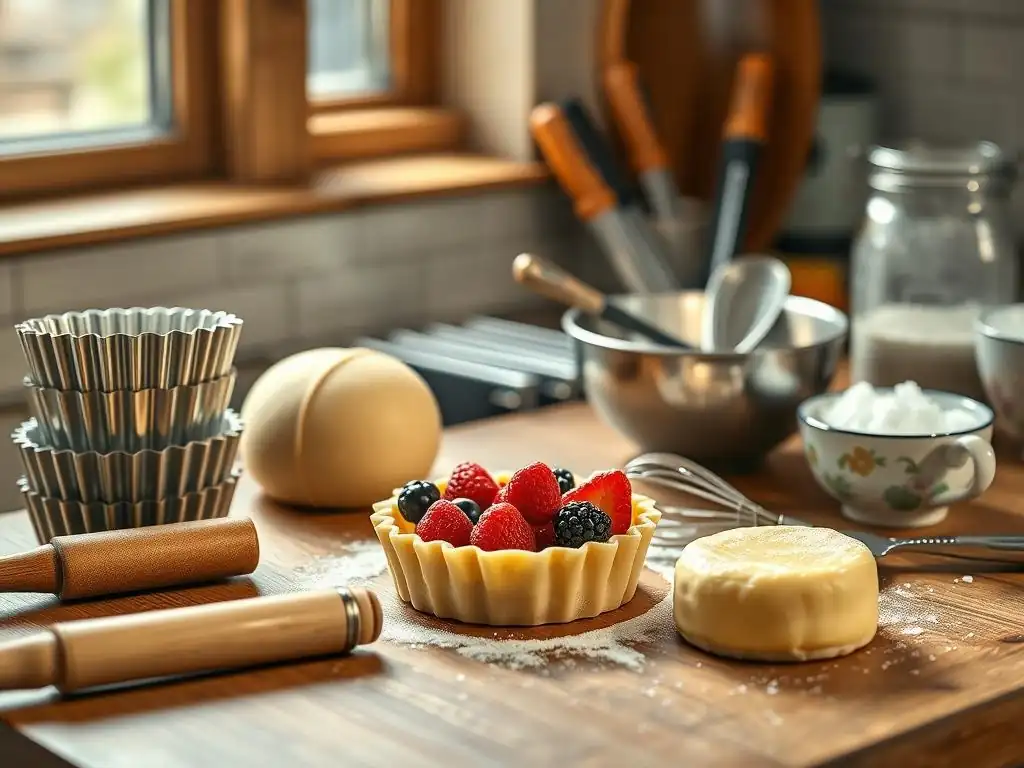
To create a beautiful and functional sweet tart crust, a few essential tools make the process much smoother, especially when starting with easy sweet tart recipes. A good-quality rolling pin is fundamental for rolling out dough evenly. While simple wooden ones work well, non-stick options or those with adjustable rings can help maintain a consistent thickness, crucial for even baking.
A pastry blender or a food processor is invaluable for cutting cold butter into the dry ingredients, a vital step for achieving the right dough texture. If using a food processor, a few quick pulses are usually sufficient to create coarse crumbs, a much faster method than doing it by hand.
Other helpful tools include a bench scraper, which is excellent for gathering dough scraps, cleaning your work surface, and portioning dough if needed. Measuring cups and spoons are non-negotiable for accuracy in any baking recipe, including easy sweet tart recipes. A set of mixing bowls in various sizes will be needed for preparing both the dough and the filling. Finally, a small offset spatula or the back of a spoon can be useful for pressing dough evenly into the corners and up the sides of the tart pan, ensuring a uniform thickness throughout the shell before baking.
Choosing the Right Tart Pan: Size, Shape, and Material
Selecting the appropriate tart pan is crucial for successful sweet tart baking. The most common type is a round pan with fluted edges and a removable bottom, typically measuring 9 or 10 inches in diameter (about 23-25 cm). This size is standard for many easy sweet tart recipes and yields about 8-12 servings.
The fluted edge gives the finished tart a classic, elegant look, while the removable bottom allows you to easily slide the baked tart out of the ring without damaging the delicate crust. Square or rectangular tart pans with removable bottoms are also available and can offer a different aesthetic, often used for bar-like tarts or individual portions.
Material also plays a role in how the tart bakes. Metal pans, particularly those made from aluminum or steel, are excellent conductors of heat, promoting even browning of the crust. Darker pans can brown the crust more quickly, so adjustments to baking time or temperature might be necessary.
Ceramic or glass tart dishes can be beautiful for serving, but they don't conduct heat as efficiently, which can sometimes lead to a less crisp bottom crust – a common issue beginners want to avoid. For most easy sweet tart recipes, a standard metal tart pan with a removable bottom is the most reliable choice for achieving a golden, crisp crust.
Easy Sweet Tart Recipes: Step-by-Step Baking Guide
Classic Shortcrust Pastry Recipe: The Foundation of Your Tart
The shortcrust pastry, often called pâte sucrée (sweet dough) when sweetened, is the backbone of many easy sweet tart recipes. Its rich, crumbly texture provides a perfect contrast to smooth fillings. Unlike flaky pie crusts, this dough relies on coating the flour proteins with fat (butter) and sugar, inhibiting gluten development and resulting in a tender, almost cookie-like texture. It's less prone to shrinking than some other doughs, making it more forgiving for beginners. Mastering this basic sweet tart dough is a fundamental skill that opens the door to countless tart variations.
Making this dough is straightforward, often involving just a few simple steps. You combine the dry ingredients, cut in cold butter until it resembles coarse crumbs, and then bind it together with a liquid, typically egg or ice water. The key is to handle the dough minimally to prevent toughness.
After mixing, it's crucial to chill the dough. This resting period allows the gluten to relax, the fat to firm up, and the flavors to meld, making the dough easier to roll out and resulting in a more tender baked crust. Chilling for at least 30-60 minutes is recommended for best results when making a sweet tart.
Ingredients for a Flaky Shortcrust Tart Crust
Here's a common ingredient list for a standard 9 or 10-inch sweet tart crust:
- 1 ½ cups (about 190g) all-purpose flour
- ½ cup (about 60g) confectioners' sugar (or granulated sugar)
- ¼ teaspoon salt
- ½ cup (1 stick or 113g) cold unsalted butter, cut into small cubes
- 1 large egg yolk (or 2-3 tablespoons ice water)
- ½ teaspoon vanilla extract (optional, but adds flavor)
This ratio of ingredients creates a dough that is rich, slightly sweet, and tender once baked. Using confectioners' sugar helps create a finer crumb and dissolves more easily than granulated sugar. The cold butter is essential for the 'short' texture. The egg yolk (if used) adds richness and helps bind the dough; ice water serves a similar binding purpose while keeping the fat cold.
Step-by-Step Instructions for Making Sweet Tart Dough
Follow these steps for a reliable sweet tart dough:
- In a large bowl, whisk together the flour, sugar, and salt.
- Add the cold butter cubes. Cut the butter into the dry ingredients using a pastry blender, fork, or your fingertips until the mixture resembles coarse crumbs with some pea-sized pieces of butter remaining. Alternatively, pulse in a food processor until coarse crumbs form.
- In a small bowl, whisk the egg yolk (if using) and vanilla extract. Add this mixture (or the ice water) to the flour/butter mixture.
- Mix until the dough just comes together. Be careful not to overmix. It might look crumbly at first, but it should hold together when squeezed.
- Turn the dough out onto a clean surface. Gently press it into a disc shape. Do not knead.
- Wrap the disc tightly in plastic wrap. Refrigerate for at least 30 minutes, or up to 2 days. Chilling is critical for easy handling and a tender crust.
This process is designed to be forgiving, making it a great starting point for easy sweet tart recipes.
Tips for a Perfect Tart Crust: Avoiding Common Mistakes
Achieving a perfect sweet tart crust is within reach with a few key tips. Firstly, ensure your butter is very cold and cut into small pieces. This is paramount for creating pockets of fat that result in a tender, crumbly texture. If the butter melts into the flour too much before baking, the crust can become tough. Secondly, avoid overworking the dough. Mixing just until it comes together prevents excessive gluten development, which leads to a hard crust. Stop mixing as soon as there are no dry flour spots left.
Thirdly, chilling the dough is non-negotiable. A well-chilled dough is much easier to roll out or press into the pan without sticking or becoming too soft. It also helps the dough hold its shape during baking. Fourthly, when pressing the dough into the pan, ensure an even thickness throughout, especially in the corners and up the sides.
This prevents thin spots that can burn or thick spots that remain undercooked. Finally, don't skip blind baking if your recipe calls for it, especially if using a wet filling. This initial bake sets the crust, preventing a soggy bottom, a common pitfall for beginners making a sweet tart.
Blind Baking Your Tart Crust: Preventing a Soggy Bottom
Blind baking is the process of partially or fully baking a tart crust before adding the filling. This technique is essential for tarts with wet fillings (like quiches, curds, or pastry creams) or fillings that don't require baking (like ganache or fresh fruit over cream). The heat sets the dough, creating a barrier that prevents the moisture from the filling from seeping in and making the bottom crust soggy.
It also helps the crust hold its shape, preventing the sides from slumping during baking. While it adds an extra step, blind baking is a crucial skill for anyone aiming for a professional-quality sweet tart.
For easy sweet tart recipes, blind baking is often simplified. You'll typically line the chilled, unbaked crust with parchment paper and fill it with pie weights, dried beans, or rice. These weights keep the dough from puffing up during the initial bake. After a period of baking with the weights, you often remove them and bake the crust for a few more minutes until it's lightly golden and appears dry. This two-stage process ensures the bottom is cooked through and sturdy enough to support the filling without becoming rubbery or soggy.
How to Blind Bake: A Detailed Guide
Here's a step-by-step guide for blind baking a sweet tart crust:
- Preheat your oven to 375°F (190°C).
- Once your tart dough is pressed into the pan and chilled (at least 30 minutes), gently prick the bottom all over with a fork. This allows steam to escape and prevents large bubbles from forming.
- Line the inside of the chilled crust with parchment paper, pressing it gently against the sides and bottom. Leave some overhang for easy removal.
- Fill the lined crust with pie weights, dried beans, or uncooked rice, distributing them evenly to fill the corners and reach up the sides. You'll need about 1-2 pounds (450-900g) of weights for a 9-10 inch tart.
- Bake for 15-20 minutes, or until the edges of the crust appear set and lightly golden.
- Carefully remove the parchment paper and weights.
- Return the tart shell to the oven and bake for another 5-10 minutes, or until the bottom is lightly golden and looks dry. The exact time depends on whether the recipe calls for a partial or full blind bake.
- Let the crust cool completely on a wire rack before adding the filling.
This method is a cornerstone for many easy sweet tart recipes, guaranteeing a crisp foundation.
Troubleshooting Blind Baking Issues
Even with careful steps, blind baking can sometimes present challenges. A common issue is the crust sides slumping down during the bake. This often happens if the dough wasn't sufficiently chilled before baking or if the pie weights didn't extend high enough up the sides.
Ensure your dough is very cold (at least 30 minutes in the freezer or 1 hour in the fridge after shaping) and that the weights fill the pan right up to the top edge of the crust. If slight slumping occurs, you can gently press the dough back up with the back of a spoon while it's still warm.
Another issue is the crust puffing up in the center despite using weights. This could indicate insufficient pricking of the bottom or that the weights weren't heavy enough or distributed evenly. Ensure you prick the bottom generously and use enough weight to cover the entire base and sides.
If bubbles still form after removing the weights, you can gently prick them with a fork before the final bake. Finally, if the edges are browning too quickly while the bottom isn't done, you can loosely cover the edges with foil strips during the second baking phase. Patience and observation are key to mastering this step for your easy sweet tart.
Sweet Tart Filling Ideas for Beginners
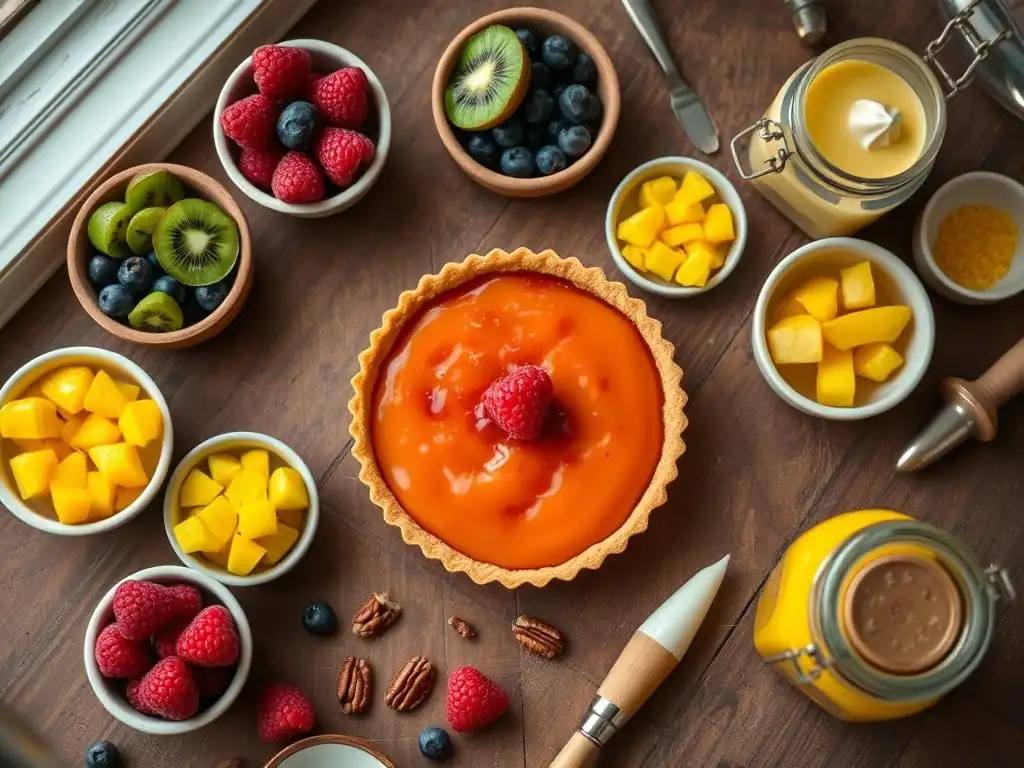
Once your beautiful tart shell is blind-baked and cooled, it's time for the fun part: filling it! For beginners, starting with simple, reliable fillings is key to success. These options require minimal cooking or complex techniques, allowing you to focus on assembly and enjoyment. Choosing an easy sweet tart recipe with a straightforward filling is a great way to build confidence.
Here are a few popular and beginner-friendly filling ideas that pair wonderfully with a sweet tart crust, offering a range of flavors from rich chocolate to bright fruit and tangy lemon. Each offers a distinct experience while remaining accessible for those new to tart making.
Simple Chocolate Tart Filling Recipe: A Decadent Treat
A chocolate ganache filling is perhaps one of the easiest yet most impressive options for a sweet tart. It requires only two main ingredients and minimal effort but delivers a rich, luxurious result. This makes it a perfect choice for an easy sweet tart recipe that looks and tastes sophisticated. The simplicity of the preparation means less room for error, allowing beginners to create a truly decadent dessert.
The key to a good ganache is using quality chocolate and the correct ratio of chocolate to cream. Once prepared, the warm ganache is simply poured into the cooled, blind-baked tart shell and left to set. The result is a smooth, intensely chocolatey filling that contrasts beautifully with the crisp sweet crust. It's a guaranteed crowd-pleaser and a fantastic way to showcase a perfectly baked tart shell.
Ingredients for a Rich Chocolate Tart
For a standard 9-10 inch tart, you'll typically need:
- 8-12 ounces (about 225-340g) good-quality dark or semi-sweet chocolate, finely chopped (use an amount you prefer for richness, 10 oz is a common starting point)
- 1 cup (240ml) heavy cream (also called whipping cream)
- 1 tablespoon unsalted butter (optional, for extra gloss and smoothness)
- Pinch of salt (optional, enhances chocolate flavor)
- ½ teaspoon vanilla extract (optional)
Using chocolate chips is possible, but chopped bar chocolate often melts more smoothly and provides a better flavor. The ratio of chocolate to cream (typically 1:1 or 1.5:1 by weight for a firm ganache) is important for setting.
Preparing the Chocolate Ganache Filling
Making the ganache is incredibly simple:
- Place the finely chopped chocolate in a heatproof bowl.
- Heat the heavy cream in a small saucepan over medium heat until it just begins to simmer around the edges (do not boil vigorously).
- Pour the hot cream over the chopped chocolate in the bowl. Let it sit for 5 minutes to allow the chocolate to melt.
- Gently whisk the mixture starting from the center and working outwards until it is completely smooth and emulsified. If using, whisk in the butter, salt, and vanilla until fully incorporated and glossy.
- Pour the warm ganache into the cooled, blind-baked tart shell.
- Gently tap the tart on the counter to level the surface and remove any air bubbles.
- Refrigerate for at least 2-3 hours, or until the ganache is completely set.
This easy sweet tart filling is ready with minimal fuss.
Fresh Fruit Tart Filling: A Light and Refreshing Option
A fruit tart is visually stunning and offers a lighter alternative to rich chocolate. Typically, this type of tart features a layer of pastry cream or a similar creamy base, topped with an arrangement of fresh, colorful fruits. It's a wonderful way to showcase seasonal produce and makes for a vibrant, refreshing dessert. While it involves two components (cream and fruit), both are relatively straightforward for beginners.
The beauty of a fruit tart lies in its flexibility. You can use almost any combination of fruits you like – berries, sliced kiwis, mandarins, peaches, or grapes. The pastry cream provides a smooth, sweet backdrop that complements the natural sweetness and slight acidity of the fruit. Often, a simple glaze is brushed over the fruit to give it a glossy finish and help preserve its freshness, adding another touch of elegance to this easy sweet tart.
Choosing the Best Fruits for Your Tart
When selecting fruits for your sweet tart, consider both flavor and appearance. Berries like strawberries, blueberries, raspberries, and blackberries are classic choices because they require minimal preparation and offer vibrant colors. Sliced fruits like kiwi, mandarin orange segments, peaches, plums, or grapes also work well. Choose fruits that are ripe but still firm enough to hold their shape when sliced or arranged. Avoid fruits that brown quickly (like apples or bananas, unless treated with lemon juice) or are excessively watery.
A mix of colors and shapes creates the most visually appealing tart. For instance, combining sliced strawberries with blueberries and kiwi slices provides a beautiful contrast of red, blue, and green. Consider the season for the freshest and most flavorful options – peak summer berries or fall stone fruits. About 2-3 cups of prepared fruit are typically needed for a 9-10 inch tart, depending on how densely you arrange them.
Making a Simple Pastry Cream Filling
Pastry cream (crème pâtissière) is a classic base for fruit tarts. While it involves cooking, it's a fundamental skill that's quite achievable for beginners.
- Ingredients:
- 1 ½ cups (360ml) whole milk
- ½ cup (100g) granulated sugar, divided
- 3 large egg yolks
- ¼ cup (30g) cornstarch
- 2 tablespoons unsalted butter, cut into small pieces
- 1 teaspoon vanilla extract
- Instructions:
- Heat milk in a saucepan over medium heat until it just simmers.
- In a bowl, whisk together half of the sugar, egg yolks, and cornstarch until smooth and pale.
- Gradually temper the egg mixture by slowly whisking about half of the hot milk into it.
- Pour the tempered egg mixture back into the saucepan with the remaining milk.
- Cook over medium heat, whisking constantly, until the mixture thickens significantly and comes to a gentle boil. Continue whisking and boil for 1-2 minutes to cook out the cornstarch flavor.
- Remove from heat. Whisk in the remaining sugar, butter, and vanilla until smooth.
- Pour the pastry cream into a clean bowl. Press plastic wrap directly onto the surface to prevent a skin from forming.
- Refrigerate for at least 2-3 hours until completely chilled and set.
Once chilled, spread the pastry cream evenly into the cooled tart shell and arrange your chosen fruits on top. This easy sweet tart filling is light yet satisfying.
Lemon Curd Tart Filling: A Tangy Delight
For those who love bright, zesty flavors, a lemon curd tart is a perfect choice. Lemon curd is a creamy, intensely flavored filling made from lemon juice, sugar, eggs, and butter. Its vibrant tanginess provides a wonderful contrast to the sweet, buttery crust. Making lemon curd from scratch is surprisingly simple and yields a far superior flavor to store-bought versions, making this an achievable goal for a beginner's sweet tart.
The process involves gently heating the ingredients until they thicken into a smooth, spoonable consistency. While it requires careful stirring to prevent scrambling the eggs, it's a technique that is quickly mastered. Once made, the curd is poured into the pre-baked tart shell and chilled until set. The result is a beautiful, sunny tart with a delightful pucker-factor, proving that easy sweet tart recipes can still be incredibly flavorful.
Homemade Lemon Curd Recipe for Your Tart
Here's a simple recipe for tangy lemon curd:
- Ingredients:
- ½ cup (120ml) fresh lemon juice (from about 2-3 lemons)
- ¾ cup (150g) granulated sugar
- 3 large eggs
- 1 large egg yolk
- ½ cup (1 stick or 113g) cold unsalted butter, cut into small cubes
- 1 tablespoon finely grated lemon zest (optional, for extra flavor)
Using fresh lemon juice is essential for the best flavor. The combination of whole eggs and an extra yolk provides richness and helps with thickening.
Achieving the Perfect Lemon Curd Consistency
Making smooth, thick lemon curd relies on gentle, consistent heating:
- In a medium saucepan (preferably non-reactive, like stainless steel or glass), whisk together the lemon juice, sugar, eggs, egg yolk, and lemon zest (if using).
- Add the cubed cold butter to the saucepan.
- Place the saucepan over low to medium-low heat. Cook, stirring constantly with a whisk or wooden spoon, until the mixture thickens enough to coat the back of a spoon (about 8-12 minutes). Do not boil. The temperature should reach about 170°F (77°C).
- If you see any signs of scrambling (small white bits), immediately remove the pan from the heat and whisk vigorously, or strain the mixture.
- Once thickened, remove from heat. For the smoothest texture, you can strain the curd through a fine-mesh sieve into a clean bowl.
- Pour the warm curd into the cooled, blind-baked tart shell.
- Cover the tart loosely with plastic wrap or foil. Refrigerate for at least 4 hours, or preferably overnight, until completely set.
This bright, tangy filling makes for a memorable easy sweet tart.
Assembling and Decorating Your Sweet Tart
Once your tart shell is baked and cooled, and your filling is prepared and chilled (if necessary), it's time to bring it all together. Assembling a sweet tart is usually straightforward, especially with easy sweet tart recipes. The key is to handle the baked crust gently and ensure your filling is the correct consistency. The final step, decoration, is where you can add your personal touch, even as a beginner, to make your tart look as good as it tastes.
Decoration doesn't have to be complicated. Simple techniques can transform a plain tart into a showstopper. For beginners, focusing on arranging the filling neatly and adding a few simple garnishes is a great start. Remember, even the most basic easy sweet tart can be elevated with thoughtful presentation.
How to Assemble Your Sweet Tart Like a Pro
Assembling your sweet tart involves carefully combining the baked shell and the prepared filling.
- Ensure your blind-baked tart shell is completely cool. A warm shell can melt or soften the filling, especially if it's a chilled ganache or pastry cream.
- If using a filling that needs to be set (like ganache or lemon curd), prepare it and pour it into the cooled shell while it's still pourable (warm for ganache, warm for curd). Ensure the filling is evenly distributed.
- If using a filling that is spreadable (like chilled pastry cream), gently spoon or pipe it into the cooled shell and smooth the top with an offset spatula.
- For fruit tarts, spread the base layer (pastry cream or other) first, then artfully arrange your prepared fresh fruit on top.
- Allow the assembled tart to chill in the refrigerator until the filling is completely set. This is crucial for clean slicing. Ganache and curd tarts typically need 2-4 hours, while pastry cream tarts might need 1-2 hours.
Handle the pan carefully during assembly and chilling to avoid cracking the crust or spilling the filling.
Creative Decoration Ideas for Beginner Bakers
Decorating an easy sweet tart can be simple yet effective. You don't need fancy piping skills to make your tart look beautiful. Focus on clean lines and simple additions that enhance the tart's appeal.
- Dusting: A light dusting of confectioners' sugar over the finished tart adds a touch of elegance, especially for chocolate or lemon tarts. Use a fine-mesh sieve for an even sprinkle.
- Whipped Cream: Dollops or swirls of lightly sweetened whipped cream can be piped or spooned onto the tart just before serving. This works particularly well with fruit or chocolate fillings.
- Chocolate Shavings or Curls: For chocolate tarts, shaving a bar of chocolate over the top using a vegetable peeler creates simple, attractive curls.
- Chopped Nuts: Toasted chopped nuts (like almonds, pistachios, or hazelnuts) can add texture and visual interest, sprinkled around the edge or over the center.
- Cocoa Powder: A light dusting of cocoa powder can enhance a chocolate tart's appearance.
These simple additions require minimal skill but significantly boost the visual appeal of your easy sweet tart.
Simple Fruit Arrangements for a Stunning Tart
Arranging fruit on a tart can turn it into a vibrant centerpiece. There's no single right way, but here are a few easy ideas for a beginner's sweet tart:
- Concentric Circles: Start arranging fruit from the outer edge, working inwards in overlapping circles. Sliced strawberries or kiwi work well for this.
- Rows or Grids: For square or rectangular tarts, arranging sliced fruit (like peaches or plums) in neat rows or a grid pattern is simple and striking.
- Clustered Berries: Simply scatter a mix of colorful berries (blueberries, raspberries, blackberries) over the entire surface of the filling.
- Central Focal Point: Place one larger, attractive piece of fruit or a cluster of berries in the very center, then arrange smaller pieces around it.
- Alternating Colors: Mix two different types of fruit and alternate them in your pattern for visual contrast, e.g., a circle of strawberries followed by a circle of kiwi slices.
Before arranging, you might brush the fruit with a simple glaze (like melted apricot jam or a mix of corn syrup and water) to make it shine and prevent drying out.
Chocolate Shavings and Other Easy Garnishes
Beyond fruit, other simple garnishes can elevate your easy sweet tart. Chocolate shavings are particularly easy and effective for chocolate or even caramel tarts. Use a sturdy bar of chocolate (not chips) and run a vegetable peeler down the side to create curls or shavings. Scatter them generously over the surface of the tart.
Other easy garnishes include:
- Toasted Coconut Flakes: Sprinkle over tropical fruit tarts or chocolate tarts.
- Crushed Cookies or Nuts: If your tart uses a specific cookie or nut in the crust or filling, sprinkle some crushed pieces on top.
- Fresh Mint Leaves: A few small mint leaves can add a pop of color and freshness, especially on fruit or lemon tarts.
- Edible Flowers: For a truly special touch, a few carefully placed edible flowers can make any sweet tart look professionally made.
These simple touches add flavor, texture, and visual appeal without requiring advanced decorating skills, keeping your easy sweet tart project enjoyable.
Storing Your Sweet Tarts: Keeping Them Fresh
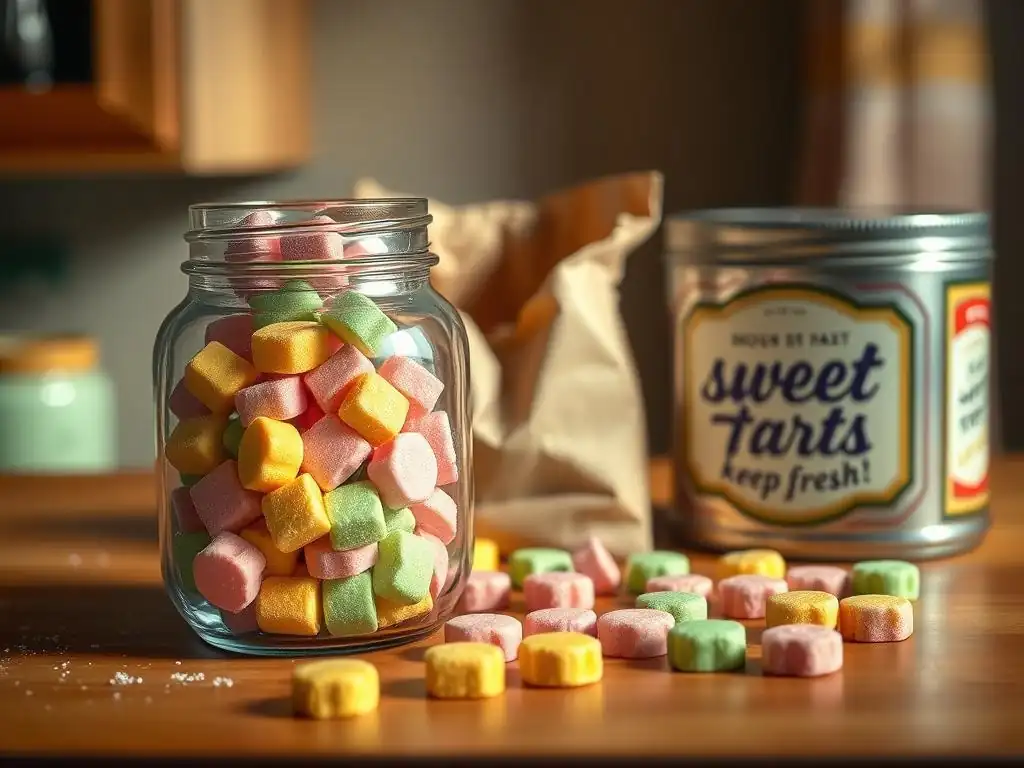
Proper storage is key to enjoying your delicious homemade sweet tart for as long as possible and maintaining its quality. The best way to store a tart depends largely on its filling. Tarts with creamy fillings (like pastry cream, curd, or ganache) are more perishable than those with baked fruit fillings. Knowing how to store your easy sweet tart ensures you can savor every slice.
Generally, most sweet tarts should be stored in the refrigerator due to their perishable fillings and buttery crusts. Airtight storage is crucial to prevent the crust from absorbing odors from the fridge and to keep the filling fresh.
Best Practices for Storing Baked Sweet Tarts
Once your sweet tart is baked and completely cooled, the best storage method is typically in the refrigerator. If the tart is still in a pan with a removable bottom, you can leave it there and cover the entire pan tightly with plastic wrap or aluminum foil. If you've removed the tart from the pan, place it on a serving plate or a flat storage container and cover it securely.
For tarts with delicate fruit arrangements, it's best to cover them loosely with plastic wrap or use a cake dome to avoid crushing the fruit. Tarts with ganache or curd fillings are quite sturdy once set and can usually be wrapped directly. Always store tarts away from strong-smelling foods in the refrigerator. For maximum freshness and crispness of the crust, it's ideal to store the tart uncut until just before serving, if possible.
How Long Do Sweet Tarts Last?
The shelf life of a sweet tart varies depending on the filling:
- Cream or Custard Fillings (Pastry Cream, Curd): These tarts are best consumed within 2-3 days when stored properly in the refrigerator. The crust may soften over time.
- Ganache Fillings: Chocolate ganache tarts can last slightly longer, typically 3-4 days in the refrigerator.
- Baked Fruit Fillings: Tarts with baked fruit can sometimes last 3-4 days in the refrigerator, though the crust will lose its crispness.
It's generally not recommended to store sweet tarts at room temperature for more than a few hours, especially those with dairy-based fillings, due to the risk of spoilage. Freezing is sometimes possible for certain types of tarts (like those with baked fruit), but creamy or curd fillings often change texture upon thawing. For most easy sweet tart recipes designed for beginners, refrigeration is the standard and safest storage method.
Troubleshooting Common Sweet Tart Baking Problems
Even with easy sweet tart recipes, baking can sometimes present minor challenges. Knowing how to identify common problems and, more importantly, how to fix or prevent them, is a valuable skill for any beginner baker. Don't be discouraged if your first sweet tart isn't absolutely perfect; troubleshooting is part of the learning process.
Here are some frequent issues encountered when making a sweet tart and practical advice on how to address them, helping you improve with each bake.
Soggy Bottom Tart Crust: Causes and Solutions
A soggy bottom is one of the most frustrating issues when making a sweet tart. It happens when moisture from the filling or steam from the baking process penetrates the unbaked or underbaked crust, turning it soft and unpleasant.
- Causes:
- Not blind baking the crust, especially with wet fillings.
- Insufficient blind baking (not baking the crust long enough before adding the filling).
- Filling the tart shell while it's still warm.
- Using a pan material that doesn't conduct heat well (like thick ceramic) without adjusting baking time.
- Excessively wet filling.
- Solutions:
- Always blind bake your sweet tart crust, especially for fillings that don't require significant baking or are very moist.
- Ensure the blind bake is sufficient. The bottom of the crust should look dry and lightly golden after removing the weights and baking for the second phase. Bake it longer if needed.
- Cool the tart shell completely before adding the filling.
- Consider brushing the partially blind-baked crust with a thin layer of egg white or melted chocolate and baking for a few more minutes; this creates a moisture barrier.
- For fruit tarts, drain excess liquid from the fruit if necessary.
- Use a metal tart pan for better heat conductivity.
Blind baking is the primary defense against a soggy bottom when making an easy sweet tart.
Cracked Tart Filling: Prevention Tips
Some sweet tart fillings, particularly those that set upon cooling like curds or custards, can sometimes crack on the surface. This doesn't usually affect the taste, but it impacts the appearance.
- Causes:
- Overbaking the filling, causing it to set too firmly or dry out.
- Rapid cooling of the tart after baking, causing the filling to contract too quickly.
- Moving the tart before the filling is fully set.
- Prevention Tips:
- Monitor baking time carefully. For fillings that bake (like some custards), bake just until the edges are set and the center is still slightly wobbly. It will continue to set as it cools.
- Cool the tart gradually. For baked fillings, turn off the oven, prop the door open slightly, and let the tart cool inside the oven for 15-30 minutes before transferring it to a wire rack. Avoid placing a hot tart directly into a cold refrigerator.
- Allow the filling to set completely and undisturbed before moving the tart or attempting to slice it. Refrigeration is usually required for several hours.
- For fillings like ganache or curd that are poured into a pre-baked shell, ensure they are poured while still warm and then chilled until fully set, avoiding temperature fluctuations.
While a cracked surface isn't ideal for presentation, simple decorations like a dusting of sugar or a dollop of cream can easily mask it on your easy sweet tart.
Unevenly Baked Tart Crust: How to Fix It
An unevenly baked crust might have edges that are too dark while the bottom is still pale, or vice versa.
- Causes:
- Hot spots in the oven.
- Dough that is not of uniform thickness in the pan.
- Edges browning faster than the bottom during blind baking.
- How to Fix It (Prevention/Correction):
- Ensure the dough is pressed or rolled evenly into the tart pan, with consistent thickness on the bottom and sides.
- Rotate the tart pan halfway through baking to help ensure even exposure to heat, especially if you suspect your oven has hot spots.
- During blind baking, if the edges start browning too quickly while the bottom needs more time, you can protect the edges by carefully covering them with strips of aluminum foil. This is a common technique.
- Use the correct oven temperature. If your crust is consistently burning on the bottom, your oven might be too hot or you might need a lighter-colored pan. An oven thermometer can verify the temperature.
Paying attention to evenness when shaping the dough and monitoring the bake are key to preventing an unevenly baked crust on your easy sweet tart.
Frequently Asked Questions
What makes a sweet tart "easy" for beginners?
Easy sweet tart recipes often feature a simple crust recipe that doesn't require advanced techniques like blind baking or complex folding. The fillings are also usually straightforward, using easily accessible ingredients and minimal steps.
What are some common ingredients found in easy sweet tart recipes?
Common ingredients include all-purpose flour, butter, sugar, and eggs for the crust. Fillings often utilize fruits like berries or citrus, along with simple creams or custards made from milk, sugar, and egg yolks.
How can I prevent my tart crust from shrinking during baking?
To prevent shrinking, ensure the dough is properly rested in the refrigerator before baking. Also, dock the crust (poke holes with a fork) before baking to allow steam to escape and reduce puffing.
What are some variations I can make to a basic sweet tart recipe?
You can experiment with different fruits, such as apples, peaches, or pears. Consider adding nuts like almonds or pecans to the filling or crust. Another option is to incorporate different flavor extracts, such as vanilla, almond, or lemon.
What are some tips for achieving a perfectly golden-brown tart crust?
Brushing the crust with an egg wash before baking helps achieve a beautiful golden-brown color. Also, monitor the tart closely during baking and rotate it halfway through to ensure even browning.
Final Reflection: The Enduring Allure of the Sweet Tart
The humble sweet tart, a seemingly simple confection, holds a surprising power to connect us to culinary traditions and spark joy in the everyday. From the simplest fruit tarts to more elaborate creations, the ease of preparation belies the profound satisfaction derived from both making and sharing these delightful treats. This guide has explored various accessible recipes, proving that anyone can master the art of sweet tart baking.
The influence of sweet tarts extends far beyond the kitchen table; they represent a comforting familiarity, a link to cherished memories, and a celebration of seasonal ingredients. They are a canvas for creativity, allowing for endless variations and personal expression. Baking is at once child's play and adult joy. And love, of course.
This quote perfectly encapsulates the magic of sweet tart baking – a simple process yielding immense satisfaction and the opportunity to share love through deliciousness.
Now, I invite you to embark on your own sweet tart journey. Don't be intimidated by the seemingly complex recipes; embrace the simplicity and the potential for personal expression. Experiment with different fruits, fillings, and crusts. Most importantly, share your creations with loved ones and savor the joy of creating something beautiful and delicious. The world needs more sweet tarts, and you, dear reader, are perfectly capable of adding to its abundance.
Unleash Your Inner Pastry Chef!
Thanks for taking the time to explore the wonderful world of sweet tarts with us! We hope you've gained some valuable insights and inspiration. Now it's time to put your newfound knowledge into action.
- Bake your first sweet tart! Use the recipes and techniques you've learned here to create your own delicious masterpiece. Don't be afraid to experiment—that's where the real fun begins!
- Share your creation on social media! Use #BakeWithEaseSweetTarts and tag us so we can admire your handiwork.
- Try a surprising twist: Adapt one of the recipes to use seasonal fruits or unique flavor combinations. Let your creativity shine!
Ready to transform your kitchen into a sweet tart haven? What unique flavor combination will you try first?