
The Ultimate Guide to Troubleshooting Ciabatta & Rustic Breads


Welcome to BakeWithEase, your trusted guide to conquering the world of baking! Are you struggling to achieve that perfect, airy crumb in your Ciabatta? Dive into our latest article, "The Ultimate Guide to Troubleshooting Ciabatta & Rustic Breads," where we unravel common Ciabatta bread baking problems and provide simple solutions to help you bake artisan-quality bread at home. Discover the secrets to achieving a light, open texture and a delightfully crisp crust. Ready to transform your baking? Let's get started!
- The Ultimate Guide to Troubleshooting Sourdough Bread Baking
- Understanding Common Sourdough Bread Baking Problems
- Diagnosing Sourdough Dough Issues: A Troubleshooting Guide
- Fixing Common Sourdough Baking Problems: Step-by-Step Solutions
- Troubleshooting Whole Wheat Sourdough Baking: Specific Challenges
- Preventing Future Sourdough Bread Baking Problems
- Advanced Sourdough Baking Techniques: Addressing Complex Issues
- Sourdough Baking Problem Checklist: Quick Reference Guide
-
Frequently Asked Questions
- What are the most common problems bakers face when making Ciabatta bread?
- Why is my Ciabatta dough so sticky and difficult to handle?
- My Ciabatta bread didn't develop those signature air pockets. What went wrong?
- The crust of my Ciabatta is too hard or too soft. How can I fix this?
- What type of flour is best for achieving a light and airy Ciabatta bread?
- Final Reflection: The Enduring Allure of the Perfect Crust
- Unleash Your Inner Baker: Master Ciabatta & Rustic Breads!
The Ultimate Guide to Troubleshooting Sourdough Bread Baking
Understanding Common Sourdough Bread Baking Problems
Baking with sourdough can feel magical, but it's also a journey with its own set of unique challenges. Many bakers encounter sourdough bread baking problems that can be frustrating, from dough that won't rise to crusts that refuse to crisp. Identifying exactly what went wrong is the first crucial step in fixing these issues and improving your next bake. Understanding the common pitfalls helps you become a more confident sourdough baker.
These sourdough issues often stem from a few key areas: the health of your starter, the handling and fermentation of your dough, or the baking process itself. By learning to recognize the signs of these problems, you can start to diagnose the root cause and implement effective solutions. This guide will walk you through the most frequent sourdough bread baking problems and how to overcome them.
Identifying Issues in Sourdough Starter Activity
A healthy, active sourdough starter is the heart of your bread; without it, your dough simply won't rise properly. One of the most common sourdough bread baking problems starts right here. A starter should consistently double or triple in volume after being fed within a predictable timeframe, typically 4-12 hours depending on temperature and feeding ratio. Look for lots of bubbles throughout the culture, not just on the surface, and a pleasant, slightly tangy aroma, not sharp or acetone-like.
If your starter shows minimal growth, lacks bubbles, or has a strong, off-putting smell (like nail polish remover), it's likely weak or hungry. This inactivity is a major contributor to sourdough issues down the line, resulting in flat, dense loaves. Addressing a sluggish starter requires consistent feeding with the right ratio of flour and water, potentially adjusting the temperature to encourage yeast and bacteria activity. For example, feeding a starter 1:1:1 (starter:flour:water by weight) and keeping it around 75-80°F (24-27°C) can quickly revitalize it.
Recognizing Problems with Sourdough's Crust and Crumb
The appearance of your sourdough bread's crust and the structure of its interior (the crumb) are key indicators of successful baking, or conversely, signs of sourdough bread baking problems. A good sourdough crust should be deep golden to dark brown, crisp, and have a satisfying chew. Common crust issues include a pale, soft crust (often due to lack of steam or insufficient baking time) or a burnt bottom (too high heat).
The crumb tells an even more detailed story about your sourdough issues. A desirable sourdough crumb typically features an open, airy structure with a mix of small and large irregular holes (alveoli). Problems manifest as a dense, tight crumb with few holes, a gummy or wet-looking interior, or large, uneven tunnels just under the crust. These crumb issues point towards problems in fermentation, shaping, or baking, and understanding their visual cues is vital for accurate troubleshooting sourdough.
Diagnosing Sourdough Dough Issues: A Troubleshooting Guide
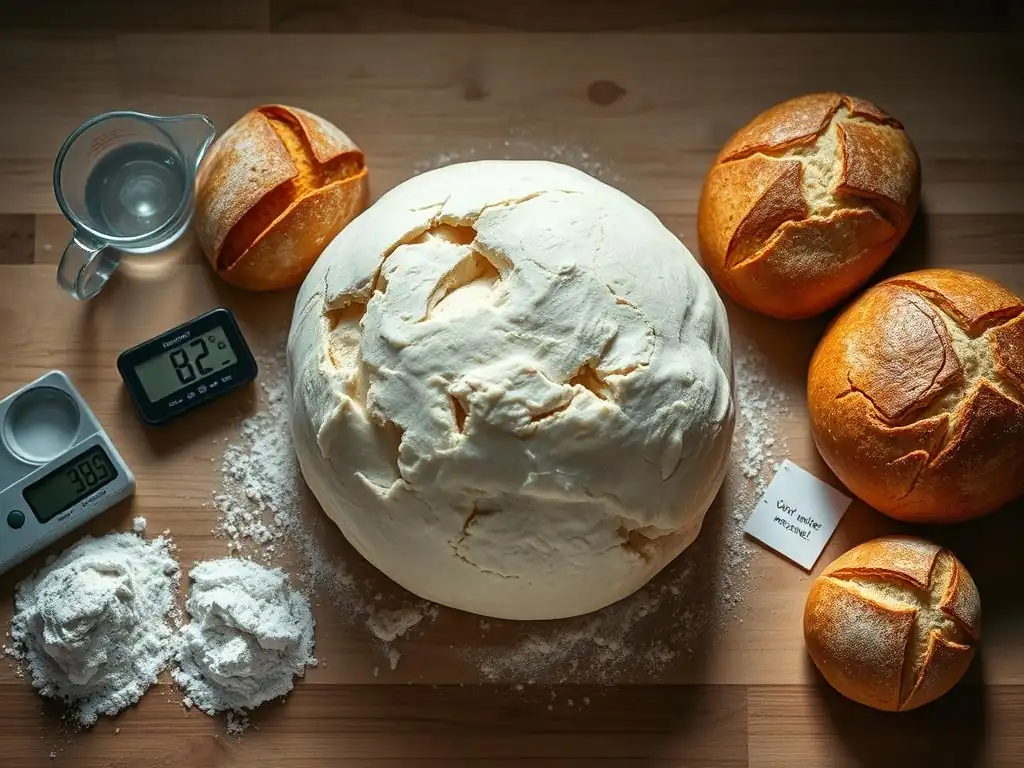
Once you've confirmed your starter is healthy, issues often arise during the dough handling and fermentation stages. Diagnosing these sourdough bread baking problems involves paying close attention to the dough's texture, elasticity, and how it behaves over time. Two common culprits for poor dough performance are slackness and a lack of rising.
Understanding the difference between these sourdough issues is critical. A slack dough might feel overly wet, difficult to handle, and spread out rather than holding its shape. Dough that isn't rising, on the other hand, maintains its form but simply doesn't increase significantly in volume during bulk fermentation or proofing. Each of these scenarios points to distinct underlying causes requiring specific solutions.
Slack Sourdough Dough: Causes and Solutions
Slack dough is a common sourdough issue, characterized by its inability to hold tension and its tendency to flatten out. This can make shaping incredibly difficult and often results in a loaf that spreads wide rather than rising upwards in the oven. Identifying the cause of slack dough is crucial for effective troubleshooting sourdough.
One primary reason for slack dough is insufficient gluten development. Gluten is the protein network that gives bread dough its structure and elasticity, allowing it to trap gases produced by the starter. If this network isn't properly formed or strengthened, the dough will lack the necessary tension to hold its shape. Another significant cause is over-fermentation, where the long, slow activity of the starter eventually starts to break down the very gluten structure it helped to build.
Insufficient Gluten Development: Techniques for Strengthening Sourdough Dough
Insufficient gluten development is a frequent contributor to slack sourdough dough. This often happens when the dough isn't mixed or folded enough to build a strong gluten network. Unlike commercial yeast doughs that might require vigorous kneading, sourdough relies heavily on time and gentle handling to develop gluten. Techniques like the autolyse (mixing flour and water and letting it rest before adding the starter and salt) allow gluten to start forming naturally.
Once the starter and salt are added, incorporating stretch and folds or coil folds at regular intervals during the first few hours of bulk fermentation is key. For example, performing 4-6 sets of stretch and folds every 30-45 minutes can dramatically strengthen a high-hydration dough. These movements gently align the gluten strands, building structure and tension without tearing the delicate network. Consistent folding is a fundamental technique for troubleshooting sourdough dough slackness.
Over-Fermentation: Managing Fermentation Time and Temperature
Over-fermentation is another major cause of slack dough and can lead to significant sourdough bread baking problems. While fermentation is essential for flavor and rise, letting the dough ferment for too long or at too high a temperature allows the acidic byproducts of fermentation to start degrading the gluten structure. The dough will become overly extensible, lose its elasticity, and feel very weak and difficult to handle. It might also smell strongly acidic or alcoholic.
Managing fermentation time and temperature is paramount. Pay attention to the dough itself, not just the clock. Look for a significant increase in volume during bulk fermentation (typically 30-50% for many sourdoughs) and signs of activity like bubbles on the surface. Using a clear container can help you visually track the volume increase. If your kitchen is warm (above 75°F or 24°C), bulk fermentation will be much faster than in a cooler environment (below 70°F or 21°C). Learning to read your dough's signs and adjusting fermentation time accordingly is a key skill in troubleshooting sourdough.
Sourdough Dough Not Rising: Reasons and Remedies
One of the most disheartening sourdough bread baking problems is dough that simply doesn't rise during bulk fermentation or proofing, resulting in a dense, heavy loaf. This lack of activity indicates that the leavening process isn't working effectively. The primary culprits are typically a weak starter or environmental conditions that are too cold for the starter's microbes to thrive.
Addressing dough that isn't rising requires investigating the source of the problem and providing the necessary conditions for the yeast and bacteria in your starter to produce carbon dioxide gas, which is what makes the dough rise. It's like providing the right fuel and temperature for an engine to run.
Weak Starter: Feeding and Strengthening Your Starter
As mentioned earlier, a weak or inactive starter is a prime reason for dough not rising. If your starter isn't consistently doubling or tripling after feeding, it won't produce enough gas to leaven your bread dough. This is a fundamental sourdough issue that must be resolved before you can expect a good rise.
To strengthen a weak starter, increase the frequency of feeding and potentially adjust the feeding ratio. Feeding it twice a day with a ratio of 1:1:1 (starter:flour:water) can quickly boost its activity. Ensure you are using unbleached flour, preferably bread flour or whole wheat flour, as these provide ample nutrients for the microbes. Using water around 80-85°F (27-29°C) can also help invigorate a sluggish starter. Give it a few days of consistent, warm feeding until it shows predictable, vigorous activity before using it for baking. This preventative measure helps avoid many sourdough bread baking problems.
Cold Temperatures: Maintaining Optimal Fermentation Temperature
Sourdough fermentation is heavily influenced by temperature. The yeast and bacteria in the starter are most active within a specific temperature range, typically between 70°F and 80°F (21°C and 27°C). If your dough is kept in a colder environment, the microbes will slow down significantly, resulting in very slow or minimal rising. This is a common sourdough issue, especially in cooler kitchens.
To combat cold temperatures, find a warmer spot in your home for fermentation. This might be near a warm appliance, in a proofing box, or inside an oven (turned off) with the light on (which usually provides enough warmth). Alternatively, you can embrace the cold and opt for a much longer fermentation time. For instance, a bulk fermentation that takes 4-5 hours at 75°F might take 12-18 hours at 65°F (18°C). Understanding this relationship between time and temperature is key to successful sourdough baking and troubleshooting sourdough issues related to rising.
Fixing Common Sourdough Baking Problems: Step-by-Step Solutions
Once your dough has successfully fermented and proofed, the final stage – baking – presents its own set of potential sourdough bread baking problems. The baking process is where the dough transforms into a loaf with a beautiful crust and an airy crumb. Issues at this stage can undo all the careful work you put into your starter and dough.
Common baking problems include issues with the crust being too dark or too pale, and the crumb being dense or gummy. Fortunately, many of these sourdough issues can be addressed by adjusting your baking technique, specifically focusing on temperature, time, and steam management.
Achieving the Perfect Sourdough Crust: Troubleshooting Techniques
A hallmark of great sourdough bread is a robust, crisp crust. Achieving this requires managing heat and moisture during the bake. Two common sourdough bread baking problems related to the crust are it becoming burnt too quickly or remaining too soft and pale.
Mastering the use of steam and adjusting baking temperature and time are the primary techniques for troubleshooting sourdough crust issues. Baking in a Dutch oven or using a steam setup in your oven creates a humid environment initially, which keeps the crust soft and allows the dough to expand fully during the initial oven spring. Then, removing the lid or steam source allows the crust to dry out and brown beautifully.
Burnt Crust: Adjusting Baking Time, Temperature, and Steam
A burnt crust, particularly on the bottom or edges, is a clear sign of sourdough bread baking problems related to excessive heat or time. This often happens when the oven temperature is too high, the bread bakes for too long, or the baking surface (like a stone or Dutch oven bottom) gets too hot.
To prevent a burnt crust, try reducing your oven temperature slightly (e.g., from 500°F to 475°F or 260°C to 245°C). If using a Dutch oven, you can place a baking sheet on the rack below the Dutch oven during the second half of the bake to shield the bottom from direct heat. Also, ensure you are not baking the bread for an excessive amount of time – check for doneness using internal temperature (aiming for 205-210°F or 96-99°C). Shortening the time the lid is on your Dutch oven might also help prevent premature browning.
Soft Crust: Promoting a Crisper Sourdough Crust
Conversely, a soft or pale crust indicates insufficient heat or steam management during the bake, another common sourdough issue. Without enough steam in the initial phase, the crust forms too early, restricting oven spring. Without enough dry heat in the later phase, the crust doesn't brown or crisp up.
To achieve a crispier crust, ensure you are using adequate steam for the first 15-20 minutes of baking. A Dutch oven is excellent for trapping steam. If baking on a stone or steel, use a steam pan with hot water or ice cubes placed on a rack below. After the initial steam phase, remove the lid or steam source and continue baking in a dry oven.
This allows the crust to develop color and become crisp. Ensure the oven is fully preheated to the correct temperature before loading the bread. Letting the bread cool completely on a wire rack after baking is also crucial for a crisp crust, as steam escapes as it cools.
Improving Sourdough Crumb Structure: Addressing Dense or Uneven Crumb
The interior structure, or crumb, is a key indicator of successful sourdough baking. Common sourdough bread baking problems include a dense, heavy crumb or one with large, uneven holes and dense areas (often called "tunnels"). These issues point towards problems that occurred before the bake, specifically during fermentation, shaping, or proofing.
Fixing crumb issues involves refining your dough handling techniques and understanding the subtle signs of properly fermented and proofed dough. Addressing these sourdough issues requires patience and attention to detail in the final stages before baking.
Dense Crumb: Promoting Air Incorporation Through Proper Shaping and Proofing
A dense crumb is often a result of under-proofed dough or poor shaping techniques that fail to create sufficient tension. If the dough hasn't fermented enough during bulk or hasn't proofed long enough before baking, it won't have accumulated enough gas or developed the strength to hold an open structure during oven spring. This leads to a tight, heavy interior – a classic sourdough issue.
Ensure your bulk fermentation reaches the desired volume increase (typically 30-50%). Learn to read the dough's texture and feel – it should be visibly bubbly and feel aerated. During shaping, focus on creating surface tension without degassing the dough too much. A well-shaped loaf holds its structure. Proper final proofing is also critical; the dough should feel light and airy, and pass the poke test (an indentation springs back slowly). Adjusting proofing time based on temperature is vital for troubleshooting sourdough density issues.
Gummy Crumb: Addressing Underbaking and Starch Conversion
A gummy or wet-looking crumb, even after the bread has cooled, is almost always a sign of underbaking. The starches in the flour haven't fully gelatinized and set, leaving the interior doughy and sticky. This is a frustrating sourdough bread baking problem because the outside might look perfectly baked.
To avoid a gummy crumb, ensure you bake your sourdough bread for a sufficient amount of time. Doneness is best checked by the internal temperature of the loaf, which should reach 205-210°F (96-99°C). If your crust is browning too quickly, tent the loaf loosely with foil for the final part of the bake. Perhaps even more importantly, always let your sourdough bread cool completely on a wire rack before slicing.
This allows the internal structure to set and moisture to redistribute. Slicing a hot loaf traps steam and results in a gummy texture. Patience during the cooling phase is crucial for fixing this sourdough issue.
Troubleshooting Whole Wheat Sourdough Baking: Specific Challenges
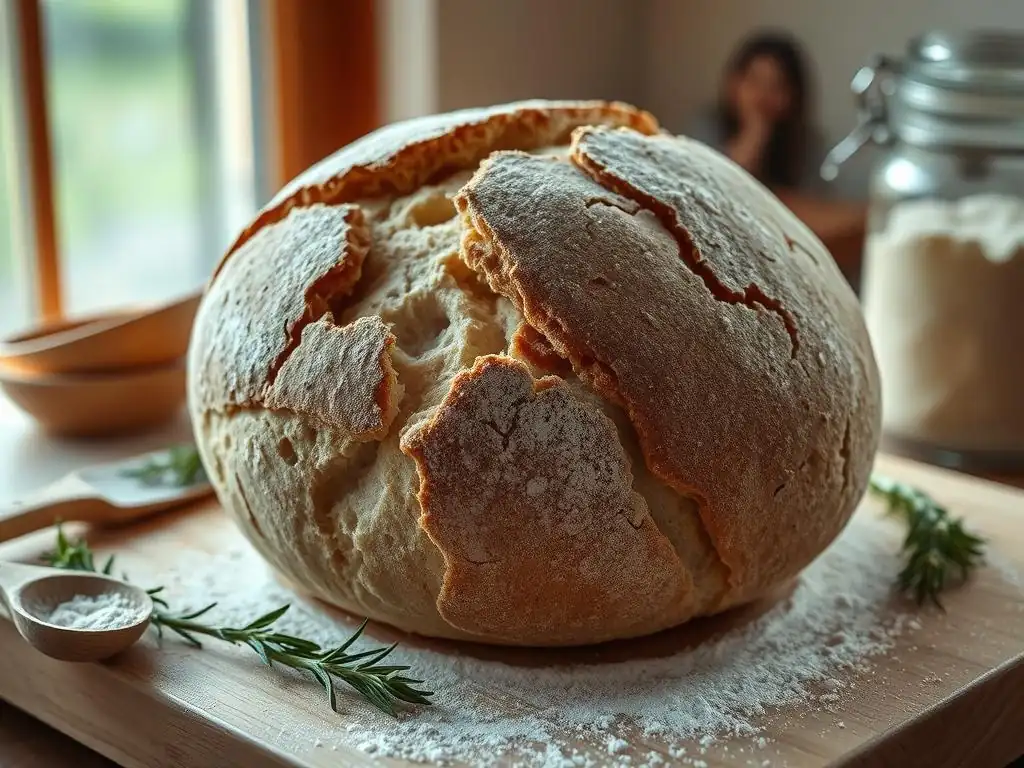
Baking with whole wheat flour presents some specific sourdough bread baking problems not typically encountered with white flour. Whole wheat contains bran and germ, which can affect gluten development, fermentation, and flavor. While incredibly nutritious and flavorful, whole wheat sourdough requires slightly different considerations.
Understanding how whole wheat flour behaves is key to successfully troubleshooting sourdough recipes that incorporate it. Its unique composition affects dough handling, rise, and even taste.
Common Problems in Whole Wheat Sourdough Recipes
Working with whole wheat flour can lead to sourdough issues like a denser loaf and sometimes a slightly bitter taste. These problems stem directly from the presence of bran and germ, which are removed in white flour.
Addressing these specific sourdough bread baking problems involves techniques that account for the impact of bran on gluten and managing fermentation speed, as whole wheat ferments faster than white flour.
Dense Whole Wheat Sourdough: Improving Volume and Texture
Whole wheat flour contains sharp pieces of bran that can cut the developing gluten strands, making it harder to achieve an open, airy crumb compared to white sourdough. This often results in a denser whole wheat sourdough loaf.
To improve the volume and texture of whole wheat sourdough, consider using techniques that promote gluten development gently and account for the bran. A longer autolyse (60-90 minutes or even longer) can help soften the bran and allow gluten to hydrate. Higher hydration doughs (more water) can also help, as the extra water helps the gluten strands slide past the bran particles.
Gentle handling and incorporating folds are still important, but avoid aggressive kneading. Some bakers also sift out the largest bran particles, hydrate them separately, and add them back later, or use a portion of strong bread flour in the recipe (e.g., 80% whole wheat, 20% white bread flour) to add extra gluten strength.
Bitter Taste: Managing Bran Fermentation
Sometimes, whole wheat sourdough can develop a slightly bitter or overly acidic taste. This can be related to the fermentation of compounds in the bran, or simply over-fermentation of the whole wheat flour itself, which ferments faster than white flour. This is a less common but noticeable sourdough issue.
To manage potential bitterness or excessive acidity in whole wheat sourdough, consider slightly shorter bulk fermentation times compared to a white loaf, especially in warmer conditions. You might also find building your levain (the portion of active starter used to leaven the dough) with white flour, even if the main dough is whole wheat, can help produce a milder flavor profile. Experimenting with different whole wheat flours can also make a difference, as the composition varies between mills.
Preventing Future Sourdough Bread Baking Problems
While troubleshooting sourdough issues is a valuable skill, prevention is always better than cure. Many common sourdough bread baking problems can be avoided by establishing good habits and understanding the fundamental principles of sourdough baking. Consistency and observation are your best tools.
Focusing on maintaining a healthy starter, optimizing fermentation, and understanding your ingredients will lay a solid foundation for consistent, successful sourdough bakes. These practices minimize the likelihood of encountering frustrating sourdough issues in the first place.
Maintaining a Healthy Sourdough Starter: Best Practices
A healthy, vigorous sourdough starter is the single most important factor in preventing a multitude of sourdough bread baking problems. Think of it as the engine of your bread; it needs to be well-maintained to perform reliably.
Best practices for starter maintenance include regular feeding (daily if kept at room temperature, weekly if refrigerated), using unbleached flour (a mix of white and whole wheat often works well), and clean water. Pay attention to its feeding schedule, consistency, and discard history. If you bake infrequently, storing your starter in the refrigerator and feeding it weekly (or even every two weeks) is fine, but be sure to revive it with 2-3 regular feedings at room temperature before baking.
Using a consistent feeding ratio (like 1:2:2 or 1:3:3 starter:flour:water) helps you predict its peak activity. A well-maintained starter is your first line of defense against sourdough issues.
Optimizing Fermentation for Sourdough: Achieving Consistent Results
Fermentation is where much of the magic (and potential sourdough bread baking problems) happens. Achieving consistent results requires learning to read your dough and understanding the impact of temperature and time. Relying solely on a timer is often insufficient.
Observe your dough during bulk fermentation. Look for visual cues like increased volume (again, 30-50% is a common target), bubbles on the surface and sides of the container, and a domed top. Learn the feel of properly fermented dough – it should feel lighter and more aerated than when you started. Monitor your kitchen temperature and adjust bulk fermentation time accordingly. Similarly, for the final proof, the poke test is an invaluable tool to assess readiness. Over-proofed or under-proofed dough leads to significant sourdough issues in the final bake.
Understanding Flour Composition and its Impact on Sourdough: A Baker's Guide
The type and quality of flour you use have a profound impact on your sourdough baking. Different flours have varying protein contents, which directly affect gluten development and hydration needs. Using the wrong flour for a recipe or not understanding its properties can lead to unexpected sourdough bread baking problems.
Flours with higher protein content (like bread flour, typically 12-14%) develop stronger gluten networks, making them ideal for chewy sourdough bread and easier to handle at higher hydration levels. All-purpose flour (typically 10-12%) can work but may require less water or more careful handling. Whole wheat and rye flours, while nutritious, have lower effective gluten-forming protein and contain bran/pentosans that absorb more water and can hinder gluten development, contributing to sourdough issues if not handled correctly. Always check the protein content of your flour and understand how it will influence your dough's behavior.
Advanced Sourdough Baking Techniques: Addressing Complex Issues

As you gain experience, you might explore advanced techniques or encounter more complex sourdough bread baking problems. These often involve managing very wet doughs or dealing with dough that hasn't behaved as expected.
Learning how to handle high-hydration doughs and having rescue strategies for over-proofed dough are valuable skills for the advanced sourdough baker. These techniques help you tackle more challenging sourdough issues and refine your craft.
Troubleshooting High-Hydration Sourdough: Unique Challenges and Solutions
High-hydration sourdough doughs (typically 75% water or more relative to flour weight) are known for producing incredibly open, airy crumbs but can be notoriously difficult to handle. They are prone to being slack and can feel more like a batter than a dough, leading to unique sourdough issues during shaping and transfer to the oven.
Troubleshooting high-hydration sourdough requires specific techniques to build strength and manage stickiness. Extensive use of stretch and folds or coil folds during bulk fermentation is essential to develop the gluten network. Working with wet hands or a bench scraper can make handling easier. Cold proofing in the refrigerator is highly recommended for high-hydration doughs; the cold stiffens the dough, making it much easier to score and transfer to the hot oven. Don't be afraid to use a generous amount of rice flour on your proofing basket or couche to prevent sticking.
Dealing with Over-Proofed Sourdough Dough: Rescue Techniques
Over-proofing is a common and frustrating sourdough bread baking problem where the dough has fermented past its peak. The gluten structure starts to collapse, and the dough may look bubbly and deflated or spread out significantly. It might also tear easily when handled. While a fully collapsed, over-proofed dough is hard to save for a classic loaf, there are still rescue techniques.
If the dough is only slightly over-proofed but still has some structure, you can try shaping it very gently and baking it immediately, without any further proofing. It might not get a perfect rise, but it will likely be edible. For severely over-proofed dough that lacks any tension, trying to shape it into a loaf is futile.
Instead, turn it into a flatbread like focaccia or use it for sourdough discard recipes. Spread it thinly on a baking sheet, add toppings, and bake. This prevents the dough from going to waste and is a practical way to handle this specific sourdough issue.
Sourdough Baking Problem Checklist: Quick Reference Guide
Sometimes, a quick checklist is all you need when faced with unexpected sourdough bread baking problems. Use these guides to quickly identify potential causes and solutions based on what you're observing.
Having a systematic way to review the different stages of the sourdough process can help pinpoint where things might have gone wrong, making troubleshooting sourdough much more efficient.
Sourdough Starter Troubleshooting Checklist
- Problem: Starter not doubling/tripling?
- Possible Cause: Weak starter, cold temperature, irregular feeding.
- Action: Feed 1:1:1 or 1:2:2 ratio, use warmer water (80-85°F), find warmer spot (75-80°F), feed more frequently (twice daily).
- Problem: Starter smells strongly acidic/alcoholic?
- Possible Cause: Hungry starter, needs feeding.
- Action: Feed more frequently, increase feeding ratio (e.g., 1:3:3 or 1:4:4).
- Problem: Mold on starter?
- Possible Cause: Contamination.
- Action: Discard starter and start fresh.
- Problem: Liquid layer (hooch) on top?
- Possible Cause: Starter is hungry, needs feeding.
- Action: Pour off hooch or stir in, then feed. Adjust feeding ratio or frequency.
Baking Process Troubleshooting Checklist
- Problem: Dough not rising during bulk fermentation?
- Possible Cause: Weak starter, cold temperature, under-mixed.
- Action: Strengthen starter, find warmer spot, ensure proper folds/mixing.
- Problem: Dough very slack, hard to shape?
- Possible Cause: Insufficient gluten development, over-fermentation.
- Action: Perform more folds during bulk fermentation, reduce fermentation time/temperature.
- Problem: Loaf spread wide, little oven spring?
- Possible Cause: Over-proofed, weak shaping, insufficient tension.
- Action: Reduce final proof time, improve shaping technique, ensure sufficient bulk fermentation.
- Problem: Crust pale and soft?
- Possible Cause: Not enough steam, underbaked, not cooled properly.
- Action: Use Dutch oven or steam setup, bake longer (check internal temp), cool completely on rack.
- Problem: Crust burnt on bottom/edges?
- Possible Cause: Too high temperature, baked too long on hot surface.
- Action: Reduce oven temp, use shield under loaf (e.g., baking sheet), shorten bake time.
- Problem: Crumb dense and heavy?
- Possible Cause: Under-proofed, weak starter, poor shaping.
- Action: Increase bulk fermentation time/temperature, ensure starter is active, improve shaping.
- Problem: Crumb gummy or wet?
- Possible Cause: Underbaked, sliced too early.
- Action: Bake until internal temp is 205-210°F, cool completely (several hours) before slicing.
- Problem: Large tunnels under crust?
- Possible Cause: Uneven shaping, lack of tension, potentially under-proofed.
- Action: Ensure consistent tension during shaping, try slightly longer proofing.
Frequently Asked Questions
What are the most common problems bakers face when making Ciabatta bread?
The most common problems include dense crumb, lack of air pockets, and a flat or unrisen loaf. These usually stem from issues with hydration, proofing, or oven temperature.
Why is my Ciabatta dough so sticky and difficult to handle?
Ciabatta dough is naturally high-hydration, making it sticky. Using well-floured surfaces and wet hands will help you manage it without adding extra flour and affecting the final result.
My Ciabatta bread didn't develop those signature air pockets. What went wrong?
Insufficient gluten development or under-proofing are likely culprits. Ensure you're using strong bread flour and allowing the dough to rise properly, creating those essential air pockets.
The crust of my Ciabatta is too hard or too soft. How can I fix this?
The crust texture is primarily influenced by oven temperature and steam. Adjust your baking time and consider adding a water bath or spraying the loaf with water to control crust development.
What type of flour is best for achieving a light and airy Ciabatta bread?
Strong bread flour with a high protein content is crucial for developing the necessary gluten structure. This high-gluten flour provides the elasticity needed for large air pockets.
Final Reflection: The Enduring Allure of the Perfect Crust
The quest for the perfect ciabatta, with its airy interior and crackling crust, remains a testament to the enduring power of simple ingredients and meticulous technique. This guide has explored the most common pitfalls in ciabatta and rustic bread baking, from hydration levels and fermentation times to oven spring and achieving that coveted open crumb. But more than just a troubleshooting guide, it's a journey into the heart of bread making itself – a process that demands patience, precision, and a deep appreciation for the transformative power of flour, water, and yeast.
The challenges of ciabatta baking, however, are not merely technical; they mirror the complexities of life itself. Each failed loaf, each collapsed crumb, teaches us valuable lessons about perseverance and the importance of understanding the nuances of a process. The best bread is made with love, and a little bit of frustration.
This unspoken truth resonates deeply with every baker who has wrestled with a doughy interior or a stubbornly dense crust. The journey, with its triumphs and setbacks, is as rewarding as the final product.
Now, consider your own baking journey. What have you learned from your successes and failures? What adjustments will you make to your technique based on the insights shared in this guide? Don't be afraid to experiment, to embrace the imperfections, and to find joy in the process. The next loaf you bake might just be your masterpiece. The path to mastering ciabatta is a continuous learning experience, a testament to the enduring magic of bread making. Embrace the challenge, and the rewards will be truly delicious.
Unleash Your Inner Baker: Master Ciabatta & Rustic Breads!
Thanks for joining us on this delicious journey into the world of ciabatta and rustic breads! We hope you gained valuable insights and newfound confidence in tackling these wonderfully chewy loaves. Now it’s time to put your knowledge to the test!
- Bake your masterpiece! Use the techniques we’ve shared to create your own perfect rustic loaf—we can't wait to see the results! Consider experimenting with different flours or add-ins to personalize your bread.
- Share your baking adventure! Show us your creations on social media using #BakeWithEaseCiabatta. We'd love to see your stunning bread and celebrate your success!
- Join our baking community! Leave a comment below and share your biggest challenge (or greatest triumph!) in making ciabatta or rustic bread. Let's learn from each other and inspire even more delicious baking journeys.
What unique twist will you add to your next ciabatta creation? Let's hear about it!