
Essential Tips for Baking Perfectly Every Time

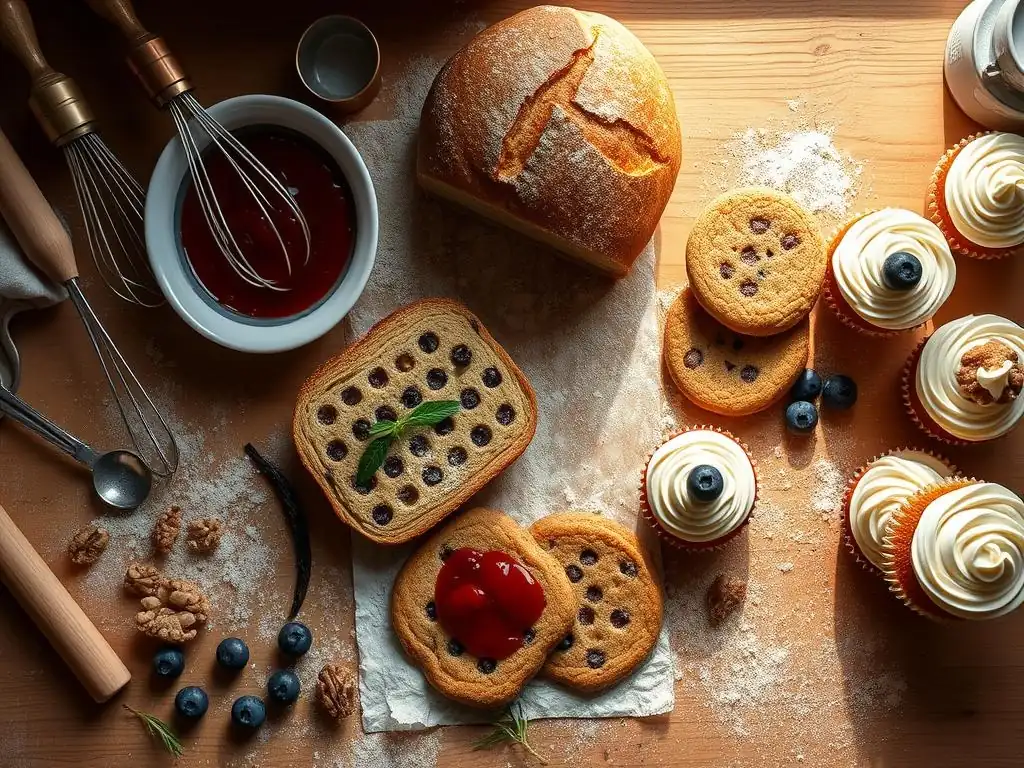
Welcome to BakeWithEase, your guide to unlocking baking perfection! Are you ready to consistently create delicious recipes that impress every time? Discover essential techniques and insider secrets within our curated collection of pastry and dessert tips, designed to elevate your baking game. Intrigued? Let's begin the journey to baking mastery...
- Essential Tips for Baking Perfectly Every Time: BakeWithEase
- Introduction: Achieving Baking Consistency with BakeWithEase
- Key Ingredients for Consistently Delicious Baking
- Mastering Baking Techniques for Optimal Results
- Essential Baking Tools for Consistent Results
- Tips for Avoiding Common Baking Mistakes
- Storing Baked Goods to Maintain Freshness
- Conclusion: Bake Consistently Delicious Recipes with Confidence
-
Frequently Asked Questions
- What is the most important factor for Baking Consistently Delicious Recipes according to BakeWithEase.com?
- How can BakeWithEase.com help beginners learn to bake?
- What kind of baked goods can I find recipes for on BakeWithEase.com?
- How can I improve my sourdough baking skills using BakeWithEase.com?
- Where can I find more information about essential baking techniques on BakeWithEase.com?
- Final Reflection: The Sweet Science of Consistent Baking
- Unlock Your Inner Baking Star!
Essential Tips for Baking Perfectly Every Time: BakeWithEase
Introduction: Achieving Baking Consistency with BakeWithEase
Welcome to Baking Bliss: Your Guide to Consistently Delicious Recipes
Welcome to BakeWithEase, your friendly corner of the internet dedicated to helping you master the wonderful world of baking. Whether you're just starting out, perhaps tackling your first batch of chocolate chip cookies, or you're aiming to perfect intricate pastries, achieving consistent results is key to truly enjoying the process and the delicious outcomes.
This guide is crafted to provide you with foundational knowledge and practical tips that will elevate your baking game, ensuring your efforts consistently yield delightful treats. We'll cover everything from the basics of ingredients to mastering oven temperatures, all aimed at helping you in baking consistently delicious recipes.
Baking is often described as a science, and like any science, precision and understanding the fundamentals are crucial. Unlike cooking, where improvisation is often celebrated, baking typically requires adherence to ratios and techniques for predictable results. At BakeWithEase, we believe that understanding why certain steps are taken makes the process less intimidating and much more rewarding. Our goal is to demystify baking, providing you with the confidence and skills needed to turn out beautifully baked goods, time after time. Let's embark on this journey together towards achieving reliable and truly delicious baking outcomes.
Why Baking Consistency Matters for Perfect Desserts
Consistency in baking isn't just about making the same cake or cookie taste identical every single time; it's about understanding the variables and controlling them to ensure success regardless of the recipe. When you can consistently produce light, airy cakes, perfectly chewy cookies, or flaky pie crusts, you build confidence and reduce waste from failed attempts. Imagine spending hours on a cheesecake only for it to crack or sink – frustrating, right? Consistency helps you avoid these common pitfalls and ensures your time and ingredients are well spent, leading to more enjoyable baking experiences and impressive results.
Moreover, achieving baking consistency allows you to truly understand how ingredients interact and how techniques impact the final product. This knowledge empowers you to eventually adapt recipes, troubleshoot issues on the fly, and even develop your own creations. For instance, knowing how different leaveners react or how overmixing gluten develops toughness helps you adjust for different flours or mixing methods. Ultimately, focusing on consistency transforms baking from a hit-or-miss activity into a reliable and rewarding craft, making baking consistently delicious recipes a standard practice in your kitchen.
Key Ingredients for Consistently Delicious Baking
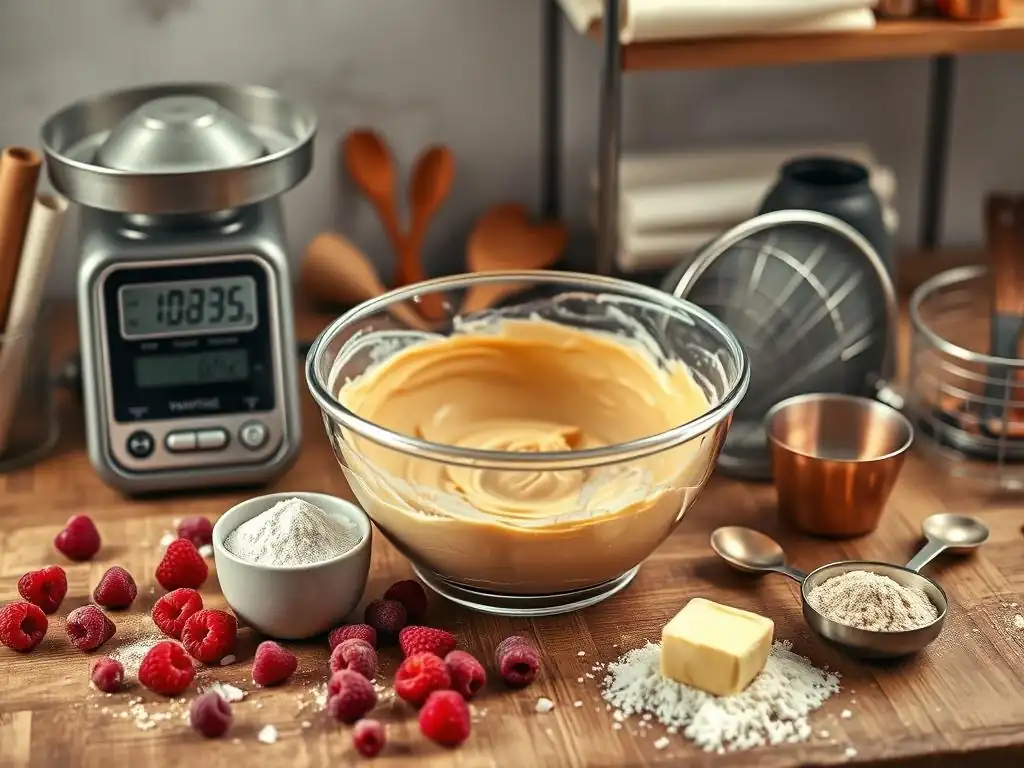
The Importance of Fresh, Quality Ingredients in Baking
The foundation of any successful baked good lies in the quality and freshness of its ingredients. Using stale flour, rancid oil, or expired leavening agents can significantly impact the texture, flavor, and rise of your baked goods, often leading to disappointing results despite following the recipe perfectly. Flour, for example, can absorb odors and moisture from the environment, affecting its performance.
Leaveners like baking soda and baking powder lose their potency over time, resulting in flat cakes or dense cookies. Even seemingly simple ingredients like salt can vary in type and grain size, which affects how they dissolve and distribute in the batter.
Investing in good quality ingredients and storing them properly is a critical step towards baking consistently delicious recipes. Keep flour in airtight containers away from light and moisture. Store butter in the refrigerator and use it within its expiration date.
Ensure your eggs are fresh – a simple test is to place an egg in water; if it sinks and lies on its side, it's very fresh; if it stands on end, it's still good but older; if it floats, it should be discarded. Vanilla extract, often a key flavor enhancer, should be pure extract, not imitation, for the best aroma and taste. Fresh ingredients react predictably, giving you a reliable starting point for every baking project.
Measuring Ingredients Accurately for Baking Success
Precision in measurement is arguably the most critical factor in baking consistently delicious recipes. Unlike cooking, where a pinch of this or a dash of that is acceptable, baking relies on specific ratios for chemical reactions (like leavening) and structural integrity. Even small deviations in the amount of flour, sugar, or liquid can drastically alter the outcome, leading to tough cookies, dry cakes, or dense breads. For instance, just a quarter cup too much flour in a standard cookie recipe can shift the texture from chewy to crumbly and dry.
Understanding the difference between volume and weight measurements and knowing when to use which is essential. While volume measurements (like cups and tablespoons) are common in many home recipes, they can be inconsistent, especially for dry ingredients like flour, which can be packed down differently each time. Weight measurements, typically done using a kitchen scale, provide a much more accurate and reproducible amount, making them the preferred method for serious bakers aiming for consistent results.
Using Kitchen Scales for Precise Baking Measurements
Using a kitchen scale is the most reliable way to measure dry ingredients like flour, sugar, oats, and even semi-solids like butter or chocolate chips. Weight measurements are not affected by how densely an ingredient is packed. For example, one cup of all-purpose flour can weigh anywhere from 120 grams to 140 grams depending on how it's scooped and leveled. However, 130 grams of all-purpose flour is always 130 grams. This consistency is vital for recipes where the ratio of dry to wet ingredients is sensitive, such as cakes, pastries, and breads.
To use a kitchen scale, simply place your mixing bowl or a separate container on the scale, tare it (set it to zero), and add the ingredient until the desired weight is reached. This method is faster, cleaner, and significantly more accurate than scooping and leveling with cups. Many professional recipes and baking books provide measurements by weight (grams or ounces) for this very reason. Adopting a kitchen scale is one of the simplest yet most impactful steps you can take towards baking consistently delicious recipes.
Understanding Volume Measurements in Baking
While weight measurements are highly recommended for dry ingredients, volume measurements using standard measuring cups and spoons are perfectly acceptable and often necessary for liquids (milk, water, oil, extracts) and small amounts of leaveners or spices. However, it's crucial to use the correct type of measuring cup. Liquid measuring cups are typically clear with a spout and have measurements marked on the side; they should be placed on a flat surface and read at eye level. Dry measuring cups are designed to be filled to the rim and leveled off.
For dry ingredients measured by volume, the standard technique is the "spoon and level" method: gently spoon the ingredient into the measuring cup until it overflows, then level off the excess with a straight edge (like the back of a knife or a spatula) without packing it down. Scooping directly from the bag can compact ingredients, especially flour, leading to over-measurement. While less precise than weight, using the correct volume measurement tools and techniques consistently will improve your results significantly when weight measurements aren't provided.
Understanding Different Types of Flour and Their Impact on Baking
Flour is often the structural backbone of baked goods, and choosing the right type is crucial for achieving the desired texture. Different flours vary in their protein content, which directly affects the amount of gluten they can develop. Gluten is a protein network that provides structure and elasticity to doughs and batters. A higher protein content means more gluten development is possible, resulting in chewier textures, while lower protein flours yield more tender and delicate results.
Using the flour specified in a recipe is key to baking consistently delicious recipes. Substituting one type of flour for another without adjustment can lead to drastically different outcomes. For instance, using bread flour in a cake recipe designed for cake flour will likely result in a tough, dense cake instead of a light, tender one. Understanding the characteristics of common flour types will help you make informed decisions and even troubleshoot recipes.
All-Purpose Flour: Versatility in Baking
All-purpose flour (AP flour) is the most common type found in home kitchens, and as its name suggests, it's versatile. It typically has a moderate protein content, usually ranging from 10% to 12%. This medium protein level makes it suitable for a wide range of baked goods, including cookies, muffins, quick breads, pie crusts, and some cakes. It provides enough structure for these items without making them overly tough.
Because of its versatility, many recipes call for AP flour. When a recipe simply states "flour," it usually means all-purpose. While it performs reasonably well across many applications, it's not ideal for everything. For instance, for the lightest cakes or chewiest breads, specialized flours are often preferred. However, for general baking consistently delicious recipes across a variety of categories, AP flour is a reliable staple.
Cake Flour: For Light and Tender Baked Goods
Cake flour is a finely milled flour with a lower protein content, typically around 8% to 10%. It is also often bleached, which further weakens the protein and changes the starch structure, allowing it to absorb more liquid and sugar than unbleached flour. This low protein content and fine texture result in minimal gluten development, which is essential for creating baked goods with a soft, tender, and delicate crumb, characteristic of fine cakes, cupcakes, and some biscuits.
Using cake flour when specified in a recipe is vital for achieving the intended light texture. Substituting AP flour for cake flour will result in a denser, less tender cake. If you don't have cake flour, you can approximate it by replacing a small amount of AP flour with cornstarch (e.g., for every cup of AP flour called for, remove 2 tablespoons of AP flour and replace with 2 tablespoons of cornstarch), although this won't perfectly replicate true cake flour's properties.
Bread Flour: For Chewy and Structured Breads
Bread flour has a higher protein content than all-purpose or cake flour, typically ranging from 12% to 14%. This higher protein level is ideal for developing strong gluten networks through kneading. A strong gluten structure is necessary to give yeast-leavened breads their characteristic chewy texture and provides the framework that allows the bread to rise and hold its shape. It creates elasticity and strength, enabling the dough to trap the gases produced by yeast.
While primarily used for yeast breads like sourdough, sandwich loaves, and rolls, bread flour is also sometimes used in recipes for chewier pizza crusts or bagels. Using bread flour in recipes designed for lower protein flours will result in a very tough, chewy product. Understanding the role of protein content in flour is key to selecting the correct type and ensuring successful baking consistently delicious recipes, especially when exploring bread making.
Mastering Baking Techniques for Optimal Results
The Art of Mixing: Achieving the Right Consistency
Mixing ingredients in baking is not just about combining them; it's a crucial step that develops structure, incorporates air, and creates the desired texture. Different recipes require different mixing methods, and understanding the purpose behind each technique is vital for achieving optimal results. Overmixing or undermixing can lead to undesirable textures, from tough and dense to crumbly and uneven.
For example, when making muffins or quick breads, you often mix wet and dry ingredients separately and then combine them with minimal stirring, just until they are moistened. This prevents excessive gluten development, which would result in tough baked goods. Conversely, when making brioche or challah, extensive kneading (a form of mixing) is necessary to develop a strong gluten network for structure and chewiness. Mastering mixing techniques is a cornerstone of baking consistently delicious recipes.
Creaming Butter and Sugar: The Foundation of Many Recipes
Creaming butter and sugar is a fundamental technique used in many cookie, cake, and butter-based recipes. This process involves beating softened butter with sugar until the mixture becomes light, fluffy, and pale yellow. As the sugar crystals cut through the softened butter, they create tiny air pockets. These air pockets are essential for leavening; during baking, they expand from the heat, contributing to the rise and tender texture of the finished product.
The duration and speed of creaming are important. Creaming for too short a time won't incorporate enough air, resulting in a dense product. Creaming for too long can melt the butter or incorporate too much air, leading to potential structural issues like collapsing. Typically, butter and sugar are creamed on medium speed for 3-5 minutes, or until visibly lighter in color and fluffy in texture. This initial step sets the stage for successful baking consistently delicious recipes like classic butter cakes and sugar cookies.
Folding Ingredients: Maintaining Air and Lightness
Folding is a gentle mixing technique used to combine delicate ingredients, such as whipped egg whites or whipped cream, into a heavier batter or mixture without deflating the air that has been incorporated. It involves using a spatula to cut down through the center of the mixture, then scooping up the material from the bottom and folding it over the top. This motion is repeated, rotating the bowl, until the ingredients are just combined.
Over-folding will deflate the mixture, resulting in a dense or flat baked good. This technique is critical in recipes like soufflés, mousses, chiffon cakes, and angel food cakes, where the airy texture relies heavily on the volume of whipped ingredients. Mastering the gentle art of folding is essential for achieving the light and airy texture required in many delicate desserts, contributing significantly to baking consistently delicious recipes that are meant to be light and fluffy.
Oven Temperature Control: Avoiding Baking Disasters
Your oven is one of your most important tools, and its temperature accuracy is paramount for consistent baking results. An oven that runs too hot or too cold can completely derail a recipe, leading to burnt edges, raw centers, uneven rising, or dry textures. A recipe that calls for baking at 350°F (175°C) for 30 minutes assumes the oven is actually at that temperature. If your oven is 25°F off, your baking time and outcome will be significantly affected.
For example, if your oven runs cold, cookies might spread too much before setting, or cakes might not rise properly and could become dense. If it runs hot, the outside of a cake might burn before the inside is cooked through, or cookies might be hard and dry. Understanding your oven's quirks and taking steps to ensure accurate temperature is a non-negotiable step for baking consistently delicious recipes.
Calibrating Your Oven for Accurate Baking
Most home ovens are not perfectly calibrated and can be off by as much as 25-50°F (approx. 15-30°C) from the set temperature. Using an inexpensive oven thermometer placed inside the oven is the simplest way to check its accuracy. Place the thermometer in the center of the middle rack and preheat the oven to a specific temperature, say 350°F (175°C). Let the oven preheat for at least 20-30 minutes to ensure it has reached a stable temperature, then check the thermometer reading.
If your oven consistently reads higher or lower than the set temperature, you'll need to adjust your baking time or temperature accordingly. For example, if your oven reads 375°F (190°C) when set to 350°F (175°C), you might need to reduce the baking temperature or shorten the baking time. Some modern ovens have a manual calibration setting you can adjust; consult your oven's manual. Checking and understanding your oven's true temperature is a fundamental step towards baking consistently delicious recipes.
Understanding Hot Spots and How to Work Around Them
Beyond overall temperature accuracy, most ovens also have "hot spots" – areas that are significantly hotter or colder than the rest of the oven cavity. These can cause baked goods to brown unevenly or bake faster on one side or in a specific corner. You can often identify hot spots by baking something that covers the entire baking sheet, like a large sheet cake or a batch of cookies, and observing where they brown fastest.
While you can't eliminate hot spots, you can mitigate their effects. Rotating your baking sheets or pans halfway through the baking time helps ensure even heat exposure. If you know a specific rack or area is consistently hotter, you can avoid placing delicate items there or adjust their position during baking. Using baking stones or steel can also help distribute heat more evenly. Being aware of and managing hot spots is part of the process of baking consistently delicious recipes in your unique kitchen environment.
Understanding Baking Times: Visual Cues for Perfect Doneness
Baking times provided in recipes are always estimates. Factors like the actual temperature of your oven (even if calibrated), the type of pan used, the altitude, and even the temperature of your ingredients can affect how quickly something bakes. Relying solely on the clock can lead to underbaked or overbaked goods. Instead, it's crucial to learn the visual and tactile cues that indicate doneness for different types of baked goods.
Most recipes provide a time range (e.g., "bake for 25-30 minutes"). Start checking for doneness at the earlier end of the range. Look for signs like golden brown edges, a toothpick inserted into the center coming out clean, or the baked good springing back when gently pressed. Learning these cues through practice will significantly improve your ability to achieve perfectly baked goods every time.
The Toothpick Test: A Classic Baking Indicator
The toothpick test is a simple yet effective method for checking the doneness of cakes, muffins, cupcakes, and some quick breads. To perform the test, insert a wooden skewer, toothpick, or thin knife into the center of the baked good. If it comes out clean or with only a few moist crumbs attached, the item is usually done. If it comes out with wet batter clinging to it, it needs more time.
It's important to note what "clean" means – it doesn't mean bone dry. A few moist crumbs are perfectly fine and indicate the cake is cooked but still moist. If the toothpick is completely clean and dry, the cake might be slightly overbaked. For dense items like brownies, the toothpick test isn't always reliable; you might look for moist crumbs or slightly fudgy streaks instead, depending on the desired texture. Using the toothpick test in conjunction with other visual cues helps ensure you're baking consistently delicious recipes with the right internal doneness.
Color and Texture: Visual Clues for Baking Perfection
Beyond the toothpick test, paying attention to the color and texture of your baked goods provides valuable clues about their doneness. Cookies, for instance, are often done when their edges are golden brown and the centers look set, even if they still appear slightly soft in the middle (they will continue to cook slightly as they cool). Cakes should pull away slightly from the sides of the pan and the top should spring back when gently pressed.
Bread is typically done when it has a deep golden-brown crust and sounds hollow when tapped on the bottom. Pies should have a beautifully browned crust and the filling should be set (for custard pies) or bubbling (for fruit pies). Learning to recognize these visual cues takes practice, but it's essential for moving beyond simply following a timer and truly mastering baking consistently delicious recipes based on their actual state of doneness.
Essential Baking Tools for Consistent Results
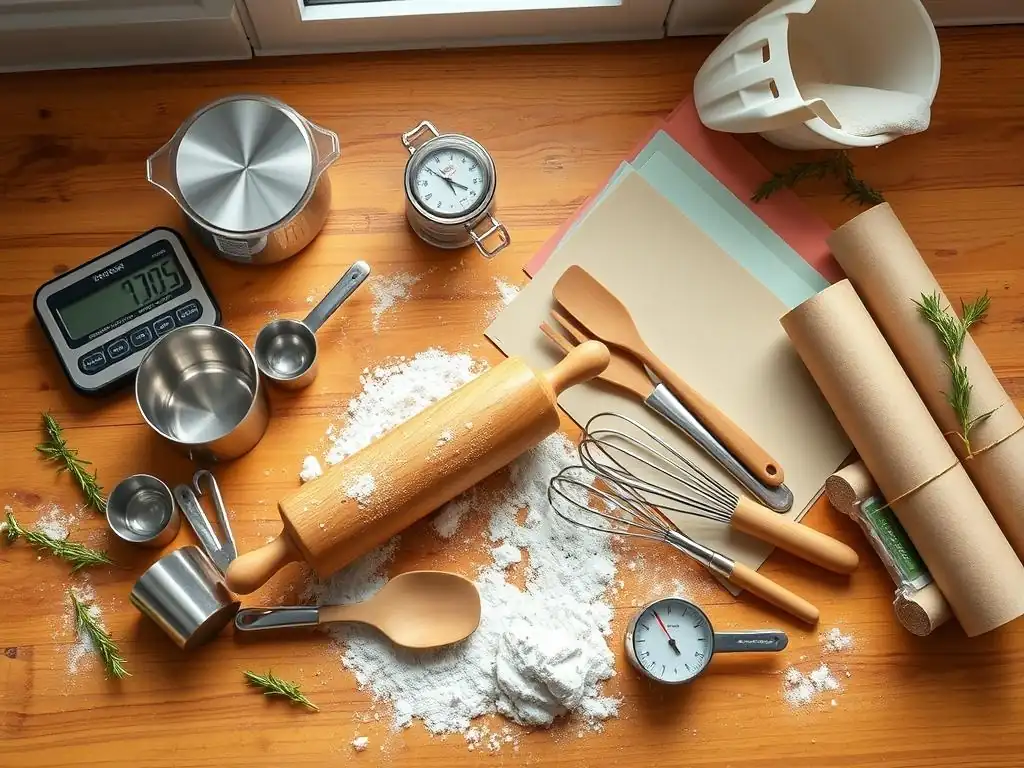
Having the right tools can make a significant difference in your baking journey, helping you achieve more consistent and predictable outcomes. While you don't need every gadget on the market, a few essential items can greatly improve your efficiency and the quality of your baked goods. These tools are designed to facilitate specific techniques and ensure even heat distribution, both critical for success.
Think of essential baking tools as investments in your hobby or craft. A good set of measuring cups and spoons, a reliable kitchen scale, sturdy mixing bowls, and quality baking pans are fundamental. They not only make the process easier but also contribute directly to the consistency of your results. Using the correct tool for the job, like a rubber spatula for folding or a whisk for aerating, is part of mastering baking consistently delicious recipes.
Must-Have Baking Pans for Even Baking
The type and material of your baking pans significantly affect how heat is transferred to your batter or dough, influencing browning, rising, and overall texture. Using the pan size and type specified in a recipe is important because it impacts the depth of the batter (which affects baking time) and how quickly the edges and bottom cook compared to the center. A standard 9x13 inch metal cake pan behaves differently than a glass one of the same dimensions.
Investing in good quality pans made from materials that conduct heat evenly will help prevent common issues like burnt bottoms or pale sides. While silicone pans are popular for their non-stick properties, metal pans generally offer better and more even heat distribution, leading to more consistent browning and baking.
Choosing the Right Pan Material: Metal, Glass, or Silicone
- Metal Pans (Aluminum or Steel): These are the most common and generally recommended for most baking. Light-colored, heavy-gauge aluminum pans conduct heat efficiently and evenly, promoting consistent browning. Darker metal pans absorb more heat and can cause faster, sometimes excessive, browning, especially on the bottom crusts of pies or cakes. If using dark pans, you might need to reduce the oven temperature by about 25°F (approx. 15°C) or shorten the baking time. Metal pans are excellent for cakes, cookies, breads, and pies, contributing to reliably baking consistently delicious recipes.
- Glass Pans: Glass heats up more slowly than metal but retains heat longer. This can be beneficial for things like casseroles or bread puddings, but for cakes and pies, it can sometimes lead to overcooked edges and bottoms by the time the center is done. If using a glass pan, you may need to reduce the oven temperature by 25°F (approx. 15°C) compared to a recipe written for metal.
- Silicone Pans: Silicone is non-stick and flexible, making it easy to unmold baked goods. However, it's a poor heat conductor compared to metal or glass. This can result in less consistent browning and longer baking times. They are often best used for individual molds, muffins, or items where crust development is less critical. Always place silicone pans on a baking sheet for stability in the oven.
Pan Preparation: Greasing and Flouring for Easy Release
Properly preparing your baking pans is essential to prevent your baked goods from sticking and to ensure easy release after baking. The most common method is greasing and flouring. Grease the inside surfaces of the pan thoroughly with butter, shortening, or baking spray, getting into all the corners and up the sides. Then, add a tablespoon or two of flour (or cocoa powder for chocolate cakes) to the greased pan, tilt and tap the pan to coat all the greased surfaces with a thin layer of flour, and tap out any excess.
For some recipes, lining the bottom of the pan with parchment paper in addition to greasing the sides provides extra insurance against sticking, particularly for delicate cakes. Always follow the recipe's instructions for pan preparation, as some items like angel food cake rely on sticking to the pan sides for structure as they rise. Proper pan prep is a simple step that prevents frustration and helps ensure your beautifully crafted baking consistently delicious recipes come out of the pan intact.
The Role of Parchment Paper in Baking
Parchment paper is a baker's best friend for many reasons. It's a heat-resistant, non-stick paper that lines baking sheets and cake pans. Its primary benefit is preventing baked goods from sticking, making cleanup significantly easier. Cookies slide off effortlessly, and cakes release cleanly from the bottom of the pan when lined with parchment.
Beyond preventing sticking, parchment paper also promotes even baking and browning, especially on the bottom of cookies or sheet cakes, by providing a consistent surface. It can also be used to create disposable piping bags, make en papillote packets for steaming, or even as a surface for rolling out dough. Keeping a roll of parchment paper in your kitchen is a simple way to improve the consistency and ease of your baking consistently delicious recipes.
The Importance of a Reliable Mixer (Stand or Handheld)
While some recipes can be mixed by hand, a mixer is an invaluable tool for achieving proper aeration, emulsification, and gluten development in many baked goods. Stand mixers, with their powerful motors and various attachments (whisk, paddle, dough hook), are particularly useful for tasks requiring prolonged mixing, like creaming butter and sugar, kneading bread dough, or whipping large quantities of cream or egg whites. Their consistent speed and power ensure thorough mixing and aeration.
Handheld electric mixers are more portable and suitable for smaller batches or lighter tasks, such as mixing cake batter, whipping egg whites for meringue, or making frosting. While less powerful than stand mixers, a good quality handheld mixer is still far more effective and less tiring than mixing by hand for many recipes. Using a mixer ensures ingredients are properly combined and aerated according to the recipe's specifications, contributing significantly to the texture and rise, and helping you achieve baking consistently delicious recipes.
Tips for Avoiding Common Baking Mistakes
Even experienced bakers encounter issues sometimes. Baking involves a series of chemical and physical processes, and deviations from the ideal can lead to less-than-perfect results. Understanding common mistakes and how to avoid them is a crucial part of mastering the craft. Many problems stem from errors in measurement, temperature control, or mixing techniques.
By paying careful attention to detail and understanding the 'why' behind each step, you can preempt many potential issues. This section covers some frequent pitfalls and provides guidance on how to steer clear of them, ensuring your efforts result in delightful outcomes and help you in baking consistently delicious recipes without the common frustrations.
Overmixing: Preventing Tough Baked Goods
Overmixing is a common mistake, especially when dealing with recipes that use flour. When liquid is added to flour and mixed, gluten begins to develop. While gluten development is desirable in chewy breads, excessive mixing in cakes, muffins, cookies, or pastries activates too much gluten, resulting in a tough, dense, or rubbery texture. For example, overmixing muffin batter after combining wet and dry ingredients leads to tunneling (large holes) and a tough crumb.
To avoid overmixing, particularly in quick breads and cakes, mix wet and dry ingredients just until they are combined and no streaks of dry flour remain. A few lumps in muffin or quick bread batter are perfectly acceptable. When creaming butter and sugar or mixing wet ingredients, you can mix more vigorously, but once the flour is added, switch to a low speed or mix gently by hand. Being mindful of mixing time and speed is vital for achieving tender results and is key to baking consistently delicious recipes.
Undermixing: Ensuring Proper Emulsification
While overmixing is a frequent issue, undermixing can also cause problems. Undermixing can lead to ingredients not being properly combined, resulting in uneven texture, pockets of unmixed ingredients (like streaks of flour or baking powder), or a batter that separates during baking. For instance, failing to properly cream butter and sugar won't incorporate enough air, resulting in a dense cake. Not mixing frosting sufficiently can leave it lumpy or separated.
In recipes requiring emulsification, such as custards or batters where egg yolks are used as binders, sufficient mixing is needed to create a stable mixture. Forgetting to scrape down the sides and bottom of the mixing bowl during the process can also lead to undermixing, leaving uncombined ingredients lurking at the edges. Always follow the recipe's mixing instructions and ensure ingredients are thoroughly incorporated to achieve the desired texture and structure for baking consistently delicious recipes.
Common Mistakes and How to Correct Them
- Ingredients are the wrong temperature: Many recipes specify using ingredients at room temperature (like butter, eggs, and milk). Cold ingredients don't emulsify as well and can result in lumpy batters or tough textures. Ensure these ingredients are out of the refrigerator for 30-60 minutes before starting, or use gentle warming methods if you're short on time (e.g., placing eggs in warm water).
- Opening the oven door too early: Resist the urge to check on your baked goods too frequently, especially during the first two-thirds of the baking time. Opening the oven door causes the temperature to drop significantly, which can disrupt the rising process, particularly for delicate items like soufflés, cheesecakes, or cakes, potentially leading to sunken centers.
- Not preheating the oven properly: Always allow your oven ample time to preheat to the correct temperature before putting your baked goods in. This ensures the leavening agents activate correctly and the item bakes evenly from the start. Use an oven thermometer to be sure it's at the right temperature.
Troubleshooting Dry Cakes
A dry cake is often a result of too much flour, too little liquid or fat, or overbaking.
- Too much flour: This is frequently caused by inaccurate volume measurement (packing flour into the cup). Use a kitchen scale for accuracy or the spoon-and-level method for volume.
- Too little liquid/fat: Ensure you've measured wet ingredients correctly. Using ingredients at the wrong temperature can also affect how they incorporate, impacting moisture.
- Overbaking: The most common culprit. Check for doneness at the earliest recommended time using visual cues and the toothpick test. Remove from the oven as soon as it's done; residual heat will continue cooking it slightly.
Troubleshooting Sunken Centers
Sunken centers in cakes and muffins can be caused by several factors:
- Undermixing: If the batter wasn't mixed enough, the structure might not be strong enough to support the rise.
- Overmixing: Conversely, overdeveloping gluten can sometimes cause the structure to collapse.
- Incorrect Leavening: Too much or too little leavening, or using expired leavening agents, can lead to improper rise and collapse.
- Oven Temperature Issues: Opening the oven door too early, an oven that's too cool, or uneven heat can cause the center to sink. Ensure your oven is accurately preheated and avoid opening the door prematurely.
- Too much liquid: An imbalance in the wet-to-dry ingredient ratio can make the batter too heavy for the structure to support.
- Baking at High Altitude: High altitude requires recipe adjustments (less leavening, more liquid, different temperature/time) because atmospheric pressure is lower, causing baked goods to rise faster and dry out quicker.
Storing Baked Goods to Maintain Freshness
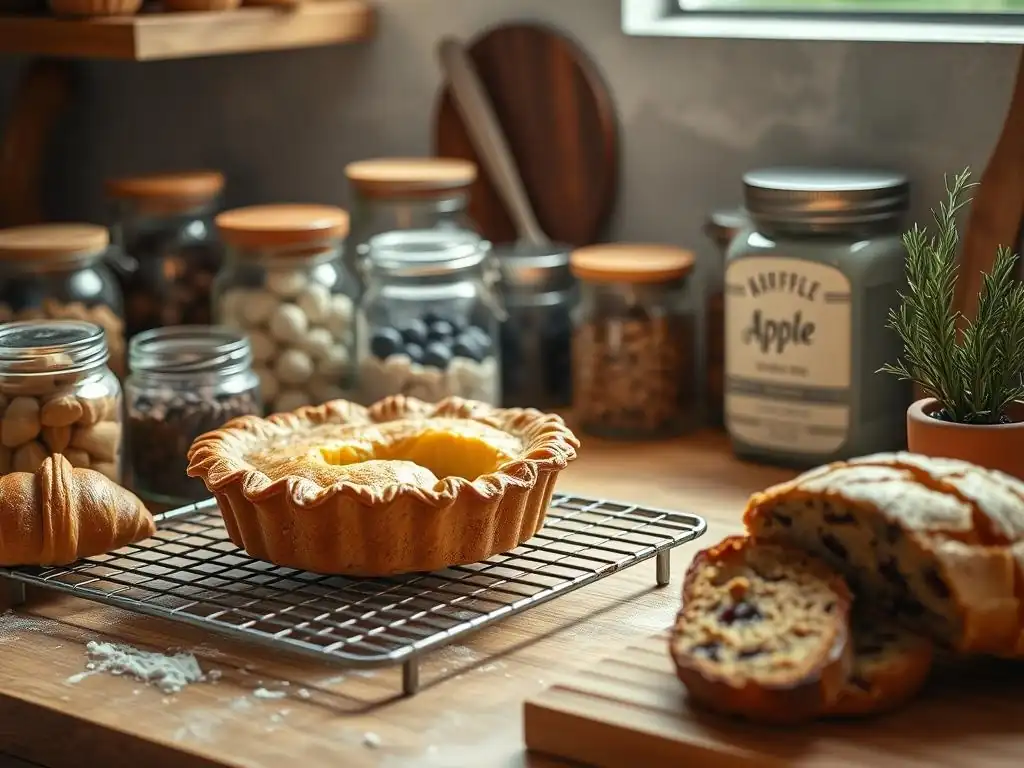
After successfully baking consistently delicious recipes, the final step is preserving their freshness and texture. Improper storage can quickly turn a perfectly baked item stale, dry, or soggy. Different types of baked goods require different storage methods to maintain their optimal quality. Understanding how to cool and store your creations correctly ensures that your hard work pays off long after they come out of the oven.
Proper storage protects baked goods from air exposure (which causes staleness), moisture (which causes sogginess or mold), and odors from other foods. Following a few simple guidelines will keep your cookies crisp, your cakes moist, and your breads fresh for as long as possible, allowing you and others to enjoy your delicious baking for longer.
Proper Cooling Techniques Before Storing
Cooling baked goods correctly after removing them from the oven is just as important as the baking process itself. Most items, like cakes, muffins, and quick breads, should cool in their pan for a short period (usually 10-20 minutes) before being transferred to a wire rack to cool completely. This initial cooling period in the pan allows the structure to set. Leaving them in the hot pan for too long can lead to overcooking from residual heat or cause the bottom to become soggy from trapped steam.
Cooling on a wire rack allows air to circulate around all sides of the baked good, preventing condensation from forming on the bottom (which leads to sogginess) and allowing steam to escape. Ensure baked goods are completely cool before storing them. Storing warm items in airtight containers traps steam, creating moisture that can make items soggy or promote mold growth. Cookies should be transferred to a wire rack almost immediately after coming out of the oven to prevent overbaking on the hot sheet.
Choosing the Right Storage Containers
The type of container you use depends on the baked good and how long you plan to store it.
- Airtight Containers: For most cakes, muffins, brownies, and quick breads stored at room temperature, an airtight container is ideal. This prevents air exposure, which causes staleness, and helps maintain moisture. Ensure the container is just large enough to hold the items without excessive empty space.
- Cookie Jars or Tins: Crisp cookies should be stored in containers that are airtight to maintain their crispness. Chewy cookies can be stored in a container that is slightly less airtight or with a piece of bread or an apple slice to help retain moisture (change the bread/apple slice every day or two).
- Bread Boxes or Bags: Freshly baked bread is best stored at room temperature in a bread box or a paper bag. Plastic bags can make the crust soggy. For longer storage, bread can be tightly wrapped and frozen.
- Refrigeration: Items with perishable fillings or frostings (like cream cheese frosting, custard, or fresh fruit) must be refrigerated. Cakes with buttercream or ganache can often be stored at cool room temperature unless the environment is very warm or humid. Refrigeration can dry out cakes and breads, so for items that don't require it, room temperature storage is often preferred.
Maintaining Moisture and Texture During Storage
Humidity and air exposure are the main enemies of texture in stored baked goods. To combat dryness in cakes and muffins stored in airtight containers, you can sometimes place a slice of bread in the container; the bread will dry out, and the cake will absorb its moisture. For cookies, separating different types with parchment paper helps maintain their individual textures and prevents flavors from mingling.
Freezing is an excellent option for longer storage of many baked goods, including cakes (frosted or unfrosted), cookies, muffins, and bread. Ensure items are completely cooled, then wrap them tightly in plastic wrap followed by a layer of aluminum foil or place them in a freezer-safe bag or container. Thaw at room temperature or gently warm if appropriate for the item. Proper cooling and storage are the final steps in baking consistently delicious recipes and ensuring they are enjoyed at their best.
Conclusion: Bake Consistently Delicious Recipes with Confidence
Mastering the Art of Baking: Your Journey to Baking Perfection
Embarking on the journey to master baking is a rewarding endeavor. It's a skill that combines precision, patience, and creativity, leading to the creation of delightful treats that bring joy to yourself and others. By focusing on the fundamental principles discussed – using quality ingredients, measuring accurately, understanding techniques, controlling oven temperature, using the right tools, avoiding common mistakes, and storing properly – you are well on your way to baking consistently delicious recipes. Each successful bake builds confidence and deepens your understanding of the craft.
Remember that baking is a process of continuous learning. Every recipe offers an opportunity to refine your skills and learn something new. Don't be discouraged by occasional setbacks; even experienced bakers have imperfect bakes from time to time. Use them as learning experiences to understand what might have gone wrong and how to adjust next time. With dedication and practice, you will find yourself achieving reliable and wonderful results in your kitchen.
Embrace the Learning Process: Baking is a Skill Worth Honing
Approaching baking with a mindset of curiosity and persistence is key. Read recipes thoroughly before you start, gather all your ingredients and tools beforehand (mise en place), and pay attention to the details. Understand why a recipe asks you to cream butter, fold ingredients, or bake at a specific temperature. This understanding empowers you to become a more intuitive and successful baker.
At BakeWithEase, we are here to support you every step of the way. Explore our recipes, guides, and tips as you continue to hone your skills. The ability to consistently produce beautiful and delicious baked goods is a skill that brings immense satisfaction. Keep practicing, keep learning, and keep baking! The world of baking consistently delicious recipes is open to you, one perfect bake at a time.
Frequently Asked Questions
What is the most important factor for Baking Consistently Delicious Recipes according to BakeWithEase.com?
The most important factor is following recipes carefully and using accurate measurements. This ensures that the ratios of ingredients are correct, leading to predictable and delicious results.
How can BakeWithEase.com help beginners learn to bake?
BakeWithEase.com offers simple recipes with step-by-step guides, making it easy for beginners to understand the baking process. They also provide easy-to-find ingredients and clear instructions.
What kind of baked goods can I find recipes for on BakeWithEase.com?
You can explore a wide variety of baked goods, including pastries, breads, cakes, and cookies. BakeWithEase.com aims to cover all the basics and beyond.
How can I improve my sourdough baking skills using BakeWithEase.com?
BakeWithEase.com provides techniques and tips specifically aimed at those perfecting their sourdough. The resource provides guidance on starter management and bread baking techniques.
Where can I find more information about essential baking techniques on BakeWithEase.com?
BakeWithEase.com offers step-by-step guides that explain essential baking techniques. Look for articles and tutorials that focus on mastering the art of baking.
Final Reflection: The Sweet Science of Consistent Baking
The pursuit of consistently delicious baked goods is more than just a hobby; it's a journey of mastering precision and understanding the subtle dance between ingredients and technique. This article has explored key elements – from precise measurements and ingredient quality to understanding oven temperatures and the importance of patience – all crucial for achieving baking success every single time. The rewards, however, extend far beyond perfectly risen loaves and golden-brown cookies.
Baking, at its heart, is a deeply satisfying act of creation, a testament to the power of careful attention and the magic of transforming simple ingredients into something truly special. It's a tradition passed down through generations, a source of comfort and joy, and a powerful tool for connection. As Julia Child wisely said, Find something you're passionate about and keep tremendously interested in it.
This passion, coupled with the knowledge and skills discussed in this article, allows us to share that joy with others, creating lasting memories and strengthening bonds through the simple act of sharing a delicious treat.
Now, consider your own baking journey. What techniques resonated most with you? Which tips are you most excited to try in your next baking adventure? Don't be afraid to experiment, to embrace the occasional mishap as a learning opportunity, and to find your own unique style within the framework of these essential techniques. The path to consistently delicious baking is a personal one, filled with delightful discoveries and the sweet satisfaction of a perfectly baked creation. Embrace the process, and enjoy the journey!
Unlock Your Inner Baking Star!
Thanks for joining us on this delicious journey into the world of perfect baking! We hope you've picked up some invaluable tips and tricks to elevate your baking game. Now it's time to put your newfound knowledge into practice.
- Bake your masterpiece! Choose your favorite recipe (or try a new one inspired by what you’ve learned!) and get baking. This is your chance to put those essential tips to the test.
- Share your success! Show off your delicious creations on social media and tag us – we’d love to see your baking triumphs!
- Explore our other baking guides on BakeWithEase.com for even more helpful advice and recipes.
Ready to create something truly amazing? What delicious treat will you bake first?