
Chocolate Éclairs with DairyFree Pastry Cream Filling

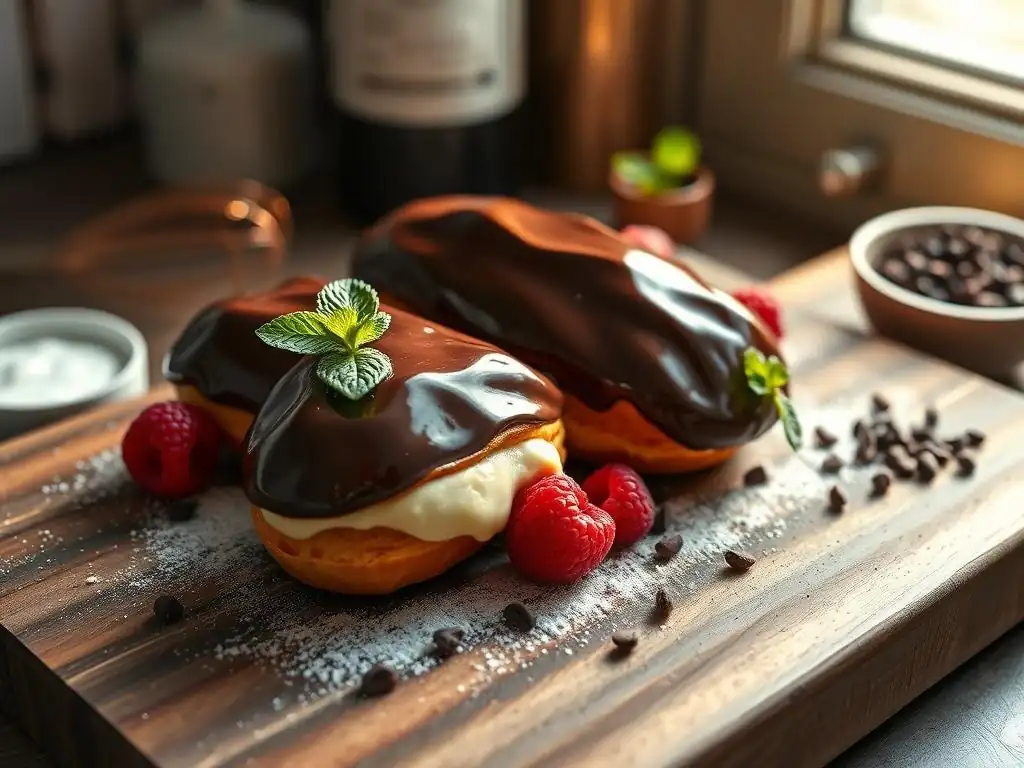
Welcome to BakeWithEase, your haven for baking bliss! Are you ready to indulge in the decadent world of dairy-free delights? Our Dairyfree chocolate éclair recipe unlocks the secrets to creating irresistibly light and airy pastries, filled with a rich, creamy, and completely guilt-free chocolate pastry cream. Discover how to craft these elegant treats and embark on a journey of delicious, dietary-friendly baking. Curious to know the secret to achieving that perfect choux pastry without any dairy? Let's get started!
- Dairy-Free Chocolate Éclair Recipe: Bake With Ease
- Introduction to Dairy-Free Éclairs: A Classic Pastry, Reimagined
- Mastering the Dairy-Free Choux Pastry: The Foundation of Perfect Éclairs
- Crafting the Dairy-Free Chocolate Pastry Cream Filling: Rich and Decadent
- Assembling Your Dairy-Free Chocolate Éclairs: From Pastry to Perfection
- Dairy-Free Chocolate Éclair Glaze: The Finishing Touch
- Tips and Tricks for Baking Dairy-Free Éclairs
- Dairy-Free Éclair Variations: Explore New Flavors
- Conclusion: Enjoy Your Homemade Dairy-Free Chocolate Éclairs
-
Frequently Asked Questions
- What makes this éclair recipe "dairy-free"?
- Can I substitute other types of non-dairy milk in the pastry cream?
- Is it difficult to make éclairs from scratch, especially the pastry cream?
- What's the best way to ensure the éclairs puff up properly during baking?
- Can I freeze the baked, unfilled éclairs for later use?
- Final Reflection: The Sweet Symphony of Dairy-Free Delight
- Unleash Your Inner Pâtissier: Make These Delicious Éclairs!
Dairy-Free Chocolate Éclair Recipe: Bake With Ease
Introduction to Dairy-Free Éclairs: A Classic Pastry, Reimagined
Why Dairy-Free Éclairs? Indulge Without the Dairy
Éclairs are a beloved classic, known for their light, airy choux pastry shell filled with rich pastry cream and topped with a glossy glaze. However, for those navigating dairy sensitivities, allergies, or simply choosing a dairy-free lifestyle, enjoying this delightful treat has often been challenging. Traditional éclair recipes rely heavily on dairy butter and milk for both the pastry and the filling. The good news is that achieving the same luxurious texture and decadent flavor is absolutely possible with clever substitutions, opening up this world of pastry to everyone.
The demand for dairy-free alternatives in baking has surged significantly in recent years. According to various market reports, the plant-based food market, which includes dairy-free options, is projected to grow substantially, indicating a clear consumer interest in delicious, allergen-friendly treats. Developing a reliable dairy-free chocolate éclair recipe means catering to this growing audience, allowing them to experience the joy of biting into a perfectly crisp shell yielding to a smooth, creamy filling, all without the discomfort or restriction that dairy can impose. It's about inclusivity in the kitchen and at the dessert table.
BakeWithEase Presents: A Step-by-Step Guide
At BakeWithEase, we believe that baking should be accessible and enjoyable for everyone, regardless of dietary needs. That's why we've developed this comprehensive guide to creating a truly exceptional dairy-free chocolate éclair recipe. We'll walk you through each stage, from preparing the foundational choux pastry to crafting the lush dairy-free chocolate pastry cream and finishing with a shiny glaze. Our aim is to demystify the process, providing clear instructions and helpful tips to ensure your success.
This guide is designed to empower you, whether you're a seasoned baker or attempting éclairs for the first time. We'll cover specific ingredient choices, explain the 'why' behind certain techniques, and offer troubleshooting advice. By following these steps, you'll gain the confidence to create beautiful, delicious dairy-free chocolate éclairs that rival their traditional counterparts. Get ready to impress yourself and your loved ones with this dairy-free take on a French patisserie favorite.
Mastering the Dairy-Free Choux Pastry: The Foundation of Perfect Éclairs
Key Ingredients for Dairy-Free Choux Pastry
Crafting perfect choux pastry, the light and hollow shell essential for éclairs, requires precision and the right ingredients. In a dairy-free version, the substitution of butter is the primary change. Beyond that, standard baking ingredients like flour, eggs, water (or a dairy-free milk alternative), and a pinch of salt are typically used. The magic of choux lies in the high moisture content of the dough, which creates steam during baking, causing the pastry to puff up and form that characteristic hollow interior.
Selecting high-quality ingredients is paramount for the best results. Using fresh eggs is crucial for the structure and rise of the choux. The type of flour can also subtly impact the outcome, though all-purpose flour is generally reliable. The dairy-free butter substitute, however, is perhaps the most critical choice in adapting this recipe. It needs to perform similarly to dairy butter, contributing fat for richness and moisture without causing the dough to separate or become greasy.
Dairy-Free Butter Substitutes: Choosing the Right One
When selecting a dairy-free butter substitute for choux pastry, look for stick-style plant-based butters specifically formulated for baking. These often have a composition closer to dairy butter (around 80% fat) compared to spreadable tub margarines, which may contain more water. Brands like Miyoko's Kitchen (cashew-based) or Melt Organic (coconut and shea based) are popular choices often recommended by dairy-free bakers for their performance in recipes requiring creaming or melting like dairy butter.
Avoid substitutes that are primarily oil or have a very low fat content, as they won't create the necessary structure or richness. Some bakers also find success using refined coconut oil in a solid state, though this can impart a subtle flavor unless refined oil is used. Experimentation may be necessary to find the brand that works best in your kitchen, but a high-quality, stick-form dairy-free butter is the most reliable starting point for this dairy-free chocolate éclair recipe.
Flour Power: Selecting the Best Flour for Éclairs
For classic choux pastry, standard all-purpose wheat flour is the most common and reliable choice. It provides the necessary gluten structure to trap the steam generated during baking, allowing the pastry to puff and hold its shape. Look for an unbleached all-purpose flour for consistent results. While some bakers prefer a slightly higher protein bread flour for added structure, it's not strictly necessary and can sometimes make the dough tougher.
If you are also baking gluten-free, adapting choux pastry requires a carefully formulated gluten-free blend, often containing a mix of rice flour, tapioca starch, and potato starch, plus a binder like xanthan gum. However, for this specific dairy-free chocolate éclair recipe focused on the dairy substitution, we recommend sticking with standard all-purpose wheat flour unless gluten intolerance is also a concern. Using the correct flour ensures the pastry achieves its signature light, hollow structure.
Step-by-Step Guide to Making Dairy-Free Choux Pastry
Making choux pastry involves cooking flour and liquid together to form a paste, then incorporating eggs. This process is known as the panade. The key is to cook the flour mixture thoroughly to gelatinize the starches, which helps the dough absorb the eggs smoothly and provides structure for the puff. It might seem intimidating, but by following a few key steps, you can master this fundamental technique for your dairy-free chocolate éclair recipe.
The temperature and consistency at each stage are crucial. The initial cooking over the heat must be vigorous enough to dry out the dough slightly, causing it to pull away from the sides of the pan. Adding the eggs requires patience, incorporating them one at a time and mixing thoroughly until each egg is fully absorbed before adding the next. The final dough should be smooth, glossy, and fall from the spoon in a V-shape.
Combining Ingredients: Achieving the Perfect Dough Consistency
Begin by combining the water (or dairy-free milk), dairy-free butter substitute, and salt in a saucepan over medium heat. Bring this mixture to a rolling boil, ensuring the butter is completely melted. This high heat is important for the next step. Once boiling, remove the pan from the heat and quickly add all the flour at once. Stir vigorously with a wooden spoon until the mixture comes together to form a cohesive ball of dough.
Return the pan to low heat and continue to cook the dough, stirring constantly, for 1-2 minutes. This step, often called 'drying out' the dough, helps to cook the flour and evaporate excess moisture. You'll notice a slight film forming on the bottom of the pan. This is a good sign that the starches are gelatinizing correctly. Once the dough is smooth and pulls cleanly away from the sides, transfer it to a mixing bowl (or stand mixer fitted with a paddle attachment) to cool slightly for a few minutes before adding the eggs.
Baking the Choux Pastry: Secrets to Getting the Ideal Puff
Once your choux dough is prepared and piped into éclair shapes on a baking sheet lined with parchment paper, it's crucial to bake them correctly to achieve that perfect puff. Start by baking at a relatively high temperature, around 400°F (200°C), for the first 10-15 minutes. This initial burst of heat creates steam inside the pastry, causing it to expand rapidly and create the hollow center.
After the initial high-heat period, reduce the oven temperature to around 350°F (180°C) and continue baking for another 20-30 minutes, or until the éclairs are deeply golden brown and feel light and hollow when lifted. It's vital not to open the oven door during the first half of baking, as the sudden drop in temperature can cause the éclairs to collapse.
Baking them until they are truly dry and firm is key to preventing them from becoming soggy after cooling. Once baked, turn off the oven, prop the door open slightly, and let the éclairs cool inside for 10-15 minutes to help them firm up gradually.
Crafting the Dairy-Free Chocolate Pastry Cream Filling: Rich and Decadent
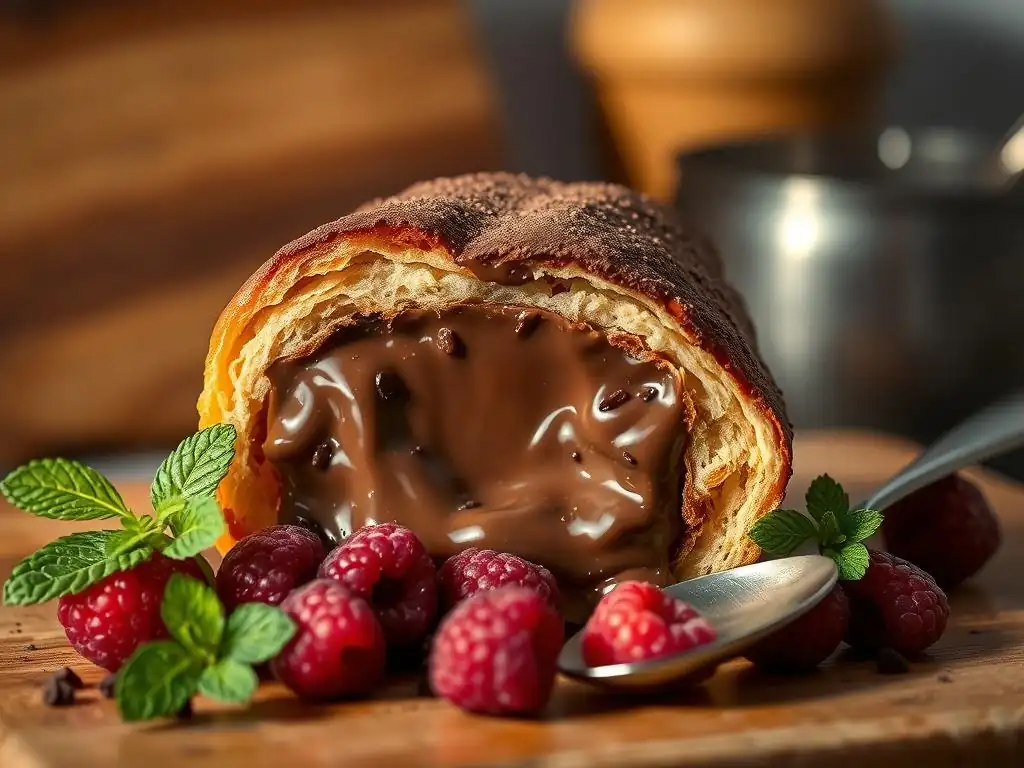
Ingredients for the Dairy-Free Chocolate Pastry Cream
A luscious pastry cream is the heart of a dairy-free chocolate éclair recipe. This requires replacing traditional dairy milk and butter with dairy-free alternatives while maintaining the creamy texture and rich flavor. Essential ingredients typically include dairy-free milk, sugar, egg yolks (for richness and thickening), cornstarch or flour (as the primary thickener), vanilla extract, and, of course, dairy-free chocolate for that decadent flavor.
The quality of your dairy-free milk and chocolate choices will significantly impact the final taste and texture of the pastry cream. Unlike the choux pastry where the fat content of butter is key, the flavor and creaminess of the milk alternative are crucial here. Selecting a good dairy-free chocolate ensures a deep, satisfying chocolate flavor without any dairy contamination.
Dairy-Free Milk Alternatives: Achieving Creamy Perfection
For dairy-free pastry cream, aim for a milk alternative that is relatively neutral in flavor and provides good richness. Full-fat coconut milk (from a can, not the carton beverage) is an excellent choice as it's naturally thick and creamy, mimicking the mouthfeel of dairy milk well. Unsweetened soy milk is another reliable option, offering a good protein content that contributes to a stable cream.
Other options like almond milk or oat milk can also work, but be mindful of their fat content and flavor profile. Oat milk, especially the barista blends, can offer good creaminess. Almond milk is thinner and might result in a less rich cream unless combined with another thicker liquid or slightly more thickener. Approximately 2 cups (480ml) of your chosen dairy-free milk alternative will be needed for a standard batch of pastry cream sufficient to fill a dozen éclairs.
Chocolate Choices: Selecting the Best Dairy-Free Chocolate
Selecting the right dairy-free chocolate is paramount for a truly indulgent dairy-free chocolate éclair recipe. Look for high-quality dark chocolate that is naturally dairy-free (check the ingredients list carefully!). Many dark chocolates with 70% cocoa content or higher are made without dairy, but cross-contamination can be an issue for those with severe allergies, so certified vegan or allergen-free options are safest if needed.
Chocolate chips, fèves, or a chopped bar can be used. Using chopped bar chocolate often provides a smoother melt and richer flavor compared to chips, which contain stabilizers to help them hold their shape. You'll likely need about 4-6 ounces (115-170g) of finely chopped dairy-free dark chocolate to achieve a deep chocolate flavor in the pastry cream. The better the quality of the chocolate, the more luxurious your filling will be.
Dairy-Free Pastry Cream Recipe: A Detailed Walkthrough
Making dairy-free pastry cream follows a similar process to traditional pastry cream, involving tempering egg yolks and cooking the mixture until thick. Start by whisking together the sugar, cornstarch (or flour), and egg yolks in a bowl until pale and creamy. This creates a stable base for thickening. Meanwhile, gently heat your chosen dairy-free milk alternative in a saucepan until it is just simmering, but not boiling.
Once the milk is hot, slowly and gradually whisk about half of the hot milk into the egg yolk mixture. This process, called tempering, slowly raises the temperature of the yolks, preventing them from scrambling. Once the yolk mixture is warm, pour it back into the saucepan with the remaining hot milk. Return the pan to medium heat and whisk constantly. The mixture will thicken relatively quickly as it heats.
Cooking the Pastry Cream: Preventing Lumps and Achieving Smoothness
As you whisk the pastry cream mixture over medium heat, pay close attention. It will start to thicken around the edges first. Continue whisking vigorously, especially getting into the corners of the pan, to ensure even cooking and prevent lumps. Once the cream begins to bubble, continue to cook and whisk for another 1-2 minutes. This boiling period is essential for the starch thickener (cornstarch or flour) to fully activate and for the cream to reach its maximum thickness and stability.
Cooking it long enough also helps remove any starchy flavor. Don't be afraid to let it bubble; just keep whisking to prevent scorching. If you encounter small lumps, you can push the finished cream through a fine-mesh sieve after cooking to achieve a perfectly smooth texture. Once cooked, remove from the heat immediately and proceed to infuse the chocolate flavor.
Infusing Chocolate Flavor: Elevating the Pastry Cream
To transform the dairy-free pastry cream into a decadent chocolate filling for your dairy-free chocolate éclair recipe, the finely chopped dairy-free chocolate is added while the cream is still hot. Immediately after removing the thickened pastry cream from the heat, add the chopped chocolate to the pan. Let it sit for a minute to begin melting, then whisk gently until the chocolate is completely melted and the cream is smooth, glossy, and uniformly chocolatey.
A small amount of dairy-free butter substitute (maybe 1-2 tablespoons) can also be whisked in at this stage for extra richness and shine, though this is optional. Pour the finished chocolate pastry cream into a clean bowl. To prevent a skin from forming on the surface as it cools, press a piece of plastic wrap directly onto the surface of the cream.
Allow it to cool at room temperature for a bit, then refrigerate for at least 2-3 hours, or preferably until fully chilled and set. A properly chilled pastry cream will be thick and stable, perfect for piping into your éclairs.
Assembling Your Dairy-Free Chocolate Éclairs: From Pastry to Perfection
Cooling the Choux Pastry and Pastry Cream: Essential Steps
Before you can fill and glaze your dairy-free chocolate éclairs, both the choux pastry shells and the dairy-free chocolate pastry cream must be completely cool. Attempting to fill warm shells will result in soggy pastry, and warm pastry cream will be too runny to hold its shape inside the éclair and will also potentially melt the pastry from the inside out. Patience during this cooling stage is crucial for achieving the desired texture and presentation.
Allow the baked choux shells to cool completely on a wire rack. The rack allows air circulation around the entire shell, helping them to dry out and crisp up properly. The dairy-free chocolate pastry cream, having been covered with plastic wrap pressed directly on its surface, needs ample time in the refrigerator to chill and set. This typically takes a minimum of 2-3 hours, but overnight is even better. A well-chilled cream will be firm enough to hold its structure when piped.
Filling the Éclairs: Techniques for a Professional Finish
Filling éclairs can be done in a couple of ways, each offering a slightly different result. The goal is to get a generous amount of rich dairy-free chocolate pastry cream inside the hollow choux shell without breaking the delicate pastry. Whether you're aiming for speed or a specific look, choosing the right method for your dairy-free chocolate éclair recipe is important.
Using a piping bag fitted with a long, thin tip is a popular technique for a clean finish, as it requires making only small holes in the pastry. Alternatively, slicing the éclairs open allows for easy filling and can showcase the creamy interior, though it changes the classic look. Both methods are effective and relatively simple once you understand the process.
Piping vs. Slicing: Choosing Your Filling Method
Piping the filling is often considered the more traditional method for éclairs. Using a piping bag fitted with a bismarck tip (a long, narrow tip designed specifically for filling pastries), you make 2-3 small holes on the underside or ends of each éclair shell. Insert the tip into a hole and gently squeeze the bag, filling the éclair until you feel resistance or see the pastry puff slightly. Move to the next hole to ensure even filling. This method keeps the top of the éclair intact, ready for glazing.
Alternatively, you can slice each éclair horizontally using a serrated knife. Carefully cut about two-thirds of the way through the pastry, creating a hinge. Then, use a spoon or a piping bag (with a star or round tip, if you prefer a decorative look) to fill the bottom half generously with dairy-free chocolate pastry cream.
Close the top gently. This method is often easier for beginners and ensures the éclair is fully filled, though the hinge can sometimes break, and the sliced top needs to be carefully re-seated before glazing. For a classic dairy-free chocolate éclair recipe appearance, piping is usually preferred.
Dairy-Free Chocolate Éclair Glaze: The Finishing Touch
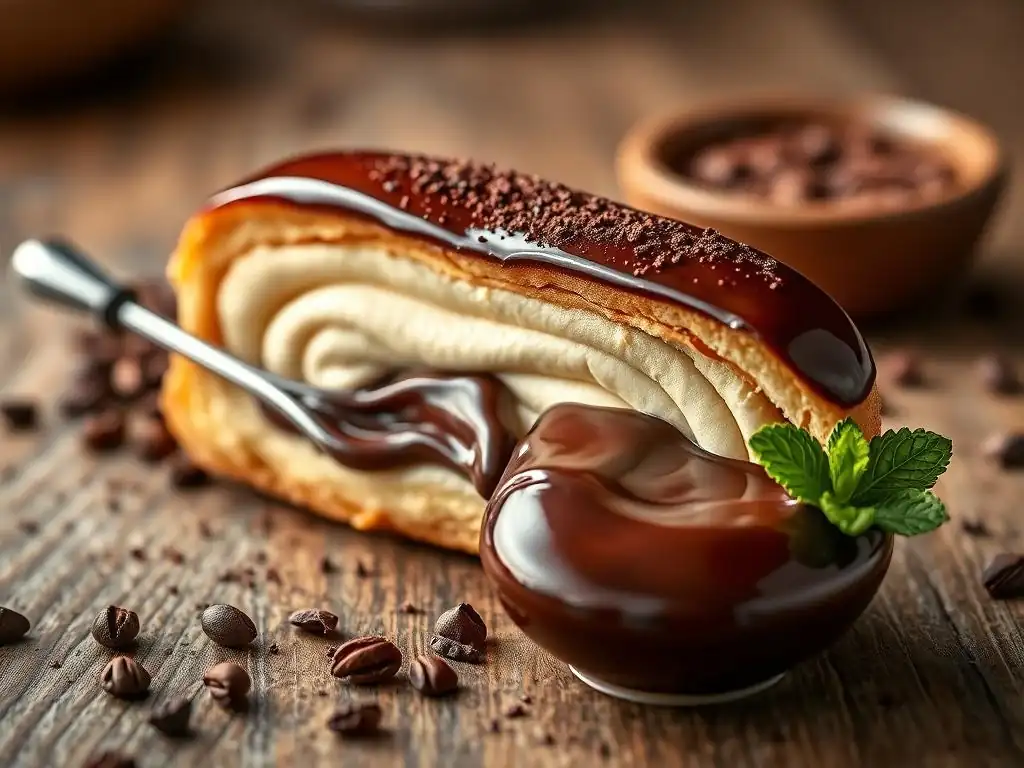
Ingredients for a Shiny Dairy-Free Chocolate Glaze
A shiny, smooth chocolate glaze is the signature topping for dairy-free chocolate éclairs, adding both visual appeal and another layer of chocolate flavor. A simple yet effective dairy-free glaze can be made with just a few ingredients: dairy-free chocolate, a small amount of dairy-free butter substitute, and a liquid like dairy-free milk or even water or corn syrup to achieve the right consistency and shine.
The ratio of chocolate to liquid and fat is key to getting a glaze that sets up nicely but remains glossy. Using a good quality dairy-free chocolate is again important here for flavor. The liquid helps thin the glaze to a dippable consistency, and the small amount of fat from the dairy-free butter substitute contributes to the shine and smoothness.
Dairy-Free Chocolate Options for the Glaze
Just like with the filling, selecting a high-quality dairy-free dark chocolate is crucial for the glaze. Aim for a chocolate with around 60-70% cocoa content for a good balance of bitterness and sweetness. Ensure the chocolate is certified dairy-free or check the ingredient list carefully if allergies are a concern. Brands specifically marketing dairy-free or vegan chocolate are excellent choices.
You will need approximately 4-6 ounces (115-170g) of finely chopped dairy-free chocolate for a batch of glaze. Finely chopping the chocolate or using chocolate chips ensures it melts smoothly and quickly when heated with the liquid and fat. Avoid using baking cocoa powder alone for the glaze, as it won't provide the necessary structure or shine; it's best to use solid chocolate.
Preparing the Glaze: Achieving the Perfect Consistency
Preparing the dairy-free chocolate glaze is straightforward. Combine the finely chopped dairy-free chocolate, dairy-free butter substitute, and your chosen liquid (dairy-free milk, water, or corn syrup) in a heatproof bowl set over a saucepan of simmering water (a double boiler setup). Ensure the bottom of the bowl does not touch the water. Gently heat, stirring occasionally, until the chocolate is completely melted and the mixture is smooth and glossy.
Alternatively, you can melt the ingredients carefully in a microwave in short bursts (30 seconds at a time), stirring well after each burst, until smooth. Be cautious not to overheat the chocolate, as this can cause it to seize. The consistency should be thick enough to coat the back of a spoon but thin enough to drip smoothly. If it's too thick, add a tiny bit more liquid; if too thin, stir in a few more chopped chocolate pieces and let them melt.
Glazing the Éclairs: Tips for a Beautiful Presentation
Once your dairy-free chocolate glaze is prepared and slightly cooled (it should still be warm and fluid, but not hot enough to melt the pastry cream), it's time to glaze the filled éclairs. The easiest way to achieve a professional-looking finish is to dip the tops of the filled éclairs into the glaze. Hold an éclair by the unfilled underside, dip the top surface into the bowl of glaze, ensuring it's fully coated.
Lift the éclair out of the glaze, allowing any excess to drip back into the bowl. Gently scrape the underside edge of the éclair against the rim of the bowl to remove any large drips. Place the glazed éclairs glaze-side up on a wire rack set over parchment paper (to catch drips) to allow the glaze to set.
For an extra neat edge, you can run a finger along the underside where the glaze meets the pastry before it sets completely. Allow the glaze to firm up at room temperature or in the refrigerator for about 15-30 minutes before serving.
Tips and Tricks for Baking Dairy-Free Éclairs
Troubleshooting Common Éclair Problems
Even experienced bakers can encounter challenges when making choux pastry. One common issue is éclairs that don't puff properly, resulting in flat or dense pastries. This can often be attributed to the dough not being cooked sufficiently during the 'drying out' phase on the stovetop, leading to too much moisture. Another cause could be adding eggs when the dough is too hot, which can cook the eggs prematurely, or not mixing the eggs in thoroughly enough.
Another frequent problem is the éclairs collapsing after being removed from the oven. This usually happens if they haven't been baked long enough or at a high enough temperature initially to create a stable shell. Undercooked choux pastry is weak and prone to deflating as it cools. Ensuring the pastry is a deep golden brown and feels light and hollow is key to preventing collapse.
Preventing Soggy Éclairs
To prevent your dairy-free chocolate éclairs from becoming soggy, especially after filling, there are a few key steps. First, ensure the choux pastry is baked until it is very dry and firm, not just golden. Leaving them in the turned-off oven with the door slightly ajar for 10-15 minutes helps them crisp up further as they cool gradually. Second, make sure both the choux shells and the dairy-free chocolate pastry cream filling are completely cool before assembly.
Humidity can also contribute to sogginess. If you live in a humid environment, consider storing unfilled shells in an airtight container once cooled. Fill the éclairs as close to serving time as possible. Once filled, moisture from the pastry cream will inevitably start to soften the shell over time, so éclairs are best enjoyed within a few hours of filling, though they can often hold up reasonably well for up to 24 hours if stored correctly.
Achieving the Perfect Puff
Achieving that characteristic hollow puff in your dairy-free choux pastry is the mark of success. This is primarily driven by the steam created from the moisture in the dough during baking. Ensure your initial cooking of the panade on the stovetop is thorough (1-2 minutes after the dough forms a ball) to gelatinize the starches and dry out the dough just enough. This allows the dough to properly absorb the eggs.
Adding the eggs one at a time and mixing until each is fully incorporated is vital for developing the right dough consistency. The dough should be shiny and fall from a spoon in a thick V-shape. Finally, baking at the correct high initial temperature (around 400°F/200°C) followed by a lower temperature (350°F/180°C) provides the necessary heat for rapid steam production and then thorough drying. Don't open the oven door during the critical first 15-20 minutes of baking!
Storage and Serving Suggestions for Dairy-Free Éclairs
Unfilled and unglazed dairy-free choux pastry shells can be stored at room temperature in an airtight container for 1-2 days, or frozen for up to a month. If freezing, thaw at room temperature and crisp them up in a 350°F (180°C) oven for 5-10 minutes before filling. The dairy-free chocolate pastry cream can be stored in the refrigerator, with plastic wrap pressed directly on the surface, for up to 3-4 days.
Once assembled, dairy-free chocolate éclairs are best enjoyed fresh, ideally within a few hours of being filled and glazed. They can be stored in a single layer in an airtight container in the refrigerator for up to 24 hours, though the pastry shell will gradually soften. For optimal texture, serve them chilled from the refrigerator, allowing the flavors of the dairy-free chocolate pastry cream and glaze to shine.
Dairy-Free Éclair Variations: Explore New Flavors
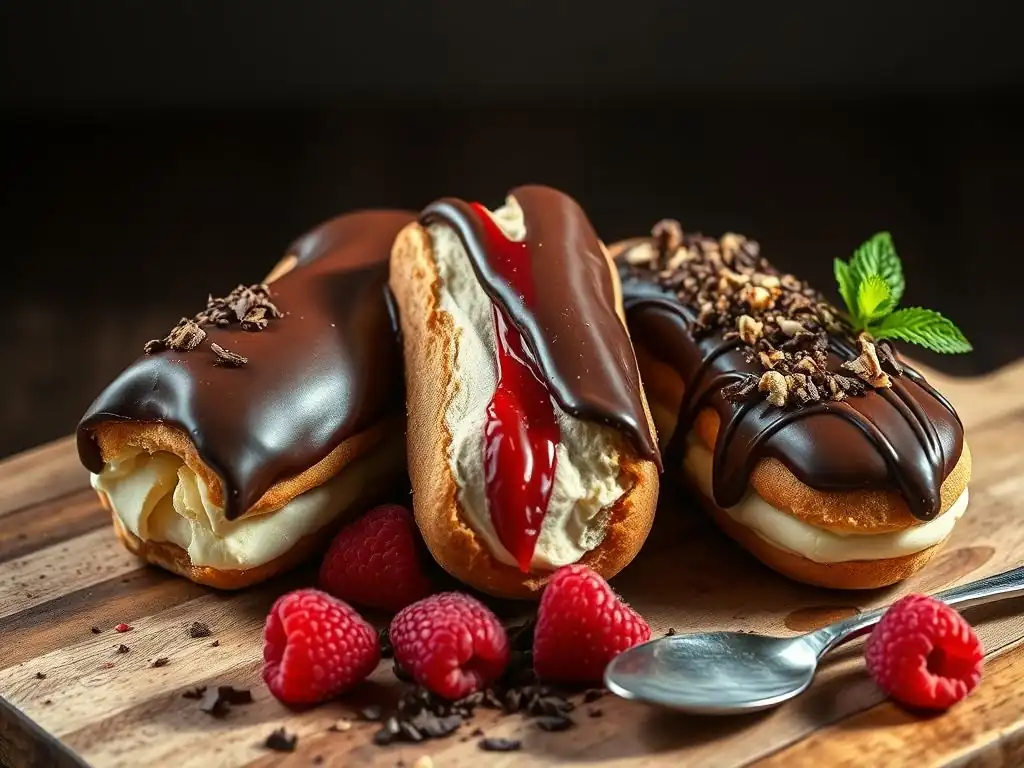
While the classic dairy-free chocolate éclair recipe is undeniably delicious, the beauty of mastering the choux pastry and pastry cream is the ability to create exciting variations. By simply altering the flavoring of the dairy-free pastry cream or the glaze, you can produce a whole range of different éclairs to suit any preference.
Experimenting with different extracts, infusions, or additions like coffee, vanilla bean, or even salted caramel can transform the basic dairy-free chocolate éclair concept into something new and exciting. These variations are perfect for special occasions or simply expanding your dairy-free baking repertoire.
Coffee Éclairs
To create dairy-free coffee éclairs, you can infuse the dairy-free milk for the pastry cream with coffee or add instant espresso powder to the cooked pastry cream. Heat about 2 cups (480ml) of dairy-free milk with 1-2 tablespoons of instant espresso powder (adjust to taste) before tempering the egg yolks. Proceed with the rest of the pastry cream recipe as instructed.
Alternatively, dissolve 1-2 tablespoons of instant espresso powder in a tablespoon of hot water and whisk this into the finished, hot dairy-free pastry cream along with the dairy-free chocolate. For the glaze, you can either use the dairy-free chocolate glaze as is or add a teaspoon of instant espresso powder dissolved in a tiny bit of hot liquid to the melted chocolate mixture for a mocha-flavored topping.
Vanilla Bean Éclairs
For a classic vanilla bean éclair (which can be paired with a dairy-free chocolate glaze or a simple vanilla glaze), infuse the dairy-free milk with vanilla bean. Split a vanilla bean lengthwise, scrape out the seeds, and add both the seeds and the pod to the dairy-free milk before heating it for the pastry cream. Let it simmer gently for a few minutes to allow the flavor to infuse, then remove the pod before proceeding.
If you don't have vanilla bean, use good quality vanilla extract. Add 1-2 teaspoons of vanilla extract to the finished dairy-free pastry cream after it's cooked and removed from the heat. For a pure vanilla éclair, omit the chocolate from the pastry cream and glaze, making a simple vanilla pastry cream and topping with a dairy-free vanilla or confectioners' sugar glaze instead of chocolate.
Salted Caramel Éclairs
Creating dairy-free salted caramel éclairs involves making a dairy-free caramel sauce and incorporating it into the pastry cream and/or using it as a glaze. A dairy-free caramel can be made by boiling sugar and water, then whisking in heated dairy-free cream (like coconut cream) and dairy-free butter substitute, finishing with sea salt. Use caution as caramel is very hot.
Once your dairy-free caramel sauce is made and cooled slightly, you can swirl 1/4 to 1/2 cup (60-120ml) of it into the finished dairy-free chocolate pastry cream for a chocolate salted caramel filling. For the glaze, you could top the chocolate glaze with a drizzle of the dairy-free salted caramel sauce, or create a standalone dairy-free caramel glaze by whisking powdered sugar into the caramel sauce until it reaches a dippable consistency.
Conclusion: Enjoy Your Homemade Dairy-Free Chocolate Éclairs
Congratulations! You've successfully navigated the steps to create delicious dairy-free chocolate éclairs from scratch. From mastering the delicate choux pastry to crafting the rich dairy-free chocolate pastry cream and applying that perfect glossy glaze, you've proven that dietary needs don't have to be a barrier to enjoying classic patisserie. This dairy-free chocolate éclair recipe is a testament to the possibilities of inclusive baking.
Baking éclairs is a rewarding process that yields impressive results. The combination of the light, crisp shell and the smooth, decadent filling is truly satisfying. Whether you made them for yourself, for family, or for friends with dairy sensitivities, these homemade treats are sure to be appreciated. Don't be discouraged if your first batch isn't perfect; like all baking skills, mastering choux pastry takes practice. Keep trying, and you'll get there!
We love seeing what our community bakes! If you've made this dairy-free chocolate éclair recipe, we encourage you to share your photos and experiences. Connecting with other bakers is a great way to learn new tips, get inspired, and celebrate your successes in the kitchen. Your creations can also help encourage others who are looking for reliable dairy-free baking resources.
Sharing your results helps us see how our recipes are working and provides valuable feedback. Whether you followed the recipe exactly or experimented with one of the variations, we're excited to see your beautiful dairy-free chocolate éclairs. Tag us or share on our community platforms to show off your hard work and delicious treats!
Further Dairy-Free Baking Resources
Mastering this dairy-free chocolate éclair recipe is just the beginning of your journey into dairy-free baking. There is a vast world of delicious cakes, cookies, breads, and pastries that can be made entirely without dairy. Exploring different substitutes and techniques will open up even more possibilities in your kitchen.
BakeWithEase offers a wealth of other dairy-free recipes and guides, covering everything from basic substitutions to complex pastry techniques. We have articles on choosing the best dairy-free milks for baking, adapting classic cake recipes, and creating flaky dairy-free pie crusts. Continue exploring our site for more resources to build your skills and expand your dairy-free baking repertoire. Happy baking!
Frequently Asked Questions
What makes this éclair recipe "dairy-free"?
This recipe uses dairy-free alternatives like almond milk and vegan butter, ensuring the pastry cream and overall recipe are suitable for those with dairy intolerances or allergies.
Can I substitute other types of non-dairy milk in the pastry cream?
Yes, you can typically substitute other non-dairy milks such as oat milk or soy milk. Keep in mind that the flavor profile may slightly change based on the type of milk used.
Is it difficult to make éclairs from scratch, especially the pastry cream?
While éclairs can seem intimidating, this recipe provides step-by-step guidance to make the process easier. The dairy-free pastry cream is made with simple ingredients and clear instructions.
What's the best way to ensure the éclairs puff up properly during baking?
High heat initially is key. Make sure your oven is preheated properly and avoid opening the oven door during the first part of baking. This ensures optimal puffing.
Can I freeze the baked, unfilled éclairs for later use?
Yes, you can freeze the baked, unfilled éclairs. Allow them to cool completely, then wrap them individually in plastic wrap before placing them in a freezer-safe bag. This helps maintain their freshness and texture.
Final Reflection: The Sweet Symphony of Dairy-Free Delight
The demand for delicious, inclusive recipes continues to grow, and this dairy-free chocolate éclair recipe stands as a testament to the power of culinary creativity and accessibility. It proves that indulging in decadent treats doesn't require compromising on taste or dietary needs. This recipe isn't just about avoiding dairy; it's about expanding the possibilities of what's considered "delicious" and making joy accessible to everyone.
Creating this recipe was more than just a culinary experiment; it was a journey into understanding the importance of inclusivity in food. The process highlighted the surprising ease with which dairy-free alternatives can create equally satisfying, if not superior, results. The best things in life are simple,
a phrase often used, rings especially true when considering the pure joy a perfectly crafted éclair can bring, regardless of dietary restrictions. This recipe aims to share that joy widely.
Now, I invite you to step into your kitchen and embark on your own culinary adventure. Don't be afraid to experiment, to adapt, and to find your own unique twist on this recipe. The beauty of baking lies in its ability to connect us through shared experiences and the simple pleasure of creating something delicious. Let this dairy-free chocolate éclair be a starting point, a springboard to explore the boundless world of inclusive and delectable desserts. Share your creations, your adaptations, and your joy with others – let's build a community of flavor, one éclair at a time.
Here's a Call to Action (CTA) tailored for a BakeWithEase article on Dairy-Free Chocolate Éclairs:
Unleash Your Inner Pâtissier: Make These Delicious Éclairs!
Thanks for joining us on this delectable journey into the world of dairy-free baking! We hope you’ve gained some inspiration and confidence to tackle this seemingly challenging recipe. Now it's time to put your newfound skills to the test.
- Bake your own batch of exquisite dairy-free chocolate éclairs! Follow the recipe step-by-step and impress your friends and family with your culinary prowess. (This is the primary action)
- Share your creation with us! Tag @BakeWithEase on social media and show us your delicious results. We love seeing your baking adventures!
- Challenge yourself: Try experimenting with different flavors or fillings for your éclairs. Get creative and make them your own!
Ready to create your masterpiece? What unique twist will you add to these amazing dairy-free chocolate éclairs?