
Getting the Signature Choux Puff: Key Tips for Success

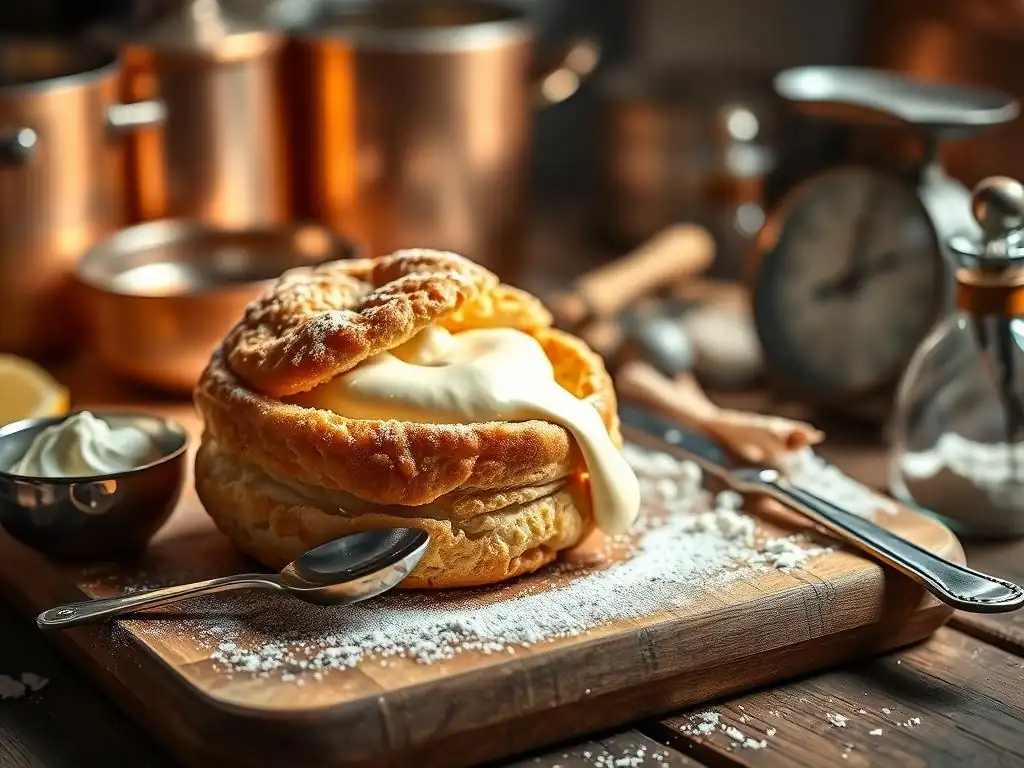
Welcome to BakeWithEase, your trusted guide to baking bliss! Ever wondered how to achieve those airy, perfectly formed choux puffs that seem to defy gravity? This week, we're diving deep into the secrets of choux pastry, focusing on perfecting your choux puff recipe. Get ready to uncover the key tips that separate delicious results from baking mishaps. Eager to learn the insider tricks? Let's get baking!
- Understanding Choux Pastry: The Science Behind the Puff
- Perfecting Your Choux Pastry: Essential Techniques
- Baking Choux Pastry to Perfection: Temperature and Timing
-
Troubleshooting Common Choux Pastry Problems: Solutions
- Problem: Flat or Collapsed Puffs - Identifying the Cause
- Solution: Increase Baking Time, Reduce Oven Door Opening, Ensure Dough Consistency
- Problem: Soggy Puffs - Avoiding Moisture Traps
- Solution: Cool Completely on a Wire Rack, Dry in a Warm Oven
- Problem: Unevenly Baked Puffs - Ensuring Consistent Heat Distribution
- Solution: Rotate Baking Sheets Mid-Bake, Use a Convection Oven
- Elevating Your Choux Pastry: Fillings, Toppings, and Variations
- Advanced Choux Pastry Techniques: Expanding Your Skills
- Conclusion: Mastering the Art of Choux Pastry
-
Frequently Asked Questions
- What are the most common pitfalls when attempting a choux puff recipe?
- How crucial is the temperature of the ingredients for a successful choux puff?
- Why is it important to cook the pâte à choux dough before baking?
- What's the best way to ensure even baking and prevent burnt bottoms of choux puffs?
- Can I freeze choux puffs, and if so, what's the best method?
- Final Reflection: The Enduring Allure of the Perfect Choux Puff
- Unleash Your Inner Pâtissier: Master the Choux Puff!
Understanding Choux Pastry: The Science Behind the Puff
What is Choux Pastry? A Definition and History
Choux pastry, also known as pâte à choux, is a light pastry dough used to make cream puffs, éclairs, gougères, and more. Unlike most pastry doughs which rely on fat or leavening agents like baking powder or yeast, choux pastry puffs up dramatically when baked due to its high moisture content. The dough is cooked on the stovetop before baking, creating a gelatinized structure from the starch in the flour.
When this structure hits the high heat of the oven, the water in the dough turns to steam, expanding rapidly and creating a large cavity inside the pastry. This unique process is fundamental to achieving the signature hollow interior perfect for fillings.
Tracing its origins back to 16th century France, choux pastry is credited to Catherine de' Medici's pastry chef, Pantanelli, who created a dough called pâte à chaud (hot paste). Later, in the 18th century, Chef Antoine Carême perfected the recipe, renaming it pâte à choux because the small baked pastries resembled little cabbages ( choux in French). Mastering this dough is key to perfecting choux puff recipe tips and opening up a world of classic French pastries. The basic recipe involves just four ingredients: water (or milk), butter, flour, and eggs, but the technique is paramount.
Key Ingredients for Successful Choux Pastry: Ratios and Roles
The magic of choux pastry lies in the precise balance of its simple ingredients. Water or milk provides the liquid that will turn to steam; milk can add richness and help with browning. Butter adds fat for tenderness and flavor. Flour, typically all-purpose, provides the structure (starch and gluten) that holds the steam.
Eggs are crucial for emulsification, binding the dough, adding richness, and providing additional liquid and protein that contributes to the puff and structure. A common ratio is roughly 1 part liquid, 1 part butter, 1 part flour, and 2 parts eggs by weight, though variations exist. For example, 250ml water, 100g butter, 150g flour, and 4-5 large eggs is a classic starting point.
Understanding the role of each ingredient helps in perfecting choux puff recipe tips. The initial cooking on the stovetop melts the butter into the liquid and then gelatinizes the starch in the flour, creating a thick paste. The eggs are then beaten in one by one, creating a smooth, glossy dough.
Too little egg, and the dough will be too stiff, resulting in small, dense puffs. Too much egg, and the dough will be too loose, causing the puffs to spread and collapse. The quality and size of eggs can vary, so adding the last egg gradually is often recommended to achieve the correct consistency.
Perfecting Your Choux Pastry: Essential Techniques
Technique #1: Achieving the Right Dough Consistency: The Ribbon Test
After cooking the flour-butter-liquid mixture on the stovetop and letting it cool slightly, the eggs are incorporated. This is where achieving the correct consistency is vital for perfecting choux puff recipe tips. The dough should be smooth, glossy, and thick enough to hold its shape when piped, but not so stiff that it's difficult to work with. The best way to check for this is the "ribbon test."
To perform the ribbon test, lift a spoon or spatula full of the dough. The dough should fall back into the bowl in a thick ribbon or V-shape, and a portion should remain attached to the spoon, slowly dripping off in a triangular shape. If the dough breaks off too cleanly or is very stiff, it needs more egg.
If it's too runny and falls off rapidly without holding any shape, it has too much egg (a difficult problem to fix, highlighting the importance of adding eggs gradually). This perfect consistency ensures the dough has enough structure to hold the steam during baking but is pliable enough to expand evenly.
Technique #2: Incorporating Eggs Correctly: Temperature and Emulsification
Adding the eggs correctly is a critical step in perfecting choux puff recipe tips. After the dough has cooked on the stovetop, it's essential to let it cool slightly before adding the eggs. If the dough is too hot (above 60°C or 140°F), the eggs will scramble, ruining the texture. Transferring the hot dough to a clean bowl or stand mixer and stirring it for a few minutes helps it cool down. The ideal temperature for adding eggs is around 50-55°C (120-130°F).
Eggs should be added one at a time, mixing thoroughly after each addition until the egg is fully incorporated and the dough returns to a smooth consistency before adding the next. Using a stand mixer with a paddle attachment on medium speed is highly recommended for this step, as it ensures complete emulsification and develops the dough's structure.
If mixing by hand, be prepared for a vigorous workout! The emulsification process, where the fat and liquid from the eggs are evenly dispersed throughout the dough, is what gives the choux pastry its characteristic smooth texture and contributes significantly to its ability to rise and puff.
Technique #3: Piping for Uniform Results: Bag Angle and Pressure
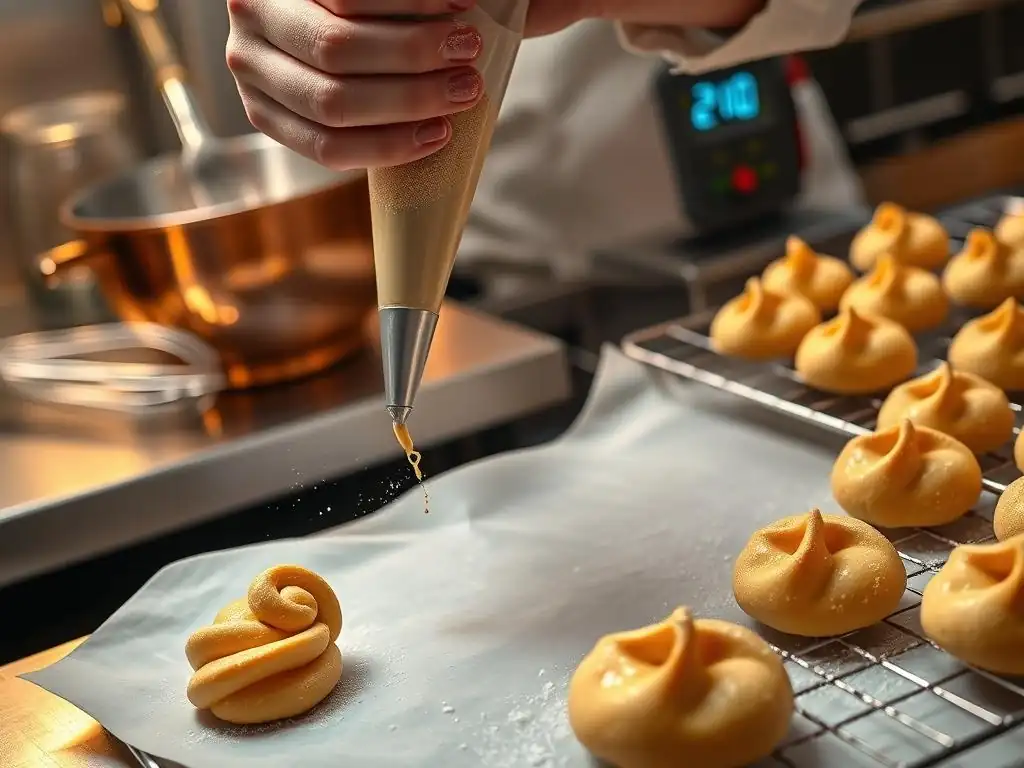
Once the dough is ready, piping is the method of choice for shaping choux pastries and is a key part of perfecting choux puff recipe tips for consistent results. Using a piping bag fitted with a plain or star tip allows for uniform shapes and sizes, which ensures they bake evenly. For classic cream puffs, a large plain tip (like an Ateco 808 or 809) is ideal.
When piping onto a baking sheet lined with parchment paper or a silicone mat, hold the piping bag perpendicular to the surface (at a 90-degree angle). Apply steady, even pressure, lifting the bag straight up when you've piped enough dough for one puff. This technique helps create height and a round shape.
For éclairs, hold the bag at a slight angle (around 45 degrees) and pipe in straight, even lines while moving the bag steadily away from you. Consistent size and shape are crucial; pastries of different sizes will bake at different rates, leading to some being overcooked while others are underbaked. Leaving adequate space between puffs (at least 2-3 cm or 1 inch) is also important as they will expand significantly.
Baking Choux Pastry to Perfection: Temperature and Timing
Technique #4: Oven Temperature Control: Avoiding Premature Browning
Baking choux pastry requires careful management of oven temperature, perhaps one of the most critical elements in perfecting choux puff recipe tips. Many recipes call for starting the baking process at a high temperature, such as 220°C (425°F), for the first 10-15 minutes. This initial blast of high heat is essential for generating the maximum amount of steam quickly, which causes the dough to puff dramatically and form a strong shell.
After this initial high-heat period, the temperature is typically reduced to a lower setting, around 180°C (350°F), for the remainder of the baking time. This lower temperature allows the pastry to dry out and crisp up without burning the exterior. Baking at too low a temperature initially will result in less dramatic puffing, while keeping the temperature too high for too long will cause the outside to brown and set before the inside is fully cooked and dry, leading to collapsed or soggy puffs. Precise oven calibration is helpful here; an oven thermometer can verify the actual temperature.
Technique #5: The Importance of Venting: Releasing Steam for Structure
Venting the choux pastry during baking is a technique often recommended to ensure the puffs dry out properly and maintain their structure, contributing significantly to perfecting choux puff recipe tips. After the initial puffing phase (typically when the temperature is reduced), some bakers slightly open the oven door for a few seconds or pierce the side of each puff with a skewer or knife tip.
The purpose of venting is to allow some of the steam trapped inside the pastry to escape. While steam is necessary for the initial puff, excess moisture inside the baked shell can lead to a soggy interior or cause the pastry to collapse as it cools. Releasing this steam helps the interior dry out and set, resulting in a sturdy, hollow shell. This step, combined with adequate baking time at the lower temperature, is key to creating those perfectly crisp, empty cavities ready for filling.
Technique #6: Achieving a Golden-Brown Crust: Visual Cues and Doneness
Knowing when choux pastry is perfectly baked is crucial for perfecting choux puff recipe tips. The pastries should be a deep golden brown color, not just lightly golden. This rich color indicates that the crust is fully developed and dry. If they are removed from the oven too early, they will likely collapse as they cool because the internal structure hasn't set properly.
Look for visual cues: the puffs should look firm and dry, not soft or wet on the surface. They should also feel light when picked up, indicating the interior is hollow. Baking time will vary depending on the size of the pastries and your oven, but typically ranges from 25 to 40 minutes after the initial high-heat phase.
A good test is to take one puff out; if it deflates as it cools, the batch needs more baking time. When they are fully baked, turn off the oven and leave the door ajar for 5-10 minutes to allow them to cool gradually, further preventing collapse.
Troubleshooting Common Choux Pastry Problems: Solutions
Problem: Flat or Collapsed Puffs - Identifying the Cause
Few things are more disheartening than watching your beautifully piped choux pastry deflate after baking. Flat or collapsed puffs are a common issue when perfecting choux puff recipe tips and can stem from several causes.
The most frequent culprits include insufficient baking time, opening the oven door too early or too frequently during baking, dough that was too wet (too many eggs), or dough that wasn't cooked sufficiently on the stovetop. If the starch structure isn't properly developed or the moisture isn't driven out during baking, the pastry lacks the strength to hold its shape once removed from the heat.
Another potential cause is baking at too low a temperature initially, which doesn't generate enough steam for a strong puff, or reducing the temperature too drastically or too early. Overcrowding the baking sheet can also inhibit proper heat circulation, leading to uneven baking and potential collapse. Identifying the specific cause requires reviewing your process, but often it's a combination of factors related to heat management and dough consistency.
Solution: Increase Baking Time, Reduce Oven Door Opening, Ensure Dough Consistency
To combat flat or collapsed puffs, implement these solutions for perfecting choux puff recipe tips. Increase baking time: Ensure the pastries are deeply golden brown and feel light before removing them. When in doubt, bake for a few extra minutes. Reduce oven door opening: Avoid opening the oven door during the first 20-25 minutes of baking, especially during the initial high-heat phase.
Each time the door opens, heat escapes, and the sudden temperature drop can cause the delicate structure to collapse. Ensure dough consistency: Double-check your egg incorporation using the ribbon test (Technique #1). If the dough is too wet, it will be harder to achieve a stable puff. Also, make sure you cook the flour mixture on the stovetop for the recommended time (often 1-2 minutes after the dough pulls away from the sides) to fully gelatinize the starch.
If you suspect your oven temperature is inaccurate, use an oven thermometer. Baking at the correct temperatures (high initially, then lower) for the appropriate duration is paramount. For example, baking at 220°C (425°F) for 10-15 minutes, then reducing to 180°C (350°F) for another 20-25 minutes (or longer for larger pastries) is a standard practice. Also, ensure adequate spacing on the baking sheet.
Problem: Soggy Puffs - Avoiding Moisture Traps
Soggy choux puffs, while sometimes inflated, lack the desirable crisp exterior and dry, hollow interior. This problem is almost always related to moisture management, either during or after baking, and is a key area to address when perfecting choux puff recipe tips. If the pastries are not baked long enough, the interior remains moist and dense. Even if baked correctly, improper cooling can lead to sogginess as condensation forms.
Overfilling the puffs with wet fillings too early can also cause the shell to become soft and soggy. Humidity in the kitchen environment can also play a small role, especially after the pastries have cooled. The goal is to drive out as much moisture as possible during baking and prevent moisture from getting back in during cooling and storage.
Solution: Cool Completely on a Wire Rack, Dry in a Warm Oven
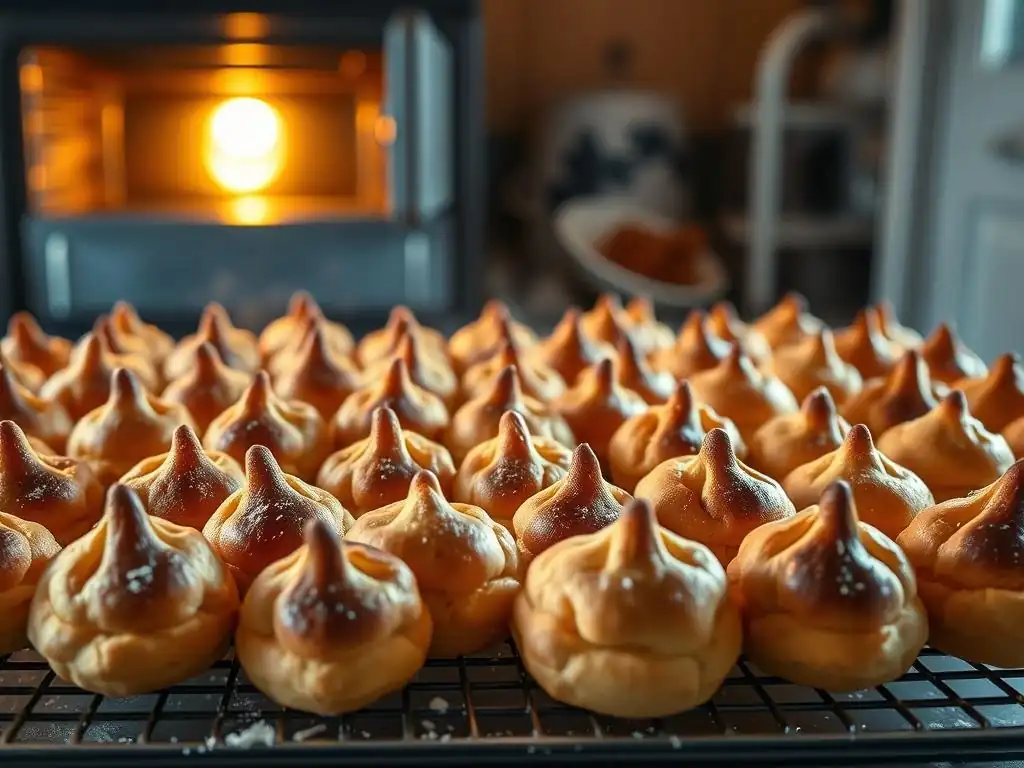
To prevent soggy choux puffs and ensure a crisp result, focus on proper drying and cooling. Cool Completely on a Wire Rack: As soon as the choux pastries are done baking, transfer them to a wire rack. This allows air to circulate around all sides, preventing condensation from forming on the bottom and making them soggy.
Do not cool them on the baking sheet. Dry in a Warm Oven: For extra insurance against sogginess, especially if you've had problems in the past or live in a humid climate, you can turn off the oven once the choux are baked, prop the door open slightly (using a wooden spoon), and leave the puffs inside for an additional 10-15 minutes. This allows them to dry out further in a warm, dry environment.
Only fill choux pastries just before serving to prevent the shell from absorbing moisture from the filling. If you need to store empty shells, keep them in an airtight container at room temperature. If they lose some crispness, they can often be refreshed by baking them in a preheated oven at 180°C (350°F) for 5-10 minutes before filling. These steps are vital for perfecting choux puff recipe tips focused on texture.
Problem: Unevenly Baked Puffs - Ensuring Consistent Heat Distribution
Unevenly baked choux puffs, where some are perfectly golden and puffed while others are pale, collapsed, or burnt on one side, are usually a result of inconsistent heat distribution in the oven. Ovens often have hot spots, and if the baking sheet remains in one position throughout the bake, the pastries in the hotter areas will cook faster than those in cooler spots.
Overcrowding the baking sheet can also contribute to this problem by hindering air circulation around the pastries. If the oven isn't preheated adequately, or if the temperature fluctuates significantly, it can also lead to unpredictable and uneven baking results. Addressing heat distribution is key to achieving uniformly beautiful choux.
Solution: Rotate Baking Sheets Mid-Bake, Use a Convection Oven
To ensure even baking and improve your success in perfecting choux puff recipe tips, implement strategic techniques. Rotate Baking Sheets Mid-Bake: About halfway through the baking time (usually after the initial high-heat phase when you reduce the temperature), carefully open the oven door and rotate the baking sheet 180 degrees. If you are baking two sheets at once, swap their positions (top rack to bottom, bottom to top) as well. This exposes all the pastries to different parts of the oven, helping them bake more evenly.
Use a Convection Oven: If you have access to a convection oven, use it. Convection ovens use a fan to circulate hot air, which provides much more even heat distribution and can help pastries puff higher and brown more uniformly. When using convection, you may need to reduce the temperature by about 15-20°C (25-35°F) and potentially reduce the baking time slightly compared to a conventional oven. Ensure your oven is fully preheated before putting the choux in; this is crucial for the initial powerful puff.
Elevating Your Choux Pastry: Fillings, Toppings, and Variations
Cream Filling Options: Pastry Cream, Whipped Cream, Chocolate Ganache
Once you've mastered perfecting choux puff recipe tips and produced beautiful, hollow shells, the real fun begins: filling them! The classic filling for cream puffs and éclairs is pastry cream ( crème pâtissière). This rich, thick custard is made from milk, sugar, egg yolks, and a thickener like flour or cornstarch, often flavored with vanilla. It's smooth, creamy, and holds up well inside the pastry. A standard batch for about 24 medium puffs might use 500ml milk, 100g sugar, 4-6 egg yolks, and 40-50g cornstarch.
Other popular fillings include simple whipped cream, lightly sweetened and sometimes flavored with vanilla or a liqueur. Whipped cream is lighter than pastry cream and best used just before serving as it can weep over time. For a decadent treat, chocolate ganache (a mixture of melted chocolate and hot cream) is fantastic, offering a rich, intense flavor that pairs wonderfully with the light choux shell. A ratio of 1:1 or 2:1 chocolate to cream (by weight) works well depending on desired richness and firmness.
Toppings and Finishes: Glazes, Chocolate, Powdered Sugar
Toppings add both flavor and visual appeal to choux pastries. Glazes are common for éclairs, with classic options including a simple powdered sugar glaze mixed with a little milk or lemon juice, or a rich chocolate glaze made from melted chocolate or cocoa powder mixed with sugar and liquid. For a shiny finish, a fondant glaze is often used on éclairs.
Melted chocolate can be drizzled or dipped for a quick, delicious finish on cream puffs or profiteroles. A simple dusting of powdered sugar is also a lovely, understated way to finish cream puffs or gougères. For extra crunch and visual interest, some choux variations are topped with craquelin, a thin, sweet biscuit layer placed on top of the piped dough before baking, which spreads and cracks during the puffing process.
Variations: Gougères, Croquembouche, Paris-Brest
Perfecting choux puff recipe tips opens the door to numerous delightful variations. Gougères are savory choux pastries, typically flavored with cheese (like Gruyère or Emmental) mixed into the dough before piping and baking. They are often served as appetizers.
The Croquembouche is a showstopping centerpiece, a towering cone of cream puffs ( profiteroles) filled with pastry cream and bound together with threads of caramel, often decorated with spun sugar or other confections. Each profiterole is essentially a small, filled choux puff.
The Paris-Brest is a large, ring-shaped choux pastry, often topped with flaked almonds, sliced horizontally after baking and filled with a rich praline-flavored cream ( crème mousseline). Its shape was inspired by the Paris–Brest–Paris bicycle race. These variations demonstrate the versatility of the humble choux dough.
Advanced Choux Pastry Techniques: Expanding Your Skills
Making Éclairs: Techniques for Shaping and Filling
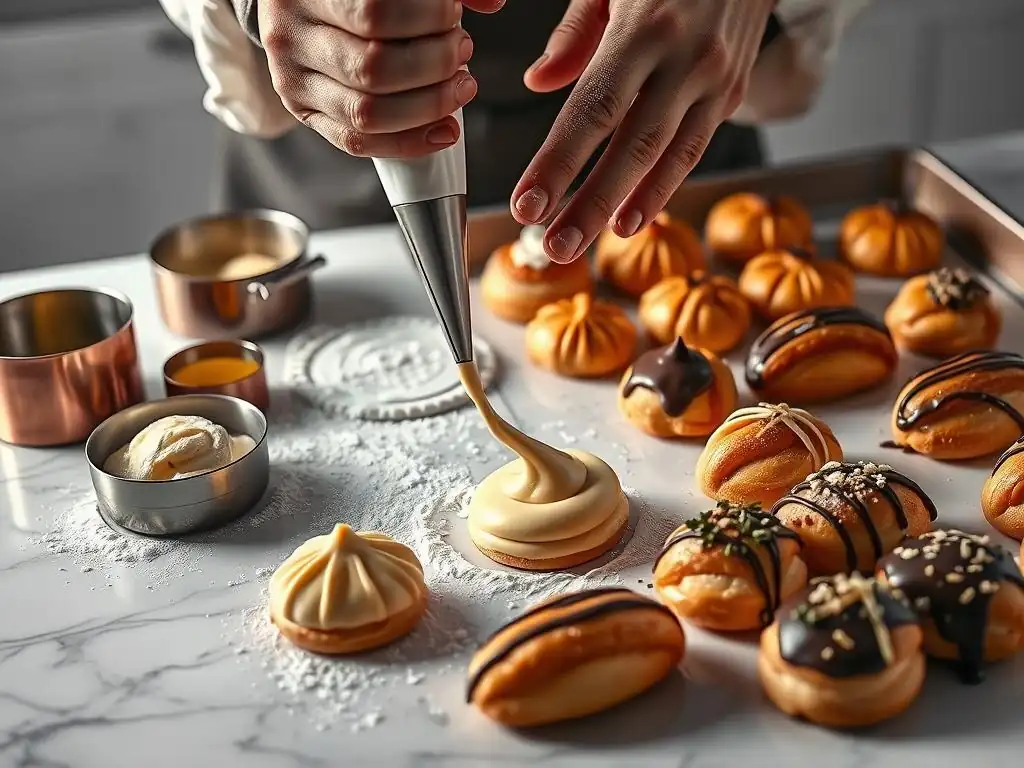
Making éclairs involves specific shaping and filling techniques beyond basic cream puffs, adding another layer to perfecting choux puff recipe tips. Éclairs require piping straight, even lengths of dough, typically 10-15 cm (4-6 inches) long, using a medium plain or star tip. Consistency in length and width is important for even baking and professional presentation. Piping on parchment paper with pre-drawn lines can help maintain uniformity.
After baking and cooling, éclairs are traditionally filled from the underside using a piping bag fitted with a long, thin tip. You can make 2-3 small holes in the bottom of each éclair and pipe the filling until the pastry feels heavy and full. Alternatively, some bakers slice the éclair horizontally and spread the filling inside. The tops are then typically dipped in a glaze, most commonly chocolate fondant or ganache.
Creating Profiteroles: Assembling Dessert Towers
Profiteroles are simply small cream puffs, usually filled with pastry cream or ice cream and often served with chocolate sauce. The advanced technique here lies in assembling them into impressive structures like the Croquembouche. Creating a stable tower requires perfectly baked, sturdy profiteroles and skill in using caramel.
The base of the tower is often a disc of nougatine or cardboard. Profiteroles are dipped in hot caramel one by one and quickly attached to each other and the base, building upwards in layers. The hot caramel acts as glue but hardens very quickly, requiring speed and precision. The finished tower is often decorated with delicate spun sugar threads, crystallised flowers, or other sugar work, showcasing advanced sugar artistry alongside choux skill.
Making Cream Puffs: Classic Fillings and Presentation
While simple in concept, perfecting cream puffs involves mastering the basic choux dough and achieving the ideal puff and texture (as discussed in the previous sections on perfecting choux puff recipe tips). The classic presentation involves filling the baked and cooled puff. This can be done by slicing the puff horizontally and filling the base, then replacing the top, or by making a small hole in the bottom and piping the filling inside.
Classic fillings include pastry cream or whipped cream. For serving, they can be dusted with powdered sugar, drizzled with chocolate sauce, or glazed. For a more elegant presentation, ensure the puffs are uniform in size and color, and fill them generously so they feel substantial. The contrast between the crisp, light shell and the smooth, rich filling is the hallmark of a perfect cream puff.
Conclusion: Mastering the Art of Choux Pastry
Recap of Key Techniques for Perfect Choux Pastry
Mastering choux pastry is a journey that rewards attention to detail and practice. By focusing on a few key techniques, you can significantly improve your results and confidently achieve those signature hollow puffs. Remembering the science behind the puff – the steam expansion – guides many of the crucial steps in perfecting choux puff recipe tips.
From ensuring the right dough consistency via the ribbon test, correctly incorporating eggs for structure and richness, and piping uniformly for even baking, the initial stages are fundamental. Equally important is the baking process itself: utilizing high heat for the initial puff, reducing the temperature to dry out the interior, and potentially venting steam. Finally, proper cooling on a wire rack prevents sogginess.
While challenges like collapsing or flat puffs can occur, understanding their causes and applying the solutions discussed will help you troubleshoot effectively. With practice, patience, and attention to these core techniques, you'll be well on your way to creating delicious choux pastries, ready to be filled and enjoyed in countless ways.
Frequently Asked Questions
What are the most common pitfalls when attempting a choux puff recipe?
The most common issues are insufficient cooking of the pâte à choux dough, leading to under-expanded puffs, and opening the oven too early, causing them to collapse.
How crucial is the temperature of the ingredients for a successful choux puff?
Using room temperature eggs is extremely important. Cold eggs can affect the dough's consistency and prevent proper puffing.
Why is it important to cook the pâte à choux dough before baking?
Cooking the dough on the stovetop gelatinizes the starch, which allows it to absorb more liquid and create the necessary structure for the puffs to rise properly in the oven.
What's the best way to ensure even baking and prevent burnt bottoms of choux puffs?
Baking on the middle rack of the oven ensures consistent heat distribution. Using parchment paper also helps prevent sticking and over-browning.
Can I freeze choux puffs, and if so, what's the best method?
Yes, you can! Freeze unfilled, baked choux puffs in an airtight container. Thaw completely before filling.
Final Reflection: The Enduring Allure of the Perfect Choux Puff
The pursuit of the perfect choux puff transcends mere culinary skill; it's a testament to patience, precision, and the enduring power of a flawlessly executed recipe. From humble beginnings as a simple pastry, the choux puff has evolved into a symbol of elegance and mastery in the baking world, its delicate crispness and airy interior captivating palates worldwide. This enduring appeal speaks to a deeper human desire for perfection and the satisfaction derived from mastering a challenging technique.
The journey to achieving that signature choux puff, as explored in this article, is a microcosm of life itself. It requires careful attention to detail, a willingness to learn from mistakes, and the unwavering belief that success is attainable. The only way to do great work is to love what you do.
- Steve Jobs. This quote, while seemingly unrelated to baking, perfectly encapsulates the dedication and passion required to perfect any craft, including the art of choux pastry. The subtle nuances, the precise measurements, the watchful eye during baking – these are all elements that contribute to the final, breathtaking result, mirroring the dedication needed to achieve our personal goals.
Now, it's your turn. Don't be intimidated by the seemingly complex process. Take the tips and techniques outlined in this article, embrace the challenge, and embark on your own journey to mastering the choux puff. Remember the satisfaction of that first perfectly puffed pastry, the joy of sharing your creations, and the lasting sense of accomplishment that comes with conquering a culinary feat. The perfect choux puff awaits – dare to create it.
Unleash Your Inner Pâtissier: Master the Choux Puff!
Thanks for joining us on this delicious journey into the world of choux pastry! We hope you now feel confident tackling even the most intricate choux creations. Ready to put your newfound skills to the test?
- Bake your dream choux today! Experiment with different fillings and glazes – let your creativity run wild!
- Share your choux puff triumphs on social media using #BakeWithEaseChoux – we'd love to see your masterpieces!
- Challenge a friend to a choux-baking duel – may the best puff win!
What exciting choux creation will you bake first?