
Baking the Festive Italian Panettone: A StepbyStep Guide

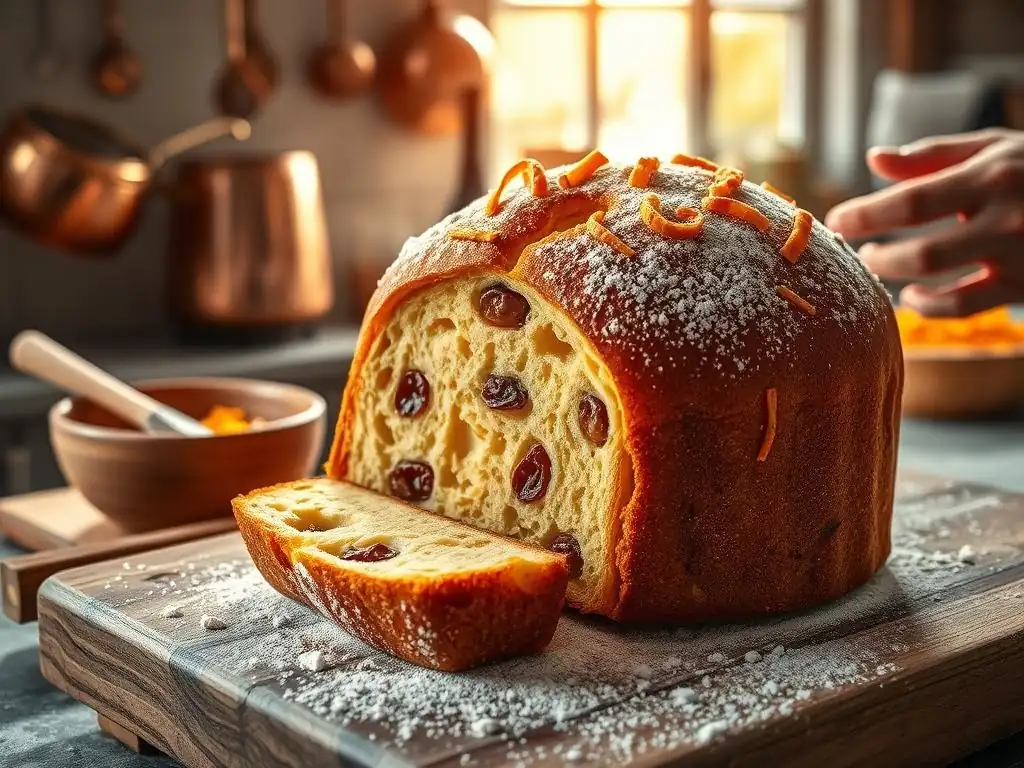
Welcome to BakeWithEase, your trusted guide to baking brilliance! Ever dreamt of creating that perfectly airy, festive centerpiece? Dive into our step-by-step guide and discover the secrets behind a truly authentic Italian panettone. Ready to unlock the magic of this holiday classic? Let's begin!
- Baking Panettone: A Step-by-Step Guide
- Introduction to Panettone
- Preparing to Bake: Ingredients and Equipment
- Step-by-Step Baking Guide
- Tips and Tricks
- Storing and Serving
- Conclusion: Enjoy Your Homemade Panettone
-
Frequently Asked Questions
- What makes Panettone a festive bread?
- Is the BakeWithEase Panettone recipe suitable for beginner bakers?
- What are the key ingredients in the BakeWithEase Festive Italian Panettone recipe?
- How long does it take to make Panettone using the BakeWithEase recipe?
- Can I substitute any ingredients in the BakeWithEase Panettone recipe?
- Final Reflection: The Enduring Magic of Panettone
- Unleash Your Inner Panettone Maestro!
Baking Panettone: A Step-by-Step Guide
Introduction to Panettone
What is Panettone and Why Bake it?
Panettone is a traditional Italian sweet bread loaf, typically prepared and enjoyed during the Christmas and New Year holidays. Its distinctive tall, dome shape, light and airy texture, and inclusion of candied fruits and raisins make it a truly special treat. Baking a Festive Italian panettone recipe at home is a rewarding experience, filling your kitchen with incredible aromas and offering a sense of accomplishment.
Unlike standard bread, panettone requires patience and specific techniques, but the result is a rich, moist, and fragrant bread that far surpasses most store-bought versions. It's a centerpiece for holiday tables and makes a cherished homemade gift.
Beyond its delicious taste and festive appeal, baking your own panettone allows you to control the quality of ingredients, ensuring the freshest candied fruits and the finest flour. Many bakers find the process meditative, a slow craft that connects them to centuries of Italian baking tradition. Sharing a slice of warm, homemade panettone with loved ones is a simple joy that embodies the spirit of the holidays. This guide will walk you through creating your own Festive Italian panettone recipe right in your kitchen.
History of Panettone
The origins of panettone are steeped in legend, primarily rooted in Milan, Italy. One popular tale involves a baker's assistant named Toni who saved Christmas dinner for the Duke of Milan by creating a sweet bread with leftover ingredients. This "Pane di Toni" (Toni's bread) supposedly gave the pastry its name. While this story is charming, historical records suggest panettone evolved from leavened, enriched breads made for special occasions throughout the Middle Ages. By the 15th century, a sweet, yeasted bread with spices and raisins was a common Christmas treat in Milanese homes.
Over the centuries, the recipe and techniques for baking panettone were refined. The characteristic tall shape and incredibly light texture, achieved through a long fermentation process and high butter and egg content, became standard. In the 20th century, industrial production made panettone widely available, but traditional artisanal methods, often relying on a natural sourdough starter (lievito madre), continued to produce the most prized loaves. Mastering a traditional Festive Italian panettone recipe connects you to this rich history, echoing the methods used by Italian bakers for generations.
Preparing to Bake: Ingredients and Equipment
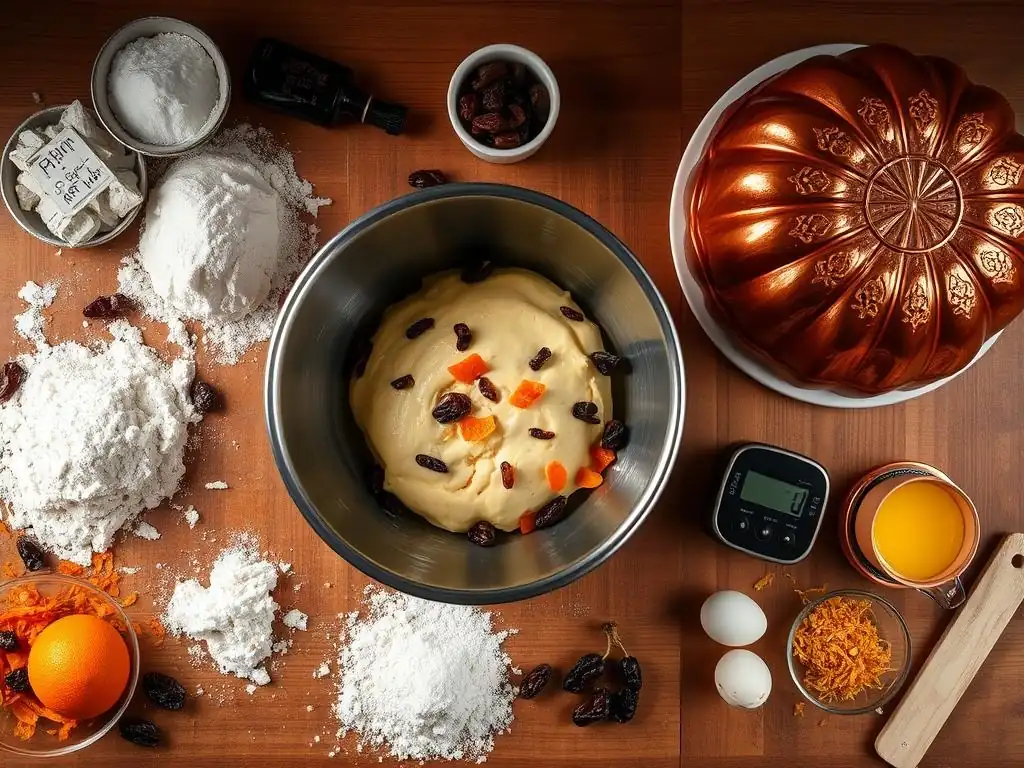
Key Ingredients
Flour: Type and Protein Content
Choosing the right flour is crucial for a successful Festive Italian panettone recipe. Panettone dough is incredibly rich and requires significant gluten development to support the high fat and sugar content and achieve the characteristic tall structure. A strong bread flour with a high protein content, ideally between 13% and 15%, is recommended. This high protein level allows for the formation of a robust gluten network capable of trapping the gases produced during the long fermentation and supporting the heavy load of fruit and butter. Using all-purpose flour (typically 10-12% protein) will likely result in a shorter, denser loaf.
Some recipes might specify a specific "Panettone flour," which is essentially a very high-protein bread flour often milled from specific wheat varieties. If you can't find flour explicitly labeled for panettone, look for the highest protein bread flour available. For example, a strong Canadian or Italian '00' bread flour with a W index above 300 would be suitable. The protein content should be listed on the nutrition label; aim for 13g or more per 100g of flour.
Yeast: Sourdough vs. Commercial
Traditional, artisanal panettone relies on a natural sourdough starter, specifically a stiff Italian starter known as lievito madre. This starter provides a unique flavor profile and contributes significantly to the dough's strength and longevity. Using a lievito madre involves several careful refreshments leading up to the bake to ensure it is active and strong enough to leaven such a rich dough. This method requires experience and a well-maintained starter, often fed daily.
For home bakers seeking a more accessible Festive Italian panettone recipe, a hybrid approach or using commercial yeast is common. A hybrid recipe might use a small amount of commercial yeast alongside a sourdough starter to provide a boost. Alternatively, using only active dry or instant yeast simplifies the process considerably while still allowing for a delicious result. If using commercial yeast, the fermentation times might be shorter than with a pure sourdough method. For example, a recipe using commercial yeast might proof for 8-12 hours in total, while a sourdough version could take 24-36 hours or even longer.
Candied Citrus and Raisins: Preparation
High-quality candied citrus peel (orange and lemon) and raisins are essential for the authentic flavor and texture of a Festive Italian panettone recipe. Avoid brightly colored, artificially flavored candied fruit; seek out natural, soft candied peels. Raisins should be plump and moist. Many recipes call for soaking the dried fruit before adding it to the dough. This rehydrates the fruit, preventing it from drawing moisture out of the finished bread and resulting in a dry crumb.
Common soaking liquids include warm water, orange juice, or spirits like rum or Grand Marnier. Soak the raisins and candied peel separately for at least 30 minutes, or ideally for several hours. After soaking, drain the fruit thoroughly and pat it dry with paper towels. Some bakers toss the drained fruit with a small amount of flour before adding it to the dough; this helps prevent the fruit from sinking to the bottom during baking. A typical panettone recipe might use around 200-300 grams of mixed candied fruit and raisins per kilogram of flour.
Essential Equipment
Panettone Mold: Size and Material
A panettone mold is indispensable for achieving the bread's signature tall, cylindrical shape. These are typically tall paper molds designed specifically for panettone. The paper provides support for the very soft, rich dough as it rises and bakes, allowing it to climb upwards rather than spreading outwards. Panettone molds come in various sizes, commonly 500g, 750g, and 1kg. The size you choose should match your recipe's yield. For example, a recipe designed for a 1kg panettone will require a 1kg mold.
Using the correct size mold is crucial. If the mold is too small, the dough will overflow during proofing or baking. If it's too large, the panettone won't achieve its characteristic height. These paper molds are single-use and are designed to be left on the panettone after baking, providing support during the essential upside-down cooling process. Ensure the mold is placed on a sturdy baking sheet before filling.
Mixer: Stand Mixer Considerations
Due to the extremely rich and sticky nature of panettone dough, which contains a high percentage of butter and eggs relative to flour, kneading by hand is exceptionally challenging and time-consuming. A stand mixer with a dough hook attachment is highly recommended, if not essential, for successfully developing the necessary gluten structure. The dough will go through stages, starting as a shaggy mass, then becoming very sticky and wrapping around the hook, and finally pulling away from the sides of the bowl as the gluten develops.
You will need a powerful stand mixer capable of handling stiff doughs. A mixer with at least 500 watts is preferable for a standard 1kg loaf. Smaller, less powerful mixers might struggle or even overheat. The kneading process can take a significant amount of time, often 20-40 minutes or more, depending on the mixer and the dough hydration. Be prepared for the dough to be very soft and unlike typical bread dough; this is normal for a Festive Italian panettone recipe.
Oven: Temperature Accuracy
Accurate oven temperature is vital for baking panettone. The high sugar and fat content means the crust can brown quickly, potentially before the interior is fully cooked. Panettone is typically baked at a moderate temperature, often starting hotter and then reducing the heat. For example, a common baking strategy might be to start at 190°C (375°F) for the first 10-15 minutes to encourage oven spring, then reduce the temperature to 170-180°C (340-350°F) for the remainder of the baking time.
Using an oven thermometer is highly recommended to verify your oven's internal temperature, as oven thermostats can be inaccurate by 10-20°C (20-40°F) or more. Preheating the oven thoroughly is also critical to ensure a consistent temperature from the moment the panettone goes in. If the crust begins to brown too quickly, you can loosely tent the top of the panettone with aluminum foil.
Step-by-Step Baking Guide
Step 1: First Dough (Biga or Poolish)
Sourdough Starter Refresh (Optional)
If you are using a sourdough starter (lievito madre) for your Festive Italian panettone recipe, the process begins with preparing the starter. A lievito madre needs to be strong and active. This typically involves several refreshments (feeding) in the 24-48 hours leading up to mixing the first dough. A common schedule might be feeding the starter every 4 hours, using a ratio of 1:1:0.4 (starter:flour:water by weight). The starter should double or triple in volume consistently within 3-4 hours after feeding and smell pleasant, slightly acidic, but not overly sour.
For panettone, the lievito madre is often kept quite stiff, around 40-50% hydration. Ensuring the starter is peaked or just starting to recede from its peak when you use it for the first dough is crucial for leavening power. If your starter isn't very active or you're new to lievito madre, refreshing it multiple times ensures it has the strength needed to handle the rich panettone dough. Some traditional methods even involve 'bathing' the starter in sugary water to encourage specific bacterial activity beneficial for panettone flavor.
Mixing the First Dough
The first dough, often a biga (stiff pre-ferment) or poolish (liquid pre-ferment) if using commercial yeast, or the initial mix with sourdough, is the foundation of your panettone. For a sourdough Festive Italian panettone recipe, this typically involves combining the refreshed lievito madre with a portion of the flour, water, and sometimes a small amount of sugar or egg yolk from the main recipe. The goal is to create a moderately developed dough that will undergo a long, slow fermentation.
Mix the ingredients for the first dough until just combined, forming a relatively smooth ball. Avoid over-kneading at this stage. The hydration of this first dough can vary; a biga might be around 40-50% hydration, while a poolish is 100%. Cover the dough and let it ferment at a controlled temperature. For a sourdough first dough, this might be 10-14 hours at around 20-24°C (68-75°F), or even longer at cooler temperatures (e.g., 16-18 hours at 16°C/60°F). It should roughly double in volume and show signs of fermentation like small bubbles.
Step 2: Second Dough (Main Dough)
Combining First and Second Dough Ingredients
The second dough is where the magic of a Festive Italian panettone recipe truly comes together. You combine the fermented first dough with the remaining ingredients: more flour, sugar, eggs, egg yolks, salt, and most significantly, a large amount of butter. Often, the butter is added gradually in small pieces after the initial ingredients are mixed. Eggs and yolks contribute richness, color, and tenderness, while sugar not only sweetens but also helps retain moisture and tenderness.
Begin by combining the first dough with the remaining flour, sugar, salt, eggs, and egg yolks in your stand mixer bowl. Mix on low speed until everything is just incorporated into a shaggy mass. Some recipes might suggest adding the sugar and eggs alternately. Once a rough dough forms, you will begin the process of adding the softened (but not melted) butter.
Kneading: Gluten Development
Kneading the second dough is the most critical and time-consuming step in baking panettone. The dough is very wet and sticky due to the high ratio of liquids, sugar, and especially fat. Using a stand mixer with a dough hook is essential. Knead on medium speed, gradually adding the softened butter a small piece at a time. Wait until each addition of butter is fully absorbed before adding the next piece. This process can take 20-40 minutes or even longer.
The dough will initially be very slack and sticky, smearing against the sides of the bowl. As you continue to knead and the gluten develops, the dough will become smoother, more elastic, and eventually start to pull away from the sides of the bowl, wrapping around the dough hook.
You are looking for the "windowpane test": you should be able to stretch a small piece of dough very thinly without it tearing, allowing light to pass through. Proper gluten development is paramount for the dough to support the fruit and achieve the signature airy texture of a successful Festive Italian panettone recipe.
Step 3: First Rise (Bulk Fermentation)
Ideal Proofing Environment
After the intensive kneading, the dough needs a long, slow fermentation to develop flavor and volume. The ideal proofing environment for the first rise (bulk fermentation) is warm and humid. A temperature of around 26-28°C (79-82°F) is often recommended for optimal activity, especially when using sourdough or a hybrid method. Too cold, and the rise will be excessively slow; too hot, and the dough might ferment too quickly and develop off-flavors or weaken the gluten structure.
You can create a warm environment by placing the covered dough in a proofer box, a turned-off oven with the light on, or a warm spot in your kitchen. Covering the dough tightly with plastic wrap or a damp towel prevents a skin from forming on the surface. The duration of this first rise varies significantly depending on the recipe, the type of leavening (commercial yeast vs. sourdough), and the temperature. It could range from 4-6 hours with commercial yeast to 12-18 hours or more with sourdough.
Monitoring Dough Volume
Monitoring the dough's volume increase is key to knowing when the first rise is complete. For a Festive Italian panettone recipe, the dough typically needs to double or even slightly more than double in volume during the bulk fermentation. The dough will become noticeably lighter and airy, and you should see bubbles on the surface.
A good way to monitor is to place the dough in a clear container with straight sides and mark the initial level. This allows you to easily track the volume increase. Be patient; this enriched dough rises slowly. If the dough hasn't doubled after the time suggested in your recipe, give it more time, ensuring the environment is warm enough. Under-proofing at this stage can result in a dense panettone.
Step 4: Adding Fruit
Distributing Candied Fruit and Raisins
Once the first rise is complete, it's time to incorporate the prepared candied fruit and raisins into your Festive Italian panettone recipe dough. The goal is to distribute them evenly throughout the dough without deflating the airy structure you've worked hard to build. Turn the dough out onto a lightly floured surface. Gently flatten the dough into a rectangle or square using your hands; avoid pressing out all the air.
Scatter the drained and patted-dry fruit evenly over the surface of the dough. If you tossed the fruit with a little flour earlier, this is when that helps prevent clumping. Ensure the fruit isn't too cold; room temperature is best.
Folding Technique
To incorporate the fruit, use a gentle folding technique. Fold the dough over itself, encasing the fruit, then gently pat it down and scatter more fruit. Repeat this process, folding and patting, until all the fruit is incorporated and relatively evenly distributed. Avoid vigorous kneading or punching down the dough, which would damage the gluten network and expel too much gas.
A common method is the "letter fold": fold one third of the dough over the middle, then the opposite third over that, as if folding a letter. Repeat this process a few times, gently working the fruit in with each fold. The dough will be soft and sticky, so work efficiently. Some bakers even incorporate the fruit using the stand mixer on a very low speed for just a minute or two after the main kneading is complete, before the bulk fermentation.
Step 5: Shaping and Proofing
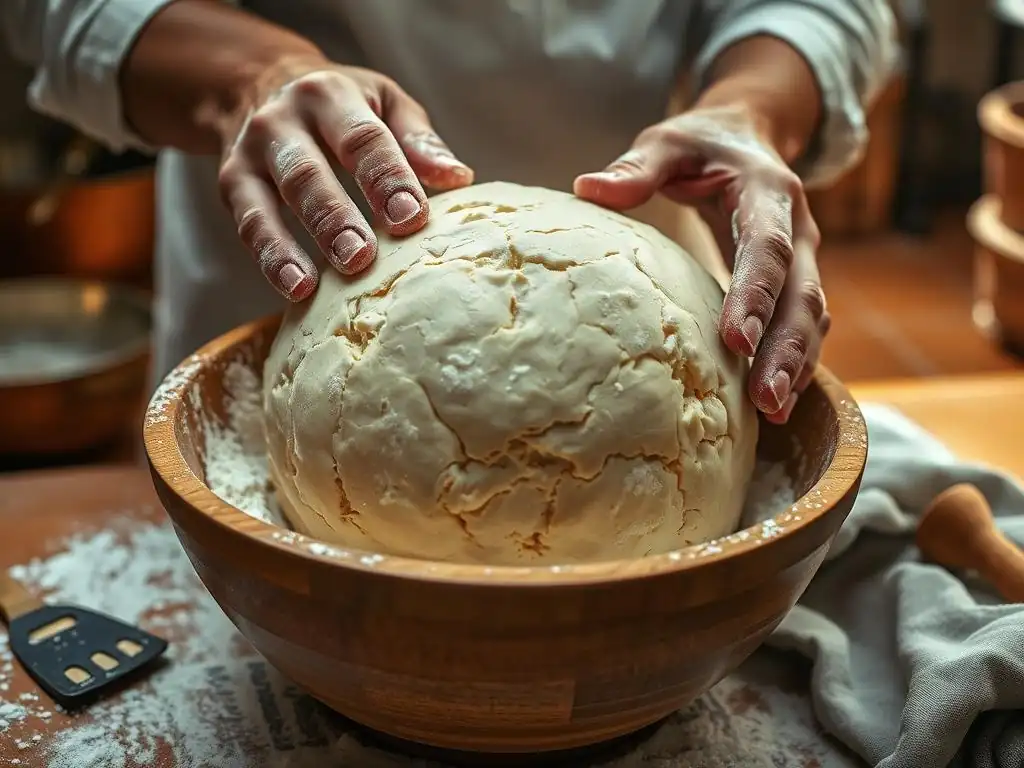
Shaping the Dough
After incorporating the fruit, gently gather the dough into a ball. The surface should be relatively smooth and taut. Avoid rough handling. Place the dough seam-side down on a lightly floured surface. Cup your hands around the base of the dough and gently rotate it, using the surface tension to shape it into a neat ball. This process is sometimes called "rounding."
The dough will be quite soft and extensible. The goal is to create a smooth exterior surface with tension, which will help the dough rise upwards in the mold. Don't spend too long shaping; a few rotations are usually sufficient.
Placing Dough in Mold
Immediately after shaping, transfer the dough into the panettone mold. The mold should be placed on a baking sheet for stability. Gently lift the shaped dough and carefully place it into the center of the mold. The dough should fill the mold about one-third to halfway up, depending on the recipe and the size of the mold relative to the dough weight.
Ensure the dough is centered in the mold. The paper mold provides the necessary structure for the dough to climb during the final proof and baking. Resist the urge to push the dough down firmly; let it settle naturally into the mold.
Second Rise: Achieving Volume
The second rise, or final proof, is crucial for achieving the characteristic dome and light texture of a Festive Italian panettone recipe. Cover the mold loosely with plastic wrap or place it in a large plastic bag to maintain humidity. Proof the dough in a warm environment, similar to the first rise, around 26-28°C (79-82°F).
The dough needs to rise significantly in the mold, ideally reaching the top rim or slightly above it before baking. This can take anywhere from 2-6 hours or more, depending on the yeast activity and temperature. Monitor the dough closely; it should look puffy and airy. An under-proofed panettone will have less volume and a denser crumb, while an over-proofed one might collapse during baking. The dough should jiggle slightly when the mold is gently shaken.
Step 6: Baking
Scoring the Top
Just before baking, the top of the panettone dough is typically scored. This step allows the dough to expand predictably in the oven. A common scoring pattern for a Festive Italian panettone recipe is a cross shape. Use a very sharp blade, like a razor blade (lame), to make two perpendicular cuts across the top of the dough, about 1-2 cm deep. Some bakers also lift the four corners of the cross and place a knob of butter in the center before baking; this is traditional and helps create a soft, rich crust in the middle.
Work quickly and confidently when scoring to avoid deflating the dough. If the dough is properly proofed, the cuts should open slightly.
Baking Temperature and Time
Baking panettone requires careful temperature management. As mentioned earlier, a common approach is to start at a higher temperature to encourage oven spring, then reduce the heat to ensure the interior cooks thoroughly without the crust burning. For example, preheat your oven to 190°C (375°F), place the panettone on the center rack, and bake for 10-15 minutes. Then, reduce the temperature to 170-180°C (340-350°F) and continue baking.
The total baking time for a 1kg panettone is typically 40-60 minutes, but this varies greatly depending on your oven. A 500g loaf will bake faster, perhaps in 30-45 minutes. If the top starts to brown too much, loosely tent it with aluminum foil.
Doneness Test
Determining when your Festive Italian panettone recipe is fully baked is crucial. The exterior should be a deep golden brown. However, the best way to check for doneness is to use an instant-read thermometer. Insert the thermometer into the center of the loaf, avoiding any fruit. The internal temperature should reach 93-96°C (200-205°F).
If the crust looks ready but the internal temperature is too low, reduce the oven temperature slightly and continue baking, tenting with foil if necessary. Baking panettone properly ensures a moist interior; under-baking can lead to a gummy texture.
Step 7: Cooling Upside Down
Preventing Collapse
Cooling panettone upside down is a non-negotiable step to prevent the tall, airy loaf from collapsing on itself as it cools. The rich, delicate structure is still fragile when it comes out of the oven. The weight of the fruit and the loaf itself would compress the crumb if cooled upright. Hanging it upside down allows the structure to set while gravity works in reverse, gently stretching the crumb rather than compressing it.
This technique is unique to tall, enriched breads like panettone and pandoro. Skipping this step will almost certainly result in a significantly shorter, denser loaf.
Hanging Method
To cool your Festive Italian panettone recipe upside down, you'll need long skewers or knitting needles. Immediately upon removing the panettone from the oven, carefully insert two long skewers horizontally through the bottom third of the paper mold, roughly parallel to each other. These skewers will support the panettone as it hangs.
Suspend the panettone by the skewers between two elevated surfaces. This could be between two chairs, between stacks of books, or across the rim of a deep pot or container, ensuring there is plenty of airflow around the loaf. Let the panettone hang completely upside down until it is fully cooled, which can take several hours (4-8 hours or even overnight). The paper mold provides the necessary structure to hang it from.
Tips and Tricks
Troubleshooting
Dough Not Rising: Solutions
If your Festive Italian panettone recipe dough isn't rising as expected, several factors could be at play. The most common issues relate to yeast activity or temperature. Ensure your yeast (commercial or sourdough) is active. If using commercial yeast, check its expiry date or proof it in warm water with a pinch of sugar first. If using sourdough, ensure your lievito madre is strong and has been refreshed recently.
Temperature is critical. The dough needs a warm environment (ideally 26-28°C / 79-82°F) to ferment properly. If your kitchen is cool, find a warmer spot or create a proofing environment (e.g., oven with light on). Also, ensure you didn't kill the yeast by adding it directly to very hot liquids or salt/sugar without hydrating it first. Finally, ensure sufficient kneading – underdeveloped gluten can hinder rise.
Panettone Collapsing: Prevention
A panettone collapsing, either during baking or cooling, is usually due to insufficient gluten development, under-baking, or not cooling it upside down. Ensure you kneaded the dough long enough to pass the windowpane test; this strong gluten network is needed to support the rich dough and fruit.
Under-baking is a major cause of collapse during cooling. Always check the internal temperature with a thermometer (93-96°C / 200-205°F). If it's not high enough, continue baking. And absolutely, always cool your panettone upside down using skewers. This allows the structure to set against gravity. Over-proofing can also weaken the structure, so monitor the final proof closely and don't let it go too long past the rim of the mold before baking.
Over-Browning: Adjustments
If the crust of your Festive Italian panettone recipe is browning too quickly before the interior is cooked, your oven temperature might be too high or inconsistent. Use an oven thermometer to verify the temperature. If it's accurate, you might need to bake at a slightly lower temperature overall, perhaps reducing the initial high temperature period or lowering the subsequent baking temperature by 5-10°C (10-20°F).
The simplest solution is to loosely tent the top of the panettone with aluminum foil once it has reached your desired crust color. This shields the top from direct heat while allowing the interior to continue baking. Ensure the foil doesn't touch the dough surface if possible.
Variations
Chocolate Panettone
A popular variation on the classic Festive Italian panettone recipe replaces some or all of the candied fruit with chocolate. Instead of candied citrus and raisins, incorporate high-quality dark chocolate chunks or chips. Use about 200-300 grams of chocolate per 1kg of flour.
The process is the same as the classic version, simply adding the chocolate chunks during the fruit incorporation step (Step 4). Ensure the chocolate is good quality and doesn't melt too quickly during mixing. This variation results in a rich, decadent loaf perfect for chocolate lovers.
Lemon Panettone
For those who prefer a brighter, citrus-forward flavor, a lemon panettone is a delightful twist. This variation emphasizes lemon zest and candied lemon peel. Use the zest of 2-3 large lemons in the dough, ensuring it's finely grated. Replace the mixed candied fruit with high-quality candied lemon peel.
You can also add a small amount of lemon extract or limoncello to the dough for an extra burst of flavor. The bright acidity of the lemon balances the richness of the dough beautifully.
Cranberry Orange Panettone
This variation offers a more North American twist while staying true to the spirit of a Festive Italian panettone recipe. Substitute some or all of the traditional raisins with dried cranberries and use candied orange peel. Soak the cranberries as you would raisins to plump them up.
Adding fresh orange zest along with the candied orange peel enhances the flavor. This combination of tart cranberries and sweet orange is particularly festive and pairs wonderfully with holiday meals and drinks.
Storing and Serving
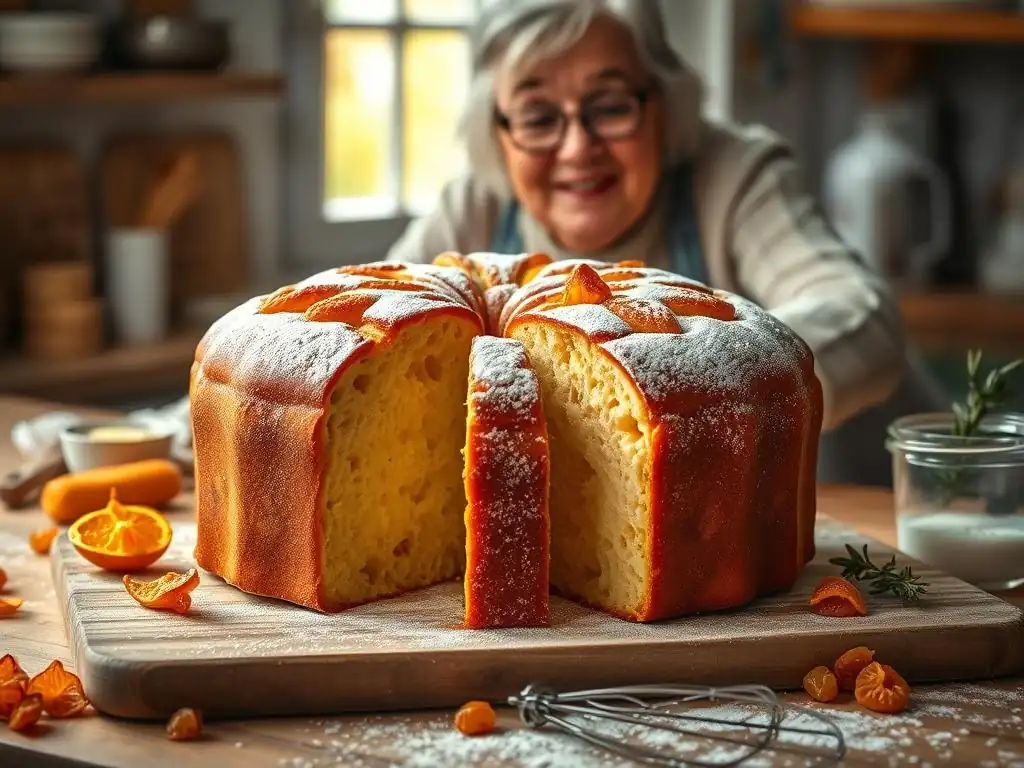
Storing for Freshness
Properly stored, a homemade Festive Italian panettone recipe can stay fresh and moist for several days, or even up to a week, thanks to its high fat and sugar content. Once completely cool (after hanging upside down for several hours), you can remove the skewers but leave the paper mold on.
The best way to store panettone is to place it in a large, airtight plastic bag. Squeeze out as much air as possible before sealing. Store it at room temperature, away from direct sunlight or heat sources. Do not refrigerate, as this can dry out the bread. For longer storage, panettone freezes exceptionally well. Slice it first, then wrap individual slices or sections tightly in plastic wrap, followed by aluminum foil, and place in a freezer bag. It can be frozen for up to 2-3 months.
Serving Suggestions
Serving a homemade Festive Italian panettone recipe is simple and delightful. It is traditionally enjoyed sliced vertically. Use a serrated knife to cut through the soft loaf. Panettone is wonderful served plain, allowing its subtle flavors and textures to shine.
For a richer experience, you can serve slices lightly toasted and spread with butter. It also pairs beautifully with whipped cream, mascarpone cheese, or a dollop of crème fraîche. Some enjoy dipping slices into coffee, hot chocolate, or a sweet wine.
Pairing Ideas
Panettone pairs wonderfully with a variety of beverages. Traditionally, it's served with sweet wines, such as Vin Santo, Moscato d'Asti, or Passito. The sweetness of the wine complements the richness of the bread.
For a non-alcoholic option, coffee, espresso, or hot chocolate are perfect companions. During the holidays, it's also lovely with a cup of tea or a glass of sparkling cider. The light, airy texture makes it versatile for pairing with both rich drinks and lighter options.
Conclusion: Enjoy Your Homemade Panettone
Frequently Asked Questions
What makes Panettone a festive bread?
Panettone is a rich, sweet bread traditionally enjoyed during Christmas and New Year. Its elaborate preparation and high-quality ingredients contribute to its festive appeal. It's often served as a celebratory treat.
Is the BakeWithEase Panettone recipe suitable for beginner bakers?
While Panettone requires patience, our step-by-step guide aims to make it accessible to all. Some steps might be challenging for beginners, but we offer detailed instructions and tips for success. We recommend starting with simpler recipes first.
What are the key ingredients in the BakeWithEase Festive Italian Panettone recipe?
The core ingredients include strong bread flour, eggs, butter, sugar, and natural yeast (lievito madre). Candied citrus peel and raisins are also essential for the authentic Panettone flavor.
How long does it take to make Panettone using the BakeWithEase recipe?
Preparing Panettone is a multi-day process due to the fermentation requirements. From start to finish, including proofing and baking, it can take approximately 2-3 days.
Can I substitute any ingredients in the BakeWithEase Panettone recipe?
While substitutions are possible, they can affect the final result. We recommend sticking to the recipe for the best outcome. If substituting, choose ingredients that maintain the moisture and structure of the bread.
Final Reflection: The Enduring Magic of Panettone
The scent of warm, citrusy panettone is more than just a festive aroma; it's a tangible link to generations of Italian culinary tradition and a powerful symbol of warmth and togetherness. This step-by-step guide aimed to demystify the seemingly complex process of baking this iconic bread, making it accessible to home bakers everywhere. The result, we hope, is a deeper appreciation for the artistry and dedication involved in creating this beloved treat.
Baking panettone is more than just following a recipe; it's a journey through time, connecting us to the rich history and cultural significance of this special bread. The process itself, from the initial proofing to the final bake, is a meditative experience, demanding patience and precision. As we knead the dough, we are not just creating a loaf of bread, but also weaving together threads of tradition and family. Food is symbolic of love when words are inadequate.
- Alan D. Wolfelt. This quote perfectly encapsulates the emotional resonance of sharing homemade panettone with loved ones during the holiday season.
This year, as you gather with family and friends, consider taking on the challenge of baking your own panettone. Don't be intimidated by the seemingly long process; embrace it as an opportunity for mindful creation and connection. The reward? Not just a delicious treat, but a deeper understanding of Italian culture and the enduring power of shared culinary experiences. Let the aroma of your homemade panettone fill your home with warmth, joy, and the sweet taste of tradition.
Unleash Your Inner Panettone Maestro!
Thanks for joining us on this delicious journey into the art of baking Panettone! We hope you've gained the confidence and knowledge to create this festive Italian treat. Now it's time to put your newfound skills to the test!
- Bake your own magnificent Panettone: Don't just read about it – experience the joy of crafting this iconic bread from scratch. Follow our step-by-step guide again, this time with your own hands!
- Share your baking triumph: Snap a picture of your masterpiece and share it with us and your friends on social media using #BakeWithEasePanettone. Let's inspire others!
- Explore other festive recipes: Dive deeper into our collection of holiday baking delights – you might discover your new favorite dessert!
Ready to transform your kitchen into a fragrant Italian bakery? What unique twist will you add to your Panettone this year?