
Unlock the Secrets of Authentic Italian Ciabatta

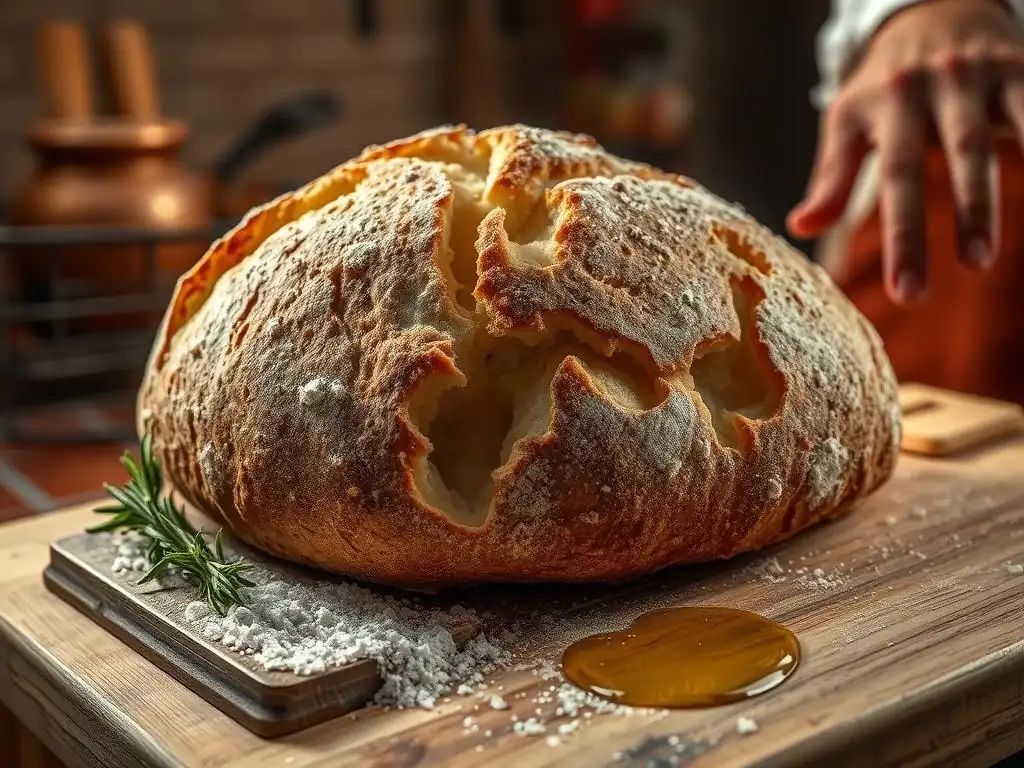
Welcome to BakeWithEase! Ever dreamed of pulling a perfectly crusty, airy loaf of ciabatta from your oven? We're about to make that dream a reality. Discover the secrets behind our Authentic Italian Ciabatta recipe and embark on a bread-baking journey that will delight your senses. Ready to unlock the magic? Let's get started!
- Unlock the Secrets of Authentic Italian Ciabatta: Bake the Perfect Loaf at Home
- Introduction to Authentic Italian Ciabatta Bread
-
Mastering the Authentic Italian Ciabatta Recipe: A Step-by-Step Guide
- Gathering Your Ingredients: Essential Components for Perfect Ciabatta
- Step 1: Preparing the Biga (Pre-ferment) for Enhanced Flavor
- Step 2: Mixing the Ciabatta Dough: Achieving the Right Consistency
- Step 3: Bulk Fermentation: Developing Flavor and Structure
- Step 4: Shaping the Ciabatta: Maintaining the Open Crumb
- Step 5: Baking the Ciabatta: Achieving a Crispy Crust and Open Crumb
- Step 6: Cooling and Enjoying Your Homemade Ciabatta
- Troubleshooting Your Authentic Italian Ciabatta: Common Mistakes and Solutions
- Tips and Tricks for Perfecting Your Authentic Italian Ciabatta Recipe
- Beyond the Basics: Exploring Variations of the Classic Ciabatta
- Conclusion: Embrace the Art of Authentic Italian Ciabatta Baking
-
Frequently Asked Questions
- What makes an Authentic Italian Ciabatta recipe truly authentic?
- What is the key ingredient for achieving the signature airy texture of Ciabatta?
- How long should I ferment my Ciabatta dough for the best flavor?
- What are some common mistakes to avoid when making Ciabatta?
- Can I use a stand mixer, or is hand-kneading essential for Ciabatta?
- Final Reflection: The Enduring Legacy of Authentic Italian Ciabatta
- Unleash Your Inner Ciabatta Master!
Unlock the Secrets of Authentic Italian Ciabatta: Bake the Perfect Loaf at Home
Introduction to Authentic Italian Ciabatta Bread
What Makes Ciabatta Unique? Exploring the Characteristics of Authentic Ciabatta
Authentic Italian ciabatta, whose name literally translates to "slipper" in Italian, is instantly recognizable by its distinctive shape and texture. Unlike many traditional loaves, ciabatta is typically long, broad, and relatively flat, resembling a worn slipper. Its most celebrated characteristic is its incredibly open, airy crumb structure – full of large, irregular holes – encased in a thin, crisp crust.
This unique texture is achieved through a combination of very high hydration dough, a long fermentation period, and gentle handling during shaping. The flavor profile is often subtly tangy, a result of the long fermentation or the use of a pre-ferment like a biga, which adds complexity and depth not found in quick breads.
The history of ciabatta is relatively recent compared to other European breads. It was developed in the Veneto region of Italy in 1982 by a baker named Arnaldo Cavallari, reportedly to compete with the popularity of French baguettes. Cavallari and his team experimented with various doughs and techniques to create a bread that could rival the baguette's crust and crumb but with a distinctly Italian character.
Their success resulted in the now-iconic ciabatta, which quickly gained popularity across Italy and eventually worldwide. This modern classic relies on techniques like minimal kneading and high water content to achieve its signature open structure, setting it apart from denser loaves.
Why Bake Ciabatta at Home? The Joys and Benefits
Baking an authentic Italian ciabatta recipe at home offers a deeply rewarding experience that goes beyond simply acquiring a loaf of bread. There's immense satisfaction in transforming simple ingredients – flour, water, yeast, and salt – into a beautiful, rustic bread with your own hands. The process itself, from mixing the wet dough to watching it blister and brown in the oven, is a culinary adventure. Furthermore, the aroma of fresh ciabatta filling your kitchen is incomparable. You have control over the quality of ingredients, ensuring no unwanted additives, just pure, delicious flavor.
Beyond the sensory pleasures, baking homemade ciabatta allows for complete customization. You can adjust the fermentation time slightly to influence the tanginess, experiment with different flours for subtle flavor nuances, or even add ingredients like olives or herbs directly into the dough. While baking high-hydration dough can seem intimidating initially, mastering the authentic Italian ciabatta recipe builds valuable baking skills and confidence. Plus, a warm, freshly baked loaf of ciabatta, with its perfect crust and airy interior, is a versatile foundation for countless meals, from soaking up olive oil to building incredible sandwiches.
Mastering the Authentic Italian Ciabatta Recipe: A Step-by-Step Guide
Gathering Your Ingredients: Essential Components for Perfect Ciabatta
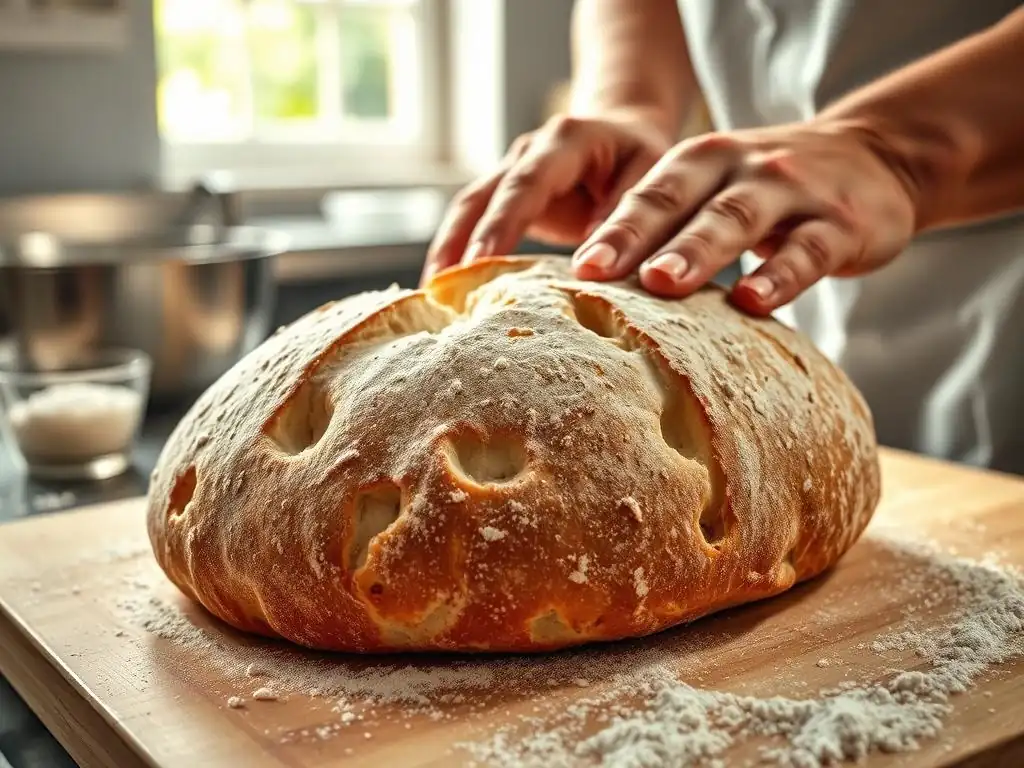
Crafting an authentic Italian ciabatta requires attention to detail starting with your ingredients. The quality of each component directly impacts the final texture, flavor, and rise of your bread. Having everything measured and ready before you begin the mixing process ensures a smooth workflow, especially with such a wet and sometimes challenging dough. Think of these core ingredients as the building blocks upon which your perfect ciabatta loaf will stand.
Ensuring your ingredients are at the correct temperature is also crucial. Water is often specified at a certain temperature range to optimize yeast activity, typically lukewarm (around 95-105°F or 35-40°C) if activating dry yeast directly, or cooler if using a pre-ferment or instant yeast. Flour should be at room temperature. Using accurate kitchen scales for measurements is highly recommended for baking, especially with high-hydration doughs like ciabatta, as small variations in flour or water can significantly alter the dough's consistency.
High-Quality Flour: The Foundation of Authentic Ciabatta
The type of flour you use is paramount for achieving the characteristic open crumb of authentic Italian ciabatta. A strong bread flour with a protein content typically between 12% and 14% is ideal. This higher protein level means more gluten development is possible, which is essential for trapping the gases created during fermentation and creating those signature large holes. Italian Tipo 00 flour can also be used, particularly a stronger version designed for bread, but a good quality North American or European bread flour works wonderfully and is often more accessible.
Using bleached all-purpose flour is generally not recommended for a true ciabatta, as its lower protein content (often 10-11.5%) will result in a weaker gluten structure. This can lead to a denser crumb and flatter loaf. Look for unbleached bread flour, which tends to have better gluten potential. Some bakers even blend a small percentage of whole wheat or specialty flour for added flavor, but for a classic authentic Italian ciabatta recipe, a strong white bread flour is the standard base.
The Importance of Water Hydration in Ciabatta Dough
High hydration is perhaps the single most defining characteristic of ciabatta dough. Hydration refers to the ratio of water to flour by weight, expressed as a percentage. Authentic ciabatta recipes typically have hydration levels ranging from 75% to even over 90%.
This means for every 100 grams of flour, you use 75 to 90+ grams of water. For instance, a recipe using 500g of flour at 80% hydration would require 400g of water. This high water content is what contributes significantly to the wet, slack nature of the dough and is key to developing the open, irregular crumb structure during baking.
Working with such a wet dough can be challenging for beginners, as it's sticky and difficult to handle traditionally. However, this is precisely what allows the gluten network to develop without extensive kneading and encourages the large air pockets to form. The water essentially helps hydrate the flour proteins, making it easier for them to link up and form gluten strands. Don't be tempted to add more flour during mixing or handling unless explicitly instructed, as this will reduce the hydration and alter the final bread's texture.
Yeast Selection: Choosing the Right Yeast for Your Ciabatta
Yeast is the leavening agent responsible for making your ciabatta rise and developing complex flavors through fermentation. For an authentic Italian ciabatta recipe, you typically have a few options: active dry yeast, instant yeast, or fresh yeast. The quantity required will vary depending on the type of yeast and the intended fermentation time; recipes using a long, slow fermentation (especially with a biga) will use significantly less yeast than a faster recipe. For example, a recipe for two loaves might use just 2-3 grams of instant yeast with a long fermentation, compared to 7-10 grams for a quicker method.
Instant yeast is popular for its convenience as it can be mixed directly into the flour without proofing. Active dry yeast usually needs to be dissolved in warm water first to activate. Fresh yeast, while preferred by some professional bakers for its subtle flavor nuances, is less common for home bakers and has a shorter shelf life. Whichever you choose, ensure your yeast is fresh and active. Expired or inactive yeast will result in a flat, dense loaf, wasting your efforts on the authentic Italian ciabatta recipe.
Don't Forget the Salt: Balancing Flavors in Ciabatta
Salt is an essential, often underestimated, ingredient in bread baking. While it might seem counterintuitive, salt doesn't just add flavor; it plays a crucial role in controlling yeast activity and strengthening the gluten structure. Salt slows down fermentation slightly, which can be beneficial in a long-fermented bread like ciabatta, allowing flavors to develop more fully before the dough over-proofs. It also tightens the gluten network, making the dough more manageable and helping it hold its shape and trap gases during the rise and bake.
Too little salt results in bland bread and a dough that can ferment too rapidly and be overly sticky and difficult to handle. Too much salt can inhibit yeast activity significantly, leading to a poor rise and a dense loaf, as well as an unpleasantly salty taste. The typical salt ratio in bread is around 1.8% to 2.2% of the flour weight.
For a 500g flour recipe, this means approximately 9 to 11 grams of salt. Using fine sea salt or kosher salt is often preferred over iodized table salt, which can sometimes impart a slight off-flavor or interfere with yeast activity.
Step 1: Preparing the Biga (Pre-ferment) for Enhanced Flavor
Many authentic Italian ciabatta recipes utilize a pre-ferment, most commonly a biga. A biga is a stiff, dry pre-ferment made with flour, water, and a very small amount of yeast, typically fermented for a long period, often 12-16 hours or even longer, at cool room temperature or in the refrigerator. Preparing the biga is the first step and requires planning ahead, as it needs significant time to develop before you mix the final dough. This slow fermentation process is key to unlocking deeper flavors and improving the structure and keeping quality of the finished ciabatta.
The purpose of the biga is twofold: flavor development and dough strength. During its long fermentation, the small amount of yeast works slowly on the flour, producing organic acids and other compounds that contribute complex aromas and a subtle tang to the final bread. This enzymatic breakdown also helps condition the flour, resulting in a more extensible dough that can handle the high hydration of the final ciabatta mix. Including a biga is a hallmark of traditional Italian bread-making and elevates a simple ciabatta recipe to an authentic level.
Why Use a Biga? Understanding the Benefits of Pre-ferments
Using a pre-ferment like a biga in your authentic Italian ciabatta recipe brings several significant advantages. Primarily, it enhances the flavor profile of the bread. The long, slow fermentation process allows enzymes to break down starches into simpler sugars, which are then metabolized by yeast into alcohol and organic acids. These compounds contribute nutty, sweet, and slightly tangy notes that are far more complex than those found in bread made with a single, rapid fermentation. This depth of flavor is a key characteristic of truly exceptional ciabatta.
Secondly, a biga improves the structure and texture of the final loaf. The acidity developed in the biga helps strengthen the gluten network in the final dough, enabling it to better trap the large gas bubbles characteristic of ciabatta's open crumb. This results in a loaf with better volume, a more open interior structure, and a crisper crust. Additionally, the pre-ferment contributes to better keeping quality, meaning your homemade ciabatta will stay fresh and delicious for a longer period compared to bread made without one.
Biga Recipe: Precise Measurements and Instructions
A standard biga for an authentic Italian ciabatta recipe is quite simple, typically using equal parts flour and water by weight (50% hydration relative to the biga's flour) and a tiny pinch of yeast. A common ratio might be 200g strong bread flour, 100g water, and just 0.2-0.5g instant yeast (or a tiny crumb of fresh yeast). The low hydration makes it a stiff mixture, unlike a wetter poolish.
To prepare, combine the flour and yeast in a bowl, then add the water and mix just until all the flour is hydrated and a shaggy, stiff dough forms. It won't look smooth or elastic.
Once mixed, cover the biga tightly with plastic wrap or a lid to prevent it from drying out. Leave it to ferment at room temperature for 12-16 hours. The ideal temperature is often cited around 60-68°F (15-20°C).
If your kitchen is warmer, you might reduce the fermentation time or consider fermenting it in the refrigerator for a longer period (up to 24-48 hours), which further enhances flavor development. The biga should show signs of activity – it might have slightly increased in volume and will have a pleasant, fermented aroma. It will be ready when it looks bubbly and slightly domed or peaked on top.
Biga Fermentation: Time and Temperature Considerations
The fermentation of the biga is a critical step that requires patience and attention to environmental conditions. The recommended fermentation time for a biga used in an authentic Italian ciabatta recipe is typically 12 to 16 hours at cool room temperature, ideally between 60°F and 68°F (15°C to 20°C).
This slow, cool fermentation allows the yeast to work gradually, producing flavorful metabolic byproducts without over-acidifying the mixture or running out of food too quickly. If your kitchen is warmer, say above 75°F (24°C), the biga might be ready in as little as 8-10 hours, but the flavor development might not be as deep.
Alternatively, for maximum flavor complexity and flexibility, you can ferment the biga in the refrigerator. At temperatures between 35°F and 40°F (2°C to 4°C), fermentation slows down dramatically. A refrigerated biga can ferment for 24 to 48 hours.
This extended cold fermentation allows enzymes more time to break down starches and proteins, contributing to a sweeter taste and better gluten development in the final dough. When ready to use, a refrigerated biga should be taken out about an hour before mixing the final dough to come closer to room temperature. A properly fermented biga will be slightly bubbly and have a pleasant, yeasty, slightly acidic smell.
Step 2: Mixing the Ciabatta Dough: Achieving the Right Consistency
Mixing the final dough for your authentic Italian ciabatta recipe is where the magic truly begins, combining the mature biga with the remaining ingredients. The key challenge here is managing the high hydration. The dough will be exceptionally wet and sticky, unlike standard bread doughs you might be used to. The goal is to fully incorporate all ingredients and develop the gluten structure without overworking the dough, which can actually tighten it too much and hinder the open crumb development.
Whether you use a stand mixer or mix by hand, the process involves bringing the wet ingredients together with the dry, then mixing until the dough shows signs of gluten development. This stage is less about traditional kneading to create a smooth ball and more about encouraging the gluten network to form through mixing and subsequent folding. The final dough consistency should be very slack, sticky, and shaggy, not smooth and elastic like pizza dough.
Combining the Biga with Remaining Ingredients
Start by breaking the mature biga into smaller pieces directly into your mixing bowl (either a stand mixer bowl or a large hand-mixing bowl). Add the remaining water for the final dough, and often, the remaining yeast (if not all was used in the biga). Let the biga pieces soak in the water for a few minutes; this helps soften it and makes it easier to incorporate.
Next, add the remaining flour and the salt. If your recipe calls for any other ingredients like a touch of olive oil (though many traditional recipes omit oil), add them now. Begin mixing on a low speed or with a sturdy spoon/dough whisk by hand. The mixture will look very wet and unmanageable at first. Continue mixing until all the flour is hydrated and no dry pockets remain, and the ingredients are roughly combined. This initial mix might take just a few minutes.
The Importance of a Wet Dough: Hydration Levels Explained
As mentioned earlier, the high hydration level (typically 75% to 90%+) is fundamental to the authentic Italian ciabatta recipe. This significant amount of water serves multiple purposes. It allows the gluten strands to move and align more freely during mixing and folding, which helps develop strength without intensive kneading. More importantly, the high water content creates a very loose dough structure, which promotes the formation of large, irregular air pockets during fermentation and baking. These air pockets are the hallmark of ciabatta's open crumb.
Working with such a wet dough requires a shift in mindset from traditional bread baking. You won't achieve a smooth, non-sticky ball of dough. Instead, you'll have a very slack, sticky mass that might resemble thick batter more than dough. Resist the urge to add significant amounts of extra flour to make it easier to handle; this will reduce the hydration and result in a denser crumb. Embrace the stickiness – it's a sign you're on the right track to achieving that perfect ciabatta texture.
Mixing Techniques: Using a Stand Mixer vs. Hand Mixing
Mixing ciabatta dough can be done using a stand mixer with a dough hook or entirely by hand, though the high hydration makes stand mixing considerably easier. If using a stand mixer, begin mixing on the lowest speed for 2-3 minutes until the ingredients are just combined. Then, increase the speed to medium (speed 3-4 on most mixers) and mix for 8-12 minutes.
The dough will slap against the sides of the bowl and may climb the hook. It will remain very wet but should start to show some signs of development – perhaps pulling away from the bottom of the bowl occasionally. The goal isn't a perfectly smooth dough, but one that has begun to develop some elasticity.
Mixing by hand is more challenging due to the stickiness, but certainly possible. Use a sturdy spoon or dough whisk initially to combine ingredients in a large bowl. Once combined, you can use the "stretch and fold" method directly in the bowl or turn the dough out onto a lightly wet surface (using water instead of flour helps manage stickiness). Use wet hands or a wet bench scraper to scoop underneath the dough, stretch it upwards, and fold it back over itself.
Rotate the bowl and repeat this process for 5-10 minutes. The dough will become slightly less shaggy and show minimal elasticity. This hand mixing is followed by multiple sets of folds during the bulk fermentation to build sufficient strength.
Step 3: Bulk Fermentation: Developing Flavor and Structure
Bulk fermentation, also known as the first rise, is a crucial stage in creating authentic Italian ciabatta. This is the period after the dough is mixed but before it's divided and shaped. During bulk fermentation, the yeast produces carbon dioxide gas, causing the dough to rise, while also producing organic acids and other compounds that contribute significantly to the bread's flavor profile. Equally important, this is the time when the gluten network continues to develop and strengthen, especially through periodic folding.
For ciabatta, bulk fermentation is often relatively long, ranging from 2 to 4 hours or even longer, depending on the recipe, yeast amount, and temperature. The dough should roughly double in volume and become noticeably aerated and bubbly. This slow development allows the unique characteristics of ciabatta to emerge.
First Rise: Creating Air Pockets and Complexity
After mixing, transfer the very wet ciabatta dough to a lightly oiled large container or bowl. A square or rectangular container is often preferred over a round one, as it makes subsequent folding easier. Ensure the container is large enough to accommodate at least a doubling in volume. Cover the container tightly to prevent a skin from forming on the dough surface.
Place the dough in a warm spot (around 75-80°F or 24-27°C is often ideal for this stage, though cooler temperatures will require longer times and can yield more flavor) to begin its first rise. During this period, the yeast is actively converting sugars into gas and alcohol. You'll notice bubbles forming on the surface and within the dough structure visible through the container sides. This initial rise builds the foundation for the open crumb.
Folding the Dough: Strengthening the Gluten Network
Because ciabatta dough is so wet, traditional kneading isn't practical after the initial mix. Instead, strength is built through a series of "folds" performed during the bulk fermentation. Typically, 2-4 sets of folds are performed during the first 1-2 hours of the bulk rise, with 30-45 minutes between each set. To perform a fold, lightly wet your hands or use a wet bench scraper. Gently lift one side of the dough, stretch it upwards, and fold it over the rest of the dough. Rotate the container 90 degrees and repeat this process with the other three sides.
These gentle folds redistribute the yeast and food sources, equalize the dough temperature, and, most importantly, align the gluten strands, strengthening the dough's structure without degassing it excessively. After each set of folds, the dough will feel slightly firmer and more cohesive. By the final set of folds, the dough should feel significantly stronger and be able to hold some shape when lifted, though it will remain very slack.
Second Rise: Allowing the Dough to Fully Expand
After the initial folds are completed, the dough enters the final stage of bulk fermentation, sometimes referred to as a second rise within the bulk period. During this time, the dough continues to ferment undisturbed until it has reached the desired volume increase, typically doubling or slightly more. The surface should be visibly bubbly, and the dough should feel airy and light.
The total bulk fermentation time, including the folding period, is crucial. If under-fermented, the bread will be dense with an uneven crumb. If over-fermented, the dough can collapse, resulting in a flat loaf with a poor structure. Pay attention to the dough's appearance and feel – it should look lively and aerated. A poke test isn't standard for such a wet dough, but observing the volume increase and bubble formation is key. For many authentic Italian ciabatta recipes, this entire bulk fermentation might last 2.5 to 4 hours depending on temperature and dough strength.
Step 4: Shaping the Ciabatta: Maintaining the Open Crumb
Shaping ciabatta is less about creating tight surface tension and more about gently coaxing the dough into its characteristic rectangular form while preserving the precious air pockets developed during fermentation. This stage requires a light touch; rough handling will deflate the dough and result in a dense crumb. The goal is to handle the dough minimally to maintain its airy structure.
You'll need a well-floured surface for this step, not for kneading, but to prevent the incredibly sticky dough from adhering irrevocably. Using semolina flour or a mix of flour and semolina is common, as it helps prevent sticking and adds a lovely rustic texture to the crust.
Gently Dividing the Dough: Avoiding Deflation
Once the bulk fermentation is complete, the dough will be very bubbly and expanded. Carefully turn the dough out onto your generously floured surface. Do this gently to avoid degassing the dough. You can use a bench scraper to help guide the dough out of the container. The dough will spread out into a somewhat flat, irregular shape.
Using a sharp knife or a bench scraper, gently divide the dough into the desired number of pieces. For classic ciabatta loaves, the dough is often divided into two or three rectangular portions. Avoid pulling or tearing the dough; make clean cuts. Be mindful not to press down or handle the dough more than necessary during this division.
Shaping Techniques: Creating the Signature Ciabatta Shape
Shaping ciabatta is less about traditional shaping and more about creating rough rectangles. Once divided, gently nudge or stretch each piece of dough into a rough rectangle. The surface should be facing upwards. You can lightly stretch the dough lengthwise if needed, but avoid degassing it. The generous flouring underneath and on top helps manage the stickiness.
Some bakers perform a simple letter fold: fold one third of the rectangle over the middle, then fold the other third over that, creating a slightly more defined shape. Other methods involve simply nudging the sides to create straighter edges. The key is minimal handling. The shape doesn't need to be perfect; the rustic, irregular form is part of ciabatta's charm. The generous flouring will coat the surface, preventing the dough from sticking to itself or the proofing surface.
Preparing the Baking Surface: Preventing Sticking
After shaping, the ciabatta loaves need a final short proof before baking. Because the dough is so wet and sticky, you cannot simply place them on a baking sheet without them spreading out and sticking. The standard method is to place the shaped loaves on a well-floured surface, often linen or canvas couche fabric, or even just parchment paper, heavily dusted with flour, semolina, or a mix.
If using a couche, dust it generously with flour/semolina. Place the loaves on the couche, leaving space between them. Create folds in the fabric between the loaves to support their shape and prevent them from spreading into each other. If using parchment paper, dust the paper heavily and place the loaves on it. You can create temporary supports by folding the paper up between the loaves. This final proof is typically short, around 30-60 minutes, just enough time for the loaves to relax slightly and gain a little final lift before hitting the hot oven.
Step 5: Baking the Ciabatta: Achieving a Crispy Crust and Open Crumb
Baking is the final transformation for your authentic Italian ciabatta. The goal is to achieve a beautiful, golden-brown, crispy crust and maximize the oven spring to enhance the open interior crumb structure. High heat and steam are essential elements in the baking process for ciabatta and many other rustic breads.
Properly preheating your oven and baking surface is crucial. Using a baking stone or steel is highly recommended as it provides a burst of heat from underneath, promoting good oven spring. Creating steam in the oven during the initial phase of baking keeps the surface of the dough moist, allowing it to expand fully before the crust sets. This results in a thinner, crispier crust and better overall volume.
Oven Temperature and Setup: Optimizing for Ciabatta
A hot oven is necessary for baking ciabatta. Preheat your oven to a high temperature, typically between 450°F and 500°F (230°C and 260°C). If using a baking stone or steel, place it in the oven before preheating and allow it to heat up for at least 45 minutes to a full hour to ensure it's thoroughly hot. This stored heat provides the necessary thermal mass for excellent oven spring.
Position the baking stone or steel on the middle or lower-middle rack. Ensure you have space to create steam, whether that's a pan on the bottom rack or room to spray the oven walls. Some bakers also preheat a cast iron skillet on the bottom rack to add water for steam. A well-preheated oven and baking surface are critical for achieving the desired crust and crumb characteristics of an authentic Italian ciabatta recipe.
Creating Steam: The Secret to a Crusty Exterior
Steam is vital during the first 10-15 minutes of baking ciabatta. The steam keeps the dough's surface supple, allowing the loaf to expand rapidly in the hot oven (oven spring) before the crust hardens. This expansion contributes significantly to the open crumb structure. Once the crust sets in a steamy environment, it becomes thin and crisp rather than thick and tough.
There are several ways to create steam in a home oven. A common method is to place a metal pan (like a broiler pan or cast iron skillet) on the lowest rack while the oven preheats. Just before loading the bread, carefully pour a cup of hot water into the hot pan. Be cautious of the resulting burst of steam.
Another method is to spray the oven walls with water using a clean spray bottle just after loading the bread and again a minute or two later. Some recipes even recommend placing ice cubes in the hot pan. Use whichever method is safest and most effective for your oven setup.
Baking Time: Monitoring for Doneness
The baking time for ciabatta depends on the size of your loaves and your oven, but typically ranges from 20 to 35 minutes. Smaller ciabatta rolls might bake in 20-25 minutes, while larger loaves could take 30-35 minutes. The bread is done when the crust is a deep golden brown and sounds hollow when tapped on the bottom.
After the initial steam period (usually 10-15 minutes), you can open the oven briefly to remove the steam pan or stop spraying, allowing the crust to dry out and become crisp. Continue baking until the desired color is achieved. If the crust is browning too quickly, you can reduce the oven temperature slightly or loosely tent the loaves with foil, but aim for a robust color as it indicates proper cooking and flavor development. An internal temperature of around 200-210°F (93-99°C) also indicates doneness, though tapping the bottom is a more common method for this type of bread.
Step 6: Cooling and Enjoying Your Homemade Ciabatta
Once your beautiful, golden-brown ciabatta loaves emerge from the oven, the hardest part is waiting. However, allowing the bread to cool properly is just as important as the baking itself. Cutting into hot bread can lead to a gummy interior, even if the crumb structure looks open.
Transfer the baked ciabatta immediately from the baking stone/sheet to a wire cooling rack. This allows air to circulate around the entire loaf, preventing the bottom crust from becoming soggy from trapped steam and allowing the interior crumb structure to finish setting properly.
The Importance of Cooling: Allowing the Crumb to Set
Cooling bread is not just about preventing burns; it's a continuation of the baking process. As the bread cools, moisture from the interior migrates outwards, and the complex starches in the crumb finalize their structure. For a loaf as airy as authentic Italian ciabatta, proper cooling is essential for the open crumb to set and become stable. Cutting into the loaf too early can compress the delicate structure and result in a dense, doughy texture despite a successful bake.
Allow ciabatta to cool on a wire rack for at least 30-60 minutes before slicing. For larger loaves, an hour or even longer is preferable. This waiting period allows the internal steam to dissipate and the crumb to firm up, ensuring you get that perfect, chewy texture and open hole structure when you finally slice into it.
Serving Suggestions: Pairing Your Ciabatta with Delicious Foods
Once properly cooled, your homemade authentic Italian ciabatta is ready to be enjoyed! Its versatile nature makes it a perfect companion for a wide array of dishes. The classic way to savor its flavor and texture is simply torn or sliced and dipped in high-quality extra virgin olive oil, perhaps with a sprinkle of sea salt or balsamic vinegar.
Ciabatta is also the quintessential bread for Italian-style sandwiches (panini, though true panini are pressed). Its sturdy crust and open crumb hold up well to fillings. Use it for bruschetta, lightly toasted and topped with fresh tomatoes, garlic, and basil. It's fantastic served alongside soups, stews, or pasta dishes, perfect for soaking up sauces. Or simply enjoy a slice slathered with butter – the simple pleasures are often the best with such a flavorful bread.
Troubleshooting Your Authentic Italian Ciabatta: Common Mistakes and Solutions
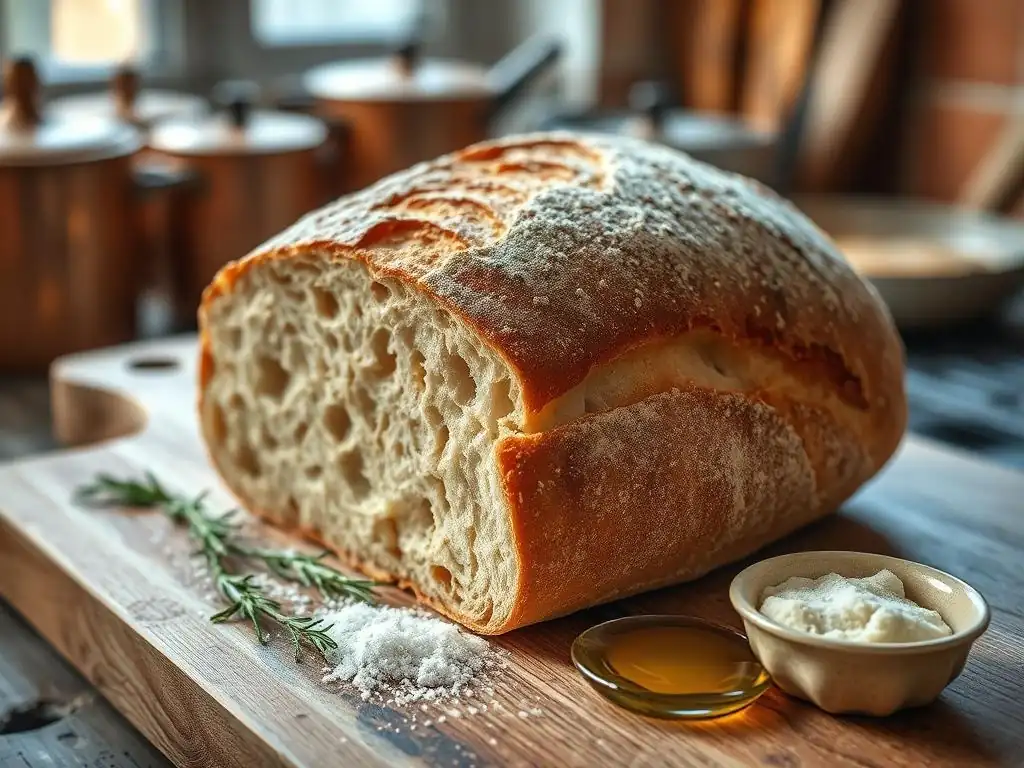
Baking ciabatta can be tricky due to its high hydration. Don't be discouraged if your first few attempts aren't perfect. Understanding common issues and their solutions will help you refine your authentic Italian ciabatta recipe technique.
Dough Too Sticky: Adjusting Hydration Levels
If your ciabatta dough feels excessively sticky and almost impossible to handle even with wet hands or a wet bench scraper, it might be too hydrated for your flour or technique. While high hydration is key, there's a point where it becomes unmanageable.
Solution: First, ensure you are using a strong bread flour capable of absorbing a high amount of water (12%+ protein). If you are, the initial solution isn't to add flour during mixing, but to rely on the folding technique during bulk fermentation. The dough will become slightly easier to handle after a couple of folds. If, after the first set of folds, it still feels like soup, you might slightly reduce the water by 5-10 grams in your next attempt at the authentic Italian ciabatta recipe. Also, ensure you are measuring accurately by weight using scales.
Dense Crumb: Improving Fermentation and Shaping Techniques
A dense crumb with small, uniform holes instead of large, irregular ones is a common issue, indicating insufficient gas production or retention.
Solution: This can be caused by several factors:
- Under-fermentation: The dough didn't have enough time to develop gas. Ensure your biga is active and the bulk fermentation is long enough, with the dough doubling in volume and becoming visibly bubbly (2.5-4 hours at room temp is typical).
- Inactive Yeast: Your yeast might be old or killed by too hot water. Use fresh yeast and check water temperature.
- Rough Handling: Degassing the dough too much during shaping. Be extremely gentle when dividing and shaping, preserving as many bubbles as possible.
- Insufficient Steam: The crust set too quickly, preventing oven spring. Ensure adequate steam is created in the oven during the initial bake.
Flat Ciabatta: Strengthening the Gluten Network
If your ciabatta spreads out excessively during proofing or baking and doesn't achieve much height, the gluten network might be too weak to support the dough's structure.
Solution: This can happen if the dough is under-mixed initially or if insufficient folds were performed during bulk fermentation.
- Initial Mixing: Ensure you mix the dough (especially in a stand mixer) long enough to start developing some elasticity (8-12 minutes on medium speed).
- Folding: Perform the recommended 2-4 sets of folds within the first couple of hours of bulk fermentation. These folds are crucial for building strength in the wet dough.
- Flour Strength: Confirm you are using a strong bread flour (12%+ protein). Weaker flour struggles to build a strong enough gluten network at high hydration.
Burnt Crust: Controlling Oven Temperature and Baking Time
Sometimes the crust darkens too quickly, becoming burnt or excessively thick before the interior is fully cooked.
Solution:
- Oven Temperature: Your oven might be running hotter than the setting indicates. Consider using an oven thermometer to verify accuracy. If consistently too hot, reduce the temperature slightly (e.g., bake at 425°F/220°C instead of 450°F/230°C).
- Baking Time/Position: If the top is browning too fast, move the rack lower in the oven. If the bottom is burning, your baking stone might be too hot, or the oven element is too close; try placing a sheet pan on the rack below your baking stone.
- Tent with Foil: If necessary, loosely tent the ciabatta loaves with aluminum foil once they've achieved a good color but still need more baking time to cook through.
Tips and Tricks for Perfecting Your Authentic Italian Ciabatta Recipe
Elevating your homemade ciabatta from good to great often comes down to mastering a few key techniques and understanding how subtle variations impact the final result.
Using a Dutch Oven for Enhanced Steam
While creating steam in a standard oven can be effective, baking ciabatta in a preheated Dutch oven or a combination cooker (a Dutch oven with a shallow lid) is an excellent way to achieve professional-level crust and oven spring in a home setting. The sealed environment of the Dutch oven traps the moisture released by the dough as it bakes, effectively creating a steamy micro-climate around the loaf during the crucial initial baking phase.
Preheat your Dutch oven with the lid on at your baking temperature (e.g., 450°F/230°C) for 30-45 minutes. Carefully transfer your proofed ciabatta (often on parchment paper) into the hot Dutch oven, score if desired (though often omitted on ciabatta), cover, and bake for 15-20 minutes. Then, remove the lid and continue baking for another 10-15 minutes until the crust is golden brown and crisp. This method simplifies steam generation and often leads to fantastic results with your authentic Italian ciabatta recipe.
Experimenting with Different Flour Types
While strong white bread flour is standard for authentic Italian ciabatta, experimenting with different flours can add interesting dimensions to your homemade loaves. Replacing a small percentage (e.g., 10-15%) of the white flour with whole wheat flour will add nutty flavors and increase the fiber content, though it may slightly reduce the openness of the crumb.
Using a high-quality Italian Tipo 00 flour specifically milled for bread (often labeled "Tipo 00 for bread" or "W300+") can yield a very fine, tender crumb and a delicate crust. Some bakers also like to use a small amount of rye flour in the biga for added complexity and tang. Just remember that substituting large amounts of lower-gluten or whole grain flours will significantly alter the dough's hydration needs and the final texture compared to a classic authentic Italian ciabatta recipe.
Adding Herbs and Flavors to Your Ciabatta
Once you've mastered the basic authentic Italian ciabatta recipe, you can easily incorporate flavorings to create delicious variations. Olives are a classic addition; add drained, pitted olives (like Kalamata or Castelvetrano) during the final minutes of mixing or during the first set of folds. Use about 100-150g of olives per 500g of flour.
Fresh herbs like rosemary, thyme, or oregano can also be added during the mix or folds (about 1-2 tablespoons of chopped fresh herbs per loaf). Sun-dried tomatoes (packed in oil, drained) are another popular choice. For a cheesy twist, add grated Parmesan or finely diced hard cheese towards the end of mixing. Ensure any additions are relatively dry to avoid introducing excess moisture that could affect the dough's hydration.
Storing Your Ciabatta for Maximum Freshness
Freshly baked ciabatta is best enjoyed on the day it's baked, ideally within a few hours of cooling. However, if you need to store it, proper technique will help maintain its quality. Once completely cooled, store the ciabatta at room temperature. Avoid refrigerating bread, as it can accelerate staling.
For storing overnight or for a day, a paper bag is often preferred over plastic, as it allows the crust to remain crisp. If you need to store it for longer, or if your climate is very dry, a plastic bag or bread bin can help keep the interior soft, though the crust will soften. For longer storage (more than 1-2 days), ciabatta freezes exceptionally well.
Slice or cut the loaf into desired portions, wrap tightly in plastic wrap, and then place in a freezer bag. To reheat, thaw at room temperature, then refresh in a preheated oven at 350°F (175°C) for 5-10 minutes until the crust is crisp again.
Beyond the Basics: Exploring Variations of the Classic Ciabatta
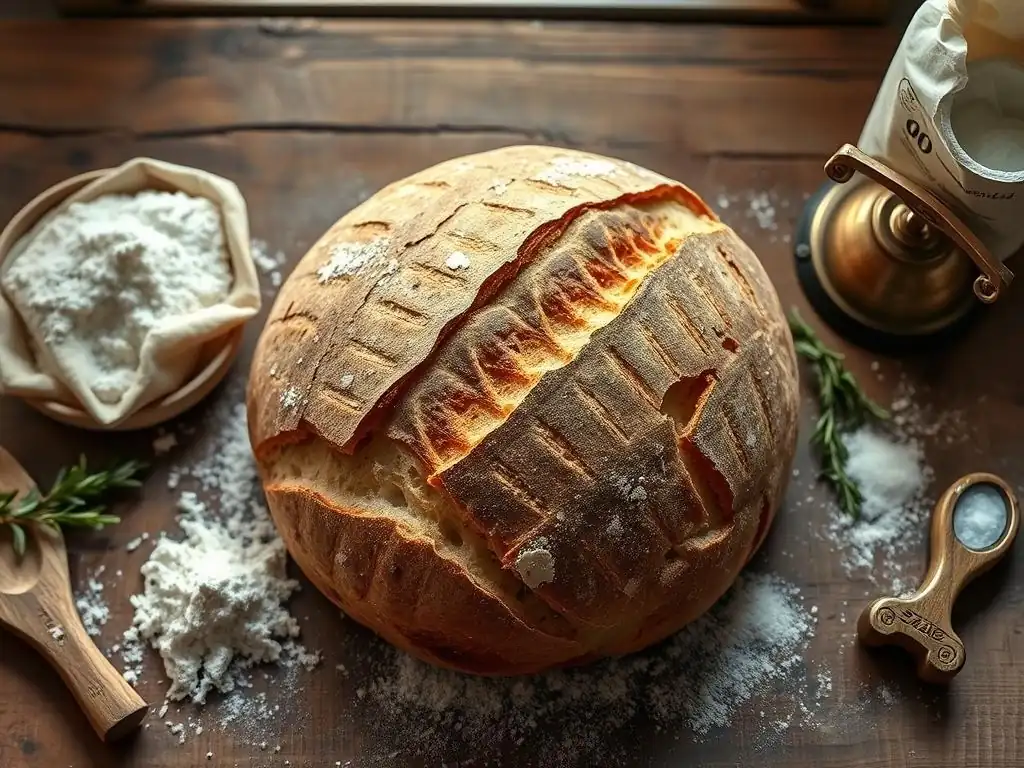
The authentic Italian ciabatta recipe is a fantastic starting point, but its versatility lends itself beautifully to exciting variations. Once you're comfortable with the high-hydration dough and folding techniques, you can easily adapt the core recipe to create different shapes and flavors.
Ciabatta Rolls: Perfect for Sandwiches
Transforming the classic ciabatta dough into individual rolls is simple and creates perfect portions for sandwiches or serving alongside meals. Instead of dividing the dough into 2-3 large loaves, gently divide it into 6-8 smaller, roughly square or rectangular portions after bulk fermentation.
Dust your proofing surface generously and place the rolls on it, leaving space between them. You can create folds in the couche or paper to keep their shape. The baking process is similar, though the baking time will be shorter, typically 20-25 minutes. Ciabatta rolls offer the same wonderful open crumb and crispy crust as the large loaf but in a convenient, individual size.
Whole Wheat Ciabatta: Adding Nutty Flavors
Incorporating whole wheat flour introduces delightful nutty flavors and increased nutritional value to your ciabatta. For a whole wheat variation, replace a portion of the strong white bread flour with whole wheat flour, perhaps 15-30%. Keep in mind that whole wheat flour absorbs more water than white flour due to the bran and germ content.
You might need to slightly increase the overall hydration level or adjust the water quantity based on the dough's feel. The bran can also interfere slightly with gluten development, so ensure adequate mixing and folding. The resulting whole wheat ciabatta will likely have a slightly tighter crumb than a pure white version but will boast a richer flavor and denser texture.
Olive Ciabatta: Infusing Mediterranean Flavors
Adding olives is one of the most popular and delicious variations of the authentic Italian ciabatta recipe. As mentioned earlier, pitted olives (like Kalamata, Gaeta, or Castelvetrano) are typically added towards the end of the mixing process or gently folded in during the first set of bulk fermentation folds.
Use a generous amount of olives, perhaps 20-30% of the flour weight (e.g., 100-150g olives for 500g flour). Ensure they are well-drained if packed in brine or oil. The olives infuse the bread with their savory, briny flavor, making the olive ciabatta a perfect accompaniment to Mediterranean dishes or simply enjoyed on its own.
Conclusion: Embrace the Art of Authentic Italian Ciabatta Baking
Enjoy the Journey of Baking Your Own Ciabatta
Baking an authentic Italian ciabatta recipe is a journey that rewards patience, practice, and attention to detail. From understanding the role of the biga and high hydration to mastering gentle handling and steam baking, each step contributes to the final, glorious loaf. Don't be discouraged by initial challenges; the sticky dough and long process are part of what makes this bread unique and ultimately so satisfying to create.
Embrace the tactile experience of working with the wet dough, appreciate the subtle changes during fermentation, and savor the incredible aroma as your ciabatta bakes. Each loaf you bake will teach you something new about the process and about your own baking environment. It's a skill that improves with repetition, leading to more consistently delicious results.
One of the greatest joys of baking, especially rustic breads like ciabatta, is sharing the fruits of your labor. A warm loaf of homemade authentic Italian ciabatta is a welcoming centerpiece for any meal and a thoughtful gift. Tear off a piece to share, slice it for sandwiches at a picnic, or bring a loaf to a dinner party.
The pride you feel in sharing something you've created from scratch, following traditional techniques, is immense. Your friends and family will undoubtedly appreciate the effort and the superior taste and texture of truly authentic homemade ciabatta compared to store-bought versions. So, bake that loaf, slice it thick, and share the delicious experience!
Frequently Asked Questions
What makes an Authentic Italian Ciabatta recipe truly authentic?
Authenticity comes from using simple, high-quality ingredients, a long fermentation process for flavor development, and the characteristic irregular hole structure in the crumb.
What is the key ingredient for achieving the signature airy texture of Ciabatta?
The key is a high hydration dough, meaning a higher ratio of water to flour. This creates a loose and extensible dough that results in those iconic air pockets.
How long should I ferment my Ciabatta dough for the best flavor?
A long, slow fermentation, ideally overnight or even longer in the refrigerator, allows the dough to develop complex flavors and a more digestible gluten structure.
What are some common mistakes to avoid when making Ciabatta?
Overmixing the dough is a big one, as it can develop too much gluten and result in a tough loaf. Also, avoid adding too much flour during shaping, which can prevent proper expansion.
Can I use a stand mixer, or is hand-kneading essential for Ciabatta?
While a stand mixer can be helpful, hand-kneading is often preferred to avoid overworking the dough. The goal is to gently develop the gluten without making it too strong.
Final Reflection: The Enduring Legacy of Authentic Italian Ciabatta
The pursuit of the perfect ciabatta is not merely a culinary quest; it's a journey into the heart of Italian tradition and a testament to the power of simple ingredients elevated by meticulous technique. The seemingly straightforward process of making ciabatta belies a depth of knowledge and experience passed down through generations of Italian bakers.
This article has explored the key elements – from the specific flour type and hydration levels to the crucial fermentation process – that distinguish authentic ciabatta from its imitators. This knowledge remains incredibly relevant today, as the demand for high-quality, artisan bread continues to grow.
The enduring appeal of ciabatta lies not just in its taste, but in its representation of a slower, more mindful approach to food production. It's a reminder to appreciate the artistry and dedication involved in crafting something truly special. As the great Italian chef, Gualtiero Marchesi, once said, Simplicity is the ultimate sophistication.
This perfectly encapsulates the essence of authentic ciabatta: a seemingly simple bread that reveals its complexity only through careful attention to detail and a deep respect for the ingredients. The process itself becomes a meditation, a connection to the land and the traditions that have shaped this iconic bread.
Now, I invite you to take what you've learned and embark on your own ciabatta journey. Don't be afraid to experiment, to embrace the imperfections, and to savor the process as much as the final product. The true reward lies not just in the perfectly crisp crust and airy crumb, but in the understanding and appreciation you gain for the history, the technique, and the enduring legacy of authentic Italian ciabatta. The next loaf you bake could be your masterpiece.
Unleash Your Inner Ciabatta Master!
Thanks for joining us on this delicious journey into the world of authentic Italian ciabatta! We hope you gained valuable insights into the art of crafting this iconic bread. Now it's time to put your newfound knowledge to the test.
- Bake your own masterpiece! Use the recipe and techniques we shared to create your first (or next!) perfect ciabatta loaf. This is your chance to experience the incredible taste and texture firsthand.
- Share your baking journey! Post a picture of your ciabatta creation on social media and tag us – we'd love to see your results and celebrate your success!
- Explore variations: Experiment with different flours, herbs, or additions to create your signature ciabatta. What unique twist will you add?
Ready to transform your kitchen into a little corner of Italy? What unique ingredient will you add to your ciabatta to make it truly your own?