
GlutenFree Herb and Garlic Bread Recipe

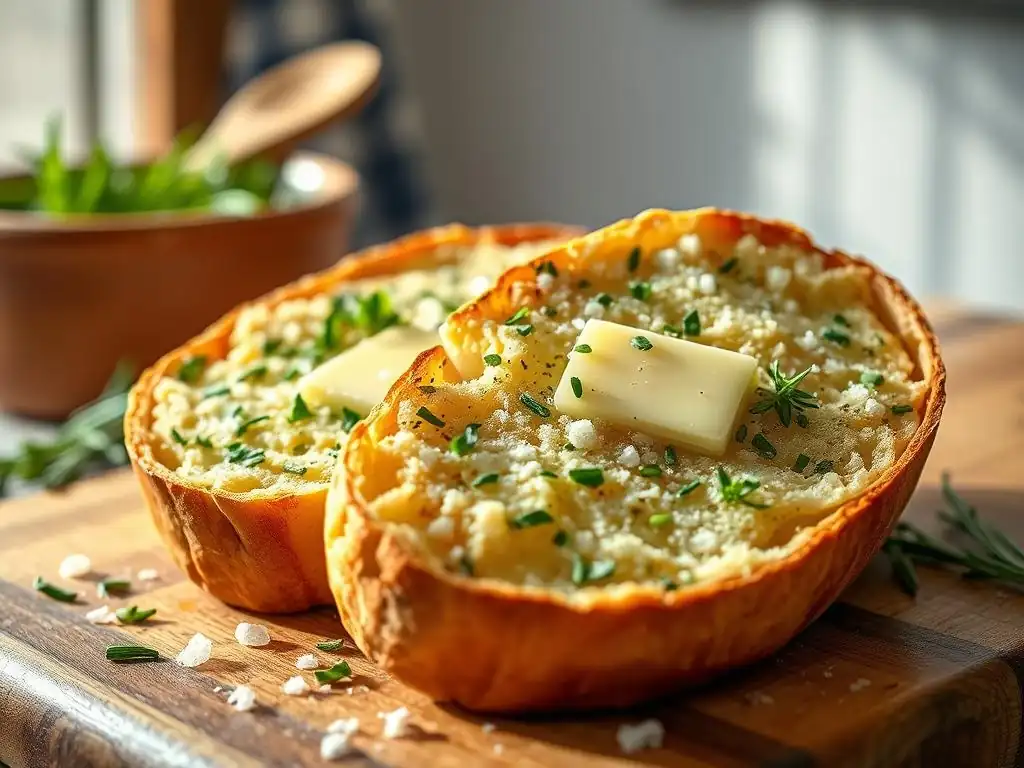
Welcome to BakeWithEase, your kitchen companion for baking adventures! Ever dreamt of sinking your teeth into a warm, fragrant loaf of Gluten-Free Herb and Garlic Bread without the gluten-induced guilt? We'll show you how with our simple recipe. But that's just the beginning... Discover the secret to creating bakery-worthy results at home, one delicious loaf at a time. Intrigued? Let's get baking!
- Gluten-Free Herb and Garlic Bread Recipe: BakeWithEase
- Introduction to Gluten-Free Baking: Herb and Garlic Bread Delight
- Gluten-Free Herb Garlic Bread Recipe: The Ingredients You'll Need
- Step-by-Step Guide: Baking Your Gluten-Free Herb and Garlic Bread
- Tips for Baking the Perfect Gluten-Free Herb and Garlic Bread
- Storing Your Gluten-Free Herb and Garlic Bread
- Troubleshooting Common Gluten-Free Baking Issues
- Enjoy Your Homemade Gluten-Free Herb and Garlic Bread!
-
Frequently Asked Questions
- What makes this gluten-free herb and garlic bread different from other recipes?
- Can I substitute any of the gluten-free flours listed in the recipe?
- What is the best way to store leftover gluten-free herb and garlic bread?
- What herbs work best in this gluten-free herb and garlic bread?
- Is it essential to use a stand mixer for this recipe, or can I mix the dough by hand?
- Final Reflection: The Simple Joy of Gluten-Free Goodness
- Unleash Your Inner Baker: Craft the Perfect Gluten-Free Loaf!
Gluten-Free Herb and Garlic Bread Recipe: BakeWithEase
Introduction to Gluten-Free Baking: Herb and Garlic Bread Delight
Why Choose Gluten-Free Herb and Garlic Bread?
Choosing to bake a gluten-free herb and garlic bread offers a delightful way to enjoy classic flavors without the constraints of gluten. For individuals with celiac disease, gluten sensitivity, or those simply opting for a gluten-free lifestyle, this bread provides a safe and delicious alternative to traditional wheat-based loaves.
It allows everyone at the table to partake in the simple pleasure of tearing into a warm, fragrant loaf, making it perfect for shared meals, dipping in soups, or serving alongside pasta. The aromatic combination of herbs and garlic elevates the taste, transforming a basic gluten-free loaf into something truly special and satisfying.
Beyond dietary needs, many bakers find gluten-free baking a rewarding challenge, leading to a deeper understanding of ingredients and techniques. Crafting a successful gluten-free herb garlic bread demonstrates mastery over alternative flours and binding agents, resulting in a loaf that is not only free from gluten but also boasts a pleasing texture and robust flavor.
It's a chance to experiment and create a bread that rivals its gluten-containing counterparts in taste and appeal, proving that gluten-free doesn't mean flavor-free. This particular recipe is a fantastic entry point for those new to gluten-free bread baking, offering a relatively straightforward path to a delicious result.
BakeWithEase's Commitment to Delicious Gluten-Free Recipes
At BakeWithEase, our mission is to empower bakers of all levels, and that includes making gluten-free baking accessible and enjoyable. We understand that working with gluten-free flours can sometimes be tricky, often resulting in textures that differ significantly from traditional wheat bread. That's why we dedicate ourselves to developing and sharing gluten-free recipes that are not only reliable but also yield genuinely delicious results. Our gluten-free herb garlic bread recipe, for instance, has been tested and refined to ensure a soft interior crumb and a satisfying crust, dispelling the myth that gluten-free bread must be dense or crumbly.
We focus on clear, step-by-step instructions and provide insights into the 'why' behind each step, helping you understand the nuances of gluten-free ingredients. Our goal is to build your confidence in the kitchen, whether you're attempting your first gluten-free loaf or looking to perfect your technique. We believe that everyone deserves to enjoy freshly baked bread, and our collection of gluten-free recipes, including this fragrant gluten-free herb garlic bread, is designed to make that a reality, turning potential baking frustrations into rewarding successes.
Gluten-Free Herb Garlic Bread Recipe: The Ingredients You'll Need
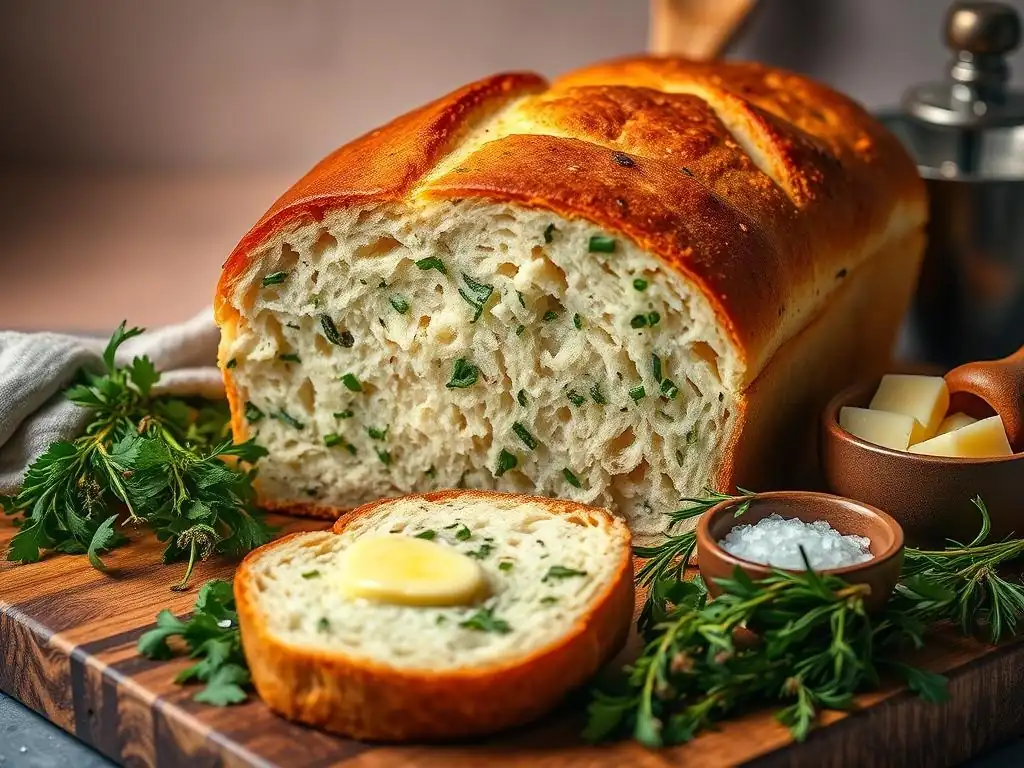
Gluten-Free Flour Blend: Selecting the Right Mix for Optimal Texture
Selecting the right gluten-free flour blend is paramount for achieving a desirable texture in your gluten-free herb and garlic bread. Commercially available blends vary significantly in their composition, often containing a mix of rice flour (white and brown), sorghum flour, tapioca starch, potato starch, and sometimes ancient grains like millet or quinoa.
A good all-purpose gluten-free blend designed for baking bread typically contains a balance of starches and protein flours to mimic the structure that gluten provides. Look for blends that specifically mention suitability for yeast breads or have a higher proportion of protein flours like sorghum or brown rice flour, which can contribute to a better structure and less gumminess.
Avoid blends that are primarily composed of starches, as these can lead to a very dense or gummy texture in yeast-leavened bread. While some recipes might call for mixing individual gluten-free flours and starches, using a high-quality, reliable blend simplifies the process and increases the likelihood of success, especially for beginners. For this gluten-free herb garlic bread recipe, a blend that includes rice flour, sorghum flour, and tapioca starch in roughly equal parts or with slightly more rice/sorghum flour tends to yield excellent results, providing both structure and tenderness.
Fresh Herbs: Choosing the Best Combination for Flavor
Fresh herbs are key to the vibrant flavor of this gluten-free herb garlic bread. While dried herbs can be used in a pinch, fresh herbs offer a brighter, more aromatic profile that truly elevates the bread. Classic combinations for herb bread often include rosemary, thyme, and oregano.
Rosemary provides a pungent, piney note, thyme offers subtle earthy and floral undertones, and oregano adds a warm, slightly peppery flavor. Using a mix of these can create a complex and satisfying taste. Consider using about 2-3 tablespoons of finely chopped fresh herbs in total for a standard loaf size, adjusting based on your preference for intensity.
Other fresh herbs that work well include chives (for a mild oniony flavor), parsley (for freshness), or even a hint of sage (use sparingly as it can be strong). Ensure the herbs are finely chopped so they distribute evenly throughout the dough and don't create large pockets that could affect the bread's structure. Washing and thoroughly drying the herbs before chopping is also crucial to avoid introducing excess moisture into the dough. Experimenting with different fresh herb combinations is a wonderful way to personalize your gluten-free herb garlic bread.
Garlic: Fresh vs. Powdered - A Flavor Comparison
The choice between fresh garlic and garlic powder significantly impacts the flavor intensity and moisture level in your gluten-free herb garlic bread. Fresh garlic, when minced finely, provides a pungent, sharp, and authentic garlic flavor that mellows slightly during baking but remains distinct. It also introduces a small amount of moisture. For this recipe, using 2-3 cloves of finely minced fresh garlic per loaf is a good starting point, offering a robust garlic presence without being overwhelming. Ensure the garlic is minced very finely to distribute the flavor evenly and prevent large, uncooked pieces in the final bread.
Garlic powder, on the other hand, offers a more mellow, rounded garlic flavor that is less sharp than fresh garlic. It's also dried, so it doesn't add moisture to the dough. About 1 teaspoon of garlic powder is roughly equivalent to 2-3 cloves of fresh garlic in terms of general intensity, but the flavor profile is different. While convenient, garlic powder won't give you the same vibrant burst of flavor as fresh garlic. For the most authentic and aromatic gluten-free herb garlic bread, fresh garlic is highly recommended. If using garlic powder, ensure it's fresh for maximum potency.
Other Essential Ingredients: Yeast, Oil, and Binding Agents
Beyond the flour, herbs, and garlic, several other essential ingredients are vital for successful gluten-free bread baking. Yeast, specifically active dry or instant yeast, is the leavening agent that makes the bread rise and gives it a light, airy texture. Ensure your yeast is fresh; expired yeast is a common culprit for flat bread. A typical loaf uses about 1 to 2 teaspoons of instant yeast or 2 to 2.5 teaspoons of active dry yeast.
Oil (such as olive oil or vegetable oil) adds richness, moisture, and tenderness to the gluten-free dough, helping to prevent it from drying out and contributing to a softer crumb. About 2-3 tablespoons of oil per loaf is standard. Gluten-free bread also relies on binding agents to help hold the structure together in the absence of gluten. Psyllium husk or xanthan gum are commonly used.
Psyllium husk is often preferred for yeast breads as it creates a gel-like consistency when mixed with liquid, mimicking some of gluten's properties and resulting in a more pliable dough and better loaf structure. About 1-2 tablespoons of psyllium husk or 1-1.5 teaspoons of xanthan gum per cup of gluten-free flour blend is a general guideline, though specific blend instructions may vary. Salt is also crucial for flavor and controlling yeast activity.
Step-by-Step Guide: Baking Your Gluten-Free Herb and Garlic Bread
Step 1: Preparing the Gluten-Free Dough
Preparing the dough for gluten-free herb and garlic bread requires careful measurement and mixing. Unlike wheat dough, gluten-free dough is often stickier and more batter-like due to the different properties of the flours and the inclusion of binding agents. The initial steps involve activating the yeast (if using active dry), combining the dry ingredients, and then incorporating the wet ingredients to form the base dough. Precision in measuring both dry and wet components is more critical in gluten-free baking than in traditional baking because the hydration level significantly impacts the final texture.
Using a kitchen scale to measure the gluten-free flour blend by weight (grams) rather than volume (cups) is highly recommended for consistency. Different blends can have varying densities, leading to inaccurate measurements by volume. For example, 300 grams of a gluten-free blend is a common amount for a smaller loaf, which might be anywhere from 2 to 2.5 cups depending on the blend. Ensuring all ingredients are at room temperature also helps with proper mixing and yeast activation.
Activating the Yeast for a Perfect Rise
If using active dry yeast, it needs to be activated before being combined with the dry ingredients. This process involves dissolving the yeast in warm liquid (typically water or milk) with a pinch of sugar. The ideal temperature for the liquid is usually between 105°F and 115°F (40°C to 46°C). If the liquid is too cold, the yeast won't activate; if it's too hot, it can kill the yeast. Within 5-10 minutes, the mixture should become foamy and bubbly, indicating that the yeast is alive and active.
Instant yeast, on the other hand, does not require prior activation and can be mixed directly with the dry ingredients. This makes the process slightly simpler. However, regardless of the yeast type, ensuring your yeast is fresh is paramount. A simple test for active dry yeast is the foaming described above. For instant yeast mixed into dry ingredients, you'll observe the dough starting to rise during the proofing stage if the yeast is viable.
Combining the Dry and Wet Ingredients
Once the yeast is ready (either activated or mixed with dry), combine all the dry ingredients in a large bowl. This includes the gluten-free flour blend, salt, sugar (if using), and the binding agent (like psyllium husk or xanthan gum). Whisk them together thoroughly to ensure even distribution, especially for the binding agent, which needs to be dispersed throughout the flour.
In a separate bowl or jug, combine the wet ingredients: the activated yeast mixture (if applicable), warm liquid (water, milk, or a dairy-free alternative, usually between 105-115°F or 40-46°C), oil, and any other liquid components like vinegar (which can help with texture and rise in gluten-free bread). Gradually add the wet ingredients to the dry ingredients, mixing until just combined.
Mixing the Dough to the Right Consistency
Mixing gluten-free dough is different from kneading wheat dough. There's no gluten network to develop. Instead, the goal is to hydrate the flours and binding agents and ensure all ingredients are evenly incorporated. The dough will be quite sticky and resemble a thick batter or soft cookie dough rather than a firm, elastic mass.
You can mix the dough using a stand mixer with a paddle attachment on medium speed for about 5-7 minutes, or by hand with a sturdy spoon or spatula for a similar amount of time. The mixture should be smooth and uniform, with no dry pockets of flour. The binding agent, like psyllium husk, will start to absorb liquid and make the dough slightly more manageable, but it will remain much softer than traditional bread dough. Avoid overmixing, but ensure everything is well combined.
Step 2: Incorporating Herbs and Garlic
Adding the aromatic components is where your gluten-free herb garlic bread truly begins to take shape in terms of flavor. This step should happen after the main dough has been mixed to the right consistency, allowing the herbs and garlic to be evenly distributed without interfering with the initial hydration process. Gently fold or mix in the finely chopped fresh herbs and minced fresh garlic (or garlic powder) until they are dispersed throughout the sticky dough.
It's important not to overmix at this stage, just enough to incorporate the flavorings. Ensure the garlic is minced very finely to prevent intense pockets and aid even flavor distribution. For a standard loaf using 300-350g of flour blend, approximately 2-3 tablespoons of mixed fresh herbs and 2-3 cloves of finely minced garlic are typical amounts, offering a noticeable but not overpowering flavor.
Infusing the Dough with Aromatic Flavors
The act of incorporating the herbs and garlic infuses the entire dough with their wonderful aromas. As the dough proofs and bakes, these flavors will meld and intensify, creating the signature taste of your gluten-free herb garlic bread. The natural oils in the fresh herbs and garlic are released during mixing and baking, permeating the dough.
This infusion process is passive but essential. By ensuring the herbs and garlic are finely prepared and evenly distributed, you guarantee that every slice of your baked bread will carry these delightful flavors. It's this step that transforms a basic gluten-free loaf into a fragrant, savory treat perfect for various uses.
Kneading the Herbs and Garlic Evenly
While traditional bread dough is kneaded to develop gluten, gluten-free dough doesn't require this type of kneading. The term "kneading" in the context of gluten-free dough often refers to the process of gently mixing or folding in additions like herbs and garlic, or briefly working the dough to shape it. When adding herbs and garlic, the goal is uniform distribution without overworking the delicate structure formed by the binding agents.
Use a spatula or dough scraper to gently fold the herbs and garlic into the dough until they appear evenly speckled throughout. If using a stand mixer, mix on low speed for just 30-60 seconds after adding them. Avoid vigorous kneading, which can potentially damage the structure and lead to a denser bread. The dough will remain sticky, so using lightly oiled hands or a spatula can help manage it.
Step 3: Shaping and Proofing the Gluten-Free Bread
Shaping gluten-free dough is different from shaping wheat dough due to its stickier, less elastic nature. However, giving it a basic shape helps create a more uniform loaf that will rise and bake evenly. Proofing is a critical step where the yeast produces carbon dioxide, causing the dough to expand and become light and airy before baking.
Since gluten-free dough lacks the strong structure of gluten, it often needs support during proofing and baking. Using a loaf pan is the most common method for shaping and supporting gluten-free bread, helping it rise upwards rather than spreading outwards. Lightly oiling or lining the loaf pan with parchment paper prevents sticking.
Shaping Techniques for a Visually Appealing Loaf
While elaborate shaping like braiding is difficult with sticky gluten-free dough, you can still achieve a pleasant loaf shape. The simplest method is to scrape the dough directly into a prepared loaf pan and smooth the top with a wet or oiled spatula. For a slightly more structured loaf, you can turn the dough out onto a lightly floured (using gluten-free flour) or oiled surface. Gently form it into a log shape that fits your pan by folding the edges under or patting it into shape.
Avoid handling the dough more than necessary. Once shaped, place it immediately into the prepared loaf pan. For a rustic look, you could try shaping it into a round loaf on a baking sheet lined with parchment paper, but be aware that it might spread more without the support of a pan. A standard 9x5 inch loaf pan is suitable for a recipe using around 300-350g of gluten-free flour blend.
The Importance of Proofing in Gluten-Free Baking
Proofing is absolutely essential for achieving a light texture in gluten-free herb and garlic bread. During proofing, the yeast ferments the sugars in the dough and produces gas, causing it to rise. Without adequate proofing, the bread will be dense and heavy. Gluten-free dough often proofs faster or slower than wheat dough depending on the blend, temperature, and hydration.
Place the shaped dough in a warm, draft-free place to rise. An oven with just the light on is an ideal environment, typically reaching around 80-90°F (27-32°C). Cover the loaf pan loosely with oiled plastic wrap or a damp tea towel to prevent the surface from drying out. Proofing time can vary significantly, usually taking anywhere from 45 minutes to 1.5 hours.
The dough should visibly increase in size, typically rising by about 50-75% or reaching just above the rim of the loaf pan. It won't double in size like wheat dough. Gently poke the side of the dough; if the indentation slowly springs back halfway, it's usually ready to bake.
Step 4: Baking to Golden Perfection
Baking is the final stage where the heat sets the structure, develops the crust, and completes the flavor profile of your gluten-free herb and garlic bread. Proper oven temperature and baking time are crucial for ensuring the bread is cooked through without being dry or having a pale, undercooked crust. Preheating your oven thoroughly is key to a good bake.
Most gluten-free bread recipes call for baking at a moderate to hot temperature, often starting around 375-400°F (190-200°C). Some bakers like to start at a higher temperature for the first 10-15 minutes to encourage oven spring (the final burst of rising) and crust development, then reduce the temperature to ensure the interior cooks through.
Oven Temperature and Baking Time
Preheat your oven to 400°F (200°C) with a rack in the center. This temperature is effective for achieving a good crust while allowing the interior to bake fully. Once the oven is fully preheated, carefully place the loaf pan on the center rack. Bake for approximately 40-50 minutes. The exact time will depend on your oven, the size of the loaf, and the specific gluten-free flour blend used.
The bread is done when the crust is golden brown and firm, and the internal temperature reaches around 200-210°F (93-99°C) when measured with an instant-read thermometer inserted into the center of the loaf. If the top is browning too quickly, you can loosely tent the loaf with aluminum foil for the remaining baking time.
Achieving a Crusty Exterior and Soft Interior
Achieving a crusty exterior on gluten-free bread can be challenging, as the absence of gluten affects how the crust forms. Baking in a humid environment during the initial phase can help.
You can create steam by placing a shallow pan of water on the bottom rack of the oven when you preheat it, or by spraying the oven walls with water a couple of times during the first 10 minutes of baking (be cautious of glass doors). This steam keeps the surface of the dough moist initially, allowing it to expand fully before the crust sets, resulting in a thinner, crispier crust.
For a soft interior, ensure the dough was adequately hydrated and proofed correctly. Baking until the internal temperature reaches 200-210°F (93-99°C) ensures the starches are fully cooked and the crumb is set but still moist. Allowing the bread to cool completely on a wire rack after baking is also vital. Cutting into hot gluten-free bread can result in a gummy texture, as the internal structure is still setting. Patience during the cooling phase is rewarded with a better crumb.
Tips for Baking the Perfect Gluten-Free Herb and Garlic Bread
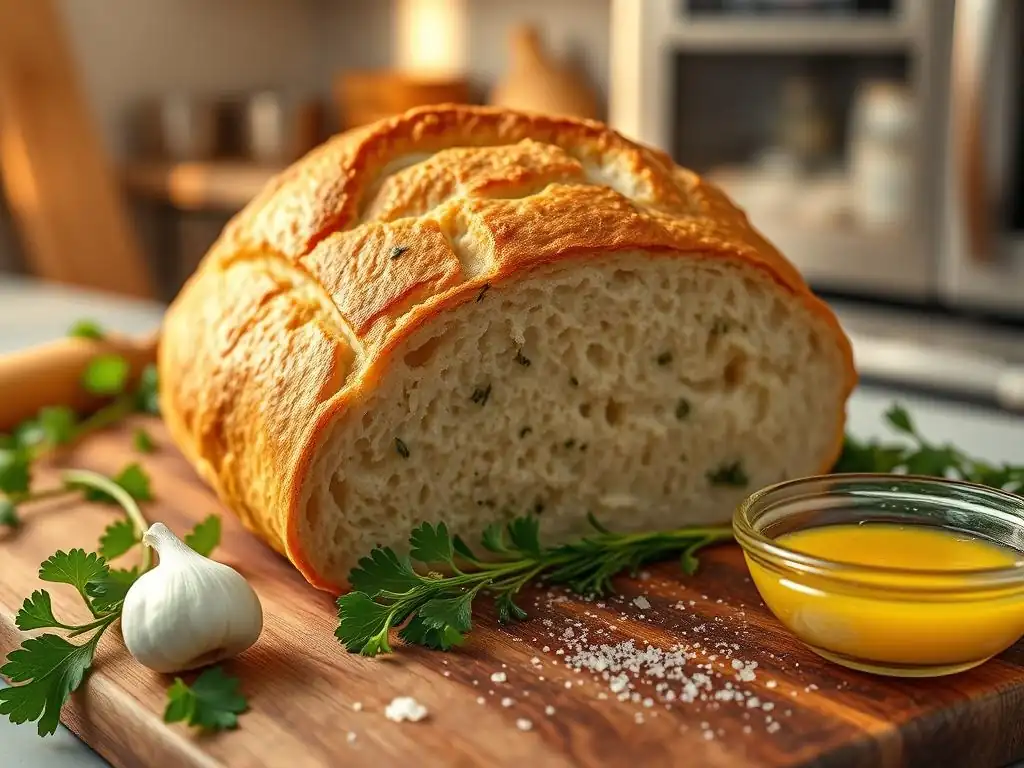
Achieving Optimal Texture in Gluten-Free Bread
Achieving optimal texture in gluten-free bread, like this gluten-free herb garlic bread, relies heavily on balancing moisture, using effective binding agents, and proper proofing. Gluten-free flours absorb liquid differently than wheat flour, and the dough often benefits from higher hydration levels. Ensuring the dough is sticky and quite wet before proofing is usually a good sign that it has enough moisture to create a soft crumb.
Using ingredients like psyllium husk or xanthan gum is crucial as they provide the necessary structure and elasticity that gluten would normally provide, preventing the bread from collapsing or becoming too crumbly. Psyllium husk, in particular, can contribute to a chewier texture closer to traditional bread.
Furthermore, the temperature of your ingredients and proofing environment plays a significant role. Using warm liquids (105-115°F / 40-46°C) helps activate the yeast effectively, leading to a better rise. Proofing in a warm, draft-free place allows the yeast to work optimally, creating air pockets that contribute to a lighter texture. Avoid over-proofing, which can cause the structure to collapse during baking. Finally, allowing the bread to cool completely on a wire rack is non-negotiable; this process allows the internal structure to set properly, preventing a gummy texture.
Preventing a Gummy or Dense Result
A gummy or dense texture is a common challenge in gluten-free baking, but it's preventable. One primary cause is insufficient baking or inadequate cooling. As mentioned, cutting into the bread before it has fully cooled allows the internal steam to escape too quickly and the starches to set improperly, resulting in a gummy center. Always wait at least 1-2 hours, or ideally until completely cool, before slicing. Another factor is too much moisture combined with insufficient binding agent or baking time. Ensure you are using the correct amount of psyllium husk or xanthan gum as specified in the recipe.
Using the right blend of gluten-free flours also helps. Blends high in starch can sometimes lead to a gummy texture. Look for blends with a good proportion of whole grain gluten-free flours. Ensuring the dough is fully proofed but not over-proofed is also key; an under-proofed loaf will be dense, while an over-proofed one might collapse. Finally, verifying that your oven temperature is accurate is important. An oven that runs too cool can lead to under-baked, dense bread. Using an oven thermometer is a simple way to check.
Flavor Variations: Experimenting with Different Herbs and Spices
While the classic gluten-free herb garlic bread is delicious, don't hesitate to experiment with flavor variations. Instead of or in addition to rosemary, thyme, and oregano, consider adding other herbs like finely chopped chives for a mild oniony flavor, dill for a fresh, slightly tangy note, or even a touch of sage for an earthy depth. Use about the same total quantity of fresh herbs (2-3 tablespoons).
You can also introduce different spices. A pinch of black pepper adds a subtle kick. For a warmer, richer flavor, consider adding a small amount of smoked paprika or even a tiny pinch of red pepper flakes if you like a bit of heat. Incorporating grated cheese, such as Parmesan or nutritional yeast for a dairy-free option, alongside the herbs and garlic just before baking can also add a wonderful savory dimension and a slightly crispier crust. Ensure any additions are mixed in evenly during the shaping stage.
Serving Suggestions: Enjoying Your Freshly Baked Bread
Your freshly baked gluten-free herb garlic bread is incredibly versatile. Enjoy it warm from the oven (after it's cooled enough to slice without gumminess) slathered with butter or olive oil. It's the perfect companion to soups, stews, or chili, ideal for soaking up flavorful broths.
Use slices as the base for open-faced sandwiches or bruschetta, topped with tomatoes, mozzarella, or other savory ingredients. It pairs beautifully with Italian dishes, serving as a side for pasta or lasagna. Leftover slices can be toasted for croutons or breadcrumbs. The robust flavor of the gluten-free herb garlic bread makes it a standout addition to any meal.
Storing Your Gluten-Free Herb and Garlic Bread
Best Practices for Maintaining Freshness
Proper storage is essential to keep your gluten-free herb and garlic bread fresh and prevent it from drying out too quickly. Gluten-free bread tends to dry out faster than wheat bread because it lacks gluten, which helps retain moisture. Once the bread has completely cooled, store it at room temperature in an airtight container, a bread box, or wrapped tightly in plastic wrap or beeswax wrap.
Avoid refrigerating gluten-free bread, as this can actually accelerate the staling process and make it dry and crumbly. Stored properly at room temperature, your gluten-free herb garlic bread should stay fresh for 2-3 days. For longer storage, freezing is the best option.
Freezing and Reheating Tips
Freezing is an excellent way to preserve the quality of your gluten-free herb garlic bread for future enjoyment. Ensure the bread is completely cooled before freezing. You can freeze the entire loaf, half a loaf, or slice the loaf and freeze individual slices. For a whole or half loaf, wrap it tightly in plastic wrap, then in aluminum foil or place it in a freezer-safe bag, removing as much air as possible. For slices, stack them with parchment paper in between and place the stack in a freezer bag or container.
Frozen gluten-free bread can last for up to 2-3 months. To reheat a whole or half loaf, unwrap it and warm it in a preheated oven at 350°F (175°C) for 15-25 minutes, or until heated through. Individual slices can be popped directly into a toaster or toaster oven from frozen, or microwaved briefly (though this can sometimes make them slightly chewy). Reheating frozen gluten-free herb garlic bread brings back much of its original texture and aroma.
Troubleshooting Common Gluten-Free Baking Issues
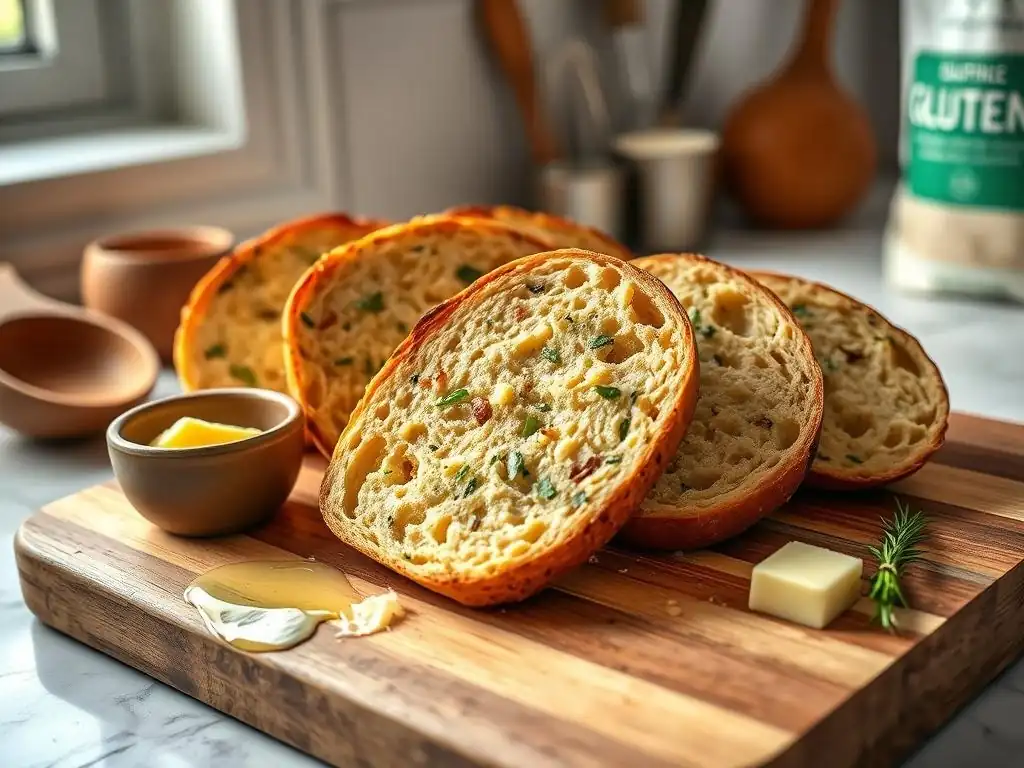
Addressing a Dough That's Too Wet or Too Dry
Working with gluten-free dough can sometimes present challenges with consistency – it might seem too wet or too dry. If your dough feels excessively sticky and more like a pourable batter than a thick dough or soft cookie dough, it might be too wet.
This could be due to inaccurate liquid measurement or using a gluten-free blend that absorbs less liquid. You can try adding a small amount (1-2 tablespoons at a time) of your gluten-free flour blend or a bit of psyllium husk powder, mixing gently until the consistency is manageable (it should still be sticky, just not liquid).
Conversely, if your dough feels crumbly or too stiff, it's likely too dry. This can happen if you measured too much flour or not enough liquid, or if your binding agent absorbed more liquid than expected. Add a small amount (1-2 teaspoons at a time) of warm water or milk, mixing until the dough comes together and has a consistency resembling thick cake batter or soft playdough – still sticky, but cohesive. Always make adjustments gradually, as it's easier to add more liquid or flour than to correct a large imbalance.
Preventing a Flat or Under-Risen Bread
A flat or under-risen loaf is a common disappointment in gluten-free bread baking. The most frequent cause is inactive or expired yeast. Ensure your yeast is fresh and active, especially if using active dry yeast (check for foam when activating). The temperature of your liquid is also critical; too cold won't activate the yeast, and too hot will kill it. Aim for 105-115°F (40-46°C).
Another reason for poor rise is an incorrect amount of yeast or sugar (sugar feeds the yeast). Follow the recipe's measurements carefully. The proofing environment is also vital; it needs to be warm and draft-free, ideally around 80-90°F (27-32°C). Insufficient proofing time will result in a dense loaf. Ensure the dough has visibly increased in size by 50-75% before baking. Finally, check that you included the binding agent (psyllium husk or xanthan gum) as it provides the necessary structure for the loaf to hold its shape as it rises.
Fixing a Bread That's Too Dense
If your gluten-free herb garlic bread turns out too dense, several factors could be at play. Insufficient hydration is a common cause; as mentioned, gluten-free dough needs to be quite wet before baking. Too little liquid results in a stiff dough that can't expand properly. Under-proofing is another major contributor to density; the yeast didn't have enough time to create sufficient air pockets. Ensure you proof until the dough shows a significant increase in volume.
Overmixing the dough after adding the binding agent can sometimes negatively impact the texture, although this is less common than hydration or proofing issues. Also, cutting the bread before it's fully cooled will make the interior seem gummy and dense. Always allow complete cooling on a wire rack. Using a gluten-free flour blend that is primarily starch can also lead to a denser crumb; opting for a blend with more whole grain flours can help.
Enjoy Your Homemade Gluten-Free Herb and Garlic Bread!
We love seeing your baking creations! Once your delicious gluten-free herb and garlic bread is baked to golden perfection, we encourage you to share your success. Snap a photo of your beautiful loaf and share it online, tagging BakeWithEase. Tell us about your experience, any variations you tried, or how you plan to enjoy your fresh, fragrant bread. Your baking journey inspires others in the BakeWithEase community.
Sharing your results helps us all learn and grow as bakers. It's a testament to the fact that delicious, satisfying gluten-free bread is achievable right in your own kitchen. Celebrate your accomplishment – you've baked a wonderful gluten-free herb garlic bread from scratch!
Discover More Gluten-Free Bread Baking Recipes
If you've enjoyed baking this gluten-free herb and garlic bread, there's a whole world of gluten-free bread baking waiting for you to explore on BakeWithEase. We offer a variety of recipes, from simple sandwich loaves to artisan-style boules, sweet breads, and more. Each recipe is crafted with clear instructions and helpful tips to guide you.
Dive into our collection of gluten-free bread recipes to expand your skills and repertoire. Whether you're looking for a basic gluten-free loaf, a seeded bread, or something entirely new, BakeWithEase is here to support your baking adventures. Keep baking, keep experimenting, and keep enjoying the wonderful taste of homemade gluten-free bread.
Frequently Asked Questions
What makes this gluten-free herb and garlic bread different from other recipes?
This recipe focuses on achieving a texture and flavor similar to traditional bread by using a specific blend of gluten-free flours and flavorful herbs and garlic. The precise measurements and techniques ensure a satisfying, non-gummy result.
Can I substitute any of the gluten-free flours listed in the recipe?
While possible, substituting flours may affect the final texture. We recommend sticking to the recipe for the best results. However, if you must substitute, consider using flours with similar starch and protein content and be aware of the potential impact on crumb structure.
What is the best way to store leftover gluten-free herb and garlic bread?
Store leftover bread in an airtight container at room temperature for up to two days or in the refrigerator for up to five days. You can also freeze slices individually for longer storage and reheat as needed.
What herbs work best in this gluten-free herb and garlic bread?
The recipe calls for a blend of herbs, but you can customize it to your liking. Fresh herbs like rosemary, thyme, and parsley work wonderfully. Experiment with different combinations to find your perfect flavor profile.
Is it essential to use a stand mixer for this recipe, or can I mix the dough by hand?
While a stand mixer makes the process easier, you can mix the dough by hand. Be prepared for a slightly longer mixing time and ensure all ingredients are thoroughly combined for optimal results.
Final Reflection: The Simple Joy of Gluten-Free Goodness
The demand for delicious and accessible gluten-free options continues to rise, and this simple herb and garlic bread recipe proves that embracing dietary restrictions doesn't mean sacrificing flavor. This recipe isn't just about avoiding gluten; it's about celebrating the potential of alternative ingredients to create something truly satisfying and flavorful.
Creating this recipe was a personal journey, born from a desire to share the joy of good food with everyone, regardless of dietary needs. It's a testament to the power of adaptation and the endless possibilities in the kitchen. The best way to find yourself is to lose yourself in the service of others.
– Mahatma Gandhi. This quote resonates deeply because sharing this recipe feels like a small act of service, offering a delicious and inclusive culinary experience. The positive feedback I've received from those who have tried it underscores the importance of accessible and enjoyable gluten-free options.
Now, I invite you to try this recipe and experience the deliciousness for yourself. Don't be intimidated by the "gluten-free" label; embrace the opportunity to experiment with new flavors and techniques. Share your creations, adapt the recipe to your own tastes, and most importantly, savor the simple joy of a perfectly crafted piece of herb and garlic bread, free from gluten but full of flavor and love.
Unleash Your Inner Baker: Craft the Perfect Gluten-Free Loaf!
Thanks for taking the time to explore this delicious gluten-free herb and garlic bread recipe! We hope you discovered a new favorite way to enjoy this classic. Ready to take your baking skills to the next level?
- Bake your own masterpiece: Try out the recipe today – the aroma alone is worth it! Let us know how it turns out.
- Share your success: Post a picture of your creation on social media and tag #BakeWithEaseGlutenFree – we’d love to see it!
- Experiment with flavors: What other herbs and spices would you add to elevate this recipe? Share your ideas in the comments!
Ready to transform your kitchen into a gluten-free haven?