
Your Guide to Troubleshooting GlutenFree Bread Issues

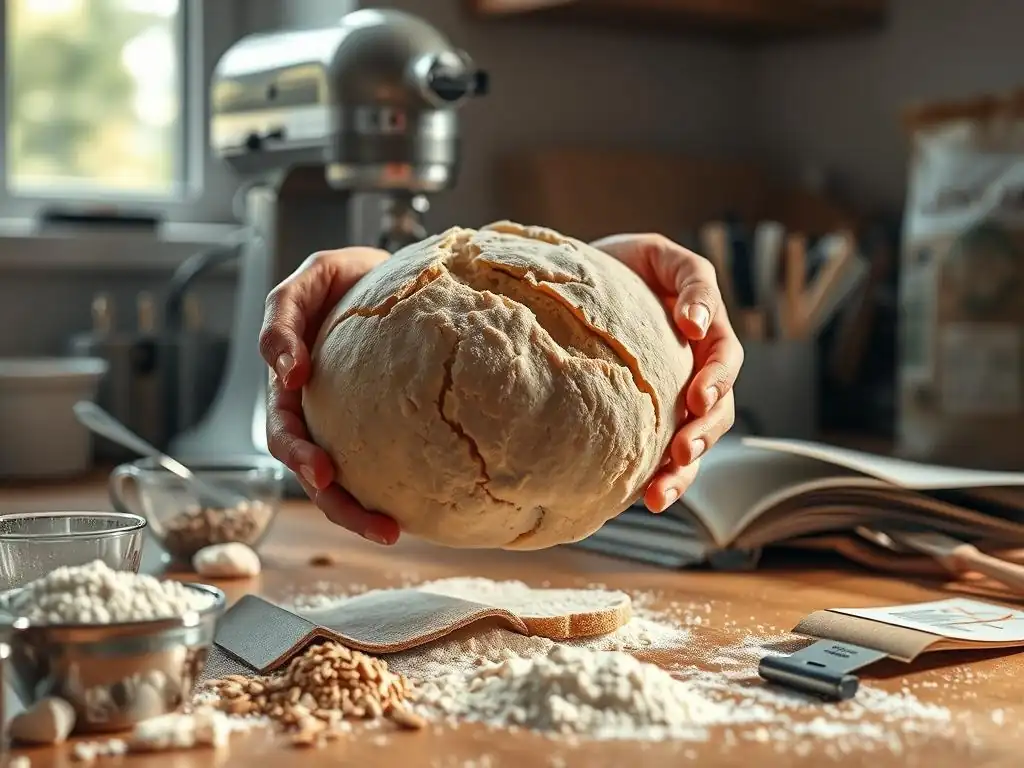
Welcome to BakeWithEase, your trusted companion on your baking journey! Ever dreamt of perfectly risen, delicious gluten-free bread but keep running into frustrating snags? This is where we come in. Dive into our article, "Your Guide to Troubleshooting GlutenFree Bread Issues," and unlock the secrets to baking success. From gummy textures to flat loaves, we'll help you identify common pitfalls and provide practical solutions to achieve bakery-worthy results, every single time. Ready to finally master gluten-free bread baking? Let's get started!
- Your Guide to Troubleshooting Gluten-Free Bread Issues: Bake With Ease
- Introduction to Gluten-Free Bread Baking Challenges
- Gluten-Free Bread Troubleshooting Tips: Identifying the Issues
- Problem 1: Dense and Gummy Gluten-Free Bread
- Problem 2: Dry and Crumbly Gluten-Free Bread
- Problem 3: Gluten-Free Bread Not Rising Properly
- Problem 4: Gluten-Free Bread with a Poor Texture
- Problem 5: Gluten-Free Bread Collapsing After Baking
- Advanced Gluten-Free Bread Baking Techniques for Success
- Gluten-Free Bread Baking: Mastering the Art
-
Frequently Asked Questions
- How do I prevent my gluten-free bread from being too dense?
- Why is my gluten-free bread crumbly and falling apart?
- My gluten-free bread is gummy inside, even when fully baked on the outside. What's wrong?
- What can I do if my gluten-free bread doesn't rise properly?
- How can I improve the flavor of my gluten-free bread?
- Final Reflection: The Ongoing Quest for the Perfect Gluten-Free Loaf
- Unleash Your Inner Gluten-Free Baker!
Your Guide to Troubleshooting Gluten-Free Bread Issues: Bake With Ease
Introduction to Gluten-Free Bread Baking Challenges
Why Gluten-Free Bread Baking Can Be Tricky
Baking gluten-free bread presents a unique set of challenges compared to traditional wheat-based baking. Gluten, a protein found in wheat, rye, and barley, acts as the structural backbone of conventional bread. It forms an elastic network that traps gases produced by yeast, allowing the dough to rise and creating that familiar chewy texture.
Without gluten, bakers must find alternative ways to replicate these crucial functions, often relying on a blend of different flours, starches, and binding agents. This delicate balance makes gluten-free baking less forgiving, as small adjustments in ingredient ratios or technique can significantly impact the final outcome. Mastering these nuances is key to successful glutenfree bread troubleshooting tips.
Navigating the world of gluten-free flours adds another layer of complexity. Each gluten-free flour, such as rice flour, almond flour, tapioca starch, or sorghum flour, possesses distinct properties in terms of absorption, protein content, and flavor. A recipe calling for "gluten-free flour blend" might yield vastly different results depending on the specific blend used. Furthermore, gluten-free dough tends to be wetter and stickier than wheat dough, requiring different handling techniques. Understanding these fundamental differences is the first step in tackling common gluten-free bread problems and applying effective glutenfree bread troubleshooting tips.
Common Problems Faced When Baking Gluten-Free Bread
Bakers new to the gluten-free world often encounter a range of frustrations. One of the most frequent issues is bread that turns out dense and heavy, lacking the airy crumb of its gluten-containing counterpart. Another common complaint is bread that is excessively dry or crumbly, falling apart easily when sliced. Getting the bread to rise properly can also be a hurdle, leading to flat loaves. Additionally, texture can be problematic, resulting in a grainy or gummy mouthfeel. These challenges highlight the need for specific glutenfree bread troubleshooting tips tailored to the unique properties of gluten-free ingredients.
Beyond texture and rise, bakers may face issues with the bread collapsing after baking or developing an unappealing flavor. The absence of gluten means the structure is more fragile, prone to collapsing if not handled correctly during and after baking. Achieving a pleasant flavor profile requires careful selection and blending of gluten-free flours, as some can impart strong or bitter tastes. Identifying the specific problem you're facing is the crucial first step in applying the right glutenfree bread troubleshooting tips to achieve delicious, well-structured gluten-free bread.
Gluten-Free Bread Troubleshooting Tips: Identifying the Issues
Understanding Gluten's Role in Traditional Bread
Gluten is formed when two proteins, glutenin and gliadin, found in wheat flour, combine with water and are mixed or kneaded. Glutenin provides elasticity and strength, allowing the dough to stretch without breaking. Gliadin contributes extensibility, enabling the dough to expand. Together, they create a viscoelastic network that traps the carbon dioxide gas produced by yeast during fermentation.
This trapped gas causes the dough to rise, giving bread its volume and airy structure. During baking, this gluten network solidifies, setting the structure of the loaf. Without this natural scaffolding, gluten-free recipes must rely on other ingredients to mimic these functions, which is why glutenfree bread troubleshooting tips often focus on binders and flour blends.
In traditional baking, kneading develops the gluten network, making the dough smooth and elastic. A well-developed gluten structure can hold its shape and support the weight of the rising dough. The absence of gluten means that gluten-free doughs don't benefit from this development. Instead, they often use hydrocolloids like xanthan gum or psyllium husk, or ingredients like eggs and psyllium, to bind the ingredients and provide some structural support. Understanding how gluten works helps illuminate why gluten-free bread behaves differently and why specific glutenfree bread troubleshooting tips are necessary to compensate for its absence.
Recognizing the Signs of Gluten-Free Bread Problems
Spotting the signs of a gluten-free bread issue often starts with observing the dough and the final loaf. If your dough feels overly wet and doesn't seem to hold together even after resting, it might indicate an imbalance in your flour-to-liquid ratio. During proofing, a lack of significant rise suggests yeast or temperature problems. After baking, examining the crumb is vital.
A dense, brick-like loaf that feels heavy for its size is a classic sign of insufficient rise or too much heavy flour. If the bread crumbles excessively when you try to slice it, it's likely too dry. These visual and tactile clues are the first indicators that you need to apply some glutenfree bread troubleshooting tips.
Other signs include a loaf that has a hard crust but a gummy interior, pointing towards improper baking time or temperature, or perhaps too much starch. If the top crust cracked excessively or the sides collapsed inward, it could be an issue with the internal structure not being strong enough to support the loaf as it cools.
Paying close attention to these symptoms – from how the dough feels to how the baked loaf looks and feels – provides crucial clues for diagnosing the underlying problem and selecting the most effective glutenfree bread troubleshooting tips to improve your next bake.
Problem 1: Dense and Gummy Gluten-Free Bread
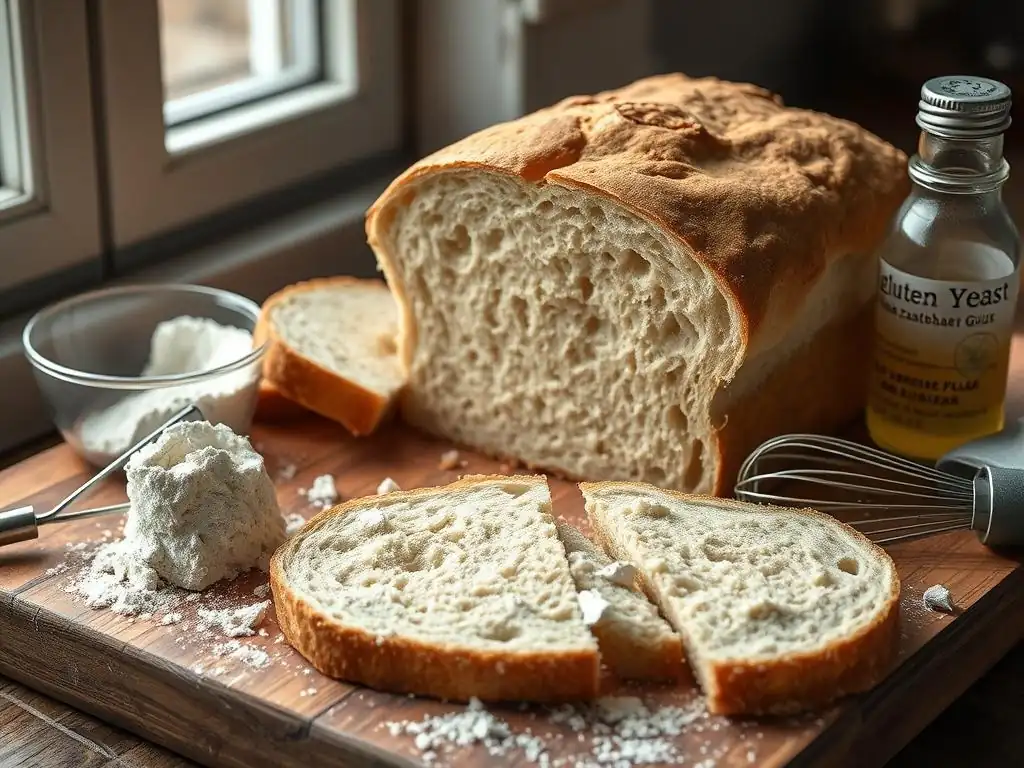
Causes of Dense Gluten-Free Bread
Too Much Starch in the Gluten-Free Flour Blend
Many commercial gluten-free flour blends contain a high proportion of starches like tapioca starch, potato starch, and cornstarch. While starches contribute to tenderness and binding, an excessive amount can lead to a gummy texture and a dense crumb. Starch absorbs a lot of liquid but doesn't provide structural support on its own.
When these flours are used as the primary component (sometimes making up 50-70% of a blend), the resulting bread can be heavy and lack the open structure desired. For example, a blend with 60% rice flour and 40% tapioca starch might be prone to gumminess compared to a more balanced blend. Addressing this often involves adjusting your glutenfree bread troubleshooting tips related to flour composition.
A high starch content also affects how the dough hydrates and bakes. Starches gelatinize when heated in the presence of moisture, and too much gelatinization can create that undesirable gummy layer, especially near the bottom or center of the loaf. This is particularly noticeable in recipes that rely heavily on a single starch or starch-heavy blend. Understanding the starch content of your blend is a key step in applying effective glutenfree bread troubleshooting tips to avoid dense, gummy results.
Insufficient Leavening Agents
Leavening agents, whether yeast, baking powder, or baking soda (often used in quick breads), are responsible for creating the gas that makes bread rise and become light and airy. If the recipe calls for too little leavening, or if the leavening agent is old or inactive, the dough won't produce enough gas to expand properly. This results in a loaf that doesn't rise much during proofing or baking, leading to a dense, heavy texture.
For instance, a yeast bread recipe requiring 2 teaspoons of active dry yeast might fail if only 1 teaspoon is used, or if the yeast is past its expiration date (yeast typically lasts about 4-6 months once opened if stored correctly). Applying glutenfree bread troubleshooting tips here means checking your leavening.
Furthermore, the temperature of the liquid used with yeast is critical. Water that is too hot (above 130°F or 55°C) will kill the yeast, while water that is too cold (below 105°F or 40°C) won't activate it effectively. In quick breads using baking soda and powder, the balance of acid and base is crucial for activation.
If the recipe lacks sufficient acidic ingredients (like buttermilk, yogurt, or lemon juice) to react with the baking soda, or if the baking powder has lost its potency (it typically lasts 6-12 months once opened), the chemical leavening won't work, resulting in a dense loaf. Incorporating these checks into your glutenfree bread troubleshooting tips can save your bake.
Overmixing the Dough
While traditional wheat dough benefits from kneading to develop gluten, gluten-free dough does not. Overmixing gluten-free dough can actually damage the fragile structure created by the binders and starches. Unlike gluten, which becomes stronger with mixing, the components in gluten-free blends can break down or become overworked, leading to a loss of trapped air and a denser texture.
The goal with gluten-free dough is simply to combine the ingredients thoroughly until no dry pockets remain, often resulting in a batter-like consistency rather than a firm dough. Overmixing might manifest as a dough that becomes excessively sticky or loses its initial slight aeration. This is a crucial point in glutenfree bread troubleshooting tips.
Mixing for too long can also prematurely activate binding agents like xanthan gum or psyllium husk, causing the dough to become overly stiff or gluey before it even starts proofing. This can hinder the yeast's ability to expand the dough later. Gentle mixing, often just until combined, is preferred. Using a stand mixer on a low speed or mixing by hand until just incorporated is usually sufficient. Recognizing the signs of overmixing and adjusting your technique is a vital part of effective glutenfree bread troubleshooting tips for achieving a lighter loaf.
Solutions for Dense Gluten-Free Bread
Adjusting Your Gluten-Free Flour Blend Ratio
To combat density caused by too much starch, consider adjusting your flour blend. Aim for a blend that includes a good balance of wholegrain gluten-free flours (like brown rice, sorghum, millet, or oat flour) and starches (tapioca, potato, corn). A common recommendation is a ratio of roughly 60-70% wholegrain flours to 30-40% starches.
For example, instead of a blend that is 50% white rice flour and 50% tapioca starch, try a blend with 40% brown rice flour, 20% sorghum flour, 20% tapioca starch, and 20% potato starch. This provides more structure from the wholegrains while still getting some lightness from the starches. Experimenting with different ratios is a key glutenfree bread troubleshooting tip.
Alternatively, you can purchase a commercially blended flour known for its balance, or create your own blend. If using a recipe designed for a specific type of blend (e.g., one high in starches), you may need to slightly reduce the liquid if switching to a blend with more wholegrains, as wholegrains often absorb more moisture. Making these adjustments based on the flour blend you use is one of the most effective glutenfree bread troubleshooting tips for improving texture.
Incorporating More Leavening: Yeast, Baking Powder, or Baking Soda
If insufficient leavening is the culprit, check the expiration date of your yeast, baking powder, or baking soda. For yeast, perform a simple test: dissolve 1 teaspoon of sugar in 1/4 cup of warm water (105-115°F or 40-46°C), then stir in 2 teaspoons of yeast. If it doesn't become foamy and bubbly within 5-10 minutes, your yeast is likely dead and needs to be replaced.
For baking powder, drop a teaspoon into hot water; it should fizz vigorously. For baking soda, mix a small amount with vinegar; it should bubble immediately. Replacing inactive leavening is a fundamental glutenfree bread troubleshooting tip.
If your leavening is active but your bread is still dense, you might need to slightly increase the amount called for in the recipe, especially if you've adjusted the flour blend or added heavier ingredients like nuts or seeds. For yeast breads, ensuring the dough proofs in a warm, draft-free environment (around 75-80°F or 24-27°C) is also crucial for optimal yeast activity. Using these glutenfree bread troubleshooting tips related to leavening will help ensure a proper rise.
Gentle Mixing Techniques for Gluten-Free Dough
To avoid overmixing, mix your gluten-free dough only until the ingredients are just combined and there are no dry pockets of flour visible. The dough will likely be more like a thick batter or a very wet dough, unlike the firm, elastic dough of wheat bread. Avoid vigorous kneading or prolonged mixing in a stand mixer. Often, just 3-5 minutes on a low speed in a mixer, or mixing by hand with a spoon or spatula until cohesive, is sufficient. This gentle approach is a critical glutenfree bread troubleshooting tip.
Pay attention to the texture as you mix. If the dough starts to become overly sticky or gluey and loses its initial slightly aerated look, you've likely mixed enough, or even too much. Learning to recognize the correct consistency for your specific recipe is key. Gentle handling throughout the process, from mixing to shaping (often just spooning into a pan), helps preserve the delicate structure and contributes to a lighter loaf. Implementing these mixing glutenfree bread troubleshooting tips can make a significant difference.
Problem 2: Dry and Crumbly Gluten-Free Bread
Causes of Dry Gluten-Free Bread
Insufficient Moisture in the Recipe
Gluten-free flours, particularly whole-grain varieties like brown rice, sorghum, and millet, tend to absorb more liquid than wheat flour. If a recipe doesn't account for this higher absorption, the resulting dough will be too dry, leading to a crumbly texture in the baked bread. A common cause is using a gluten-free flour blend that requires more hydration than the one the recipe was originally developed for.
For example, a blend heavy in absorbent flours might need 10-20% more liquid than a blend high in starches. Not adding enough liquid is a primary reason bakers seek glutenfree bread troubleshooting tips for dryness.
Even slight variations in measuring flour (scooping vs. spooning) can lead to too much flour being used, further exacerbating the dryness problem. Gluten-free doughs typically have a higher hydration level than wheat doughs, often resembling a thick batter. If your dough feels stiff or dry before proofing, it's a strong indicator that more liquid is needed. Recognizing this early is a valuable glutenfree bread troubleshooting tip.
Overbaking the Bread
Baking the bread for too long or at too high a temperature can evaporate too much moisture from the loaf, resulting in a dry, hard crust and a crumbly interior. Gluten-free bread can sometimes brown faster than wheat bread due to different sugar content in the flours, giving the appearance of being done when the inside is still baking and drying out. For instance, baking a loaf meant for 45 minutes at 375°F (190°C) for 60 minutes can easily lead to excessive dryness. This is a common mistake addressed by glutenfree bread troubleshooting tips for oven use.
The internal temperature is a more reliable indicator of doneness than bake time alone. Gluten-free bread is typically done when the internal temperature reaches 200-210°F (93-99°C). Relying solely on visual cues or recipe time can lead to overbaking. Using a digital thermometer is a helpful glutenfree bread troubleshooting tip to prevent drying out your loaf.
Using the Wrong Gluten-Free Flour Combination
Certain gluten-free flours are inherently drier or absorb less moisture than others. Using a blend that is too high in flours like white rice flour or corn flour without sufficient balancing flours or binders can result in a dry, brittle crumb. Similarly, relying solely on nut flours like almond flour without adequate binders or moisture can lead to a crumbly texture, although these are often used in denser, cake-like breads.
A blend with 70% white rice flour and 30% potato starch, for example, might yield a drier result than a blend containing brown rice, sorghum, and tapioca starch. Selecting an appropriate flour combination is a key aspect of effective glutenfree bread troubleshooting tips.
Some flours also contribute to a grainy texture, which can be perceived as dryness. Using very coarsely ground flours or a blend that doesn't include finer flours or starches can contribute to this issue. Understanding the properties of different gluten-free flours and how they interact is essential for creating a balanced blend that prevents dryness and improves overall texture. This knowledge is fundamental to applying successful glutenfree bread troubleshooting tips.
Solutions for Dry Gluten-Free Bread
Increasing Liquid Content: Water, Milk, or Oil
If your gluten-free bread is consistently dry, the simplest solution is often to increase the liquid content in your recipe. Start by adding a small amount, perhaps 1-2 tablespoons, to the dough, and assess the consistency. Gluten-free dough should generally feel like a thick, scoopable batter, not a firm dough that you can easily knead (unless the recipe specifically indicates a kneadable dough type, which is less common).
Ingredients like milk, yogurt, or even oil can add richness and moisture beyond just water. For example, if a recipe calls for 1.5 cups of water, try using 1.75 cups in your next attempt if the previous loaf was dry. Adjusting hydration is one of the most impactful glutenfree bread troubleshooting tips.
Factors like humidity and the specific batch of flour can affect absorption, so don't be afraid to trust your intuition about the dough's consistency. It's better to have a slightly wetter dough than one that is too dry. Record the adjustments you make so you can replicate successful outcomes. Learning to recognize the correct dough consistency for your recipe is a crucial glutenfree bread troubleshooting tip for preventing dryness.
Reducing Baking Time and Temperature
To prevent overbaking, reduce the baking time slightly or lower the oven temperature by 10-20°F (5-10°C). Tent the top of the bread loosely with foil about halfway through the baking time if the crust is browning too quickly. Most importantly, use an instant-read thermometer to check the internal temperature of the loaf. Insert the thermometer into the center of the bread. When it reaches 200-210°F (93-99°C), the bread is done, regardless of the time stated in the recipe. This precise measurement is a critical glutenfree bread troubleshooting tip.
Allow the bread to cool completely on a wire rack before slicing. Cutting into hot gluten-free bread can release steam too quickly and contribute to a dry or gummy texture. Proper cooling is just as important as proper baking time. By carefully monitoring the internal temperature and allowing for proper cooling, you can significantly reduce the chances of a dry, crumbly loaf. These are essential glutenfree bread troubleshooting tips for achieving optimal moisture.
Choosing a Hydrating Gluten-Free Flour Blend
Selecting a gluten-free flour blend that contains a good balance of absorbent whole grains and moisture-retaining starches, or even flours like oat flour which adds tenderness, can help prevent dryness. Some blends also incorporate ingredients like psyllium husk or flax meal, which become gel-like when wet and help retain moisture in the bread. For instance, a blend containing brown rice, sorghum, tapioca, and psyllium husk is likely to produce a moister loaf than one based primarily on white rice and cornstarch.
Looking for blends designed for bread baking is a good start. This is a proactive glutenfree bread troubleshooting tip.
If you make your own blend, ensure it includes components that contribute moisture and tenderness. Adding a small amount of a high-fat flour like almond flour (use cautiously as it can make bread heavy) or a binder like psyllium husk or xanthan gum can improve moisture retention. Experimenting with different blend compositions, keeping notes on which combinations yield the best results, is a valuable process in mastering gluten-free bread troubleshooting tips.
Problem 3: Gluten-Free Bread Not Rising Properly
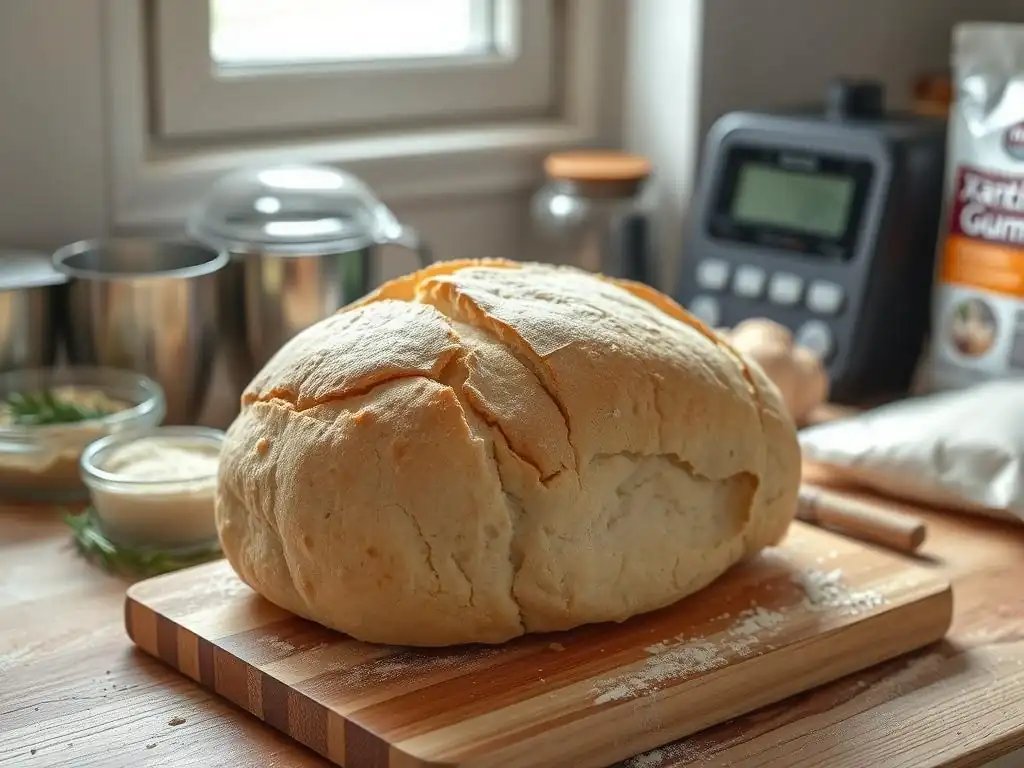
Causes of Gluten-Free Bread That Won't Rise
Expired or Inactive Yeast
Yeast is a living organism responsible for fermentation, producing the carbon dioxide gas that makes bread rise. If your yeast is old, improperly stored, or has been exposed to moisture or heat, it can die or become inactive. Using inactive yeast means no gas production, resulting in a dense, flat loaf that doesn't rise during proofing or baking.
Standard active dry yeast typically lasts for about a year unopened, but only a few months once opened, especially if not stored in an airtight container in the refrigerator or freezer. Instant yeast is slightly more forgiving but also loses potency over time. This is a very common reason bakers need glutenfree bread troubleshooting tips.
As mentioned before, the temperature of the liquid used to activate yeast is also critical. Water that is too hot will kill the yeast, while water that is too cold won't awaken it. Using liquids containing yeast inhibitors, like certain preservatives in packaged ingredients, can also prevent yeast activity. Always check your yeast activity if your bread fails to rise; it's one of the most basic yet effective glutenfree bread troubleshooting tips.
Incorrect Oven Temperature
While yeast does most of its work during proofing, there is a final burst of activity in the oven during the first few minutes of baking, known as oven spring. If your oven temperature is too low, this oven spring might not happen effectively, contributing to a flatter loaf. More significantly, an oven that is too hot can kill the yeast too quickly before it has a chance to produce maximum lift, setting the structure prematurely while it's still dense.
An oven thermometer is crucial here; many ovens can be off by 25-50°F (15-30°C) from the set temperature. Inaccurate oven temperature is a common cause of issues addressed by glutenfree bread troubleshooting tips.
Furthermore, inconsistent oven temperature or drafts can affect the even rising of the loaf. Ensuring your oven is properly preheated to the correct temperature and stays consistent throughout the bake is vital for optimal lift and structure in gluten-free bread. Checking and calibrating your oven temperature is a valuable glutenfree bread troubleshooting tip.
Lack of a Binding Agent
Unlike wheat dough where gluten provides the structure to trap gases and support the rise, gluten-free dough requires binding agents to perform this function. Without sufficient binders like xanthan gum, psyllium husk, or even eggs, the carbon dioxide gas produced by the yeast will simply escape from the dough, resulting in little to no rise. The dough won't have the internal strength to hold its expanded shape.
For instance, a recipe using just rice flour and water without any binder will likely result in a flat, crumbly mass. This is a critical component often missing when seeking glutenfree bread troubleshooting tips.
The type and amount of binder needed can vary depending on the flour blend used. Recipes often specify a certain amount of xanthan gum or psyllium husk per cup of flour or per batch. Using too little, or omitting it entirely when the recipe calls for it, will almost certainly lead to a poor rise and dense texture. Ensuring the correct binder is used in the right quantity is a fundamental step in successful gluten-free bread baking and a key glutenfree bread troubleshooting tip.
Solutions for Gluten-Free Bread Rising Issues
Testing Your Yeast for Activity
Before starting your bread recipe, always test your yeast if you are unsure of its freshness. Use the warm water and sugar test described earlier (1 tsp sugar, 1/4 cup warm water 105-115°F/40-46°C, 2 tsp yeast; should foam in 5-10 mins). If it doesn't foam, discard the yeast and buy a fresh packet. Store opened yeast in an airtight container in the refrigerator or freezer to prolong its life. Using reliably active yeast is the single most important glutenfree bread troubleshooting tip for a good rise.
Ensure the liquid you are using to activate the yeast is within the correct temperature range. Too hot kills it, too cold keeps it dormant. For active dry yeast, 105-115°F (40-46°C) is ideal. For instant yeast, warmer temperatures up to 120-130°F (49-55°C) are acceptable, or it can often be mixed directly with dry ingredients. Using the correct liquid temperature ensures the yeast is ready to work, which is a foundational glutenfree bread troubleshooting tip.
Ensuring Accurate Oven Temperature
Invest in an inexpensive oven thermometer and keep it in your oven. This will show you the true temperature inside. Adjust your oven's thermostat based on the thermometer reading (e.g., if you set it to 375°F but the thermometer reads 350°F, set your oven to 400°F). Always allow your oven ample time to preheat, usually 15-20 minutes after it indicates it's reached the set temperature, to ensure it's fully heated and stable. Proper oven temperature is crucial for the final burst of oven spring. Checking your oven temperature is a critical glutenfree bread troubleshooting tip.
Avoid opening the oven door unnecessarily during baking, especially in the first 20-30 minutes, as this can cause temperature fluctuations and potentially lead to the bread collapsing or not rising fully. A consistent, accurate oven temperature provides the best environment for your gluten-free bread to achieve its maximum rise. Implementing these steps is a vital glutenfree bread troubleshooting tip for achieving a good loaf volume.
Using Binding Agents: Psyllium Husk, Xanthan Gum, or Chia Seeds
Ensure your recipe includes an appropriate binding agent for the type and amount of gluten-free flours used. Xanthan gum and psyllium husk (or psyllium powder) are the most common and effective binders in gluten-free bread. A typical amount is 1/2 to 1 teaspoon of xanthan gum or 1 to 2 tablespoons of psyllium husk per cup of gluten-free flour blend, though this varies by recipe and blend.
Psyllium husk tends to absorb more liquid and create a more structured, sometimes chewier crumb, while xanthan gum is more widely used and often results in a softer texture. Using the correct binder is a fundamental glutenfree bread troubleshooting tip.
Some recipes use ground chia seeds or flax seeds mixed with water (creating a gel) as binders, often in combination with other ingredients. Eggs also act as excellent binders and contribute to structure and richness. If a recipe seems to lack sufficient binding, consider adding a small amount of a recommended binder, following general guidelines or successful recipes for similar bread types. Properly incorporating binding agents is a critical glutenfree bread troubleshooting tip for achieving a well-risen loaf.
Problem 4: Gluten-Free Bread with a Poor Texture
Identifying Texture Problems in Gluten-Free Bread
Grainy Texture
A grainy texture is a common complaint in gluten-free bread and is often caused by using flours that are too coarse or don't hydrate well. Brown rice flour, in particular, if not finely ground, can contribute to this issue. Other culprits can include using large amounts of nut flours without balancing them with finer starches or binders. The texture feels gritty or sandy in the mouth, which is quite different from the smooth, soft crumb of traditional bread. Identifying this specific texture issue is the first step in applying the right glutenfree bread troubleshooting tips.
This problem is exacerbated if the dough is not given enough time for the flours to fully hydrate before baking. Sometimes, letting the dough rest for 15-30 minutes after mixing the wet and dry ingredients can help the flours absorb moisture more evenly, reducing graininess. However, the primary cause is usually the composition of the flour blend itself. Addressing the flour blend is a key glutenfree bread troubleshooting tip for graininess.
Sticky Texture
Sticky or gummy texture, often discussed in relation to density, can also manifest as a distinct textural problem. This happens when starches in the flour blend gelatinize excessively, creating a gluey or slimy layer, often in the interior of the loaf. This can be caused by too much starch, insufficient baking time or temperature (preventing the starch from fully setting), or cutting the bread before it has cooled completely (trapping steam and promoting gumminess).
A loaf that feels moist and pleasant on the outside but is wet and sticky when sliced likely has a gummy interior. Recognizing this specific issue helps target your glutenfree bread troubleshooting tips.
The ratio of starch to protein in the flour blend is a major factor. Blends high in tapioca or cornstarch are more prone to gumminess than those with more balanced starches and whole grains. Over-hydrating the dough can also contribute to stickiness, as excess moisture promotes starch gelatinization. Pinpointing the cause of stickiness is vital for selecting effective glutenfree bread troubleshooting tips.
Uneven Texture
Uneven texture can present in several ways: large, irregular holes (tunneling), a very tight crumb in one area and looser in another, or dense pockets within an otherwise acceptable loaf. Tunneling is often caused by over-proofing or proofing at too high a temperature, causing large gas bubbles to form and merge. Dense pockets can result from inadequate mixing, leaving dry clumps of flour, or from not allowing the dough to rest sufficiently for ingredients to hydrate evenly.
An uneven rise might also indicate inconsistent oven temperature or drafts during baking. Identifying the specific pattern of unevenness is key for applying targeted glutenfree bread troubleshooting tips.
Sometimes, uneven texture is simply a characteristic of a particular gluten-free recipe or blend. However, significant inconsistencies usually point to a problem in the process – mixing, proofing, or baking. Observing the pattern of unevenness in the crumb provides clues about where in the baking process the issue occurred, guiding your glutenfree bread troubleshooting tips.
Solutions for Improving Gluten-Free Bread Texture
Fine-Tuning Your Flour Blend for Smoothness
To reduce graininess, ensure your gluten-free flour blend uses finely ground flours. If using a blend you suspect is too coarse, consider sifting it, although this will remove some larger particles and potentially change the flour ratio slightly. Alternatively, switch to a commercially available blend known for its fine texture, often marketed as "superfine" rice flour or blends specifically for baking.
Incorporating a higher percentage of smooth, fine starches like tapioca or potato starch (while being mindful of potential gumminess) can also help, aiming for a balance of whole grains and starches. Adjusting the blend is a primary glutenfree bread troubleshooting tip for texture.
Adding ingredients that contribute to a smoother mouthfeel, such as a small amount of oil, yogurt, or even mashed potato, can also help. These ingredients add moisture and interfere with starch retrogradation, contributing to a softer, less grainy crumb. Experimenting with different blends and minor additions is part of mastering glutenfree bread troubleshooting tips for texture.
Adjusting Hydration Levels for Optimal Texture
Proper hydration is crucial for preventing both dryness (leading to crumbliness/graininess) and excessive stickiness/gumminess. If your bread is gummy, try slightly reducing the liquid in your recipe, perhaps by 1-2 tablespoons. Observe the dough consistency; it should be thick but pourable or scoopable, not runny.
If it's dry, increase the liquid as discussed earlier. The goal is a dough that is hydrated enough for flours and starches to fully absorb the liquid but not so wet that it becomes excessively sticky or fails to set properly during baking. Finding the right hydration level is a critical glutenfree bread troubleshooting tip.
The type of binder also affects hydration. Psyllium husk absorbs significantly more water than xanthan gum. If substituting binders, you may need to adjust the liquid accordingly. Recipes often provide a visual description of the dough consistency – pay close attention to this. Mastering hydration is perhaps one of the most impactful glutenfree bread troubleshooting tips for texture.
Proper Proofing Techniques for Even Texture
To avoid tunneling and ensure an even crumb, pay close attention to proofing time and temperature. Proofing in a warm, consistent environment (around 75-80°F or 24-27°C) encourages even gas production. Avoid proofing in overly hot conditions (above 90°F or 32°C), which can cause rapid, uneven rising and lead to large air pockets. Gluten-free dough often doesn't double in size like wheat dough; it might only increase by about 50-75%. Over-proofing can cause the structure to weaken and collapse slightly before baking, leading to a dense texture with large holes. Monitoring proofing is a vital glutenfree bread troubleshooting tip.
Ensure ingredients are thoroughly mixed initially to avoid dry pockets. Allowing the dough to rest for 15-30 minutes after mixing the wet and dry ingredients but before the main proofing period can help flours hydrate evenly, contributing to a more uniform texture. Gentle handling when transferring the dough to the baking pan also helps prevent deflating air pockets and promotes an even rise. Applying these proofing glutenfree bread troubleshooting tips will significantly improve your crumb texture.
Problem 5: Gluten-Free Bread Collapsing After Baking
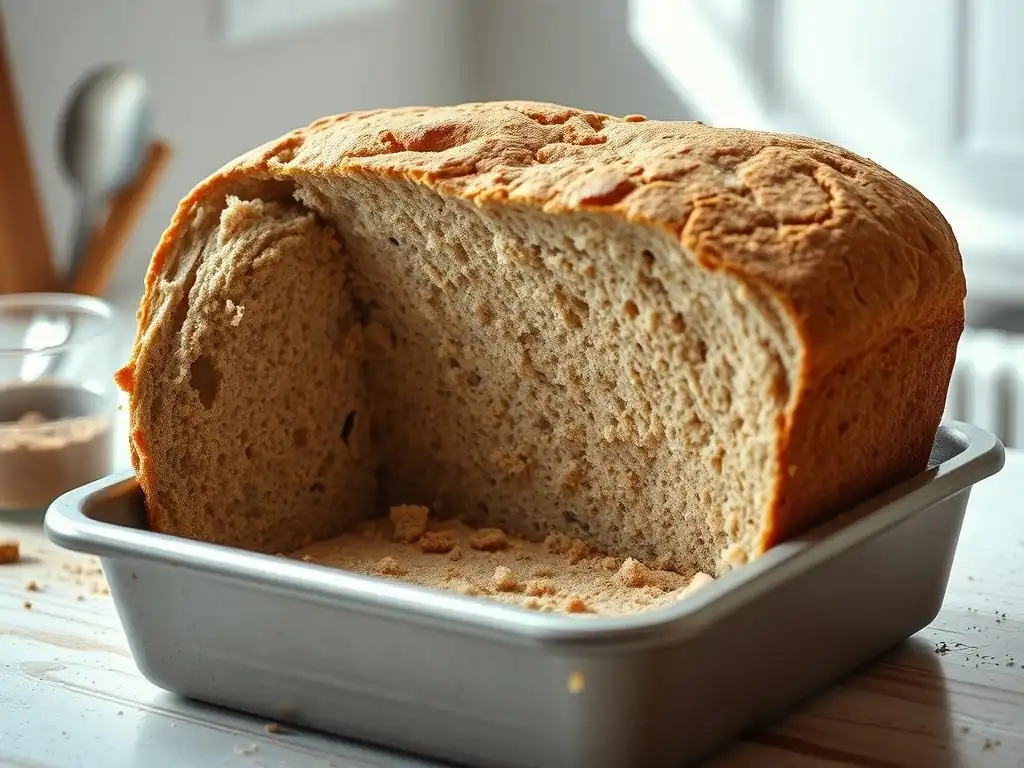
Reasons for Gluten-Free Bread Collapse
Insufficient Internal Structure
Gluten provides a strong, elastic network that supports the bread's structure even after it's removed from the oven. In gluten-free bread, this support must come from alternative binders and structural ingredients. If the recipe lacks sufficient binding (xanthan gum, psyllium, eggs) or if the flour blend doesn't provide enough protein or fiber, the internal structure may not be strong enough to support the loaf's height once it's out of the oven.
The loaf might look perfectly risen in the oven but then sink significantly as it cools. This lack of structural integrity is a common issue addressed by glutenfree bread troubleshooting tips.
The protein content of gluten-free flours varies widely. Flours like sorghum, millet, and almond flour have more protein than rice flour or starches. A blend low in protein and fiber, combined with insufficient binders, is prone to collapse. Ensuring a robust internal structure through adequate binders and a balanced flour blend is crucial. This is a key area for glutenfree bread troubleshooting tips.
Removing the Bread from the Oven Too Soon
Taking gluten-free bread out of the oven before it is fully baked is a common cause of collapse. The internal structure needs sufficient time and heat to set completely. If the center is still underbaked, it lacks the firmness to support the loaf's weight as it cools, especially as the steam escapes.
The bread might look golden brown on the outside, but the inside is still too moist and soft. This is why relying on internal temperature is so important; reaching 200-210°F (93-99°C) ensures the starches and proteins have set. Premature removal is a frequently encountered problem when seeking glutenfree bread troubleshooting tips.
Undercooked bread will often feel heavy for its size and may have a very moist or gummy interior. The crust might also seem soft rather than firm. Allowing the bread to bake until the correct internal temperature is reached is a simple yet vital step to prevent collapse. This is a fundamental glutenfree bread troubleshooting tip for structural integrity.
Over-Proofing the Dough
While insufficient rise is a problem, over-proofing can also lead to collapse. If gluten-free dough proofs for too long or in too warm a place, the yeast can produce too much gas, stretching the fragile structure created by the binders beyond its capacity. The dough might initially look impressively large, but the cell walls become thin and weak.
During baking, this weakened structure cannot support the rapid expansion (oven spring) or even its own weight, causing it to deflate or collapse in the oven or shortly after removal. Over-proofing is a subtle but important issue in glutenfree bread troubleshooting tips.
Over-proofed dough may also develop a very strong, alcoholic smell due to excessive fermentation. Visually, it might look puffy and fragile, and it may even start to sink slightly in the center before going into the oven. Learning to recognize the signs of properly proofed gluten-free dough – which is usually less than double in size – is essential for preventing collapse. Adjusting proofing time based on temperature is a key glutenfree bread troubleshooting tip.
Preventing Gluten-Free Bread Collapse
Adding Structural Ingredients: Eggs or Dairy
Incorporating ingredients that add structure and richness can help prevent collapse. Eggs are excellent binders and contribute protein, which helps set the internal structure during baking. If your recipe allows, adding an extra egg or using whole eggs instead of just egg whites can provide more support. Dairy products like yogurt or buttermilk also contain proteins that add structure, in addition to contributing moisture and tenderness. For example, substituting some of the liquid with yogurt can improve stability. Using ingredients like eggs or dairy is a common glutenfree bread troubleshooting tip for structural issues.
Some bakers also find that adding a small amount of a high-protein gluten-free flour, like oat flour or even a small amount of a gluten-free protein powder designed for baking, can boost the structural integrity. These ingredients reinforce the network created by the binders, making the loaf more resilient to collapse. Experimenting with these additions can be a valuable glutenfree bread troubleshooting tip.
Allowing Bread to Cool Completely in the Oven
One effective technique to prevent gluten-free bread collapse is to allow it to cool gradually within the oven. Once the bread has reached its target internal temperature (200-210°F/93-99°C) and you turn the oven off, crack the oven door open slightly and leave the bread inside for 15-30 minutes. This allows the loaf to cool down slowly, giving the internal structure time to set more firmly without the sudden shock of a temperature change. This gradual cooling is a simple but effective glutenfree bread troubleshooting tip.
After the initial cooling period in the oven, transfer the bread to a wire rack to cool completely before slicing. Cooling on a wire rack allows air circulation around the entire loaf, preventing moisture from accumulating on the bottom and contributing to a gummy texture or further weakening the base. Patience during the cooling process is a vital part of preventing collapse and is a recommended glutenfree bread troubleshooting tip.
Monitoring Proofing Time Closely
Pay close attention to the recipe's recommended proofing time and temperature, but also learn to judge the dough's readiness visually. Gluten-free dough is typically ready to bake when it has increased in size by about 50-75% and looks slightly puffy. It should not look doubled or overly expanded.
Gently pressing the dough with a wet finger might leave a slight indentation that springs back slowly, but avoid poking too much, as this can deflate it. Using a clear proofing container with measurements can help you gauge the increase in volume. Careful monitoring of proofing time is a crucial glutenfree bread troubleshooting tip.
If your kitchen is warm, your dough will proof faster than the recipe might indicate. If it's cool, it will take longer. Adjust the proofing time based on your environment. If you suspect over-proofing, you might try baking the loaf slightly sooner than the recipe suggests, provided it has achieved a noticeable increase in volume. Learning to read the signs of proper proofing is an essential skill for applying effective glutenfree bread troubleshooting tips.
Advanced Gluten-Free Bread Baking Techniques for Success
Using a Starter or Sourdough for Improved Flavor and Texture
Incorporating a gluten-free sourdough starter into your bread baking can significantly improve both flavor and texture. A sourdough starter is a culture of wild yeast and bacteria that ferments the dough slowly, producing acids and gases. The acids help break down the flours, making nutrients more available and improving the texture by interfering with starch retrogradation, which can reduce gumminess and dryness.
The fermentation also develops complex flavors not found in commercially yeasted bread. Maintaining a healthy gluten-free starter (typically made from a blend of gluten-free flours like brown rice, sorghum, or millet) requires regular feeding but offers rewarding results. This is a more advanced glutenfree bread troubleshooting tip but highly effective.
Using a sourdough starter can also contribute to a more open crumb structure and a chewier texture, closer to traditional bread. The natural acids produced by the starter also act as a mild preservative. While gluten-free sourdough can be more challenging than wheat sourdough due to the lack of gluten structure, mastering this technique can elevate your gluten-free bread significantly, addressing many common texture and flavor issues. Exploring sourdough is a great way to expand your glutenfree bread troubleshooting tips.
Exploring Different Gluten-Free Flour Blends and Their Properties
Becoming familiar with the characteristics of individual gluten-free flours is key to advanced baking. Brown rice flour provides structure and nutrients but can be grainy if not superfine. White rice flour is neutral in flavor and fine but offers less nutritional value and structure. Sorghum and millet flours add whole-grain goodness and a pleasant, slightly sweet or nutty flavor.
Tapioca starch and potato starch contribute to lightness and binding but can cause gumminess if overused. Oat flour adds tenderness and moisture but needs to be certified gluten-free if celiac is a concern. Understanding these properties allows you to custom-blend flours for specific results. This knowledge enhances your glutenfree bread troubleshooting tips.
Experimenting with different ratios of whole grains to starches, and incorporating flours like almond flour, coconut flour (use sparingly as it's very absorbent), or teff flour can dramatically change the outcome of your bread. Keep a baking journal to note which blends work best for different types of bread (e.g., a blend for sandwich bread might differ from one for a rustic loaf). This iterative process of exploration is fundamental to mastering gluten-free bread troubleshooting tips.
The Importance of Proper Cooling Techniques
Proper cooling is not just about preventing collapse; it's crucial for the final texture and flavor development of gluten-free bread. As the bread cools, moisture redistributes throughout the loaf, and the internal structure continues to set. Cutting into the bread too soon traps steam, which can lead to a gummy, dense layer, especially near the center. Allowing the bread to cool completely, ideally on a wire rack for at least 2-3 hours for a standard loaf (or even longer for larger or denser breads), is essential. This patience is a simple yet vital glutenfree bread troubleshooting tip.
Cooling on a wire rack ensures air circulation on all sides, preventing the bottom crust from becoming soggy. While it's tempting to slice into warm bread, waiting allows the starches to fully gel and the crumb to firm up, resulting in a much better texture and cleaner slices. Think of cooling as the final stage of baking; it's where the bread truly finishes its transformation. Mastering this final step is a valuable part of your glutenfree bread troubleshooting tips repertoire.
Gluten-Free Bread Baking: Mastering the Art
Practice Makes Perfect: Experimentation and Refinement
Mastering gluten-free bread baking is a journey that requires practice, patience, and a willingness to experiment. Don't be discouraged by initial failures; every bake, successful or not, offers valuable lessons. Keep detailed notes on your recipes, including the specific flour blend used, hydration levels, proofing times, oven temperature (actual, not just set), and observations about the dough and the final loaf. This documentation is your guide to effective glutenfree bread troubleshooting tips. For instance, if a loaf was dense, your notes might point to insufficient rise time or a known issue with that particular flour blend.
Refine your technique with each bake. Did the crust brown too fast? Try tenting it with foil next time. Was the crumb too dry? Increase the liquid slightly. By systematically identifying problems and trying targeted solutions, you'll gradually improve your results. Don't be afraid to slightly adapt recipes based on your experiences and the specific ingredients you have on hand. This iterative process of baking, observing, and adjusting is the core of applying glutenfree bread troubleshooting tips effectively.
Resources for Gluten-Free Bread Baking Recipes and Tips
The gluten-free baking community is vast and generous with information. Explore reputable gluten-free baking blogs, cookbooks dedicated specifically to gluten-free bread, and online forums or social media groups where bakers share their experiences and glutenfree bread troubleshooting tips. Look for resources that provide detailed instructions, explain the role of different ingredients, and offer variations for different flour blends. Websites like BakeWithEase.com aim to provide just these kinds of resources, offering simple recipes and helpful tips.
Many experienced gluten-free bakers share their go-to flour blends and techniques. Learning from others who have already navigated common challenges can save you time and frustration. Pay attention to comments and reviews on recipes, as they often highlight potential issues and successful modifications others have made. Utilizing these resources is a smart way to access a wealth of glutenfree bread troubleshooting tips.
Achieving Baking Success with Gluten-Free Bread
Achieving baking success with gluten-free bread is absolutely possible and incredibly rewarding. By understanding the unique properties of gluten-free ingredients, learning to identify common problems, and applying targeted glutenfree bread troubleshooting tips, you can consistently bake delicious, well-structured loaves. Remember that gluten-free bread will likely never be an exact replica of wheat bread, but it can be fantastic in its own right, with its own unique textures and flavors. Embrace the differences and celebrate your successes.
The key takeaways for mastering gluten-free bread troubleshooting tips are: use fresh, active leavening; measure ingredients accurately (preferably by weight, especially flours); understand your flour blend and its hydration needs; use binders correctly; don't overmix; proof appropriately; bake to the correct internal temperature; and cool completely. With practice and persistence, you'll navigate the challenges and enjoy the satisfaction of pulling beautiful, homemade gluten-free bread from your oven. Happy baking!
Frequently Asked Questions
How do I prevent my gluten-free bread from being too dense?
Dense gluten-free bread is often caused by insufficient leavening or too much heavy flour. Try using a precise scale for measurements and ensuring your yeast or baking powder is fresh.
Why is my gluten-free bread crumbly and falling apart?
Crumbly gluten-free bread often lacks the binding power of gluten. Consider adding ingredients like xanthan gum or psyllium husk to improve structure and reduce crumbling.
My gluten-free bread is gummy inside, even when fully baked on the outside. What's wrong?
A gummy interior suggests the bread wasn't baked long enough or at a high enough temperature to fully cook the starches. Try baking it longer or increasing the oven temperature slightly.
What can I do if my gluten-free bread doesn't rise properly?
Poor rise is a common problem with gluten-free baking. Ensure your yeast is active and consider adding an acidic ingredient like lemon juice or vinegar to help with leavening.
How can I improve the flavor of my gluten-free bread?
Gluten-free bread can sometimes taste bland. Enhance the flavor by adding ingredients like herbs, spices, or seeds. Experiment with different gluten-free flour blends for improved taste.
Final Reflection: The Ongoing Quest for the Perfect Gluten-Free Loaf
The struggle for delicious, reliably-textured gluten-free bread is far from over, but armed with the right knowledge, we can significantly improve our baking success. This isn't just about avoiding gluten; it's about reclaiming the joy of fresh bread, a staple in so many cultures and a source of comfort for many. The tips and techniques explored in this guide offer a pathway to that goal.
The journey to mastering gluten-free bread baking is a testament to human ingenuity and resilience. It's a constant process of experimentation, adaptation, and a deep appreciation for the science behind baking. The challenges we face highlight the profound impact gluten has on bread texture and rise, an impact often overlooked until we attempt to replicate it without. The best things in life are worth fighting for,
and for many, that perfect gluten-free loaf is certainly one of them. This pursuit reflects a broader cultural shift towards inclusivity and catering to dietary needs, demonstrating our commitment to finding solutions for everyone.
Now, it's your turn. Don't be discouraged by initial setbacks. Use this guide as a springboard for your own experimentation. Try different flours, adjust your techniques, and most importantly, don't be afraid to fail. Each failed loaf brings you closer to understanding the nuances of gluten-free baking, and ultimately, to the satisfaction of biting into that perfectly risen, delicious slice of bread you've worked so hard to create. Embrace the journey, and the reward will be well worth the effort.
Unleash Your Inner Gluten-Free Baker!
Thanks for taking the time to explore the world of gluten-free bread baking with us! We hope you gained valuable insights and feel more confident in tackling those tricky doughs. Now it's time to put your new knowledge into practice.
- Bake your best gluten-free loaf yet! Use what you've learned to experiment with a new recipe or perfect your favorite. Don't be afraid to tweak ingredients and techniques – that's part of the fun!
- Share your baking triumphs (and challenges!) Let’s connect! Tell us about your experiences in the comments below. What worked, what didn't, and what you learned along the way?
- Discover a new gluten-free flour blend: Explore a type you haven't tried before. You might just find your new go-to!
What's your biggest gluten-free baking hurdle, and how will you overcome it this week?