
Get HighDomed Muffins: Simple Trick for Beginners


Welcome to BakeWithEase, where even the most daunting baking dreams become deliciously achievable!
Ever wondered how bakery muffins get that perfect, irresistible dome? You're not alone! This article unveils a simple trick to bake easy, domed muffins that will impress your friends and family. Get ready to unlock the secrets to bakery-worthy muffins, even if you're a complete beginner! Prepare to be amazed at how easy it is to elevate your muffin game.
- Achieving High-Domed Muffins: A Baker's Guide
- The Art of the Muffin Dome: Unlocking Bakery-Style Results
- Understanding Muffin Dome Formation: Science and Technique
- The High-Heat Technique: Maximizing Muffin Lift
- Basic Muffin Recipe: A Foundation for Domed Perfection
- Troubleshooting Common Muffin Issues
- Flavor Variations for Your Basic Muffin Recipe
- Refining Your Muffin Baking: Tips and Tricks
- Beyond the Basics: Expanding Your Muffin Mastery
-
Frequently Asked Questions
- What is the key to achieving a high-domed muffin according to BakeWithEase?
- Does BakeWithEase offer recipes suitable for beginner bakers looking to make muffins?
- What types of baking resources does BakeWithEase offer besides muffin recipes?
- How does BakeWithEase help bakers perfect their sourdough skills?
- Where can I find the ingredients list for the "Easy, domed muffins recipe" on BakeWithEase?
- Final Reflection: Elevating Your Baking with Easy, Domed Muffins
- Unlock Perfectly Domed Muffins: Your Baking Journey Starts Now!
Achieving High-Domed Muffins: A Baker's Guide
The Art of the Muffin Dome: Unlocking Bakery-Style Results
Achieving that perfect, rounded dome on your muffins is a hallmark of bakery-quality baking. It's not just about aesthetics; a well-formed dome often indicates a light, airy texture within. For beginners, mastering this simple trick can elevate an easy, domed muffins recipe from good to truly impressive. It shows you've successfully managed the delicate balance of ingredients, mixing, and temperature crucial for a beautiful rise.
Beyond the visual appeal, the dome formation is a sign that the leavening agents worked effectively and the structure set correctly. When done right, the muffin top is slightly crisp, giving way to a tender interior. This contrast in texture is part of what makes a great muffin so satisfying. Our goal with this guide is to demystify the process and show you how to consistently bake easy domed muffins that stand tall and proud.
Understanding Muffin Dome Formation: Science and Technique
The magical transformation from a simple batter in a cup to a beautifully domed muffin involves a bit of kitchen science. It's about how your ingredients interact under heat and how the structure of the batter supports the rise. Understanding these principles makes it easier to troubleshoot and perfect your easy, domed muffins recipe.
At its core, muffin rise is driven by gas expansion. Leavening agents like baking powder and baking soda produce carbon dioxide bubbles when they react with liquid, acid, and heat. As the batter heats up in the oven, these gas bubbles expand, causing the batter to lift. The key to a domed rise, rather than a flat one, lies in how quickly the outer edges of the muffin set compared to the center.
The Science Behind a Perfect Muffin Dome
The primary drivers of the muffin dome are the leavening agents, typically baking powder and sometimes baking soda. Baking powder is often double-acting, meaning it produces gas when mixed with liquid and again when exposed to heat, usually above 120°F (around 50°C). Baking soda, requiring an acid (like buttermilk, yogurt, or brown sugar) to activate, reacts quickly upon mixing with the wet ingredients. The combined effect creates significant lift potential.
As the muffin bakes, the heat causes the batter to expand rapidly. The outer edges and bottom of the muffin tin heat up fastest, causing the batter there to cook and set quickly. This forms a relatively firm crust around the base and sides. The center of the muffin, being insulated by the surrounding batter, heats up slower. With the sides set, the expanding gas in the still-liquid center has nowhere to go but up, pushing the middle of the muffin higher and higher, forming the characteristic dome. This rapid upward push is sometimes called "oven spring."
Common Mistakes That Hinder Muffin Doming
One of the most common culprits preventing a good dome is overmixing the batter. Muffins rely on minimal gluten development for their tender texture. Flour contains proteins that form gluten when mixed with liquid. Vigorous or prolonged mixing develops these gluten strands, making the batter elastic. An elastic batter resists the upward expansion of gases, resulting in tough, flatter muffins. Aim to mix only until the dry ingredients are just incorporated into the wet, often leaving small lumps.
Another frequent mistake is underfilling the muffin cups. If there isn't enough batter in the cup, there isn't sufficient volume to create significant upward pressure as the batter rises. For a good dome, cups are typically filled quite full, often two-thirds to three-quarters full, and sometimes even closer to the brim for maximum dome potential. Using cold ingredients can also slightly hinder the initial reaction of leavening agents and affect batter consistency, though this is less critical than overmixing or oven temperature.
The High-Heat Technique: Maximizing Muffin Lift

The "simple trick" for achieving spectacular domes in your easy, domed muffins recipe is the high-heat technique. Instead of baking at a constant moderate temperature, you start the muffins in a much hotter oven for the first few minutes. This provides an initial powerful burst of energy that supercharges the leavening process and sets the outside quickly.
This method leverages the science of dome formation discussed earlier. The rapid heat sets the outer crust almost instantly, creating a strong structure early in the bake. This forces all the subsequent expansion from the leavening agents directly upwards through the softer, still-rising center. It's like giving your muffins a powerful springboard right at the start.
The Role of Initial High Heat
Starting your muffins in a very hot oven, typically around 425°F (220°C), for the first 5 to 8 minutes is the secret weapon for achieving those impressive domes. This sudden blast of heat causes a rapid production and expansion of gases from the leavening agents. Simultaneously, it quickly forms a crust on the surface and sides of the muffin.
With the crust setting rapidly due to the high temperature, the interior of the muffin continues to rise. Because the sides are already somewhat firm, the expanding batter is directed upwards, concentrating the lift in the center and pushing it high above the rim of the muffin tin. This creates a much more pronounced dome compared to baking at a constant lower temperature, where the rise is slower and more even across the surface.
Proper Oven Preheating for Optimal Results
To make the high-heat technique work its magic for your easy domed muffins, your oven must be fully preheated to the initial high temperature before the muffins go in. Simply waiting for the oven light to indicate it's reached temperature isn't always enough; many ovens can take an additional 15-20 minutes for the heat to fully saturate the oven walls and racks. For best results, preheat your oven to 425°F (220°C) for at least 20-30 minutes before baking.
Using an oven thermometer is highly recommended, as built-in thermostats can often be inaccurate, sometimes by as much as 25-50°F (15-30°C). If your oven is running cold, you won't get the necessary initial heat shock for a strong dome. Place the oven rack in the center position for even heat distribution. Once the muffins are in, resist the urge to open the oven door during the initial high-heat phase, as this causes a significant temperature drop that can hinder the rise.
Basic Muffin Recipe: A Foundation for Domed Perfection
Here is a straightforward easy, domed muffins recipe designed for beginners, incorporating the high-heat technique. This recipe provides a solid base that you can later adapt with different flavors.
Ingredients for a Classic Muffin
- 2 cups (approx. 240g) all-purpose flour
- ¾ cup (approx. 150g) granulated sugar
- 2 teaspoons baking powder
- ½ teaspoon salt
- 1 large egg
- 1 cup (240ml) milk
- ⅓ cup (80ml) vegetable oil or melted unsalted butter
- 1 teaspoon vanilla extract
Essential Equipment
- Standard 12-cup muffin tin
- Paper muffin liners or butter/baking spray for greasing
- Two mixing bowls (one large for dry, one medium for wet)
- Whisk
- Rubber spatula or wooden spoon
- Measuring cups and spoons
Step 1: Preparing the Batter for Optimal Rise
Preheat your oven to 425°F (220°C) and place a rack in the center position. Line a standard 12-cup muffin tin with paper liners, or grease it thoroughly with butter or baking spray. In a large bowl, whisk together the flour, sugar, baking powder, and salt until well combined. This distributes the leavening evenly.
In a separate medium bowl, whisk together the egg, milk, vegetable oil (or melted butter), and vanilla extract. Pour the wet ingredients into the bowl with the dry ingredients. Using a rubber spatula or wooden spoon, gently fold the ingredients together just until the dry ingredients are moistened. The batter will be lumpy, and that's perfectly fine – do not overmix!
Overmixing develops gluten and results in flat, tough muffins. Divide the batter evenly among the prepared muffin cups, filling each about two-thirds to three-quarters full. For truly high domes, you can fill them even closer to the brim, especially if you have a sturdy batter.
Step 2: The Temperature Adjustment
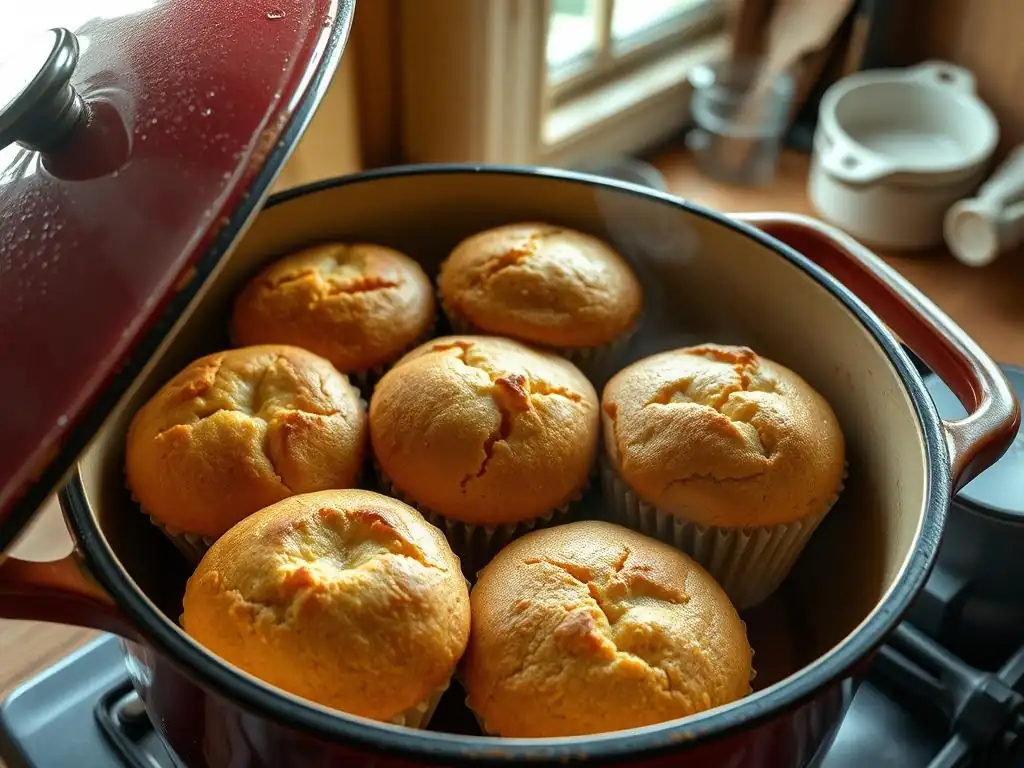
Carefully place the filled muffin tin into the preheated 425°F (220°C) oven. Set a timer for 5 minutes. During this initial high-heat period, the muffins will experience rapid oven spring, pushing the centers upwards.
After 5 minutes, without opening the oven door, reduce the oven temperature to 375°F (190°C). If your oven requires you to open the door to change the temperature setting, do so as quickly as possible to minimize heat loss. This temperature reduction allows the muffins to continue baking through evenly without burning the tops or sides, ensuring the interior cooks properly while maintaining the dome shape achieved during the initial heat blast.
Step 3: Baking to Golden Brown
Continue baking at 375°F (190°C) for an additional 13-20 minutes, or until the muffins are golden brown on top and a toothpick inserted into the center of a muffin comes out clean or with just a few moist crumbs attached. The total baking time, including the initial high-heat phase, will typically range from 18 to 25 minutes, depending on your oven and the size of your muffins.
Check for doneness towards the earlier end of the time range, especially the first time you make this easy domed muffins recipe. If the tops look done but you're unsure about the inside, gently press the top of a muffin; it should spring back slightly. Avoid overbaking, as this can lead to dry muffins.
Step 4: Cooling and Serving
Once baked, carefully remove the muffin tin from the oven. Let the muffins cool in the tin for about 5-10 minutes. This allows them to firm up slightly before handling.
After the initial cooling period in the tin, transfer the muffins to a wire rack to cool completely. Cooling on a wire rack allows air circulation around the entire muffin, preventing the bottoms from becoming soggy. Serve warm or at room temperature. These easy domed muffins are best enjoyed fresh!
Troubleshooting Common Muffin Issues
Even with an easy, domed muffins recipe, beginners might encounter a few common hurdles. Here's how to address them.
Addressing Insufficient Doming
If your muffins aren't achieving that impressive dome, revisit the key factors. The most likely culprits are overmixing, insufficient leavening, underfilling the cups, or an inaccurate oven temperature during the initial high-heat phase. Ensure you are mixing the batter only until the dry ingredients are just incorporated; lumps are okay! Fill your muffin cups generously, aiming for at least two-thirds to three-quarters full.
Check the freshness of your baking powder. Baking powder loses potency over time. You can test it by adding a teaspoon to about a third of a cup of hot water; it should fizz vigorously. If it doesn't, it's time for a new can. Crucially, verify your oven's temperature with an oven thermometer. If your oven isn't reaching 425°F (220°C) accurately during the first 5 minutes, the necessary rapid rise won't occur. Adjust your oven setting if needed, or consider extending the initial high-heat period slightly if your oven runs cool.
Preventing Dry Muffins
Dry muffins are often a result of overmixing or overbaking. Overmixing develops excess gluten, which can lead to a tough, dry texture. Stick to folding the batter gently until just combined. Overbaking evaporates essential moisture from the muffins.
To prevent dryness, start checking for doneness at the lower end of the suggested baking time range (e.g., starting at 18 minutes for this recipe). Use the toothpick test: it should come out with a few moist crumbs, not completely clean and dry. Baking for even a few minutes too long can significantly impact moisture content. Ensure your liquid and fat measurements are accurate, as these contribute significantly to moisture. Using room temperature ingredients can also help create a more consistent and moist batter.
Avoiding Burnt Muffins
Burnt muffins, especially on the bottoms or edges during the high-heat phase, can happen if your oven runs too hot or if you use dark-colored muffin tins. Dark pans absorb and transfer heat more efficiently than lighter-colored ones, which can lead to faster browning and potential burning.
Again, verify your oven temperature with a thermometer. If it's consistently running hot, you may need to reduce the initial high temperature slightly (e.g., to 400°F or 200°C) or shorten the initial high-heat period by a minute or two. If you're using dark muffin tins, consider reducing the initial high temperature by about 25°F (15°C) or checking the muffins earlier in the baking process. Ensure your oven rack is in the center position for even heat distribution, preventing bottoms from being too close to the heating element.
Flavor Variations for Your Basic Muffin Recipe

Once you've mastered the basic easy, domed muffins recipe and the high-heat technique, it's simple to introduce new flavors. Here are a few popular variations.
Blueberry Muffins
To make classic blueberry muffins, gently fold about 1 to 1.5 cups of fresh or frozen blueberries into the finished batter just before scooping. If using frozen blueberries, you can toss them with a tablespoon of flour before adding them to the batter; this helps prevent them from sinking to the bottom during baking. Be careful not to overmix when adding the berries, as this can crush them and tint the batter gray.
Chocolate Chip Muffins
For chocolate chip lovers, simply fold in about 3/4 to 1 cup of your favorite chocolate chips (milk, semi-sweet, or dark) into the batter after combining the wet and dry ingredients. You can reserve a few chips to sprinkle on top of the batter in each cup before baking for a more appealing look.
Lemon Poppy Seed Muffins
Add the zest of 1 to 2 lemons and 1 to 2 tablespoons of poppy seeds to the dry ingredients and whisk them together before adding the wet ingredients. You can also substitute some of the milk with fresh lemon juice (e.g., use 3/4 cup milk and 1/4 cup lemon juice) in the wet ingredients for a stronger lemon flavor.
Banana Nut Muffins
For banana nut muffins, mash 2 to 3 ripe bananas (about 1 cup mashed) and whisk them into the wet ingredients before combining with the dry. Gently fold in about 1/2 cup of chopped nuts, such as walnuts or pecans, with the wet ingredients or after combining wet and dry. Ensure the bananas are very ripe for the best flavor and sweetness.
Refining Your Muffin Baking: Tips and Tricks
Beyond the core technique and recipe, a few extra tips can help you consistently bake beautiful, easy domed muffins.
Muffin Liners vs. Greasing
Using paper muffin liners makes for easy cleanup and ensures your muffins don't stick to the tin. For achieving the highest domes, liners are often preferred as they provide a slippery surface up which the batter can climb unimpeded. However, some bakers prefer the slightly crispier edge that comes from greasing the tin directly (using butter, shortening, or baking spray), as it allows the batter to brown more on the sides. Both methods work well; it's largely a matter of preference, though liners are arguably simpler for beginners.
Storing Muffins for Freshness
To keep your easy domed muffins fresh after they've cooled completely on a wire rack, store them in an airtight container at room temperature. Avoid storing them while they are still warm, as this creates condensation that can make them soggy. Placing a paper towel inside the container, either on the bottom or tucked over the tops, can help absorb excess moisture and maintain texture. Muffins stored this way are typically best eaten within 2-3 days.
Freezing Muffins for Longevity
Muffins freeze exceptionally well, allowing you to enjoy your easy, domed muffins recipe batch by batch over time. Ensure the muffins are completely cooled. Wrap each individual muffin tightly in plastic wrap, then place the wrapped muffins in a freezer-safe bag or container. This double layer of protection helps prevent freezer burn. Properly frozen muffins can maintain their quality for about 2-3 months. Thaw frozen muffins at room temperature for a few hours, or warm them gently in a microwave or oven.
Beyond the Basics: Expanding Your Muffin Mastery
Mastering this easy, domed muffins recipe and the high-heat technique is a fantastic starting point for any beginner baker. It unlocks the secret to that coveted bakery-style dome and provides a versatile base for countless flavor combinations.
Exploring Advanced Techniques
As you gain confidence, you might explore other techniques that influence muffin texture and flavor. Experiment with different fats, like using melted butter for a richer flavor or oil for a lighter texture. Try substituting some of the milk with buttermilk or yogurt; the added acidity reacts with baking soda (if used) and can contribute to tenderness and a slightly different rise. Incorporating ingredients like brown sugar can add moisture and a caramel note. Don't be afraid to experiment with adding toppings like streusels or glazes after you've mastered the basic dome formation.
Resources for Further Learning
This guide provides the foundation for baking beautiful, easy domed muffins. The best way to continue learning is to keep practicing and exploring! Try the flavor variations suggested here, or get creative and invent your own. Explore other muffin recipes on BakeWithEase.com to see how different ingredient ratios and techniques influence the final result. With this high-heat trick in your baking toolkit, you're well on your way to becoming a muffin master!
Frequently Asked Questions
What is the key to achieving a high-domed muffin according to BakeWithEase?
The simple trick is to ensure a significant temperature difference between the batter and the oven. This creates a rapid rise leading to the dome.
Does BakeWithEase offer recipes suitable for beginner bakers looking to make muffins?
Yes, BakeWithEase provides easy recipes and step-by-step guides designed for bakers of all levels, including beginners wanting to learn how to make muffins.
What types of baking resources does BakeWithEase offer besides muffin recipes?
BakeWithEase provides resources for various baked goods, including pastries, breads, cakes, and cookies, with a focus on easy-to-find ingredients.
How does BakeWithEase help bakers perfect their sourdough skills?
While the focus is on easy baking, BakeWithEase also offers resources for those perfecting their sourdough, indicating support for more advanced baking techniques.
Where can I find the ingredients list for the "Easy, domed muffins recipe" on BakeWithEase?
The ingredients list and step-by-step instructions are available directly on the BakeWithEase.com website under the "Get High-Domed Muffins: Simple Trick for Beginners" article.
Final Reflection: Elevating Your Baking with Easy, Domed Muffins
The art of baking is not just about following a recipe; it’s about creating joy and connection in our kitchens. In today’s fast-paced world, where convenience often trumps creativity, the ability to whip up a batch of easy, domed muffins serves as a delightful reminder of the simple pleasures in life. These muffins are not just a treat; they symbolize the joy of homemade goodness and the satisfaction that comes from mastering a skill that can brighten anyone’s day.
Cooking and baking have a profound impact on our cultural and social landscapes, bringing people together and fostering a sense of community. The act of sharing freshly baked muffins can spark conversations, create memories, and build relationships. As we navigate our busy lives, it’s essential to carve out moments for ourselves and our loved ones. Baking is both an art and a science, and it allows us to express our creativity while nurturing those we care about.
This ongoing influence of baking reminds us that the kitchen can be a sanctuary, a place of comfort and connection.
As you reflect on the lessons from this article, I encourage you to embrace the joy of baking and experiment with your own easy, domed muffins recipe. Take a moment to gather your ingredients, invite a friend or family member to join you, and let the aroma of freshly baked muffins fill your home. In doing so, you’ll not only create delicious treats but also foster connections and memories that will last a lifetime. So, roll up your sleeves, preheat that oven, and let your baking journey begin!
Here's a Call to Action (CTA) based on the provided information:
Unlock Perfectly Domed Muffins: Your Baking Journey Starts Now!
Thanks for taking the time to learn the secrets to perfectly domed muffins! You've gained valuable baking knowledge today, and we're excited to see you put it to use. Ready to take your baking skills to the next level?
- Bake a batch of perfectly domed muffins today! Use the simple trick outlined in the article and share your results with us.
- Try a variation: Experiment with different muffin recipes, focusing on the dome-enhancing techniques. What flavors will you create?
- Share your baking triumph: Post a picture of your magnificent muffins on social media and tag us—we can't wait to see them!
Ready to transform your baking from 'okay' to 'amazing'? What innovative flavor combination will you try first?