
Sourdough Ciabatta: Mastering the High Hydration Italian Classic

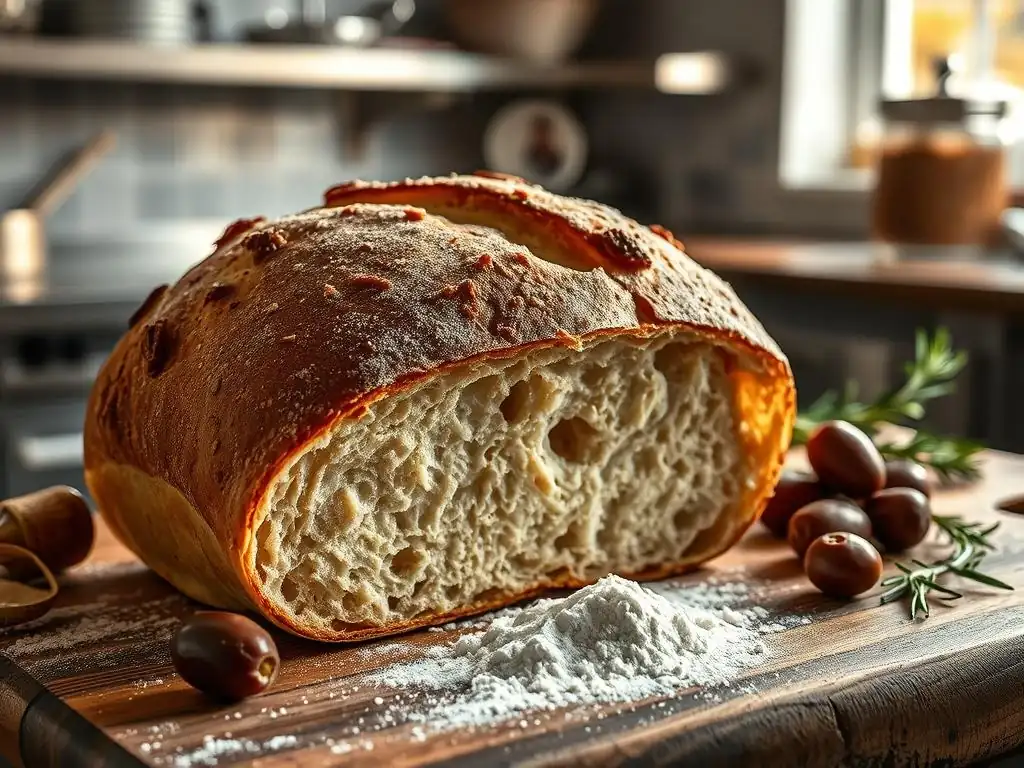
Welcome to BakeWithEase, your guide to unlocking baking brilliance! Ever dreamt of crafting a perfectly airy and flavorful sourdough ciabatta? This time, we're diving deep into the secrets of sourdough ciabatta high hydration, an Italian classic that's easier than you think. Prepare to be amazed as we demystify the process and guide you through each step, leaving you with a loaf that's sure to impress. Ready to elevate your baking game? Let's get started!
- Introduction to Sourdough Ciabatta and High Hydration Baking
- Essential Ingredients for Sourdough Ciabatta
-
Step-by-Step Guide to Making Sourdough Ciabatta
- Preparing the Sourdough Levain: Activating Your Starter
- Mixing the High Hydration Ciabatta Dough: Achieving the Right Consistency
- Bulk Fermentation: Developing Flavor and Structure
- Folding Techniques for High Hydration Dough: Building Strength
- Dividing and Shaping the Ciabatta: Gentle Handling for a Perfect Loaf
- Proofing the Ciabatta: Achieving the Ideal Rise
- Baking the Sourdough Ciabatta: Achieving the Perfect Crust and Crumb
- Troubleshooting Common Sourdough Ciabatta Problems
- Tips and Tricks for Perfect Sourdough Ciabatta
- Sourdough Ciabatta Recipe: A Detailed Guide
- Beyond the Basics: Sourdough Ciabatta Variations
- Enjoying Your Homemade Sourdough Ciabatta
- Conclusion: The Joy of Baking Sourdough Ciabatta at Home
-
Frequently Asked Questions
- How does the high hydration level affect the sourdough ciabatta?
- What makes sourdough ciabatta different from regular ciabatta?
- Is the BakeWithEase sourdough ciabatta recipe suitable for beginners?
- What are some common problems encountered when making high hydration sourdough ciabatta?
- What key ingredients are essential for achieving a successful sourdough ciabatta?
- Final Reflection: The Enduring Allure of the High-Hydration Ciabatta
- Unleash Your Inner Artisan: Bake the Perfect Ciabatta!
Introduction to Sourdough Ciabatta and High Hydration Baking
What Makes Sourdough Ciabatta Unique? An Overview
Sourdough ciabatta stands out in the world of bread due to its distinctive shape, incredibly open and airy crumb, and rustic, chewy crust. The word "ciabatta" literally translates to "slipper" in Italian, a nod to its elongated, flat form. Unlike many other breads that are heavily shaped and proofed in baskets, ciabatta is typically handled gently and proofed on a flat surface, contributing to its irregular, rustic appearance. Its unique texture is a direct result of working with a very wet, high hydration dough, which challenges traditional bread-making techniques but rewards the baker with a truly exceptional loaf.
The hallmark of a great sourdough ciabatta is its large, irregular holes in the crumb, often referred to as an "open crumb." This texture is achieved through careful handling of the high hydration dough, allowing for significant gas production during fermentation and minimal degassing during shaping. The sourdough starter not only provides the leavening but also imparts a complex flavor profile, ranging from subtly tangy to pleasantly sour, which complements the simple ingredients beautifully. Mastering this high hydration sourdough ciabatta requires patience and a willingness to embrace the stickiness of the dough.
Understanding High Hydration Dough: Key to a Light and Airy Ciabatta
High hydration dough refers to dough with a high ratio of water to flour, typically 75% hydration or higher (meaning the weight of the water is 75% or more of the weight of the flour). Traditional bread doughs might be around 60-65% hydration, making them much easier to handle. A sourdough ciabatta high hydration dough often pushes into the 80s or even 90s percentile, making it quite slack and sticky. This high water content is crucial for achieving the characteristic open crumb structure and moist interior of ciabatta.
The abundance of water in high hydration dough allows the gluten network to develop more easily and expand significantly during fermentation. As the yeast (or sourdough starter) produces gas, the slack dough stretches readily, creating larger air pockets. While challenging to work with initially, learning to handle this sticky dough through techniques like stretching and folding rather than kneading is key. This gentle manipulation helps build strength and structure without expelling the precious gas bubbles needed for that signature light and airy sourdough ciabatta texture.
Why Sourdough and Ciabatta are a Perfect Match
The natural acidity of a sourdough starter plays a vital role in high hydration doughs like ciabatta. The acids produced during fermentation help strengthen the gluten network, which is particularly beneficial when working with large amounts of water. This added strength allows the dough to hold its structure and trap gas more effectively, contributing to a better rise and a more open crumb compared to using commercial yeast alone in such a wet dough. The sourdough process essentially "predigests" some of the flour, making the dough more extensible and easier to work with despite its hydration level.
Beyond the structural benefits, the flavor contributed by the sourdough starter elevates ciabatta from a simple bread to a complex and nuanced one. The tangy notes of fermentation add depth and character that pair wonderfully with the bread's rustic texture. Furthermore, the longer fermentation times typical of sourdough baking allow for the development of more complex flavors through the breakdown of starches and proteins. This synergy between the high hydration dough structure and the sourdough fermentation process is what makes sourdough ciabatta a truly exceptional loaf, combining incredible texture with sophisticated flavor.
Essential Ingredients for Sourdough Ciabatta
The Sourdough Starter: Building a Strong Foundation
A healthy and active sourdough starter is the cornerstone of successful sourdough ciabatta. This living culture of wild yeast and beneficial bacteria is responsible for both leavening the bread and developing its characteristic flavor. To ensure your starter is ready for baking a high hydration dough like ciabatta, it should be active and bubbly, ideally having doubled or tripled in volume within 4-6 hours after being fed. A mature starter that has been maintained consistently for several months or years will generally provide more reliable results and complex flavors than a young one.
Feeding your starter regularly with a consistent ratio of flour and water (often 1:1:1 starter:water:flour by weight) is crucial for maintaining its vigor. For baking sourdough ciabatta high hydration, some bakers prefer to use a stiff levain (lower hydration starter) or a liquid levain (higher hydration starter) depending on their overall recipe structure, but a standard 100% hydration starter is perfectly fine. Observe your starter's peak activity – this is the ideal time to use it for your levain or directly in the dough to ensure maximum rising power for your high hydration sourdough ciabatta.
Flour Selection: Choosing the Right Flour for High Hydration Ciabatta
The type of flour you use significantly impacts the outcome of a high hydration dough. For sourdough ciabatta, a strong bread flour with a high protein content (typically 12-14%) is highly recommended. The higher protein level means more gluten development is possible, which is essential for building the structure needed to support the large volume of water in a high hydration dough. Without sufficient gluten strength, the dough would simply collapse and fail to develop that signature open crumb.
While bread flour is the standard, you can experiment with adding a small percentage (perhaps 10-20%) of other flours like whole wheat or rye for added flavor and nutrition. However, be aware that these flours absorb water differently and can weaken the gluten structure, potentially making your sourdough ciabatta high hydration dough even more challenging to handle and resulting in a less open crumb if used in large quantities. Starting with 100% good quality bread flour is the best approach when first learning to master this specific type of high hydration sourdough ciabatta.
Water Quality and Its Impact on Dough Hydration
The quality of the water used in baking, especially in high hydration doughs where water is a major component, can subtly affect the final product. Ideally, use filtered or bottled water. Tap water containing high levels of chlorine can potentially inhibit the activity of your sourdough starter's microorganisms. While boiling tap water and letting it cool can help dissipate chlorine, using filtered water is a simpler approach.
The temperature of the water is also important as it influences the dough temperature, which in turn affects fermentation speed. For sourdough ciabatta high hydration dough, aiming for a final dough temperature typically between 75-80°F (24-27°C) is common to encourage active fermentation. You can adjust the water temperature based on the temperature of your flour and starter to hit this target dough temperature, often using slightly warmer water in cooler environments and cooler water in warmer environments.
Other Key Ingredients: Salt and Olive Oil
Salt is a critical ingredient in bread baking, not just for flavor but also for controlling fermentation speed and strengthening the gluten network. It slows down yeast activity, preventing the dough from rising too quickly and allowing flavors to develop more fully. Salt also tightens the gluten structure, which is particularly helpful in managing the slackness of a sourdough ciabatta high hydration dough. Typically, salt is added at a rate of 1.8-2% of the total flour weight. Adding it too early can sometimes interfere with gluten development, so it's often incorporated after the initial mixing or autolyse phase.
Olive oil is a traditional addition to ciabatta dough. It contributes to a softer crumb and adds a characteristic aroma and flavor. While not strictly necessary for structure, it enhances the overall texture and taste of the sourdough ciabatta. A common addition rate is around 2-5% of the total flour weight. Using a good quality extra virgin olive oil will impart the best flavor. It is usually added towards the end of the mixing process or during the first set of folds.
Step-by-Step Guide to Making Sourdough Ciabatta
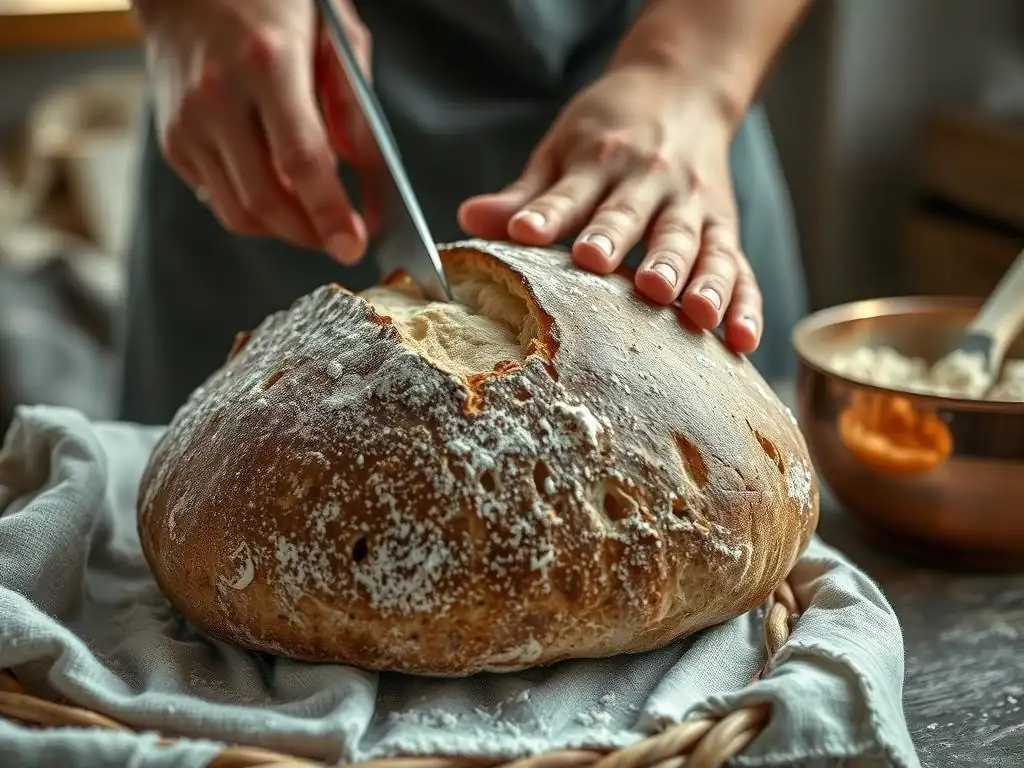
Preparing the Sourdough Levain: Activating Your Starter
To begin making your sourdough ciabatta, you'll typically prepare a levain, which is an offshoot of your main sourdough starter specifically built for the bake. This ensures you're using your starter at its peak activity. Around 8-12 hours before you plan to mix your dough, take a small amount of your active starter (e.g., 20-30 grams) and feed it with flour and water according to your recipe's specifications (often a 1:2:2 or 1:3:3 ratio of starter:water:flour). For example, feeding 20g starter with 40g water and 40g flour creates 100g of levain.
Allow the levain to ferment at room temperature until it is bubbly, has roughly doubled in volume, and passes the float test (a small spoonful dropped in water floats). This usually takes 4-8 hours depending on the temperature. Using the levain at its peak ensures maximum leavening power for your sourdough ciabatta high hydration dough. If you don't have a separate levain step, ensure your main starter is robust and recently fed before using it directly in the dough.
Mixing the High Hydration Ciabatta Dough: Achieving the Right Consistency
Mixing sourdough ciabatta high hydration dough is different from kneading standard bread dough. Due to the high water content, the dough will be very wet and sticky. The goal is not to develop gluten through aggressive kneading but through gentle mixing and subsequent folding. Start by combining the water and levain (or active starter) in a large bowl, mixing to disperse the starter. Then, add the flour and mix just until no dry flour remains. This initial mix, often called an autolyse, allows the flour to fully hydrate.
After the autolyse period (typically 20-30 minutes), add the salt and olive oil (if using) to the dough. At this stage, you can mix by hand using a wet hand or a dough whisk, or use a stand mixer with a dough hook on low speed. Mix until the salt and oil are incorporated, and the dough starts to look slightly smoother, although it will still be very sticky and shaggy. Avoid overmixing; the majority of gluten development will occur during the bulk fermentation with folding.
Bulk Fermentation: Developing Flavor and Structure
Bulk fermentation is the crucial period after mixing where the dough rests and rises before dividing and shaping. For sourdough ciabatta high hydration, this phase is typically long and slow, often lasting 3-5 hours at room temperature (around 70-75°F or 21-24°C), or potentially longer if fermenting in a cooler environment or partially in the refrigerator. During this time, the sourdough starter works to produce gas, causing the dough to rise, while enzymatic activity breaks down starches into sugars, developing complex flavors.
During bulk fermentation, you will perform a series of folds (see next section) to build structure and strength in the slack dough. The dough should increase significantly in volume, perhaps by 50-80%, and show signs of fermentation like bubbles on the surface. The length of bulk fermentation is highly dependent on temperature and starter activity, so learning to read the dough – looking for signs of activity and increased volume – is more reliable than sticking strictly to a timer.
Folding Techniques for High Hydration Dough: Building Strength
Folding is essential for developing the gluten structure in sourdough ciabatta high hydration dough without aggressive kneading. It helps align the gluten strands, builds tension, and incorporates air. Typically, you perform 3-5 sets of folds during the first 1.5-2 hours of bulk fermentation, with 30-45 minute rests between sets. To fold, wet your hands slightly to prevent sticking. Gently stretch a section of the dough up and fold it over the center. Rotate the bowl and repeat with the other sides (usually 4 sides), effectively creating a package.
As you perform the folds, you should feel the dough gain strength and become less slack after each set. The dough will resist stretching more, indicating gluten development. By the final set of folds, the dough should be significantly smoother and stronger than after initial mixing, capable of holding some tension. These folds are critical for creating the structure that will support the large air pockets characteristic of sourdough ciabatta.
Dividing and Shaping the Ciabatta: Gentle Handling for a Perfect Loaf
After bulk fermentation, the dough should be bubbly and expanded. For sourdough ciabatta, the shaping process is minimal and gentle to preserve the gas developed during fermentation. Lightly flour your work surface – be generous but avoid incorporating too much flour into the dough itself. Gently ease the dough out of the bowl onto the floured surface. Avoid punching it down.
Using a bench scraper, gently divide the dough into the desired number of portions. For a typical ciabatta, you might divide a batch into 2-4 pieces. With floured hands or bench scrapers, gently coax each piece into a rectangular or square shape. Avoid stretching or degassing the dough aggressively. The goal is simply to portion it and give it a rough shape before the final proof. Excessive handling at this stage will deflate the dough and result in a dense crumb, not the desired open structure of sourdough ciabatta high hydration.
Proofing the Ciabatta: Achieving the Ideal Rise
Proofing is the final rise before baking. For sourdough ciabatta, the shaped pieces are typically proofed on a heavily floured surface (like a couche or parchment paper) to prevent sticking. Create folds or pleats in the couche/parchment between loaves to help them hold their shape as they relax and spread. Cover the loaves loosely with plastic wrap or a light cloth to prevent a skin from forming.
Proofing time for sourdough ciabatta can vary greatly depending on temperature and the dough's activity level, but it typically ranges from 1-2 hours at room temperature. The loaves should look visibly puffier and feel airy. An over-proofed ciabatta may spread excessively and lack oven spring, while an under-proofed one will be dense. You can gently poke the side of a loaf; if the indentation springs back slowly, it's likely ready. If it springs back immediately, it needs more time. If it doesn't spring back at all, it might be over-proofed.
Baking the Sourdough Ciabatta: Achieving the Perfect Crust and Crumb
Oven Temperature and Baking Time: Key Factors for Success
Baking sourdough ciabatta high hydration requires a hot oven to achieve maximum oven spring and develop a beautiful, crispy crust. Preheat your oven, ideally with a baking stone or steel inside, to a high temperature, typically between 450-480°F (230-250°C). Allowing the oven and stone/steel to preheat for at least 30-60 minutes ensures consistent, radiant heat transfer to the bottom of the loaf, promoting a good rise.
Once the oven is properly preheated, carefully transfer the proofed ciabatta loaves onto the hot baking surface. The baking time will vary depending on the size and thickness of your loaves and your oven, but it generally ranges from 20 to 30 minutes. The loaves should turn a deep golden brown, and the bottom crust should be firm and sound hollow when tapped.
Creating Steam in Your Oven: Essential for a Crispy Crust
Creating steam in the oven during the initial phase of baking is absolutely critical for developing the signature thin, crispy crust of sourdough ciabatta. Steam keeps the surface of the dough moist, allowing it to expand fully before a hard crust forms. Without steam, the crust sets too early, restricting oven spring and resulting in a thicker, tougher crust.
There are several methods for creating steam. A common approach is to place a pan (like a cast iron skillet or old baking pan) on the bottom rack of your oven while preheating. Just before loading the bread, carefully pour a cup of hot water into the hot pan to generate a burst of steam.
Another method is to use a Dutch oven or cloche, which naturally traps the moisture released by the bread itself. Bake the ciabatta with steam for the first 15-20 minutes, then vent the oven or remove the steam source for the remainder of the baking time to allow the crust to crisp up.
Monitoring the Baking Process: Visual Cues and Internal Temperature
Throughout the baking process, keep an eye on your sourdough ciabatta. In the first 10-15 minutes, you should observe significant oven spring as the dough expands rapidly in the heat. After this initial phase with steam, the crust will begin to color. Look for a rich golden-brown hue across the top and sides. Pale ciabatta is often underbaked and will have a gummy crumb.
To be certain your sourdough ciabatta is fully baked, you can check its internal temperature using an instant-read thermometer. The center of the loaf should reach a temperature of at least 200-210°F (93-99°C). This ensures the starches are fully gelatinized and the crumb is set. Tapping the bottom of the loaf – it should sound hollow – is another good indicator of doneness. If the crust is browning too quickly before the inside is cooked, you can loosely tent the loaves with foil.
Troubleshooting Common Sourdough Ciabatta Problems
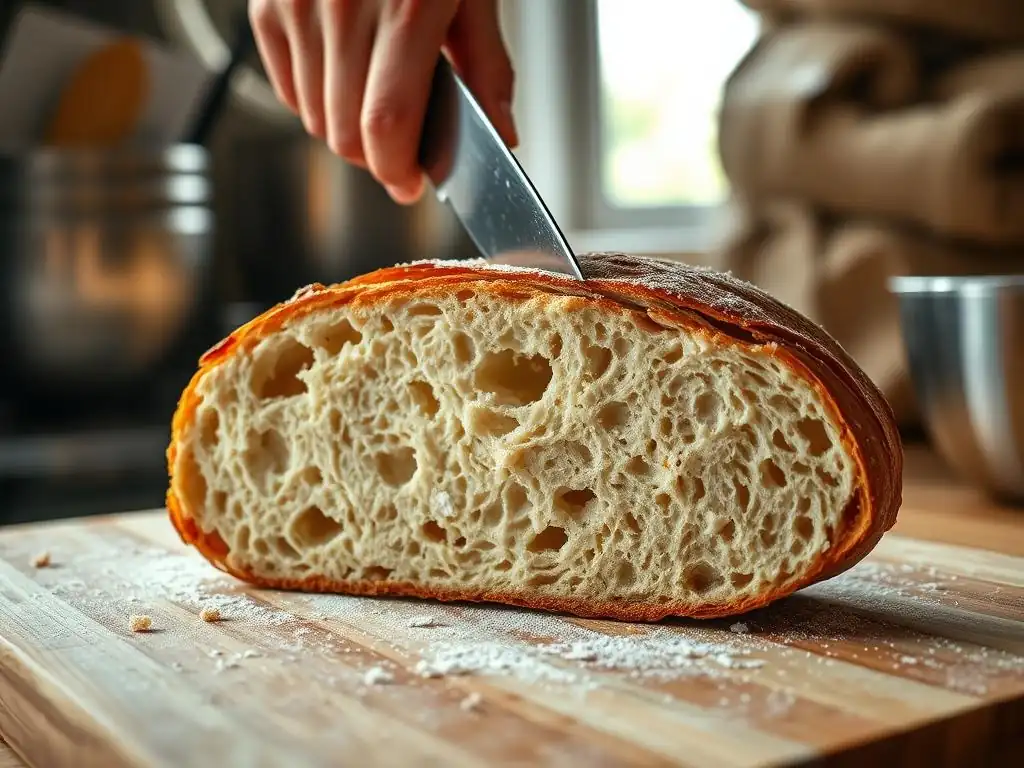
Dough Too Sticky: Handling High Hydration Challenges
Working with a sourdough ciabatta high hydration dough means dealing with stickiness – it's inherent to the style. If your dough feels excessively sticky and unmanageable, even after several folds, several factors could be at play. The hydration level might be too high for your specific flour, as different flours absorb water differently. Try reducing the hydration slightly in your next bake, perhaps by 5% (e.g., from 85% to 80%).
Ensure you are using sufficient, but not excessive, flour on your work surface and hands during shaping and handling. Using a bench scraper liberally to move and shape the dough is also crucial; don't rely solely on your hands. Performing enough sets of folds during bulk fermentation is also key, as proper gluten development helps the dough become less sticky and more manageable. Remember, a truly high hydration sourdough ciabatta dough will always be sticky, the goal is to learn to manage it effectively.
Flat Ciabatta: Addressing Proofing and Starter Issues
A flat sourdough ciabatta can be disheartening, and it's often due to issues with leavening or structure. The most common culprits are an inactive sourdough starter or over-proofing. If your starter or levain wasn't active enough (didn't double/triple after feeding), it won't produce enough gas to lift the heavy, wet dough. Ensure your starter is vigorous and used at its peak.
Over-proofing is another frequent cause of flat ciabatta. If the dough ferments for too long before baking, the gluten structure can break down, and the gas bubbles can collapse. This leaves the dough with no strength to rise in the oven, resulting in a flat, dense loaf. Watch the dough, not just the clock, during proofing – look for signs of readiness like a slow spring-back test rather than relying solely on prescribed times.
Dense Crumb: Improving Fermentation and Shaping
A dense crumb, lacking the characteristic large holes of sourdough ciabatta, can stem from insufficient fermentation, inadequate gluten development, or improper handling. If the bulk fermentation or proofing time was too short, the starter didn't have enough time to produce sufficient gas or develop complex flavors, leading to a tight crumb. Ensure your fermentation times are adequate for your specific conditions.
Insufficient gluten development due to not enough folds or using a low-protein flour can also result in a dense crumb, as the dough lacks the structure to hold large air pockets. Finally, degassing the dough too much during shaping is a common error. Sourdough ciabatta requires very gentle handling during dividing and shaping to preserve the precious gas bubbles created during fermentation. Practice handling the sticky high hydration sourdough ciabatta dough lightly.
Burnt Crust: Adjusting Oven Temperature and Baking Time
A burnt crust while the interior is still underbaked indicates that your oven temperature is likely too high or the baking time is too long for your specific oven and loaf size. While sourdough ciabatta needs a hot oven for good oven spring, excessive heat can burn the crust before the heat penetrates to the center.
Try reducing your oven temperature slightly, perhaps by 10-20°F (5-10°C). Ensure your oven thermostat is accurate; using an oven thermometer can help. If the crust is browning too quickly during the bake, loosely tenting the loaf with aluminum foil after the first 15-20 minutes can protect the top crust while the interior continues to cook. Adjusting rack position (moving the bread lower in the oven) can also help if the top element is too strong.
Tips and Tricks for Perfect Sourdough Ciabatta
Mastering the High Hydration Dough Technique
Working with a sourdough ciabatta high hydration dough is a skill that improves with practice. Don't be discouraged by the initial stickiness. Embrace it! Think of the dough as a very wet sponge that you need to gently manipulate rather than a firm ball to knead. Keep your hands and tools (like a bench scraper) wet or floured as needed.
One of the best ways to master this technique is through consistent practice. Try making sourdough ciabatta high hydration several times, paying close attention to how the dough feels at each stage – after mixing, after each fold, after bulk fermentation, and during shaping. You'll develop an intuition for the dough's consistency and strength over time, which is invaluable for successful high hydration baking.
Working with a Sticky Dough: Essential Tools and Techniques
Handling sticky sourdough ciabatta high hydration dough is much easier with the right tools. A sturdy bench scraper is your best friend for moving, dividing, and shaping the dough without it sticking completely to your hands or the work surface. Keep a small bowl of water nearby to wet your hands periodically when performing folds or handling the dough.
Using a non-stick surface, such as a silicone baking mat or heavily floured parchment paper, for proofing and transferring the dough to the oven is also highly recommended. A generous dusting of flour (rice flour is excellent as it's less likely to be absorbed) on your work surface will also help prevent sticking during shaping. Remember to work confidently and quickly when handling the dough to minimize frustration.
Achieving an Open Crumb: Maximizing Air Pockets
Achieving that coveted open crumb in your sourdough ciabatta high hydration loaf is the ultimate goal for many bakers. This requires a combination of factors: a very active starter, sufficient bulk fermentation time, proper gluten development through gentle folding, and minimal degassing during shaping and transferring.
Ensure your starter is at its peak activity when you mix the dough. Allow the dough to ferment fully during bulk fermentation, developing significant gas. Perform enough sets of folds to build a strong gluten network capable of trapping large gas bubbles. Most importantly, be incredibly gentle when handling the dough after bulk fermentation – use a bench scraper to move and shape it, avoid pressing or punching it down, and handle it with care when transferring it to the oven.
Storing Sourdough Ciabatta: Maintaining Freshness
Sourdough ciabatta is best enjoyed fresh from the oven, but proper storage can help maintain its quality for a day or two. Once completely cooled, store the ciabatta at room temperature. The best way to store crusty bread like ciabatta is in a paper bag, which allows the crust to breathe and prevents it from becoming soggy. Avoid plastic bags, as they trap moisture and will soften the crust.
If you won't eat the sourdough ciabatta within a day or two, it freezes exceptionally well. Slice the cooled loaf or freeze it whole. Wrap it tightly in plastic wrap, then in aluminum foil or place it in a freezer bag. Frozen ciabatta can be stored for up to a few months. To reheat, thaw the bread at room temperature and then crisp it up in a hot oven (around 350-400°F or 175-200°C) for 5-10 minutes.
Sourdough Ciabatta Recipe: A Detailed Guide
Ingredient List and Measurements
This recipe yields approximately two medium-sized sourdough ciabatta loaves, using a high hydration dough.
Levain (built 8-12 hours before mixing):
- 20g Active Sourdough Starter
- 40g Lukewarm Water (75-80°F / 24-27°C)
- 40g Bread Flour
Final Dough:
- All of the Levain (approx. 100g)
- 400g Lukewarm Water (75-80°F / 24-27°C)
- 500g Strong Bread Flour (12-14% protein)
- 10g Fine Sea Salt (2% of flour weight)
- 20g Extra Virgin Olive Oil (4% of flour weight)
Note: This recipe uses 80% hydration relative to the final dough flour (400g water / 500g flour = 80%), plus the water and flour from the levain, making the effective overall hydration slightly higher.
Step-by-Step Instructions with Detailed Explanations
- Build the Levain: Combine the starter, water, and flour for the levain in a jar or small container. Mix until smooth. Cover loosely and let ferment at room temperature (68-75°F / 20-24°C) for 8-12 hours, or until it has doubled/tripled and is very active and bubbly.
- Autolyse: In a large mixing bowl, combine the lukewarm water and the bread flour for the final dough. Mix with a spoon or dough whisk until just combined and no dry flour remains. The mixture will be shaggy. Cover the bowl and let rest for 20-30 minutes. This autolyse step allows the flour to hydrate fully before the salt is added.
- Add Levain, Salt, and Olive Oil: Add the ripe levain, salt, and olive oil to the dough in the bowl.
- Initial Mixing: Mix the ingredients until everything is incorporated. This can be done by hand (using a wet hand or dough whisk) or in a stand mixer on low speed for 3-5 minutes. The dough will be very wet and sticky. Don't worry about developing smooth gluten at this stage.
- Bulk Fermentation with Folds: Cover the bowl and let the dough rest for 30 minutes. This marks the start of bulk fermentation. Over the next 2 hours, perform 4 sets of stretch and folds at 30-minute intervals. To fold, wet your hands, grab a section of the dough, stretch it gently upwards, and fold it over the center. Rotate the bowl and repeat 3-4 times per set. After the folds, cover the bowl and let the dough continue to ferment undisturbed for another 1-2 hours, or until it has increased in volume by 50-80% and is visibly bubbly. The total bulk fermentation time will be around 3-4 hours at room temperature (70-75°F / 21-24°C).
- Divide and Shape: Lightly flour your work surface generously with bread flour or rice flour. Gently pour or ease the dough out of the bowl onto the floured surface. Avoid deflating it. Using a bench scraper, gently divide the dough into 2 equal pieces. Lightly flour the tops of the dough pieces. Using floured hands and/or bench scrapers, gently coax each piece into a rough rectangular or square shape. Avoid stretching or pulling too hard.
- Proofing: Prepare your proofing surface. You can use a baker's couche heavily floured, or parchment paper placed on a baking sheet. If using parchment, create folds or pleats in the paper between the loaves to provide support. Carefully transfer the shaped ciabatta pieces onto the prepared surface. Cover loosely with plastic wrap or a light cloth to prevent drying. Let proof at room temperature for 1-1.5 hours, or until they look puffy and feel airy. The poke test should show a slow spring-back.
- Preheat Oven: About 30-45 minutes before you plan to bake, preheat your oven to 450°F (230°C) with a baking stone or steel inside, if using. If creating steam with a water pan, place an empty oven-safe pan on the bottom rack during preheating.
- Bake: If using parchment paper, you can simply slide the paper onto the hot baking stone/steel. If using a couche, gently flip the proofed loaves onto a peel or baking sheet dusted with cornmeal or semolina, then slide them onto the stone/steel. Immediately create steam in the oven (pour hot water into the preheated pan or close the lid of a Dutch oven). Bake with steam for 15 minutes.
- Finish Baking: Carefully open the oven, remove the steam source (or lid if using a Dutch oven), and continue baking for another 10-15 minutes, or until the loaves are deep golden brown and the internal temperature is 200-210°F (93-99°C).
- Cool: Transfer the baked sourdough ciabatta loaves to a wire rack to cool completely before slicing. This is crucial for the crumb structure to set properly.
Beyond the Basics: Sourdough Ciabatta Variations
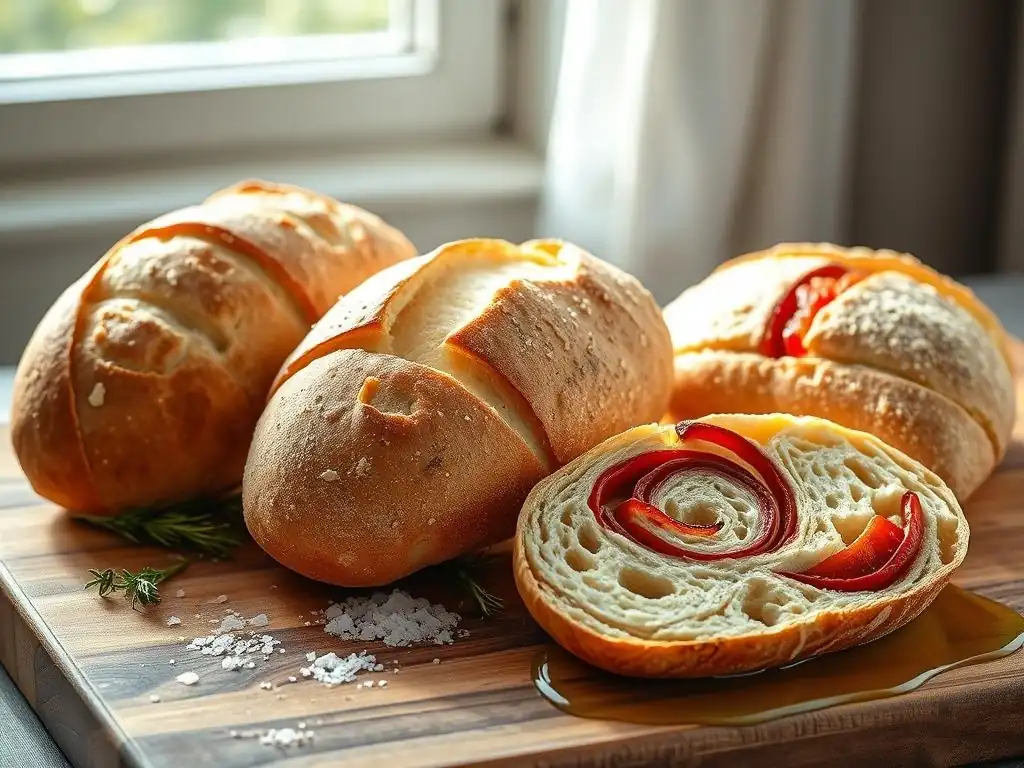
Adding Herbs: Creating Unique Ciabatta Variations
Incorporating fresh or dried herbs is a simple yet effective way to add a new dimension of flavor to your sourdough ciabatta. Herbs like rosemary, thyme, oregano, or a mix of Italian herbs work wonderfully. You can add chopped fresh herbs or dried herbs to the dough during the initial mixing phase, along with the salt and olive oil.
For a typical batch using 500g of flour, you might add 1-2 tablespoons of dried herbs or 2-3 tablespoons of chopped fresh herbs. Ensure they are evenly distributed throughout the sticky sourdough ciabatta high hydration dough during the folding process. The herbs will infuse the bread with their aromatic qualities as it ferments and bakes, creating a delicious variation perfect for pairing with savory dishes.
Exploring Different Flour Combinations: Experimenting with Taste and Texture
While strong bread flour is recommended for mastering the basic sourdough ciabatta high hydration technique, you can experiment with different flour blends once you're comfortable. Substituting a small percentage (e.g., 10-20%) of the bread flour with whole wheat, rye, or even spelt flour can add nutty flavors and slightly alter the texture.
Keep in mind that whole grains absorb more water and can weaken the gluten structure, potentially making the dough even stickier and the crumb less open. You might need to slightly adjust the overall hydration or use a stronger folding technique when incorporating these flours. Experimenting with different flour combinations allows you to personalize your sourdough ciabatta and discover new taste profiles.
Making Sourdough Ciabatta Rolls: Adapting the Recipe for Smaller Portions
The sourdough ciabatta high hydration recipe can easily be adapted to make smaller rolls, perfect for sandwiches or individual servings. Follow the recipe exactly through the bulk fermentation stage. When it's time to divide and shape, instead of dividing the dough into 2 large pieces, gently divide it into 6-8 smaller, roughly square or rectangular portions using a bench scraper.
Proof the rolls on a floured surface or parchment paper, leaving space between them. The proofing time for rolls will likely be shorter than for large loaves, perhaps 45-75 minutes. Baking time will also be reduced, typically 15-25 minutes, depending on their size. Keep an eye on the color and check the internal temperature (around 200°F / 93°C) to ensure they are fully baked. Sourdough ciabatta rolls offer all the flavor and texture of the larger loaf in a convenient size.
Enjoying Your Homemade Sourdough Ciabatta
Serving Suggestions: Pairing Your Ciabatta with Meals
Homemade sourdough ciabatta is incredibly versatile and pairs beautifully with a wide range of meals. Its open crumb and chewy texture make it ideal for soaking up sauces or olive oil. Serve it alongside pasta dishes, stews, or soups. A simple drizzle of good quality olive oil and a sprinkle of sea salt is often all that's needed to enjoy its wonderful flavor.
Consider serving slices of warm sourdough ciabatta with antipasti platters, cheese boards, or as an accompaniment to grilled meats or fish. Its rustic charm makes it a perfect addition to a casual family dinner or a more formal gathering. The slightly tangy flavor complements both rich and light dishes alike.
Making Sandwiches with Sourdough Ciabatta: Elevating Your Lunch
Sourdough ciabatta is arguably one of the best breads for making sandwiches. The large, irregular holes in the crumb create pockets that hold fillings wonderfully, while the sturdy crust provides structure. Slice the ciabatta horizontally and fill it with your favorite ingredients.
Classic Italian-inspired fillings like prosciutto, mozzarella, tomatoes, and basil are fantastic. Grilled vegetables, roasted meats, or simple spreads like pesto or tapenade also work well. The slightly sour tang of the sourdough adds an extra layer of flavor that elevates even a simple ham and cheese sandwich into something special. A sourdough ciabatta high hydration loaf turns an ordinary lunch into a delightful culinary experience.
Making Croutons with Leftover Ciabatta: Preventing Food Waste
Even if your sourdough ciabatta isn't eaten fresh, its life doesn't have to end there! Stale ciabatta makes excellent croutons, a perfect way to prevent food waste and add homemade goodness to salads or soups. Cut the leftover ciabatta into cubes (about 1 inch).
Toss the cubes with olive oil, salt, pepper, and any desired herbs or spices (garlic powder, dried oregano, etc.). Spread them in a single layer on a baking sheet and bake in a preheated oven at around 350°F (175°C) for 15-25 minutes, or until golden brown and crispy, stirring occasionally. Let them cool completely before storing in an airtight container. These homemade sourdough ciabatta croutons are far superior to store-bought ones.
Conclusion: The Joy of Baking Sourdough Ciabatta at Home
Embracing the Challenge of High Hydration Baking
Baking sourdough ciabatta, particularly mastering the high hydration technique, can feel challenging at first. The sticky dough, the minimal handling, the reliance on observation rather than strict timing – it all requires a shift in perspective from traditional bread baking. However, embracing this challenge is part of the reward. Each bake is a learning experience, teaching you more about dough behavior, fermentation, and the nuances of working with a live culture.
The process encourages patience and attention to detail. As you become more comfortable handling the wet dough and reading its cues, you gain confidence in your baking skills. The satisfaction of transforming simple ingredients and a bubbly starter into a beautiful, airy sourdough ciabatta loaf is immense and truly worth the effort.
One of the greatest joys of baking is sharing your creations. There's something uniquely satisfying about presenting a basket of warm, rustic sourdough ciabatta to friends and family. The oohs and aahs over the open crumb and the crispy crust are the ultimate validation of your efforts in mastering this high hydration technique.
Whether served with a simple meal, used for epic sandwiches, or simply enjoyed with olive oil, your homemade sourdough ciabatta high hydration loaf is sure to be a hit. Sharing your baking journey and its delicious results connects you with others and spreads the simple pleasure of good food made with care. Enjoy the process, enjoy the bread, and enjoy sharing it!
Frequently Asked Questions
How does the high hydration level affect the sourdough ciabatta?
High hydration results in a more open and airy crumb and a chewier texture. It makes the dough more challenging to handle but yields a superior final product.
What makes sourdough ciabatta different from regular ciabatta?
Sourdough ciabatta utilizes a sourdough starter for leavening, which imparts a tangy flavor and unique texture. Regular ciabatta relies on commercial yeast.
Is the BakeWithEase sourdough ciabatta recipe suitable for beginners?
While the recipe provides step-by-step guidance, the high hydration dough can be tricky. Some baking experience is recommended before attempting it.
What are some common problems encountered when making high hydration sourdough ciabatta?
Common issues include sticky dough, difficulty shaping, and uneven crumb. BakeWithEase provides tips for overcoming these challenges.
What key ingredients are essential for achieving a successful sourdough ciabatta?
Besides flour, water, and salt, a healthy and active sourdough starter is crucial. The quality of the flour also significantly impacts the final result.
Final Reflection: The Enduring Allure of the High-Hydration Ciabatta
The pursuit of the perfect sourdough ciabatta, especially at high hydration, is more than just baking; it's a journey of patience, precision, and ultimately, profound connection with the craft. This article explored the intricacies of achieving that open crumb, that airy texture, that unforgettable taste – a testament to the power of simple ingredients transformed by time and technique. The demand for high-hydration sourdough ciabatta reflects a growing appreciation for artisanal bread and the rewarding process of making it from scratch.
The journey of mastering this bread has profoundly impacted my own understanding of baking, pushing me beyond simple recipes and into the heart of fermentation and gluten development. The subtle nuances of hydration, the dance between starter activity and dough manipulation, the anticipation of the oven spring – these are lessons that extend far beyond the kitchen. The best bread is made with love and patience,
a wise baker once told me, and this sentiment rings truer than ever when working with such a delicate and rewarding dough.
Now, it's your turn. Don't be intimidated by the high hydration; embrace the challenge. Experiment with different flours, explore the rhythm of your starter, and savor the journey. The reward? A loaf of bread that transcends mere sustenance, becoming a testament to your dedication and a source of pride and deliciousness. The perfect sourdough ciabatta awaits – dare to bake it.
Unleash Your Inner Artisan: Bake the Perfect Ciabatta!
Thanks for joining us on this sourdough ciabatta adventure! You've now unlocked the secrets to crafting this beautiful, airy Italian classic. Ready to put your new skills to the test?
- Bake your own ciabatta today! Use the recipe and tips from the article as your guide. Don't be afraid to experiment – that's half the fun!
- Share your baking journey! Post a picture of your creation on social media and tag #BakeWithEaseCiabatta – let's inspire each other!
- Challenge a friend to bake along with you! Making bread is even more rewarding when shared.
What unique twist will you add to your ciabatta masterpiece?