
Unlock the Secrets of Enriched Doughs: Your Brioche Journey Starts Here

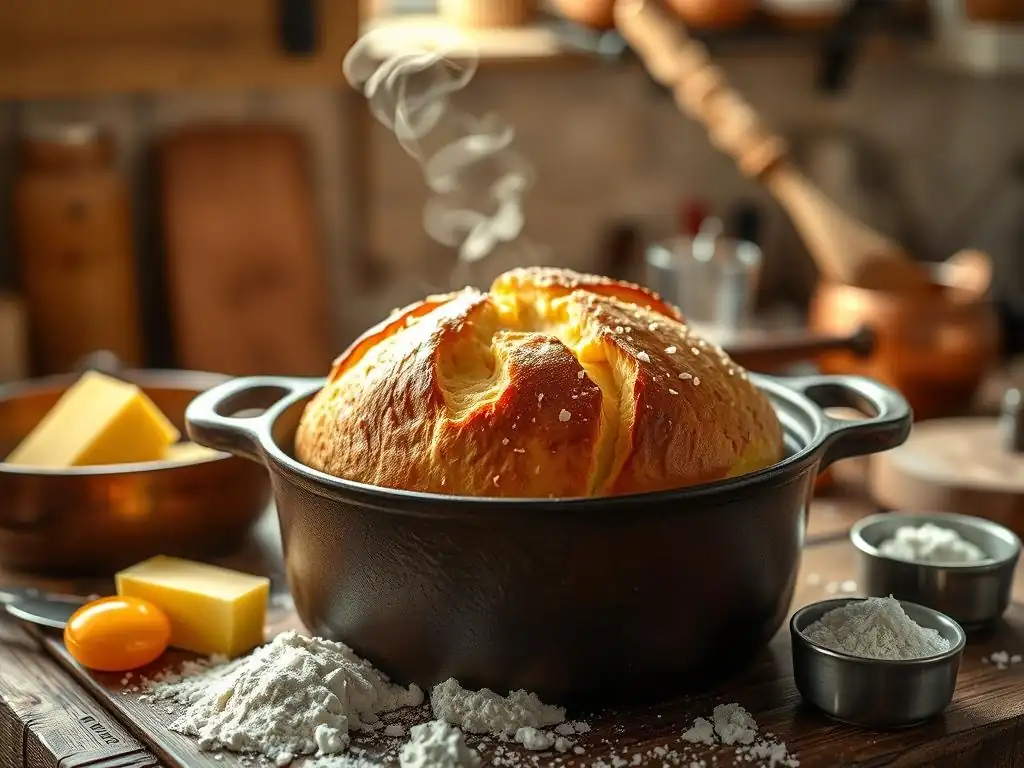
Welcome to BakeWithEase, where even the most ambitious baking projects become approachable! Ever dreamt of creating that perfectly golden, melt-in-your-mouth brioche? Our Brioche dough recipe for beginners unlocks the secrets to enriched doughs, transforming simple ingredients into culinary masterpieces. Intrigued? Keep reading to discover the step-by-step guide that will have you baking like a pro in no time!
-
Brioche Dough Recipe Beginner: A Step-by-Step Guide for Home Bakers
- Gathering Your Ingredients: Essential Components for Perfect Brioche
- Brioche Dough Recipe: The Mixing Process Explained
- First Rise: Allowing the Dough to Develop Flavor and Texture
- Shaping Your Brioche: From Dough to Delightful Forms
- Second Rise: Preparing for the Oven
- Baking Your Brioche: Achieving Golden Perfection
-
Frequently Asked Questions
- What makes Brioche dough different from other types of dough?
- Is brioche dough difficult to make for a beginner baker?
- What are the key ingredients that make a good brioche dough?
- What are common problems beginners face when making brioche dough, and how can I avoid them?
- How can I use brioche dough once it's made?
- Final Reflection: The Enduring Allure of Brioche
- Unleash Your Inner Baker: Craft the Perfect Brioche!
Brioche Dough Recipe Beginner: A Step-by-Step Guide for Home Bakers
Embarking on your first brioche dough recipe as a beginner can feel like a grand adventure, but with a clear guide, it's incredibly rewarding. This section breaks down the process, step by step, from selecting the right ingredients to shaping and baking your beautiful, enriched loaf. Think of this as your friendly roadmap to achieving that signature tender crumb and golden crust.
Mastering a brioche dough recipe for beginners involves understanding the role of each ingredient and the purpose behind every step. Unlike standard bread doughs, brioche is rich with butter and eggs, which requires a slightly different handling technique. Don't be intimidated; we'll walk through everything, ensuring your first attempt is a delicious success.
Gathering Your Ingredients: Essential Components for Perfect Brioche
The quality of your brioche starts with the ingredients you choose. Since this is an enriched dough, each component plays a crucial role in achieving the desired texture, flavor, and rise. Using fresh, high-quality ingredients will make a noticeable difference in the final product of your brioche dough recipe beginner journey.
Consider this phase the foundation of your baking project. Taking the time to measure accurately and ensure your ingredients are at the correct temperature (often room temperature for eggs and butter) is key. Precision here sets you up for success down the line, especially when working with a rich dough like brioche.
High-Protein Bread Flour: The Foundation of Your Brioche
For a classic brioche dough recipe beginner, using a high-protein bread flour is highly recommended. This type of flour typically has a protein content ranging from 12% to 14%, which is essential for developing strong gluten networks. Gluten is what gives your brioche structure and allows it to rise and hold its shape despite the heavy load of butter and eggs.
Using all-purpose flour (typically 10-12% protein) might result in a less structured, potentially denser brioche. While it's possible to make brioche with all-purpose, bread flour provides the necessary strength to support the rich additions, leading to a lighter, airier crumb that is characteristic of a well-made brioche.
Instant Dry Yeast: Choosing the Right Leavening Agent
Instant dry yeast is a fantastic choice for a brioche dough recipe beginner because it's incredibly user-friendly. Unlike active dry yeast, instant yeast can typically be added directly to your dry ingredients without needing to be proofed in liquid first. This saves a step and reduces the chance of issues if your yeast isn't active.
A typical amount for a standard brioche loaf might be around 7 to 10 grams of instant dry yeast per 500 grams of flour. Ensure your yeast is fresh; check the expiration date on the packet. If you're unsure, you can always proof a small amount in warm liquid to see if it bubbles, though this step isn't strictly necessary with fresh instant yeast.
Sugar and Salt: Balancing Sweetness and Flavor
Sugar in brioche serves multiple purposes. It provides food for the yeast, helping with fermentation and rise, and it contributes to the golden-brown color of the crust during baking due to caramelization. Furthermore, sugar adds that touch of sweetness that balances the richness of the butter and eggs in this type of enriched dough.
Salt, while seemingly counterintuitive in a sweet dough, is crucial for flavor development. It enhances the taste of the other ingredients and also helps regulate yeast activity, preventing it from fermenting too quickly. Typically, the ratio of salt to flour is around 1.5% to 2% by weight, so for 500g of flour, you might use 7.5g to 10g of salt.
Unsalted Butter and Large Eggs: Enriching Your Dough for a Luxurious Texture
Butter and eggs are the defining ingredients that transform a simple dough into rich, luxurious brioche. Eggs add protein, fat, and liquid, contributing to tenderness, color, and structure. Using large eggs (approximately 50-60g each) is standard for most recipes, providing consistent hydration and enrichment.
Unsalted butter is preferred because it gives you control over the salt content in the final product. The amount of butter in brioche can vary significantly, from 30% to over 60% of the flour weight in classic recipes (e.g., 150g to 300g+ of butter for 500g flour). Adding this high percentage of fat gradually and ensuring it's soft (room temperature but not melted) is key to achieving that signature soft, melt-in-your-mouth texture in your brioche dough recipe beginner attempt.
Brioche Dough Recipe: The Mixing Process Explained
Mixing brioche dough is different from mixing leaner doughs due to the high fat and sugar content. It often requires a stand mixer because the dough can be quite sticky and needs significant kneading to develop the gluten properly. Don't worry if it seems messy at first; this is normal for such a rich dough.
The process typically involves combining the initial ingredients, developing some gluten strength, and then gradually adding the softened butter. This method, sometimes called "enriched dough mixing," allows the gluten network to form before being coated and potentially inhibited by the fat. Patience during mixing is crucial for a successful brioche dough recipe beginner.
Activating the Yeast: Starting Your Dough off Right
While instant yeast can be added directly, some recipes for a brioche dough recipe beginner might still suggest hydrating it in a warm liquid (like milk or water around 105-115°F or 40-46°C) with a pinch of sugar. This step confirms the yeast is alive and gives it a little head start before encountering the richer environment of the dough.
If you are using active dry yeast, you must activate it first. Mix it with the warm liquid and sugar and let it sit for 5-10 minutes until foamy. If it doesn't foam, your yeast is likely dead, and you'll need to start with a fresh packet. Using instant yeast often simplifies this part of the brioche dough recipe beginner process.
Combining Dry Ingredients: Achieving Uniformity
Before adding any wet ingredients, it's good practice to combine your dry components: flour, sugar, salt, and instant yeast (if adding directly). Whisking them together briefly in your mixing bowl ensures that the salt and yeast are evenly distributed throughout the flour. This prevents pockets of high salt concentration, which can inhibit yeast activity.
For a brioche dough recipe beginner, this simple step guarantees that the leavening agent is present throughout the dough from the start, leading to a more even rise. Use a whisk or fork to gently mix the ingredients, making sure there are no clumps of yeast or salt.
Incorporating Wet Ingredients: The Key to a Smooth Dough
After the dry ingredients are combined, add the wet ingredients, which typically include eggs and any initial liquid (like milk or water if not used for proofing). Mix on a low speed using the dough hook attachment of your stand mixer. The dough will initially look shaggy and wet, which is expected for a brioche dough recipe beginner.
Continue mixing until the ingredients just come together. At this point, the dough will be very soft and sticky. Resist the urge to add more flour unless the recipe specifically calls for it later. The stickiness is due to the high hydration and the presence of eggs, and it will change as you knead and add butter.
The Importance of Kneading: Developing Gluten Strength
Kneading is perhaps the most critical step in developing a strong brioche dough. Using a stand mixer, knead the dough on medium speed (typically speed 2 or 3 on most mixers) for a significant amount of time, often 10-15 minutes before adding the butter. This initial kneading develops the gluten structure needed to support the fat.
Once the dough starts to pull away from the sides of the bowl and looks somewhat smooth and elastic, begin adding the softened butter, one piece at a time. Wait until each piece is fully incorporated before adding the next. This process is slow, and the dough may seem to break apart and become very sticky again.
Continue kneading after all the butter is added for another 10-15 minutes, or until the dough is smooth, elastic, and passes the windowpane test – you should be able to stretch a small piece thin enough to see light through it without it tearing. This extensive kneading is vital for a successful brioche dough recipe beginner.
First Rise: Allowing the Dough to Develop Flavor and Texture
The first rise, also known as bulk fermentation, is a crucial period where the yeast gets to work, producing carbon dioxide which makes the dough rise, and developing complex flavors through fermentation. For a brioche dough recipe beginner, understanding this stage is key to achieving a light and airy crumb.
During this time, the gluten relaxes, making the dough easier to handle for shaping later. The dough should significantly increase in volume, typically doubling in size. The length of the first rise depends heavily on the temperature of the dough and the environment.
Understanding the First Rise: What's Happening Inside
As the dough rests, the yeast consumes the sugars and produces ethanol and carbon dioxide gas. The gas gets trapped within the gluten network, causing the dough to inflate. Simultaneously, enzymatic processes break down starches and proteins, contributing to the dough's flavor profile and improving its handling properties.
For a brioche dough recipe beginner, it's important to know that time is just as important as volume increase. A slower, longer rise, especially in a cooler environment (like the refrigerator), develops more complex flavors. Aim for at least doubling in size, but observe the dough's activity rather than sticking strictly to a timer.
Optimal Temperature for Proofing: Creating the Perfect Environment
A warm, draft-free environment is ideal for the first rise. A temperature range of 75-80°F (24-27°C) is often recommended, where the dough might double in 1-2 hours. You can create this by placing the covered dough in a turned-off oven with the light on, or near a warm window (but out of direct sun).
Alternatively, and often preferred for enriched doughs like brioche, is a slow, cold fermentation in the refrigerator. This can take 8-12 hours or even up to 24 hours. Cold fermentation develops superior flavor and makes the sticky dough much easier to handle and shape. For a brioche dough recipe beginner, refrigerating the dough after the initial mix and knead is often the simplest approach before shaping.
Shaping Your Brioche: From Dough to Delightful Forms
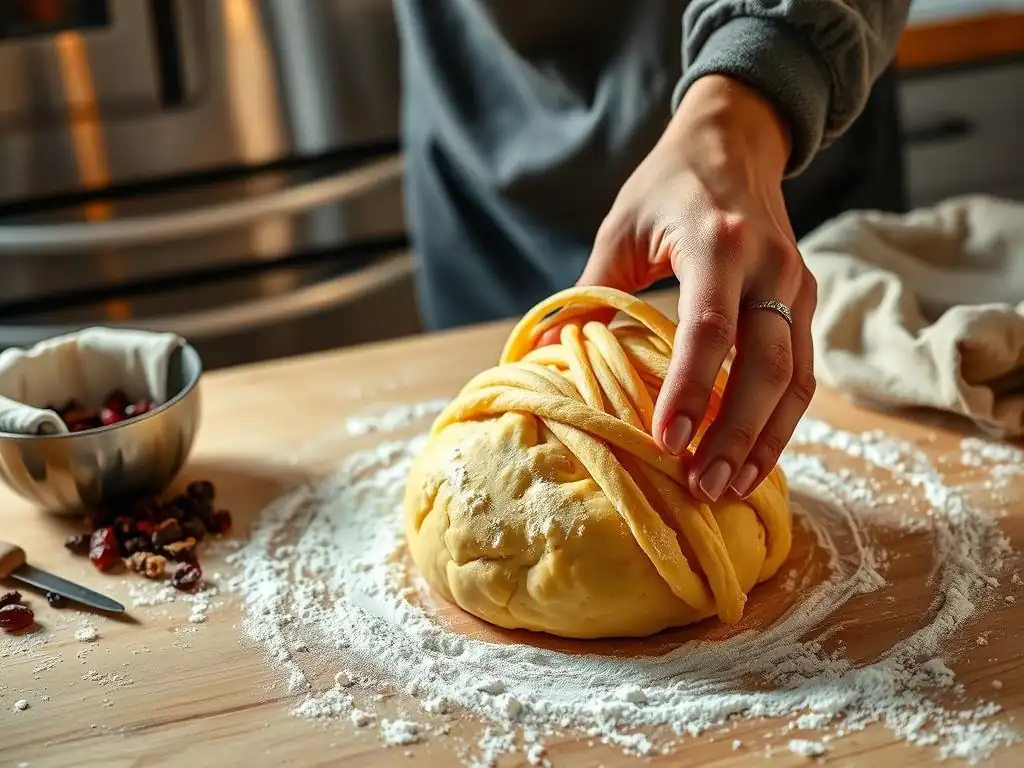
Once your brioche dough has completed its first rise (and potentially a cold rest), it's time to shape it. Enriched doughs like brioche are typically very soft and can be sticky, so working on a lightly floured surface and handling the dough gently is important. Shaping is where you give your brioche its final form before the second rise and baking.
There are several classic brioche shapes, each offering a different aesthetic and sometimes slightly different texture due to how the dough is formed. Don't be afraid to experiment with shapes as you become more comfortable with your brioche dough recipe beginner skills.
Classic Brioche à Tête: The Traditional Shape
The Brioche à Tête, or "head" brioche, is the most iconic shape, featuring a large base with a smaller ball of dough perched on top. To create this, divide your dough into portions. For each portion, shape the majority of the dough into a smooth ball and place it in a fluted brioche mold.
Then, take a small piece of dough (about 1/4 the size of the base ball), shape it into a tear-drop or pear shape, and gently push the pointed end into the center of the large ball in the mold. This creates the distinctive "head." Handling the dough lightly preserves the air pockets formed during the first rise.
Brioche Nanterre: A Loaf Pan Favorite
Brioche Nanterre is a simple yet elegant loaf made by arranging small balls of dough in a loaf pan. Typically, you divide the dough into 6 or 8 equal pieces, shape each piece into a smooth ball, and arrange them in two rows in a greased loaf pan. This shape is particularly easy for a brioche dough recipe beginner.
As the dough rises during the second proof and bakes, the balls expand and fuse together, creating a pull-apart loaf with a beautiful segmented appearance. A standard 9x5 inch loaf pan is perfect for a typical brioche dough recipe using around 500g of flour.
Braided Brioche: An Elegant Presentation
A braided brioche loaf is visually stunning and relatively easy to achieve once you've mastered basic braiding techniques. Divide the dough into three or four equal pieces, roll each piece into a long, even strand, about 1-1.5 inches thick.
Pinch one end of the strands together securely, then braid them loosely. Pinch the other end to seal. A three-strand braid is the simplest for a brioche dough recipe beginner, but a four-strand braid (weaving the outer strand over the next, under the third, and over the last) creates a wider, flatter loaf. Place the finished braid on a baking sheet lined with parchment paper.
Second Rise: Preparing for the Oven
The second rise, or proofing, is the final fermentation period before the brioche is baked. This stage allows the shaped dough to expand further, becoming light and airy. It's critical to handle the shaped dough gently to avoid deflating the delicate structure you've built.
This rise is typically shorter than the first and aims for the dough to increase by about 50-75% in volume, rather than doubling. Over-proofing can lead to a collapsed loaf in the oven, so keeping an eye on the dough's progress is important for your brioche dough recipe beginner success.
The Importance of the Second Proof: Achieving Maximum Volume
During the second proof, the yeast continues to produce gas, expanding the shaped dough and filling it with air. This expansion is what gives the final baked brioche its light texture and good volume. It also allows the flavors to continue developing subtly.
Proofing the shaped dough helps ensure an even bake and a tender crumb. Dough that hasn't proofed enough might result in a dense loaf, while over-proofed dough can collapse or have a coarse texture. Aim for dough that looks visibly puffier and feels light when gently touched.
Gentle Handling: Preserving the Dough's Structure
The shaped brioche dough is delicate after its first rise and shaping. When transferring it to the proofing area or preparing it for the oven (like applying an egg wash), handle it with extreme care. Avoid pressing down or knocking the dough, as this can expel the trapped gases.
Cover the dough lightly with plastic wrap or a clean kitchen towel during the second rise to prevent a skin from forming, which can restrict its expansion. If proofing in a mold or pan, ensure there's enough space for the dough to expand without spilling over. This careful handling is a key step for a successful brioche dough recipe beginner.
Baking Your Brioche: Achieving Golden Perfection
Baking is the grand finale where your carefully prepared brioche dough transforms into a golden, fragrant loaf. The high sugar and fat content means brioche browns more readily than leaner breads, so monitoring the bake is essential.
Preheating your oven properly is crucial for achieving a good oven spring (the final burst of rising in the oven) and an even crust color. Get your oven up to temperature well in advance of baking.
Oven Temperature and Baking Time: Mastering the Heat
Brioche is typically baked at a moderate temperature, often between 350°F and 375°F (175°C and 190°C). The exact temperature and time will depend on the size and shape of your loaf. A single large loaf might bake for 30-40 minutes, while smaller rolls or individual brioche à tête might take only 15-25 minutes.
Starting at a slightly higher temperature for the first 10-15 minutes can help with oven spring, then reducing the temperature can prevent the crust from burning before the interior is cooked through. Always consult your specific brioche dough recipe beginner guide for recommended temperatures and times, but be prepared to adjust based on your oven.
Egg Wash: Adding Shine and Color
An egg wash is typically applied to the surface of the brioche just before baking. A common egg wash is one whole egg whisked with a tablespoon of milk or water. Brushing this mixture gently over the dough provides a beautiful glossy finish and promotes an even, rich golden-brown crust color.
Apply the egg wash carefully using a pastry brush, avoiding letting it pool around the base of the loaf, especially for brioche à tête, as this can prevent the "head" from lifting properly. Some recipes might suggest a double egg wash: one before the second rise and another just before baking for extra shine.
Monitoring Doneness: Ensuring a Perfectly Baked Brioche
Knowing when your brioche is done is key to avoiding a doughy interior. The crust should be a deep golden brown. If it starts browning too quickly, you can loosely tent the top of the loaf with aluminum foil.
The most reliable way to check for doneness is to use an instant-read thermometer. Insert the thermometer into the thickest part of the loaf; a fully baked brioche should register an internal temperature of around 190-200°F (88-93°C). If it's below this temperature, continue baking for a few more minutes and check again. This step is vital for a successful brioche dough recipe beginner bake.
Frequently Asked Questions
What makes Brioche dough different from other types of dough?
Brioche dough is a type of enriched dough, meaning it contains a high proportion of butter and eggs. This results in a richer, more tender crumb compared to lean doughs like baguette dough.
Is brioche dough difficult to make for a beginner baker?
While it requires patience, brioche dough is achievable for beginners with a reliable recipe and careful attention to detail. Focus on proper mixing and temperature control for the best results.
What are the key ingredients that make a good brioche dough?
The essential ingredients are flour, yeast, sugar, salt, eggs, and, most importantly, a high quantity of butter. The quality of the butter significantly impacts the flavor and texture of the brioche.
What are common problems beginners face when making brioche dough, and how can I avoid them?
Common issues include dough that is too wet or doesn't rise properly. Ensure accurate measurements, use active yeast, and allow sufficient proofing time in a warm environment.
How can I use brioche dough once it's made?
Brioche dough is incredibly versatile and can be used to create various baked goods, such as buns, loaves, rolls, and even pastries. Get creative with fillings and toppings for a delicious and versatile treat.
Final Reflection: The Enduring Allure of Brioche
The art of brioche baking, once a closely guarded secret, is now within everyone's reach. This journey into the world of enriched doughs has revealed not just a recipe, but a process—a testament to patience, precision, and the undeniable magic of butter, eggs, and flour working in perfect harmony. The seemingly simple act of creating a brioche becomes a meditation on texture, flavor, and the satisfaction of crafting something beautiful from humble ingredients.
The influence of brioche extends far beyond the kitchen; it's a symbol of celebration, comfort, and the enduring power of tradition. Its rich history, woven into the fabric of countless cultures, speaks to a deeper human need for connection through shared culinary experiences. The best things in life are simple, but not easy.
This quote perfectly encapsulates the brioche-making process: seemingly simple ingredients transformed through careful technique into something extraordinary. The journey of learning to make brioche is a journey of self-discovery, revealing hidden patience and a surprising capacity for precision.
Now, as you close this article, I invite you to consider your own journey. Will you embark on the adventure of creating your own brioche? Will you embrace the challenge, the subtle nuances, and the ultimate reward of sinking your teeth into a perfectly golden, buttery, and airy loaf? The secrets are unlocked; the path is clear. The only thing left is for you to take the first step and begin your own brioche story.
Unleash Your Inner Baker: Craft the Perfect Brioche!
Thanks for joining us on this delicious journey into the world of enriched doughs! We hope you've gained valuable insights and inspiration to elevate your baking game. Ready to put your newfound knowledge into practice?
- Bake your own masterpiece: Try our signature Brioche recipe (found on our recipe page) and experience the unbelievable texture and flavor for yourself. It's easier than you think!
- Share your success: Show us your beautiful creations! Post a picture on social media using #BakeWithEaseBrioche and tag us – we’d love to see what you bake.
- Explore our community: Join our online forum to connect with fellow baking enthusiasts, share tips, and ask questions. You might even discover new techniques!
What unique twist will you add to your first homemade brioche? Let's hear about it in the comments!