
Advanced Scoring Patterns: Adding Artistry to Your Loaves

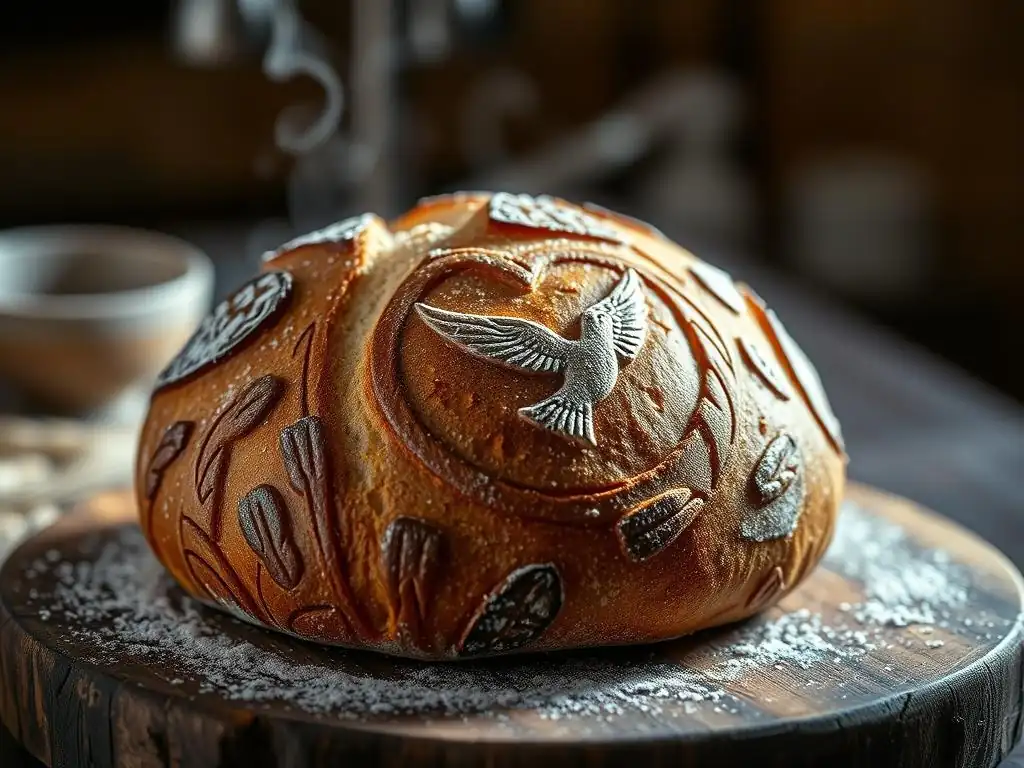
Welcome to BakeWithEase, where baking becomes a joy! Ready to elevate your sourdough game? This week, we're diving into the fascinating world of sourdough scoring patterns designs. Discover how simple cuts can transform your loaf from rustic to remarkable, adding a touch of artistry to every bake. Curious about the secrets to achieving that perfect ear and stunning visual appeal? Keep reading to unlock the techniques and inspiration you need!
- Introduction to Advanced Sourdough Scoring Patterns
- Understanding the Fundamentals of Sourdough Scoring
- Exploring Different Sourdough Scoring Patterns Designs
- Mastering Specific Sourdough Scoring Techniques
- Sourdough Scoring Patterns: Troubleshooting Common Issues
- Advanced Scoring Pattern Examples and Inspirations
- Tips for Perfecting Your Sourdough Scoring Skills
- Conclusion: The Art and Science of Beautiful Sourdough
-
Frequently Asked Questions
- What is sourdough scoring, and why is it important?
- What are some basic sourdough scoring patterns for beginners?
- What tools are recommended for achieving advanced sourdough scoring patterns?
- How deep should I score my sourdough loaf for different patterns?
- What factors besides scoring affect the final appearance of my sourdough loaf?
- Final Reflection: The Art and Science of Sourdough Scoring
- Unleash Your Inner Bread Artist: Master Advanced Scoring Techniques!
Introduction to Advanced Sourdough Scoring Patterns
Elevating Your Sourdough: Beyond Basic Scoring
Moving past simple slashes opens a world of creative expression in your sourdough baking. While a single, central score or a cross shape is functional and effective for basic oven spring, delving into advanced sourdough scoring patterns designs transforms your loaf into a canvas. This stage of baking is where technique truly meets artistry, allowing you to personalize each bake and develop a signature style. It’s about understanding how cuts interact with the dough's structure and oven heat to produce predictable, beautiful outcomes.
Embracing more complex sourdough scoring designs requires practice and patience, but the rewards are loaves that not only taste fantastic but look stunning. Consider the visual impact of a well-executed scoring pattern – it’s often the first thing someone notices about your bread. Whether aiming for intricate geometric shapes, delicate floral motifs, or bold abstract lines, mastering advanced scoring adds a significant layer of skill and satisfaction to your sourdough journey. It's a step that signals confidence and control over your dough.
Why Advanced Scoring Matters: Aesthetics and Functionality
Advanced sourdough scoring patterns designs serve a dual purpose: they are both aesthetically pleasing and functionally crucial for a successful bake. On the aesthetic side, intricate patterns elevate a simple loaf into a piece of edible art. Imagine presenting a loaf adorned with a detailed wheat stalk or a complex geometric tessellation – it speaks volumes about the care and skill invested in its creation. These designs can make your bread stand out, whether for sharing with friends, selling at a market, or simply admiring yourself.
Functionally, advanced scoring is about controlling the expansion of the dough during oven spring. Without scoring, the crust would simply tear haphazardly as the gases within the dough expand rapidly in the hot oven. Strategic cuts provide weak points for the dough to burst through, directing the expansion in a controlled manner.
More elaborate sourdough scoring designs require a deeper understanding of how multiple cuts interact. For instance, shallow decorative cuts might surround a deeper structural score, ensuring the main expansion happens where intended while the decorative elements retain their shape relatively well. The right pattern, executed correctly, maximizes oven spring, contributes to an open crumb structure, and helps achieve a beautiful, caramelized crust.
Understanding the Fundamentals of Sourdough Scoring
The Purpose of Scoring: Controlled Expansion and Crust Development
Scoring, also known as slashing or lame work, is fundamentally about managing the explosive growth that occurs when your shaped sourdough loaf hits the high heat of the oven – the phenomenon known as oven spring. During oven spring, the trapped gases within the dough expand dramatically, causing the loaf to increase significantly in volume. If the crust has already started to set without being scored, the pressure will force the dough to rupture at its weakest points, often resulting in uncontrolled, uneven tears.
By creating intentional cuts (scores) on the surface of the dough just before baking, you are providing designated pathways for this expansion. These cuts offer less resistance than the developing crust, allowing the dough to push outwards and upwards along the score lines. This controlled expansion ensures a more predictable shape, prevents random blowouts, and contributes to a better overall structure and volume. Furthermore, the way the dough expands along the scores influences the development of the crust's texture and color, creating desirable features like the 'ear' on a baguette or the defined edges of a pattern.
Essential Tools for Sourdough Scoring: Lames, Blades, and More
Having the right tools is paramount for achieving clean, precise sourdough scoring patterns designs. The most common and effective tool is a lame (pronounced "lahm"), which is essentially a handle designed to hold a razor blade. Razor blades are incredibly sharp and thin, allowing them to slice through the dough's surface without dragging or catching, which can happen with knives or less sharp blades. Lames come in various forms:
- Straight Lame: Holds the blade flat, ideal for deep, straight cuts or intricate patterns requiring precision.
- Curved Lame: Holds the blade in a curve, perfect for creating the iconic "ear" on loaves by holding the blade at an angle.
- Fixed vs. Adjustable Lames: Some lames have fixed blade positions, while others allow you to change the blade's curve or angle.
Beyond the standard lame, other tools can be useful depending on the complexity of your sourdough scoring patterns designs. Small, sharp scissors can be used for certain decorative cuts or snips, especially for creating leaf-like shapes or simple bursts. A sharp paring knife can work in a pinch, though it's generally harder to achieve the same clean cut as a razor blade. For marking out complex geometric designs before cutting, a light dusting of flour and a stencil or even a ruler can help guide your hand, though the final cuts should always be made with a sharp blade.
Key Techniques: Depth, Angle, and Speed for Optimal Scoring
Mastering sourdough scoring patterns designs goes beyond just drawing shapes; it involves understanding the fundamental techniques of depth, angle, and speed. Depth is critical: structural scores intended to facilitate major expansion (like a central cut) need to be relatively deep, often between 1/2 to 1 inch (1-2.5 cm), depending on the loaf size and hydration.
Shallow cuts, perhaps only 1/4 inch (0.5 cm) deep, are typically used for decorative elements that you want to retain their shape more clearly. Too shallow for a structural cut will result in blowouts elsewhere; too deep for a decorative cut might cause it to merge into the main expansion.
The angle at which you hold the blade significantly impacts the result, particularly for creating an 'ear'. Holding a curved lame at a shallow angle (around 30 degrees or less) almost parallel to the dough's surface lifts a flap of dough that then bakes into a crisp ear. For cuts intended to open symmetrically, like those in a geometric pattern, holding the blade perpendicular (90 degrees) to the surface is usually best.
Speed is also important: a swift, confident cut is much cleaner than a hesitant, slow one. Dragging the blade tears the dough rather than slicing it cleanly, leading to a less attractive opening and potentially hindering optimal oven spring. Practice these three elements on scrap dough or even playdough to build muscle memory before scoring your precious loaves.
Exploring Different Sourdough Scoring Patterns Designs
Geometric Scoring Patterns: Lines, Squares, and Triangles
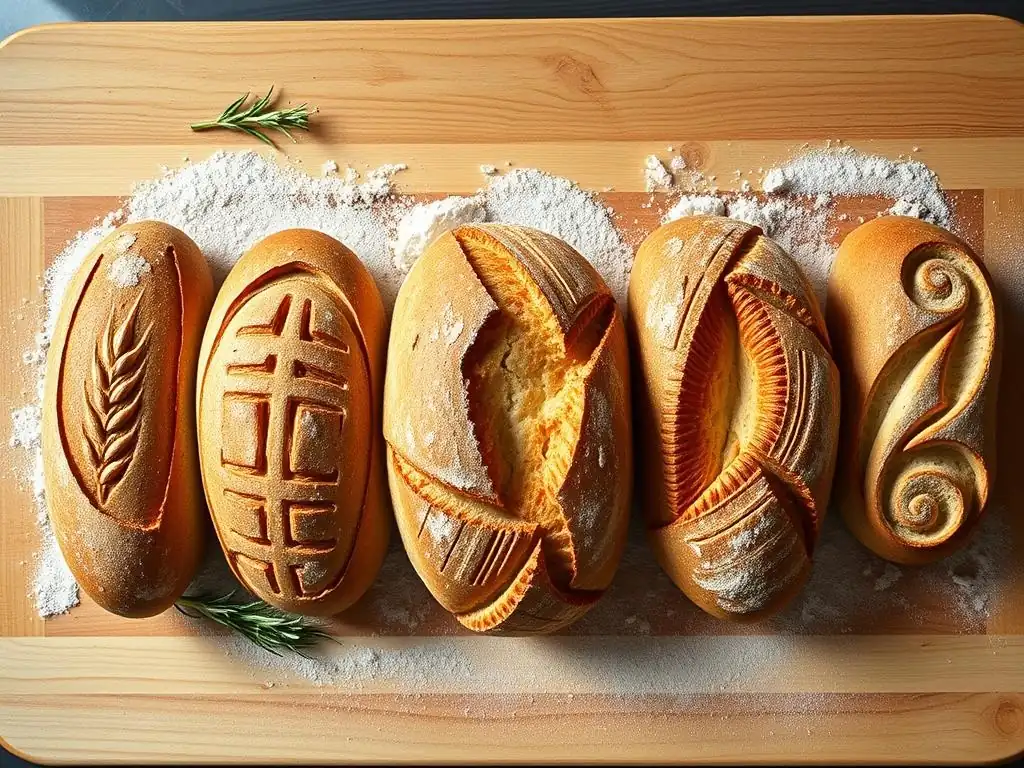
Geometric sourdough scoring patterns designs offer a structured and often striking aesthetic. These patterns rely on straight lines, curves, or points arranged in symmetrical or repeating sequences. Simple geometric scores include crosshatching (multiple parallel lines scored in two directions), creating a grid of squares or diamonds. A single, off-center curved score can create a dramatic sweep. More complex designs might involve dividing the loaf surface into sections and scoring each section with parallel lines or curves radiating from a central point.
The beauty of geometric patterns lies in their precision and the contrast they create with the organic nature of the bread. Implementing these sourdough scoring designs requires careful planning and steady hands. For instance, scoring a series of parallel lines requires consistent depth and spacing to ensure even expansion along each cut. A common pattern involves scoring concentric squares or circles, where the outer cuts are shallower than the inner, central cut to direct expansion inwards while preserving the outer design. These patterns often result in a beautiful crackled or segmented crust appearance after baking.
Creating Intricate Geometric Designs on Sourdough
Creating intricate geometric sourdough scoring patterns designs demands planning and precision. Start by visualizing or even lightly marking your pattern on the proofed dough using a dusting of flour. For a grid pattern, you might make parallel cuts across the width of the loaf, then rotate it 90 degrees and make another set of parallel cuts perpendicular to the first. Ensure your blade is sharp and you make each cut in one fluid motion. For patterns involving curves or radiating lines, consider using a straight lame and rotating the loaf or your hand to follow the intended path.
A popular intricate geometric pattern is the 'starburst' or 'sunburst'. This involves scoring a central point and then making several cuts radiating outwards from that point, like spokes on a wheel. The depth of the cuts can vary, with deeper cuts towards the center to encourage maximum expansion there. Another challenging but rewarding design is a weave or basketweave pattern, achieved by making overlapping curved cuts. For all intricate geometric sourdough scoring designs, consistency in depth and angle is key to ensure the pattern opens up evenly during baking.
Floral Sourdough Scoring: Wheat Stalks, Leaves, and Flowers
Floral sourdough scoring patterns designs bring a touch of nature and organic beauty to your loaves. These patterns mimic elements like wheat stalks, leaves, flowers, or vines. They are often favored for their elegant and artistic appearance, turning a loaf into a centerpiece. Creating these designs typically involves a combination of longer, structural cuts and smaller, decorative snips or slices. The goal is often to create a sense of movement and growth on the crust.
Common floral sourdough scoring designs include a prominent wheat stalk running the length of the loaf, often paired with smaller leaf-like cuts along the sides. Single large leaves or clusters of smaller leaves are also popular. More ambitious designs might attempt stylized flowers or vines winding across the surface. These patterns often require a mix of scoring techniques, utilizing both the edge of the blade for long cuts and sometimes the tip for delicate details or snips. The natural expansion of the dough during baking helps to open these cuts, making the design more pronounced and beautiful.
Step-by-Step Guide to Scoring Floral Designs
Let's outline a basic approach for a common floral pattern: the wheat stalk with leaves, a popular choice for sourdough scoring patterns designs.
- Prepare your loaf: Ensure your loaf is well-proofed and chilled (chilling the dough firms it up, making scoring easier and cleaner).
- Identify the main stem: Using a straight lame, make one relatively deep, slightly curved cut running the length of the loaf. This will be your wheat stalk stem. Aim for about 1/2 to 3/4 inch deep.
- Add wheat grains: Along one side of the stem cut, make a series of shallow, short, curved cuts emanating outwards and slightly upwards. Repeat on the other side, staggering the cuts to mimic the arrangement of grains on a wheat stalk. These cuts should only be about 1/4 inch deep.
- Score the leaves (optional): If adding leaves, use the tip of your blade or small, sharp scissors to make small snips or cuts resembling leaf shapes near the base or sides of the loaf. For a simple leaf, you can make a central shallow cut and then score angled lines radiating from it.
- Bake: Transfer your beautifully scored loaf to the oven immediately. The deeper stem cut will provide the main expansion point, while the shallower grain and leaf cuts will open subtly, retaining their shape.
Abstract Scoring Techniques: Unleashing Your Creativity
Abstract sourdough scoring patterns designs are where you truly let your imagination run wild. Unlike geometric or floral patterns that mimic specific shapes, abstract scoring is about creating unique, non-representational designs. This could involve swirling lines, random slashes, dots, or any combination of cuts that appeals to your artistic sensibility. The focus is often on texture, flow, and the interplay of expansion points across the loaf's surface.
Experimenting with abstract sourdough scoring designs is a fantastic way to develop your intuition about how dough behaves. You might try covering the loaf with many small, shallow cuts, leading to a crackled appearance. Or perhaps a few bold, sweeping curves that allow large areas to expand dramatically. Abstract scoring encourages you to think outside the box and create truly original loaves. It's a less structured approach, allowing for spontaneity and personal expression.
Experimenting with Freehand Sourdough Art
Freehand sourdough art involves scoring without a predefined pattern or guide, relying solely on your hand and eye. This is the essence of abstract sourdough scoring patterns designs. Begin by simply experimenting with different types of cuts – long, short, curved, straight, deep, shallow. Try combining them in unexpected ways. For instance, you might make a few deep, structural cuts and then fill the surrounding areas with numerous small, shallow decorative slashes or snips.
Consider the directionality of your cuts and how they might interact. Swirling patterns created with a curved lame can lead to fascinating expansions. A series of dots made by poking the dough with the tip of a blade can create a textured effect. Don't be afraid to fail – some of the most interesting results come from unplanned cuts. The key to successful freehand sourdough scoring designs is confidence and a willingness to experiment. Each loaf becomes a unique piece, reflecting your mood and creativity at that moment.
Mastering Specific Sourdough Scoring Techniques
The "Ear" Technique: Achieving a Dramatic Score
The "ear" is a highly sought-after feature in sourdough scoring patterns designs, particularly on elongated loaves like bâtards or baguettes. It refers to the thin, crisp flap of crust that forms along the edge of a single, well-executed score. Achieving a prominent ear is a sign of good dough development, proper proofing, and skillful scoring. It adds both visual appeal and a delightful textural element to the bread.
To create an ear, you typically use a curved lame (or a straight lame held at an angle) and make a single, decisive cut along one side of the loaf. The blade should be held at a very shallow angle to the surface of the dough, ideally around 15-30 degrees. This angle allows the blade to slice just under the skin of the dough, lifting a flap.
The cut needs to be deep enough to allow significant expansion (often 1/2 to 3/4 inch deep) but not so deep that the dough collapses. As the loaf bakes, the dough expands upwards and outwards along this cut, pushing the lifted flap into that beautiful, crisp ear.
Creating a "Grigne": Optimizing Oven Spring
"Grigne" (pronounced "green-yuh") is the French term for the crisp, blistered edge that forms along a score line, often encompassing the "ear" but also referring to the overall opening and crust development facilitated by scoring. Achieving a good grigne is synonymous with optimizing oven spring and developing a fantastic crust. It's not just about making a cut; it's about making the right cut for your specific dough and desired outcome.
The ideal grigne is characterized by a clean, smooth opening that reveals a beautiful, caramelized interior crust. The edges of the grigne should be thin and crisp, sometimes with small blisters. To optimize grigne development when practicing sourdough scoring patterns designs, ensure your dough is properly fermented and proofed – it needs enough strength and gas production to expand vigorously in the oven.
Your scoring tool must be razor-sharp to avoid dragging, which inhibits a clean opening. Finally, baking in a hot oven with sufficient steam is crucial. The steam keeps the surface of the dough pliable initially, allowing the scores to open maximally before the crust sets.
Scoring for Different Sourdough Hydration Levels
The hydration level of your sourdough dough significantly impacts how it behaves during scoring and baking, influencing the best approach for your sourdough scoring patterns designs. Lower hydration doughs (say, 65-70% hydration) are typically firmer and hold their shape well. They are relatively easy to score, and you can often achieve very precise, intricate patterns. The cuts tend to stay put and open predictably.
Higher hydration doughs (75-85%+ hydration) are wetter, stickier, and more challenging to handle and score. They are more prone to spreading and can be difficult to score cleanly if not handled correctly. For high-hydration doughs, swift, confident cuts are essential.
Chilling the dough thoroughly before scoring is highly recommended as it firms up the surface. Simple, bold sourdough scoring designs with fewer, deeper cuts often work better than intricate patterns, as too many shallow cuts can cause the dough to lose structure or the patterns to merge messily during expansion. Understanding your dough's hydration is key to choosing and executing effective scoring patterns.
Sourdough Scoring Patterns: Troubleshooting Common Issues
Preventing Collapsed Loaves: Understanding Scoring Depth
One frustrating issue when experimenting with sourdough scoring patterns designs is a loaf that collapses or spreads excessively after scoring. This often relates to the depth and placement of your cuts relative to the dough's structure and proofing level. If your structural scores are too deep or too numerous for the dough's strength, particularly if the dough is slightly over-proofed, the cuts can weaken the loaf's structure too much, causing it to deflate before or during baking.
To prevent collapse, ensure your dough has sufficient gluten development to hold its shape. For your main structural score(s), aim for a depth that allows for expansion (e.g., 1/2 to 1 inch) but doesn't slice through the majority of the loaf's height. Decorative cuts should always be shallow (1/4 inch or less).
If creating complex sourdough scoring designs with many cuts, ensure there are still underlying structural elements holding the loaf together. Practice helps you gauge the right depth for different doughs and designs. Also, ensure your dough isn't significantly over-proofed, as this weakens the gluten structure, making it more susceptible to collapse upon scoring.
Avoiding Over-Scoring: Recognizing the Limits
Over-scoring is another pitfall when attempting elaborate sourdough scoring patterns designs. While it might seem like more cuts equal more artistry, too many scores, especially if they are all deep or too close together, can lead to several problems. As mentioned, it can weaken the dough's structure, potentially causing collapse. It can also prevent the desired oven spring, as the dough may expand outwards through numerous small cuts rather than pushing upwards through intended structural scores.
Recognizing the limits of sourdough scoring designs for your specific dough is crucial. A very wet dough or a dough with less gluten development might not support highly intricate patterns with many cuts. Start with simpler patterns and gradually increase complexity as you gain experience. Observe how your dough behaves with different scoring patterns. If your loaf consistently spreads thin or fails to achieve good height, you might be over-scoring or making your cuts too deep or numerous for that particular dough. Sometimes, less is more, allowing the dough's natural expansion to enhance a few well-placed scores.
Dealing with Dull Blades: Maintaining Your Scoring Tools
A dull blade is the enemy of clean, precise sourdough scoring patterns designs. A sharp blade slices through the dough's surface cleanly, creating defined edges that open beautifully in the oven. A dull blade, however, tends to drag and tear the dough, resulting in ragged edges, inconsistent openings, and potentially hindering proper oven spring. This is particularly noticeable when attempting intricate patterns or thin lines.
Regularly changing your razor blade is the simplest solution. Razor blades are inexpensive and designed for single or very limited use in scoring before they lose their edge. Don't try to push a blade for too many loaves, especially when working on detailed sourdough scoring designs. A good rule of thumb is to use a fresh blade every 1-3 loaves, depending on the complexity of the scoring and the stickiness of the dough.
Always handle blades with care and store them safely. Some lames allow you to reverse the blade to use the other edge, doubling its lifespan. Keeping your lame clean and dry also helps maintain the blade's effectiveness.
Advanced Scoring Pattern Examples and Inspirations
Showcase of Stunning Sourdough Scoring Art
The world of sourdough scoring patterns designs is vast and inspiring. Online communities, baking books, and social media platforms are filled with stunning examples of bakers treating their loaves as canvases. You'll find everything from simple yet elegant geometric repeats to breathtakingly intricate floral scenes and abstract masterpieces. These showcases demonstrate the incredible potential for creativity in sourdough scoring.
Examples include loaves scored to look like pinecones, detailed leaves with veins, complex woven baskets, geometric mandalas, and even narrative scenes. Some bakers use stencils or freehand drawing before scoring to plan their intricate sourdough scoring designs. Observing these examples can provide a wealth of ideas and motivation.
Pay attention not just to the patterns themselves but also to how they open during baking – the grigne tells the story of the scoring technique and the dough's health. Use these showcases as inspiration, but remember to start with patterns that match your current skill level and gradually work your way up to more complex designs.
Wheat Stalk Pattern: Detailed Description and Scoring Guide
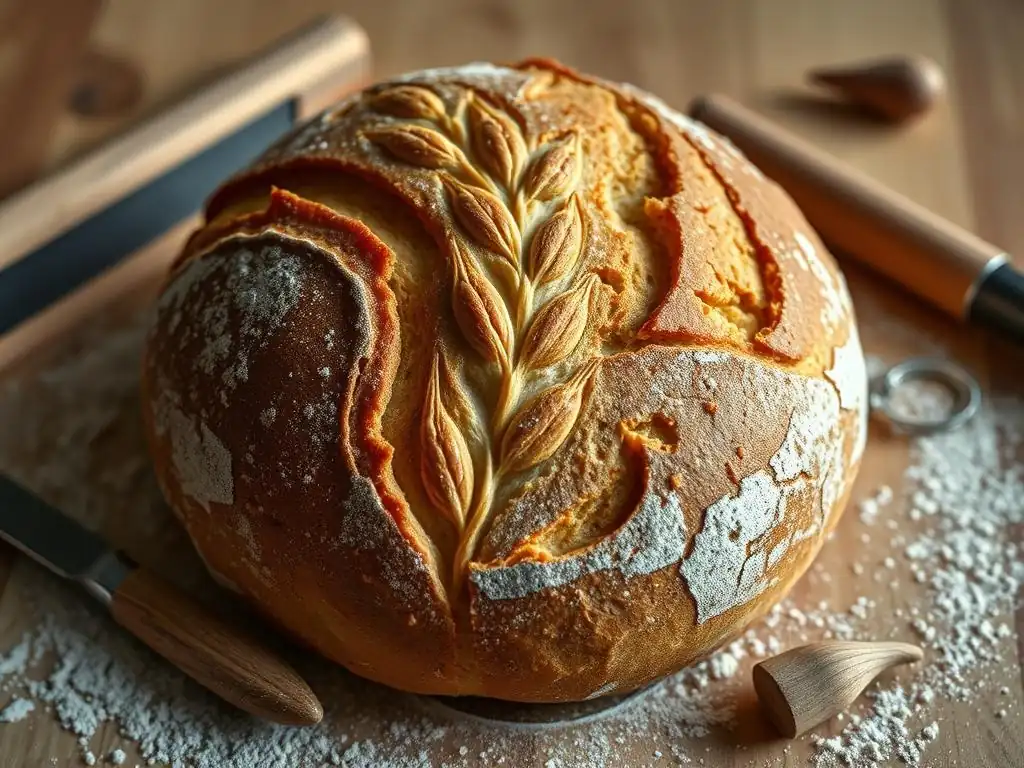
The wheat stalk is a classic and popular choice among sourdough scoring patterns designs due to its organic beauty and relative manageability. It typically features a central stem with 'grains' branching off to the sides.
- Description: A single, slightly curved deep cut forms the stem. Along one side of the stem, a series of short, curved cuts (like crescent moons) are made, angled upwards and outwards. These are repeated on the other side, staggered from the first set.
- Scoring Guide:
- Chill your proofed loaf for at least 30-60 minutes.
- Using a straight lame held at about a 45-degree angle, make a single, sweeping cut down the length of the loaf. This should be about 1/2 to 3/4 inch deep. This is your stem.
- Switch to holding your lame almost parallel to the dough (15-30 degrees angle). Starting near the bottom of the stem, make a short, curved cut outwards and slightly upwards, meeting the stem cut.
- Move up the stem about 1/2 inch and make another similar curved cut on the opposite side of the stem.
- Continue alternating sides as you move up the stem, making slightly smaller cuts towards the top. Ensure your 'grain' cuts are relatively shallow (1/4 inch or less) so they open delicately.
- Bake immediately with steam.
Celtic Knot Pattern: Detailed Description and Scoring Guide
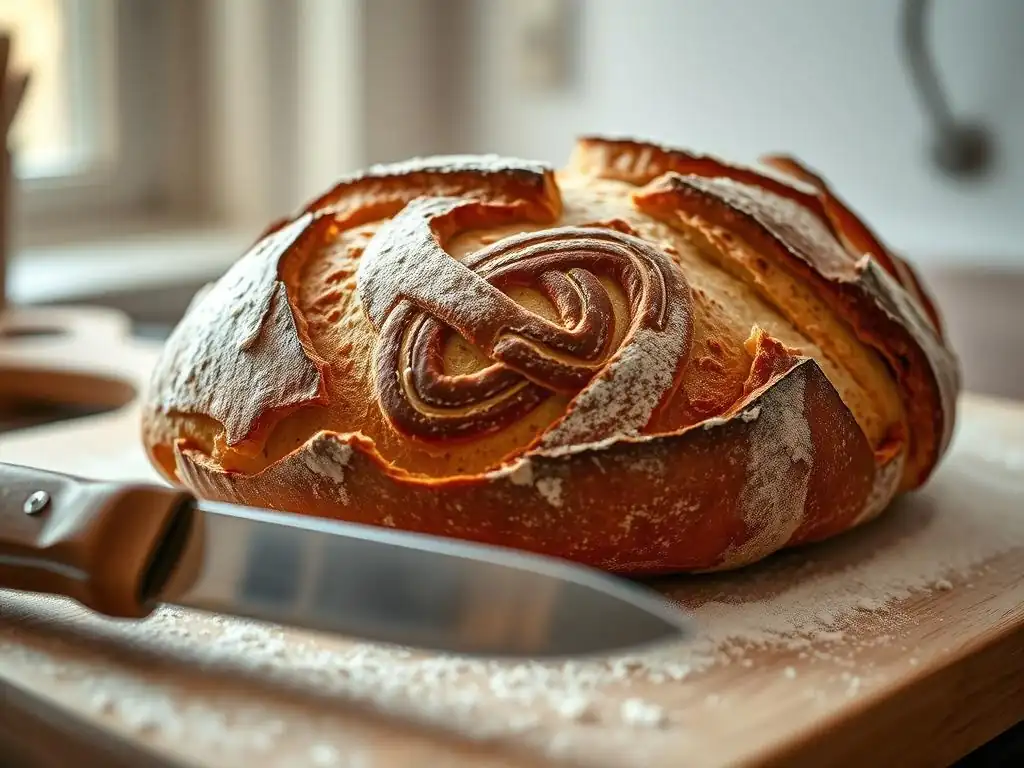
The Celtic knot is a complex and impressive geometric pattern in the realm of sourdough scoring patterns designs, symbolizing eternity or interconnectedness. It requires careful planning and precise execution.
- Description: A continuous line that weaves over and under itself to form intricate knots. On a round loaf, this often involves scoring a central knot with surrounding loops or a pattern covering the entire surface.
- Scoring Guide: This pattern is challenging and often benefits from planning.
- Chill your proofed round loaf thoroughly.
- Lightly dust the surface with flour and, if helpful, use a stencil or draw the basic outline of the knot with a skewer very gently.
- Using a sharp straight lame held perpendicular (90 degrees) to the surface, begin scoring the pattern. The key is to decide which lines 'go over' and which 'go under'.
- Score the lines that 'go over' first, making them slightly deeper (say, 1/2 inch).
- Then, score the lines that 'go under', making these cuts shallower (1/4 inch or less) where they pass "under" the deeper lines. This difference in depth helps create the illusion of weaving as the dough expands.
- Work slowly and precisely, following your guide lines. A slight hesitation or change in angle can disrupt the pattern.
- Bake immediately with steam. This pattern relies heavily on even expansion to maintain its form.
Mandala Pattern: Detailed Description and Scoring Guide
Mandala sourdough scoring patterns designs are circular geometric or floral patterns radiating from a central point, symbolizing harmony or wholeness. They can range from simple to incredibly intricate.
- Description: A circular design on a round loaf, often starting with a central point or small circle, surrounded by concentric rings of repeating elements like petals, points, or geometric shapes.
- Scoring Guide: Mandala patterns require careful planning and often benefit from dividing the loaf's surface mentally (or lightly marking) into sections.
- Chill your proofed round loaf well.
- Decide on your design – how many points, rings, and what elements they will contain. You might lightly mark the center and radial lines with flour.
- Start from the center. You could score a small central circle or a few radiating lines.
- Work outwards in rings. For each ring, repeat your chosen element (e.g., a curved slash like a petal, a straight line, a dot). Ensure consistent spacing between elements in a ring.
- Varying the depth of your cuts is crucial for definition. The main structural cuts might be deeper, while decorative elements are shallower. For example, the lines defining petals might be shallow, while a cut between petals is slightly deeper to encourage separation.
- Hold your lame at an angle appropriate for the desired effect – perpendicular for clean openings, angled for slight 'ears' on curved elements.
- Bake immediately with steam. The even expansion of a round loaf is ideal for maintaining the symmetry of mandala sourdough scoring designs.
Tips for Perfecting Your Sourdough Scoring Skills
Practice Makes Perfect: Regular Scoring Exercises
Like any skill, mastering advanced sourdough scoring patterns designs requires consistent practice. Don't expect your first attempt at a complex pattern to be flawless. Set aside time to practice scoring regularly, even if it's just on a portion of your loaf or on scrap dough.
Consider dedicating a few loaves specifically to practicing different sourdough scoring designs. You can even practice on proofed dough that you then bake as usual; the practice itself is valuable, regardless of the final loaf's appearance. Some bakers practice on playdough or even just draw patterns on paper to build muscle memory and plan designs. The more you practice making clean cuts with confidence using your lame, the better you will become at executing intricate patterns on your actual loaves. Aim for consistency in depth, angle, and speed with each stroke.
Documenting Your Progress: Learning from Each Bake
To truly improve your sourdough scoring patterns designs, it's incredibly helpful to document your work. Take photos of your loaves before scoring, immediately after scoring, and after baking. Keep notes about the dough's hydration, proofing time, the specific scoring pattern used, the tools you used, and any challenges you encountered.
Reviewing these notes and photos will help you understand what worked well and what didn't. Did a particular pattern collapse? Was the grigne uneven? Did the decorative cuts disappear? By correlating the results with your notes on the scoring technique and dough characteristics, you can identify areas for improvement. This systematic approach to documenting your sourdough scoring designs will accelerate your learning and help you refine your techniques over time.
Seeking Inspiration: Exploring Online Communities and Resources
The sourdough baking community is incredibly generous with sharing knowledge and inspiration for sourdough scoring patterns designs. Numerous online platforms, including Instagram, Facebook groups, and dedicated baking forums, showcase stunning examples of scoring art from bakers around the world.
Spend time browsing these resources to see the vast array of possible sourdough scoring designs. Many bakers also share videos or step-by-step guides for creating specific patterns. Look for bakers whose style you admire and try to replicate their techniques. Don't be afraid to ask questions in friendly online communities. Learning from others, seeing diverse approaches to scoring, and staying updated on trends in sourdough scoring patterns designs will keep your own baking fresh and exciting.
Conclusion: The Art and Science of Beautiful Sourdough
Combining Technique and Creativity for Stunning Results
Mastering advanced sourdough scoring patterns designs is a journey that beautifully marries technical skill with artistic expression. It's about understanding the science of how dough behaves under heat and using that knowledge to execute creative visions with precision. Each score is a deliberate action, influencing not just the aesthetics of the final loaf but also its structure and crust development. The ability to consistently produce loaves with both excellent internal structure and breathtaking external patterns is a hallmark of an accomplished sourdough baker.
The process encourages experimentation and learning from every bake. By focusing on clean cuts, appropriate depth and angle, and understanding your dough, you gain the control necessary to move beyond basic slashes into complex and personalized sourdough scoring designs. This combination of rigorous technique and boundless creativity is what makes advanced scoring such a rewarding aspect of sourdough baking.
Continuing Your Journey in Advanced Sourdough Baking
The world of sourdough scoring patterns designs is constantly evolving, with bakers pushing the boundaries of what's possible. Continue to challenge yourself by attempting new and more intricate patterns. Don't be discouraged by attempts that don't turn out exactly as planned; every loaf is a learning opportunity. Revisit classic sourdough scoring designs like the wheat stalk or geometric grids to refine your technique, and then explore abstract or freehand styles to unleash your personal artistry.
As you grow in skill, you'll develop a deeper intuition for how different doughs respond to scoring. This understanding will empower you to create your own unique sourdough scoring patterns designs. Remember that the goal is not just a pretty loaf, but a delicious one too. Advanced scoring is the final artistic flourish on a foundation of good dough development and baking practice. Keep baking, keep practicing your sourdough scoring patterns, and enjoy the journey of turning simple ingredients into edible works of art.
Frequently Asked Questions
What is sourdough scoring, and why is it important?
Sourdough scoring is the act of making cuts on the surface of your loaf before baking. It's important because it controls how the bread expands in the oven, preventing it from cracking uncontrollably and allows for artistic designs.
What are some basic sourdough scoring patterns for beginners?
Beginner-friendly patterns include a simple slash down the center, a single curved line, or a cross pattern. These are easy to execute and still provide ample room for the bread to expand.
What tools are recommended for achieving advanced sourdough scoring patterns?
A lame is the primary tool, ideally with a sharp, replaceable blade. Some bakers also use scissors for more intricate cuts and designs.
How deep should I score my sourdough loaf for different patterns?
The depth varies depending on the desired effect. For basic expansion, a quarter-inch deep cut is sufficient. More intricate designs may require varying depths to control the rise.
What factors besides scoring affect the final appearance of my sourdough loaf?
Factors include dough hydration, proofing time, and oven temperature. These all play a crucial role in how the loaf rises and ultimately looks, alongside your scoring pattern.
Final Reflection: The Art and Science of Sourdough Scoring
The intricate world of sourdough scoring is far more than just a functional act; it's a powerful expression of creativity that directly impacts the final product's beauty and even its bake. The techniques explored in this article—from classic ear cuts to ambitious designs—are not merely decorative flourishes, but tools that allow bakers to control oven spring, enhance crust texture, and ultimately, elevate their loaves to works of art.
The journey from simple slashes to elaborate patterns reflects a broader cultural shift in baking, a move away from purely functional approaches towards a more mindful and artistic practice. We've seen a resurgence of interest in traditional techniques, coupled with a desire for personalization and self-expression. This resonates deeply with me; the act of scoring becomes a meditative process, a moment of quiet contemplation before the magic of the oven transforms flour and water into something truly special. The baker's touch is not just in the recipe, but in the intention behind each step.
Consider the possibilities: What unique patterns will you create? Will you experiment with different blade types, depths, and angles? The techniques discussed here are a starting point, a springboard for your own exploration. Don't be afraid to fail, to experiment, and to let your creativity guide your hand. Each loaf is a canvas, and your scoring is the brushstroke that defines its character. Embrace the journey, and let your sourdough scoring reflect your unique artistry.
Unleash Your Inner Bread Artist: Master Advanced Scoring Techniques!
Thanks for taking the time to explore the artistry of advanced bread scoring! We hope you now feel empowered to create truly stunning loaves. Ready to put your new skills into practice?
- Try a new scoring pattern: Challenge yourself with a design you haven't attempted before – maybe a chevron, a sail, or even a personalized monogram! This is where the real fun begins.
- Document your baking journey: Share your creations (and any spectacular fails!) on social media using #BakeWithEaseAdvancedScoring. Let's inspire each other!
- Explore alternative flours and hydration levels: How do different flours and hydration percentages affect your scoring results? This is your chance to truly experiment and personalize your baking.
What unique scoring pattern will you bake next? Let us know in the comments below!