
The Ultimate Guide to Troubleshooting Common Macaron Problems

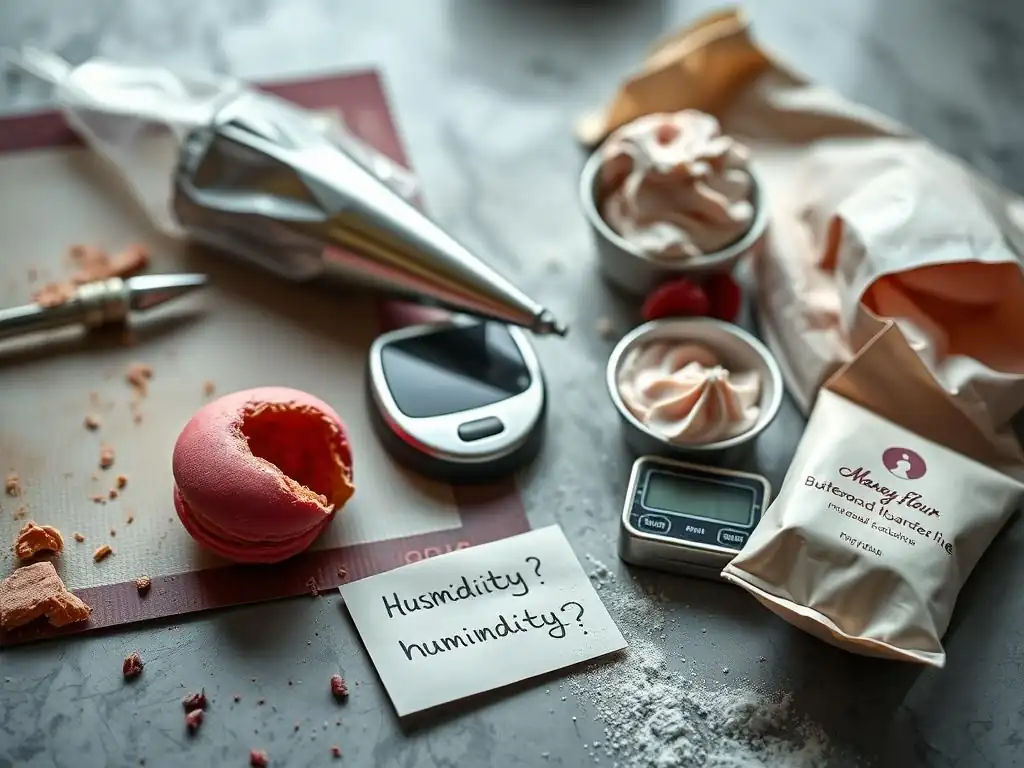
Welcome to BakeWithEase, your baking sanctuary! Ever dreamt of perfectly smooth, delicate macarons but found yourself facing cracked shells or hollow interiors? You're not alone! Dive into our ultimate guide and unlock the secrets to mastering these notoriously tricky treats. Get ready to transform your macaron mishaps into masterpieces with our macaron troubleshooting tips for beginners – let's bake with ease!
- Introduction to Macaron Troubleshooting: BakeWithEase Guide
- Common Macaron Problems and Solutions: A Comprehensive Troubleshooting Guide
- Macaron Recipe Troubleshooting: Ingredient Specific Issues
- Advanced Macaron Troubleshooting Tips for Beginners
- Macaron Troubleshooting: Mastering Macaronage Technique
- Macaron Troubleshooting: Baking Time and Temperature
- Macaron Troubleshooting: Humidity and Environment
- Macaron Troubleshooting: Storage and Maturation
- Conclusion: Become a Macaron Troubleshooting Pro
-
Frequently Asked Questions
- What are the most common mistakes beginners make when baking macarons?
- Why are my macaron shells cracking during baking?
- My macarons have "feet" (the frilly edge), but they are hollow inside. What causes this?
- What can I do if my macaron batter is too runny?
- How long should I let my macaron shells rest before baking to form a skin?
- Final Reflection: Mastering the Delicate Art of the Macaron
- Unlock Your Macaron Mastery!
Introduction to Macaron Troubleshooting: BakeWithEase Guide
Why Macarons Can Be Tricky: Understanding the Challenges
Macarons have a reputation for being notoriously finicky, and for good reason! These delicate French confections require precision, patience, and an understanding of how ingredients interact and respond to technique and environment. Unlike baking a simple batch of cookies, macarons are highly sensitive to seemingly minor factors such as humidity levels, oven temperature fluctuations, and even the age of your egg whites. Many beginners feel overwhelmed when their first attempts don't yield perfect, shiny shells with delicate "feet." It's a common experience, so don't be discouraged – it's all part of the learning process!
The challenges often stem from the specific structure of a macaron, which relies on a stable meringue base and a delicate almond flour mixture. Achieving the correct consistency for piping, allowing the shells to dry properly to form a skin, and baking them at just the right temperature for the right amount of time are critical steps.
If any one of these steps is slightly off, it can lead to a cascade of issues, from cracked shells to hollow interiors or a lack of those signature "feet." This is why understanding macaron troubleshooting tips beginners can use is so valuable – it turns potential failures into learning opportunities.
This Macaron Troubleshooting Guide: What You'll Learn
Welcome to your comprehensive guide designed specifically to help you navigate the often-bumpy road of macaron making. This guide will walk you through the most common problems bakers face when making macarons, explaining why they happen and, more importantly, providing practical, actionable macaron troubleshooting tips beginners can easily implement. We'll cover everything from the initial mixing stage to baking and even storage.
You'll learn how to identify the signs of under- or over-mixed batter, understand the critical role of resting time, and discover how your oven might be contributing to your macaron woes. By the end of this guide, you'll have a solid toolkit of macaron troubleshooting techniques to help you diagnose issues in your own kitchen and improve your macaron-making success rate. Think of this as your personal BakeWithEase mentor, helping you turn those tricky batches into beautiful, delicious macarons.
Common Macaron Problems and Solutions: A Comprehensive Troubleshooting Guide
Problem 1: Cracked Macaron Shells - Causes and Fixes
Identifying the Reasons for Cracked Macaron Shells
Cracked macaron shells are one of the most frustrating problems bakers encounter. When you pull your tray out of the oven, expecting smooth, perfect domes, and instead find a landscape of fissures, it's easy to feel defeated. Several factors can contribute to this issue.
One common culprit is insufficient resting time, which prevents a proper skin from forming on the surface of the macaron. Without this skin, the expanding air inside the shell during baking has nowhere to go but through the top, causing cracks. Another significant factor is trapped air within the batter; improper piping or insufficient tapping of the tray can leave large air pockets that burst during baking.
Furthermore, issues related to the oven itself can cause cracking. An oven that is too hot, or has uneven heating, can cause the outside of the macaron to set too quickly while the inside is still expanding, leading to stress and cracking. Similarly, opening the oven door too early to check on the macarons can cause a sudden drop in temperature and air pressure, which can also result in cracking. Understanding these potential causes is the first step in effective macaron troubleshooting.
Troubleshooting Cracked Shells: Adjusting Oven Temperature and Time
If you suspect your oven temperature is the issue behind your cracked shells, slight adjustments can make a significant difference. Macarons typically bake at a lower temperature than many other cookies, often in the range of 280°F to 320°F (140°C to 160°C). If your oven runs hot or you've been baking at a higher temperature, try lowering it by 10-15°F (5-8°C).
This allows the macarons to bake more gently and evenly, giving the structure time to stabilize without cracking. It's also helpful to use an oven thermometer to verify the actual temperature inside your oven, as built-in thermostats can be inaccurate by as much as 25-50°F (14-28°C).
Increasing the baking time slightly when you lower the temperature is also a common macaron troubleshooting tip. For example, if you were baking at 320°F for 12 minutes and getting cracks, try lowering the temperature to 300°F and baking for 14-16 minutes. This extended, gentler bake helps ensure the macaron is cooked through without creating excessive pressure that leads to cracking. Pay attention to how your macarons behave at the lower temperature; they should puff up evenly and develop feet without the tops splitting.
Macaron Shell Cracking: The Importance of Resting
Resting the piped macaron shells before baking is a non-negotiable step in successful macaron making, and it's crucial for preventing cracks. After piping your batter onto baking sheets, you need to let them sit at room temperature until a skin forms on the surface. You can test this by gently touching the top of a macaron; your finger should not stick, and the surface should feel dry and smooth. This resting period allows the tops to dry and become slightly firm, creating a stable cap.
The duration of the resting period varies depending on the humidity of your kitchen. In a dry environment, it might only take 30-60 minutes. In a humid climate, it could take 1-3 hours, or even longer. Skipping or shortening this step significantly increases the likelihood of cracked shells because the steam generated inside the macaron during baking has no firm surface to push against, causing it to erupt through the top. Patience during the resting phase is a key macaron troubleshooting strategy for beginners struggling with cracking.
Problem 2: Hollow Macarons - Preventing Air Gaps
Understanding Hollow Macarons: Why They Happen
Hollow macarons, where the shell looks perfect on the outside but is empty underneath the dome, are another common issue that plagues bakers. While a slight air gap is sometimes acceptable, large, completely hollow shells indicate a problem in the process. The primary reason for hollows is often related to the meringue structure or the macaronage technique. If the meringue isn't stable enough (e.g., egg whites weren't whipped to stiff peaks, or sugar wasn't incorporated properly), it can deflate during baking, leaving a void.
Another critical factor is under-macaronage. If the batter isn't mixed enough, the meringue and dry ingredients aren't fully incorporated, leading to an unstable structure that collapses slightly as it bakes and cools. Conversely, while less common as a cause of hollows than under-mixing, severely over-macaronaged batter can also contribute to hollowness because the meringue structure is completely broken down. The delicate balance of the batter consistency is key to preventing these frustrating air gaps.
Macaron Troubleshooting for Hollows: Mastering the Macaronage Technique
Macaronage, the process of folding the dry ingredients (almond flour and powdered sugar) into the meringue, is arguably the most critical step in achieving non-hollow macarons. The goal is to deflate the meringue just enough to create a batter that flows like "slow-moving lava" or "ribbon," but not so much that all the air is knocked out.
Under-macaronaged batter will be too stiff and won't flow smoothly, often resulting in lumpy shells with potential hollows or peaks that don't subside. Over-macaronaged batter will be too runny and thin, spreading excessively and also potentially leading to hollows due to a completely destroyed meringue structure.
To troubleshoot hollows caused by macaronage, focus on achieving the correct consistency. Mix until the batter flows smoothly off your spatula in a thick ribbon. If you lift the spatula, the ribbon should fall back into the bowl and slowly disappear back into the mass of batter within 10-20 seconds. Practice observing this consistency; it takes feel and experience. Many macaron troubleshooting tips beginners receive emphasize this stage because it's where many problems originate. Mixing just a few extra folds can mean the difference between perfect shells and hollow ones.
The Role of Egg Whites in Avoiding Hollow Macarons
The quality and preparation of your egg whites play a significant role in preventing hollows. Using aged egg whites (separated a day or two in advance and stored in the fridge, then brought to room temperature) is often recommended. Aging is thought to slightly dehydrate the whites, making them easier to whip into a stable meringue. However, many bakers successfully use fresh, room-temperature egg whites. The key is ensuring they are whipped to the correct stage: stiff, glossy peaks.
Stiff peaks mean that when you lift the whisk, the meringue stands up straight without drooping. If your meringue is under-whipped (soft or medium peaks), it won't provide enough structure to support the macaron shell during baking, leading to collapse and hollows. Ensure your mixing bowl and whisk are scrupulously clean and free of any grease or egg yolk, as even a tiny amount can prevent the egg whites from whipping properly. A stable, well-formed meringue is the foundation for solid, non-hollow macaron shells.
Problem 3: Macarons with No Feet - Achieving Perfect Macaron Feet
What are Macaron Feet and Why are They Important?
The "feet" (or pied in French) are the ruffled base of the macaron shell, a signature characteristic that lifts the shell slightly off the baking surface. They form when the macaron is baking and the skin on the top of the shell has set. The heat from the oven causes the batter inside to expand and push outwards and upwards, but because the top is firm (thanks to the resting period), the expansion is forced downwards, creating the ruffled edge at the base.
The presence of feet is crucial for both aesthetics and texture. A macaron without feet often looks flat or like a simple cookie, lacking the elegant lift. Texturally, the feet contribute to the slight chewiness and structure of the shell before you reach the softer interior. Troubleshooting macarons with no feet is a common goal for beginners aiming for that classic macaron look.
Troubleshooting Macarons with No Feet: Recipe Adjustments
If your macarons consistently bake without feet, examining your recipe and proportions is a good starting point for troubleshooting. An incorrect ratio of dry ingredients to meringue can sometimes inhibit foot development. For example, if there's too much liquid or if the batter is significantly over-macaronaged, the structure might be too weak to form a stable foot. Ensure you are weighing your ingredients accurately using a kitchen scale, as volume measurements (cups) are not precise enough for macaron making.
Another recipe-related issue could be the type of sugar used or how it's incorporated into the meringue. Using superfine or caster sugar (granulated sugar that's ground finer) helps it dissolve more easily into the egg whites, creating a smoother, more stable meringue. Adding the sugar slowly, one spoonful at a time, while whipping the egg whites allows the sugar to dissolve fully and build a strong meringue structure capable of developing feet. Ensure the meringue is whipped to stiff, glossy peaks before folding in the dry ingredients.
Macaron Feet Troubleshooting: Humidity and Environmental Factors
Environmental conditions, particularly humidity, significantly impact whether macarons develop feet. High humidity prevents the macaron shells from forming a proper skin during the resting period. As discussed earlier, a set skin on the top is essential for forcing the batter's expansion downwards to create feet. If the tops are still tacky when they go into the oven, the expansion might escape upwards, leading to cracks or shells that simply puff up without lifting.
If you live in a humid climate, finding effective macaron troubleshooting tips beginners can use for this issue is vital. Try extending the resting time considerably, perhaps several hours, until the shells are dry to the touch. Using a fan in the room (not blowing directly on the macarons) can help circulate air and speed up drying. Some bakers even use a dehumidifier in their kitchen. Ensuring adequate resting time in a relatively dry environment is one of the most impactful steps you can take to encourage those coveted feet.
Problem 4: Wrinkled Macaron Shells - Smooth Surfaces Solutions
Why Macaron Shells Wrinkle: Common Culprits
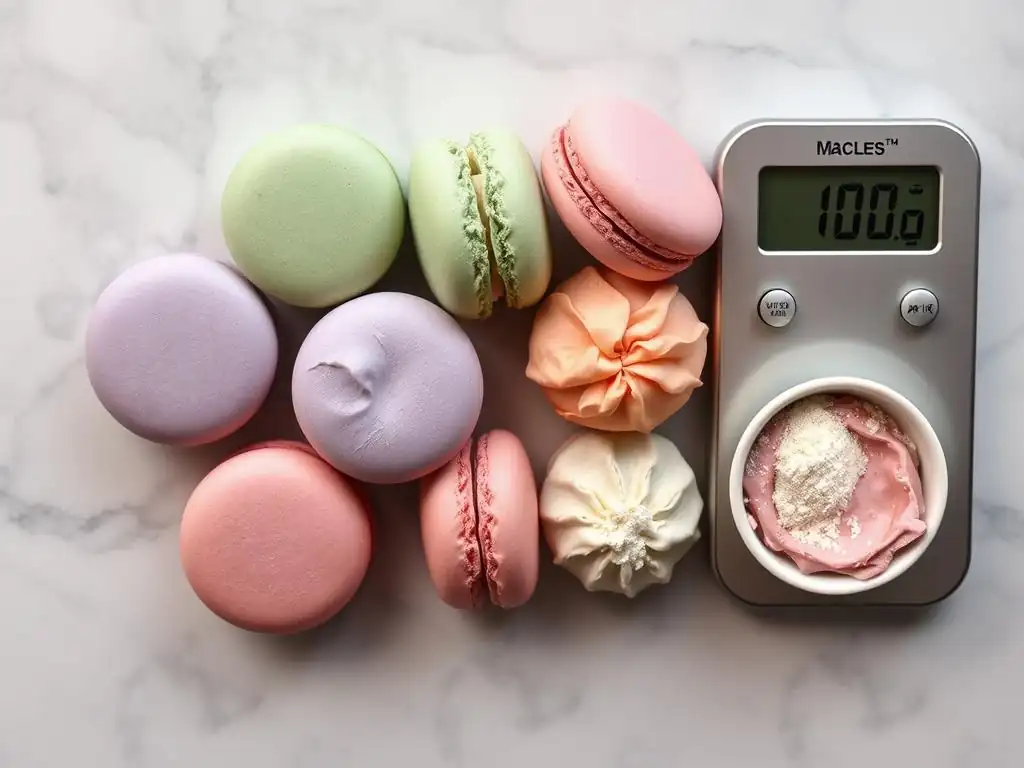
Wrinkled macaron shells, which appear puckered or uneven on the surface, are usually a sign that the shells haven't dried properly before baking, or that the oven temperature is incorrect. If the shells go into the oven without a sufficiently dry skin, the top surface remains pliable. As the macaron expands during baking, this soft top can move and shift, resulting in a wrinkled appearance rather than a smooth dome.
Another cause can be related to the oven temperature being too low or the baking time being too short. If the shells don't bake long enough or at a high enough temperature to fully set the internal structure while the outside dries, they can collapse slightly upon cooling, leading to wrinkles. Improper macaronage can also contribute; if the batter is significantly under-mixed, it might contain too much air and structure that collapses during baking, causing the surface to wrinkle.
Troubleshooting Wrinkled Shells: Proper Drying and Baking
To troubleshoot wrinkled shells, focus on two key areas: drying time and baking process. First, ensure your macaron shells are completely dry to the touch before they go into the oven. This means they should feel smooth and firm, and you should be able to lightly touch them without any batter sticking to your finger. Depending on your environment, this could take anywhere from 30 minutes to 3 hours. Be patient! This resting period is crucial for developing that stable skin.
Second, verify your oven temperature and baking time. Use an oven thermometer to confirm the temperature is accurate. If your wrinkles seem related to collapse after baking, you might need to increase the temperature slightly (e.g., from 280°F to 295°F) or extend the baking time by a minute or two (e.g., from 14 minutes to 16 minutes).
The shells should look matte and feel firm when gently touched. They should also release fairly easily from the baking paper when they are ready. Experimenting with small adjustments to temperature and time based on your specific oven is a key macaron troubleshooting tip beginners often need to perfect.
Problem 5: Sticky Macarons - Mastering the Baking Process
Understanding Sticky Macarons: Identifying the Cause
Sticky macaron shells, either on the top or stuck stubbornly to the baking paper, are usually a clear sign of under-baking. While you want a slightly chewy interior, the shell itself should not feel wet or sticky once cooled. If the tops are sticky, it often means they didn't bake long enough for the surface to fully dry and set. If the bottoms are stuck to the paper, the interior hasn't cooked sufficiently to separate cleanly from the baking surface.
Humidity can also contribute to stickiness, making it harder for the shells to dry properly before and during baking. If the air is very moist, the shells may retain too much moisture throughout the process. However, in most cases, stickiness points back to an issue with the baking time or temperature not being quite right for your specific oven and batch size.
Macaron Troubleshooting for Stickiness: Correct Baking Time
The most direct way to troubleshoot sticky macarons is to adjust your baking time. If your shells are sticky, they likely need to bake for longer. A typical baking time for macarons is between 12 and 18 minutes, depending on the size of your macarons and your oven. If you've been baking for 12 minutes and they're sticky, try increasing the time to 14 minutes for your next batch.
How do you know when they are done? A good test is to gently touch the side of a macaron shell. If it wobbles or shifts easily, it's likely under-baked and needs more time. If it feels firm and doesn't move much, it's probably ready. The feet should also look fully developed and stable. They should release from the baking paper with only a slight pull; if they are completely glued down, they are definitely under-baked. Extending the baking time in small increments (1-2 minutes at a time) is a simple yet effective macaron troubleshooting step.
Cooling Macarons Properly to Avoid Stickiness
Even if baked correctly, how you cool your macarons can impact potential stickiness issues, particularly with the bottoms. Once the macarons are out of the oven, they should be left on the baking sheet for several minutes before attempting to peel them off. Some bakers recommend letting them cool completely on the sheet before handling. Trying to remove them too soon can not only cause them to stick and tear but also potentially cause them to collapse slightly if the internal structure hasn't fully set upon cooling.
Placing the hot baking sheet onto a wire cooling rack immediately after removing it from the oven can also help. This allows air to circulate underneath the sheet, promoting even cooling and preventing steam from getting trapped between the paper and the macaron bottoms, which could lead to stickiness. Patience during the cooling phase is just as important as patience during the resting phase!
Macaron Recipe Troubleshooting: Ingredient Specific Issues
Almond Flour Troubleshooting: Finding the Right Grind
The quality and grind of your almond flour significantly impact the texture and appearance of your macaron shells. Using almond flour that is too coarse can result in bumpy, uneven shells that may not develop smooth tops or proper feet. The larger granules don't integrate as smoothly into the meringue, disrupting the delicate structure of the batter. For best results, you need superfine almond flour.
If you can't find superfine almond flour, or if yours seems a bit coarse, you can process it further yourself. Pulse the almond flour briefly in a food processor or high-powered blender with the powdered sugar from your recipe (this helps prevent the almonds from turning into paste due to their oils). Pulse only for a few seconds at a time – you want a finer powder, not almond butter!
After processing, it's highly recommended to sift the almond flour/powdered sugar mixture to remove any larger pieces or lumps. Discard any large bits that don't pass through the sieve. Using a fine-mesh sieve is a crucial step in macaron troubleshooting when dealing with grainy shells.
Egg White Troubleshooting: Achieving Stiff Peaks for Macarons
The meringue is the backbone of the macaron, and achieving stiff, glossy peaks is non-negotiable for success. If your egg whites aren't whipping up properly, several factors could be at play. Firstly, ensure your egg whites are at room temperature; cold egg whites are much harder to whip to full volume and stability. Let them sit out for 30-60 minutes before using, or gently warm them in a bowl set over warm water for a few minutes.
Secondly, any trace of fat – whether from egg yolk, oil, or residue on your bowl or whisk – will prevent the egg whites from whipping. Use a clean glass or metal bowl (plastic can retain grease) and wipe it down with a little vinegar or lemon juice before starting, just to be sure. Finally, ensure you are whipping for long enough and gradually adding the sugar.
Don't dump all the sugar in at once; add it slowly, a spoonful at a time, allowing it to dissolve as you whip. This process can take 8-15 minutes in a stand mixer on medium-high speed to reach the correct stiff, glossy peak stage. If your meringue looks dull or collapses, it's likely under-whipped or contaminated, and it will lead to macaron troubleshooting issues like hollows or poor feet.
Sugar Troubleshooting: The Importance of Granulated and Powdered Sugar Ratios
Macaron recipes typically use two types of sugar: granulated sugar (often superfine/caster) for the meringue and powdered sugar (also called confectioners' sugar or icing sugar) mixed with the almond flour. Both play distinct, crucial roles. The granulated sugar stabilizes the meringue, helping the egg whites hold air and create a strong structure. The powdered sugar, combined with almond flour, forms the bulk of the shell and contributes to its texture and smoothness.
Getting the ratio right, and ensuring the sugars are properly incorporated, is key macaron troubleshooting for beginners. Always weigh your sugars precisely. If you use too little granulated sugar in the meringue, it might be unstable. If you use too much powdered sugar in the dry mix, the batter might be too stiff.
Ensure the granulated sugar is fully dissolved into the meringue – rub a little meringue between your fingers; it should feel smooth, not gritty. Also, make sure the powdered sugar is free of lumps by sifting it with the almond flour. Using cornstarch-free powdered sugar is sometimes recommended, though many bakers successfully use standard powdered sugar which contains a small amount of cornstarch (usually 3-4%).
Advanced Macaron Troubleshooting Tips for Beginners
Macaron Troubleshooting Checklist: A Quick Reference Guide
Keeping a checklist handy can be incredibly useful when you're learning to make macarons and encounter problems. Before you even start mixing, run through these points:
- Ingredients: Are egg whites aged and at room temperature? Is almond flour superfine and sifted? Are sugars weighed accurately?
- Equipment: Is the bowl and whisk clean and grease-free? Is the oven preheated and calibrated with a thermometer?
- Environment: Is humidity low? Can you use a fan or dehumidifier if needed?
- Process (Mental Walkthrough): Am I prepared to whip meringue to stiff peaks? Do I understand the visual cue for correct macaronage consistency ("lava-like")? Am I planning for adequate resting time (30+ minutes)?
During and after baking, check:
- Piping: Are bubbles tapped out?
- Resting: Is a dry skin formed before baking?
- Baking: Is the temperature correct? Did I bake for the right duration (12-18 mins)?
- Cooling: Did I let them cool on the sheet before removing?
Using a checklist helps systematically review potential failure points, making macaron troubleshooting tips beginners can rely on easier to apply.
Macaron Troubleshooting: Understanding Your Oven
Your oven is one of the most variable factors in macaron success. Even if a recipe calls for 300°F, your oven might actually be 280°F or 320°F. Uneven heating is also common. Hot spots can cause some macarons on the tray to burn or crack while others are under-baked. A reliable oven thermometer is an essential tool for macaron troubleshooting. Place it in the center of your oven to see the true temperature.
If your oven runs consistently hot or cold, adjust the temperature accordingly. If it has hot spots, you might need to rotate your baking sheet halfway through the baking time. Some bakers even place an empty baking sheet on the rack above or below the macarons to help diffuse the heat and create a more even temperature. Getting to know your oven's quirks through observation and using a thermometer is a crucial step in mastering macaron baking and troubleshooting.
Troubleshooting Macaron Color: Achieving Vibrant Hues
Achieving vibrant, consistent macaron colors can be tricky. The type and amount of food coloring you use matter. Liquid food colorings, especially the standard grocery store variety, contain water, which can negatively impact the macaron batter's consistency and stability, potentially leading to hollows or poor feet. Gel or powder food colorings are preferred because they are highly concentrated and add minimal moisture.
Add your gel or powder coloring to the meringue after the stiff peaks have formed but before adding the dry ingredients. This allows you to mix it in thoroughly without overworking the final batter. Start with a small amount – gel colors are potent! – and add more gradually until you achieve the desired shade. Remember that the color will often lighten slightly during baking. If your colors are turning dull or brownish, your oven might be too hot, causing the sugar in the shells to caramelize excessively. Lowering the temperature slightly can help preserve vibrant hues.
Macaron Troubleshooting: Mastering Macaronage Technique
Macaronage Troubleshooting: Visual Cues and Consistency
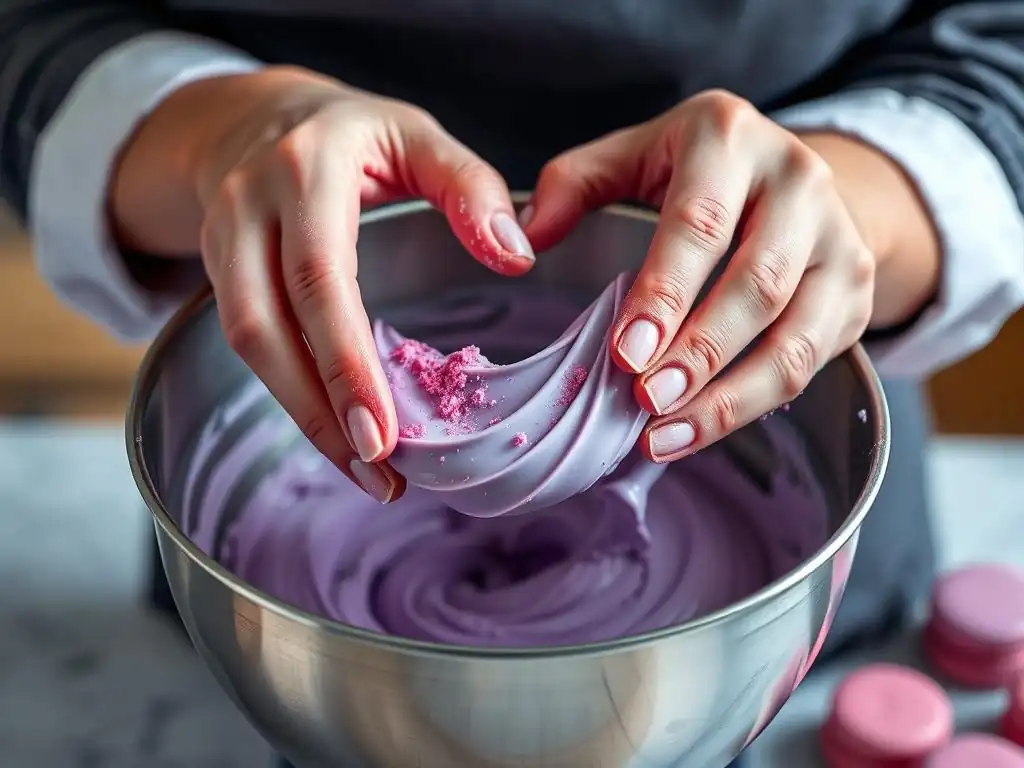
Mastering macaronage is perhaps the most challenging part of macaron troubleshooting for beginners. It's a technique that relies heavily on visual cues and feel. The goal is to fold the dry ingredients into the meringue until the batter reaches the "lava-like" or "ribbon" consistency. What does this mean? When you lift your spatula, the batter should flow off in a thick, continuous stream, like slow-moving molten rock. This ribbon should then slowly sink back into the main mass of batter within 10-20 seconds, leaving a faint trace before disappearing.
If the batter is too stiff and breaks into clumps or doesn't flow at all when you lift the spatula, it's under-macaronaged. If it flows very quickly, disappears immediately, or seems watery, it's over-macaronaged. Practice folding gently but thoroughly, scraping the sides and bottom of the bowl, and checking the consistency frequently by lifting the spatula. It's better to err on the side of slightly under-macaronaging until you get the feel for it, as over-macaronaging is harder to fix and more likely to lead to problems like hollows or flat shells.
Over-Macaronaged vs. Under-Macaronaged: Troubleshooting the Texture
The results of incorrect macaronage are distinct and require different macaron troubleshooting approaches in future batches.
- Under-macaronaged batter: Results in shells with peaks that don't subside, lumpy or uneven surfaces, and potentially hollow interiors because the ingredients aren't fully integrated. The batter will be too stiff to pipe smoothly. Troubleshooting: Fold a few more times in your next batch, ensuring the ribbon test is met.
- Over-macaronaged batter: Results in shells that spread too much on the baking sheet, lack feet, are flat, or are completely hollow because the meringue structure has been destroyed. The batter will be too runny. Troubleshooting: Stop folding sooner in your next batch as soon as the ribbon consistency is achieved. Remember, it's a fine line!
It takes practice to recognize the perfect consistency. Don't be discouraged by early attempts. Many beginners find it helpful to watch videos of experienced bakers performing the macaronage to see the correct flow and texture.
Macaron Troubleshooting: Baking Time and Temperature
Baking Temperature Troubleshooting: Finding the Sweet Spot
Finding the perfect baking temperature for macarons is crucial and often requires experimentation with your specific oven. Most recipes suggest a range between 280°F and 320°F (140°C and 160°C). A temperature that is too high can cause the shells to crack, brown too quickly, or develop large, blow-out feet. A temperature that is too low can result in shells that don't develop feet, are sticky, or spread excessively because they don't set quickly enough.
Start with the temperature recommended in your recipe, but use an oven thermometer to verify it. If you experience cracking or browning, try lowering the temperature by 10-15°F (5-8°C). If your macarons lack feet or are sticky, try increasing the temperature slightly. Baking on a lower rack can sometimes help prevent the tops from browning too quickly, while baking on a middle rack is often recommended for even heat distribution. Keep notes on your adjustments and their results to find the "sweet spot" for your oven. This trial-and-error is a fundamental part of macaron troubleshooting.
Baking Time Troubleshooting: Avoiding Over-Baking and Under-Baking
Just like temperature, the ideal baking time for macarons varies based on your oven, the size of your piped shells, and the specific recipe. Under-baking is a common cause of sticky bottoms and shells that are difficult to remove from the baking paper. Over-baking, on the other hand, can result in dry, brittle shells that lack the desired chewy interior.
A good starting point is 12-15 minutes for smaller macarons (about 1.5 inches) and 15-18 minutes for larger ones (2 inches or more). To check for doneness, gently touch the side of a macaron. It should feel firm and stable on its foot, not wobbly. Another test is to try wiggling one shell gently; if it moves easily on its foot, it needs more time.
If it feels securely attached to the foot and doesn't wiggle, it's likely done. They should also peel off the parchment or silicone mat with minimal resistance once slightly cooled. If they stick, they need more time in the oven in the next batch. Adjust your time in 1-2 minute increments based on your results; this is vital macaron troubleshooting for beginners.
Macaron Troubleshooting: Humidity and Environment
The Impact of Humidity on Macarons: Troubleshooting Strategies
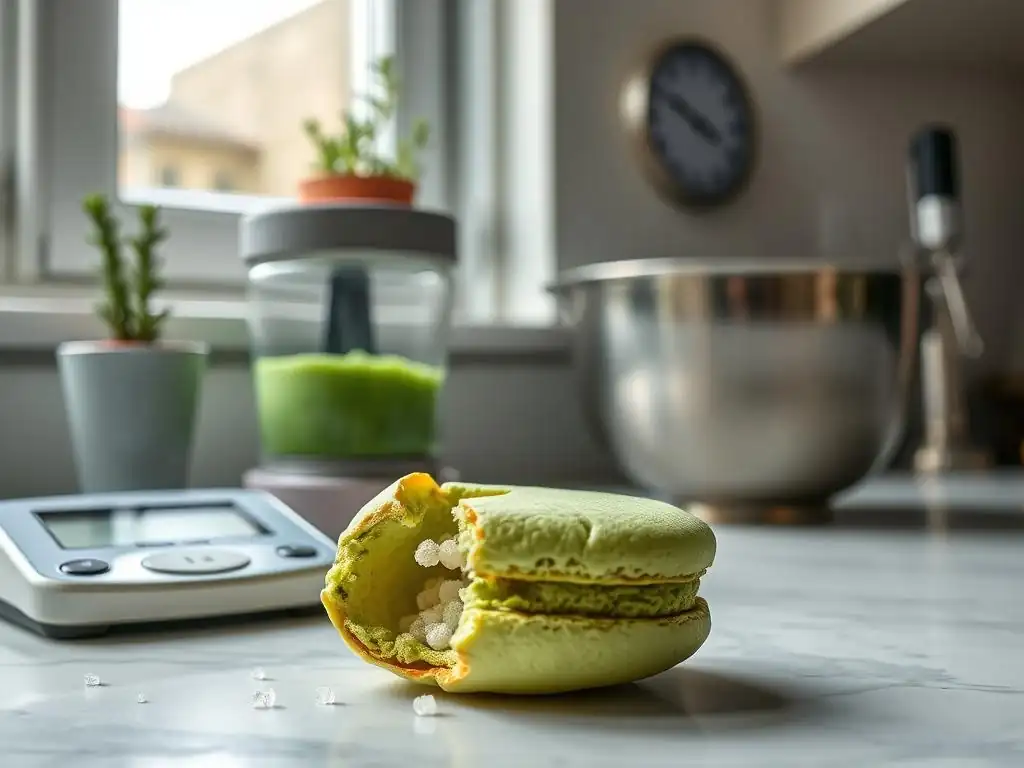
Humidity is the nemesis of the macaron baker. High moisture levels in the air directly interfere with the crucial drying period needed to form a skin on the piped shells. Without a proper skin, the macarons are highly susceptible to cracking, lack of feet, and a sticky texture. On days with high humidity (say, above 50-60%), macaron making becomes significantly more challenging.
While you can't change the weather, you can implement macaron troubleshooting strategies to mitigate humidity's effects. As mentioned earlier, extend the resting time considerably – from the standard 30-60 minutes to 2-3 hours or even longer, until the shells are dry to the touch. Using a fan in the room (not blowing directly on the tray) can help increase air circulation and speed up drying. Running a dehumidifier in your kitchen is another effective method. Some bakers even avoid making macarons on very rainy or humid days altogether. Choosing a dry day is often the simplest solution!
Troubleshooting Macarons in Different Climates
Baking macarons in different climates presents unique challenges. In dry climates, the shells might form a skin very quickly, sometimes within 20-30 minutes. While this seems good, it can also lead to the shells drying out too much, potentially causing brittle shells or cracks. In such climates, you might reduce the resting time slightly or ensure your macaronage isn't overly aggressive, which could contribute to dryness.
In very humid climates, as discussed, the main challenge is getting the shells to dry. This is where extending resting time, using fans, or dehumidifiers becomes essential macaron troubleshooting. Altitude can also play a role; at higher altitudes, liquids evaporate faster and baked goods tend to spread more. Recipes may need slight adjustments to account for this, such as slightly increasing the oven temperature or reducing the amount of sugar. Understanding how your local climate affects baking is key to consistent macaron success.
Macaron Troubleshooting: Storage and Maturation
Proper Macaron Storage: Maintaining Quality
Once you've successfully baked your macarons, proper storage is key to maintaining their delicate texture and preventing them from becoming sticky or hard. Macarons are best stored in an airtight container in the refrigerator. Layer them gently between sheets of parchment paper to prevent them from sticking together or getting crushed. Stored this way, unfilled shells can last for several days, and filled macarons typically last for 3-5 days, depending on the filling (fillings like ganache or buttercream keep longer than fruit curds).
Storing macarons improperly can lead to issues. If left exposed to air, they can dry out and become brittle. If stored in a humid environment or a container that isn't airtight, they can absorb moisture and become sticky. Freezing is also an option for longer storage. Unfilled shells freeze very well in an airtight container for up to a month. Filled macarons can also be frozen, though some fillings fare better than others. Thaw frozen macarons slowly in the refrigerator.
Maturation Troubleshooting: Developing Flavor and Texture
Macarons are often said to improve with "maturation" or "aging" in the refrigerator after being filled. This process involves the moisture from the filling slowly migrating into the shell, softening it slightly and allowing the flavors of the shell and filling to meld together. A freshly baked and filled macaron might have a shell that's a bit too crisp and a filling that feels separate. After 12-24 hours (or even longer for some fillings) in the fridge, the shell softens to that perfect chewy-tender texture, and the flavors harmonize beautifully.
If your macarons aren't developing the desired texture after filling, consider the maturation time. Are you waiting long enough? Some fillings, like thick ganaches, might take longer to soften the shells than a lighter buttercream. Ensure the macarons are stored properly in an airtight container during this time.
If they become too soft or soggy during maturation, your filling might be too wet, or they might be stored in an overly humid environment. Conversely, if the shells remain hard, they might have been slightly over-baked, or the filling might be too dry. Experimenting with maturation times based on your filling and desired texture is part of the macaron troubleshooting process.
Conclusion: Become a Macaron Troubleshooting Pro
Mastering Macaron Troubleshooting: Practice Makes Perfect
Embarking on the journey of making macarons is a rewarding experience, filled with both triumphs and learning opportunities. Encountering problems like cracked shells, hollow interiors, or lack of feet is a normal part of the process, especially for beginners. The key to mastering macarons isn't avoiding problems entirely, but learning how to identify why they happened and how to fix them in your next batch. This comprehensive guide has provided you with essential macaron troubleshooting tips beginners can use to diagnose and correct common issues.
Remember that every oven is different, every kitchen environment is unique, and even slight variations in technique can impact the outcome. Don't be discouraged by setbacks. See each batch as a chance to learn. Keep notes on what you did, what went wrong, and what you'll try differently next time. With patience, persistence, and the macaron troubleshooting techniques you've learned here, you'll steadily improve your skills and consistently bake beautiful, delicious macarons.
Further Resources for Macaron Troubleshooting and Baking Success at BakeWithEase
This guide provides a solid foundation for tackling common macaron problems. For even more detailed guidance, step-by-step visuals, and delicious macaron recipes, explore other sections of the BakeWithEase website. We offer resources specifically tailored for bakers of all levels, including more in-depth tutorials on meringue techniques, macaronage videos, and a variety of recipes to put your new macaron troubleshooting skills to the test. Keep practicing, keep learning, and enjoy the sweet rewards of mastering these delightful treats!
Frequently Asked Questions
What are the most common mistakes beginners make when baking macarons?
Beginner macaron bakers often struggle with overmixing the batter, uneven oven temperatures, and not allowing the macarons to form a skin before baking. These issues can lead to cracked shells or flat, spread-out cookies.
Why are my macaron shells cracking during baking?
Cracking is often caused by insufficient skin formation before baking or too high of an oven temperature. Ensure your macarons have a dry, matte skin and that your oven is properly calibrated.
My macarons have "feet" (the frilly edge), but they are hollow inside. What causes this?
Hollow macarons can result from overmixing the batter, which deflates the air and creates empty space. It can also be related to oven temperature fluctuations during baking.
What can I do if my macaron batter is too runny?
A runny batter indicates overmixing, which breaks down the almond flour's structure. Unfortunately, there's no easy fix; it's best to start a new batch and be more careful mixing.
How long should I let my macaron shells rest before baking to form a skin?
The resting time depends on your kitchen's humidity. Generally, 20-60 minutes is sufficient. The shells should be dry to the touch and have a matte appearance before baking.
Final Reflection: Mastering the Delicate Art of the Macaron
The seemingly simple macaron hides a world of intricate challenges, but understanding these hurdles is the key to unlocking consistent success. This guide has explored the most common pitfalls beginners encounter, from the dreaded feet-less macaron to cracked shells and hollow interiors. Mastering these techniques isn't just about creating beautiful pastries; it's about understanding the delicate balance of ingredients and technique that elevates baking from a hobby to an art.
The journey of the macaron maker is a testament to patience, precision, and the rewarding feeling of overcoming seemingly insurmountable odds. Each failed batch, each cracked shell, teaches a valuable lesson. It's a process of refinement, a dance between science and artistry. As the French proverb says: Patience is a virtue.
This rings especially true in the world of macaron baking, where the rewards are as sweet as the final product itself. The process itself, with its meticulous steps and attention to detail, fosters a sense of mindfulness and accomplishment that extends far beyond the kitchen.
Now, it's your turn. Don't be discouraged by initial setbacks. Embrace the learning process, experiment with different techniques, and most importantly, enjoy the journey. Each macaron you create, whether perfect or imperfect, represents a step forward in your culinary adventure. So, gather your ingredients, dust off your mixer, and embark on your own macaron masterpiece. The sweet taste of success awaits!
Unlock Your Macaron Mastery!
Thanks for joining us on this delicious journey into the world of macarons! We hope you've gained valuable insights and are ready to conquer those pesky baking challenges. Now it's time to put your newfound knowledge into action.
- Bake your perfect batch: Use the techniques we've outlined to create your dream macarons. Don't be afraid to experiment – even minor adjustments can make a huge difference!
- Share your success (or your funny fails!): We'd love to see your macaron creations! Tag us on social media – let's build a supportive baking community together.
- Explore our other baking guides: Discover more tips and tricks to elevate your baking skills. We've got plenty of resources to help you master other delightful treats.
Ready to transform your kitchen into a macaron paradise? What's the first recipe you're tackling?