
The Art of the French Tart: Baking Perfect Pastry Shells

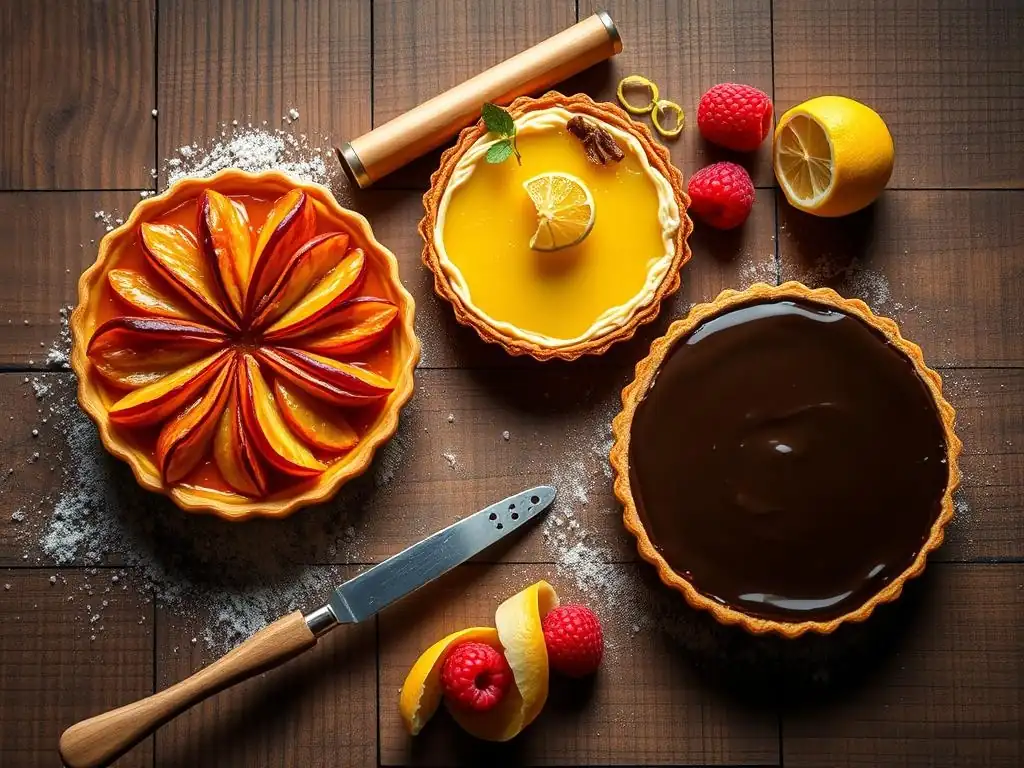
Welcome to BakeWithEase, where the magic of baking comes to life! Ever dreamt of creating picture-perfect pastries? Dive into our world of simple recipes and foolproof techniques, starting with a cornerstone of French patisserie. This week we are focusing on how to bake perfect French tart pastry shells. Intrigued by the secrets to a flaky, golden crust that holds its shape? Discover our step-by-step guide and unlock the secrets to this essential skill, and get ready to elevate your dessert game!
- BakeWithEase Presents: Mastering French Tart Pastry
- Understanding the Fundamentals of French Tart Dough
-
Step-by-Step Guide to Baking Perfect French Tart Pastry Shells
- Step 1: Preparing the French Tart Dough - Mise en Place
- Step 2: Combining Ingredients for a Smooth and Tender Dough
- Step 3: Chilling the Dough: Relaxing the Gluten for a Flaky Crust
- Step 4: Rolling Out the Dough: Achieving Uniform Thickness
- Step 5: Shaping and Fitting the Dough into Your Tart Pan
- Step 6: Blind Baking: Preventing a Soggy Bottom Tart Crust
- Step 7: Cooling and Preparing the Tart Shell for Filling
- Troubleshooting Common French Tart Pastry Problems
- Flavor Variations: Elevating Your French Tart Shell
- French Tart Pastry Shell Recipe: BakeWithEase's Foolproof Method
- Beyond the Basics: Advanced French Tart Techniques
- Serving Suggestions: Pairing Your Perfect French Tart Shell
- Enjoy Your Homemade French Tart Pastry!
-
Frequently Asked Questions
- What makes a French tart pastry shell different from other tart shells?
- What are the key ingredients needed to make a perfect French tart pastry shell?
- What is the best technique for preventing the pastry shell from shrinking during baking?
- How do I avoid a soggy bottom crust when filling my French tart?
- Can I make French tart pastry dough ahead of time?
- Final Reflection: Mastering the Art of the Perfect French Tart Shell
- Unleash Your Inner Pâtissier: Master the French Tart!
BakeWithEase Presents: Mastering French Tart Pastry
Creating a truly exquisite French tart begins with the foundation: the pastry shell. A perfect French tart pastry shell is crisp, tender, and holds its shape beautifully, providing the ideal base for both sweet and savory fillings. It's a cornerstone of classic French patisserie, and mastering it unlocks a world of delicious possibilities. At BakeWithEase, we believe anyone can achieve this seemingly complex feat with the right knowledge and techniques. This guide will walk you through the essential steps to bake perfect French tart pastry shells every time.
Forget soggy bottoms or shrinking crusts! We'll demystify the process, from selecting the right ingredients to the crucial step of blind baking. Whether you're aiming for a delicate sweet crust for a fruit tart or a sturdy savory base for a quiche, the principles remain the same. By understanding the science behind the ingredients and following our foolproof method, you'll be creating perfect French tart pastry shells that rival those from a Parisian patisserie. Let's dive into the delicious details.
Understanding the Fundamentals of French Tart Dough
Achieving a perfect French tart pastry shell relies on a few fundamental principles. Unlike bread dough, which relies on gluten development for structure, tart dough aims for tenderness and flakiness, minimizing gluten activation. This is primarily achieved through careful ingredient selection and precise technique. The right balance of fat, flour, and liquid, combined with temperature control, is key to preventing toughness and ensuring a delicate, melt-in-your-mouth texture.
Understanding the "why" behind each step makes the process much easier and helps troubleshoot potential issues. We'll explore how each ingredient contributes to the final texture and flavor, and why techniques like chilling are non-negotiable for achieving that desired crisp, tender, perfect French tart pastry shell. Getting these basics right is the foundation upon which all great tarts are built.
What Makes a Perfect French Tart Crust? Key Ingredients and Techniques
A perfect French tart crust is characterized by its delicate crispness, tender bite, and subtle richness. It should hold its shape when sliced and not crumble excessively, yet still feel light and flaky rather than dense or tough. This ideal texture is a result of the careful interaction between the main ingredients: flour, fat (traditionally butter), a small amount of liquid (usually cold water or sometimes egg yolk), and often a touch of sugar and salt.
The key techniques involve minimizing gluten development by handling the dough gently and keeping ingredients cold. The fat is cut into the flour, creating small pockets. As the pastry bakes, the fat melts, leaving air pockets that expand, resulting in layers and flakiness. Hydration is also crucial; just enough liquid is added to bring the dough together without making it sticky or activating too much gluten. Precision in measurement and temperature control are paramount.
The Role of Butter in Achieving Flaky Tart Pastry
Butter is the star of the show in French tart pastry, contributing both flavor and texture. High-quality unsalted butter is preferred for its clean taste and high-fat content (typically around 80-82%). The fat coats the flour particles, inhibiting gluten formation, which is essential for tenderness. More importantly, when cold butter is cut into the flour, it creates small, irregular pieces dispersed throughout the dough.
During baking, these cold butter pieces melt and release steam, which pushes apart the layers of dough, creating those desirable flaky layers. Using cold butter is critical; if the butter is too soft or melted, it will be absorbed by the flour, leading to a greasy, tough crust rather than a flaky one. Some recipes specify European-style butter for its slightly higher fat content, which can enhance flakiness.
Flour Power: Choosing the Right Flour for Your Tart Shell
The type of flour used significantly impacts the texture of your French tart pastry shell. Most recipes call for all-purpose flour, which has a moderate protein content (typically 10-12%). This level provides enough structure to hold the pastry together without developing excessive gluten, which would make the crust tough. Using a lower-protein flour, like pastry flour (around 8-9% protein), can result in an even more tender crust, though it might be slightly more delicate to handle.
Avoid high-protein flours like bread flour, as they will develop too much gluten, leading to a chewy, tough crust unsuitable for a tender tart shell. Sifting the flour before measuring can help aerate it and ensure accurate measurement, contributing to a lighter texture. While some specialty flours exist, standard unbleached all-purpose flour is perfectly adequate for achieving excellent results for perfect French tart pastry shells.
Icy Secrets: The Importance of Cold Ingredients for Tart Dough
Keeping all ingredients, especially the fat and liquid, as cold as possible is one of the most critical steps in making perfect French tart pastry shells. Cold butter is essential for creating those distinct pockets that lead to flakiness when they melt during baking. If the butter is warm, it incorporates too fully into the flour, resulting in a short, crumbly texture without the desired layers.
Similarly, using ice-cold water or liquid helps keep the butter firm and also slows down gluten development. Some bakers even recommend chilling the flour beforehand, especially in warm kitchens. Working quickly once the liquid is added also helps maintain the cold temperature of the dough and prevents the butter from melting before it hits the oven. This emphasis on cold ensures the structure needed for a flaky, tender crust.
Step-by-Step Guide to Baking Perfect French Tart Pastry Shells
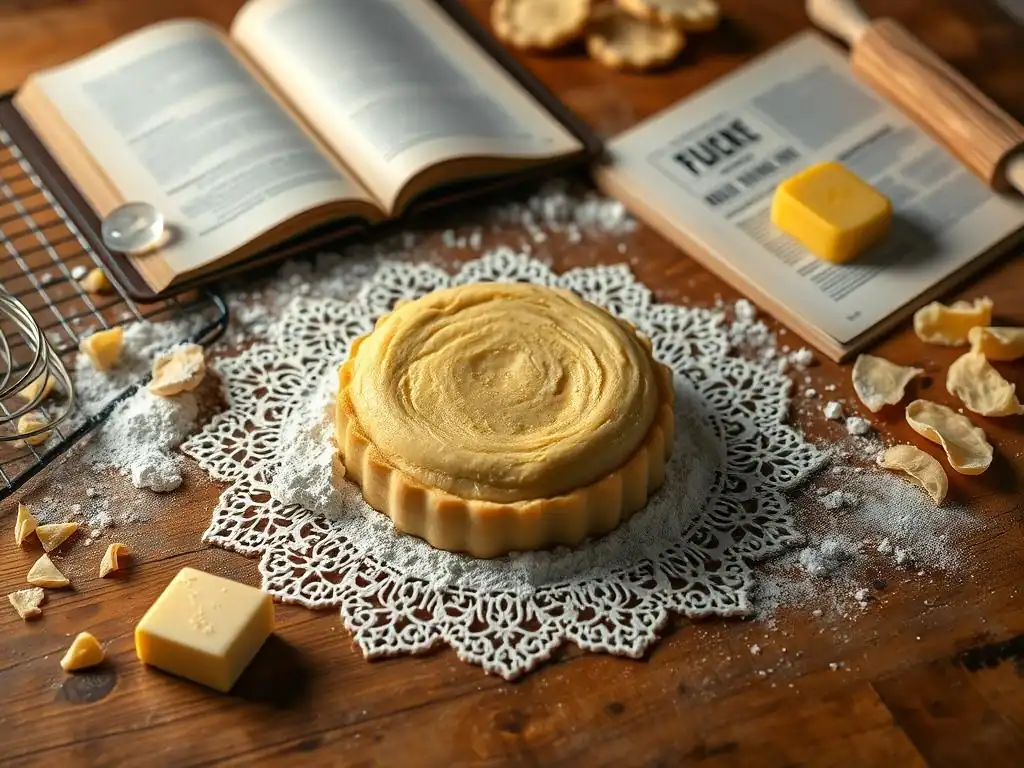
Baking perfect French tart pastry shells is a process that requires attention to detail, but it's entirely achievable for home bakers. By breaking it down into manageable steps, you can navigate the process with confidence. This guide provides a clear path from gathering your ingredients to the final bake, ensuring a beautiful and delicious result every time.
Follow these steps precisely, paying close attention to temperatures and dough handling. The goal is to create a dough that is just hydrated enough, handled minimally, and kept cold until it's ready to bake. Let's get started on your journey to mastering the perfect French tart pastry shell.
Step 1: Preparing the French Tart Dough - Mise en Place
Mise en place, a French term meaning "everything in its place," is crucial for baking success, especially with pastry. Before you begin mixing, gather all your ingredients and equipment. Ensure your butter is very cold, ideally cut into small cubes (about 1/2 inch or 1 cm) and placed back in the refrigerator or even the freezer for 10-15 minutes. Measure your flour, sugar (if using), and salt accurately.
Have your ice water ready in a small bowl. You'll likely only need a few tablespoons, but having it prepared ensures you can add it quickly when the dough is ready. Prepare your workspace, ensuring it's clean and relatively cool. This preparation minimizes delays during the mixing process, helping to keep your ingredients cold, which is vital for achieving a flaky, perfect French tart pastry shell.
Step 2: Combining Ingredients for a Smooth and Tender Dough
Start by combining the dry ingredients – flour, sugar (if using), and salt – in a large bowl or the bowl of a food processor. If using a food processor, pulse a few times to combine. Add the cold, cubed butter to the dry ingredients. If using a food processor, pulse in short bursts (about 1-second pulses) until the mixture resembles coarse meal with some pea-sized pieces of butter still visible. This typically takes 10-15 pulses.
If mixing by hand or with a stand mixer, use a pastry blender, forks, or the paddle attachment on low speed to cut the butter into the flour until the mixture reaches the same consistency. The key is not to overmix; you want visible pieces of butter. Once the butter is cut in, drizzle in the ice water, one tablespoon at a time, pulsing or mixing on low speed just until the dough just comes together.
It should look shaggy and hold together when you pinch a small amount. Avoid adding too much water, as this develops gluten and leads to a tough crust.
Step 3: Chilling the Dough: Relaxing the Gluten for a Flaky Crust
Once the dough has just come together, turn it out onto a lightly floured surface. Gently bring the dough together into a flat disc. Do not knead it. Overworking the dough develops gluten, which is the enemy of a tender tart crust. Wrap the disc tightly in plastic wrap, pressing it into a neat, flat shape.
Refrigerate the dough for at least 30 minutes, but preferably 1-2 hours. Chilling allows the gluten to relax, making the dough easier to roll without shrinking. It also firms up the butter pieces, which is crucial for flakiness during baking. A well-chilled dough is much more manageable and less likely to stick when rolling, setting you up for success in creating perfect French tart pastry shells.
Step 4: Rolling Out the Dough: Achieving Uniform Thickness
Remove the chilled dough from the refrigerator. If it's very hard, let it sit at room temperature for just 5-10 minutes to make it pliable enough to roll, but not warm. Lightly flour your work surface and rolling pin. Place the dough disc in the center and begin rolling from the center outwards, rotating the dough frequently and adding minimal flour as needed to prevent sticking.
Aim for a circle or square (depending on your tart pan shape) that is about 1/8 inch (3-4 mm) thick and large enough to generously fit your tart pan, with some overhang. Rolling to a uniform thickness is important for even baking. A thickness of 1/8 inch provides a sturdy yet tender base for your perfect French tart pastry shell. Avoid stretching the dough, as this can cause it to shrink during baking.
Step 5: Shaping and Fitting the Dough into Your Tart Pan
Carefully transfer the rolled dough to your tart pan. The easiest way is to gently roll the dough around your rolling pin, then unroll it over the pan. Alternatively, fold the dough into quarters and carefully unfold it into the pan. Gently press the dough into the bottom corners and up the sides of the pan, ensuring it is snug against the fluted edges.
Do not stretch the dough to make it fit; if it seems too small, it's better to re-roll it (after briefly chilling it again if it's become warm). Trim the excess dough by rolling your pin over the top edge of the pan, or by using a sharp knife. Patch any small cracks by wetting your finger slightly and pressing the dough together.
For a neat edge, you can press the dough firmly against the fluted sides with your fingers. Chill the lined tart pan for at least 20-30 minutes before blind baking. This crucial step prevents the sides from slumping during baking and helps maintain the shape of your perfect French tart pastry shell.
Step 6: Blind Baking: Preventing a Soggy Bottom Tart Crust
Blind baking is the process of partially or fully baking a tart shell before adding the filling. This step is absolutely essential for tarts with wet fillings (like quiches, custards, or fruit fillings that release a lot of juice) to prevent the bottom crust from becoming soggy. It creates a barrier between the filling and the pastry, ensuring a crisp base.
Without blind baking, the moisture from the filling would penetrate the raw dough during the baking process, resulting in a soft, unpleasant texture. For many French tarts, like lemon tarts or chocolate ganache tarts, the filling requires little to no baking, so a fully blind-baked shell is necessary. For fillings that bake for a longer time, a partial blind bake is often sufficient. Mastering this technique is key to achieving truly perfect French tart pastry shells.
Why Blind Baking is Crucial for French Tarts
French tarts are renowned for their delicate fillings, many of which contain significant moisture or are simply poured into the shell without further baking. Imagine pouring a creamy custard or a juicy fruit mixture directly into raw dough – the liquid would seep in, turning the bottom crust into an unappetizing, gluey layer instead of a crisp foundation.
Blind baking sets the structure of the pastry shell, allowing it to develop strength and a golden color before the filling is added. This pre-baking step ensures that when the filling goes in, the crust is already partially or fully cooked and forms a barrier against moisture. It's a non-negotiable technique for preserving the intended texture of your perfect French tart pastry shell.
How to Blind Bake: A Detailed Walkthrough
After chilling the lined tart pan (Step 5), preheat your oven to 375°F (190°C). Lightly prick the bottom of the tart shell all over with a fork; this allows steam to escape and prevents the crust from puffing up excessively. Line the inside of the chilled pastry shell with parchment paper or aluminum foil, pressing it gently against the sides. Fill the lined shell with pie weights, dried beans, or uncooked rice. Make sure the weights fill the shell right up to the top edge; this supports the sides and prevents them from collapsing or shrinking.
Place the weighted tart shell on a baking sheet (for easier handling and to catch any spills) and bake for 15-20 minutes, or until the edges look set and slightly golden. This is the partial bake. Carefully remove the weights and parchment/foil.
If the recipe calls for a full bake (for uncooked or quick-cooking fillings), return the naked shell to the oven for another 10-15 minutes, or until the bottom is golden brown and looks dry. If any spots puff up, gently prick them with a fork. The total blind baking time can range from 25 to 40 minutes depending on oven and desired doneness.
Step 7: Cooling and Preparing the Tart Shell for Filling
Once the blind-baked French tart pastry shell is removed from the oven, place the tart pan on a wire rack to cool completely. Cooling is essential before adding any filling, especially liquid or creamy ones. Adding filling to a warm shell can cause condensation, which can still lead to a soggy bottom, or it can cause delicate fillings like chocolate ganache to melt prematurely.
Allow the shell to cool for at least 30-60 minutes. Once cool, you can gently remove the outer ring of the tart pan (if using a tart pan with a removable bottom). Handle the baked shell carefully as it can be fragile. Your perfect French tart pastry shell is now ready to be filled according to your recipe's instructions.
Troubleshooting Common French Tart Pastry Problems
Even experienced bakers encounter challenges with pastry. Understanding common issues and how to fix or prevent them is part of mastering the art of the perfect French tart pastry shell. Don't get discouraged if your first attempt isn't flawless; baking is a skill that improves with practice.
Here we address some of the most frequent frustrations faced when baking tart shells – shrinking sides, soggy bottoms, cracks, and uneven browning – and provide practical solutions to help you achieve consistent success with your perfect French tart pastry shells.
Avoiding a Shrinking Tart Crust: Tips and Tricks
Shrinking is a common issue where the pastry pulls away from the sides of the tart pan during baking. This is usually caused by gluten development and insufficient chilling. When dough is overworked or stretched during rolling and fitting, the gluten network becomes elastic and contracts when heated in the oven.
To prevent shrinking, handle the dough minimally during mixing and rolling. Ensure your ingredients are cold, and chill the dough adequately (at least 30-60 minutes, preferably longer) after lining the tart pan. This allows the gluten to relax before baking. Also, avoid stretching the dough when fitting it into the pan; gently pressing it in is better. Using pie weights that fill the shell completely during blind baking also helps support the sides and prevents slumping and shrinking.
Preventing a Soggy Tart Bottom: Ensuring a Crisp Base
A soggy bottom is perhaps the most common and frustrating tart problem. As discussed, this is primarily due to moisture from the filling penetrating an underbaked crust. The solution is almost always proper blind baking.
Ensure you blind bake the crust for the appropriate amount of time – partially for fillings that bake for a while, and fully until golden brown for fillings that require little to no baking. Make sure you use enough pie weights to keep the bottom flat and prevent puffing. For extra insurance against a soggy perfect French tart pastry shell, some bakers brush the partially blind-baked shell with a thin layer of egg white or melted chocolate immediately after removing the weights and before the final bake or filling; this creates a moisture barrier.
Fixing Cracks and Tears in Your Tart Shell
Cracks and tears can happen, especially with delicate doughs or if the dough is too cold and brittle when rolling. Minor cracks can often be patched before baking. If a crack appears when fitting the dough into the pan, simply moisten your finger with a tiny bit of water and gently press the dough together to seal it. You can even use a small piece of trimmed-off dough as a patch, wetting the edges slightly to help it adhere.
If cracks appear after blind baking (though less common with proper technique), you can sometimes "glue" them with a paste made from flour and a little water, then bake for a few more minutes. However, prevention is key. Ensure your dough isn't too dry or too cold when rolling, and handle it gently. A well-hydrated and properly chilled dough is less prone to cracking, leading to a more perfect French tart pastry shell.
Achieving an Evenly Browned Tart Pastry
Uneven browning can result from hot spots in your oven or inconsistent dough thickness. To ensure an evenly golden perfect French tart pastry shell, make sure your oven is accurately calibrated (an oven thermometer is a good investment). Rotate the tart halfway through the baking time.
Ensure the dough is rolled to a uniform 1/8 inch thickness. If the edges are browning too quickly during blind baking, you can loosely cover them with thin strips of aluminum foil while the center continues to bake. If using a dark metal pan, the crust may brown faster; adjust temperature or time accordingly compared to a lighter pan.
Flavor Variations: Elevating Your French Tart Shell
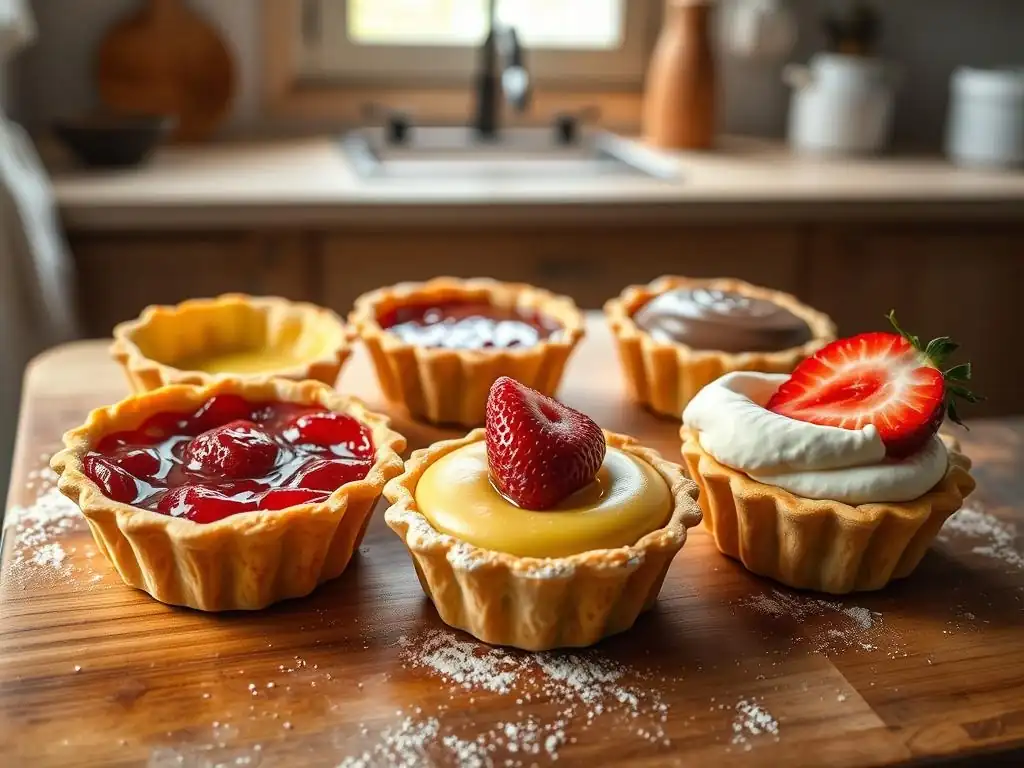
While a classic French tart pastry shell is delicious on its own, you can easily introduce subtle flavor variations to complement your filling. These simple additions can elevate your tart from great to extraordinary, adding an extra layer of complexity and interest to your perfect French tart pastry shell.
Experimenting with flavors allows you to tailor the crust specifically to the filling you're using, creating harmonious and exciting combinations. Here are a few ideas to get you started on customizing your tart dough.
Adding Citrus Zest for a Zesty Flavor
Incorporating finely grated citrus zest (like lemon, orange, or lime) into your tart dough is a simple way to add a bright, aromatic note. The oils in the zest infuse the pastry as it bakes, providing a lovely counterpoint to sweet or rich fillings.
For a typical tart dough recipe using 1 1/2 to 2 cups of flour, add the zest of one small lemon or half an orange to the dry ingredients before cutting in the butter. Ensure the zest is very fine to distribute evenly and avoid larger pieces. This works particularly well with fruit tarts, lemon fillings, or berry tarts, enhancing the overall freshness of your perfect French tart pastry shell.
Incorporating Nuts for a Nutty Crust
Adding finely ground nuts to your tart dough can provide a wonderful nutty flavor and a slightly different texture. Almond flour or finely ground hazelnuts are popular choices in French patisserie (think Pâte Sablée variations).
Replace about 1/4 to 1/3 cup of the all-purpose flour with finely ground nuts. Ensure the nuts are ground to a flour-like consistency; coarser nuts can affect the dough's structure. This variation pairs beautifully with chocolate, caramel, apple, or pear fillings, adding depth to your perfect French tart pastry shell.
Spicing Things Up: Using Spices in Your Tart Dough
Warm spices can add a comforting depth to your perfect French tart pastry shell, especially for autumn or winter-themed tarts. Cinnamon, nutmeg, ginger, or a pinch of ground cloves can transform a simple crust.
Add 1/2 to 1 teaspoon of ground spice (or a combination) to the dry ingredients along with the flour and salt. Start with a smaller amount and adjust to your preference. Spiced crusts are fantastic with pumpkin, apple, pear, or even some chocolate fillings, creating a cozy and flavorful base.
Sweet vs. Savory: Adjusting the Sugar Content
The primary difference between a sweet (Pâte Sucrée) and savory (Pâte Brisée) French tart pastry shell is the amount of sugar and sometimes the inclusion of egg yolk in the sweet version. Pâte Brisée contains little to no sugar, while Pâte Sucrée includes a significant amount, making it more tender and cookie-like.
For a savory tart shell suitable for quiches or vegetable tarts, omit the sugar entirely from the basic recipe. For a sweet shell, add anywhere from 1 to 3 tablespoons of granulated or confectioners' sugar per cup of flour, depending on how sweet you want the crust. Confectioners' sugar often results in a more tender crumb. Adjusting sugar content is fundamental to creating the right base for your perfect French tart pastry shell, whether sweet or savory.
French Tart Pastry Shell Recipe: BakeWithEase's Foolproof Method
Here is a reliable recipe for a classic French tart pastry shell, designed to be easy to follow and yield consistently excellent results. This recipe is versatile enough for many sweet and savory applications, forming the perfect base for your culinary creations.
This method incorporates the principles discussed earlier – cold ingredients, minimal handling, and chilling – to ensure you achieve a flaky, tender, and perfect French tart pastry shell.
Ingredients for the Perfect French Tart Shell
- 1 1/2 cups (about 180g) all-purpose flour, plus more for dusting
- 1/4 teaspoon salt
- 1 tablespoon granulated sugar (omit for savory tarts)
- 1/2 cup (1 stick or 113g) unsalted butter, very cold, cut into 1/2-inch cubes
- 3 to 5 tablespoons ice water
Detailed Instructions for Baking the Tart Pastry
- In a medium bowl (or food processor), whisk together the flour, salt, and sugar (if using).
- Add the cold butter cubes. Cut the butter into the dry ingredients using a pastry blender, forks, or by pulsing in a food processor until the mixture resembles coarse meal with some pea-sized pieces of butter visible.
- Gradually add the ice water, 1 tablespoon at a time, mixing just until the dough just comes together. Be careful not to add too much water.
- Turn the dough out onto a lightly floured surface and gently bring it together into a flat disc. Do not knead.
- Wrap the disc tightly in plastic wrap and refrigerate for at least 30 minutes, preferably 1-2 hours.
- Lightly flour your work surface and rolling pin. Roll the chilled dough into a circle about 1/8 inch (3-4 mm) thick and large enough to fit your 9-inch tart pan.
- Carefully transfer the dough to the tart pan. Gently press it into the bottom and up the sides, trimming excess dough. Patch any small cracks.
- Chill the lined tart pan for at least 20-30 minutes.
- Preheat oven to 375°F (190°C). Prick the bottom of the chilled shell with a fork.
- Line the shell with parchment paper or foil and fill with pie weights.
- Bake for 15-20 minutes (partial bake). Remove weights and liner.
- Bake for another 10-15 minutes (full bake), or until golden brown and dry.
- Cool completely on a wire rack before filling.
Tips for Success: Ensuring a Flawless French Tart Shell
- Keep ingredients, especially butter and water, as cold as possible throughout the process.
- Handle the dough minimally to avoid developing gluten.
- Chill the dough adequately at least twice – after mixing and after lining the pan.
- Use enough pie weights to support the sides during blind baking.
- Ensure the crust is sufficiently browned during blind baking to prevent a soggy bottom.
- Allow the baked shell to cool completely before adding the filling.
Beyond the Basics: Advanced French Tart Techniques
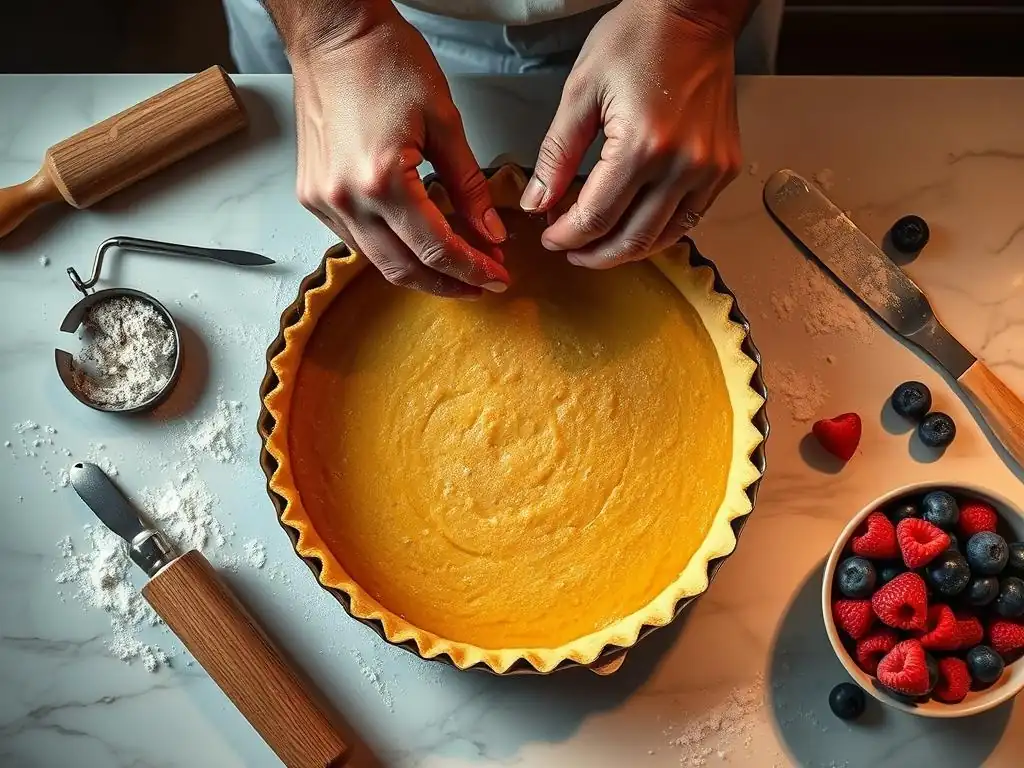
Once you've mastered the basic perfect French tart pastry shell, you might want to explore variations that offer slightly different textures and characteristics. French patisserie features several types of shortcrust pastries, each suited to different applications.
Understanding these variations, like Pâte Sucrée and Pâte Sablée, and how different tart pans can influence the outcome, can further refine your tart-baking skills and expand your repertoire of perfect French tart pastry shells.
Making a Pâte Sucrée: A Sweet Shortcrust Pastry
Pâte Sucrée, or sweet shortcrust pastry, is a classic French dough that is richer, sweeter, and more tender than a standard Pâte Brisée. It often includes egg yolk in addition to butter, sugar, and flour. The higher sugar content and presence of egg yolk inhibit gluten development further, resulting in a crumbly, cookie-like texture that is less flaky but incredibly delicate.
This dough is often made using the creaming method (beating softened butter and sugar together first) rather than cutting cold butter into flour, although some recipes use the latter. Pâte Sucrée is ideal for tarts with creamy fillings, fruit tarts, or any dessert tart where you want a tender, slightly sweet base that melts in your mouth. It's typically rolled out and blind-baked like other tart doughs.
Exploring Pâte Sablée: A Crumbly Shortcrust Pastry
Pâte Sablée, meaning "sandy dough," is another sweet French pastry that is even more delicate and crumbly than Pâte Sucrée. It contains a higher ratio of butter to flour and is made by rubbing the butter into the flour until the mixture resembles fine sand (hence the name), rather than leaving larger pieces of butter. Egg yolks are also typically included.
This method minimizes gluten development almost entirely, resulting in a very tender, almost cookie-like crust that crumbles easily. Pâte Sablée is often pressed into the tart pan rather than rolled out, as it can be quite fragile. It's perfect for delicate dessert tarts where a crumbly, rich base is desired, offering a different texture profile than the flakier Pâte Brisée, contributing to the diversity of perfect French tart pastry shells.
Using Different Tart Pans: Sizes and Materials
Tart pans come in various sizes and materials, each impacting the baking process and the final perfect French tart pastry shell. The most common are metal pans with fluted sides and a removable bottom, typically 8 to 10 inches in diameter. The removable bottom makes it easy to serve the tart without damaging the delicate shell.
Dark metal pans conduct heat more efficiently and can result in a faster, darker bake than lighter metal pans. Ceramic or glass tart dishes can also be used, but they often require longer baking times and don't provide the crisp, evenly browned edge that metal pans with fluted sides do. Mini tart pans (often 3-4 inches) are perfect for individual servings and require adjusted baking times (usually shorter).
Serving Suggestions: Pairing Your Perfect French Tart Shell
Now that you have successfully baked a perfect French tart pastry shell, the possibilities for filling it are nearly endless! The beauty of a well-made shell is its versatility, serving as a stable and delicious vessel for a wide array of fillings, both sweet and savory.
Consider the flavor profile you want to achieve and choose a filling that complements the richness and texture of your perfect French tart pastry shell. Here are just a few ideas to inspire you.
Sweet Fillings: From Chocolate Ganache to Fruit Compotes
Sweet French tart pastry shells are the foundation for countless classic desserts. A rich, smooth chocolate ganache (made from melted chocolate and heavy cream) is a simple yet decadent filling that requires no baking. Lemon curd, with its bright, tangy flavor, is another popular choice, often requiring a brief bake once in the shell or poured into a fully blind-baked shell.
Fruit fillings, whether fresh berries, apple slices, or a cooked fruit compote, are wonderful in a sweet tart shell. A classic Tarte Tatin, while starting with fruit and caramel in the pan and baking the pastry on top, is served inverted using a similar pastry base. Custard fillings, like pastry cream or almond cream (frangipane), are also delicious and often baked inside the shell.
Savory Fillings: Quiches, Vegetable Tarts, and More
The savory French tart pastry shell (Pâte Brisée) is the basis for many delicious main courses or appetizers. The most famous is arguably Quiche Lorraine, a classic French tart filled with a mixture of eggs, cream, bacon, and sometimes cheese, baked until set.
Beyond quiche, savory tart shells can hold a variety of fillings: roasted vegetables with goat cheese, caramelized onions and mushrooms, spinach and feta, or smoked salmon and dill. These fillings typically involve an egg and cream base to bind the ingredients, requiring the tart to be baked with the filling inside (often after a partial blind bake of the shell). The sturdy, crisp savory perfect French tart pastry shell provides a satisfying contrast to the tender filling.
Enjoy Your Homemade French Tart Pastry!
Congratulations on mastering the art of baking perfect French tart pastry shells! You've learned the fundamentals, walked through the process step-by-step, and explored ways to troubleshoot and add variations. This skill is a valuable addition to any baker's repertoire, opening the door to creating stunning and delicious tarts for any occasion.
Take pride in your homemade perfect French tart pastry shells. The effort put into achieving that crisp, tender texture is well worth it when you bite into a slice of your finished tart. Whether filled with a simple ganache or a complex quiche, your perfect French tart pastry shell is the star that makes the dish truly special. Happy baking from all of us at BakeWithEase!
Frequently Asked Questions
What makes a French tart pastry shell different from other tart shells?
French tart shells, often called pâte sucrée, are known for their delicate, buttery flavor and crisp, cookie-like texture, unlike the flakier crusts used in some other tarts. They also often contain powdered sugar instead of granulated.
What are the key ingredients needed to make a perfect French tart pastry shell?
The essential ingredients are cold butter, flour, powdered sugar, egg yolks, and a pinch of salt. Keeping the butter cold is crucial for achieving the desired texture.
What is the best technique for preventing the pastry shell from shrinking during baking?
To minimize shrinkage, ensure the dough is thoroughly chilled before baking and blind bake the shell with pie weights or dried beans. Docking the dough with a fork also helps release steam.
How do I avoid a soggy bottom crust when filling my French tart?
To prevent a soggy crust, you can brush the baked shell with melted chocolate or egg wash before adding the filling. This creates a waterproof barrier and helps maintain crispness.
Can I make French tart pastry dough ahead of time?
Yes, you can make the dough ahead of time! It can be stored in the refrigerator for up to 3 days, or frozen for up to a month. Just be sure to wrap it tightly to prevent it from drying out.
Final Reflection: Mastering the Art of the Perfect French Tart Shell
The pursuit of the perfect French tart shell is more than just a culinary quest; it's a journey into precision, patience, and the profound satisfaction of creating something beautiful and delicious. The techniques explored in this article—from the careful selection of ingredients to the nuanced understanding of butter temperature and blind baking—remain as relevant today as they were centuries ago. The enduring appeal of the French tart lies not only in its exquisite taste but also in the artistry involved in its creation.
The influence of the French tart extends far beyond the kitchen; it's a symbol of elegance, tradition, and the power of simple ingredients transformed into something extraordinary. The meticulous process of making a perfect shell mirrors the dedication and care we should bring to all aspects of our lives. As Julia Child once wisely said, Find something you're passionate about and keep tremendously interested in it.
This applies equally to the pursuit of culinary perfection and the pursuit of a fulfilling life. The dedication required to master the French tart shell is a microcosm of the dedication required to master any skill, and the rewards are equally sweet.
Now, I invite you to consider your own "perfect shell." What are the elements in your life that require the same precision, patience, and attention to detail? Perhaps it's a project you're working on, a relationship you're nurturing, or a skill you're striving to master. Embrace the process, appreciate the nuances, and savor the satisfaction of creating something truly exceptional. The journey towards perfection, like the creation of a flawless French tart shell, is a rewarding one in itself.
Unleash Your Inner Pâtissier: Master the French Tart!
Thanks for joining us on this delicious journey into the world of French tarts! We hope you've gained valuable insights into crafting the perfect pastry shell. Now it's time to put your newfound knowledge to the test!
- Bake your own masterpiece: Try the recipe from the article, focusing on the techniques we've discussed. Experiment with different fillings and share your creations!
- Share your baking journey: Post a picture of your tart on social media using #BakeWithEaseFrenchTart – let's inspire each other!
- Discover new flavor combinations: Browse our recipe section for more inspiration, and don't be afraid to get creative with your fillings!
Ready to transform your kitchen into a Parisian pâtisserie? What unique flavor combination are you most excited to try in your next tart?