
Classic Fruit Tart with Crème Pâtissière: An Easy Recipe

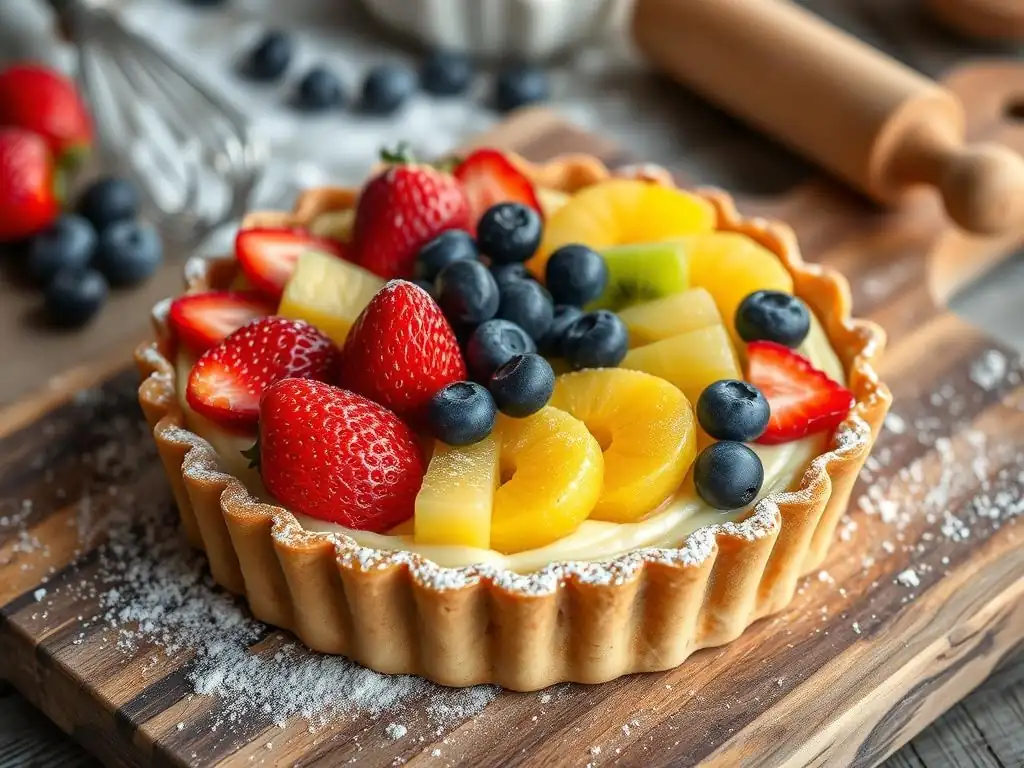
Welcome to BakeWithEase, your haven for effortless baking! Ever dreamed of creating a stunning fruit tart that tastes as good as it looks? You're in the right place! Discover our easy fruit tart recipe and unlock the secrets to a perfectly crisp crust and luscious crème pâtissière. Ready to impress? Let's get baking!
- Lemon Raspberry Tart with Vanilla Bean Crème Pâtissière: A Recipe
- Baking Bliss Presents: A Stunning Lemon Raspberry Tart
- Why This Lemon Raspberry Tart is Perfect
- Ingredients for Your Lemon Raspberry Tart
- Step-by-Step: How to Make a Lemon Raspberry Tart
- Tips for a Flawless Lemon Raspberry Tart
- Variations & Customization: Make it Your Own
- Enjoy Your Delicious Lemon Raspberry Tart!
- Frequently Asked Questions
- Final Reflection: The Sweet Simplicity of Baking and Connection
- Unlock Your Inner Pastry Chef: Bake This Tart Today!
Lemon Raspberry Tart with Vanilla Bean Crème Pâtissière: A Recipe
Baking Bliss Presents: A Stunning Lemon Raspberry Tart
Welcome to BakeWithEase, where we believe that creating beautiful and delicious pastries should be a joyful experience, not a daunting task. If you've been searching for an easy fruit tart recipe that looks incredibly impressive but is genuinely achievable, you've found it! This Lemon Raspberry Tart with luxurious Vanilla Bean Crème Pâtissière is a showstopper perfect for any occasion, from a casual weekend treat to a special celebration. We'll guide you through each step, making this classic French pastry accessible for bakers of all levels. Get ready to bake something truly special!
Why This Lemon Raspberry Tart is Perfect
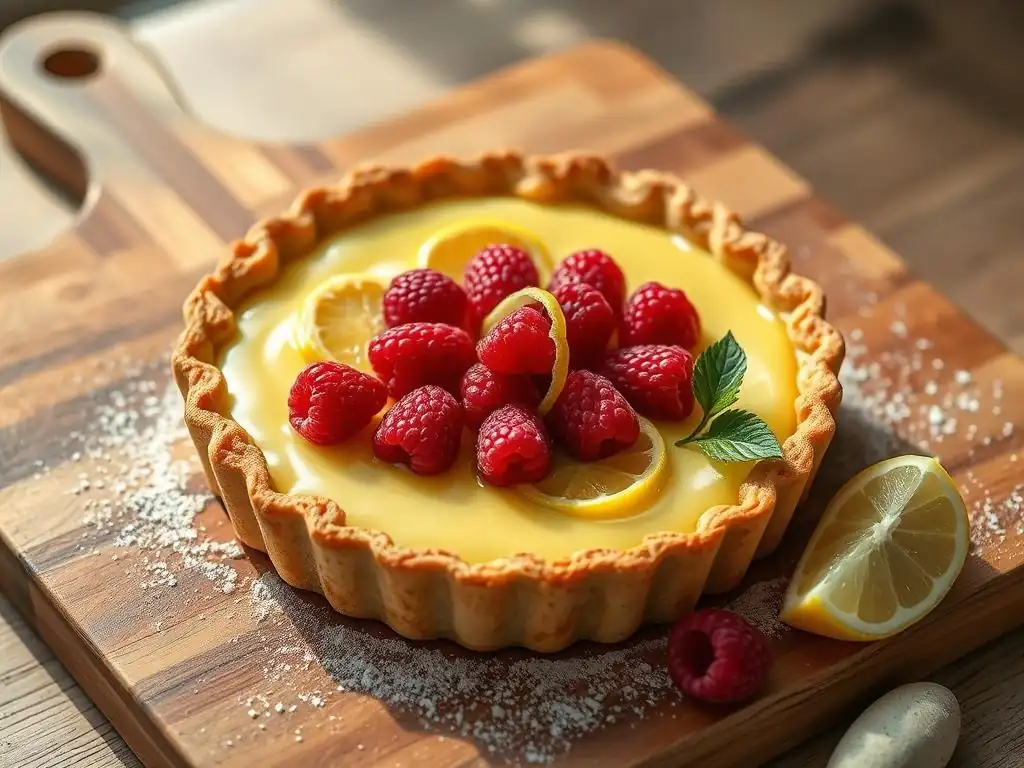
Impressive Yet Achievable: A Showstopper Tart
Many people believe that a beautiful fruit tart requires years of pastry school training, but this easy fruit tart recipe proves that wrong. The elements – a simple shortbread crust, a classic crème pâtissière, and fresh fruit – are fundamental baking techniques that, when combined, create a stunning result. You don't need specialized equipment beyond a tart pan and basic kitchen tools. It's the kind of dessert that elicits "oohs" and "aahs" when you present it, making it ideal for impressing friends and family without spending days in the kitchen.
This recipe breaks down the process into manageable parts: making the dough, blind baking the shell, preparing the cream, and assembling. By tackling each component separately, the overall task becomes far less intimidating, even for a beginner baker. Think of it as building blocks – master each one, and the final structure is guaranteed to be beautiful and stable. The shortbread crust, for instance, is much more forgiving than flaky pastry dough, reducing stress and increasing your chances of success on your first attempt at an easy tart recipe.
Vanilla Bean Crème Pâtissière: Elevated Flavor
While many easy fruit tart recipes use simple pastry cream, incorporating a real vanilla bean elevates this tart to a new level. The tiny black flecks, known as vanilla seeds or 'caviar', infuse the cream with a complex, aromatic depth that vanilla extract simply cannot replicate. This rich, smooth, and creamy custard forms the perfect base, offering a sweet, comforting contrast to the bright fruit topping.
Making crème pâtissière might sound fancy, but it's essentially a cooked custard thickened with egg yolks and a starch like cornstarch or flour. The key is gentle heating and constant whisking to prevent scorching or lumps. By using a vanilla bean pod, you extract the maximum flavor during the milk infusion step. This simple upgrade transforms a standard cream filling into a gourmet component that makes this easy tart recipe feel incredibly luxurious and refined.
Bright and Refreshing: A Balance of Sweet and Tart
The combination of zesty lemon and slightly tart raspberries atop the sweet, creamy vanilla bean filling creates a harmonious balance of flavors that is incredibly refreshing. The acidity of the fruit cuts through the richness of the crème pâtissière and the buttery crust, preventing the dessert from being overly heavy. This makes it a perfect ending to a meal, particularly in warmer months, though its vibrant flavors are welcome any time of year.
Using fresh raspberries ensures a burst of bright, natural flavor with every bite. The lemon component, whether from zest in the topping or optional lemon curd swirled into the cream, adds a tangy counterpoint that awakens the palate. This thoughtful pairing of sweet, tart, and creamy elements is what makes this simple fruit tart recipe a timeless classic, offering a delightful sensory experience that is both comforting and invigorating.
Ingredients for Your Lemon Raspberry Tart
For the Almond Shortbread Crust
- 1 ½ cups (180g) all-purpose flour
- ½ cup (50g) almond flour or finely ground almonds
- ½ cup (100g) granulated sugar
- ¼ teaspoon salt
- ½ cup (1 stick or 113g) cold unsalted butter, cut into cubes
- 1 large egg yolk
- 1 teaspoon vanilla extract
For the Vanilla Bean Crème Pâtissière
- 2 cups (473ml) whole milk
- 1 vanilla bean, split lengthwise
- 4 large egg yolks
- ½ cup (100g) granulated sugar
- ¼ cup (30g) cornstarch
- 2 tablespoons unsalted butter, cut into small pieces
For the Lemon Raspberry Topping
- 2-3 cups fresh raspberries (about 10-12 oz)
- Zest of 1 large lemon
- Optional: Lemon curls for garnish
Optional: Apricot Jam Glaze for Shine
- ¼ cup apricot jam
- 1 tablespoon water or lemon juice
Step-by-Step: How to Make a Lemon Raspberry Tart
Part 1: Preparing the Almond Shortbread Crust
Step 1: Creaming Butter and Sugar
In a large bowl, or the bowl of a stand mixer fitted with the paddle attachment, beat together the cold, cubed butter and granulated sugar until just combined and crumbly. Avoid over-creaming, as you want the butter to remain cold and in small pieces for a tender crust. This typically takes less than a minute.
Step 2: Adding Almond Flour and Flour
Add the all-purpose flour, almond flour, salt, egg yolk, and vanilla extract to the butter mixture. Mix on low speed until the dough just begins to come together into large clumps. Be careful not to overmix; the dough should still look a bit crumbly, not like a smooth ball.
Step 3: Forming the Dough and Chilling
Turn the dough out onto a clean surface. Gently press the dough together to form a cohesive disk. Wrap the disk tightly in plastic wrap and refrigerate for at least 30 minutes. Chilling the dough is crucial for making an easy tart recipe crust that is easy to handle and bakes up crisp and tender, preventing shrinkage during baking.
Part 2: Baking the Tart Shell
Step 1: Rolling Out the Dough
On a lightly floured surface, roll out the chilled dough into a circle about 12 inches (30 cm) in diameter and about ⅛ inch (3mm) thick. Aim for a size large enough to fit your 9 or 10-inch tart pan with a little overhang.
Step 2: Pressing Dough into Tart Pan
Carefully transfer the rolled dough to a 9 or 10-inch tart pan with a removable bottom. Gently press the dough into the bottom and up the sides of the pan, ensuring it fits snugly into the fluted edges. Trim any excess dough from the top edge using a knife or by rolling a pin over the top of the pan.
Step 3: Docking the Dough
Using a fork, prick the bottom of the tart shell all over. This process, called docking, allows steam to escape during baking, preventing the crust from puffing up unevenly.
Step 4: Blind Baking with Pie Weights
Line the inside of the dough shell with parchment paper or aluminum foil, pressing it gently against the bottom and sides. Fill the lined shell with pie weights, dried beans, or rice, ensuring the weights go all the way up the sides to support them. This blind baking step helps the crust hold its shape and prevents the sides from collapsing.
Step 5: Baking Until Golden Brown
Preheat your oven to 350°F (180°C). Bake the blind-baked shell for 15-20 minutes, or until the edges are lightly golden. Carefully remove the weights and parchment/foil. Return the tart shell to the oven and bake for another 5-10 minutes, or until the bottom is golden brown and looks fully baked. Let the shell cool completely on a wire rack before filling.
Part 3: Making the Vanilla Bean Crème Pâtissière
Step 1: Infusing Milk with Vanilla Bean
In a medium saucepan, combine the whole milk with the split vanilla bean pod and scraped seeds. Heat the milk over medium heat until it just reaches a simmer. Remove from the heat, cover, and let steep for 10-15 minutes to infuse the vanilla flavor. Remove and discard the vanilla bean pod.
Step 2: Whisking Egg Yolks, Sugar, and Cornstarch
In a separate medium bowl, whisk together the egg yolks, granulated sugar, and cornstarch until the mixture is pale yellow and slightly thickened. This creates a smooth paste that will help thicken the cream.
Step 3: Tempering the Egg Mixture
Slowly pour about half of the warm milk into the egg yolk mixture while whisking constantly. This tempering step gradually warms the egg yolks, preventing them from scrambling when added to the hot milk.
Step 4: Cooking Until Thickened
Pour the tempered egg mixture back into the saucepan with the remaining milk. Return the saucepan to medium heat and whisk constantly. Bring the mixture to a gentle boil, continuing to whisk vigorously. The cream will thicken considerably as it boils. Let it boil gently for 1-2 minutes, whisking continuously, to ensure the cornstarch is fully cooked and the cream is properly thickened.
Step 5: Cooling the Crème Pâtissière
Remove the pan from the heat. Whisk in the small pieces of cold butter until fully incorporated and the cream is smooth and glossy. Pour the crème pâtissière into a clean bowl. Press a piece of plastic wrap directly onto the surface of the cream to prevent a skin from forming as it cools. Refrigerate for at least 2-3 hours, or until completely cold and set.
Part 4: Assembling the Tart
Step 1: Filling the Tart Shell with Crème Pâtissière
Once the tart shell is completely cool and the crème pâtissière is cold and set, remove the plastic wrap from the cream. You may need to whisk the cream briefly to loosen it up if it's very firm. Spoon the crème pâtissière into the baked tart shell, spreading it evenly to the edges.
Step 2: Arranging Raspberries and Lemon Curls
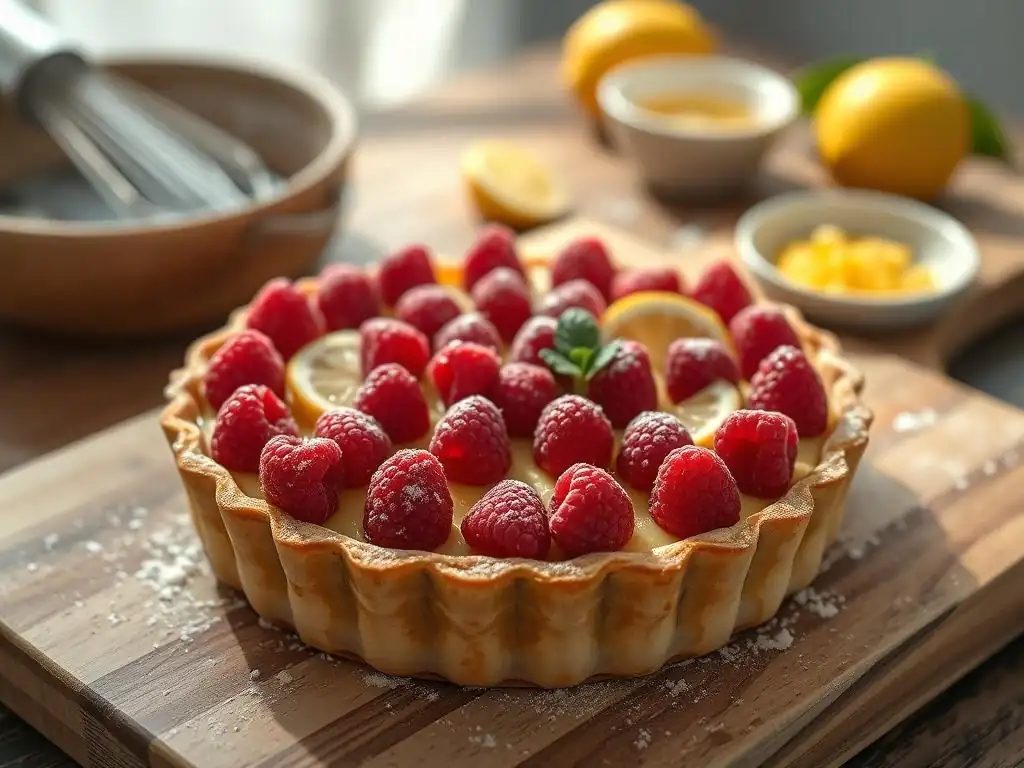
Arrange the fresh raspberries decoratively over the surface of the crème pâtissière. You can place them randomly or in a pattern, such as concentric circles. If using lemon curls, scatter them amongst the raspberries for visual appeal and a burst of lemon aroma.
Step 3: Glazing the Fruit (Optional)
For a professional look and added shine, gently heat the apricot jam with water or lemon juice in a small saucepan or microwave until melted and smooth. Strain the mixture through a fine-mesh sieve if desired. Using a pastry brush, lightly brush the warm glaze over the raspberries and lemon curls. This helps the fruit look glossy and prevents it from drying out. Let the glaze set for a few minutes before serving.
Tips for a Flawless Lemon Raspberry Tart
Ensuring a Tender Crust
Achieving a perfectly tender, flaky shortbread crust is key to this easy fruit tart recipe. The main secret lies in keeping the butter cold and avoiding overmixing the dough. When you first combine the ingredients, the mixture should resemble coarse crumbs, almost like wet sand, rather than a smooth ball. Overworking the dough develops gluten, which can result in a tough crust.
Another critical step is chilling the dough adequately before rolling and again after forming it in the pan. Cold butter creates steam pockets during baking, contributing to tenderness. Chilling also makes the dough easier to handle and reduces shrinkage in the oven. Aim for at least 30 minutes of chilling for the disk and another 15-30 minutes for the formed shell before blind baking.
Preventing a Skin on the Crème Pâtissière
A common issue with crème pâtissière is the formation of a rubbery skin on the surface as it cools. This can make the cream lumpy and unpleasant. The best way to prevent this is to place plastic wrap directly onto the surface of the warm cream immediately after cooking and whisking in the butter.
Ensure the plastic wrap is pressed down firmly, touching the entire surface of the cream, leaving no air pockets. This creates a barrier that prevents moisture evaporation and skin formation. Refrigerate the cream with the plastic wrap in place until thoroughly chilled and set, typically 2-3 hours. Before using, you can whisk it gently to restore its smooth consistency.
Creating Elegant Lemon Curls
Lemon curls add a beautiful visual garnish and a burst of fresh citrus aroma to your easy fruit tart recipe. To make them, use a sharp vegetable peeler to remove strips of zest from a washed, unwaxed lemon, trying to avoid the bitter white pith. Aim for long, thin strips.
Once you have several strips of zest, gently curl each strip around a wooden spoon handle or your finger. The natural oils in the zest will help it hold its shape. You can make these ahead of time and store them in a small airtight container in the refrigerator until you are ready to assemble the tart.
Storing the Finished Tart
This Lemon Raspberry Tart is best enjoyed the day it is assembled, as the crust is crispest and the fruit is freshest. However, if you need to store it, cover the tart loosely with plastic wrap or place it in an airtight container.
Keep the assembled tart refrigerated. It will remain delicious for 2-3 days, though the crust may soften slightly over time due to moisture from the filling and fruit. The crème pâtissière itself can be made up to 2 days in advance and stored separately in the refrigerator before assembly.
Variations & Customization: Make it Your Own
Substitute Berries: [Blueberries, Strawberries, Blackberries]
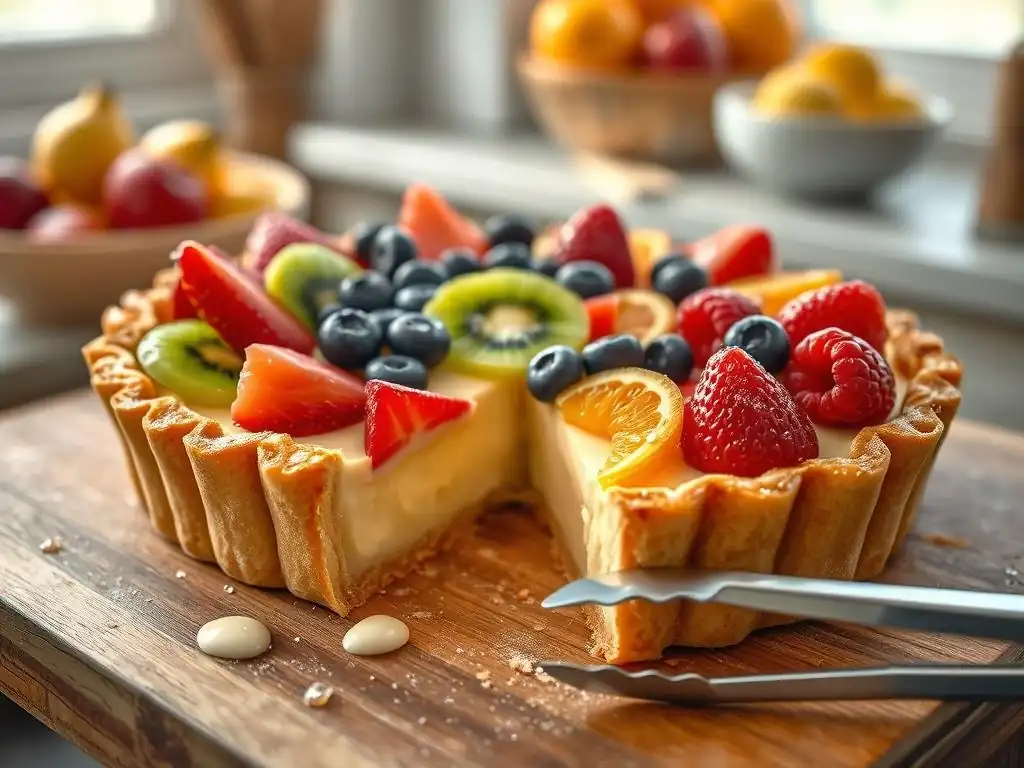
While raspberries are classic, this easy fruit tart recipe is incredibly versatile. You can easily substitute other fresh berries or a combination. Blueberries offer a sweeter, milder flavor. Sliced strawberries are visually stunning and pair wonderfully with vanilla and lemon. Blackberries provide a deeper, earthier tartness.
Consider the moisture content of the fruit; strawberries, for example, can release more liquid. If using fruit known to be very juicy, you might arrange it on the tart closer to serving time or brush the bottom of the fruit layer with a thin layer of melted white chocolate to create a moisture barrier.
Add Citrus Zest: [Lime, Orange, Grapefruit]
Enhance the citrus notes by adding zest beyond just lemon. Lime zest brings a sharper, more aromatic tang that complements berries beautifully. Orange zest adds a touch of sweetness and warmth, pairing well with vanilla. For a more adventurous twist, a little grapefruit zest can introduce a subtle bitterness and complexity.
You can stir additional zest into the crème pâtissière after it has cooled slightly, or simply scatter it over the top of the assembled tart along with the fruit. A combination of zests can create a vibrant, multi-layered citrus profile that elevates this simple fruit tart recipe.
Incorporate Liqueur: [Grand Marnier, Limoncello]
For an adult version of this easy tart recipe, consider adding a splash of liqueur. A tablespoon or two of Grand Marnier (orange liqueur) can be whisked into the crème pâtissière after it's cooked and cooled slightly, adding a sophisticated citrus note.
Limoncello, a sweet Italian lemon liqueur, is another excellent option that enhances the lemon flavor profile. You could also brush the baked tart shell lightly with a liqueur before adding the filling for an extra layer of flavor. Be mindful of the amount added, as too much liquid can affect the texture of the cream or make the crust soggy.
Enjoy Your Delicious Lemon Raspberry Tart!
Frequently Asked Questions
What makes this fruit tart recipe considered "easy"?
The recipe emphasizes simple steps, readily available ingredients, and a straightforward crème pâtissière method, making it accessible even for novice bakers.
What kind of fruit works best for this tart?
You can use a variety of fresh, seasonal fruits. Berries, kiwi, peaches, and grapes are popular choices, but feel free to get creative!
Can I use a store-bought crust to save time?
Yes, a pre-made tart crust is perfectly acceptable for a quicker version. Just be sure to blind bake it if necessary.
What is crème pâtissière, and can I substitute it?
Crème pâtissière is a classic pastry cream. While you could substitute it with other fillings like whipped cream or custard, the crème pâtissière provides a traditional and delicious taste.
How long will the fruit tart last after baking?
For best results, the tart should be consumed within 2-3 days and stored in the refrigerator. The crust may soften over time.
Final Reflection: The Sweet Simplicity of Baking and Connection
The enduring appeal of the classic fruit tart lies not just in its deliciousness, but in its accessibility. A seemingly complex dessert can be surprisingly simple to create, offering a rewarding experience for bakers of all skill levels. This recipe, designed to be easily followed, proves that even the most elegant pastries can be within reach.
Baking, for me, has always been more than just following a recipe; it's a way to connect with loved ones and create lasting memories. The simple act of sharing a homemade fruit tart fosters a sense of warmth and community, a feeling that transcends the deliciousness of the pastry itself. The best things in life are the people we love, the places we've been, and the memories we've made along the way.
This quote perfectly encapsulates the sentiment I associate with baking and sharing this simple yet elegant dessert.
Now, I invite you to roll up your sleeves, gather your ingredients, and embark on your own fruit tart journey. Don't be intimidated by the seemingly intricate design; embrace the process, savor each step, and relish the joy of creating something beautiful and delicious to share with those you cherish. The sweet reward awaits, not just in the taste, but in the connections you forge along the way.
Unlock Your Inner Pastry Chef: Bake This Tart Today!
Thanks for joining us on this delicious journey into the world of classic fruit tarts! We hope you found the recipe easy to follow and are now brimming with baking inspiration. Ready to transform your kitchen into a patisserie?
- Bake your own masterpiece: Grab those ingredients and start creating your stunning fruit tart! This recipe is designed for success, even for beginner bakers.
- Share your creation: We'd love to see your beautiful fruit tarts! Share photos on social media using #BakeWithEaseFruitTart and tag us – let’s celebrate your baking achievements together.
- Challenge yourself: Try experimenting with different fruits and flavors to make this recipe your own. What unique twist will you add?
What delicious fruit will you feature in your very own classic fruit tart?