
Achieving the Perfect Glaze for Eclairs and French Pastries

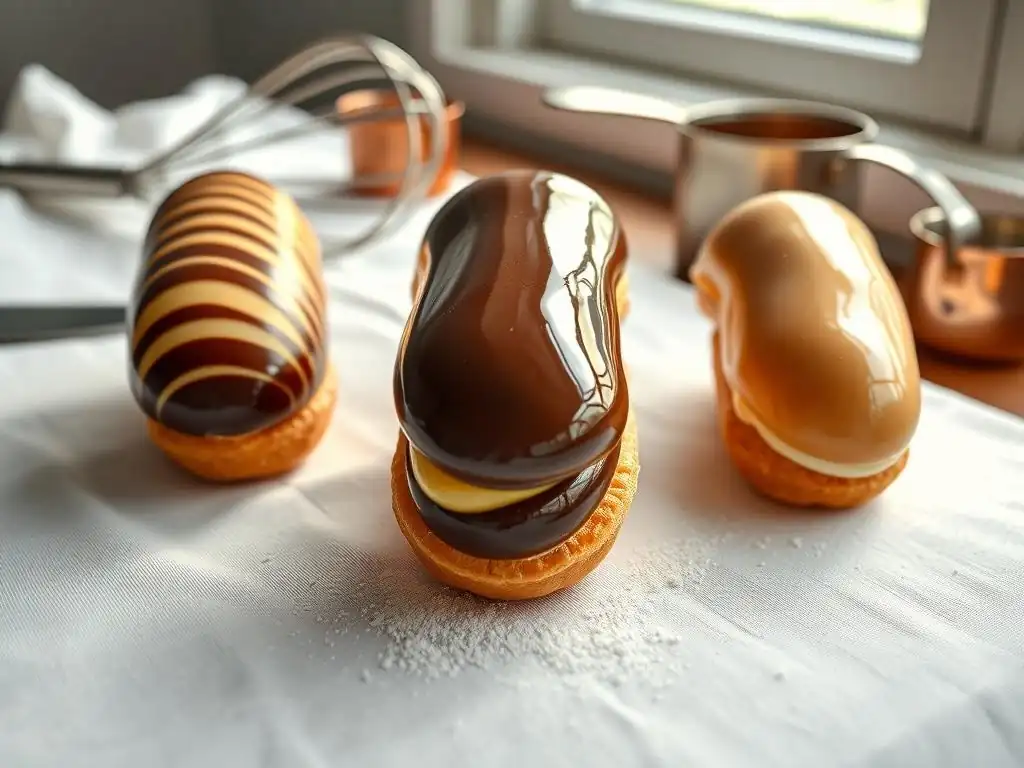
Welcome to BakeWithEase, your trusted guide to creating delectable treats! Ever wondered what separates a good éclair from a perfect one? It often comes down to the glaze. Dive in and discover the secrets to achieving the perfect glaze for eclairs and other French pastries. Unlock the techniques that will elevate your baking and leave everyone craving more. Ready to transform your eclairs from ordinary to extraordinary?
- Achieving the Perfect Glaze for Éclairs and French Pastries
- Introduction to Glazes: Elevating Your Éclair and Pastry Creations
- Understanding Different Types of Glazes for Éclairs
- Essential Ingredients for a Flawless Éclair Glaze
- Step-by-Step Guide to Making the Perfect Glaze for Éclairs
- Techniques for Applying Glaze to Éclairs and Pastries
- Tips and Tricks for a Professional-Looking Éclair Glaze
- Advanced Glaze Techniques for French Pastries
- Troubleshooting Common Glaze Issues and Solutions
- Storing and Preserving Your Perfect Éclair Glaze
- Conclusion: Mastering the Art of the Perfect Glaze for Éclairs
-
Frequently Asked Questions
- What makes a glaze "perfect" for eclairs and French pastries?
- What are the most common types of glazes used for eclairs?
- How can I prevent my glaze from being too thick or too thin?
- What's the best way to apply glaze to eclairs for a professional finish?
- Can I add other ingredients to my glaze to customize the flavor?
- Final Reflection: The Enduring Allure of the Perfect Glaze
- Unlock Your Inner Pâtissier: Master the Art of Glaze!
Achieving the Perfect Glaze for Éclairs and French Pastries
Introduction to Glazes: Elevating Your Éclair and Pastry Creations
Why a Perfect Glaze Matters for Éclairs and French Pastries
The glaze on an éclair or any French pastry isn't just an afterthought; it's a crucial component that significantly impacts the final product. A well-executed glaze provides a stunning visual appeal, transforming a simple pastry into a work of art. Think of the difference between a plain choux pastry shell and one topped with a glossy, smooth sheet of chocolate or vibrant fruit glaze – the visual impact is immediate and inviting. This aesthetic quality is particularly important for pastries like éclairs, where the long, elegant shape is highlighted by a flawless coating.
Beyond looks, the perfect glaze contributes vital texture and flavor contrasts. A classic fondant glaze offers a soft, slightly sugary bite that complements the crisp choux pastry and creamy filling. A rich chocolate glaze adds depth and intensity, while a fruit glaze introduces a burst of acidity and freshness.
This interplay of textures and flavors elevates the overall eating experience, making the pastry more complex and enjoyable. For instance, a perfectly glazed chocolate éclair offers the satisfying snap of the shell, the smooth richness of the crème pâtissière, and the slightly firm yet melt-in-your-mouth texture of the chocolate topping. Achieving this perfect glaze for eclairs is a skill every baker should cultivate.
A Baker's Guide to Mastering the Art of Glazing
Mastering the art of glazing requires attention to detail, understanding ingredients, and practicing specific techniques. It's about finding the right balance between temperature, consistency, and application methods to achieve that coveted smooth, even, and often glossy finish. This guide will walk you through the fundamentals, from selecting the right type of glaze for your pastry to troubleshooting common issues that bakers face.
By the end of this guide, you'll have a solid understanding of how to create a perfect glaze for eclairs and other French pastries. We'll explore the science behind different glaze types, the function of key ingredients like glucose syrup, and step-by-step instructions for preparing and applying your glaze. With practice, you'll be able to consistently produce pastries that are not only delicious but also visually spectacular, demonstrating true pastry chef skill.
Understanding Different Types of Glazes for Éclairs
Classic Fondant Glaze: A Traditional Éclair Topping
The classic fondant glaze is a cornerstone of traditional French pastry, particularly for éclairs. It's made primarily from cooked sugar syrup that is then worked until it crystallizes into a smooth, opaque paste. This paste is gently warmed before application, resulting in a non-greasy, clean-cutting glaze that sets quickly to a soft, slightly firm finish. Its subtle sweetness makes it incredibly versatile, often flavored with vanilla, coffee extract, or a touch of rum.
This type of perfect glaze for eclairs provides a beautiful matte or semi-glossy finish, depending on how it's handled. It's known for its characteristic 'crack' when bitten into, offering a delightful textural contrast to the soft filling and crisp shell. While it requires careful temperature control during preparation, a well-made fondant glaze is the hallmark of a classic éclair, providing a pure, unadulterated sugar flavor that pairs wonderfully with traditional pastry creams.
Chocolate Glaze: Adding Richness to Your Pastries
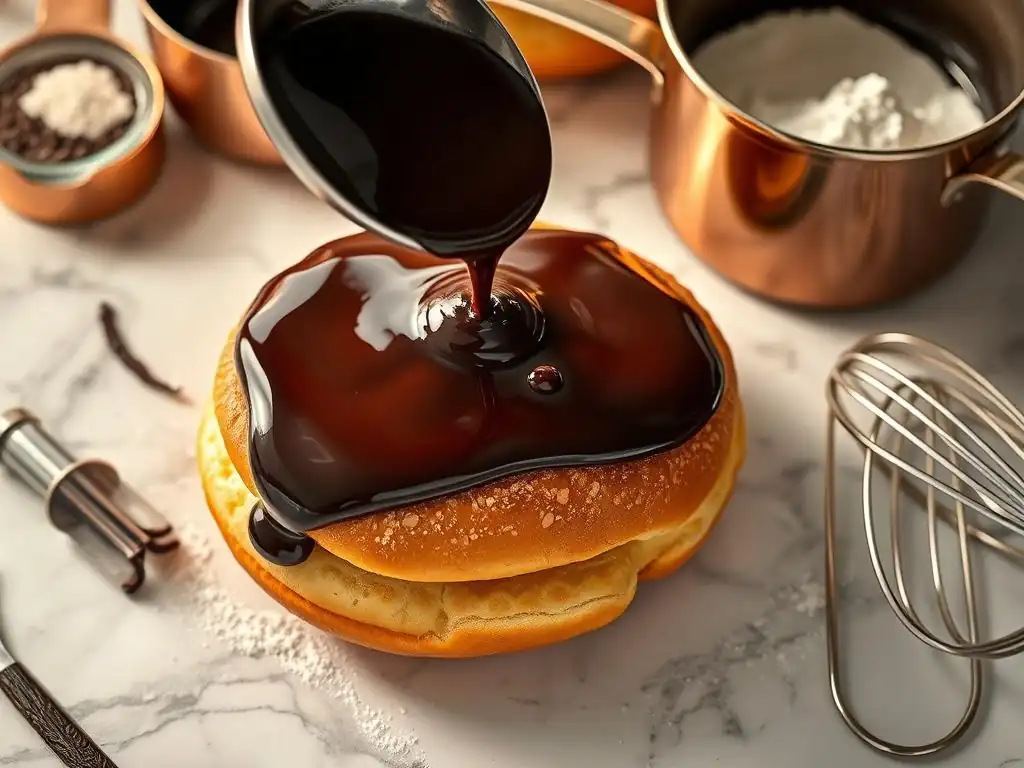
Chocolate glaze is arguably the most popular topping for éclairs and many other French pastries, offering deep, rich flavor and a luxurious appearance. These glazes can range from simple ganaches made with chocolate and cream to more complex mixtures involving cocoa powder, sugar, butter, and liquid. The key to a great chocolate glaze is using high-quality chocolate with a good percentage of cocoa butter, which contributes to both flavor and shine.
A well-executed chocolate glaze should be smooth, glossy, and set firmly but not hard, providing a clean bite. The richness of the chocolate perfectly complements the light choux pastry and often pairs beautifully with coffee or vanilla crème pâtissière. Achieving a truly perfect glaze for eclairs when working with chocolate involves careful melting and potentially tempering, especially if aiming for a very glossy, stable finish that resists fingerprints.
Fruit-Based Glazes: Infusing Flavor and Color
Fruit-based glazes, often referred to as nappage or fruit glazes, bring vibrant color and tangy sweetness to French pastries, particularly fruit tarts and sometimes éclairs (though less common than chocolate or fondant). These glazes are typically made from fruit purée or juice, sugar, and a gelling agent like pectin or cornstarch, sometimes enhanced with a touch of lemon juice for brightness. They can be clear or slightly opaque, depending on the base.
These glazes serve multiple purposes: they seal the fruit, preventing it from drying out; they add a layer of complementary flavor; and they provide a beautiful, often high-gloss finish that makes the colors of the fruit pop. Using high-quality fruit purée is essential for intense flavor and natural color. A typical fruit glaze might use 200g of fruit purée, 50g of sugar, and 5g of pectin, heated together until thickened, resulting in a bright, flavorful coating.
Caramel Glaze: A Sweet and Sticky Delight
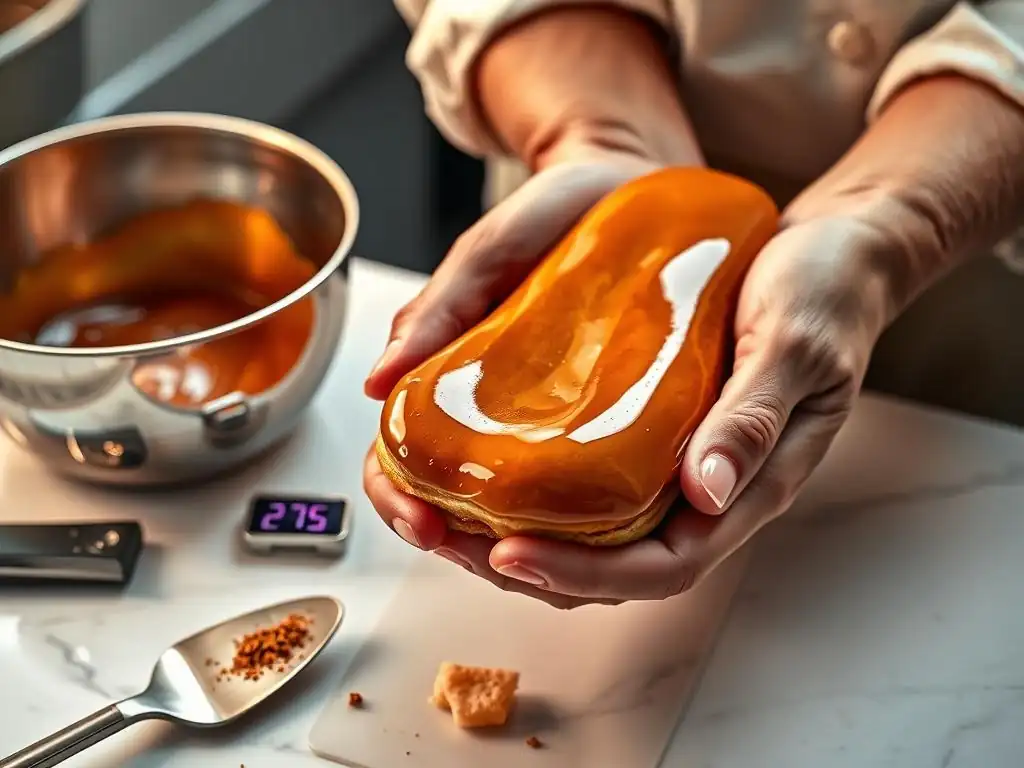
Caramel glaze offers a warm, complex sweetness and a beautiful amber hue. It's made by cooking sugar until it caramelizes, then adding liquid (often cream or butter and sometimes water or milk) to create a pourable sauce. Glucose syrup is frequently added during the caramelization process to prevent crystallization and ensure a smooth texture. This glaze pairs exceptionally well with fillings like salted caramel cream or even classic vanilla.
Creating a caramel glaze requires careful temperature monitoring to achieve the desired color and flavor – too light and it lacks depth, too dark and it can become bitter. The consistency needs to be just right for dipping or pouring; if it's too thick, it will be difficult to apply evenly, and if too thin, it won't coat properly. A perfect glaze for eclairs using caramel should be rich, slightly chewy, and glossy, adding a sophisticated sweetness.
Essential Ingredients for a Flawless Éclair Glaze
The Role of Sugar in Achieving the Right Consistency
Sugar is the primary building block of most glazes, and its type and quantity are critical for achieving the desired consistency and sweetness. Powdered sugar (icing sugar) is commonly used in quick glazes as it dissolves easily, creating a smooth texture. Granulated sugar is used in cooked glazes like fondant or caramel, where it's dissolved and heated to specific temperatures. The ratio of sugar to liquid determines how thick or thin the glaze will be.
For a simple powdered sugar glaze, a ratio of about 2 cups of powdered sugar to 3-4 tablespoons of liquid (milk, water, or juice) typically yields a thick but pourable consistency suitable for drizzling or thin coating. For cooked glazes, the sugar concentration is much higher, influencing setting properties. For example, fondant requires cooking sugar syrup to approximately 115-118°C (239-244°F) to achieve the correct crystalline structure upon cooling and working.
Using Glucose Syrup for Shine and Stability
Glucose syrup is a baker's secret weapon for creating a perfect glaze for eclairs and other pastries, especially when aiming for shine and preventing crystallization. It's an invert sugar, meaning it helps keep other sugars (like sucrose) from forming large crystals, resulting in a smoother, glossier texture. In fondant glaze, a small amount of glucose added to the sugar syrup prevents graininess. In chocolate glazes or ganaches, it can add elasticity and shine.
Adding glucose syrup also helps glazes remain stable and less likely to crack or dry out over time. For a typical chocolate glaze using 300g of chocolate and 300g of cream, incorporating 30-50g of glucose syrup can significantly improve its sheen and texture. It's a viscous ingredient, so measuring it accurately, often by weight or by dipping the spoon in hot water first, is helpful.
The Importance of High-Quality Chocolate for Chocolate Glazes
When making a chocolate glaze, the quality of the chocolate you use is paramount. High-quality chocolate, often referred to as couverture chocolate, contains a higher percentage of cocoa butter (typically 32-39% or more). Cocoa butter is what gives chocolate its smooth texture, ability to melt cleanly, and, crucially for glazes, its potential for high gloss when handled correctly. Using chocolate chips, which often contain stabilizers to help them hold their shape when baking, can result in a duller, less fluid glaze.
Different types of chocolate (dark, milk, white) will yield different flavors and colors. Dark chocolate with a cocoa percentage between 55% and 70% is popular for éclairs as it provides a good balance of bitterness and sweetness. Always opt for chocolate in bar or fève (callet) form designed for melting and tempering for the best results in achieving a smooth, glossy, perfect glaze for eclairs.
Fruit Purées and Extracts: Enhancing Flavor Profiles
While sugar and binders form the structure of many glazes, fruit purées, juices, and extracts are essential for adding vibrant flavor and color. Using real fruit purées provides a more natural and intense flavor compared to artificial extracts. For a raspberry glaze, using a strained purée ensures a smooth texture free of seeds, delivering authentic raspberry taste and a beautiful pink hue.
Extracts, such as vanilla, coffee, almond, or peppermint, allow for easy flavor customization of neutral or classic glazes like fondant or simple powdered sugar glazes. A few drops of high-quality coffee extract can transform a basic fondant into a classic coffee éclair glaze. Similarly, using lemon juice in a simple sugar glaze adds brightness and cuts through sweetness. When incorporating flavors, start with small amounts and taste as you go, as extracts can be potent.
Step-by-Step Guide to Making the Perfect Glaze for Éclairs
Preparing Your Work Station and Ingredients
Before you begin making your glaze, ensure your workspace is clean and organized. Gather all necessary ingredients and equipment, such as saucepans, bowls, whisks, spatulas, measuring cups, and scales. Having everything ready beforehand minimizes stress and allows you to work efficiently, which is particularly important for glazes that require precise timing and temperature control. For instance, when making a cooked sugar glaze like fondant, having a candy thermometer readily available is crucial for hitting the correct temperature range of 115-118°C.
If your recipe requires specific temperatures for application (e.g., chocolate glaze is often applied around 30-35°C), have a thermometer handy to check the glaze temperature before dipping or pouring. Ensure your éclairs or pastries are completely cooled before glazing; applying glaze to warm pastries can cause it to melt, slide off, or create an uneven finish. A cool, stable pastry surface is key to achieving a smooth, perfect glaze for eclairs.
Melting Chocolate Properly: Avoiding Seizing
Melting chocolate correctly is vital for a smooth chocolate glaze and to avoid the dreaded "seizing," where the chocolate suddenly becomes stiff and grainy. The safest methods are using a double boiler or the microwave. For a double boiler, place chopped chocolate in a heatproof bowl set over a pot of simmering (not boiling) water, ensuring the bottom of the bowl doesn't touch the water. Stir gently until melted and smooth.
In the microwave, heat chopped chocolate in short intervals (20-30 seconds) on medium power, stirring well after each interval. Continue until the chocolate is mostly melted, then stir until completely smooth using residual heat. Avoid overheating. Crucially, keep water away from melting chocolate; even a tiny drop can cause it to seize. Ensure all utensils and bowls are completely dry. Aim to melt chocolate to a temperature suitable for your recipe, often around 45-50°C for dark chocolate before mixing with other ingredients like cream or butter.
Achieving the Right Glaze Consistency: Thinning and Thickening Techniques
The consistency of your glaze is critical for successful application and the final appearance of a perfect glaze for eclairs. A glaze that is too thick will be difficult to spread evenly and may look heavy or lumpy. A glaze that is too thin will run off the pastry and may not provide adequate coverage or shine. The ideal consistency often depends on the type of glaze and how you plan to apply it (dipping, pouring, or spreading).
- Thinning: If your glaze is too thick, add a small amount of liquid (water, milk, cream, or juice, depending on the glaze type) very gradually, stirring well after each addition. For a powdered sugar glaze, start with a teaspoon of liquid. For a chocolate ganache, a tablespoon of warm cream can help.
- Thickening: If your glaze is too thin, you can often thicken it by adding more of the solid component (powdered sugar, melted chocolate, or cocoa powder) or by letting it cool slightly. As many glazes cool, they naturally thicken. For a simple sugar glaze, whisk in more powdered sugar a tablespoon at a time. For a chocolate glaze, letting it sit at room temperature for 15-30 minutes will often thicken it significantly.
Coloring Your Glaze: Achieving Vibrant Hues
Adding color can make your glaze visually stunning, especially for festive occasions or specific themes. Use high-quality food coloring, preferably gel or powder colors, as they are more concentrated and less likely to thin the glaze compared to liquid colors. Gel colors are excellent for fondant and powdered sugar glazes, providing vibrant hues with just a small amount.
Add color gradually, mixing thoroughly after each addition, until you achieve the desired shade. Remember that the color may deepen slightly as the glaze sets. If coloring a warm glaze (like a warm fondant or white chocolate glaze), be mindful that the heat can sometimes affect certain colors. When aiming for bright, consistent colors on a perfect glaze for eclairs, using high-quality food coloring and incorporating it evenly is key. For example, achieving a vibrant red requires a good quality gel color and careful mixing to avoid streaks.
Techniques for Applying Glaze to Éclairs and Pastries
Dipping Techniques: Ensuring Even Coverage
Dipping is a popular method for applying glaze to éclairs, as it typically results in a smooth, even coating with minimal effort. Ensure your glaze is at the correct temperature and consistency for dipping (often slightly warmer and more fluid than for pouring). Hold the éclair horizontally and gently dip the top surface into the glaze, covering about one-third to half of the pastry's width.
Lift the éclair straight up, allowing excess glaze to drip off back into the bowl. You can gently scrape the underside of the éclair against the rim of the bowl to remove drips before placing it glaze-side up on a wire rack set over a baking sheet or parchment paper to catch drips. This method is excellent for achieving a consistent, perfect glaze for eclairs across a batch. For best results, ensure your glaze is deep enough to accommodate the pastry without having to tilt excessively.
Pouring Techniques: Creating a Smooth Finish
Pouring is another effective method, especially for larger pastries or when you want a slightly thicker layer of glaze than dipping might provide. Place your pastry on a wire rack set over a tray. Spoon or pour the glaze over the top of the pastry, allowing it to flow down the sides. For éclairs, you can hold the éclair over the bowl of glaze and use a spoon to pour it evenly over the top surface.
Use a spatula or offset knife to gently guide the glaze if needed, but avoid overworking it, as this can create streaks or dull the shine. Pouring is particularly effective for glazes that are slightly thicker or contain elements you want distributed evenly, like nuts or sprinkles added before the glaze sets. A smooth, steady pour is key to a flawless, perfect glaze for eclairs using this method.
Using a Piping Bag for Decorative Glaze Designs
For more intricate designs or controlled application, a piping bag fitted with a plain or star tip can be used. This technique is less about full coverage and more about creating patterns, lines, or swirls on top of a base glaze or a plain pastry. Melted chocolate or a slightly thicker glaze works well for piping.
Fill a piping bag with your glaze, twist the top to secure, and snip off the tip or use a piping tip. Apply steady pressure to create lines, dots, or other decorative elements on your cooled pastry. This allows for greater precision and creativity, adding a personal touch to your perfect glaze for eclairs or other French pastries. For example, you might pipe thin lines of white chocolate glaze over a dark chocolate glazed éclair.
Troubleshooting Common Glazing Problems
Despite careful preparation, you might encounter issues like streaks, uneven coverage, or drips. Streaks can occur if the glaze isn't mixed thoroughly, if it's applied at the wrong temperature, or if you overwork it during application. Uneven coverage might mean the glaze consistency is off or the pastry surface wasn't smooth. Drips are common but can be minimized by scraping the excess glaze off the bottom edge after dipping or by allowing excess glaze to drip onto the tray before moving the pastry.
If your glaze sets too quickly, try warming it slightly. If it's too thin, let it cool slightly or adjust consistency as described earlier. Practice helps identify and solve these issues for a consistently perfect glaze for eclairs.
Tips and Tricks for a Professional-Looking Éclair Glaze
Achieving a Mirror Glaze Finish
A mirror glaze, or glacage miroir, is a highly glossy, often colorful glaze made with gelatin, sugar, glucose, water, and condensed milk or white chocolate. Achieving this stunning finish requires precision. The glaze must be poured over frozen or very cold pastries. The temperature of the mirror glaze itself is critical – typically applied between 28°C and 32°C (82°F and 90°F). Too hot, and it will be too thin; too cold, and it won't flow smoothly.
Pour the glaze in a single, steady motion over the completely covered pastry placed on a rack. Let the excess drip off completely. Avoid touching or spreading the glaze once poured. This advanced technique requires practice but yields an incredibly smooth, reflective surface that makes for a truly spectacular and perfect glaze for eclairs or entremets.
Preventing Glaze Cracking
Glaze cracking can be frustrating, especially with fondant or chocolate glazes. It often happens because the glaze sets too rigidly and can't accommodate the slight movement or temperature changes of the pastry. For fondant, ensuring it contains enough glucose syrup and is warmed correctly (not too hot, which makes it brittle) helps. For chocolate glazes, adding a small amount of fat (like butter or oil) or glucose syrup can increase elasticity.
Applying the glaze when the pastry is fully cooled, but not frozen (unless using mirror glaze), is also important. If the pastry is too cold relative to the glaze, the glaze might seize and crack as it sets. Ensuring the glaze consistency isn't too thick also helps prevent stress cracks. Using tempered chocolate for a chocolate glaze results in a stable, less crack-prone finish.
Storing Glazed Éclairs and Pastries
Proper storage is essential to maintain the quality and appearance of your perfectly glazed éclairs. Once the glaze has set, store the pastries in a single layer in an airtight container. Layering them can cause the glaze to stick or get damaged. Refrigeration is usually necessary due to the filling, but be aware that refrigeration can sometimes dull the shine of certain glazes, particularly chocolate.
Fondant glazes can sometimes become slightly moist or sticky in humid conditions or the refrigerator. Chocolate glazes generally hold up well. To minimize condensation when refrigerating, place the container in the coldest part of the fridge. Glazed éclairs are best enjoyed within 1-3 days for optimal freshness and texture.
Adding Decorations: Nuts, Sprinkles, and More
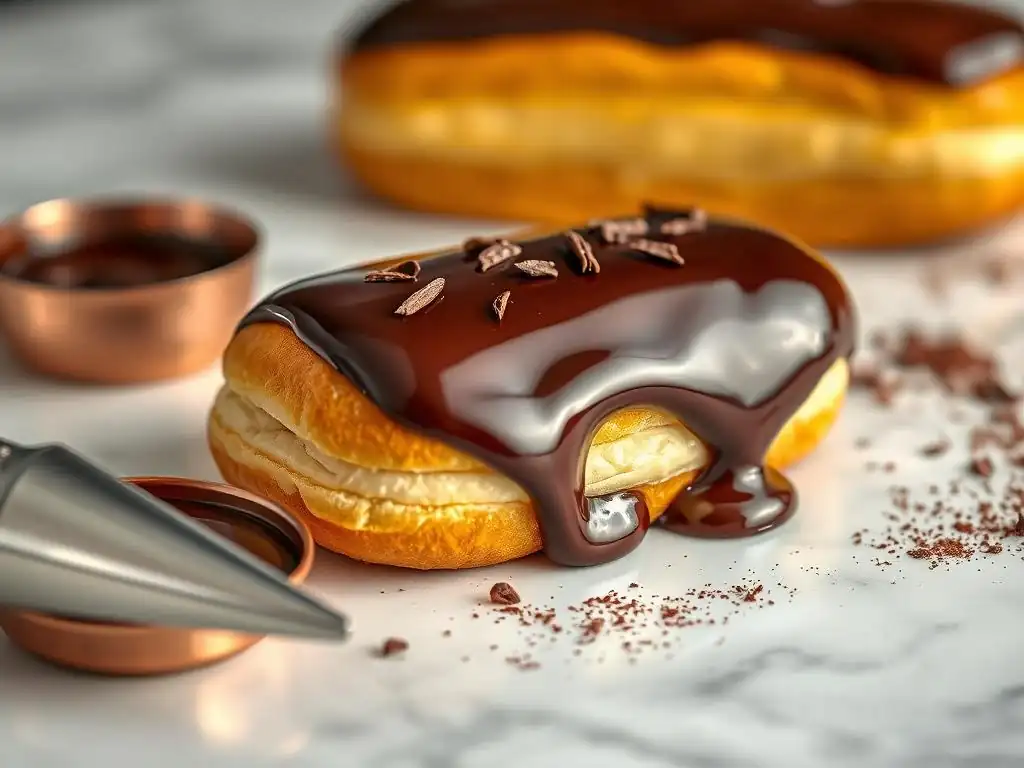
Decorations add visual interest and can enhance flavor. These should typically be added while the glaze is still wet or tacky, allowing them to adhere properly. Chopped nuts, toasted coconut, chocolate shavings, sprinkles, or edible glitter can be sprinkled over the glazed surface immediately after dipping or pouring.
For more precise decorations, like placing individual chocolate pieces or candied fruit, wait until the glaze is partially set but still soft enough for the decoration to press into slightly. This step allows you to customize your perfect glaze for eclairs, adding texture and personality. For example, a coffee-flavored fondant glaze might be topped with a few chocolate-covered coffee beans.
Advanced Glaze Techniques for French Pastries
Creating Marbled Glaze Effects
Marbling adds a sophisticated, artistic touch to glazes. This technique works well with glazes of similar consistency, often two different colors of fondant glaze or tempered chocolate. Prepare your base glaze in one color. Then, prepare a smaller amount of a contrasting color. Drizzle or dollop the second color onto the surface of the first glaze (while still in the bowl or on a flat surface).
Using a skewer, toothpick, or small spatula, gently swirl the colors together just once or twice. Do not over-mix, or the colors will blend completely. Then, dip or pour this swirled glaze over your pastry. The limited swirling creates beautiful, unique patterns as the glaze flows. This is a striking way to enhance the visual appeal of a perfect glaze for eclairs.
Using Edible Gold Leaf for Elegance
Edible gold leaf adds an undeniable touch of luxury and elegance to glazed pastries. It's typically applied to a glaze that has just set but is still slightly tacky. Handle gold leaf with specialized tools (like confectioner's brushes or tweezers) in a draft-free environment, as it is incredibly delicate and static electricity can make it difficult to work with.
Carefully pick up a piece of gold leaf and gently press it onto the glazed surface where desired. Use a soft brush to lightly pat it down. A little gold leaf goes a long way and can transform a simple glaze into a showstopper. Applying just a few small flakes onto a dark chocolate perfect glaze for eclairs creates a stunning contrast.
Tempering Chocolate for a Glossy Finish
For a truly professional, high-gloss, snap-when-you-bite-it chocolate glaze, tempering the chocolate is essential. Tempering involves melting chocolate and then cooling and reheating it to specific temperatures to stabilize the cocoa butter crystals. This process results in chocolate that sets hard, shrinks slightly (making it easy to release from molds), has a beautiful shine, and resists melting at room temperature.
While more complex than simply melting, tempered chocolate provides the most stable and visually appealing chocolate perfect glaze for eclairs. The temperature range varies depending on the type of chocolate (dark, milk, or white) but typically involves melting to ~45-50°C, cooling to ~28-30°C while agitating, and then warming slightly to ~31-32°C for dark chocolate before use. Applying tempered chocolate requires working relatively quickly as it sets rapidly.
Neutral Glaze Recipe for Fruit Tarts
A neutral glaze, often called nappage neutre or clear glaze, is a versatile preparation used primarily to coat fresh fruit on tarts, adding shine and preventing oxidation without adding significant color or a specific flavor profile. It's typically made from water, sugar, glucose syrup, and a gelling agent like pectin or agar-agar.
A basic recipe might involve combining 200g water, 200g sugar, 100g glucose syrup, and 10g pectin, bringing it to a boil and simmering briefly. This glaze is applied warm (around 60-70°C) using a pastry brush over the fruit arranged on a tart. While not a perfect glaze for eclairs themselves, understanding neutral glaze is key for achieving professional finishes on fruit-topped French pastries.
Troubleshooting Common Glaze Issues and Solutions
Glaze is Too Thick: How to Thin It Out
If your glaze is too thick for dipping or pouring smoothly, it needs to be thinned. The method depends on the type of glaze.
- For simple powdered sugar glazes, whisk in a very small amount (start with 1/2 to 1 teaspoon) of the liquid used in the recipe (milk, water, juice) until the desired consistency is reached.
- For cooked glazes like fondant, gently warm it slightly over a double boiler, adding a tiny amount of warm water or sugar syrup if necessary, stirring constantly.
- For chocolate glazes or ganaches, gently warm the glaze over a double boiler or in short microwave bursts, then stir in a tablespoon of warm cream, milk, or a neutral oil (like vegetable or grapeseed oil). Add liquid gradually to avoid making it too thin.
Glaze is Too Thin: How to Thicken It
A glaze that is too thin won't coat properly and will just run off the pastry.
- For powdered sugar glazes, simply whisk in more powdered sugar, a tablespoon at a time, until the desired thickness is achieved.
- For cooked glazes like fondant, allow it to cool slightly; it will naturally thicken as it cools. If it's still too thin, you may need to gently rewarm it and work it more vigorously as it cools to encourage crystallization.
- For chocolate glazes or ganaches, the easiest way is often to let it cool down at room temperature. As the fat (cocoa butter or cream fat) solidifies, the glaze will thicken. If you need a quicker fix, you can try stirring in a small amount of additional melted chocolate or cocoa powder, but this can slightly alter the flavor balance. Refrigerating it for 10-15 minutes and stirring can also help it thicken.
Glaze is Dull: How to Add Shine
A dull glaze lacks visual appeal. Shine is primarily related to the ingredients and temperature control.
- For fondant glazes, ensuring enough glucose syrup is used and warming it gently to the correct application temperature (around 35-40°C) helps achieve a soft sheen. Overheating fondant can make it dull.
- For chocolate glazes, using high-quality chocolate with high cocoa butter content is key. Tempering the chocolate is the best way to get a truly glossy, stable finish. If you're not tempering, ensuring the chocolate is melted gently and not overheated, and adding a touch of glucose syrup or a tiny bit of neutral oil (like 1 teaspoon per cup of glaze) can improve shine. Applying the glaze at the correct temperature (often 30-35°C for chocolate) is also vital for gloss.
- For fruit glazes, ensuring adequate gelling agent (pectin, agar) and often adding glucose syrup helps create a clear, shiny finish.
Glaze is Sticky: How to Prevent Stickiness
Sticky glazes can be messy and unpleasant to handle. This often happens when the sugar hasn't set properly or due to humidity.
- For fondant glazes, stickiness can result from not cooking the sugar syrup to a high enough temperature initially or from not working the cooled sugar mass enough to develop the correct crystalline structure. High humidity can also make fondant weep and become sticky. Storing glazed pastries in an airtight container in a cool, dry place helps.
- For simple powdered sugar glazes, stickiness is usually due to too little powdered sugar relative to the liquid. Adding more powdered sugar will help it set firmer.
- For caramel glazes, cooking the sugar to a slightly higher temperature during caramelization can result in a firmer, less sticky glaze. Adding glucose also helps prevent the sugar from recrystallizing in a sticky way. Ensuring the glaze cools and sets completely before handling is also important.
Storing and Preserving Your Perfect Éclair Glaze
Best Practices for Short-Term Storage
If you have leftover glaze or need to make it ahead of time for use within a day or two, short-term storage is simple. Most glazes can be stored at room temperature if they don't contain dairy or perishable ingredients, covered tightly with plastic wrap pressed directly onto the surface to prevent a skin from forming. This works well for simple powdered sugar glazes or fondant.
For glazes containing dairy, like chocolate ganache or caramel glaze made with cream, they must be stored in the refrigerator. Place the glaze in an airtight container and press plastic wrap onto the surface before sealing. Refrigerated glazes will thicken significantly.
Long-Term Storage Options
Long-term storage options vary depending on the glaze type. Simple sugar glazes made with only sugar and water can last for several weeks in the refrigerator in an airtight container. Cooked glazes like fondant can also be stored for several weeks to a month in the refrigerator; they may harden and require reheating and reworking before use.
Chocolate ganache or cream-based glazes are best used relatively fresh (within 3-5 days refrigerated). While some can potentially be frozen, freezing can sometimes affect the texture and glossiness, especially of delicate glazes. If freezing, store in an airtight container, leaving minimal headspace. Thaw in the refrigerator.
Reheating and Reusing Glaze
Most glazes can be gently reheated and reused.
- Fondant: Place the hardened fondant in a heatproof bowl over a double boiler. Add a teaspoon or two of warm water or sugar syrup. Stir gently as it warms, working it until it becomes smooth and reaches the desired dipping consistency and temperature (around 35-40°C).
- Chocolate Glaze/Ganache: Gently warm the refrigerated or room temperature glaze over a double boiler or in short bursts in the microwave (stirring frequently) until it is smooth and fluid enough for application (typically 30-35°C). Be careful not to overheat, which can cause separation or dullness.
- Simple Sugar Glazes: Add a tiny bit more liquid and whisk until smooth.
Always check the consistency and temperature after reheating to ensure it's suitable for achieving a perfect glaze for eclairs. If the texture seems off after reheating, it might be best to make a fresh batch.
Conclusion: Mastering the Art of the Perfect Glaze for Éclairs
Recap of Key Techniques and Tips
Achieving the perfect glaze for eclairs and French pastries is a rewarding skill that enhances both the appearance and taste of your baked goods. We've covered understanding different glaze types, from classic fondant to rich chocolate and vibrant fruit glazes, highlighting the essential ingredients like sugar, glucose syrup, and quality chocolate. Mastering the step-by-step process, including proper melting, consistency control, and application techniques like dipping and pouring, is fundamental. Remember the importance of temperature, both for the glaze and the pastry, to prevent issues like cracking or dullness.
Key tips for a professional finish include using glucose for shine, applying glaze to cooled pastries, and troubleshooting common problems like thickness or stickiness. Advanced techniques like mirror glaze and marbling offer ways to elevate your creations further. With attention to detail and practice, you can consistently produce perfectly glazed eclairs that look as incredible as they taste, demonstrating a true mastery of pastry.
Encouragement to Experiment and Create Your Own Glaze Variations
Now that you have a solid foundation in creating the perfect glaze for eclairs and other French pastries, we encourage you to experiment! Don't be afraid to try different flavor combinations – perhaps a passion fruit glaze on a vanilla éclair, or a salted caramel glaze on a chocolate pastry. Play with colors, textures, and decorative elements to make your creations unique.
Baking, especially pastry, is an art form, and glazing is your opportunity to add your signature touch. Use this guide as a springboard for your creativity. With practice and a willingness to experiment, you'll soon be crafting your own signature perfect glaze for eclairs and dazzling friends and family with your beautiful, delicious pastries. Happy glazing!
Frequently Asked Questions
What makes a glaze "perfect" for eclairs and French pastries?
A "perfect" glaze provides a beautiful shiny appearance, enhances the flavor profile of the pastry, and adheres well without being too sticky or runny.
What are the most common types of glazes used for eclairs?
Common glazes include chocolate glaze, vanilla glaze, and caramel glaze. These glazes often use a base of powdered sugar, milk, or cream and flavoring extracts.
How can I prevent my glaze from being too thick or too thin?
The key is to carefully measure your ingredients and adjust the liquid content gradually. Adding too much liquid will make it runny, while not enough will create a thick, unspreadable glaze.
What's the best way to apply glaze to eclairs for a professional finish?
Allow the eclairs to cool completely before glazing. Dip the tops of the eclairs into the glaze or use a piping bag for more control. Then, allow the glaze to set properly before serving.
Can I add other ingredients to my glaze to customize the flavor?
Yes! You can experiment with extracts like almond or coffee, spices like cinnamon or nutmeg, or even a touch of liqueur to create unique and delicious glaze variations.
Final Reflection: The Enduring Allure of the Perfect Glaze
The pursuit of the perfect éclair glaze is more than just a culinary quest; it's a reflection of our desire for precision, beauty, and the ultimate expression of flavor. A flawlessly glossy surface not only elevates the visual appeal of these delicate pastries but also speaks to the baker's skill and dedication. In a world increasingly focused on instant gratification, the meticulous process of achieving this perfect sheen stands as a testament to the enduring value of patience and craftsmanship.
The impact of a truly exceptional glaze extends beyond the immediate sensory experience. It's a symbol of artistry, a subtle yet powerful way to communicate care and attention to detail. The simple act of creating a beautiful glaze transforms a pastry into something more – a small work of art, a testament to human creativity. As the renowned pastry chef, Pierre Hermé, once said, Pastry is not just about taste; it's about emotion, about memory, about sharing.
The perfect glaze embodies this sentiment, enhancing the emotional connection we have with food and the memories it evokes.
Now, consider your own baking journey. Perhaps you've already experienced the thrill of achieving that perfect mirror-like shine, or maybe you're still striving for that elusive goal. Regardless of your skill level, remember that the process itself is just as valuable as the result.
Embrace the challenges, learn from your mistakes, and savor the satisfaction of creating something beautiful and delicious. The next time you find yourself facing a bowl of glaze, remember the power of precision, the artistry of the craft, and the enduring joy of sharing your creations with others. The perfect glaze awaits – dare to pursue it.
Unlock Your Inner Pâtissier: Master the Art of Glaze!
Thanks for joining us on this delicious journey into the world of perfect pastry glazes! We hope you gained valuable tips and tricks to elevate your baking. Ready to put your new skills to the test?
- Create your dream glaze: Experiment with different flavor combinations and techniques you learned today. Don't be afraid to get creative – the perfect glaze is waiting to be discovered!
- Share your creations: Show us your glazed masterpieces! Tag us on social media using #BakeWithEaseGlaze and inspire other bakers.
- Challenge a friend: Nominate a fellow baking enthusiast to try a new glaze recipe and share their results.
What unexpected flavor combination will you explore first in your glaze journey?