
Pain au Chocolat at Home: Recreating a Parisian Bakery Staple

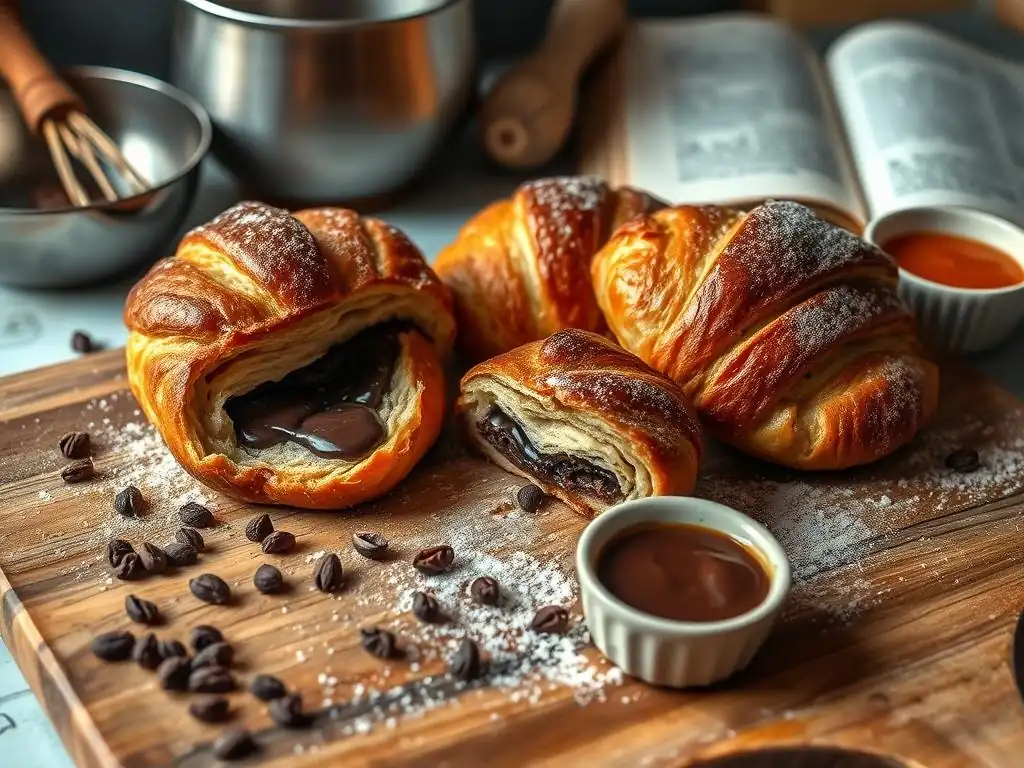
Welcome to BakeWithEase, your trusted guide to creating delectable treats! Ever dreamed of recreating the flaky, buttery perfection of a Parisian pain au chocolat in your own kitchen? Prepare to be amazed at how achievable it is. This article unveils our secrets to crafting easy homemade pain au chocolat, demystifying the process and empowering you to bake like a pro. Intrigued? Keep reading to unlock the secrets to this irresistible pastry!
- Pain au Chocolat at Home: Recreating a Parisian Bakery Staple with BakeWithEase
- Introduction: Mastering Easy Homemade Pain au Chocolat
- Understanding Pain au Chocolat: A Deeper Dive
- Easy Homemade Pain au Chocolat Recipe: Step-by-Step Guide
- Tips and Tricks for Perfecting Your Pain au Chocolat
- Variations on the Classic: Exploring Pain au Chocolat Flavors
- Storing and Reheating Your Homemade Pain au Chocolat
- Conclusion: Enjoying Your Effortlessly Delicious Pain au Chocolat
- Frequently Asked Questions
- Final Reflection: The Enduring Allure of Homemade Happiness
- Unleash Your Inner Parisian Pâtissier!
Pain au Chocolat at Home: Recreating a Parisian Bakery Staple with BakeWithEase
Introduction: Mastering Easy Homemade Pain au Chocolat
Why Make Pain au Chocolat at Home? A Baker's Delight
Embarking on the journey to create easy homemade pain au chocolat is an incredibly rewarding experience for any baking enthusiast. Beyond the simple pleasure of crafting something delicious from scratch, mastering this classic French pastry offers a unique sense of accomplishment. The process, while sometimes perceived as complex, can be broken down into manageable steps, making it accessible even for intermediate bakers.
The aroma filling your kitchen as these golden, flaky pastries bake is simply unparalleled, instantly transporting you to a Parisian boulangerie. Furthermore, controlling the quality of ingredients, from the butter to the chocolate, ensures a superior final product that often surpasses store-bought versions in freshness and flavor intensity.
Making easy homemade pain au chocolat also allows for personalization. You can choose premium chocolate batons, adjust the sweetness slightly, or even experiment with different butter types to influence the flavor profile and flakiness. The satisfaction derived from seeing layers develop and the chocolate melt perfectly within the pastry is immense.
It's not just about baking; it's about learning a technique rooted in centuries of pastry tradition, bringing a touch of sophisticated French baking into your own home. For instance, using a high-quality European-style butter with a higher fat content, typically around 82-84%, can yield significantly flakier layers compared to standard butter with 80% fat. This seemingly small detail can make a substantial difference in the final texture.
BakeWithEase's Guide to Perfect Pain au Chocolat
At BakeWithEase, our philosophy centers around demystifying baking and making seemingly daunting recipes achievable for everyone. This guide to easy homemade pain au chocolat is designed with that principle in mind. We break down the traditional techniques, like lamination, into straightforward, step-by-step instructions that minimize complexity without sacrificing authenticity. Our focus is on providing clear guidance, helpful tips, and troubleshooting advice to ensure your success from start to finish. We believe that with the right approach and a little patience, anyone can recreate this beloved Parisian staple in their own kitchen.
This comprehensive guide covers everything from selecting the right ingredients – like specifying the type of chocolate baton (typically 60-70% cocoa content) and the ideal butter consistency – to mastering the folding techniques required for lamination. We'll walk you through each stage, explaining the why behind each step, such as the importance of chilling the dough adequately between folds.
For example, chilling the dough in the refrigerator for at least 30 minutes between each fold allows the gluten to relax and the butter to firm up, which is crucial for creating distinct, flaky layers during baking. Without proper chilling, the butter can melt into the dough, resulting in a less airy and less flaky pastry.
Understanding Pain au Chocolat: A Deeper Dive
What is Pain au Chocolat? History and Origins
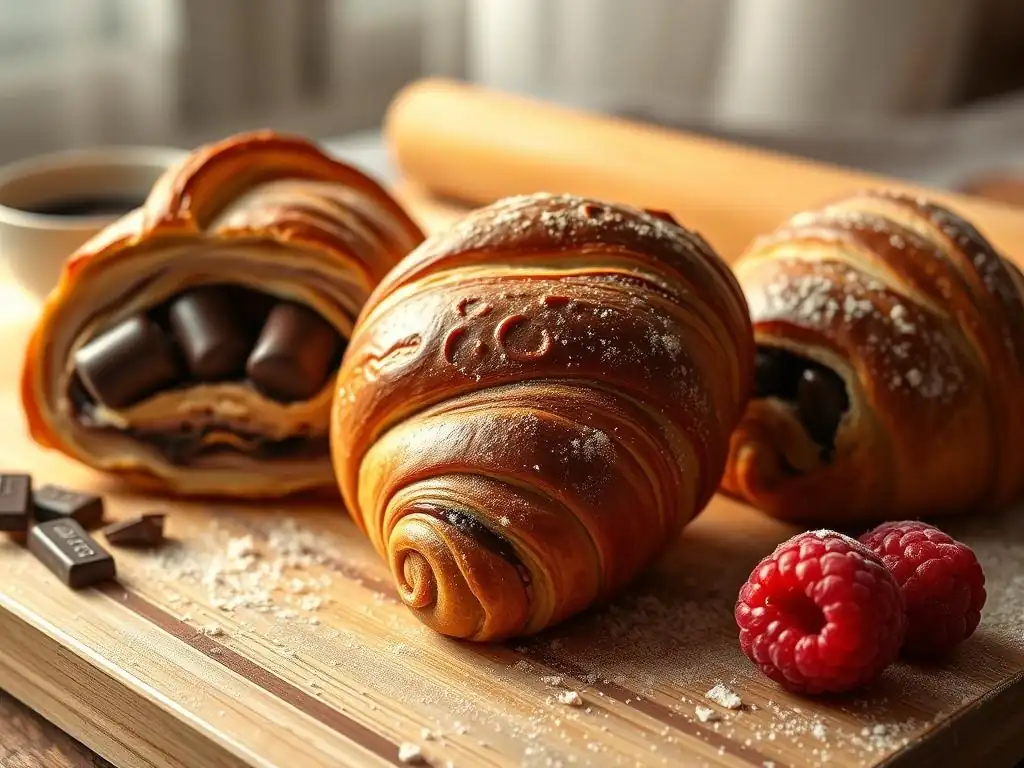
Pain au chocolat, literally translating to "chocolate bread," is one of France's most iconic viennoiseries – a category of baked goods made from a leavened dough enriched with eggs, butter, and sugar, similar to brioche or croissant dough but often laminated. While its exact origins are debated, a popular story links it to the Austrian Kipferl (the ancestor of the croissant), brought to France by Austrian baker August Zang in the 1830s. Zang opened a Viennese bakery in Paris, introducing techniques that were later adapted by French bakers.
The idea of adding chocolate to the laminated dough evolved over time, solidifying pain au chocolat's place in French breakfast and snack culture. It's not truly a bread, despite the name, but rather a rich, flaky pastry.
Historically, viennoiseries were considered a luxury due to the amount of butter and labor involved. Pain au chocolat, in particular, became a beloved treat, often enjoyed warm from the bakery in the morning or as an afternoon snack. The key characteristic is the contrast between the crisp, buttery exterior and the soft, airy interior with melted chocolate batons running through the center.
While the classic version uses dark or semi-sweet chocolate, regional variations exist, and modern interpretations might include different fillings. The term "chocolatine" is used in some parts of southwestern France instead of "pain au chocolat," a linguistic difference that is sometimes the subject of playful debate among French speakers.
Key Ingredients for Authentic Pain au Chocolat
Creating truly authentic and easy homemade pain au chocolat hinges on using high-quality, specific ingredients. The foundation is a dough made from strong bread flour, which has a higher protein content (typically 12-14%) compared to all-purpose flour (10-12%). This higher protein is essential for developing the gluten structure needed to withstand the lamination process and create airy layers. Granulated sugar provides sweetness and aids in browning, while salt balances the flavors. Instant dry yeast is the leavening agent, allowing the dough to rise and become light.
The most critical ingredient for the signature flakiness is butter, and not just any butter. High-quality, unsalted butter with a high fat content (around 82-84%) is preferred because it melts at a higher temperature than standard butter, making the lamination process more successful by creating steam between the layers of dough during baking. This steam is what forces the layers apart, resulting in that characteristic flaky texture.
For the filling, specific chocolate batons (often called bâtons de chocolat or chocolat à pain) are used. These are typically semi-sweet or dark chocolate sticks (around 60-70% cocoa) designed to hold their shape reasonably well during baking, melting just enough to become gooey but not completely dissolving.
Using chocolate chips or chopped chocolate can work, but batons provide the classic distribution and melting behavior. A simple egg wash (an egg whisked with a little water or milk) is used to brush the pastries before baking, giving them a beautiful golden sheen.
Easy Homemade Pain au Chocolat Recipe: Step-by-Step Guide
Preparing the Dough: A Simple Approach
Creating the dough for easy homemade pain au chocolat starts with a simple lean dough base, similar to a croissant dough but often slightly less enriched initially. The key is developing a smooth, elastic dough before the butter is incorporated through lamination. Begin by combining your dry ingredients: strong bread flour, sugar, salt, and instant dry yeast in a large mixing bowl.
For approximately 12 pastries, you might start with around 500 grams of strong bread flour, 60 grams of sugar, 10 grams of salt, and 7 grams of instant dry yeast. Whisk these together to ensure even distribution of the yeast and salt.
Next, gradually add cold water or milk to the dry ingredients while mixing. The exact amount of liquid will vary depending on the flour and humidity, but typically ranges from 280 ml to 320 ml. Mix until a shaggy dough forms, then turn it out onto a clean surface and knead for about 8-10 minutes. The goal is to develop gluten until the dough is smooth, elastic, and passes the windowpane test (you can stretch a small piece thinly enough to see light through it without tearing).
Avoid adding too much extra flour during kneading; a slightly sticky dough is preferable to a dry one. Once kneaded, shape the dough into a rough rectangle, wrap it tightly in plastic wrap, and refrigerate for at least 1-2 hours, or preferably overnight. This chilling is crucial for the dough to become firm and easier to handle during lamination.
Combining Dry Ingredients for Pain au Chocolat
The initial step in making the dough for easy homemade pain au chocolat involves the careful measurement and combination of the dry components. Accuracy at this stage is vital for the dough's structure and flavor balance. Measure your strong bread flour precisely, ideally using a kitchen scale for consistency.
Add the granulated sugar, which provides sweetness and helps the dough brown beautifully during baking. The salt is crucial not just for flavor, but also for controlling yeast activity and strengthening the gluten network. Finally, incorporate the instant dry yeast; this type of yeast can be mixed directly into the dry ingredients without prior proofing, simplifying the process.
Using a whisk, gently combine these dry ingredients in your mixing bowl. Ensure the salt and yeast are not clumped together, as direct contact between them for too long can potentially inhibit yeast activity. This initial mix sets the stage for the dough's development, ensuring that the leavening agent is evenly distributed throughout the flour mixture, which will lead to a consistent rise later on. For a standard batch yielding 10-12 pastries, typical quantities might be around 500g flour, 50-70g sugar, 8-10g salt, and 5-7g instant yeast.
Incorporating Butter: Achieving Lamination
Lamination is the hallmark technique for creating flaky pastries like easy homemade pain au chocolat. It involves folding a block of cold butter into the dough multiple times, creating alternating layers of dough and butter. The process starts with preparing the butter block. Take cold, high-fat butter (around 250-300g for 500g of flour) and shape it into a flat rectangle, roughly half the size of your rolled-out dough rectangle. This is often done by placing the cold butter between two sheets of parchment paper and gently pounding and rolling it.
Once the dough is chilled and firm, roll it out on a lightly floured surface into a rectangle about twice the width of your butter block. Place the butter block on one half of the dough, leaving a small border. Fold the other half of the dough over the butter, sealing the edges as best as possible. This is the first "fold" or "turn."
You will typically perform three or four such folds, with chilling periods in between. For example, after the first fold, roll the dough into a long rectangle again, fold it into thirds (like folding a letter), wrap, and chill for 30-60 minutes. Repeat the rolling and folding into thirds two or three more times, chilling between each turn. This process builds hundreds of thin layers of dough separated by thin layers of butter.
First Rise: Developing the Dough's Flavor
While traditional croissant and pain au chocolat doughs undergo significant rising primarily after shaping (proofing), the initial dough mixed before lamination often benefits from a short rest or bulk fermentation period to develop flavor. After the initial kneading (before lamination begins), shaping the dough into a rectangle and refrigerating it for several hours or overnight serves a dual purpose: it chills the dough for lamination and allows a slow, cold fermentation. This slow fermentation, even if minimal in visible rise, contributes significantly to the complexity and depth of flavor in the final baked pastry.
During this cold rest (typically 8-12 hours at 4°C / 39°F), enzymatic activity breaks down starches into sugars, and yeast produces various flavor compounds. This process is crucial for moving beyond a simple "bread" flavor towards the rich, nuanced taste characteristic of authentic viennoiseries. While you won't see a dramatic doubling in size at this stage due to the cold temperature, the dough becomes more extensible, easier to roll, and develops a foundation of flavor that baking alone cannot create. This initial chilling and slow fermentation is a key step towards achieving delicious, easy homemade pain au chocolat.
Shaping the Pain au Chocolat: A Visual Guide
Shaping is where your laminated dough starts to look like the classic easy homemade pain au chocolat. It requires careful handling to maintain the layers you've worked hard to create. After the final lamination fold and chilling period, the dough should be firm but pliable. Lightly flour your work surface and roll out the dough into a large, even rectangle. The thickness is critical – aim for about 3-4 millimeters (roughly 1/8 inch). Rolling too thin can damage layers, while rolling too thick results in dense pastries.
Once rolled, trim the edges with a sharp knife or pizza cutter to create clean lines and expose the layers. Cut the large rectangle into smaller rectangles. The classic shape for pain au chocolat is a rectangle roughly 8-10 cm (about 3-4 inches) wide and 18-20 cm (about 7-8 inches) long. You'll place chocolate batons along the width of these rectangles and roll them up. A typical batch from 500g flour might yield 10-12 pastries, meaning you'll cut the dough into 10-12 rectangles of roughly these dimensions. Consistent sizing ensures even baking.
Rolling Out the Dough: Thickness and Consistency
Achieving the correct thickness and consistency when rolling out the dough is paramount for successful easy homemade pain au chocolat. After the final turn and chilling, remove the dough from the refrigerator and let it sit at room temperature for just a few minutes to become slightly more pliable, but still cold. Lightly flour your work surface and rolling pin. Start rolling from the center outwards, applying even pressure. Rotate the dough frequently to prevent sticking and ensure an even thickness across the entire sheet.
Your goal is a rectangle approximately 3-4 mm (about 1/8 inch) thick. Rolling too thin can tear the delicate layers of butter and dough, causing them to merge and reduce flakiness. Rolling too thick will result in a heavier, less airy pastry.
Aim for a rectangle that is long enough to accommodate two chocolate batons side-by-side across its width after cutting into individual pieces. For instance, if your final rectangle is 40 cm long and 20 cm wide, and you cut it into pieces 10 cm wide, each piece will be 20 cm long, allowing you to place batons along the 10 cm width and roll along the 20 cm length. Visual inspection and gentle touch can help gauge the consistency and thickness.
Adding Chocolate Batons: The Perfect Fill
The defining feature of pain au chocolat is, of course, the chocolate. For easy homemade pain au chocolat, using specific chocolate batons is highly recommended. These are typically 8-10 cm (about 3-4 inches) long and about 1 cm (about 0.4 inches) thick, made from semi-sweet or dark chocolate (around 60-70% cocoa). Lay out your rolled and trimmed dough rectangle and cut it into smaller rectangles, each about 8-10 cm wide and 18-20 cm long.
Place one chocolate baton along the width of each small rectangle, about 1-2 cm from one end. Roll the dough over the baton once to enclose it. Place a second baton about 1-2 cm further up the dough rectangle and continue rolling until the dough is completely wrapped around both batons. The seam should be on the underside of the shaped pastry.
This ensures the chocolate is centered within the pastry after baking. Using two batons per pastry provides a generous amount of chocolate, creating that satisfying gooey center upon biting into your easy homemade pain au chocolat. Ensure the batons are placed parallel to the short side of the dough rectangle.
Proofing the Shaped Pain au Chocolat
Proofing is a critical step for easy homemade pain au chocolat, allowing the shaped pastries to rise and become light and airy before baking. After shaping, arrange the pastries on baking sheets lined with parchment paper, leaving ample space between them (at least 5-7 cm or 2-3 inches) as they will expand significantly. Cover the baking sheets loosely with plastic wrap or a clean kitchen towel to prevent the dough from drying out.
The ideal proofing environment is warm and slightly humid, ideally around 24-26°C (75-79°F). Avoid temperatures that are too high, as this can cause the butter within the layers to melt and seep out, ruining the lamination. Proofing time can vary greatly depending on the temperature, but it typically takes 1.5 to 2.5 hours. The pastries are ready when they have nearly doubled in size, look puffy, and the layers are visible but still distinct.
A gentle poke should leave a slight indentation that slowly springs back. Over-proofing can lead to collapsed pastries in the oven, while under-proofing results in dense, heavy pain au chocolat. About 15-20 minutes before baking, gently brush the tops of the proofed pastries with egg wash for a golden finish.
Baking Your Pain au Chocolat: Achieving Golden Perfection
Baking is the moment of truth for your easy homemade pain au chocolat. It's when the magic happens – the layers puff up, the butter creates steam, and the chocolate melts. Proper oven temperature and timing are crucial for achieving that coveted flaky exterior and soft interior.
Preheat your oven well in advance to the correct temperature, typically between 180°C and 200°C (350°F and 400°F), depending on your oven's calibration. A common recommendation is 190°C (375°F) for conventional ovens. Using a baking stone or steel, if you have one, can help ensure a crisp bottom crust by providing consistent heat.
Place the egg-washed, proofed pastries in the preheated oven. Baking time usually ranges from 15 to 25 minutes. The exact time will depend on your oven and the size of your pastries. Keep a close eye on them.
They are done when they are deeply golden brown all over – not just on top, but the sides and bottom as well. This deep color indicates that the layers have cooked through and become crisp. Baking until sufficiently golden is key to avoiding a pale, doughy result. For instance, in a well-calibrated oven at 190°C, a batch of 12 standard-sized pain au chocolat might take exactly 18 minutes to reach a perfect golden-brown hue and internal temperature indicating doneness.
Oven Temperature and Baking Time
Setting the correct oven temperature and monitoring baking time are vital steps for successful easy homemade pain au chocolat. A temperature that is too low can cause the butter to melt and ooze out before the layers set, resulting in flat, greasy pastries. A temperature that is too high might burn the exterior before the interior is fully cooked and the layers have properly expanded.
A widely recommended temperature range is 190°C to 200°C (375°F to 400°F). Starting at a slightly higher temperature, like 200°C for the first 5-10 minutes, and then reducing it to 180°C-190°C for the remainder of the bake, can sometimes help ensure a good initial puff before allowing the layers to cook through.
Baking time typically falls between 15 and 25 minutes. The best indicator of doneness is the color: the pastries should be a rich, deep golden brown. Pale pastries are likely underbaked and will be doughy. If they are browning too quickly on top, you can loosely tent them with aluminum foil.
For example, if baking at 190°C, check the pastries after 15 minutes. If they are already a light golden, they may need only another 5-7 minutes. If they are still quite pale, they might need closer to 20-22 minutes total. Relying on visual cues – the deep golden color and puffed layers – is more reliable than strictly adhering to a timer.
Achieving a Flaky Crust and Soft Interior
The hallmark of a great pain au chocolat is the contrast between its shatteringly crisp, flaky crust and its tender, soft interior with melted chocolate. Achieving this requires careful attention throughout the process, from lamination to baking. The multiple layers created during lamination, separated by butter, are the foundation. During baking, the water in the butter turns to steam, which forces these layers apart, creating the characteristic puff and flakiness. Using high-fat butter is crucial here, as it has less water than standard butter.
Proper proofing also contributes significantly; a well-proofed pastry will have a light, airy structure ready to expand in the oven. Finally, the baking temperature and time play the concluding role. A hot oven ensures a rapid expansion and setting of the layers before the butter fully melts away.
Baking until a deep golden brown is essential because this allows the crust to fully crisp up and develop flavor through the Maillard reaction. Removing them too early will result in a soft, pale crust lacking that satisfying shatter. Allowing the pastries to cool slightly on a wire rack after baking allows the steam to escape and the crust to set further, enhancing the flaky texture while the interior remains soft and the chocolate gooey.
Cooling and Serving Your Homemade Pain au Chocolat
Once your easy homemade pain au chocolat emerges from the oven, golden and fragrant, the final step before enjoying is proper cooling. While the aroma is tempting, resist the urge to bite into them immediately. The pastries are extremely hot, and the melted chocolate inside can cause burns. More importantly, the structure is still delicate, and the layers need a few minutes to set properly.
Carefully transfer the baked pain au chocolat from the baking sheet to a wire rack using a spatula. Allow them to cool for at least 15-20 minutes. This cooling time allows the steam to dissipate, the butter within the layers to solidify slightly, and the crust to crisp up further. The chocolate inside will still be wonderfully warm and gooey.
Serving them warm, but not piping hot, is ideal for experiencing the full contrast between the flaky exterior and the molten chocolate center. Enjoy them with a cup of coffee or tea for a truly authentic French experience. A batch of 12 pastries, cooled for 20 minutes, is perfect for sharing... or not!
Tips and Tricks for Perfecting Your Pain au Chocolat
Troubleshooting Common Pain au Chocolat Problems
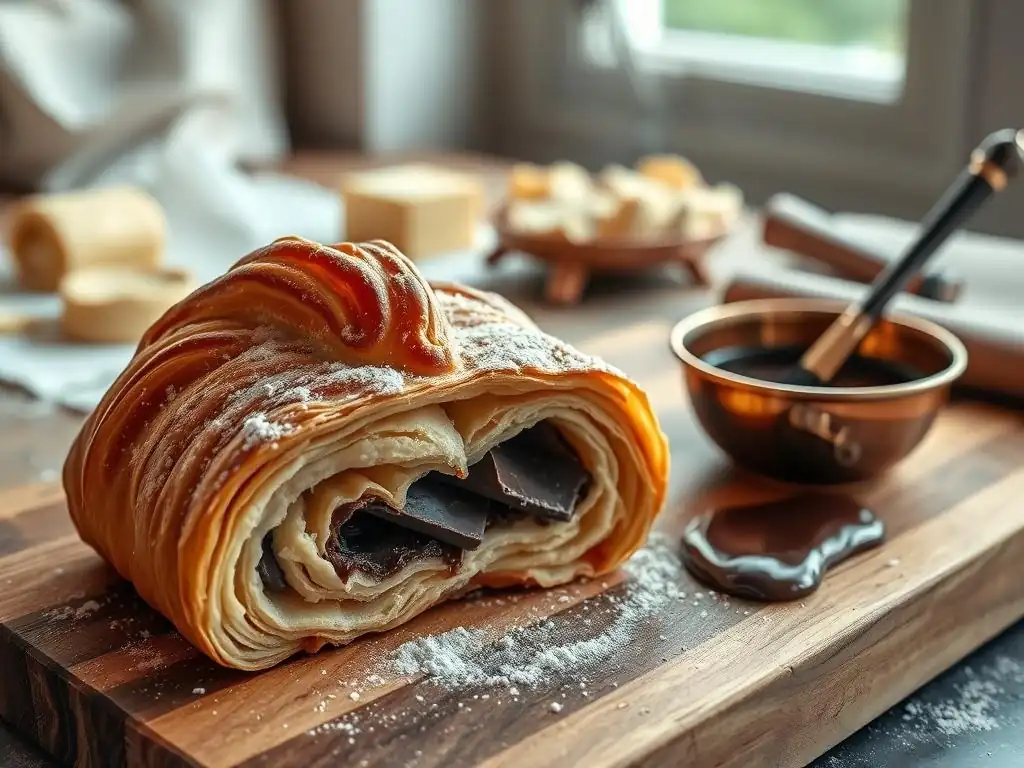
Even when following an easy homemade pain au chocolat recipe, you might encounter some common issues. Understanding the potential causes can help you fix them or prevent them next time. One frequent problem is butter leaking out during proofing or baking, resulting in greasy, flat pastries. This is usually caused by the proofing environment being too warm, the dough not being cold enough during lamination, or the layers being damaged during rolling or shaping. Ensure your proofing area is below 28°C (82°F) and that the dough is well-chilled (below 10°C or 50°F) between folds.
Another issue is pain au chocolat that is dense or heavy instead of light and airy. This can stem from several factors: insufficient gluten development during the initial kneading, under-proofing (not allowing enough time for the dough to rise before baking), or using flour with too low a protein content. Conversely, over-proofing can cause the dough structure to collapse, leading to a poor rise in the oven.
If the pastries don't puff up much during baking, it could be due to insufficient oven temperature, damaged layers from poor lamination, or inadequate proofing. Paying close attention to dough temperature, proofing conditions, and oven heat can help mitigate most problems.
Dough Not Rising Properly
If your dough for easy homemade pain au chocolat isn't rising as expected during proofing, there are a few potential culprits. First, check the viability of your yeast. If your instant dry yeast is old or has been stored improperly (e.g., in a warm, humid place), it may no longer be active. To test, mix a small amount of yeast with warm water (around 40-45°C / 105-115°F) and a pinch of sugar; it should become foamy within 5-10 minutes. If not, get new yeast.
Secondly, the temperature of your proofing environment is crucial. Yeast is most active in a warm, humid environment, ideally between 24-26°C (75-79°F). Temperatures that are too cold will slow down or halt fermentation, while temperatures that are too hot can kill the yeast. Ensure your proofing area is within this range. Lastly, ensure you used the correct amount of yeast and that it was properly distributed in the dough. Using very cold liquid initially might also slow down the start of fermentation, though cold fermentation during the initial chill is beneficial for flavor, the final proof requires warmth.
Chocolate Melting Too Much
While some melting of the chocolate batons is desired in easy homemade pain au chocolat, excessive melting where the chocolate completely disappears or oozes out is a common issue. This is often related to the type of chocolate used or the baking temperature. Chocolate chips, for instance, contain stabilizers that help them hold their shape, but standard baking chocolate or chopped bar chocolate might melt too readily. Using proper chocolate batons designed for baking is the best solution.
Another reason for excessive melting is the oven temperature being too high, causing the chocolate to melt before the dough has set around it. Ensure your oven temperature is accurate (an oven thermometer can help verify this). Baking at the recommended temperature range (190-200°C) allows the dough layers to puff and set, encasing the chocolate as it melts. If the chocolate is still melting excessively, you might try slightly reducing the oven temperature after the initial puff or ensuring the pastries are sufficiently proofed so they expand quickly in the heat.
Pain au Chocolat Being Too Dry
Dryness in easy homemade pain au chocolat can manifest as a crumbly texture or a lack of tenderness in the interior. This is typically linked to the dough's hydration or the baking process. Using too much flour during mixing or kneading can result in a dry, stiff dough that doesn't hydrate properly. The dough should be slightly sticky initially before gluten development. Ensure you measure your flour accurately, ideally by weight (grams), and add just enough liquid to bring the dough together.
Over-baking is another major cause of dryness. If the pastries spend too long in the oven or are baked at too high a temperature, too much moisture evaporates, resulting in a dry, hard texture. Ensure you bake the pain au chocolat only until they reach a deep golden brown color, checking for doneness around the 15-20 minute mark. Rely on visual cues rather than just the timer. Also, insufficient butter in the dough or poor lamination can contribute to a less rich, potentially drier final product, as the butter contributes tenderness and moisture through steam during baking.
Mastering the Lamination Technique for Extra Flakiness
Lamination is the cornerstone of achieving truly flaky easy homemade pain au chocolat. It's the process of creating hundreds of alternating thin layers of dough and butter. The key to success lies in keeping both the dough and the butter cold and firm throughout the folding process. Soft butter will integrate into the dough rather than remaining in distinct layers, resulting in a bread-like texture instead of flakiness.
Start with a well-chilled dough and a butter block that is cold but pliable enough to roll without breaking (around 12-15°C / 54-59°F). Roll the dough into a rectangle, enclose the butter, and perform the first fold (often a single fold). Then, roll the dough out again and perform subsequent folds, typically "triple" or "book" folds. A triple fold involves folding the dough into thirds like a letter.
A book fold involves folding both ends to the center and then folding in half. Most recipes call for 3-4 turns (rolls and folds), with adequate chilling time (30-60 minutes) in the refrigerator between each turn. This chilling is non-negotiable; it allows the gluten to relax and the butter to firm up, making the dough easier to roll without tearing layers. Patience and keeping things cold are your best friends for mastering lamination.
Chocolate Selection: Choosing the Best Chocolate for Pain au Chocolat
The type and quality of chocolate you use can significantly impact the final taste and texture of your easy homemade pain au chocolat. While you might be tempted to use chocolate chips or chopped chocolate bars, the traditional choice is specific chocolate batons ( bâtons de chocolat). These batons are often formulated to melt at a slightly higher temperature than standard chocolate, helping them maintain their shape better during the initial stages of baking and ensuring they don't completely liquefy and disappear into the dough.
For flavor, semi-sweet or dark chocolate (typically 60-70% cocoa content) is preferred in classic pain au chocolat. This provides a rich, intense chocolate flavor that contrasts beautifully with the buttery pastry. Milk chocolate can be used for a sweeter pastry, but it melts more readily and may not provide the same depth of flavor.
Avoid using very low-quality chocolate, as it can contain more stabilizers and less cocoa butter, resulting in a less satisfying melt and flavor. Look for chocolate batons specifically sold for baking pastries. If you cannot find batons, high-quality dark or semi-sweet chocolate bars (60-70% cocoa) cut into thick fingers (roughly 1cm x 8-10cm) can be used as a substitute, although they may melt slightly more during baking.
Variations on the Classic: Exploring Pain au Chocolat Flavors
Once you've mastered the easy homemade pain au chocolat, you might want to explore delightful variations. The beauty of baking is the ability to customize and experiment. While the classic chocolate baton version is iconic, adding other elements can create exciting new flavor profiles within the familiar flaky pastry structure. These variations often involve adding ingredients alongside or instead of the traditional chocolate, or using different types of chocolate.
Exploring variations allows you to cater to different tastes or use ingredients you have on hand. For instance, combining almond with chocolate is a classic French pairing found in many pastries. Adding fruit offers a brighter, sometimes slightly tart contrast to the rich butter and sweet chocolate. Even simply changing the type of chocolate can provide a new experience – from the intense bitterness of high-cocoa dark chocolate to the creamy sweetness of milk chocolate. These simple twists can transform your basic easy homemade pain au chocolat into a range of gourmet treats.
Adding Almond Paste for an Amandine Twist
A popular variation on pain au chocolat involves adding almond paste or frangipane (almond cream) to create a pastry known as "Pain au Chocolat Amandine" or sometimes simply "Chocolat Amandine." This combines the rich, buttery pain au chocolat with the sweet, slightly nutty flavor and moist texture of almond filling, often topped with sliced almonds and a dusting of powdered sugar. It elevates the classic pastry into a more decadent dessert.
To make this variation, you would typically prepare a simple frangipane by creaming together softened butter, sugar, almond flour (or finely ground almonds), an egg, and sometimes a splash of rum or almond extract. After shaping the pain au chocolat with the chocolate batons as usual, a tablespoon or two of frangipane is spread over the top of the rolled dough rectangle before placing the batons and rolling. Alternatively, some recipes split the baked pain au chocolat horizontally, fill it with frangipane, and bake again briefly.
Topping with sliced almonds before the final bake adds a lovely crunch. This combination of flaky pastry, gooey chocolate, and moist almond filling is truly divine.
Using Different Types of Chocolate: Dark, Milk, and White
While semi-sweet or dark chocolate (60-70% cocoa) is traditional for easy homemade pain au chocolat, experimenting with different types of chocolate can yield delicious results and cater to varying preferences. Using a higher percentage dark chocolate, such as 70-85% cocoa, will result in a less sweet pastry with a more intense, sometimes slightly bitter, chocolate flavor. This is a great option for those who prefer less sweetness and a stronger cocoa presence. Ensure the high-cocoa chocolate is in baton form or cut into thick pieces, as very high percentages can sometimes be drier when melted.
On the sweeter end, using milk chocolate batons will produce a much sweeter, creamier filling. Milk chocolate melts more easily due to its higher sugar and milk fat content, so it's even more important to ensure the dough is cold and the oven temperature is correct to prevent excessive leakage. While less traditional, some bakers also experiment with white chocolate batons.
White chocolate doesn't contain cocoa solids, offering a sweet, vanilla-rich flavor that pairs well with the buttery pastry. Keep in mind that white chocolate can scorch easily, so monitor baking closely. Combining different chocolates, like using one dark and one milk baton per pastry, is another fun way to experiment.
Incorporating Fruit: Raisins, Apricots, or Cherries
Adding fruit to your easy homemade pain au chocolat introduces a delightful contrast in flavor and texture. While not a classic Parisian variation, fruit-filled pastries using similar dough are common viennoiseries (like Pain aux Raisins, which uses pastry cream and raisins). You can adapt the pain au chocolat concept by substituting or adding fruit alongside the chocolate. For example, finely chopped dried apricots or cherries can be scattered over the dough before rolling with the chocolate batons.
A more traditional approach akin to Pain aux Raisins would involve spreading a thin layer of pastry cream (crème pâtissière) over the rolled dough, scattering raisins or other small dried fruits (like chopped dried cranberries or chopped dried figs) over the cream, and then rolling the entire sheet into a log before slicing into individual pastries. While this creates a spiral shape different from the classic pain au chocolat rectangle, it uses the same laminated dough technique and offers a wonderful fruit variation.
Alternatively, you could place a few fresh or dried cherries (pitted) or a small piece of dried apricot next to the chocolate batons before rolling the standard pain au chocolat shape. The key is to use fruit that won't release too much moisture during baking.
Storing and Reheating Your Homemade Pain au Chocolat
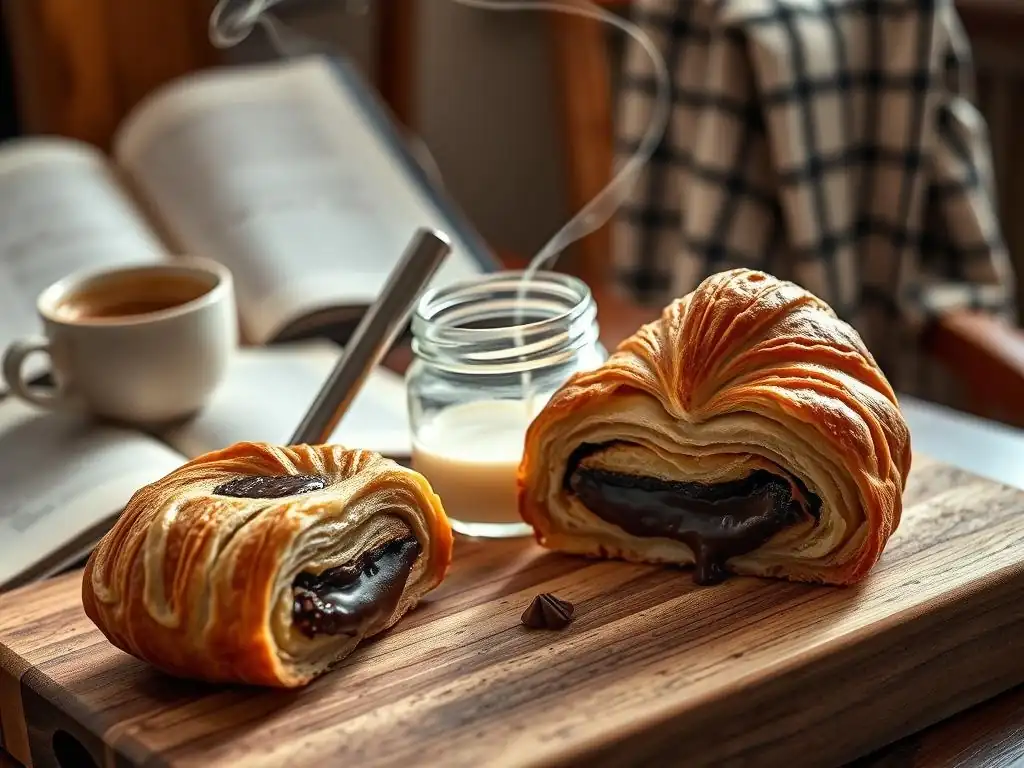
One of the great benefits of making easy homemade pain au chocolat is having delicious pastries on hand. However, like most baked goods, they are best enjoyed fresh, ideally within a few hours of baking. The crispy, flaky texture is at its peak when warm from the oven. Proper storage and reheating techniques can help preserve quality and allow you to enjoy that bakery-fresh experience even days later.
Pain au chocolat, due to its high butter content, can become slightly less crisp over time as the butter solidifies and moisture redistributes. Storing them correctly minimizes this effect. Reheating is the key to bringing back some of that initial warmth and flakiness, making leftover pastries almost as enjoyable as the freshly baked ones. Avoid refrigeration for short-term storage as it can dry them out and make them stale faster.
Keeping Your Pain au Chocolat Fresh
To keep your easy homemade pain au chocolat as fresh as possible after cooling, store them at room temperature in an airtight container. A cookie tin or a plastic container with a tight-fitting lid works well. Avoid storing them in the refrigerator, as the cold temperature can cause the butter to harden excessively and the pastry to become dry and less flavorful. Stored properly at room temperature, they will maintain reasonable quality for 1-2 days.
For longer storage, you can freeze baked pain au chocolat. Once completely cooled, wrap each pastry individually in plastic wrap, then place them in a freezer-safe bag or container. Frozen pain au chocolat can last for up to 1-2 months. Freezing is an excellent option if you've made a large batch of easy homemade pain au chocolat and want to enjoy them over time without sacrificing too much quality. Thaw frozen pastries at room temperature before reheating.
Reheating for a Warm, Bakery-Fresh Taste
To revive the flaky texture and warm, gooey chocolate center of your easy homemade pain au chocolat, reheating is highly recommended. A toaster oven or conventional oven works best for this, as a microwave can make the pastry soft and chewy rather than crisp. Preheat your oven or toaster oven to a moderate temperature, around 170-180°C (340-350°F).
Place the pain au chocolat directly on the oven rack or on a baking sheet. Heat for about 5-10 minutes, depending on the size and how many you are reheating. You'll know they are ready when the exterior feels crisp again and the chocolate inside is soft and warm to the touch. For frozen pastries, thaw them completely at room temperature first (this can take 30-60 minutes) before reheating as described. Reheating is the secret to enjoying leftover easy homemade pain au chocolat with a texture and warmth remarkably close to when they first came out of the oven.
Conclusion: Enjoying Your Effortlessly Delicious Pain au Chocolat
Congratulations! You've successfully navigated the steps to create easy homemade pain au chocolat. From mastering the dough and lamination to shaping, proofing, and baking, you've recreated a true Parisian classic in your own kitchen. The process, while requiring patience and attention to detail, is incredibly rewarding, culminating in a warm, flaky pastry filled with melted chocolate that rivals those found in the finest French bakeries. This guide from BakeWithEase aimed to simplify the journey, proving that even iconic pastries are achievable with the right instructions and a little practice.
Gather your friends and family, brew a fresh pot of coffee, and savor the fruits of your labor. Biting into that first warm, buttery, flaky pain au chocolat, experiencing the delightful contrast of textures and the rich, melted chocolate, is a moment of pure baking bliss. Whether you followed the classic recipe or experimented with variations, you've created something truly special. Making easy homemade pain au chocolat is more than just baking; it's an experience – a connection to a rich culinary tradition that brings joy with every single bite. Enjoy your delicious creation!
Frequently Asked Questions
What makes this Pain au Chocolat recipe "easy"?
This recipe focuses on simplified techniques and readily available ingredients, making the process less daunting compared to traditional, more complex methods. We prioritize easy-to-follow steps and reduced proofing times for a quicker result.
Can I use store-bought puff pastry for this recipe?
Yes, absolutely! Using store-bought puff pastry is a great shortcut. Look for all-butter puff pastry for the best flavor and texture, it helps save time and simplifies the recipe.
What kind of chocolate should I use for the Pain au Chocolat?
We recommend using baking chocolate batons specifically designed for Pain au Chocolat. However, you can also use dark chocolate bars cut into rectangles, ensuring they melt properly.
How do I ensure the Pain au Chocolat are golden brown and flaky?
Brushing the pastries with an egg wash before baking is crucial for achieving that golden-brown color. Also, baking at the correct temperature and avoiding over-proofing contribute to a flaky and delicious result.
What's the best way to store leftover Pain au Chocolat?
Store leftover Pain au Chocolat in an airtight container at room temperature. They are best enjoyed fresh, but can be slightly warmed in the oven to restore their crispness for a day or two.
Final Reflection: The Enduring Allure of Homemade Happiness
The simple act of baking a pain au chocolat at home transcends mere culinary creation; it's a journey into the heart of French tradition and a testament to the power of accessible indulgence. This article explored the surprisingly straightforward process of recreating this Parisian staple, proving that achieving bakery-quality results is within everyone's reach. The ease of the recipe, coupled with the undeniable satisfaction of biting into a perfectly flaky, chocolate-filled pastry, makes it a rewarding experience for both novice and experienced bakers.
The enduring appeal of homemade goods lies not just in their taste, but in the connection they forge between the maker and the eater. It's a tangible expression of care and effort, a small act of love that resonates far beyond the immediate satisfaction of a delicious treat. This resonates deeply with the current cultural shift towards mindful consumption and a renewed appreciation for handcrafted items. As the great Julia Child once said, Find something you're passionate about and keep tremendously interested in it.
For me, that passion is found in the simple pleasure of baking, and sharing that joy with others through recipes like this pain au chocolat.
Now, I invite you to roll up your sleeves, gather your ingredients, and embark on your own pain au chocolat adventure. Don't be intimidated by the seemingly complex layers; the process is surprisingly manageable, and the reward – the warm, buttery aroma filling your kitchen and the sheer delight of a perfectly crafted pastry – is immeasurable. Embrace the challenge, savor the process, and discover the unexpected joy of bringing a little piece of Parisian charm into your own home. The experience, like the taste of the finished product, is truly unforgettable.
Unleash Your Inner Parisian Pâtissier!
Thanks for joining us on this delicious journey into the world of pain au chocolat! We hope you've gained the confidence to tackle this seemingly complex pastry. Now it's time to put your newfound skills to the test.
- Bake your own masterpiece: Gather your ingredients and follow our recipe – we're confident you'll be amazed at the results! Remember, practice makes perfect, so don't be afraid to experiment.
- Share your creation: Post a picture of your pain au chocolat on social media and tag us @BakeWithEase – we'd love to see your baking triumphs!
- Explore other French baking delights: Discover more classic recipes on our website and expand your baking repertoire. Perhaps you'll master a croissant next?
What surprising ingredient will you try substituting in your next pain au chocolat attempt? Let us know in the comments below!