
Common Baguette Baking Mistakes and How to Avoid Them

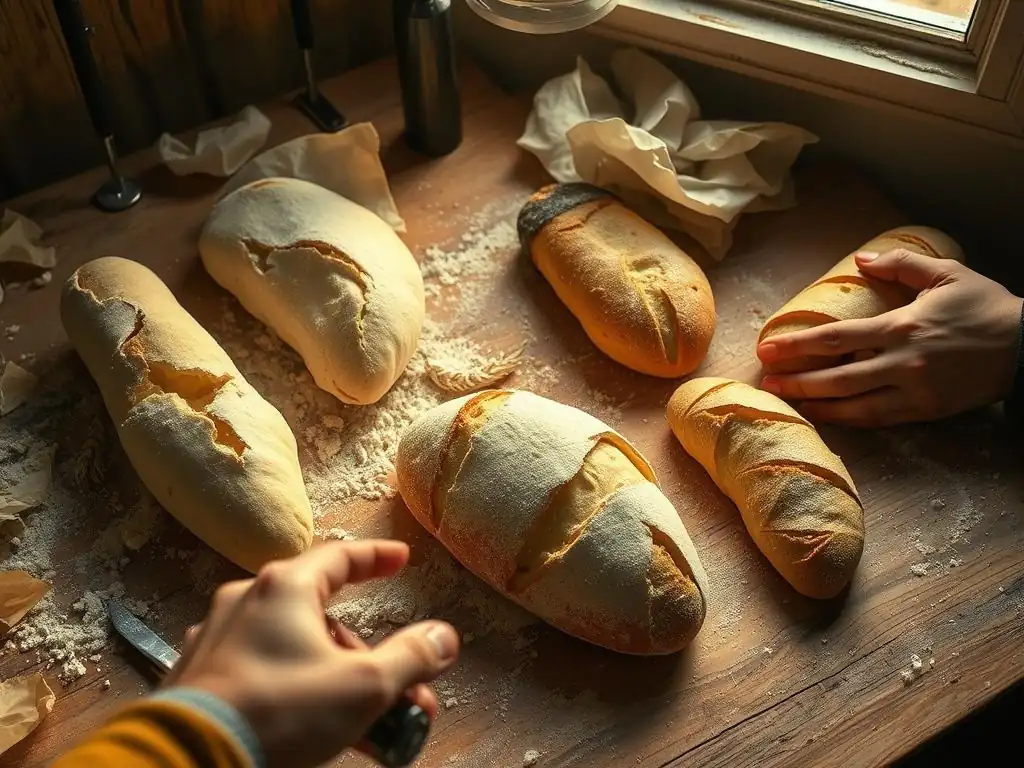
Welcome to BakeWithEase, where we believe everyone can create delicious baked goods! Are you ready to unlock the secrets to perfect, crusty baguettes? Dive in to discover the most common baguette baking mistakes and learn how to avoid them, transforming your loaves from flat and dense to the golden, airy perfection you've always dreamed of. Let's get baking!
- Introduction to Baguette Baking and Avoiding Common Pitfalls
- Mistake #1: Improper Flour Selection for Baguettes
- Mistake #2: Inaccurate Hydration Levels in Baguette Dough
- Mistake #3: Insufficient Kneading or Gluten Development
- Mistake #4: Inadequate Fermentation (Proofing) Time
- Mistake #5: Incorrect Shaping Techniques for Baguettes
- Mistake #6: Improper Scoring (Slashing) Before Baking
- Mistake #7: Insufficient Oven Temperature and Steam
- Mistake #8: Rushing the Cooling Process
- Conclusion: Mastering Baguette Baking Through Practice and Patience
- Frequently Asked Questions
- Final Reflection: The Humble Baguette, A Testament to Patience and Precision
- Unleash Your Inner Boulanger: Perfect Baguettes Await!
Introduction to Baguette Baking and Avoiding Common Pitfalls
Why Baguette Baking Can Be Tricky: Understanding Common Errors
Baguette baking holds a certain mystique for many home bakers. Achieving that perfect balance of a shatteringly crisp crust and an open, airy interior crumb can feel like chasing a culinary unicorn. While the ingredient list is deceptively simple – flour, water, salt, and yeast – mastering the process involves precise techniques and timing, making it a prime candidate for common baguette baking mistakes. Unlike a simple loaf pan bread, baguettes demand attention to detail at every stage, from the initial mix to the final cool-down.
Many aspiring bakers encounter similar hurdles repeatedly. Issues like dense crumb, tough crust, lack of oven spring, or misshapen loaves are frustratingly common. These problems often stem from fundamental misunderstandings of how gluten develops, yeast ferments, or how heat and steam interact with the dough during baking. Recognizing these typical pitfalls is the first step toward consistently producing beautiful, delicious baguettes right in your own kitchen.
Mistake #1: Improper Flour Selection for Baguettes
The Importance of High-Protein Flour for Baguette Structure
The type of flour you choose is foundational to a successful baguette. A key requirement for the characteristic open crumb and chewy texture is a strong gluten network. Gluten, formed when proteins in flour (gliadin and glutenin) combine with water and are developed through kneading, provides the dough with elasticity and structure. Without sufficient protein content, the gluten network will be weak, unable to trap the gases produced by yeast effectively.
Using a low-protein flour, such as cake flour (typically 7-9% protein), will result in a dough that lacks strength and tears easily. This weak structure cannot support the long, airy shape of a baguette or hold onto the gases needed for a light crumb and significant oven spring. Selecting a flour specifically designed for bread baking provides the necessary protein content – usually ranging from 11% to 14% – which is essential for developing the robust gluten structure required for a classic baguette.
Identifying the Right Flour: Bread Flour and its Characteristics
For most home bakers, the ideal choice for baguettes is bread flour. This flour is milled from hard wheat varieties, which are higher in protein compared to the soft wheat used for pastry or cake flour. The elevated protein level means that when hydrated and kneaded, bread flour is capable of forming a strong, extensible gluten network. This network is crucial for giving the baguette its characteristic chewiness and allowing it to rise dramatically in the oven.
While some artisan bakers might experiment with combinations or specialized French flours (like T55), standard bread flour available in most supermarkets is perfectly suitable and recommended for learning to avoid common baguette baking mistakes. Look for labels that specifically say "bread flour" and check the protein content on the nutritional information panel if possible. A protein content around 12% is a good benchmark for reliable baguette baking.
Avoiding Under-Developed Gluten: Flour Storage
Even the right flour can perform poorly if it hasn't been stored correctly. Flour is susceptible to moisture and can absorb odors from its environment. Improper storage can lead to the flour becoming stale, developing off-flavors, and potentially reducing the viability of its proteins for gluten development. Humid conditions can also encourage pest activity or mold growth, rendering the flour unusable.
To ensure your flour is in optimal condition for baguette baking, store it in a cool, dry place, away from direct sunlight and strong odors. An airtight container, such as a plastic bin with a tight-fitting lid or a large glass jar, is ideal. This protects the flour from moisture and pests, preserving its quality and protein integrity. Using fresh flour that hasn't been sitting on the shelf for months will also contribute to better gluten development and overall dough performance, helping you sidestep common baguette baking mistakes related to ingredients.
Mistake #2: Inaccurate Hydration Levels in Baguette Dough
Understanding the Role of Hydration in Baguette Texture
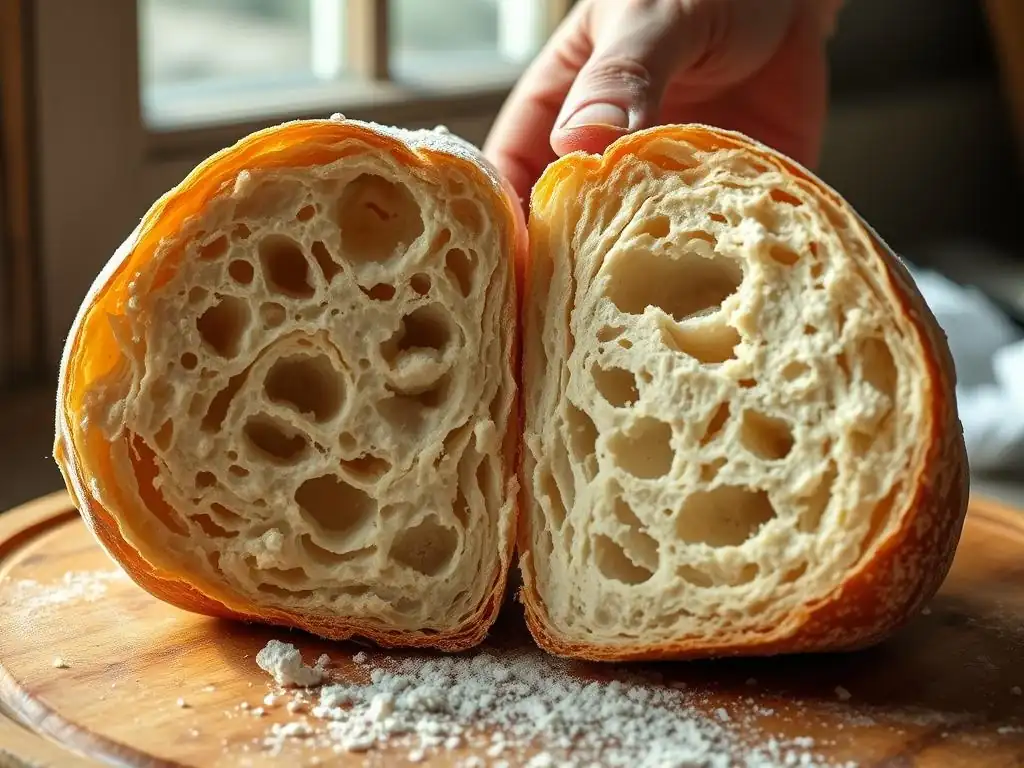
Hydration refers to the amount of water in the dough relative to the amount of flour, typically expressed as a percentage (Baker's Percentage). Baguette dough is traditionally made with a relatively high hydration level, often ranging from 70% to 80% or even higher. This high water content plays a critical role in achieving the desired open, airy crumb structure. More water allows for greater expansion of the gluten network and creates steam during baking, which contributes to the large holes (alveoli) characteristic of a well-made baguette.
However, working with high-hydration dough can be challenging, as it is often sticky and difficult to handle. Insufficient hydration (e.g., below 65%) will result in a drier, stiffer dough that is easier to manage but produces a denser crumb and a less crisp crust. Conversely, excessively high hydration without proper technique can lead to a dough that is unmanageably sticky and collapses during shaping or baking. Finding the right hydration level that you are comfortable working with, while still high enough for a good result, is key to avoiding common baguette baking mistakes related to dough texture.
Troubleshooting Sticky Dough: Adjusting Hydration for Optimal Handling
High-hydration dough is inherently sticky, which can be intimidating for beginners. It's important to remember that stickiness is not necessarily a sign of a problem, but rather a characteristic of dough with a lot of water. Instead of adding excessive amounts of flour during kneading or shaping – which reduces the effective hydration and can toughen the crust – focus on using techniques designed for wet dough.
Keeping your hands and work surface lightly wet (not floured) can help prevent sticking during initial mixing and stretch-and-fold sessions. Using a bench scraper is invaluable for manipulating and dividing sticky dough without incorporating too much extra flour. If, after the initial mix, your dough feels exceptionally wet or slurry-like, you might have mismeasured the water. In this case, you can carefully add a small amount of flour, perhaps a tablespoon at a time, until the dough comes together slightly, remembering that even a small adjustment impacts the final hydration percentage.
The Baker's Percentage: Mastering Hydration Calculations for Baguettes
Understanding and using the baker's percentage is fundamental for controlling and replicating hydration levels, helping to prevent common baguette baking mistakes. In baker's percentage, all ingredients are measured as a percentage of the flour weight, which is always considered 100%. For example, if you use 500 grams of flour and 375 grams of water, the hydration is (375 / 500) * 100% = 75%.
This system makes it easy to scale recipes up or down accurately and, more importantly, allows you to understand and adjust the hydration independently of the total batch size. A recipe calling for 75% hydration with 1000g flour will use 750g water, while the same 75% hydration with 500g flour uses 375g water. By calculating and tracking your hydration percentage, you gain precise control over your dough consistency and can intentionally adjust it based on flour type, ambient humidity, or personal handling preference, leading to more consistent baguette results.
Mistake #3: Insufficient Kneading or Gluten Development
Why Proper Kneading is Crucial for Baguette Texture
Kneading is the process of working the dough to develop the gluten network. When flour and water are mixed, the gluten-forming proteins begin to bond. Kneading physically aligns these proteins, stretching them into long, elastic strands that form a strong, interconnected web. This network is responsible for trapping the carbon dioxide gas produced by the yeast during fermentation, allowing the dough to rise and creating the characteristic open crumb structure of a baguette.
Insufficient kneading or gluten development means the network is weak and underdeveloped. The dough will lack elasticity and strength, feeling slack and potentially tearing when stretched. During fermentation and baking, it won't be able to hold onto the gas effectively, resulting in a dense, heavy crumb with small, uneven holes. Proper gluten development is therefore non-negotiable for achieving that desired light, airy interior and contributes significantly to avoiding common baguette baking mistakes that result in a brick-like loaf.
Kneading Techniques for Baguettes: French Fold and Stretch and Fold
Traditional kneading on a floured surface can be challenging with high-hydration baguette dough due to stickiness. Two techniques particularly well-suited for wetter doughs are the French Fold (also known as slap and fold) and the Stretch and Fold. The French Fold involves repeatedly lifting, slapping, and folding the dough onto itself, building strength rapidly. It's quite active and can be messy but is very effective.
Stretch and Fold is a gentler, often preferred method for high-hydration doughs, frequently performed during the bulk fermentation phase rather than intensive initial kneading. It involves wetting your hands, grabbing a portion of the dough from the edge, stretching it upwards, and folding it back over the center. This is repeated several times around the dough. Performing multiple sets of stretch and folds over an hour or two allows gluten to develop gradually with minimal mess and handling stress on the dough.
The Windowpane Test: Determining Gluten Development
The "windowpane test" is a classic method used by bakers to assess whether the gluten network in the dough is sufficiently developed. To perform this test, gently pull a small piece of dough from the main mass. Carefully and slowly stretch it between your fingers. If the dough can be stretched very thin without tearing, becoming translucent enough that you can see light passing through it (like a windowpane), then the gluten is well-developed and ready for fermentation.
If the dough tears quickly and easily before you can stretch it thin, the gluten needs more development. This indicates you should continue kneading or performing more stretch and folds. This test provides a visual cue that is far more reliable than simply timing your kneading, as factors like flour type, hydration, and kneading method influence how quickly gluten develops. Mastering this test is crucial for avoiding common baguette baking mistakes related to under-kneaded dough.
Mistake #4: Inadequate Fermentation (Proofing) Time
The Impact of Fermentation on Baguette Flavor and Structure
Fermentation, often called proofing, is a critical stage where yeast consumes sugars in the flour and produces carbon dioxide gas and alcohol. This gas is trapped by the gluten network, causing the dough to rise and expand. Equally important, fermentation allows complex flavors to develop. As the dough ferments, enzymes break down starches into simpler sugars, and various metabolic processes in the yeast and naturally present bacteria produce organic acids and other compounds that contribute to the baguette's aroma, taste, and the slight tang often found in artisan loaves.
Insufficient fermentation time means the yeast hasn't produced enough gas to give the dough adequate rise, resulting in a dense, heavy loaf. Furthermore, the flavors won't have had sufficient time to develop, leading to a bland baguette. Conversely, over-fermentation can cause the gluten structure to break down, leading to a dough that collapses during shaping or baking. Getting the fermentation time and temperature right is vital for both structure and flavor, and it's a frequent source of common baguette baking mistakes.
Bulk Fermentation vs. Proofing: Understanding the Difference
It's helpful to distinguish between the two main fermentation stages: bulk fermentation and final proofing. Bulk fermentation occurs after the initial mixing and kneading, while the dough is still in one large mass. This stage is typically longer (often several hours, sometimes overnight in the refrigerator) and allows the dough to double or more in size, developing significant flavor and strength through periodic folds.
Final proofing, or secondary fermentation, happens after the dough has been shaped into individual baguettes. This stage is shorter than bulk fermentation and occurs just before baking. The shaped loaves are allowed to rise again, but only until they are slightly puffy and have increased in volume by perhaps 50-75%. The goal here is to prepare the loaves for oven spring without letting them over-expand and lose their shape or internal structure before hitting the heat.
Signs of Over-Proofing and Under-Proofing: Visual Cues
Learning to read your dough is essential for successful fermentation and avoiding common baguette baking mistakes. Under-proofed dough will appear dense and not significantly increased in volume. When poked gently, the indentation will spring back immediately. During baking, it may experience explosive, uncontrolled oven spring, sometimes tearing along the sides instead of at the scores, resulting in a loaf that is dense at the bottom and unevenly airy at the top.
Over-proofed dough, on the other hand, will look very large and puffy, potentially starting to spread outwards rather than holding its shape. When poked, the indentation will remain or spring back very slowly. The surface may appear bubbly. In the oven, over-proofed dough will have little to no oven spring and may even collapse, resulting in a flat, dense loaf with a tight crumb structure because the gluten network has weakened and can no longer support the gas within.
Temperature Control During Fermentation
Temperature is the single biggest factor influencing the speed of fermentation. Yeast is most active in warm environments, typically between 70°F and 80°F (21°C to 27°C). Warmer temperatures speed up fermentation, while cooler temperatures slow it down. For baguettes, a slower, cooler bulk fermentation (like overnight in the refrigerator) is often preferred as it allows more complex flavors to develop.
However, for faster same-day bakes, maintaining a consistent warm temperature during both bulk fermentation and final proofing is crucial. If your kitchen is cold (below 68°F or 20°C), fermentation will be very slow. You might need to find a warmer spot, like inside a turned-off oven with just the light on, or use a proofing box if you have one. Conversely, in a very warm kitchen (above 80°F or 27°C), fermentation can happen too quickly, increasing the risk of over-proofing. Monitoring the dough's volume and appearance, rather than strictly adhering to time, is key, adjusting for your ambient temperature.
Mistake #5: Incorrect Shaping Techniques for Baguettes
Achieving the Classic Baguette Shape: A Step-by-Step Guide
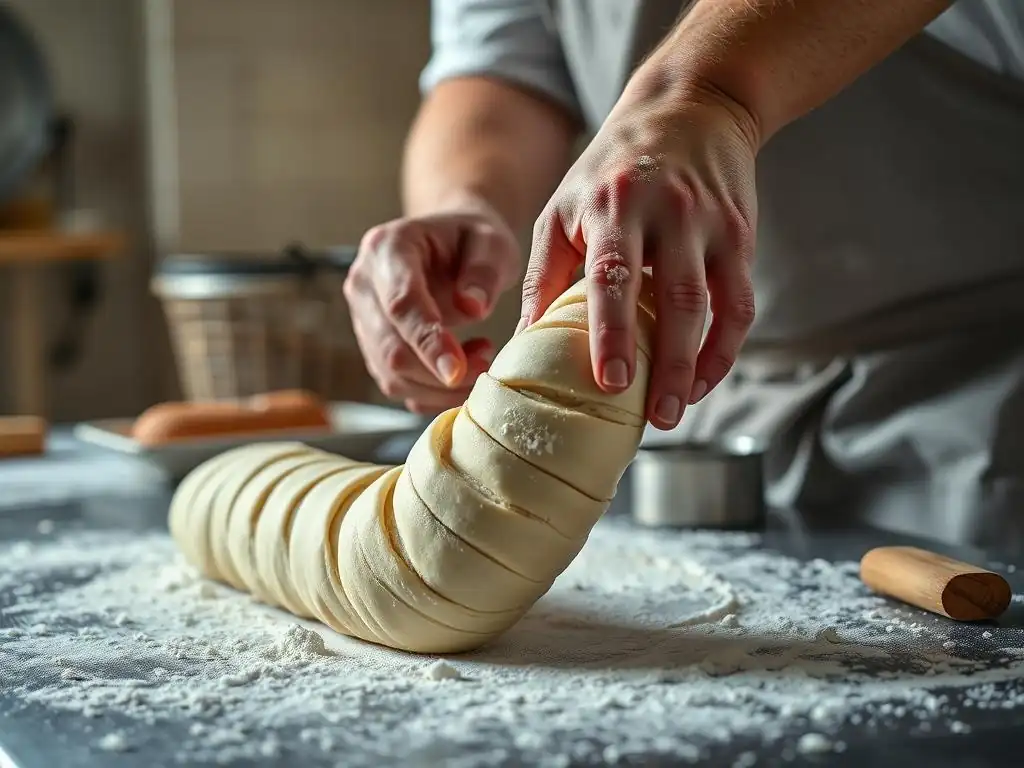
Shaping the dough correctly is crucial for the baguette's final appearance and structure, and it's a common area for baguette baking common mistakes. After bulk fermentation, the dough is typically divided and pre-shaped into rough logs or rounds and allowed to rest briefly (about 10-20 minutes). This rest period allows the gluten to relax, making the dough easier to handle for the final shaping.
For the final shape, take a piece of dough, gently flatten it into a rectangle, and fold the top edge down towards the center, pressing to seal. Rotate the dough 180 degrees and repeat with the new top edge. Then, fold the entire dough in half lengthwise, pressing the seam firmly with the heel of your hand or pinching it closed. Roll the log back and forth gently with slightly cupped hands, starting from the center and moving outwards, to lengthen it to the desired baguette length while maintaining an even thickness.
Avoiding Tearing and Deflating the Dough During Shaping
One of the most frequent common baguette baking mistakes during shaping is being too rough with the dough. Excessive pressure or aggressive handling can tear the delicate gluten network that has been carefully developed during fermentation. Tearing prevents the loaf from expanding properly during baking and can lead to a lopsided or dense baguette.
Equally important is avoiding the deflation of the dough. The gas bubbles created during fermentation are essential for the open crumb. While some handling is necessary, you want to preserve as much of that gas as possible. Work efficiently but gently. Use minimal flour on your surface – too much flour prevents the seams from sealing properly. Practice makes perfect; the more you shape, the better you'll become at handling the dough confidently without damaging its structure.
The Importance of Tension: Creating a Tight Baguette Surface
Creating surface tension during shaping is vital for a baguette that holds its shape and achieves a good oven spring. As you roll and elongate the dough, you are essentially stretching a "skin" over the surface. This taut surface provides structure and helps the loaf expand upwards and outwards in a controlled manner through the scores during baking.
If the surface lacks tension, the dough will spread outwards rather than rising upwards, resulting in a flat, wide loaf. The final seam needs to be sealed tightly and placed on the bottom of the loaf. As the loaf proofs, this tension builds. A properly shaped baguette should feel slightly firm and resilient, not slack or floppy. This tension is key to the beautiful bloom and crust development in the oven.
Mistake #6: Improper Scoring (Slashing) Before Baking
Why Scoring is Essential for Baguette Oven Spring
Scoring, also known as slashing, is the act of cutting the surface of the dough just before it goes into the hot oven. This isn't just for aesthetics; it's a crucial functional step that directly impacts oven spring and the final shape of the baguette. As the dough enters the intense heat of the oven, the yeast activity dramatically increases, and the water in the dough turns to steam, causing rapid expansion.
Without scoring, the expanding dough would burst unpredictably at the weakest points, resulting in an uneven shape and a potentially blown-out crust. The scores provide controlled weak points, guiding the expansion in a predictable manner. A well-scored baguette will open up along the cuts, creating the iconic "ears" or raised edges of the crust and allowing the loaf to achieve its maximum volume upwards and outwards.
Mastering Scoring Techniques: Single Slash, Overlapping Slashes
There are several common scoring patterns for baguettes, but the most classic involves a series of overlapping diagonal slashes running along the length of the loaf. Typically, these slashes are made at about a 45-degree angle to the surface of the dough and should be about 1/2 inch (1-2 cm) deep. Each slash should overlap the previous one by about one-third to one-half of its length.
Using a very sharp blade is paramount. A dull blade will drag and tear the surface of the dough, hindering expansion rather than guiding it. A baker's lame (a razor blade on a handle) is the preferred tool for its sharpness and ease of use at the correct angle. For beginners, practicing on loaves of playdough or even just the surface of a proofed loaf before committing can help build confidence and muscle memory, helping you avoid common baguette baking mistakes related to scoring.
Troubleshooting Poor Scoring: Dull Blades, Incorrect Angle
Poor scoring is a frequent cause of disappointing oven spring and misshapen baguettes. If your cuts are jagged and the dough tears instead of slicing cleanly, your blade is likely dull. Replace it with a fresh razor blade; they are inexpensive and make a world of difference. If your loaf expands in uncontrolled places or hardly opens at all, the angle or depth of your cuts might be incorrect.
Cuts that are too shallow won't provide enough release points for the steam and gas, leading to blowouts elsewhere. Cuts that are too deep or too vertical can cause the loaf to spread flat rather than spring upwards. Aim for that roughly 45-degree angle and consistent depth. Remember that the dough's surface tension and proofing level also affect how easily it scores. Properly proofed dough with good tension is easier to score cleanly than under- or over-proofed dough.
Mistake #7: Insufficient Oven Temperature and Steam
The Role of High Heat and Steam in Baguette Crust Formation
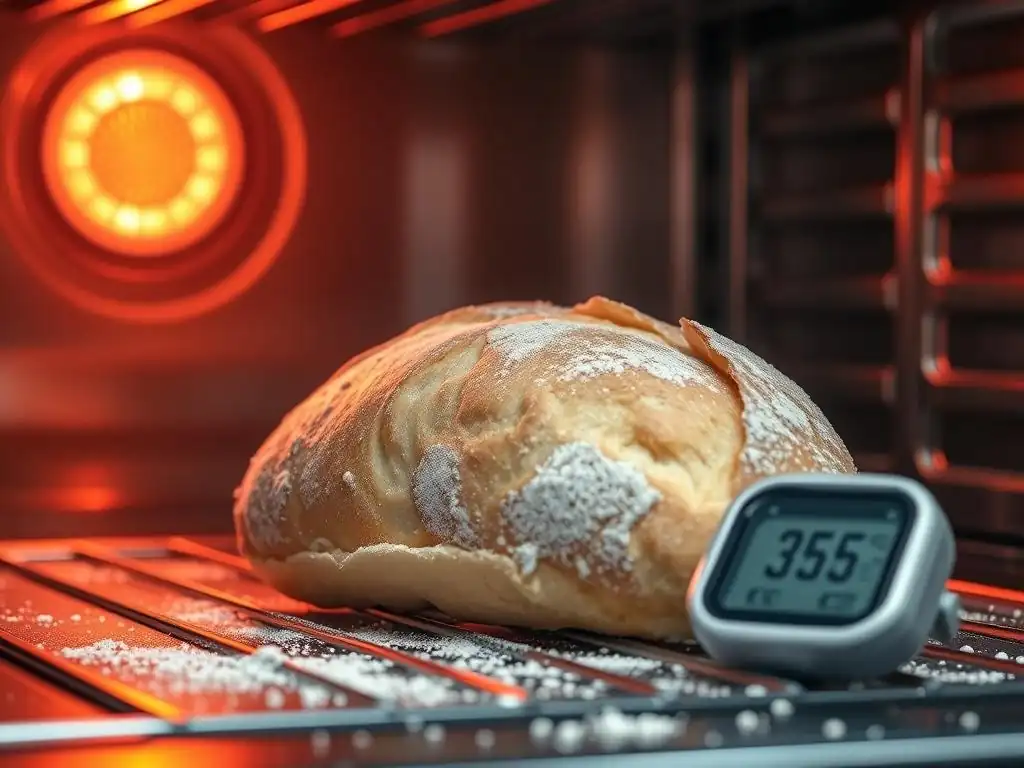
Baking baguettes requires a very hot oven and a steamy environment, especially during the first 10-15 minutes. The high initial temperature (often 450°F to 500°F or 230°C to 260°C) provides the necessary thermal shock for maximum oven spring – the rapid expansion of the dough before the crust sets. This burst of heat causes the gases inside to expand dramatically and the water to turn to steam, lifting the loaf.
Simultaneously, steam is crucial. In a dry, hot oven, the surface of the dough would quickly dry out and set into a hard crust before the loaf has fully expanded. Steam keeps the surface moist and pliable during this critical early phase, allowing the dough to expand freely through the scores. Once the crust sets, the steam helps create a thin, crisp crust rather than a thick, tough one. Lack of sufficient heat or steam is one of the most common baguette baking mistakes leading to poor oven spring and a substandard crust.
Achieving Optimal Oven Temperature: Using a Baking Stone or Steel
Home ovens can fluctuate in temperature and often don't retain heat as effectively as professional deck ovens. Using a baking stone or baking steel is highly recommended for baguette baking. These tools, typically placed on a rack in the oven during preheating, absorb and store a significant amount of heat.
When the baguettes are loaded onto the hot stone or steel, they receive a powerful burst of conductive heat from below. This helps initiate oven spring and ensures a well-baked bottom crust. Preheat your oven with the stone or steel inside for at least 45 minutes to an hour at your target temperature (e.g., 475°F or 245°C) to ensure it is fully saturated with heat. Using an oven thermometer is also helpful to verify that your oven is reaching and maintaining the correct temperature.
Creating Steam in Your Home Oven: Methods and Precautions
Creating sufficient steam in a home oven can be tricky but is essential. One common method is to place a metal tray (like a cast iron pan or broiler tray) on the bottom rack of the oven while preheating. Just before loading the baguettes, carefully pour a cup or two of boiling water into the hot tray. This will instantly create a cloud of steam. Always use caution when pouring boiling water into a hot oven to avoid burns.
Another effective method is to use lava rocks or a chain in the steam pan, which increases the surface area for water to evaporate, producing more steam. Some bakers also mist the oven walls with water, though this produces less steam and can degrade oven components over time. Baking the baguettes inside a preheated Dutch oven or cloche for the first part of the bake is also an excellent way to trap the dough's own steam around the loaf, mimicking a professional steam-injected oven.
Mistake #8: Rushing the Cooling Process
Why Cooling is Important for Baguette Texture and Flavor
It might be tempting to slice into a warm, crusty baguette straight out of the oven, but doing so prematurely is a common baguette baking mistake that can negatively impact the final texture and flavor. Even after being removed from the heat, the baguette is still undergoing important internal processes. Residual heat continues to cook the interior, and moisture within the loaf redistributes.
Cutting a hot baguette traps steam inside, leading to a gummy or doughy crumb. Allowing it to cool properly on a wire rack permits the internal moisture to equalize and the structure to set fully. Furthermore, flavor compounds continue to develop and meld as the bread cools, enhancing the overall taste and aroma. Patience during the cooling stage is just as important as patience during fermentation.
Proper Cooling Techniques: Wire Rack
The simplest and most effective way to cool baguettes is on a wire rack. Placing the hot loaf directly on a solid surface, like a counter or cutting board, prevents air circulation around the bottom and sides. This can lead to moisture condensation on the crust, making it soft and soggy rather than keeping it crisp.
A wire rack allows air to circulate freely around the entire surface of the baguette, promoting even cooling and ensuring the crust remains crisp. Allow baguettes to cool for at least 30-60 minutes, or even longer for larger loaves, before slicing. This cooling time is essential for the crumb structure to stabilize and for the flavors to reach their peak.
Storing Baguettes for Optimal Freshness
Baguettes are notoriously best eaten fresh, ideally within a few hours of baking, when the crust is at its crispiest. However, if you need to store them, proper technique can help maintain quality for a short period. Avoid storing baguettes in airtight plastic bags at room temperature, as this traps moisture and quickly turns the crust soft and chewy.
For same-day storage, simply placing the baguette cut-side down on a clean counter can work. For slightly longer storage (up to a day), a paper bag allows some air circulation while protecting the loaf. If you won't eat the baguette within 24 hours, it's best to slice it, wrap portions tightly, and freeze them. Frozen baguette slices can be quickly reheated in a toaster or oven to regain some of their fresh-baked charm.
Conclusion: Mastering Baguette Baking Through Practice and Patience
Review of Common Baguette Baking Mistakes
Baking a truly great baguette at home is a rewarding challenge, but it's one that comes with a set of common hurdles. We've explored some of the most frequent baguette baking common mistakes, from selecting the wrong flour and mismanaging hydration to insufficient kneading, rushing fermentation, improper shaping, poor scoring, inadequate baking conditions, and impatient cooling. Each step in the process, from the initial mix to the final rest on the cooling rack, plays a vital role in the outcome.
Understanding the 'why' behind each technique – why high-protein flour matters, how hydration affects texture, the purpose of kneading and fermentation, the function of shaping and scoring, and the necessity of heat, steam, and cooling – empowers you to troubleshoot and improve. While avoiding these common baguette baking mistakes takes practice, paying attention to these key areas will significantly increase your chances of success. Don't be discouraged by less-than-perfect results; every bake is a learning opportunity. Embrace the process, be patient with yourself and the dough, and you'll be well on your way to baking beautiful baguettes consistently.
Frequently Asked Questions
What is the most common mistake when shaping baguettes?
The most common mistake is being too rough with the dough. This degasses the dough, leading to a flat and dense baguette instead of a light and airy one.
Why is steam so important when baking baguettes?
Steam is crucial because it keeps the surface of the baguette moist during the initial baking phase. This allows the dough to fully expand before the crust sets, resulting in a better crust.
What happens if my baguette dough is too dry?
A dough that is too dry will result in a tough and dense baguette. It's important to ensure your dough has enough hydration for a proper rise and open crumb structure.
How can I prevent my baguettes from sticking to the baking surface?
Using parchment paper or a silicone baking mat is essential. Also, ensure your baguettes are properly floured before proofing and baking to prevent sticking.
What causes baguettes to have a pale crust?
A pale crust often indicates insufficient oven temperature or lack of steam. Ensure your oven is preheated to the correct temperature and create enough steam for a crisp, golden-brown crust.
Final Reflection: The Humble Baguette, A Testament to Patience and Precision
The pursuit of the perfect baguette is a journey, not a destination, and understanding common pitfalls is the first step towards achieving that golden, crispy crust and airy crumb. The seemingly simple act of baguette baking reveals a surprising depth of complexity, demanding precision and patience at every stage, from ingredient selection to oven spring. This journey, however, is richly rewarding, offering a tangible connection to culinary tradition and the satisfaction of creating something truly beautiful.
The influence of artisanal bread making, and the baguette in particular, continues to ripple through our culinary landscape. It's a symbol of simple ingredients elevated to an art form, a testament to the power of traditional techniques in a world increasingly dominated by convenience. Bread is the staff of life,
they say, and for many, the perfect baguette represents more than just sustenance; it represents a connection to history, culture, and the satisfaction of creating something delicious with one's own hands.
Now, consider your own baking journey. Perhaps you've encountered some of the challenges discussed here – a collapsed loaf, a gummy interior, or a pale crust. Don't be discouraged! Each failed attempt is a lesson learned, a step closer to mastering this rewarding craft. Embrace the process, experiment with different techniques, and remember that the most delicious baguettes are often the result of perseverance and a deep understanding of the fundamentals. So, gather your ingredients, preheat your oven, and embark on your own baguette adventure. The journey, with all its challenges and triumphs, is worth every delicious crumb.
Unleash Your Inner Boulanger: Perfect Baguettes Await!
Thanks for taking the time to elevate your baking game with us! You've now got the knowledge to conquer those pesky baguette blunders. Ready to put your newfound skills to the test?
- Bake your perfect baguette today! Use what you've learned to create a crispy-crusted, airy masterpiece. Document your journey and share your results!
- Explore our other baking guides for more tips and tricks – we've got plenty of delicious adventures waiting.
- Join our BakeWithEase community forum and share your baking triumphs (and challenges!) with fellow enthusiasts. Let's learn together!
What unique ingredient or technique will you try in your next baguette bake?