
Savory DairyFree Cheesy Biscuits Using Nutritional Yeast


Welcome to BakeWithEase, your guide to unlocking baking brilliance! Ever dreamt of biting into a warm, cheesy biscuit, even if you're avoiding dairy? We thought so. Dive into our latest recipe and discover how to create unbelievably savory and satisfying Dairyfree Cheesy Biscuits using the magic of nutritional yeast. Intrigued? Let's get baking!
- Savory Dairy-Free Cheesy Biscuits Using Nutritional Yeast: A BakeWithEase Recipe
- Introduction: Discover Delicious Dairy-Free Cheesy Biscuits
- Understanding the Key Ingredients for Dairy-Free Cheesy Biscuits
- The Dairy-Free Cheesy Biscuits Recipe: A Step-by-Step Guide
- Tips and Tricks for Perfect Dairy-Free Cheesy Biscuits
- Serving and Storing Your Dairy-Free Cheesy Biscuits
- Troubleshooting Common Issues with Dairy-Free Biscuit Baking
- Exploring Other Dairy-Free Baking Recipes on BakeWithEase
-
Frequently Asked Questions
- How does this dairy-free biscuit recipe achieve a "cheesy" flavor?
- Are these biscuits suitable for people with dairy allergies or lactose intolerance?
- What are some variations or additions I can make to this dairy-free cheesy biscuit recipe?
- What makes BakeWithEase.com a good resource for baking recipes like this one?
- Can I make these biscuits ahead of time?
- Final Reflection: The Unexpected Joy of Dairy-Free Delight
- Unleash Your Inner Baker: Dairy-Free Deliciousness Awaits!
Savory Dairy-Free Cheesy Biscuits Using Nutritional Yeast: A BakeWithEase Recipe
Introduction: Discover Delicious Dairy-Free Cheesy Biscuits
BakeWithEase Presents: A Savory Dairy-Free Delight
Welcome to BakeWithEase, where we believe everyone deserves delicious baked goods, regardless of dietary needs. Today, we're diving into a truly satisfying creation: savory dairy-free cheesy biscuits. These aren't just any biscuits; they're crafted to deliver that comforting, slightly tangy "cheese" flavor and tender crumb you love, all without a drop of dairy. Using nutritional yeast as our secret weapon, this recipe opens up a world of possibilities for breakfast, brunch, or as a perfect side to your favorite meal.
Whether you're navigating lactose intolerance, a dairy allergy, or simply exploring plant-based options, finding a reliable dairy-free cheesy biscuits recipe can be a game-changer. Our goal is to provide a straightforward, easy-to-follow guide that ensures success, even if you're new to dairy-free baking. We'll walk you through each step, explaining the role of key ingredients and offering tips to achieve the best possible results, making your baking journey smooth and enjoyable.
Why Choose This Dairy-Free Cheesy Biscuit Recipe?
This specific dairy-free cheesy biscuits recipe stands out for several reasons. Firstly, it relies on readily available ingredients. You won't need obscure specialty items; most components can be found in a standard grocery store. Nutritional yeast, while perhaps new to some, is increasingly common and provides an authentic savory, umami-rich flavor that mimics cheese remarkably well without any dairy.
Furthermore, this recipe is designed for ease and reliability. We've tested it to minimize common baking pitfalls, ensuring that you can achieve fluffy, flavorful biscuits consistently. Unlike some dairy-free recipes that can yield dense or dry results, our method focuses on technique and ingredient ratios to create a light, tender texture. It’s a fantastic starting point for anyone looking to master dairy-free savory baking.
Understanding the Key Ingredients for Dairy-Free Cheesy Biscuits
The Role of Nutritional Yeast in Achieving a Cheesy Flavor
Nutritional yeast is the cornerstone of the "cheesy" flavor in this dairy-free cheesy biscuits recipe. This deactivated yeast comes in flake or powder form and boasts a distinctive nutty, savory, and umami profile often described as cheesy. It's a staple in vegan cooking for creating cheese sauces, seasoning popcorn, and, as in this case, adding depth and flavor to baked goods. Unlike active yeast used for leavening, nutritional yeast does not cause dough to rise.
Beyond its flavor contribution, nutritional yeast is also a nutritional powerhouse. Just a quarter cup (about 15 grams) can provide around 60 calories, 8 grams of protein, and often significant amounts of B vitamins, especially when fortified. For our dairy-free cheesy biscuits, we typically recommend using about 1/4 to 1/2 cup (around 15-30 grams) to impart a noticeable cheesy taste without overpowering the other flavors. The exact amount can be adjusted based on your personal preference for cheesiness.
Dairy-Free Milk Alternatives: Choosing the Right One for Your Biscuits
Selecting the right dairy-free milk is crucial for the texture and moisture of your dairy-free cheesy biscuits. Unsweetened varieties are generally preferred to avoid adding unwanted sweetness to a savory biscuit. Common options include almond milk, soy milk, oat milk, and cashew milk. Each has slightly different fat content and flavor profiles that can subtly impact the final product.
For a richer biscuit, a dairy-free milk with a slightly higher fat content, such as unsweetened soy milk or cashew milk, can be beneficial. Oat milk also works well and provides a creamy texture. Avoid using flavored or sweetened milk substitutes. Approximately 1 cup (240 ml) of your chosen unsweetened dairy-free milk will typically be needed for a batch of these dairy-free cheesy biscuits, ensuring the dough comes together correctly without being too wet or too dry.
Gluten-Free Flour Options for Dairy-Free Biscuits (If Applicable)
While this core dairy-free cheesy biscuits recipe is written for traditional wheat flour, it can often be adapted for gluten-free baking. The key is using a high-quality, all-purpose gluten-free flour blend designed for baking. These blends usually contain a mix of flours like rice flour, sorghum flour, potato starch, and tapioca starch, often with a binder like xanthan gum.
When substituting gluten-free flour in a dairy-free cheesy biscuits recipe, you might need to adjust the liquid slightly, as gluten-free flours can absorb moisture differently than wheat flour. Start with the recommended amount of dairy-free milk and add more if the dough seems too dry or crumbly. Using a blend specifically formulated for biscuits or pastries will yield the best results in terms of texture and rise. Expect to use a similar volume, typically around 2 cups (about 240-280 grams depending on the blend), as you would with wheat flour.
The Dairy-Free Cheesy Biscuits Recipe: A Step-by-Step Guide

Step 1: Preparing the Dry Ingredients for Dairy-Free Biscuits
The first step in creating your delicious dairy-free cheesy biscuits is to combine all the dry ingredients in a large mixing bowl. This typically includes your flour (about 2 cups or 250g of all-purpose flour), baking powder (around 1 tablespoon for a good rise), a small amount of baking soda (perhaps 1/2 teaspoon), and salt (about 1/2 teaspoon). Whisk these ingredients together thoroughly. This ensures that the leavening agents and salt are evenly distributed throughout the flour, which is crucial for uniform rising and flavor in your dairy-free cheesy biscuits.
Adding a pinch of sugar (around 1 teaspoon) is optional but can help with browning and balance the savory flavors. If you are using a gluten-free blend, ensure it's well-mixed before measuring. Using a scale for accuracy, especially with gluten-free flours, is highly recommended. Sifting the dry ingredients together can also help aerate them and prevent lumps, contributing to a lighter biscuit texture.
Step 2: Incorporating the Dairy-Free "Cheese" Flavor
Now it's time to add the star flavor component: nutritional yeast. Measure out your desired amount of nutritional yeast, typically between 1/4 and 1/2 cup (15-30g), and add it directly to the bowl with the dry ingredients. Whisk everything together again until the nutritional yeast is fully incorporated and the mixture has a slightly yellowish tint throughout.
This step is critical for ensuring that the cheesy flavor is evenly distributed in every bite of your dairy-free cheesy biscuits. You can also add any dried herbs or spices at this stage, such as garlic powder (1/2 teaspoon) or dried chives (1 tablespoon), to enhance the savory profile. Make sure they are also well-mixed into the dry ingredients before proceeding.
Step 3: Adding Wet Ingredients and Forming the Dough
With the dry ingredients and nutritional yeast combined, it's time to introduce the wet components and the fat. Cold, solid fat is essential for flaky biscuits. For dairy-free cheesy biscuits, this means using cold dairy-free butter or solid vegetable shortening, cut into small cubes (about 1/2 cup or 115g). Cut the cold fat into the dry ingredients using a pastry blender, fork, or your fingertips until the mixture resembles coarse crumbs with some pea-sized pieces remaining. This technique creates pockets of fat that melt during baking, resulting in those desirable flaky layers.
Next, pour in your cold dairy-free milk (around 1 cup or 240ml). Use a fork or spatula to gently mix the ingredients just until they come together into a shaggy dough. Do not overmix! Overmixing develops gluten (in wheat flour) or makes gluten-free dough tough. A few dry spots are okay; they will hydrate during the brief resting period. The dough should be moist but not sticky.
Step 4: Cutting and Shaping the Dairy-Free Cheesy Biscuits
Turn the shaggy dough out onto a lightly floured surface. Gently pat the dough into a rectangle or square about 1/2 to 3/4 inch thick. For classic layered biscuits, you can perform a "fold and turn" technique: fold the dough in half, pat it down again, and repeat this process 2-3 times. This helps create extra layers in your dairy-free cheesy biscuits. Handle the dough as little as possible to keep it tender.
Use a biscuit cutter or a sharp knife to cut out your biscuits. For round biscuits, press the cutter straight down without twisting to ensure clean edges, which helps them rise evenly. Gather the scraps, gently press them together, and cut out any remaining biscuits. Aim for a thickness of about 3/4 inch (around 2 cm) for best results. This recipe typically yields 8-12 biscuits depending on the size of your cutter.
Step 5: Baking Your Savory Dairy-Free Biscuits to Golden Perfection
Preheat your oven to a relatively high temperature, typically between 400°F and 425°F (200°C - 220°C). A hot oven helps the biscuits rise quickly and creates a beautiful golden-brown crust. Place the cut dairy-free cheesy biscuits onto a baking sheet lined with parchment paper, spacing them about 1-2 inches apart. For softer sides, place them closer together; for crispier edges, give them more space.
Bake for 12-18 minutes, or until the biscuits are well-risen and the tops are golden brown. Baking time will vary depending on your oven and the size and thickness of your biscuits. Keep an eye on them in the last few minutes to prevent burning. You can brush the tops with a little melted dairy-free butter before baking for extra richness and color, or sprinkle with a little more nutritional yeast for a boost of cheesy flavor.
Tips and Tricks for Perfect Dairy-Free Cheesy Biscuits
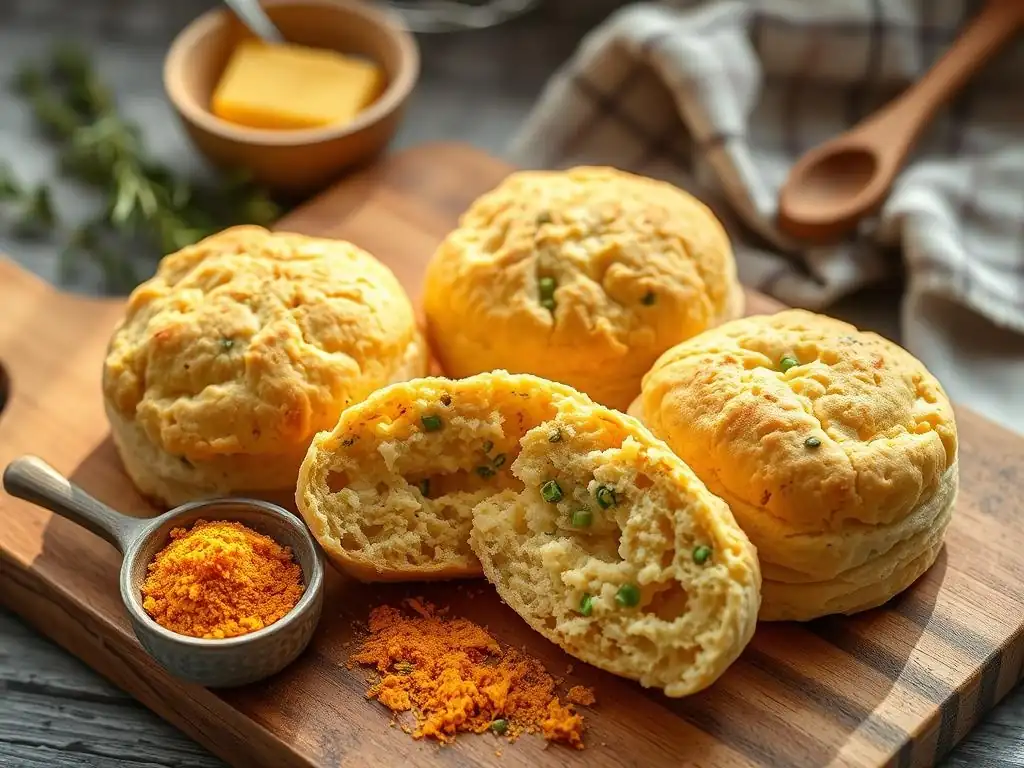
Achieving the Ideal Biscuit Texture: Flaky vs. Dense
The texture of your dairy-free cheesy biscuits is largely determined by how you handle the fat and the dough. For flaky biscuits, using very cold solid fat (like dairy-free butter or shortening) cut into the flour until it resembles coarse crumbs with pea-sized pieces is key. These fat pieces create steam as they melt during baking, pushing the layers of dough apart to form flakes. Handling the dough minimally after adding the liquid is also crucial; overworking the dough develops gluten, leading to a tougher, denser biscuit.
If you prefer a softer, more cake-like biscuit texture, you can cut the fat in more finely, until it resembles cornmeal. This distributes the fat more evenly and results in less distinct layers. Additionally, you can use a softer fat, though cold solid fat is generally recommended for any type of biscuit. Aim for about 1/2 cup (115g) of cold fat for approximately 2 cups (250g) of flour for a good balance of tenderness and flakiness in your dairy-free cheesy biscuits.
Optimizing the Cheesy Flavor with Nutritional Yeast
Nutritional yeast is the primary source of the cheesy flavor in this dairy-free cheesy biscuits recipe, and you can adjust the amount to suit your taste. The recipe suggests 1/4 to 1/2 cup (15-30g), but feel free to experiment. Adding more, say up to 3/4 cup (45g), will result in a more intense cheesy flavor. Just be mindful that too much can sometimes impart a slightly bitter note, though this is rare with standard amounts.
You can also layer the flavor by adding nutritional yeast at different stages. Incorporating it into the dry ingredients is essential for overall flavor distribution. For an extra boost, sprinkle a little nutritional yeast (perhaps 1-2 tablespoons total for the batch) over the tops of the biscuits just before baking. This creates a slightly crisp, concentrated cheesy crust. Pairing the nutritional yeast with a pinch of garlic powder or onion powder can also enhance the savory, cheesy profile.
Variations: Adding Herbs and Spices to Your Dairy-Free Biscuits
While delicious on their own, these dairy-free cheesy biscuits are incredibly versatile and welcome additions of herbs and spices. Fresh or dried herbs like chives, rosemary, thyme, or dill pair wonderfully with the savory nutritional yeast flavor. Add about 1-2 tablespoons of finely chopped fresh herbs or 1-2 teaspoons of dried herbs to the dry ingredients along with the nutritional yeast.
For a bit of heat, incorporate a pinch of cayenne pepper or red pepper flakes. Other savory additions could include smoked paprika (1 teaspoon) for a smoky depth or a touch of black pepper (1/4 teaspoon). You could even fold in some finely chopped sun-dried tomatoes (1/4 cup) or dairy-free cheese shreds (1/2 cup) into the dough just before shaping for added texture and flavor dimensions. These simple variations allow you to customize your savory dairy-free biscuits to perfectly complement any meal.
Serving and Storing Your Dairy-Free Cheesy Biscuits
Serving Suggestions: Complementing Your Savory Biscuits
Savory dairy-free cheesy biscuits are incredibly versatile and can elevate numerous dishes. Serve them warm, fresh from the oven, brushed with a little melted dairy-free butter. They are a perfect accompaniment to soups and stews, such as a hearty lentil soup or a creamy tomato bisque. Consider them alongside a chili or a savory casserole.
For breakfast or brunch, split them open and top with dairy-free cream cheese, avocado, or even a tofu scramble. They also make excellent bases for savory shortcakes topped with mushroom gravy or other plant-based savory fillings. A batch of 8-12 biscuits typically serves 4-6 people as a side dish, making them ideal for family meals or gatherings.
Storing Leftover Dairy-Free Biscuits for Maximum Freshness
Proper storage is key to maintaining the quality of your dairy-free cheesy biscuits. Once they have cooled completely, store them in an airtight container at room temperature for up to 2-3 days. Avoid refrigerating them, as this can dry them out and make them crumbly.
For longer storage, dairy-free biscuits freeze exceptionally well. Wrap individual cooled biscuits tightly in plastic wrap or aluminum foil, then place them in a freezer-safe bag or container. Frozen biscuits will keep for up to 2-3 months. To reheat, thaw at room temperature if frozen, then warm them in a preheated oven at 350°F (175°C) for about 5-10 minutes, or until heated through. Avoid microwaving, as it can make them tough.
Troubleshooting Common Issues with Dairy-Free Biscuit Baking

Dry Biscuits: Causes and Solutions
One common issue when baking dairy-free cheesy biscuits is ending up with a dry, crumbly texture. This is often caused by using too much flour, not enough liquid, or overmixing the dough. Flour measurements can vary, especially when scooping directly from the bag; weighing your flour (approx. 250g per 2 cups) is the most accurate method. Ensure you are using the full amount of dairy-free milk specified in the recipe, which is typically around 1 cup (240ml).
If your dough still seems dry after adding the liquid, you can cautiously add an extra tablespoon or two of dairy-free milk until it just comes together. Remember that the dough should be moist but not overly sticky. Also, avoid the temptation to keep mixing once the ingredients are combined; excessive mixing develops gluten and leads to a tough, dry biscuit. Handle the dough minimally during shaping.
Flat Biscuits: Preventing Them from Losing Height
Flat dairy-free cheesy biscuits can be disappointing. This issue is usually related to insufficient leavening, warm ingredients, or improper handling. Ensure your baking powder and baking soda are fresh; they lose potency over time. Using cold fat and cold dairy-free milk is crucial; the cold helps create steam and structure during the initial hot oven phase, promoting a good rise.
Handle the dough gently and minimally. Overworking or twisting the biscuit cutter can seal the edges, preventing a full rise. Make sure your oven is properly preheated to the correct high temperature (400-425°F / 200-220°C); a hot oven provides the necessary initial burst of heat for the leavening agents to work effectively. Also, ensure your biscuits are at least 1/2 to 3/4 inch thick before baking; thinner biscuits have less potential for height.
Uneven Baking: Achieving Consistent Results
Uneven baking in your dairy-free cheesy biscuits can result in some being perfectly golden while others are pale or overdone. This is often due to hot spots in your oven or crowding the baking sheet. To mitigate this, rotate your baking sheet halfway through the baking time (e.g., after 7-8 minutes). This exposes all biscuits to different areas of the oven.
Ensure your biscuits are spaced adequately on the baking sheet, leaving at least 1-2 inches between them to allow hot air to circulate evenly around each one. Using a reliable oven thermometer can also help confirm that your oven is actually reaching and maintaining the set temperature. If you consistently have one side of the baking sheet browning faster, you may need to adjust your oven rack position or consider if your oven needs calibration.
Exploring Other Dairy-Free Baking Recipes on BakeWithEase
Dairy-Free Baking: Beyond Biscuits
Mastering this dairy-free cheesy biscuits recipe is just the beginning! BakeWithEase offers a wealth of resources for exploring the vast and delicious world of dairy-free baking. From flaky dairy-free pies and tender scones to moist cakes and chewy cookies, removing dairy doesn't mean sacrificing flavor or texture.
Many traditional baking techniques and principles apply, with simple substitutions like using dairy-free butter, milk alternatives, and sometimes different leavening approaches. We provide step-by-step guides and tips on navigating common challenges, making it easy to expand your repertoire. Explore recipes for dairy-free chocolate chip cookies, vegan brownies, almond milk pancakes, and much more on our site.
Expanding Your Dairy-Free Recipe Collection
Ready to bake more? Dive into our dedicated sections for dairy-free desserts, breads, and pastries. Try your hand at a dairy-free quick bread, perfect for breakfast or snacking. Learn how to make a rich dairy-free ganache for topping cakes. Experiment with different dairy-free fats to see how they impact texture in various recipes.
Our goal at BakeWithEase is to empower you with the knowledge and confidence to bake anything dairy-free. Whether you're looking for a simple everyday recipe or something special for a celebration, you'll find inspiration and reliable instructions to help you succeed. Keep practicing with this dairy-free cheesy biscuits recipe and then venture out to discover your next favorite dairy-free bake!
Frequently Asked Questions
How does this dairy-free biscuit recipe achieve a "cheesy" flavor?
The recipe uses nutritional yeast as a dairy-free substitute to mimic the cheesy taste. It provides a savory, umami flavor profile similar to cheese.
Are these biscuits suitable for people with dairy allergies or lactose intolerance?
Yes, this recipe is specifically designed to be dairy-free, making it a great option for individuals with dairy allergies or lactose intolerance. All ingredients are chosen to exclude dairy products.
What are some variations or additions I can make to this dairy-free cheesy biscuit recipe?
You could add different herbs like rosemary or thyme, or incorporate roasted garlic for extra flavor. Experiment with different spices or add chopped vegetables for a unique twist.
What makes BakeWithEase.com a good resource for baking recipes like this one?
BakeWithEase.com focuses on simple recipes and techniques accessible to all skill levels. The site offers step-by-step guides and uses easy-to-find ingredients.
Can I make these biscuits ahead of time?
You can prepare the dough in advance and store it in the refrigerator for up to 24 hours. Bake just before serving for the best texture and flavor, ensuring they are freshly baked.
Final Reflection: The Unexpected Joy of Dairy-Free Delight
The quest for a truly satisfying dairy-free cheesy biscuit has been a culinary challenge for many, but the results, as this recipe demonstrates, can be surprisingly delicious and surprisingly accessible. This isn't just about avoiding dairy; it's about unlocking a world of flavor and texture previously thought unattainable without the richness of cheese. The power of nutritional yeast to mimic that umami depth is a revelation, proving that delicious and healthy can coexist beautifully.
This recipe, and the journey of creating it, highlights the growing demand for inclusive and adaptable cooking. It's a testament to the creativity born from dietary restrictions and a desire to share delicious food with everyone. The positive feedback I've received from readers, many with dairy allergies or intolerances, has been incredibly rewarding. Food is symbolic of love when words are inadequate.
– Alan D. Wolfelt. This simple biscuit recipe transcends mere sustenance; it's a symbol of inclusivity and the power of culinary innovation to bring people together.
Now, I invite you to step into your kitchen and embark on your own culinary adventure. Don't be afraid to experiment with the recipe, to add your own personal touch, and to share the joy of these savory, dairy-free biscuits with loved ones. The possibilities are endless, and the reward? A taste of deliciousness that proves that limitations can inspire incredible creativity and satisfaction. Let the journey begin!
Unleash Your Inner Baker: Dairy-Free Deliciousness Awaits!
Thanks for joining us on this cheesy, dairy-free adventure! We hope you gained some tasty inspiration and newfound confidence in creating delicious biscuits without the dairy. Ready to take your baking to the next level?
- Bake a batch of these incredible biscuits today! Use the recipe as a starting point, and feel free to experiment with different herbs and spices.
- Share your baking triumphs (or even your baking mishaps!) with us on social media – we'd love to see your creations! Use #BakeWithEaseDairyFree.
- Explore our other dairy-free recipes on BakeWithEase.com to discover even more flavourful possibilities.
What exciting dairy-free creation will you bake next?