
Mini GlutenFree Cheesecake Cups: A Portable Dessert Delight

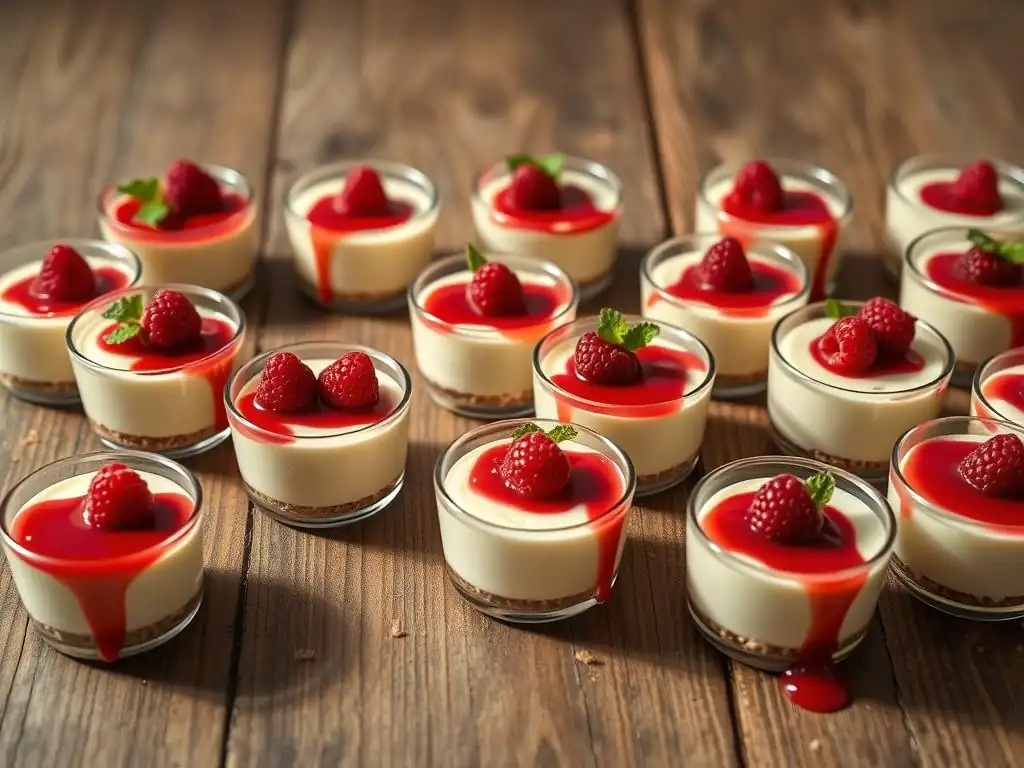
Welcome to BakeWithEase, your companion on a delightful baking journey! Ever dreamt of a perfectly portioned, melt-in-your-mouth dessert that caters to dietary needs? Dive into the world of easy-to-make treats with our featured article: a sensational Glutenfree Mini Cheesecake Recipe. Intrigued? Discover how simple it is to create these portable delights and unlock a world of flavor without the gluten. Let's get baking!
- Introduction to Gluten-Free Mini Cheesecakes
- BakeWithEase's Gluten-Free Mini Cheesecake Recipe: A Step-by-Step Guide
- Preparing the Gluten-Free Crust for Mini Cheesecakes
- Crafting the Perfect Gluten-Free Cheesecake Filling
- Baking Your Gluten-Free Mini Cheesecake Cups
- Cooling and Setting Your Gluten-Free Mini Cheesecakes
- Gluten-Free Mini Cheesecake Variations & Flavor Ideas
- Tips for Gluten-Free Baking Success
- Storing Your Gluten-Free Mini Cheesecake Cups
- Serving Suggestions for Gluten-Free Mini Cheesecakes
- Conclusion: Enjoying Your Homemade Gluten-Free Mini Cheesecakes
- Frequently Asked Questions
- Final Reflection: The Enduring Allure of Mini Gluten-Free Delights
- Unleash Your Inner Pastry Chef!
Introduction to Gluten-Free Mini Cheesecakes
Discovering the Joy of Gluten-Free Baking with Mini Cheesecakes
Embarking on the journey of gluten-free baking opens up a world of delicious possibilities, and one of the most rewarding creations is the mini gluten-free cheesecake. For those navigating gluten sensitivities or Celiac disease, finding truly satisfying desserts can sometimes feel like a challenge. However, with the right approach and a reliable glutenfree mini cheesecake recipe, you can whip up treats that are not only safe but also incredibly decadent and delightful.
Making gluten-free mini cheesecakes allows you to experience the rich, creamy texture and sweet flavor of traditional cheesecake without the gluten. It's a fantastic way to expand your baking repertoire and prove that dietary restrictions don't mean compromising on taste or enjoyment. These individual portions are perfect for managing serving sizes and ensuring everyone gets a perfectly crafted dessert.
Why Mini Gluten-Free Cheesecakes are the Perfect Treat
Mini gluten-free cheesecakes offer several advantages over their full-sized counterparts, making them an ideal choice for many bakers and dessert lovers. Their individual size means faster baking times, reducing the overall time spent in the kitchen. This is particularly appealing when you're craving a sweet treat without the commitment of baking a large cake.
Furthermore, these mini delights are inherently portion-controlled, which can be helpful for managing dietary intake. They are also much easier to handle and serve, eliminating the need for slicing and potentially messy presentation. The simplicity and speed make this glutenfree mini cheesecake recipe a go-to for spontaneous baking sessions or when you need a quick dessert fix.
Portable & Delicious: Ideal for Any Occasion
One of the standout features of mini gluten-free cheesecakes is their exceptional portability. Once chilled and set, these individual cups can be easily transported to picnics, potlucks, parties, or packed in lunchboxes. Their sturdy crust and compact size prevent the issues often faced when transporting a large, delicate cheesecake.
Whether it's a casual gathering with friends, a family celebration, or just a personal craving, mini gluten-free cheesecake cups fit the bill perfectly. They offer a gourmet feel in a convenient package, ensuring that anyone following a gluten-free diet can enjoy a special dessert wherever they are. This portability makes mastering a reliable glutenfree mini cheesecake recipe truly worthwhile.
BakeWithEase's Gluten-Free Mini Cheesecake Recipe: A Step-by-Step Guide
Ingredients for Your Gluten-Free Mini Cheesecake Cups
Gathering the correct ingredients is the first step to success when making this glutenfree mini cheesecake recipe. You'll need specific items for both the crust and the creamy filling. Ensuring your ingredients are at the right temperature, especially the cream cheese and eggs, is crucial for a smooth batter, typically requiring them to be at room temperature for about 30-60 minutes before mixing.
Using high-quality ingredients will elevate the flavor of your mini gluten-free cheesecakes significantly. Opt for full-fat cream cheese for the creamiest texture and fresh eggs for the best results. Checking ingredient labels is paramount when baking gluten-free to avoid hidden sources of gluten in items like extracts or pre-made crumb mixes.
Gluten-Free Crust Ingredients
The foundation of a great gluten-free mini cheesecake is a sturdy, flavorful crust. Typical ingredients include:
- Gluten-free graham cracker crumbs (or other gluten-free cookie crumbs)
- Melted unsalted butter
- Granulated sugar (optional, to add a touch more sweetness)
- A pinch of salt (optional, enhances flavor)
For approximately 12-18 mini cheesecakes, you might use about 1 ½ cups of gluten-free crumbs and around ¼ to ⅓ cup of melted butter, adjusting slightly based on the type of crumb used.
Gluten-Free Cheesecake Filling Ingredients
The heart of the glutenfree mini cheesecake recipe is the rich and creamy filling. Key components usually include:
- Cream cheese (full-fat, softened)
- Granulated sugar
- Large eggs (room temperature)
- Sour cream or Greek yogurt (adds tanginess and moisture)
- Vanilla extract
- Lemon juice (optional, brightens flavor)
- A small amount of gluten-free flour or cornstarch (helps stabilize and prevent cracks)
For a batch of 12-18 mini cheesecakes, you'd likely need 2-3 packages (8 ounces each) of cream cheese, around ¾ to 1 cup of sugar, 2 large eggs, ¼ to ½ cup of sour cream or yogurt, and a teaspoon or two of vanilla extract and stabilizer.
Equipment Needed for Gluten-Free Mini Cheesecakes
Having the right tools makes the baking process much smoother and more enjoyable when tackling this glutenfree mini cheesecake recipe. You don't need highly specialized equipment, but a few standard kitchen items are essential. Preparation is key, so gather everything before you begin mixing.
Ensure your measuring cups and spoons are accurate, as precise measurements are important in baking, especially for consistent results with the gluten-free components. A good quality muffin tin is also necessary for shaping the mini cheesecakes.
Essential equipment includes:
- Standard 12-cup or 24-cup muffin tin(s)
- Paper cupcake liners or silicone liners
- Mixing bowls (at least one large for the filling)
- Electric mixer (stand mixer or hand mixer)
- Measuring cups and spoons
- Spatula or rubber scraper
- Small bowl for melting butter
- Cookie scoop or spoon for portioning filling
Using paper liners is highly recommended as it makes removing the finished mini gluten-free cheesecakes from the tin much easier and cleaner, preventing them from sticking.
Preparing the Gluten-Free Crust for Mini Cheesecakes
Making the Gluten-Free Crumb Base
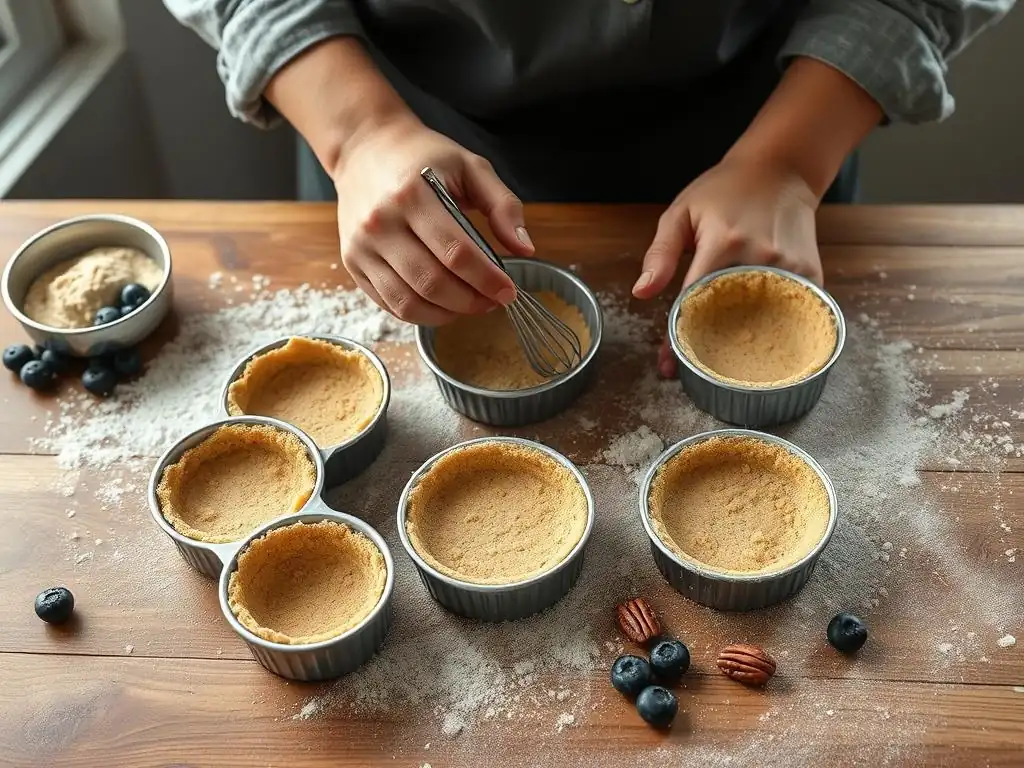
Creating the crust for your gluten-free mini cheesecake cups is a simple yet crucial step. Start by finely crushing your chosen gluten-free crackers or cookies. If you're using whole cookies, a food processor works quickly to turn them into fine crumbs. Aim for a texture similar to coarse sand; overly fine crumbs can become dense, while too coarse ones won't bind well.
Once the crumbs are ready, combine them in a bowl with the melted butter and optional sugar and salt. Stir the mixture until the crumbs are evenly coated with the butter. The mixture should resemble wet sand and hold together loosely when squeezed. This ensures the crust will compact properly and maintain its shape after baking.
Pressing the Crust into Muffin Tins
With the gluten-free crumb mixture prepared, the next step is to portion and press it into your lined muffin tin. Place a paper or silicone liner in each cup of the tin. Then, distribute the crumb mixture evenly among the liners. A cookie scoop or a large spoon can help with portioning for consistency; aim for about 1 ½ to 2 tablespoons of crumb mixture per cup for a standard crust thickness.
Using the bottom of a small glass, a tart tamper, or even your fingers, firmly press the crumbs into the bottom of each liner. Compact the crumbs as much as possible to form a solid base. This firmness is essential to prevent the crust from crumbling when you remove the mini gluten-free cheesecakes from the liners later. Bake the pressed crusts briefly, typically for 5-8 minutes at around 350°F (175°C), to help set them before adding the filling.
Crafting the Perfect Gluten-Free Cheesecake Filling
Mixing the Gluten-Free Cheesecake Batter
Achieving a smooth, lump-free filling is key to a delicious glutenfree mini cheesecake recipe. Start with softened cream cheese; it should be pliable but not melted. Beat the cream cheese alone in a large bowl using an electric mixer on medium speed until it is completely smooth and creamy, usually for 1-2 minutes. Scrape down the sides of the bowl as needed to ensure no lumps remain.
Gradually add the sugar to the cream cheese, continuing to beat until it is well incorporated and the mixture is light and fluffy. Avoid overmixing once the sugar is added, as incorporating too much air can sometimes lead to cracks during baking. Next, mix in the sour cream or yogurt, vanilla extract, and any optional flavorings like lemon juice. Finally, gently beat in the eggs one at a time, mixing just until each egg is incorporated. Overmixing the eggs is a common cause of tough cheesecake.
Achieving a Smooth and Creamy Texture
The secret to a divinely smooth and creamy gluten-free mini cheesecake filling lies in proper mixing technique and ingredient temperature. Ensure all dairy ingredients and eggs are at room temperature. Cold ingredients won't emulsify properly, leading to a lumpy batter. Beat the cream cheese alone first to break it down and make it smooth before adding other ingredients.
When adding subsequent ingredients, especially the eggs, mix on low speed and stop as soon as they are just combined. Vigorously beating the batter after the eggs are added incorporates excess air. This air expands during baking, then contracts rapidly during cooling, which can cause the cheesecake to sink or crack. A slightly under-mixed batter is preferable to an over-mixed, airy one for achieving that signature dense, creamy texture in your gluten-free mini cheesecake cups.
Baking Your Gluten-Free Mini Cheesecake Cups
Baking Time and Temperature for Gluten-Free Cheesecakes
Baking mini gluten-free cheesecakes requires a slightly different approach than a large cheesecake, primarily due to their smaller size. A typical baking temperature range is between 325°F and 350°F (160°C to 175°C). The exact temperature can depend on your oven and whether you're using a water bath (though less common for mini cheesecakes, it can still help).
The baking time for mini cheesecakes is significantly shorter than a full-sized one, often ranging from 18 to 25 minutes. You'll know they're done when the edges appear set and slightly puffed, but the center still looks a little soft and jiggly when you gently tap the side of the muffin tin. They will continue to set as they cool. Overbaking is a common mistake that can result in a dry, cracked cheesecake.
Preventing Cracks in Your Gluten-Free Mini Cheesecakes
Cracks can sometimes appear on the surface of cheesecakes, including mini ones, even in a well-executed glutenfree mini cheesecake recipe. While cracks don't affect the taste, they can impact the appearance. One primary cause is overbaking, which dries out the top layer. Another is sudden temperature changes during cooling.
To minimize cracking:
- Do not overmix the batter, especially after adding eggs.
- Do not overbake; remove the cheesecakes when the centers are still slightly soft.
- Allow the mini cheesecakes to cool gradually. After baking, turn off the oven and prop the door open slightly, letting the cheesecakes cool inside for about 15-20 minutes before removing the tin from the oven.
- Avoid moving the tin abruptly while they are hot.
Gradual cooling is your best friend for preventing cracks in gluten-free mini cheesecakes. Patience pays off!
Cooling and Setting Your Gluten-Free Mini Cheesecakes
The Importance of Chilling Gluten-Free Desserts
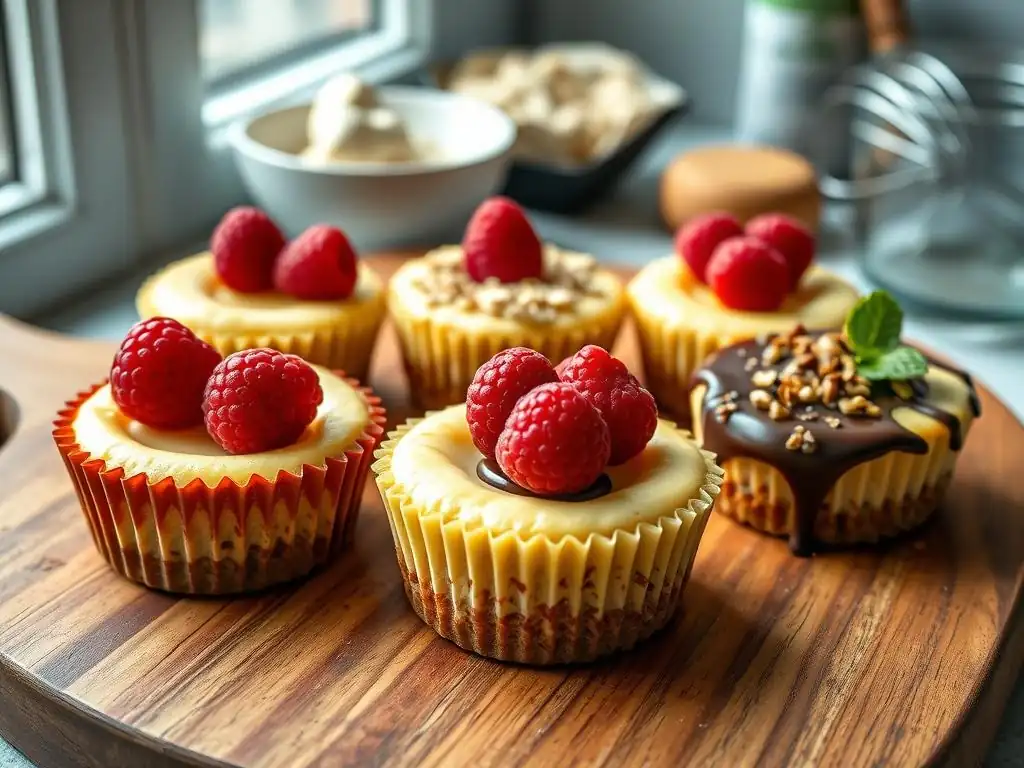
Once your mini gluten-free cheesecakes have baked and cooled gradually in the oven, the chilling phase is absolutely critical. Cheesecake is an egg-custard based dessert, and it needs time in the refrigerator to fully set and develop its characteristic dense, creamy texture. Skipping or shortening the chilling time will result in a runny, unappealing filling.
After the initial cooling period outside the oven, transfer the muffin tin to a wire rack to cool completely to room temperature, typically for another 30-60 minutes. Then, move the tin (or the individual cheesecakes if you've carefully removed them from the tin while still in their liners) to the refrigerator. Chilling for at least 2-3 hours is necessary, but 4 hours or even overnight is ideal for the best texture in your glutenfree mini cheesecake recipe.
Achieving the Perfect Cheesecake Consistency
The magic of a perfect cheesecake consistency happens during the chilling process. As the mini gluten-free cheesecakes cool in the refrigerator, the proteins in the eggs and cream cheese firm up, transforming the slightly soft baked filling into that rich, smooth, and dense texture we all love. The flavors also meld and intensify during this time.
To ensure the best consistency, make sure your cream cheese was fully softened and mixed smoothly initially. Also, avoid opening the refrigerator door too frequently while they are chilling, as consistent cold temperature is important for proper setting. A properly chilled gluten-free mini cheesecake will be firm enough to hold its shape beautifully when removed from its liner.
Gluten-Free Mini Cheesecake Variations & Flavor Ideas
Chocolate Gluten-Free Mini Cheesecakes
Transforming your standard glutenfree mini cheesecake recipe into a chocolate lover's dream is simple and incredibly rewarding. You can incorporate chocolate in several ways. One popular method is to add melted, cooled semi-sweet or dark chocolate directly into the cheesecake filling batter along with the cream cheese and sugar. Aim for about 4-6 ounces of melted chocolate per batch of 12-18 mini cheesecakes.
Alternatively, you can add cocoa powder to the filling – start with 2-3 tablespoons of unsweetened cocoa powder, sifting it to avoid lumps. For an extra chocolate boost, use gluten-free chocolate cookies for the crust or top the finished, chilled mini cheesecakes with chocolate ganache or chocolate shavings.
Fruity Gluten-Free Mini Cheesecakes (Strawberry, Blueberry, Raspberry)
Fruity variations add brightness and a touch of tang to balance the richness of the cheesecake. Berries like strawberries, blueberries, and raspberries are classic choices for this glutenfree mini cheesecake recipe. You can swirl fruit compote or puree into the top of the cheesecake batter before baking, or fold small, finely diced pieces of fruit into the batter.
Another popular approach is to create a simple fruit topping or compote after the mini cheesecakes have chilled. A quick strawberry compote involves simmering sliced strawberries with a little sugar and lemon juice until thickened. Spooning this over the set mini gluten-free cheesecakes just before serving provides a burst of fresh flavor and vibrant color.
Caramel Gluten-Free Mini Cheesecakes
Caramel offers a wonderfully rich and slightly salty contrast to the sweet and creamy cheesecake. To make caramel gluten-free mini cheesecakes, you can incorporate caramel sauce or dulce de leche into the filling or use it as a topping. Swirling caramel into the top of the batter before baking creates beautiful patterns and pockets of flavor.
For added texture and flavor, consider using gluten-free shortbread cookies for the crust and adding a sprinkle of sea salt to the caramel topping. Drizzling warm caramel sauce over the chilled mini gluten-free cheesecakes just before serving is a simple way to add this decadent flavor. You can also add chopped caramel candies or toffee bits (ensure they are gluten-free) to the top.
Tips for Gluten-Free Baking Success
Choosing the Right Gluten-Free Flour Blend
While the glutenfree mini cheesecake recipe primarily relies on a gluten-free crust (often crumb-based) and a filling that uses minimal or no flour, some recipes incorporate a small amount of gluten-free flour or cornstarch for stabilization. If your recipe calls for it, selecting the right blend is important. All-purpose gluten-free flour blends vary significantly in composition (rice flour, tapioca starch, potato starch, etc. ), which can affect texture and absorption.
Look for a reputable all-purpose gluten-free blend that is designed for baking and ideally contains a binder like xanthan gum. If the recipe specifies using a particular type of starch like cornstarch or tapioca starch, stick to that. Approximately 1-2 tablespoons of starch or gluten-free flour are typically sufficient for a batch of 12-18 mini cheesecakes, adding stability without impacting the creamy texture negatively.
Avoiding Common Gluten-Free Baking Mistakes
Baking gluten-free, even with a simple glutenfree mini cheesecake recipe, has its nuances. One common mistake is not checking all ingredient labels for hidden gluten; this includes extracts, chocolate, and even some dairy products or pre-made crumbs. Another error is using cold ingredients, which leads to a lumpy batter and inconsistent texture in the final product.
Overmixing the cheesecake batter, especially after adding eggs, is detrimental as it incorporates too much air, leading to potential cracking or a less dense texture. Finally, impatience during the cooling and chilling phases is a major pitfall. Allowing the mini cheesecakes to cool gradually and chill fully is essential for the filling to set correctly and achieve that signature creamy consistency.
- [x] Ensure all dairy and eggs are at room temperature before mixing.
- [x] Beat cream cheese until smooth *before* adding other ingredients.
- [ ] Avoid overmixing, especially after adding eggs.
- [ ] Do not overbake; centers should be slightly jiggly.
- [ ] Cool gradually in the oven after baking.
- [ ] Chill for at least 2-3 hours, preferably longer.
Storing Your Gluten-Free Mini Cheesecake Cups
Proper Storage for Freshness
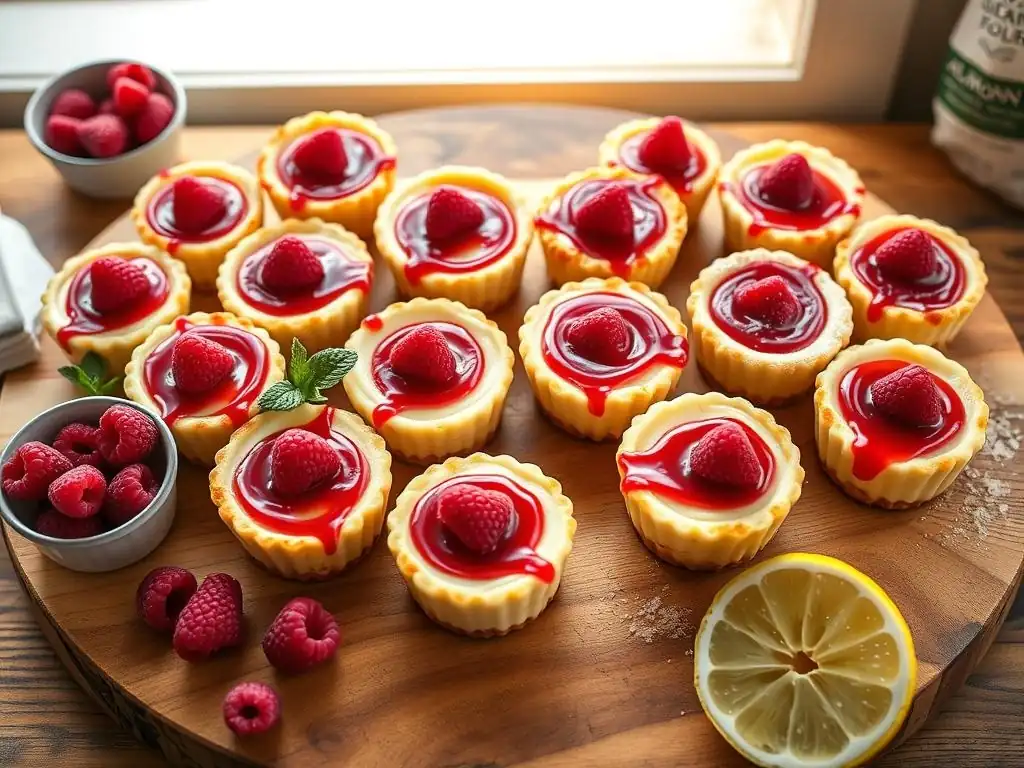
Once your delicious mini gluten-free cheesecakes are fully chilled and ready, proper storage is essential to maintain their freshness, texture, and flavor. Due to their dairy content, they must be kept refrigerated. The best way to store them is in an airtight container. If they are still in their muffin liners, you can place them directly into the container.
Ensure the container is sealed tightly to prevent the cheesecakes from absorbing odors from other food in the refrigerator and to keep them from drying out. When stored correctly in the refrigerator, mini gluten-free cheesecakes typically stay fresh for 3 to 5 days.
Freezing Gluten-Free Mini Cheesecakes
Yes, you can absolutely freeze your mini gluten-free cheesececake cups! This is a fantastic option if you've made a large batch or want to save some for later enjoyment. Freezing allows you to extend their shelf life significantly, up to 1-2 months while maintaining good quality.
To freeze, ensure the cheesecakes are completely cooled and chilled. If they have toppings, it's best to freeze them without toppings and add them after thawing. Place the mini cheesecakes (still in liners or carefully removed) on a baking sheet and freeze them for about 1-2 hours until firm. Once firm, transfer them to a freezer-safe airtight container or a heavy-duty freezer bag, layering them with parchment paper to prevent sticking. To thaw, simply move them from the freezer to the refrigerator and let them thaw for several hours or overnight.
Serving Suggestions for Gluten-Free Mini Cheesecakes
Garnishing Ideas for Gluten-Free Desserts
Elevate the presentation and flavor of your mini gluten-free cheesecakes with creative garnishes. Simple additions can turn a delicious dessert into a showstopper. Consider fresh berries like strawberries, blueberries, raspberries, or a mix, placed artfully on top. A dollop of whipped cream (dairy or non-dairy) is a classic, light addition.
Other ideas include a drizzle of fruit compote, chocolate sauce, or caramel sauce. A sprinkle of gluten-free cookie crumbs, toasted nuts, or chocolate shavings adds texture and visual appeal. For a touch of elegance, garnish with a sprig of fresh mint. The possibilities are vast, allowing you to customize each mini gluten-free cheesecake cup.
Pairing Gluten-Free Mini Cheesecakes with Beverages
The rich and creamy nature of mini gluten-free cheesecakes pairs wonderfully with a variety of beverages, enhancing the overall dessert experience. For a warm option, a cup of coffee, espresso, or a rich black tea complements the sweetness and creaminess beautifully.
If you prefer cold drinks, consider serving them with a glass of milk (dairy or non-dairy), iced coffee, or even a chilled dessert wine. The key is often to choose a beverage that can stand up to the richness of the cheesecake without overwhelming it. A sparkling cider or a slightly tart fruit juice can also provide a refreshing contrast.
Conclusion: Enjoying Your Homemade Gluten-Free Mini Cheesecakes
The Perfect Gluten-Free Dessert Recipe for All
Mastering this glutenfree mini cheesecake recipe opens the door to creating a dessert that truly caters to everyone, regardless of gluten restrictions. These delightful mini cups offer all the indulgence of traditional cheesecake in a convenient, portable, and perfectly portioned format. They are proof that baking gluten-free doesn't mean sacrificing flavor or texture.
Whether you're baking for personal enjoyment, a family gathering, or a special event, mini gluten-free cheesecakes are a reliable and crowd-pleasing choice. Their adaptability to various flavors and toppings means you can make them unique every time.
Mastering the Art of Easy Gluten-Free Baking
Through the process of making mini gluten-free cheesecakes, you've taken a significant step in mastering the art of easy gluten-free baking. This recipe, with its straightforward steps and forgiving nature (especially in mini form), builds confidence in working with gluten-free ingredients and techniques. It demonstrates that delicious, high-quality gluten-free desserts are well within reach for home bakers.
Continue experimenting with different crusts, fillings, and toppings to explore the full potential of this versatile glutenfree mini cheesecake recipe. Happy baking!
Frequently Asked Questions
How do I ensure my gluten-free mini cheesecakes don't crumble?
Using a gluten-free flour blend specifically designed for baking is crucial. Also, avoid over-baking; slightly underbaked cheesecakes are better than dry, crumbly ones.
Can I substitute the cream cheese in the recipe?
While cream cheese is essential for the classic cheesecake texture, you could try a dairy-free cream cheese alternative, but be aware it may alter the flavor and texture.
What's the best way to prevent the cheesecakes from cracking?
Baking the cheesecakes in a water bath helps maintain consistent moisture and prevents drastic temperature changes that cause cracking.
How long will these gluten-free mini cheesecakes last?
Stored in an airtight container in the refrigerator, these cheesecakes should last for up to 3-4 days. Freezing is also an option for longer storage.
What are some topping ideas for these mini cheesecakes?
Fresh berries, chocolate ganache, or a simple fruit compote are all excellent choices. Consider a gluten-free cookie crumble for added texture.
Final Reflection: The Enduring Allure of Mini Gluten-Free Delights
The demand for delicious, convenient, and allergy-friendly desserts is higher than ever, and these mini gluten-free cheesecake cups perfectly capture that trend. Their portability and ease of preparation make them ideal for everything from casual gatherings to sophisticated events, proving that indulgence doesn't have to compromise on health or convenience.
The journey of creating this recipe, from initial experimentation to the final, perfectly balanced bite, underscored the importance of inclusivity in the culinary world. It's not just about catering to dietary restrictions; it's about creating joy and deliciousness for everyone. Food is symbolic of love when words are inadequate.
– Alan D. Wolfelt. This quote resonates deeply, as these little cheesecakes offer a tangible expression of care and consideration, ensuring everyone can participate in the sweet moments of life.
Now, it's your turn. Consider the possibilities! Experiment with different flavor combinations, toppings, and presentations. Don't be afraid to adapt this recipe to your own tastes and preferences. These mini cheesecakes are a blank canvas for your culinary creativity, a testament to the power of deliciousness and inclusivity. Go forth and create your own miniature masterpieces!
Unleash Your Inner Pastry Chef!
Thanks for joining us on this delicious journey into the world of mini gluten-free cheesecake cups! We hope you've gained some inspiration and valuable baking tips. Ready to take your newfound skills to the next level?
- Bake a batch today! Use our recipe as a springboard – experiment with different toppings and fillings to create your signature cheesecake cup.
- Share your creations! Post a picture of your masterpiece on social media and tag us – we'd love to see your culinary artistry!
- Challenge a friend to a cheesecake cup bake-off! It's a fun way to share this delightful recipe and create some friendly competition.
What unique flavour combination will you create for your next batch of mini cheesecakes?