
Crafting Sourdough Bagels: A StepbyStep Advanced Guide

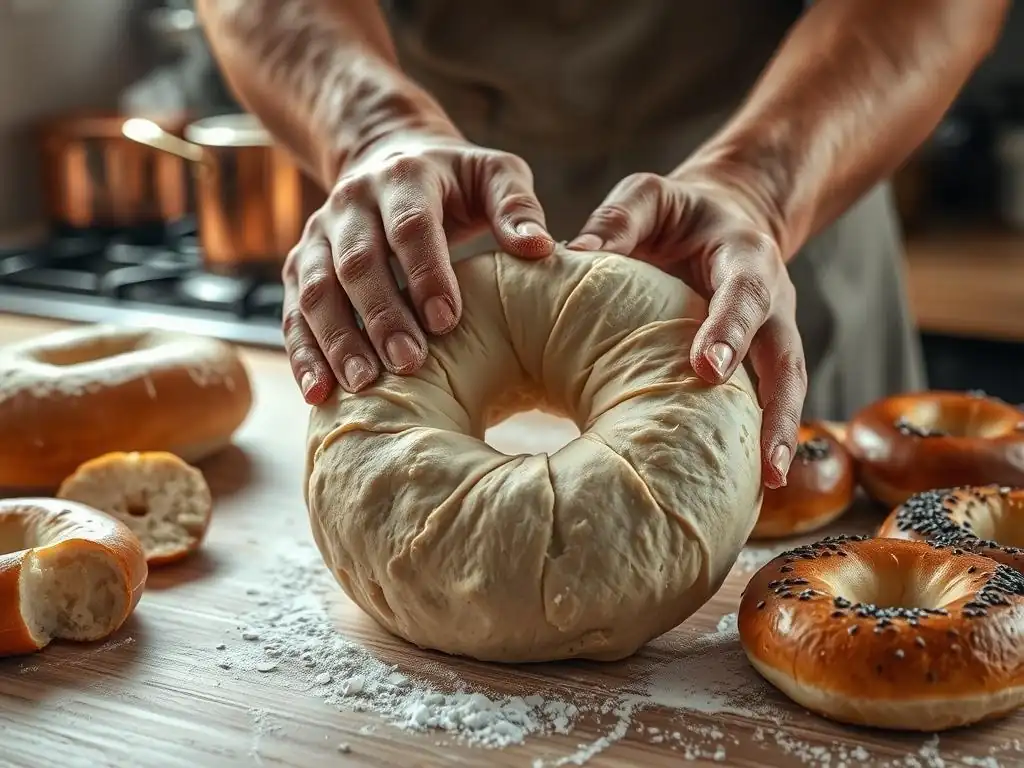
Welcome to BakeWithEase, your haven for baking brilliance! Ever wondered if you could elevate your baking game and conquer the coveted sourdough bagel? You're in the right place. This guide isn't just another recipe; it's your advanced masterclass in crafting bakery-worthy sourdough bagels. Prepare to unlock the secrets, master the techniques, and create the perfect chewy, tangy bagel. What makes this sourdough bagel recipe truly advanced? Let's dive in...
- Introduction to Advanced Sourdough Bagel Baking
- Mastering the Sourdough Starter for Optimal Bagel Dough
- Formulating the Perfect Sourdough Bagel Dough: Advanced Techniques
- Shaping Sourdough Bagels: Achieving the Perfect Ring
- The Boiling Process: The Key to Sourdough Bagel's Signature Crust
- Baking Sourdough Bagels: Achieving a Golden-Brown Crust
- Cooling and Storing Your Homemade Sourdough Bagels
- Troubleshooting Common Sourdough Bagel Baking Problems
- Advanced Sourdough Bagel Variations and Flavor Combinations
- Conclusion: Enjoying the Rewards of Advanced Sourdough Bagel Baking
-
Frequently Asked Questions
- What makes this sourdough bagel recipe considered "advanced"?
- What are the key differences between using a sourdough starter versus commercial yeast in bagel making?
- What if my sourdough starter isn't active enough?
- What's the secret to achieving that perfect bagel "chew"?
- Can I customize this sourdough bagel recipe with different toppings or flavorings?
- Final Reflection: The Enduring Allure of the Perfect Sourdough Bagel
- Unleash Your Inner Bagel Baker!
Introduction to Advanced Sourdough Bagel Baking
Why Bake Sourdough Bagels? Exploring the Unique Flavor and Texture
Baking sourdough bagels offers a deeply rewarding experience, primarily due to the complex flavor profile and satisfying chewiness that is difficult to replicate with commercial yeast alone. The slow fermentation process, characteristic of a natural sourdough starter, breaks down sugars in the flour, producing organic acids like lactic and acetic acid. These acids contribute a subtle tang that complements the rich, slightly sweet notes developed during the long bulk fermentation and proofing stages inherent in a quality sourdough bagels recipe advanced. This depth of flavor evolves over many hours, unlike the rapid rise provided by instant yeast.
Beyond flavor, the structure of sourdough bagels is distinct. The robust gluten network developed through proper kneading and extended fermentation creates a dense yet tender crumb, encased in a delightfully chewy crust formed during the crucial boiling step. Achieving this texture requires precision in hydration, fermentation timing, and shaping, making this a truly advanced sourdough bagel recipe challenge. The result is a bagel with an interior that resists easy compression and a crust that provides satisfying resistance with every bite, a hallmark of artisanal baking.
Who Should Attempt This Sourdough Bagel Recipe? Assessing Your Baking Skills
This sourdough bagels recipe advanced is designed for bakers who have a solid foundation in working with sourdough starters and dough. If you are comfortable maintaining an active starter, understand concepts like dough hydration, bulk fermentation, and cold proofing, and have successfully baked sourdough bread or simpler sourdough recipes, you are likely ready to tackle this project. It requires patience, attention to detail, and the ability to adapt to the subtle cues your dough provides, as environmental factors like room temperature can significantly impact fermentation times.
Attempting this advanced sourdough bagel recipe is also suitable for those eager to deepen their understanding of dough development and fermentation control. While challenging, each step offers a learning opportunity. You should be prepared to spend time on the process, as a typical timeline might involve mixing the dough one day, shaping and cold-proofing overnight, and then boiling and baking the following day. This phased approach is fundamental to developing both the flavor and structure characteristic of exceptional sourdough bagels.
Mastering the Sourdough Starter for Optimal Bagel Dough
Maintaining a Strong and Active Sourdough Starter for Bagels
A vigorous, active sourdough starter is non-negotiable for a successful sourdough bagels recipe advanced. The starter, or levain, is responsible for both leavening the dough and contributing the signature tangy flavor. For robust bagels, you need a starter that is consistently doubling or tripling in volume within 4-8 hours after feeding at a warm room temperature (ideally between 75-80°F or 24-27°C). Feeding your starter regularly, typically daily if kept at room temperature or 2-3 times a week if refrigerated, is crucial to maintaining its strength.
Using a consistent feeding ratio, such as 1:2:2 (1 part starter: 2 parts water: 2 parts flour by weight), helps ensure predictable activity. For this advanced sourdough bagel recipe, using a starter fed with high-protein flour, similar to the flour used in the dough, can further enhance its performance. A starter that passes the float test (a small piece floats in water) when it's at its peak is a good indicator of readiness, though visual cues like dome shape and numerous bubbles are often more reliable for experienced bakers.
Understanding Starter Hydration and its Impact on Sourdough Bagel Dough
The hydration level of your sourdough starter significantly influences the dough's overall hydration and the starter's activity. A typical sourdough starter is maintained at 100% hydration (equal parts flour and water by weight), which is common for many bread recipes. However, some advanced sourdough bagel recipes might call for a stiffer starter (lower hydration, e.g., 60-70%) or a more liquid starter (higher hydration, e.g., 150%).
A stiffer starter tends to develop acetic acid more readily, contributing a sharper tang, and can be slower to ferment. A more liquid starter ferments faster and promotes lactic acid production for a milder tang. For this sourdough bagels recipe advanced, we'll assume a 100% hydration starter unless otherwise specified in a particular formulation, as it offers a balanced approach to both leavening power and flavor development, while also being the most common type maintained by bakers. Understanding your starter's hydration is key to accurately calculating the final dough hydration.
Troubleshooting Common Sourdough Starter Issues for Bagel Baking
Even experienced bakers encounter issues with their sourdough starter. A common problem is a starter that isn't active enough, leading to dense bagels with poor rise. This can be caused by infrequent feeding, incorrect feeding ratios, or a room temperature that is too cold. If your starter is sluggish, try increasing feeding frequency, ensuring it's in a warm spot, and potentially switching to a blend of flours that includes some rye or whole wheat, which can boost microbial activity.
Another issue can be mold or off-smells (like acetone), indicating contamination or severe underfeeding. While a hooch layer (liquid on top) is normal and can often just be stirred in or poured off, persistent unpleasant smells or visible mold mean you might need to discard most of the starter and try rehabilitating a small portion with diligent feeding, or even start fresh. For a critical recipe like advanced sourdough bagels, using a vibrant, healthy starter is paramount, so don't hesitate to take steps to revive or replace a struggling one.
Formulating the Perfect Sourdough Bagel Dough: Advanced Techniques
Ingredient Breakdown: Selecting High-Protein Flour for Sourdough Bagels
The choice of flour is critical in a sourdough bagels recipe advanced, directly impacting the final texture. High-protein flour, specifically bread flour with a protein content of 12-14%, is essential for developing the strong gluten network needed to create the characteristic chewy texture of bagels. Lower protein flours, like all-purpose flour (typically 10-11.5% protein), will result in a softer, less resilient dough and a less traditional bagel texture.
Some advanced recipes might even incorporate a small percentage of vital wheat gluten (often 1-3% of the total flour weight) to further boost the protein content and chewiness. When selecting your flour, look for terms like "bread flour" or "high-gluten flour" and check the protein percentage on the nutrition label. Using a high-quality, unbleached bread flour will provide the best foundation for your advanced sourdough bagel dough.
Autolyse: A Critical Step for Enhanced Sourdough Bagel Texture
The autolyse technique is a simple yet powerful step in a sourdough bagels recipe advanced that involves mixing just the flour and water (and sometimes the starter, depending on the variation) and letting the mixture rest before adding salt or other ingredients. This resting period, typically ranging from 20 minutes to an hour or even longer, allows the flour to fully hydrate and enzymes present in the flour to begin breaking down proteins.
This process initiates gluten development naturally, making the dough easier to knead and resulting in a more extensible and less sticky dough. For bagels, which require significant gluten strength for their chew, an autolyse can dramatically improve dough handling and the final texture. It helps create a smoother dough early on, reducing the overall kneading time needed and potentially leading to a more open crumb structure within the dense bagel interior.
Developing Gluten Strength: Advanced Kneading Techniques for Sourdough Bagels
Achieving the necessary gluten strength is paramount for the characteristic chew of sourdough bagels. Unlike some softer sourdough bread doughs, bagel dough requires thorough development. This can be achieved through various advanced kneading techniques, including traditional stand mixer kneading or manual methods like the slap-and-fold or stretch-and-fold techniques. Kneading for 10-15 minutes in a stand mixer on medium speed is often required to reach the strong, elastic stage needed.
Alternatively, incorporating a series of stretch-and-folds during the initial bulk fermentation can effectively develop gluten with less hands-on effort. Typically, 3-4 sets of stretch-and-folds performed at 30-45 minute intervals during the first few hours of bulk fermentation will build significant strength. You know the gluten is sufficiently developed when the dough is smooth, elastic, and passes the "windowpane test," where a small piece can be stretched thinly enough to see light through it without tearing.
Bulk Fermentation: Timing and Temperature Control for Sourdough Bagel Flavor
Bulk fermentation, the initial rise of the dough after mixing and kneading, is a critical phase for flavor development in a sourdough bagels recipe advanced. This is where the sourdough starter's microbes work their magic, producing acids and gases. The duration and temperature of this phase significantly impact the final flavor profile. A typical bulk fermentation might last anywhere from 4 to 8 hours at room temperature (around 70-75°F or 21-24°C).
For a more pronounced tang and complex flavor, some advanced techniques involve a longer, cooler bulk fermentation or moving the dough to refrigeration earlier. Monitoring the dough's activity rather than strictly following a time is key; the dough should increase significantly in volume (often 50-75%) and show signs of fermentation like bubbles before moving to the next stage. Over-fermentation can lead to a weak dough and flat bagels, while under-fermentation results in dense, less flavorful bagels.
Shaping Sourdough Bagels: Achieving the Perfect Ring
Dividing and Pre-Shaping the Sourdough Bagel Dough
Once bulk fermentation is complete, the dough for your sourdough bagels recipe advanced needs to be divided into individual portions. For consistent size and weight, use a kitchen scale. A typical bagel weight can range from 100g to 130g, depending on your desired size. After dividing, gently pre-shape each piece into a smooth ball. This allows the gluten to relax slightly before the final shaping step and promotes an even structure.
Allow the pre-shaped balls to rest for 10-20 minutes, covered to prevent drying. This brief rest makes the dough more pliable and easier to shape into rings without tearing or resisting. Avoid using excessive flour during this stage, as it can interfere with sealing the dough later.
The Importance of a Smooth and Tight Bagel Shape
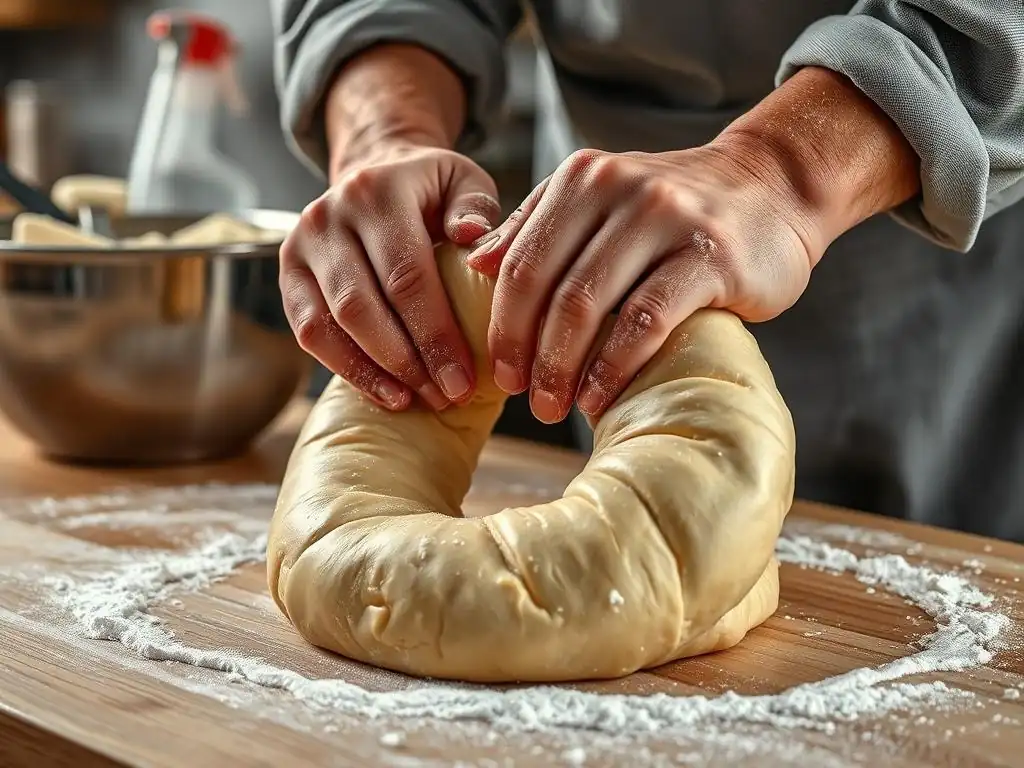
Achieving a smooth, tight shape is crucial for bagels that hold their form during boiling and baking and develop the desired chewy texture. There are two primary methods for shaping: the "hole-poking" method and the "rope" method. The hole-poking method involves poking a hole in the center of a dough ball and gently stretching it outwards, maintaining even thickness. The rope method involves rolling the dough piece into a rope and then joining the ends, often with a slight overlap and pressing firmly to seal.
Regardless of the method used in your advanced sourdough bagel recipe, the goal is a shape with uniform thickness and a well-sealed seam (if using the rope method). A tight surface tension on the outside of the bagel helps it maintain its shape and contributes to the crust development during boiling. Practice is key here; aim for a hole size that won't close completely during the subsequent proofing and baking.
Preventing Over-Proofing During the Shaping Process
Proofing, the final rise before boiling and baking, is critical but needs careful management to avoid over-proofing, which can lead to deflated or flat bagels. After shaping, the bagels are typically placed on parchment-lined trays, often dusted with cornmeal or semolina to prevent sticking. They then undergo a period of cold proofing in the refrigerator, usually for 12-24 hours.
This long, cold proof develops flavor further and, importantly, firms up the bagels, making them easier to handle during the boiling step. It also slows down fermentation significantly. Over-proofing at room temperature or too long in the cold can result in bagels that collapse when boiled or bake up flat. A properly proofed bagel should feel slightly puffy but still dense and should float when tested (though some skip the float test in favor of visual cues and timing).
The Boiling Process: The Key to Sourdough Bagel's Signature Crust
Preparing the Boiling Liquid: Malt Syrup and pH Considerations
The boiling step is what sets bagels apart from other bread. Submerging the shaped dough in boiling water gelatinizes the starches on the surface, creating a glossy, slightly tacky exterior that becomes the signature chewy crust when baked. For an authentic sourdough bagels recipe advanced, adding ingredients to the boiling water enhances flavor and crust color. Malt syrup (barley malt syrup) is traditional, adding a subtle sweetness and promoting browning. Typically, 1-2 tablespoons per quart of water is sufficient.
Some recipes also include baking soda to increase the pH of the boiling water. A higher pH (more alkaline) promotes a darker, richer crust color and can contribute to a slightly different texture. Using baking soda can elevate the pH to around 8-8.5. While not strictly necessary, incorporating malt syrup and considering pH adjustments are advanced techniques that significantly impact the final appearance and texture of your sourdough bagels.
Boiling Time: Finding the Sweet Spot for Optimal Sourdough Bagel Texture
The duration of the boil directly influences the chewiness of the sourdough bagel crust. A longer boil results in a thicker, chewier crust, while a shorter boil yields a softer crust. For an advanced sourdough bagel recipe aiming for that classic, substantial chew, boiling each side for 30-60 seconds is a common range. Some bakers prefer up to 90 seconds per side for maximum chewiness.
Boiling too briefly might result in a crust that is too thin and lacks the characteristic chew. Boiling for too long, however, can negatively impact the dough's ability to rise in the oven (oven spring), leading to denser bagels. Carefully time each bagel as it boils, flipping it halfway through the total boiling time. Handle the cold, firm bagels gently as you transfer them from the proofing tray to the boiling pot.
Safe Handling Techniques for Boiled Sourdough Bagels
Handling boiled bagels requires care to maintain their shape and prevent sticking. After boiling, the bagels will be wet and slightly sticky. Use a slotted spoon or spider strainer to carefully remove them from the boiling water. Allow excess water to drain off for a few seconds.
Transfer the boiled bagels directly to a baking sheet lined with parchment paper. If adding toppings like seeds or herbs, this is the point to do so; the wet surface helps the toppings adhere. Ensure there is adequate space between bagels on the baking sheet, as they will expand during baking. Work efficiently but carefully through the boiling batch to ensure consistent boiling times for all bagels.
Baking Sourdough Bagels: Achieving a Golden-Brown Crust
Oven Temperature and Baking Time for Perfect Sourdough Bagels
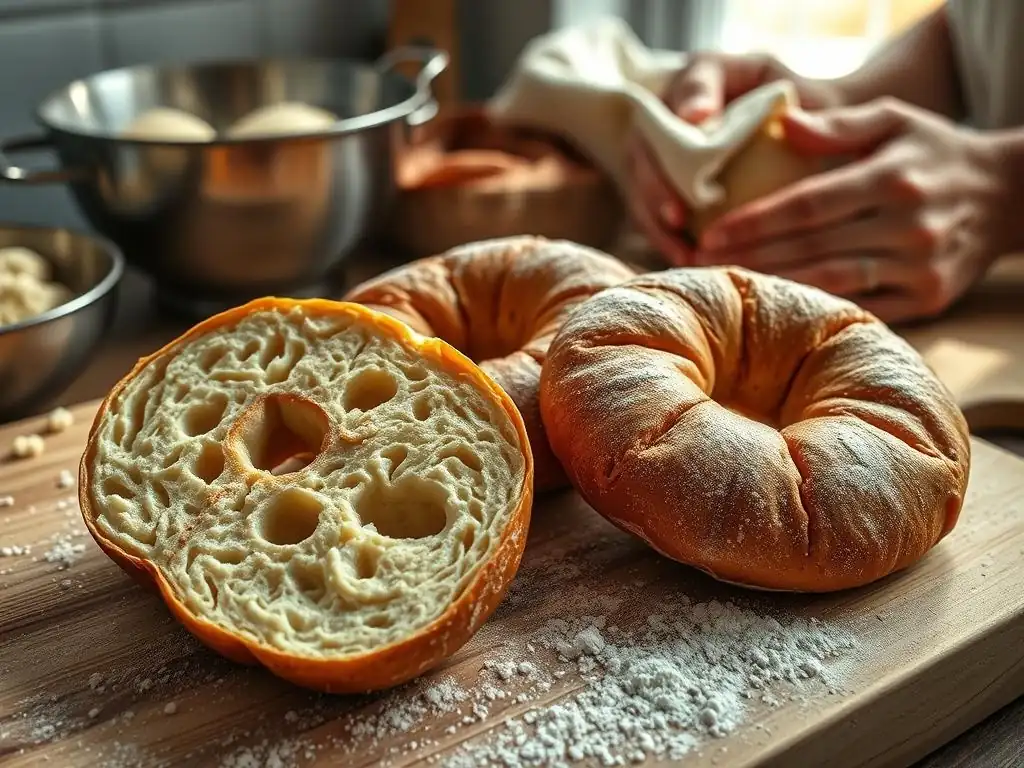
Baking sourdough bagels requires a high oven temperature to achieve a rapid rise (oven spring) and develop a beautiful, golden-brown crust. Preheat your oven to a high temperature, typically between 450°F and 500°F (230°C to 260°C). Using a baking stone or steel preheated in the oven can help provide a strong burst of heat from below, further aiding oven spring and crust development.
The baking time for sourdough bagels usually ranges from 15 to 25 minutes, depending on the oven, the size of the bagels, and your desired level of browning. Bake until the bagels are deeply golden brown on both the top and bottom. Rotating the baking sheet halfway through the baking time can help ensure even browning, especially if your oven has hot spots.
Steam Injection: Creating a Professional-Quality Sourdough Bagel Crust
Introducing steam into the oven at the beginning of the baking process is an advanced technique that significantly improves the crust of your sourdough bagels. Steam keeps the surface of the dough moist for the first few minutes of baking, allowing for maximum oven spring before the crust sets. This results in a thinner, crispier crust initially, which then develops into the characteristic chewiness upon cooling.
There are several ways to create steam in a home oven for your sourdough bagels recipe advanced. One common method is to place a heat-safe pan (like a cast iron skillet or broiler pan) on the bottom rack of the oven while it preheats. Just before loading the bagels, carefully pour a cup of hot water into the preheated pan to create a burst of steam.
Be cautious to avoid direct contact with glass oven doors, as rapid temperature changes can cause them to break. Another method is to use lava rocks or a chain in the steam pan for greater surface area.
Monitoring Internal Temperature for Perfectly Baked Sourdough Bagels
While visual cues are important, using an instant-read thermometer is the most accurate way to determine if your sourdough bagels are fully baked. A perfectly baked bagel should have an internal temperature of around 205-210°F (96-99°C). Checking the internal temperature ensures the crumb is fully cooked through, preventing a gummy texture.
Insert the thermometer into the side of a bagel, avoiding the hole. If the temperature is below the target range, continue baking for a few more minutes and check again. Monitoring internal temperature is a key step in an advanced sourdough bagel recipe to guarantee consistent, reliable results batch after batch.
Cooling and Storing Your Homemade Sourdough Bagels
Proper Cooling Techniques to Maintain Sourdough Bagel Texture
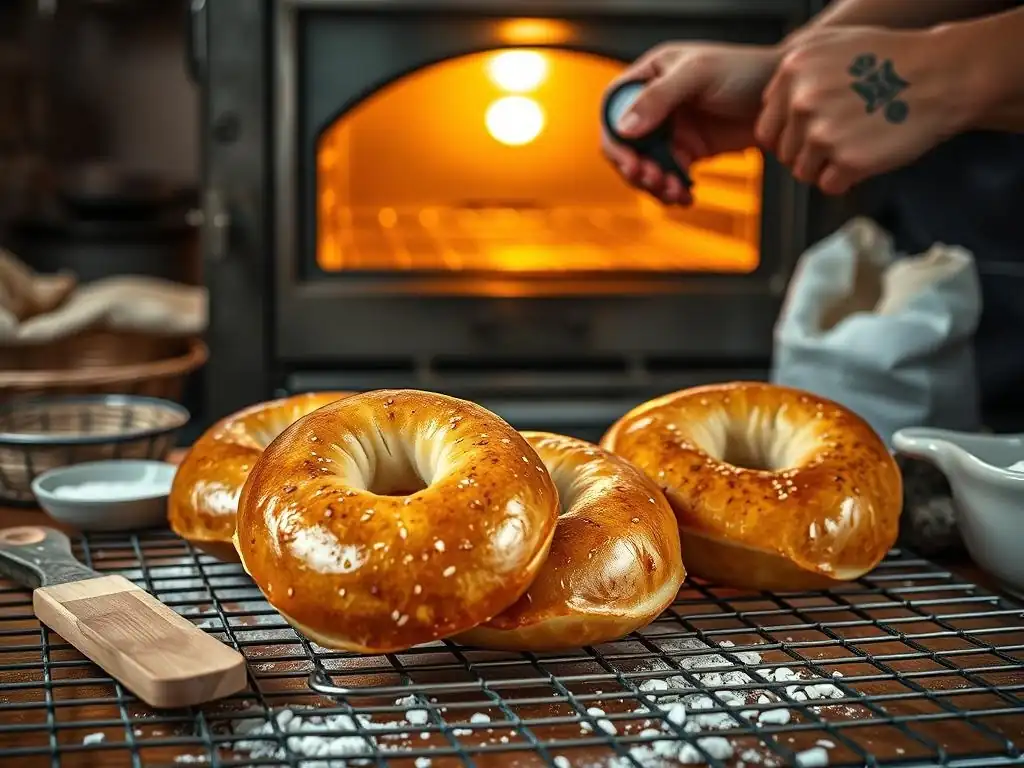
Immediately after removing your beautiful sourdough bagels from the oven, it's crucial to cool them properly. Transfer the hot bagels to a wire cooling rack. Allowing air circulation around all sides of the bagel prevents the bottom from becoming soggy from trapped steam. Cooling on a rack also allows the crust to set and the internal structure to stabilize.
Resist the urge to slice into a hot bagel! The internal structure is still developing, and slicing too early can result in a gummy texture. Allow the bagels to cool completely, which can take at least 30-60 minutes, depending on their size and density. This patient cooling period is essential for achieving the optimal chewy texture in your sourdough bagels recipe advanced.
Storage Options for Freshness and Longevity
Homemade sourdough bagels are best enjoyed fresh, ideally within 1-2 days of baking. For short-term storage, keep them at room temperature in a paper bag or loosely wrapped in a clean kitchen towel. Avoid airtight containers at room temperature, as they can trap moisture and make the crust soft and chewy in a less desirable way.
For longer storage, freezing is the best option. Once completely cooled, slice the bagels if desired, then place them in a freezer-safe bag or airtight container. Properly stored, sourdough bagels can be frozen for up to 3-4 months. Freezing preserves their texture and flavor much better than refrigeration, which can actually stale bread products more quickly.
Reheating Sourdough Bagels for Optimal Enjoyment
To enjoy frozen sourdough bagels, remove them from the freezer. If sliced, you can often toast them directly from frozen. For whole bagels, allow them to thaw at room temperature for 30-60 minutes.
Once thawed (or directly from frozen if toasting), the best way to reheat and refresh your sourdough bagels is to slice and toast them. A toaster or toaster oven works perfectly, bringing back some of the crust's crispness and warming the interior. You can also briefly mist the bagel with water and warm it in a preheated oven (around 350°F or 175°C) for a few minutes to refresh the crust before slicing and toasting. This step is vital for experiencing the full potential of your advanced sourdough bagel recipe long after baking.
Troubleshooting Common Sourdough Bagel Baking Problems
Dense or Gummy Sourdough Bagels: Identifying the Cause and Solution
A common frustration with sourdough bagels, especially in an advanced sourdough bagel recipe, is ending up with a dense or gummy interior instead of a pleasant chew. Several factors can contribute to this. A primary cause is often insufficient gluten development; the dough wasn't kneaded or stretched enough to build a strong network. Another frequent issue is under-fermentation, meaning the starter didn't adequately leaven the dough, or the bulk fermentation and proofing times were too short or too cold.
- Potential Causes:
- Weak or inactive starter.
- Insufficient kneading/gluten development.
- Under-fermentation (bulk or proof).
- Too high hydration for the flour used.
- Slicing the bagels before they are fully cooled.
- Under-baking (internal temperature too low).
- Solutions:
- Ensure your starter is vigorous before baking.
- Extend kneading time or incorporate more stretch-and-folds until the dough passes the windowpane test.
- Allow adequate bulk fermentation time, watching the dough's volume increase (aim for 50-75%).
- Ensure cold proofing is long enough (12+ hours) but not excessively long.
- Reduce dough hydration slightly if consistently gummy.
- Always let bagels cool completely on a rack.
- Verify internal temperature reaches 205-210°F (96-99°C) before removing from the oven.
Flat Sourdough Bagels: Preventing and Correcting Lack of Rise
Flat bagels are disheartening after all the effort put into an advanced sourdough bagel recipe. This usually points to issues with the dough's structure or excessive fermentation. If the gluten isn't strong enough, the dough can't hold its shape during fermentation, boiling, and baking. Over-proofing is another major culprit; if the dough ferments too much, the structure weakens, and the gases that provide oven spring are depleted.
- Potential Causes:
- Weak gluten development.
- Over-proofing (especially warm proofing or too long cold proof).
- Weak or inactive starter.
- Too high dough hydration.
- Rough handling during shaping or boiling.
- Solutions:
- Focus on developing strong gluten through kneading/stretch-and-folds.
- Carefully monitor bulk fermentation and cold proofing times; learn to recognize signs of peak fermentation vs. over-fermentation.
- Ensure your starter is active.
- Consider slightly reducing hydration.
- Shape bagels tightly and handle them gently when transferring to the boil and then to the baking sheet.
- Ensure high oven temperature and steam for maximum oven spring.
Uneven Baking: Achieving Consistent Results with Sourdough Bagels
Unevenly baked bagels, where some are darker than others or parts of a single bagel are under/overdone, are often related to oven performance or placement. Hot spots in ovens are common and can cause certain areas or bagels to brown faster than others. Crowding the baking sheet can also impede airflow and lead to inconsistent results.
- Potential Causes:
- Oven hot spots.
- Crowding the baking sheet.
- Uneven shaping (some parts thicker than others).
- Inconsistent boiling times.
- Solutions:
- Rotate your baking sheets halfway through the baking time (e.g., turn 180 degrees).
- Avoid overcrowding; use multiple sheets if necessary, ensuring space around each bagel.
- Strive for uniform thickness when shaping each bagel.
- Ensure each bagel spends the same amount of time in the boiling water.
- Consider using an oven thermometer to verify your oven's temperature accuracy and identify hotter/colder zones.
Advanced Sourdough Bagel Variations and Flavor Combinations
Experimenting with Different Flours in your Sourdough Bagel Recipe
While high-protein bread flour is the standard for a classic chewy texture, experienced bakers can explore incorporating other flours into their sourdough bagels recipe advanced to add flavor and nutritional complexity. Substituting a percentage of the bread flour with whole wheat flour (e.g., 10-20%) will add nutty flavor and fiber, though it may absorb more water and slightly impact chewiness due to the bran interfering with gluten development.
Rye flour (typically 5-15%) adds a distinct tang and earthiness that complements the sourdough flavor profile beautifully. However, rye contains less gluten-forming protein, so using it in larger proportions will significantly change the dough's handling and the final texture, resulting in a denser bagel. Experimenting with small percentages of these flours can open up a new dimension in your sourdough bagel making.
Adding Seeds, Herbs, and Spices to Elevate Your Sourdough Bagels
Beyond the plain bagel, incorporating mix-ins and toppings allows for endless customization in your sourdough bagels recipe advanced. Seeds like poppy, sesame, flax, and sunflower are classic additions. They can be mixed into the dough during the final stages of kneading (e.g., 5-10% of flour weight) or applied generously to the wet surface after boiling. An "everything" bagel seasoning blend is a popular choice, typically combining poppy seeds, sesame seeds, dried minced garlic, dried minced onion, and coarse salt.
Dried herbs like rosemary or dill, or spices like black pepper or caraway seeds, can also be added to the dough or used as toppings. For savory variations, consider incorporating grated cheese (like cheddar or Gruyère) or chopped caramelized onions into the dough. When adding mix-ins to the dough, be mindful that they can affect dough handling and potentially require slight adjustments to hydration.
Savory and Sweet Sourdough Bagel Topping Ideas
The beauty of a well-crafted sourdough bagel lies in its versatility, serving as a perfect base for a wide array of toppings, both savory and sweet. For savory options, the classic cream cheese is a must, but consider elevating it with smoked salmon (lox), capers, red onion, or fresh dill for a sophisticated take. Other savory pairings include avocado and everything seasoning, various cheese spreads, hummus, or even using a bagel as the bun for a breakfast sandwich with egg and bacon.
For those with a sweet tooth, a sourdough bagel provides a wonderful contrast to sweet toppings. Butter and jam or honey are simple yet satisfying. Nut butters, like peanut or almond butter, are popular choices, perhaps paired with sliced banana or a sprinkle of cinnamon. While less traditional, you could even experiment with sweet cream cheese flavors or fruit spreads. The slight tang of the sourdough provides a delightful counterpoint to the sweetness, making each bite interesting.
Conclusion: Enjoying the Rewards of Advanced Sourdough Bagel Baking
Celebrating Your Baking Achievements with this Sourdough Bagels Recipe Advanced.
Embarking on the journey of crafting sourdough bagels from scratch, especially following an advanced sourdough bagel recipe, is a significant baking achievement. It requires skill, patience, and attention to detail, but the rewards are immense. You gain a deeper understanding of sourdough fermentation, dough handling, and the unique techniques that define this beloved baked good.
The result is a batch of homemade bagels with a depth of flavor and a chewiness that store-bought versions simply cannot match. Sharing these exceptional sourdough bagels with friends and family is a true pleasure, a tangible representation of your dedication to the craft. Each bite is a testament to the hours spent nurturing your starter, perfecting your dough, and mastering the boiling and baking process. You've gone beyond basic baking to create something truly special with this sourdough bagels recipe advanced.
Frequently Asked Questions
What makes this sourdough bagel recipe considered "advanced"?
This recipe is considered advanced due to the complex fermentation process of the sourdough starter and the specialized shaping techniques required for bagels. It also assumes some prior baking experience.
What are the key differences between using a sourdough starter versus commercial yeast in bagel making?
Sourdough starters impart a tangier flavor and a chewier texture to bagels. Commercial yeast offers a quicker rise but lacks the complex flavors of sourdough.
What if my sourdough starter isn't active enough?
An inactive starter will result in a flat and dense bagel. Try feeding your starter for several days to increase its activity before using it in the recipe.
What's the secret to achieving that perfect bagel "chew"?
The secret lies in the high-gluten flour, the boiling process before baking, and allowing the dough to ferment properly. These steps contribute to the distinct bagel texture.
Can I customize this sourdough bagel recipe with different toppings or flavorings?
Yes, you can definitely customize the recipe! Experiment with different seeds, dried herbs, or even cheese in the dough or as toppings for a unique flavor profile.
Final Reflection: The Enduring Allure of the Perfect Sourdough Bagel
The art of crafting the perfect sourdough bagel transcends mere baking; it's a journey of patience, precision, and ultimately, profound satisfaction. This detailed guide has explored the nuances of sourdough bagel making, from cultivating a robust starter to achieving that signature chewy interior and crisp exterior. In a world of instant gratification, the time-honored process of sourdough baking offers a powerful counterpoint, reminding us of the rewards of slow, deliberate creation.
The influence of sourdough, and specifically the sourdough bagel, on the culinary landscape is undeniable. It represents a return to traditional methods, a celebration of natural fermentation, and a testament to the enduring appeal of handcrafted food. The rise in popularity reflects a growing awareness of the health benefits and unique flavors associated with sourdough, a trend that continues to gain momentum. Bread is the staff of life,
they say, and in the case of the sourdough bagel, it's a staff imbued with both history and a delicious, tangy bite.
Now, it's your turn. Don't just read about the perfect sourdough bagel—bake it! Embrace the challenge, the wait, the subtle complexities of fermentation. The journey itself, with its trials and triumphs, is as rewarding as the final, golden-brown product. The aroma alone will transport you, and the taste? Unforgettable. So, gather your ingredients, summon your patience, and embark on this delicious adventure. The perfect sourdough bagel awaits.
Unleash Your Inner Bagel Baker!
Thanks for joining us on this sourdough bagel adventure! We hope you now feel confident and equipped to create bakery-quality bagels right in your own kitchen. Ready to take your baking to the next level?
- Bake your first perfect sourdough bagel: Use the techniques you just learned to create your own batch. Experiment with different toppings and fillings – the possibilities are endless!
- Share your bagel journey: Post a picture of your creations on social media and tag us @BakeWithEase – we'd love to see your masterpieces!
- Explore our other advanced baking guides: Delve deeper into the world of sourdough with our collection of expert recipes and tips. You might be surprised by what you discover!
So, what unique topping will you try on your first batch of homemade sourdough bagels? Let us know in the comments below!