
Rolling Out Puff Pastry Without Tears: A Technique Guide

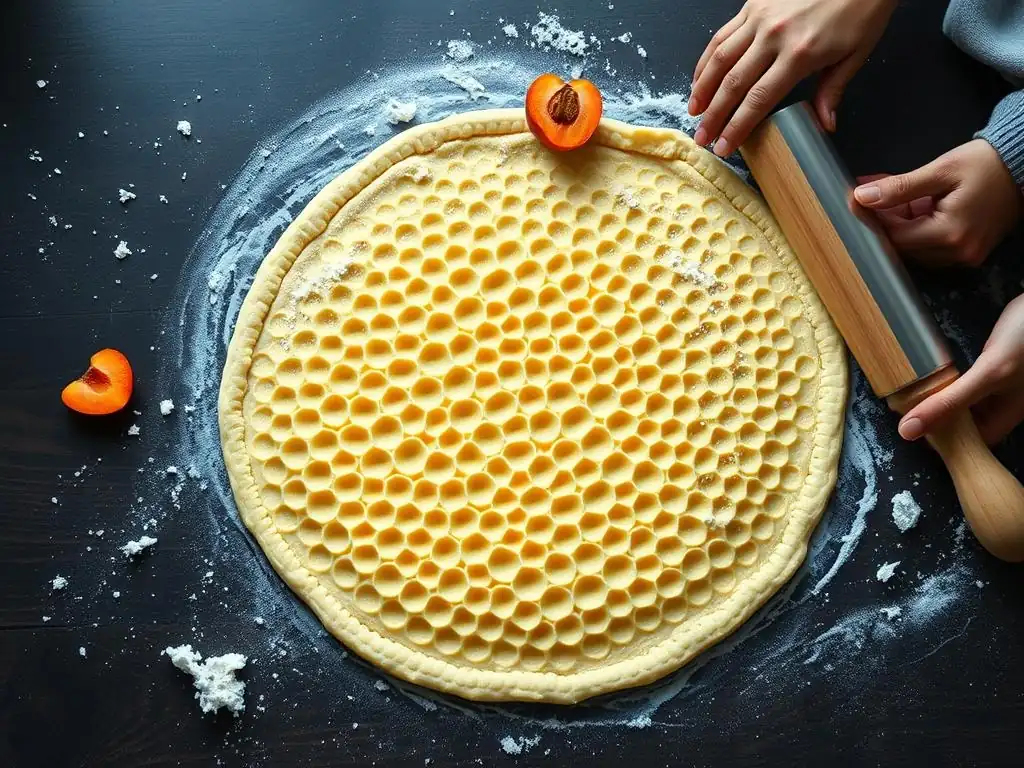
Welcome to BakeWithEase, where the magic of baking becomes deliciously accessible! Are you ready to conquer that flaky, buttery dream known as puff pastry? We understand the challenges, and that's why we've crafted this guide to master the easy puff pastry rolling technique. Forget frustrating tears and uneven layers – discover our secrets to achieving bakery-worthy results every time. Intrigued? Let's get rolling and unlock the secrets to perfect puff pastry!
- Mastering Puff Pastry: A Home Baker's Guide
- Achieving Flaky Layers: A Comprehensive Puff Pastry Guide
- Understanding Lamination: The Science Behind Puff Pastry
-
Step-by-Step Rolling Technique for Perfect Puff Pastry
- Step 1: Preparing Your Cold Workspace
- Step 2: Initial Shaping and Butter Incorporation
- Step 3: Creating the Butter Block and Enclosing It
- Step 4: Executing Turns: Developing the Layers
- Step 5: Chilling the Dough: Relaxing the Gluten
- Step 6: Completing the Turns: Increasing the Layers
- Step 7: Final Roll and Shaping for Baking
- Troubleshooting Common Puff Pastry Issues
- Tips and Tricks for Exceptional Puff Pastry
- Achieving Professional Results: From Dough to Delight
-
Frequently Asked Questions
- How crucial is cold butter and dough for easy puff pastry rolling?
- What's the best surface for rolling out puff pastry to prevent sticking?
- How thin should I roll out my puff pastry dough?
- What if my puff pastry dough starts to get warm during rolling?
- How many "turns" are typically needed for good puff pastry lamination?
- Final Reflection: Mastering the Flaky Embrace of Puff Pastry
- Unleash Your Inner Pastry Chef!
Mastering Puff Pastry: A Home Baker's Guide
Achieving Flaky Layers: A Comprehensive Puff Pastry Guide
Puff pastry, or pâte feuilletée, is a marvel of baking – yielding hundreds of crisp, buttery layers that shatter with each bite. Achieving this delicate structure relies on a precise technique of folding butter into dough, known as lamination. While it might seem intimidating, mastering the easy puff pastry rolling technique is entirely within reach for the home baker. It requires patience and attention to detail, but the reward of homemade, impossibly flaky pastry for tarts, turnovers, or palmiers is well worth the effort.
This guide breaks down the process, focusing on the essential steps and providing practical tips to help you navigate the journey from a simple dough and butter block to a beautifully laminated sheet ready for baking. We'll explore the science behind the layers, walk through a step-by-step rolling and folding process, and offer solutions to common challenges, ensuring your experience with puff pastry is successful and enjoyable.
Understanding Lamination: The Science Behind Puff Pastry
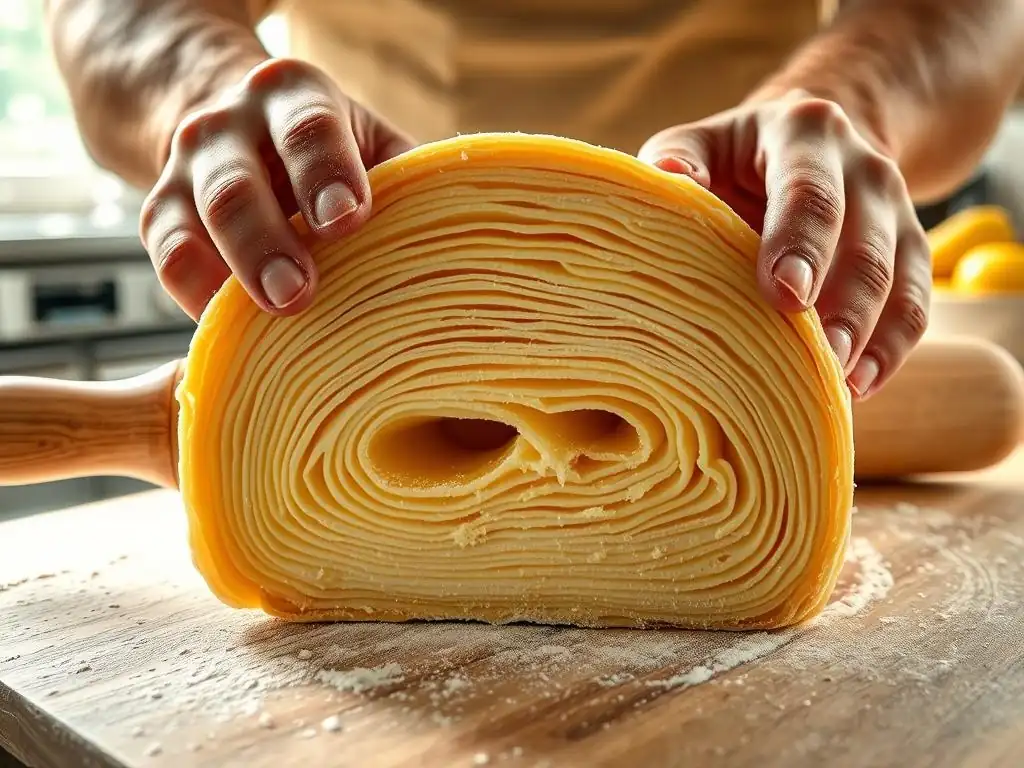
Lamination is the heart of puff pastry. It's the process of repeatedly folding a block of butter into a simple dough. As the dough is rolled and folded, the butter spreads into thin sheets between layers of dough. During baking, the water in the butter turns to steam, forcing the dough layers apart, while the fat melts and helps crisp the layers. This creates the characteristic airy, flaky structure we adore.
The success of lamination hinges on maintaining distinct layers of dough and butter. If the butter melts or incorporates too much into the dough before baking, the layers will fuse, resulting in a dense, heavy pastry rather than a light, airy one. This is why temperature control and a gentle, consistent rolling technique are paramount throughout the process.
The Role of Fat and Gluten in Puff Pastry Lamination
Fat, typically butter, is the critical element responsible for creating the separation between dough layers. When you perform the folds, the butter is spread into thin sheets. During baking, the intense heat causes the water trapped within these thin butter layers to instantly vaporize into steam.
This steam expands rapidly, pushing the delicate dough layers apart and upwards, creating hundreds of individual strata. For optimal results, the butter should be pliable but still cold enough to remain a solid sheet during rolling, typically around 12-15°C (54-59°F). If the butter is too soft, it will melt into the dough prematurely; if too hard, it will break into pieces, leading to uneven layers.
Gluten, developed from the flour and water, provides the structure and elasticity needed for the dough to be rolled thin without tearing. However, too much gluten development can make the dough tough and difficult to roll smoothly, causing it to spring back excessively. This is why resting the dough between turns is crucial – it allows the gluten strands to relax, making the dough more pliable and easier to work with for the next roll and fold. Using a lower-protein flour like all-purpose flour rather than bread flour also helps manage gluten development for a more tender final product.
Essential Ingredients: Flour, Butter, Water, and Salt
The foundation of puff pastry is surprisingly simple, requiring just four core ingredients: flour, butter, water, and salt. The type of flour matters; a medium-protein all-purpose flour is generally recommended as it provides enough structure for rolling without excessive gluten development. For instance, flours with a protein content around 10-12% work well.
The quality of your butter is perhaps the most impactful variable. High-quality butter, especially European-style butter with a higher fat content (often 82% or more compared to 80% in many American kinds), contributes to richer flavor and often has a better consistency for lamination. Ensure your butter is unsalted so you can control the seasoning.
Water is used to hydrate the flour and form the initial dough. The amount of water will vary slightly depending on the flour's absorption, but typically it's just enough to bring the dough together without being sticky. The water should be ice cold to help keep the initial dough temperature low.
Salt is essential for flavor, enhancing the richness of the butter and balancing the sweetness of any filling you might use later. It also plays a minor role in controlling yeast activity if a leavened puff pastry (like croissant dough) were being made, though traditional puff pastry relies solely on steam for lift.
Maintaining Optimal Dough Temperature for Success
Controlling the temperature of your dough and butter is the single most critical factor for successful puff pastry. Both the dough and the butter block must be kept cold throughout the entire lamination process. If the dough or butter gets too warm, the butter will soften and melt into the dough, destroying the distinct layers necessary for puff. The ideal dough temperature during rolling is typically between 10-15°C (50-59°F). This keeps the butter pliable but firm.
Working in a cool kitchen environment is highly beneficial. If your kitchen is warm, you'll need to chill the dough more frequently and for longer periods. A digital thermometer can be a useful tool to check the internal temperature of your dough.
Plan your rolling sessions for cooler parts of the day if necessary, and don't hesitate to return the dough to the refrigerator for 30-60 minutes between each turn, or even longer if it feels soft or the butter seems to be melting. This chilling time also allows the gluten to relax, making the dough easier to roll evenly without resistance.
Step-by-Step Rolling Technique for Perfect Puff Pastry
Mastering the easy puff pastry rolling technique is a process of repetition and patience. Each step builds upon the last, ensuring the butter is evenly distributed and the layers develop properly. Start with a well-chilled dough and butter block, and work efficiently to keep everything cold. The goal is to roll the dough into a consistent rectangle before each fold, maintaining even thickness throughout.
Following these steps carefully will demystify the process and help you achieve beautifully layered puff pastry at home. Remember to use gentle, even pressure with your rolling pin and always roll away from the center of the dough, lengthening it gradually. Don't rush the chilling steps, as they are vital for relaxing the dough and firming the butter.
Step 1: Preparing Your Cold Workspace
Chilling Your Work Surface for Optimal Results
Before you even touch the dough, preparing a cold workspace is paramount for an easy puff pastry rolling technique. A cool surface prevents the dough and butter from warming up too quickly as you work. If you have a marble or granite countertop, these are naturally cool surfaces.
You can enhance their cooling effect by placing ice packs or bags of ice on them for 10-15 minutes before you begin, then wiping them completely dry. Alternatively, you can use a large baking sheet placed in the freezer for 15-20 minutes as a temporary cool surface, or even use a large, chilled pastry board.
Another effective method is to chill your rolling pin. Place it in the refrigerator or freezer for a short period (10-15 minutes) before you start rolling. A cold rolling pin helps keep the dough and butter cold as you apply pressure. Ensure your kitchen environment is as cool as possible, perhaps turning off heating or using air conditioning if available. A difference of even a few degrees can significantly impact how long you can work before needing to re-chill the dough.
Gathering Essential Tools: Rolling Pin, Bench Scraper, Pastry Brush
Having the right tools at hand makes the rolling process smoother and more efficient. A good quality rolling pin is essential. A heavy, long rolling pin (like a French pin or a standard baker's pin with handles) allows you to apply even pressure and cover a larger area with each roll, which is key to maintaining consistent thickness. You'll also need a bench scraper or a sturdy spatula. This tool is invaluable for scraping up any dough or flour residue from your workspace, for lifting and folding the dough without stretching or tearing it, and for cleaning up.
A small pastry brush is also necessary. You'll use it to brush away any excess flour from the dough surface before folding. Too much flour trapped between the layers can prevent them from separating properly during baking. Keep a light dusting of flour on your surface and rolling pin, but always brush off the excess from the dough itself before completing a fold. Having these tools ready ensures a streamlined workflow, minimizing the time the dough spends warming up outside the refrigerator.
Step 2: Initial Shaping and Butter Incorporation
Gently Shaping the Dough into a Rectangle
After preparing your initial dough (the détrempe), which is typically rested and chilled, you'll need to gently shape it for the butter incorporation phase. On your lightly floured cold surface, roll or pat the dough into a rectangle. The dimensions will depend on the amount of dough, but aim for a rectangle roughly three times as long as it is wide. For example, a common starting point might be a rectangle about 18 inches long and 6 inches wide. Avoid overworking the dough at this stage; you want it pliable but not overly elastic.
The goal is to create a flap of dough on either side of where your butter block will sit, which you will then fold over the butter. Ensure the edges are relatively straight, as this will help maintain a consistent shape throughout the subsequent rolling and folding steps. Use your bench scraper to help square up the edges if needed. This initial shaping sets the stage for successful butter enclosure and even layer development.
Achieving Consistent Dough Thickness
Maintaining consistent dough thickness is crucial from this initial shaping stage onwards. Aim for a thickness of about 1/2 inch (approximately 1-1.5 cm) for this initial rectangle. Uneven thickness means the layers will be thicker in some areas and thinner in others, leading to inconsistent puffing during baking. Use your rolling pin to gently and evenly roll the dough, checking the thickness across the entire rectangle.
As you roll, lift and move the dough occasionally to ensure it's not sticking to your surface. Add just a tiny bit more flour underneath if needed, but remember to brush off the excess. Consistent thickness now will make the subsequent rolling steps much easier and contribute significantly to the uniform rise and flakiness of your finished puff pastry. This attention to detail is part of mastering an effective technique for rolling puff pastry.
Step 3: Creating the Butter Block and Enclosing It
Softening and Shaping the Butter
While your dough is chilling after its initial shaping, prepare your butter block ( beurrage). The butter should be pliable but still cool and firm, like clay. If it's too hard, it will break when you roll; if too soft, it will melt.
Take your cold butter (typically 1 part butter to 1 or slightly more parts flour/water dough by weight, e.g., 250g butter for 250-300g flour in the dough) and place it between two sheets of parchment paper or inside a large ziploc bag. Gently pound it with your rolling pin to soften it slightly and make it more pliable.
Once pliable, roll the butter into a rectangle that is half the size of your dough rectangle's length and the same width. For example, if your dough is 18x6 inches, your butter block should be 9x6 inches. Aim for a uniform thickness, typically around 1/4 to 1/2 inch (0.5-1 cm). Ensure the corners are relatively square. Chill the butter block briefly if it has become too soft, but it should remain pliable enough to fold without cracking.
Performing the First Single Fold (Letter Fold)
Now comes the critical step of enclosing the butter block within the dough. Place your chilled dough rectangle on your cold, lightly floured surface, oriented so the long side is horizontal. Place the prepared butter block on one half of the dough rectangle, leaving a margin of dough around the edges (about 1/2 inch). The butter should cover exactly one half of the dough's length.
Fold the other half of the dough over the butter block, like closing a book or folding a letter. Gently press the edges of the dough together to seal the butter inside completely. Ensure there are no gaps where the butter might escape during rolling. This is your first "turn" or fold. You now have a rectangular packet of dough with the butter enclosed. Lightly mark the dough (e.g., with an indentation from your finger) to indicate you've completed one turn.
Step 4: Executing Turns: Developing the Layers
Turns are the repetitive rolling and folding steps that create the hundreds of layers in puff pastry. Each turn doubles or triples the number of layers (depending on the fold type). The key is to roll the dough evenly and consistently before each fold, ensuring the butter spreads into a thin sheet between the dough layers. Always roll away from the center, lengthening the dough gradually.
Between each turn, the dough must be chilled to relax the gluten and firm the butter. Skipping this step will result in a tough, shrinking dough that's impossible to roll thin and butter that melts through the layers. Patience during the chilling phase is crucial for a successful outcome and an easy puff pastry rolling technique.
The Single Turn Technique: A Detailed Explanation
The single turn, also known as a letter fold, is the most common method for creating layers in puff pastry. After completing the first enclosure fold (Step 3), rotate your dough packet 90 degrees so the sealed edge is to your left or right. On your lightly floured cold surface, gently roll the dough into a rectangle about three times as long as it is wide, aiming for a thickness of about 1/4 inch (0.5-0.7 cm). Work quickly and evenly, applying gentle pressure. Lift and move the dough frequently to prevent sticking.
Once rolled, brush off any excess flour. Imagine dividing the rectangle into three equal sections. Fold one end of the dough into the center, covering the middle third. Then, fold the other end over the first fold, like folding a letter into thirds. You should now have a smaller rectangle with three layers of dough and two layers of butter (plus the initial layers from the first fold). This completes one single turn. Wrap the dough tightly in plastic wrap and refrigerate for at least 30-60 minutes before the next turn.
The Book Turn Technique: An Alternative Method
The book turn, or double fold, is an alternative method that creates more layers per turn but requires a slightly different folding technique. After rolling your dough into a rectangle about four times as long as it is wide and about 1/4 inch thick, brush off excess flour. Imagine dividing the rectangle into four equal sections. Fold both ends of the dough inward so they meet precisely in the center of the rectangle.
Then, fold the dough in half along the center seam, like closing a book. This results in a packet with four layers of dough and three layers of butter (plus initial layers). While the book turn yields more layers faster (a book turn is equivalent to roughly two single turns), some bakers find the single turn easier to manage and less prone to trapping air pockets. Whichever method you choose, consistency is key. Mark the dough to indicate the number of turns completed (e.g., one finger indentation for a single turn, two for a book turn).
Step 5: Chilling the Dough: Relaxing the Gluten
The Importance of Resting Between Turns
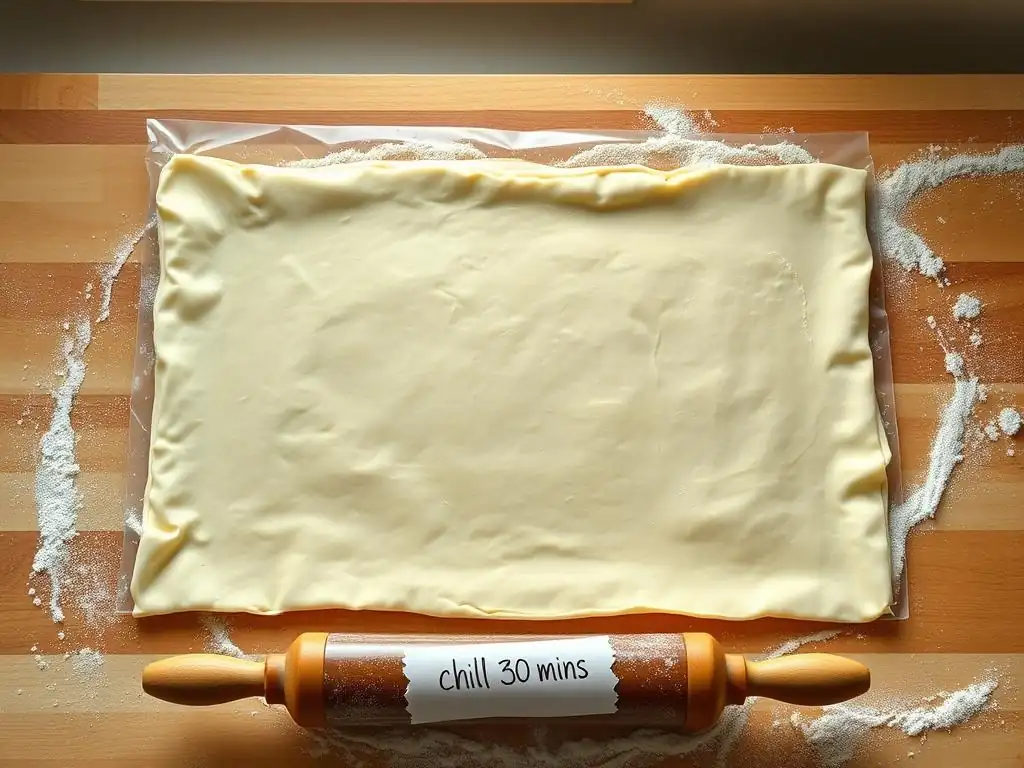
Chilling the dough between each turn is non-negotiable in puff pastry making. This rest period serves two vital purposes. First, it allows the gluten network, which was stretched and tightened during rolling, to relax. If you try to roll dough with tight gluten, it will resist, shrink back, and be incredibly difficult to roll thin and evenly. A relaxed dough is pliable and responds beautifully to the rolling pin, making the easy puff pastry rolling technique truly achievable.
Second, chilling firms up the butter layers. Rolling generates friction and warmth, which can soften the butter. If the butter is too soft, it will squeeze out the sides or melt into the dough during the next roll, destroying the distinct layers. Chilling ensures the butter remains a solid sheet, ready to be rolled thinner in the subsequent turn. Think of the chilling time as an active part of the process, not just waiting time.
Recommended Chilling Times for Best Results
The minimum recommended chilling time between turns is usually 30 minutes, but 60 minutes is often better, especially if your kitchen is warm or you are new to the process. The dough should feel firm and cold to the touch when you take it out of the refrigerator. If it feels soft or pliable right away, it needs more time. Don't hesitate to chill it for 90 minutes or even longer if necessary.
Over-chilling is generally not a problem; you can simply let the dough sit at room temperature for a few minutes to become slightly pliable before rolling. However, insufficient chilling will almost certainly lead to issues like butter leakage or a dough that constantly springs back. Plan your baking schedule to accommodate these necessary chilling periods. A typical puff pastry might require 3-4 single turns with 30-60 minute chills between each, potentially spread over several hours or even two days.
Step 6: Completing the Turns: Increasing the Layers
Determining the Number of Turns Needed
The number of turns determines the final number of layers in your puff pastry. Each single turn (letter fold) multiplies the previous number of layers by three (minus one for the fold itself, roughly resulting in 3^n layers after n turns, or more accurately following a specific sequence). After the initial enclosure (1 layer of butter), the first single turn creates 3 layers of butter within the dough.
A second single turn results in 9 layers, a third in 27, a fourth in 81, and a fifth in 243 layers of butter, all separated by dough. For most applications, 4 to 5 single turns (or 3-4 book turns) are sufficient to create hundreds of flaky layers.
Using fewer turns will result in fewer, thicker layers, which might be desired for certain applications like rough puff pastry. Too many turns, however, can make the layers too thin and prone to fusing, or worse, overwork the dough. A standard, classic puff pastry aims for a high number of thin layers, usually achieved with 4-5 single turns. Keep track of your turns by making indentations on the dough or noting it down.
Maintaining Consistent Dough Thickness
As you progress through the turns, it becomes increasingly important to maintain consistent dough thickness during each rolling step. With more layers of butter and dough, uneven rolling becomes more apparent and can lead to areas that puff less than others. Aim to roll the dough to the same approximate thickness (around 1/4 inch or 0.5-0.7 cm) before each fold. Use gentle, even pressure across the entire surface of the dough.
If you notice areas that are thicker or thinner, try to apply slightly more or less pressure in those specific spots during rolling. Lift and move the dough frequently to ensure it's not sticking, which can also cause uneven stretching. Consistent thickness ensures that when the steam is generated during baking, it pushes uniformly against all the layers, resulting in an even and beautiful puff. This consistent approach is key to mastering an easy puff pastry rolling technique.
Step 7: Final Roll and Shaping for Baking
Achieving the Desired Thickness for Baking
After completing all your turns and giving the dough a final chill (at least 60-90 minutes, or ideally several hours), it's ready for the final roll and shaping. Take the dough out of the refrigerator and let it sit at room temperature for just a few minutes until it is slightly pliable but still very cold. On your lightly floured cold surface, gently roll the dough to the thickness required for your specific recipe.
Most recipes call for puff pastry to be rolled to a thickness of about 1/8 inch (3-4 mm) for tarts, turnovers, or pastries, or slightly thicker (around 1/4 inch or 5-6 mm) for items like vol-au-vents or pie crusts. Roll evenly, applying consistent pressure. If the dough resists or springs back significantly, cover it and return it to the refrigerator for 15-20 minutes to relax before trying again. Do not force the dough.
Cutting and Shaping for Specific Recipes
Once the dough is rolled to the desired thickness, you can cut it into the shapes needed for your recipe. Use a sharp knife, pizza cutter, or pastry wheel to cut the dough cleanly. For best puff, avoid dragging the knife through the layers, which can seal them together. Make clean, decisive cuts. For example, if making palmiers, you might cut rectangles; for turnovers, squares; for tart bases, larger circles or rectangles.
For pastries that require a significant rise, like vol-au-vents, you might cut out shapes and then cut a smaller shape inside (a lid), scoring the inner piece without cutting all the way through. When baking, the outer ring will rise, creating a cavity. Ensure all your cut pieces are transferred to a baking sheet, ideally lined with parchment paper, and chilled again for at least 15-30 minutes before baking. Baking puff pastry from cold is crucial for maximum puff.
Troubleshooting Common Puff Pastry Issues
Working with puff pastry can sometimes present challenges, but understanding the common pitfalls allows you to address them effectively. Most issues stem from temperature control or improper handling of the dough. Don't be discouraged if your first few attempts aren't perfect; each batch is a learning experience.
Here, we'll cover some frequent problems encountered during the easy puff pastry rolling technique and provide practical solutions to get you back on track towards flaky success. Patience and a willingness to troubleshoot are key attributes of a successful puff pastry baker.
Dough is Too Warm and Butter is Melting: Solutions
This is perhaps the most common issue when making puff pastry, especially in a warm environment. If you notice the dough becoming very soft, greasy, or if the butter feels liquidy inside, it means it's too warm. The immediate solution is to stop working with the dough immediately.
Wrap the dough tightly in plastic wrap and place it back in the refrigerator for at least 60 minutes, or until it is firm and cold again. If the butter has started to melt significantly and incorporate into the dough, you might need to chill it for longer, perhaps 2-3 hours. When you resume rolling, try to work faster and use less pressure. Ensure your workspace is as cold as possible. If the problem persists, consider chilling the dough for 15-20 minutes between every few rolls, not just between turns. Working in shorter bursts can help manage the temperature.
Butter Leaking Out During Rolling: Prevention and Fixes
Butter leaking out the sides or ends of the dough during rolling is another frustrating problem. This usually happens if the butter wasn't properly sealed inside the dough during the initial enclosure (Step 3), if the dough tears during rolling, or if the butter is too hard and breaks into pieces that then poke through the dough. Uneven rolling can also exacerbate this.
To prevent leaks, ensure the butter is completely enclosed with no gaps in the dough seams after the first fold. When rolling, use gentle, even pressure and avoid pressing down too hard, which can force the butter through weak spots. If the butter feels too hard and is cracking, let the dough sit at room temperature for just a minute or two to allow the butter to soften slightly before rolling.
If a leak does occur, you can try to patch the hole with a small piece of dough scraped from the edge, gently pressing it into place. However, if there are significant leaks, the layers in that area may be compromised, and the puff might be uneven. It's often better to try and work around small leaks or accept that part of the pastry might not puff perfectly.
Dough is Too Elastic and Difficult to Roll: Addressing Gluten
If your dough is resisting the rolling pin, springing back significantly after rolling, or feels very tough, it's likely due to tight gluten development. This can happen if the dough was overworked during the initial mixing, if you're using a flour with too high protein content, or most commonly, if the dough hasn't rested and chilled sufficiently between turns.
The solution is simple but requires patience: stop rolling and chill the dough. Wrap it tightly and place it back in the refrigerator for a longer period, ideally 60-90 minutes or even several hours. This allows the gluten strands to relax, making the dough much more pliable and easier to roll. When you resume, use less pressure and roll more gradually. Ensure you are resting the dough for the recommended time between every turn. Using a gentle, consistent rolling technique also helps minimize excessive gluten development during the process.
Uneven Layers and Inconsistent Puff: Achieving Consistency
Puff pastry that puffs unevenly, with some areas rising high and others remaining flat, is often a result of inconsistent thickness during rolling or uneven distribution of the butter layers. If the dough was rolled thicker in some areas than others before a fold, the subsequent layers will also be uneven. Similarly, if the butter broke into pieces rather than spreading into a continuous sheet, the puff will be patchy.
To achieve consistent layers and puff, focus on rolling the dough to a uniform thickness before each fold (Step 4 and 6). Use visual cues and gentle pressure to ensure the dough is the same thickness across the entire rectangle. If the butter feels too hard, let the dough warm slightly before rolling to prevent it from breaking. During the final roll (Step 7), again, strive for uniform thickness. Also, ensure your oven temperature is accurate and consistent, as fluctuating heat can impact puffing. Baking from cold dough is also essential for maximum, even rise.
Tips and Tricks for Exceptional Puff Pastry
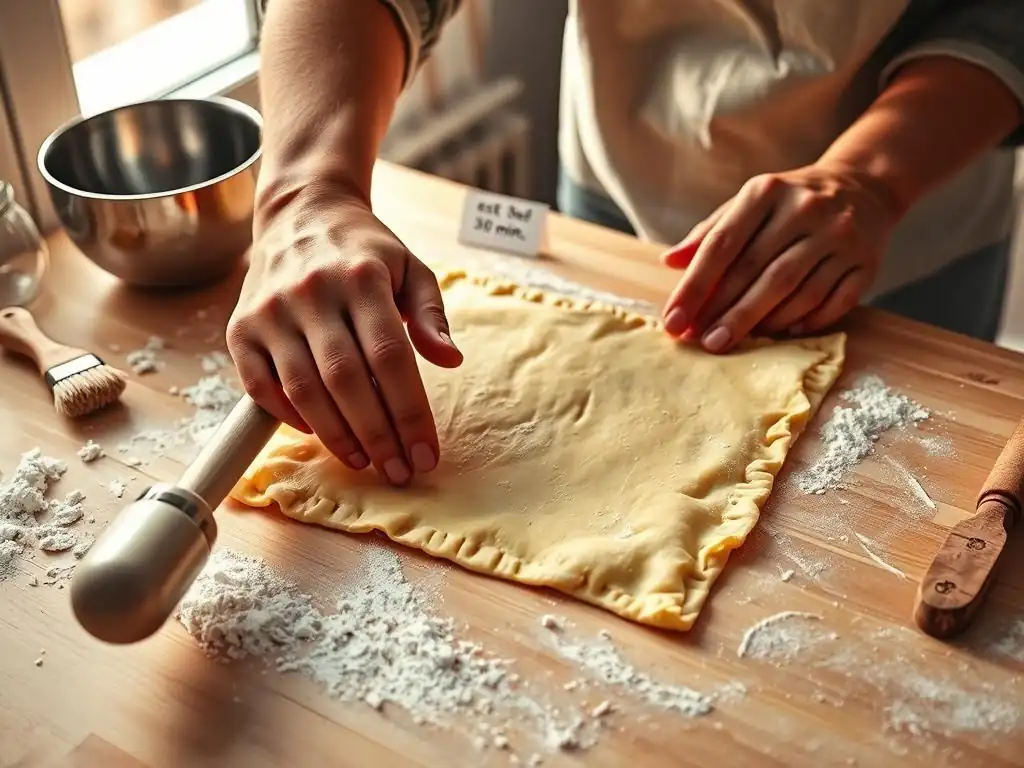
Beyond the fundamental techniques, a few extra tips can elevate your homemade puff pastry from good to truly exceptional. These small details can enhance flavor, improve texture, and make the overall process smoother, contributing to an even easier puff pastry rolling technique experience.
Consider the quality of your ingredients, how you handle the dough, and how you store it. Implementing these tips can make a noticeable difference in the final outcome, resulting in pastry that is not only beautifully layered but also rich in flavor and a joy to work with.
Using European-Style Butter for Richer Flavor
The quality of your butter significantly impacts the flavor and flakiness of your puff pastry. European-style butters typically have a higher fat content (around 82-86%) compared to standard American butters (around 80%). This higher fat content means less water, which results in a richer, more buttery flavor and can sometimes contribute to slightly better layer separation during baking.
Additionally, the texture of European-style butter is often firmer yet more pliable when cold, making it easier to handle and roll into thin, continuous sheets without breaking. While you can certainly make excellent puff pastry with good quality standard butter, experimenting with a higher-fat butter can take your results to the next level in terms of both taste and texture. Look for butters labeled "European-style" or with a fat percentage listed on the packaging.
Incorporating Herbs and Spices for Unique Flavors
While classic puff pastry is simple and buttery, you can easily infuse it with additional flavors for specific applications. Before the final roll (Step 7), you can sprinkle finely chopped fresh herbs, such as rosemary, thyme, or chives, or dried spices like paprika, black pepper, or garlic powder, evenly over the dough surface before folding or rolling it for the last time.
For a savory twist, imagine puff pastry flavored with black pepper used for cheese straws, or rosemary-infused pastry wrapped around sausages. For sweet applications, a sprinkle of cinnamon or cardamom could be lovely. Ensure the additions are finely chopped or ground so they don't tear the dough during rolling. Gently press them into the surface before folding or rolling them in. This simple step adds a layer of complexity and customization to your homemade puff pastry.
Storing Puff Pastry Dough: Freezing and Thawing
Homemade puff pastry dough can be made ahead of time and stored, making it incredibly convenient. After completing all the turns, wrap the dough block very tightly in plastic wrap, then in aluminum foil or place it in a freezer-safe bag. It can be stored in the refrigerator for 2-3 days or frozen for up to 1-2 months.
To thaw frozen puff pastry, transfer it to the refrigerator and let it thaw slowly overnight. Avoid thawing at room temperature, as the butter will melt before the dough thaws. Once thawed, let it sit at room temperature for just a few minutes until it is slightly pliable before the final roll and shaping (Step 7). You can also freeze cut, unbaked shapes (like turnovers or palmiers) on a baking sheet until solid, then transfer them to a freezer bag. Bake them directly from frozen, adding a few extra minutes to the baking time.
Achieving Professional Results: From Dough to Delight
Creating homemade puff pastry is a rewarding process that yields a versatile ingredient for countless sweet and savory creations. The journey from a simple dough and butter block to hundreds of flaky layers is a testament to the power of technique and patience. By focusing on temperature control, precise rolling, and sufficient chilling, you can master an easy puff pastry rolling technique that delivers impressive results every time.
Don't be discouraged by initial challenges; every batch is a learning opportunity. With practice, the feel of the dough and butter, and the rhythm of rolling and folding, will become intuitive. The satisfaction of pulling beautifully risen, golden-brown puff pastry from your oven, knowing you made it from scratch, is immense.
Creative Applications for Homemade Puff Pastry
The versatility of homemade puff pastry is one of its greatest strengths. Once you have your beautifully laminated dough, the possibilities are nearly endless. For savory dishes, think elegant appetizers like cheese straws, mini quiches, or vol-au-vents filled with creamy mixtures. It's perfect for wrapping around meats (like Beef Wellington) or vegetables, topping pot pies, or creating rustic galettes filled with seasonal produce.
On the sweet side, puff pastry is the base for classic pastries like palmiers (elephant ears), turnovers filled with fruit or jam, mille-feuille (Napoleons) layered with pastry cream, and various fruit tarts. You can cut it into strips to make twists dusted with sugar or cinnamon, or use it for quick and easy fruit tarts by simply topping a square with fruit and baking. Having a batch of homemade puff pastry in the freezer means you're always just a bake away from an impressive treat.
Continuous Practice: Refining Your Technique
Like any baking skill, mastering puff pastry comes with practice. The more you make it, the better you'll become at judging the correct temperature of the dough and butter, applying even pressure during rolling, and recognizing when the dough needs to rest. Each time you make a batch, you'll refine your easy puff pastry rolling technique.
Pay attention to how the dough feels at different stages. Does it roll smoothly? Is the butter staying intact? Are the layers visible (slightly) when you look at the edge of the dough after a fold? Don't be afraid to experiment slightly with chilling times or the amount of flour on your surface to find what works best in your kitchen environment. Embrace the process, learn from each attempt, and soon you'll be rolling out perfect puff pastry with confidence and ease.
Frequently Asked Questions
How crucial is cold butter and dough for easy puff pastry rolling?
Cold ingredients are absolutely essential for successful puff pastry. Cold butter ensures that it remains in distinct layers, creating steam pockets during baking for a flaky result. Warm butter melts and mixes into the dough, preventing proper lamination.
What's the best surface for rolling out puff pastry to prevent sticking?
A lightly floured surface is ideal. Too much flour can dry out the dough, while too little will cause it to stick. Consider using a silicone rolling mat for even better non-stick performance.
How thin should I roll out my puff pastry dough?
Aim for about 1/8 inch thickness. Rolling it too thin can result in a tough pastry, while rolling it too thick might prevent it from fully puffing up. Even thickness is also key.
What if my puff pastry dough starts to get warm during rolling?
Wrap the dough tightly in plastic wrap and refrigerate it for at least 30 minutes before continuing. This allows the butter to re-solidify and prevents it from melting during further handling.
How many "turns" are typically needed for good puff pastry lamination?
Typically, you'll need 4-6 single turns or 2-3 double turns. More turns generally result in a flakier pastry, but be careful not to overwork the dough, which can develop too much gluten and become tough.
Final Reflection: Mastering the Flaky Embrace of Puff Pastry
The pursuit of perfectly layered puff pastry, once a culinary Everest, is now within everyone's reach. This guide has demystified the seemingly daunting process, breaking down the technique into manageable steps and offering solutions to common frustrations. No longer need the fear of collapsed layers or tough dough deter aspiring bakers from achieving flaky, buttery perfection.
The journey of mastering puff pastry is more than just acquiring a skill; it's about embracing the process itself. The gentle folding, the careful chilling, the anticipation of that first golden-brown bite – these are the moments that connect us to a rich culinary heritage. As Julia Child once wisely said, Find something you're passionate about and keep tremendously interested in it.
For me, that passion lies in the transformative power of simple ingredients, elevated by technique and patience, and puff pastry embodies this perfectly.
Now, it's your turn. Don't be intimidated by the seemingly complex nature of puff pastry. Take what you've learned here, experiment with the techniques, and most importantly, enjoy the process. The reward – a plate of golden, flaky pastries that will impress your friends and family – is well worth the effort. So, roll up your sleeves, gather your ingredients, and embark on your own puff pastry adventure. The flaky embrace awaits!
Unleash Your Inner Pastry Chef!
Thanks for joining us on this puff pastry journey! We hope you now feel confident tackling even the flakiest of recipes. Ready to put your newfound skills to the test?
- Master the art of blind baking: Try our recipe for a classic quiche Lorraine – the perfectly crisp crust is the key!
- Share your puff pastry creations: Show us your masterpieces on social media using #BakeWithEasePuffPastry – we love seeing your success!
- Challenge yourself with a new recipe: Explore more advanced puff pastry techniques on our website—we've got plenty of tutorials and recipes waiting for you.
What delicious creation will you bake with your perfectly rolled puff pastry today?