
Simple Basic Sourdough Recipe for a Sandwich Loaf Shape

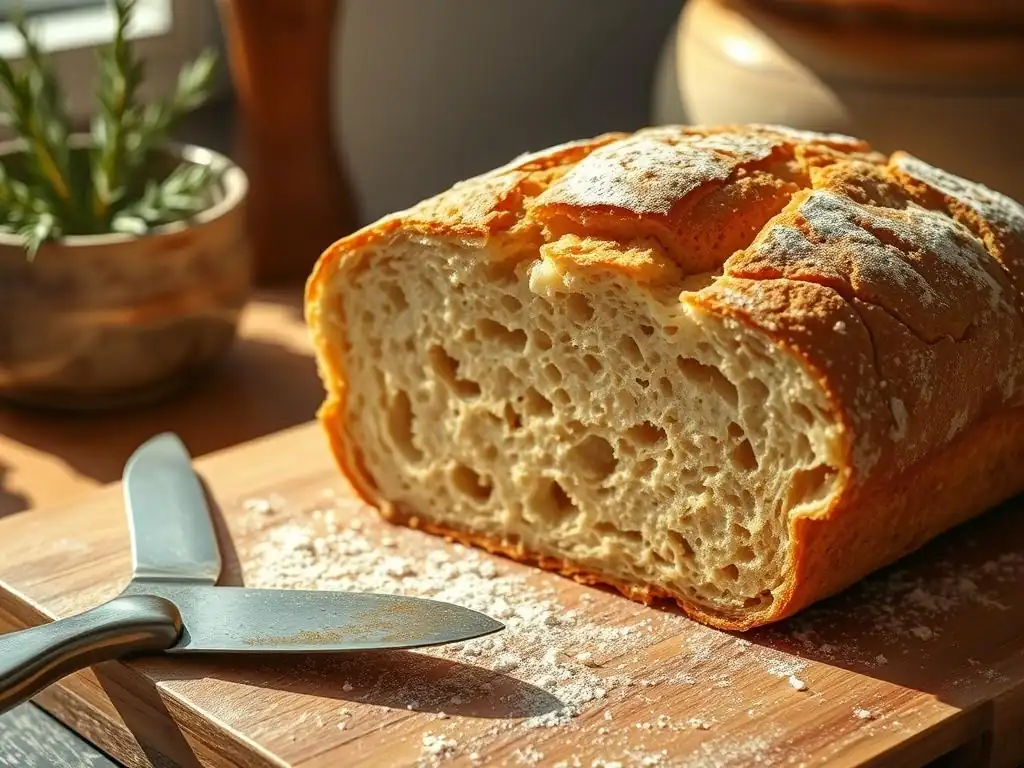
Welcome to BakeWithEase, your kitchen companion for unlocking the joys of baking! Ready to conquer that perfect sandwich? Dive into our step-by-step guide for crafting an easy sourdough sandwich loaf, and discover how simple it can be to bake a delicious, homemade loaf that's perfect for any occasion. Curious about the secret to a soft, chewy crumb and a beautifully browned crust? Keep reading to find out!
- Easy Sourdough Sandwich Loaf Recipe: BakeWithEase
- Introduction to Baking Your Own Sourdough Sandwich Bread
- Gathering Your Ingredients for the Easy Sourdough Sandwich Loaf
- Step-by-Step Guide to Making an Easy Sourdough Sandwich Loaf
- Troubleshooting Common Sourdough Sandwich Loaf Problems
- Storing Your Homemade Sourdough Sandwich Bread
- Variations on the Easy Sourdough Sandwich Loaf Recipe
- Enjoying Your Delicious Sourdough Sandwich Bread
- Conclusion: Mastering the Art of Easy Sourdough Baking with BakeWithEase
-
Frequently Asked Questions
- What makes this sourdough recipe "easy"?
- Can I use a different type of flour for this sourdough sandwich loaf?
- How long does it take to make this sourdough sandwich loaf from start to finish?
- What is the best way to store a sourdough sandwich loaf to keep it fresh?
- What if my sourdough starter isn't very active?
- Final Reflection: The Humble Loaf, A Testament to Patience
- Unleash Your Inner Baker: Craft the Perfect Sourdough Loaf!
Easy Sourdough Sandwich Loaf Recipe: BakeWithEase
Introduction to Baking Your Own Sourdough Sandwich Bread
Why Bake a Sourdough Sandwich Loaf at Home?
Baking a sourdough sandwich loaf in your own kitchen offers a level of satisfaction and control that store-bought bread simply can't match. You get to choose every ingredient, ensuring your family is eating a loaf free from commercial additives or preservatives often found in mass-produced breads. Beyond the health benefits, the process itself is incredibly rewarding, filling your home with the comforting aroma of freshly baked bread. Imagine the pride of slicing into a warm, crusty loaf you made yourself, perfect for everything from simple buttered toast to elaborate sandwiches.
Furthermore, baking an easy sourdough sandwich loaf at home can be surprisingly cost-effective in the long run. While the initial investment in ingredients like flour and salt is minimal, a good quality artisan sourdough loaf can cost anywhere from $8 to $12 or more at a bakery. The ingredients for a single homemade loaf typically cost just a few dollars, especially if you're already maintaining a sourdough starter. This allows you to enjoy delicious, high-quality bread regularly without the recurring expense, making homemade sourdough an accessible luxury.
The Benefits of Homemade Sourdough Bread
Homemade sourdough bread boasts several advantages over conventional loaves. Its characteristic tang comes from the fermentation process, which involves beneficial bacteria and wild yeast. This fermentation not only develops complex flavors but also helps to break down gluten and phytic acid, potentially making the bread easier to digest for some people compared to breads made with commercial yeast. The slow fermentation also contributes to a lower glycemic index compared to many white breads.
Beyond digestibility and flavor, baking a simple sourdough sandwich loaf at home allows you to tailor the bread to your exact preferences. Want a softer crust? Adjust the baking method. Prefer a chewier interior? Modify the hydration slightly. You have complete control over the texture, flavor profile, and even the shape, ensuring your easy sourdough sandwich loaf is exactly how you like it. It's a fundamental skill that opens the door to countless variations and baking adventures.
BakeWithEase's Simple Approach to Sourdough
At BakeWithEase, we believe that baking sourdough, including crafting a perfect easy sourdough sandwich loaf, doesn't need to be intimidating. Our approach breaks down the process into manageable steps, focusing on understanding the 'why' behind each action rather than just following instructions blindly. We simplify techniques, explain the role of each ingredient, and provide clear guidance to help you achieve consistent results, even if you're new to the world of sourdough baking.
This simple sourdough sandwich loaf recipe is designed specifically with ease and reliability in mind. We've optimized the steps to minimize complexity while maximizing flavor and texture, ensuring you get a beautiful, delicious loaf perfect for slicing for sandwiches. By focusing on foundational techniques and providing practical tips, we aim to empower you to bake this basic sourdough loaf with confidence and integrate homemade bread into your regular routine. Let's get started on your journey to baking a fantastic easy sourdough sandwich loaf.
Gathering Your Ingredients for the Easy Sourdough Sandwich Loaf
Essential Ingredients for a Perfect Loaf
Creating a delicious easy sourdough sandwich loaf starts with understanding the role of its few, humble ingredients: flour, water, salt, and your active sourdough starter. Each plays a crucial part in developing the structure, flavor, and texture of your final bread. Using high-quality ingredients will significantly impact the outcome, transforming simple components into a culinary masterpiece. Consistency in measurement, particularly with flour and water, is key, which is why using a kitchen scale is highly recommended for this simple sourdough sandwich loaf.
The hydration level, which is the ratio of water to flour, is a critical factor in sourdough baking. For a sandwich loaf, we typically aim for a moderate hydration, perhaps 65% to 75% hydration relative to the total flour weight. This range makes the dough manageable for shaping into a loaf pan while still allowing for a good open crumb structure. The quality of your water matters too; filtered water is often preferred to avoid chlorine or other chemicals that could potentially interfere with starter activity.
Bread Flour vs. All-Purpose Flour for Sourdough
Choosing the right flour is fundamental for your easy sourdough sandwich loaf. Bread flour is generally preferred for sourdough due to its higher protein content, typically ranging from 12% to 14%. This higher protein level means more gluten development is possible, leading to a stronger dough structure that can trap the gases produced by the sourdough starter. A strong gluten network is essential for achieving a good rise and an open, airy crumb structure in your finished loaf.
While all-purpose flour (typically 10-12% protein) can be used, it will result in a dough that is weaker and potentially more challenging to handle. The final loaf might be slightly denser or flatter compared to one made with bread flour. For a reliable and easy sourdough sandwich loaf, especially when you're starting out, using bread flour provides a more forgiving and consistent experience, helping you achieve that desired rise and texture in your basic sourdough loaf.
The Importance of Water Temperature
Water temperature plays a significant role in managing dough temperature, which in turn affects fermentation speed. For sourdough, using lukewarm water, typically between 75°F and 85°F (24°C and 29°C), is often ideal. This temperature range helps to wake up the wild yeast and bacteria in your sourdough starter, encouraging them to become active and begin the fermentation process efficiently. Using water that is too cold can slow down fermentation significantly, while water that is too hot can actually harm or kill the delicate microorganisms in your starter.
Maintaining a consistent dough temperature throughout bulk fermentation is crucial for predictable results. Aiming for a final dough temperature around 75°F to 78°F (24°C to 26°C) after mixing is a good target. This temperature range allows the starter to work effectively, developing both structure and flavor over the recommended fermentation time. Using a thermometer to check your water temperature before mixing is a simple step that can greatly improve the consistency of your easy sourdough sandwich loaf.
High-Quality Salt for Enhanced Flavor
Salt is more than just a flavor enhancer in your easy sourdough sandwich loaf; it also plays a critical role in dough structure and fermentation control. Salt tightens the gluten structure, making the dough stronger and easier to handle. It also helps to regulate the activity of the yeast and bacteria, slowing down fermentation slightly. This slower pace allows for more complex flavors to develop during the bulk fermentation and proofing stages.
Using a high-quality, non-iodized salt, such as fine sea salt or kosher salt, is recommended. Iodized table salt can sometimes interfere with yeast activity, and its flavor can be harsher. Measure your salt accurately, typically around 1.8% to 2% of the total flour weight for a well-balanced flavor profile in your basic sourdough loaf. This seemingly small amount has a profound impact on both the taste and texture of your finished easy sourdough sandwich loaf.
Equipment Needed for Baking Sourdough Sandwich Bread
Having the right tools makes the process of baking an easy sourdough sandwich loaf much smoother and more successful. While you don't need a professional baker's setup, a few key pieces of equipment are highly beneficial. These tools help with accurate measurement, efficient dough handling, and achieving the perfect shape and bake for your homemade sandwich sourdough. Investing in these items will improve your results and make baking this simple sourdough sandwich loaf a more enjoyable experience.
Beyond the essentials, having a few extra items like a proofing box (or simply your oven with the light on for warmth), plastic wrap or a damp towel, and a cooling rack will further assist in the process. A spray bottle filled with water can also be useful for creating steam in the oven if you're not using a Dutch oven method, contributing to a better crust on your easy sourdough sandwich loaf.
Loaf Pan Selection: Size and Material
The choice of loaf pan is obviously crucial for baking a sourdough sandwich loaf in the desired shape. A standard 9x5 inch (23x13 cm) loaf pan is the most common size and works well for most basic sourdough loaf recipes scaled for one loaf. This size provides enough height for a good rise and results in slices that are perfect for sandwiches and toast. Ensure your pan is sturdy and made from a material that conducts heat well.
Metal loaf pans, especially those made from aluminized steel or cast iron, are excellent choices as they heat evenly and help develop a nice crust. Non-stick coatings can be helpful for easy release, but ensure they are rated for high temperatures. Glass pans can also be used, but they tend to heat more slowly and can sometimes result in a thicker bottom crust; if using glass, you might need to slightly adjust baking time or temperature. Regardless of material, properly greasing and flouring the pan is key to prevent your easy sourdough sandwich loaf from sticking.
Dough Scraper and Bench Knife
A dough scraper, often called a bench knife or bench scraper, is an indispensable tool for working with sourdough dough, especially when making an easy sourdough sandwich loaf. Its rigid blade allows you to easily portion dough, scrape dough from your work surface without leaving sticky residue, and even help with folding techniques during bulk fermentation. A metal bench knife with a wooden handle is durable and provides a clean edge for cutting and scraping.
A smaller, flexible plastic bowl scraper is also incredibly useful. This tool is perfect for scraping down the sides of your mixing bowl, ensuring you incorporate all the ingredients and minimizing waste. It's also great for gently coaxing dough out of the bowl after bulk fermentation without deflating it too much. These two simple scrapers make handling the often-sticky sourdough dough much more manageable during the process of creating your easy sourdough sandwich loaf.
Kitchen Scale for Accurate Measurements
Accuracy in baking, particularly sourdough, is paramount, and a digital kitchen scale provides the precision needed. Unlike volume measurements (cups and spoons) which can vary significantly depending on how ingredients are scooped or packed, weighing ingredients in grams ensures consistency every single time. This is especially important for the hydration ratio (water to flour) and the amount of salt and starter, which directly impact the dough's behavior and the final outcome of your easy sourdough sandwich loaf.
Most sourdough recipes, including this simple sourdough sandwich loaf guide, are written using baker's percentages and weight measurements (grams) for this very reason. A scale allows you to easily scale recipes up or down and ensures you're adding the exact intended amount of each ingredient. Weighing ingredients is faster, cleaner, and significantly reduces the chances of errors that could lead to a dense or otherwise unsuccessful basic sourdough loaf. Aim for a scale that measures in single grams for the best accuracy.
Step-by-Step Guide to Making an Easy Sourdough Sandwich Loaf
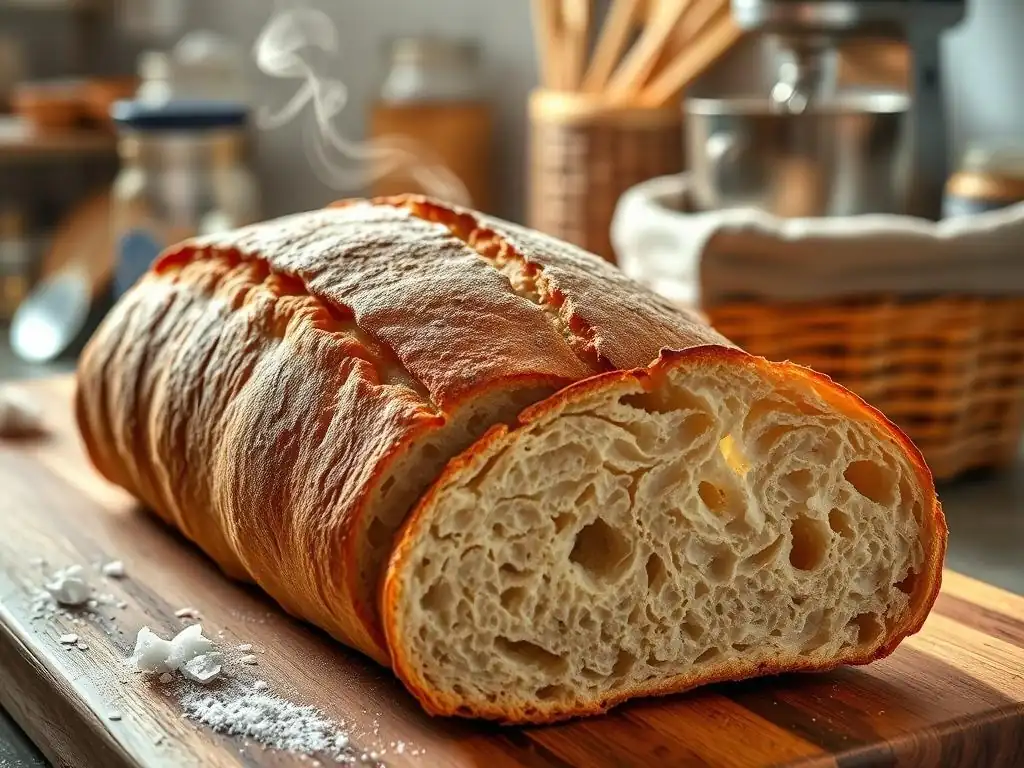
Step 1: Preparing Your Sourdough Starter
The foundation of any great sourdough bread, including an easy sourdough sandwich loaf, is a healthy, active starter. Your starter is a living culture of wild yeast and bacteria, and its strength directly influences the rise and flavor of your bread. Before you begin mixing your dough, it's crucial to ensure your starter is vigorous and ready to work. This typically means feeding it 4-12 hours before you plan to mix, allowing it sufficient time to become bubbly and active.
An active starter should show significant signs of life: it should have roughly doubled or even tripled in volume since its last feeding, the surface should be covered in bubbles, and it should float when a small piece is dropped into a glass of water (the float test). If your starter seems sluggish, feed it again and wait until it shows these signs of activity before proceeding with the recipe for your easy sourdough sandwich loaf. A consistent feeding schedule helps maintain its health and reliability for baking your basic sourdough loaf.
Ensuring an Active and Bubbly Starter
To ensure your starter is active and bubbly, consistent feeding is key. A common feeding ratio is 1:1:1 by weight (starter:water:flour). For example, if you want 50g of starter for your recipe, you might take 25g of your existing starter, mix it with 25g of water, and 25g of flour. This provides fresh food for the microorganisms. The temperature of its environment also matters; around 75-80°F (24-27°C) is often ideal for rapid activation.
After feeding, cover the starter loosely and let it sit at room temperature until it reaches its peak activity. This usually happens when it has doubled or tripled in size and is full of bubbles, often within 4-8 hours depending on the room temperature and starter health. Using your starter at its peak ensures maximum leavening power for your easy sourdough sandwich loaf, contributing to a good rise and open crumb.
Maintaining a Consistent Feeding Schedule
Maintaining a consistent feeding schedule is vital for a robust starter ready for baking an easy sourdough sandwich loaf. If you bake frequently (several times a week), keeping your starter at room temperature and feeding it daily is best. This ensures it's always active and ready to be used at its peak. Use a regular schedule, perhaps every 24 hours, discarding a portion before feeding to maintain a manageable amount and healthy culture.
If you bake less often, storing your starter in the refrigerator is a practical option. This significantly slows down its activity. When you want to bake your easy sourdough sandwich loaf, take the starter out, let it come to room temperature for an hour or two, and then feed it once or twice at room temperature until it's active and bubbly again. This might take 1-3 days depending on how long it's been refrigerated. Consistency, whether daily at room temp or regular refreshments after refrigeration, builds a strong starter.
Step 2: Autolyse - The Key to a Tender Crumb
Autolyse is a simple yet powerful technique that significantly improves the texture and handling of your sourdough dough, leading to a more tender crumb in your easy sourdough sandwich loaf. It involves mixing just the flour and water from the recipe and letting them rest before adding the starter and salt. This resting period allows the flour to fully hydrate and enzymes naturally present in the flour to start breaking down proteins.
This initial hydration begins the gluten development process without any mechanical effort (kneading) or fermentation activity (from the starter). The dough becomes more pliable and less sticky, making subsequent mixing and kneading steps easier and more efficient. For your easy sourdough sandwich loaf, incorporating an autolyse step is a simple way to enhance the dough quality and the final texture of the basic sourdough loaf.
Mixing Flour and Water for Autolyse
To perform the autolyse, simply combine the total amount of flour specified in your easy sourdough sandwich loaf recipe with the total amount of water. Mix them together by hand or with a mixer on low speed just until no dry flour remains. The mixture will look shaggy and perhaps a bit lumpy – this is perfectly normal. There's no need to develop any structure at this point; you are just ensuring all the flour gets wet.
Once combined, cover the bowl to prevent the surface from drying out. A plastic shower cap, plastic wrap, or a damp kitchen towel works well. Let the mixture rest according to the recommended time. This resting period is the autolyse phase, where the magic happens passively, preparing the dough for the next steps in making your easy sourdough sandwich loaf.
Autolyse Time: 30-60 Minutes
The duration of the autolyse can vary, but for an easy sourdough sandwich loaf, a rest period of 30 to 60 minutes is typically sufficient and effective. During this time, the water is absorbed by the flour, and enzymes begin their work. If you use whole wheat flour in your recipe (or a portion of it), a longer autolyse (up to 2-3 hours) can be beneficial as whole wheat takes longer to hydrate due to the presence of bran.
For a simple sourdough sandwich loaf using mostly or entirely bread flour, 30-60 minutes is ample time to achieve the desired hydration and initial gluten relaxation. Don't extend the autolyse much beyond this time if you're not adding salt or starter, as fermentation activity hasn't begun yet, and the dough could potentially degrade if left too long without salt to regulate enzyme action.
Step 3: Mixing the Dough
After the autolyse period, it's time to incorporate the remaining ingredients: your active sourdough starter and the salt. This step fully integrates all components and begins the process of developing the gluten structure necessary to give your easy sourdough sandwich loaf its shape and texture. Proper mixing ensures even distribution of the starter for consistent fermentation and the salt for flavor and structure.
The dough will feel different after the autolyse – more relaxed and cohesive. Adding the starter and salt requires a bit more mixing to fully incorporate them into the hydrated dough. This is where you'll start to feel the dough transforming from a shaggy mass into a more unified and elastic structure, setting the stage for a successful basic sourdough loaf.
Incorporating the Starter and Salt
To incorporate the starter and salt into your autolysed dough, spread the dough out slightly in the bowl. Dollop the active sourdough starter over the top, followed by the measured salt. You can use your hands to gently squeeze and fold the ingredients into the dough, ensuring they are evenly distributed. The dough might feel a bit sticky initially, but keep working it.
Alternatively, if using a stand mixer, add the starter and salt to the autolysed dough in the mixer bowl. Mix on low speed for a few minutes until the starter and salt are fully incorporated and the dough starts to come together more smoothly. This initial mixing ensures that every part of your easy sourdough sandwich loaf dough benefits from the leavening power of the starter and the structural benefits of the salt.
Developing the Dough: Kneading Techniques
Once the starter and salt are incorporated, you need to develop the gluten network further through kneading. This process aligns the protein strands in the flour, creating a strong, elastic structure that can hold the gases produced by the starter, allowing the dough to rise and create an open crumb in your easy sourdough sandwich loaf. The goal is to reach a point where the dough is smooth, elastic, and passes the 'windowpane test' (stretching a small piece thin enough to see light through without tearing).
The amount of kneading required depends on the flour used and the hydration level, but typically ranges from 5 to 15 minutes of active kneading. Over-kneading is rare by hand but possible with a mixer; under-kneading is more common and results in a dense loaf. Developing the dough properly at this stage is crucial for the final texture of your basic sourdough loaf.
Hand Kneading vs. Stand Mixer Kneading
You can develop your sourdough dough for the easy sourdough sandwich loaf using either hand kneading or a stand mixer. Hand kneading is a tactile process that allows you to feel the dough's development directly. On a clean surface, use techniques like the stretch-and-fold method or traditional kneading (pushing, folding, turning) until the dough becomes smooth and elastic. This usually takes about 10-15 minutes of active work.
Using a stand mixer with a dough hook is faster and requires less physical effort. Mix on medium speed for 5-10 minutes, scraping down the sides of the bowl occasionally. Stop kneading when the dough pulls away from the sides of the bowl and looks smooth and elastic. Both methods are effective; choose the one that suits your preference and equipment availability for your simple sourdough sandwich loaf.
Step 4: Bulk Fermentation - Building Flavor
Bulk fermentation, also known as the first rise, is arguably the most critical stage in sourdough baking. This is the period where the dough rests as a whole mass, allowing the wild yeast to produce carbon dioxide gas (making the dough rise) and the bacteria to produce organic acids (developing the characteristic sourdough flavor and helping with structure). For an easy sourdough sandwich loaf, managing this stage correctly is key to both texture and taste.
During bulk fermentation, you will perform a series of folds to strengthen the gluten network and redistribute the yeast and bacteria throughout the dough. This process builds tension and structure, which is essential for the dough to hold its shape and rise properly in the loaf pan. The duration and outcome of bulk fermentation are highly dependent on temperature and the activity of your starter.
Understanding Bulk Fermentation
Bulk fermentation begins immediately after mixing the dough and ends when you shape the loaf. During this time, the dough should increase significantly in volume, typically doubling or close to doubling depending on the recipe and desired outcome. You'll also notice bubbles forming on the surface and potentially within the dough when you perform folds. The dough will become lighter and more airy as fermentation progresses.
The ideal end point of bulk fermentation for an easy sourdough sandwich loaf is when the dough is visibly larger, feels airy, and shows signs of fermentation but is not yet overly gassy or fragile. Over-fermenting at this stage can lead to a dough that collapses during shaping or baking, resulting in a dense loaf. Learning to read the dough's signs rather than relying solely on a timer is a skill that develops with practice.
Folding the Dough for Strength
Folding the dough during bulk fermentation is a technique used to strengthen the gluten network and build structure. Common methods include stretch-and-folds or coil folds. For stretch-and-folds, moisten your hand, grab one side of the dough, stretch it upwards gently, and fold it over the rest of the dough. Rotate the bowl and repeat this motion 3-4 times per set of folds. For coil folds, lift the dough from the center using both hands underneath, letting the ends fold under themselves, then drop it gently back into the bowl.
Performing 3-5 sets of folds during the first 2-3 hours of bulk fermentation is typical for many sourdough recipes, including a simple sourdough sandwich loaf. Allow 30-45 minutes of rest between each set of folds. These folds redistribute the yeast and bacteria, even out the dough temperature, and build tension, which is vital for achieving a good oven spring in your basic sourdough loaf.
Bulk Fermentation Time and Temperature: 4-6 Hours at Room Temperature
The duration of bulk fermentation for an easy sourdough sandwich loaf is highly dependent on the ambient temperature and the strength of your starter. At a comfortable room temperature of 70-75°F (21-24°C), bulk fermentation typically takes between 4 and 6 hours. In warmer conditions (above 78°F/26°C), it might be faster (3-4 hours), and in cooler conditions (below 70°F/21°C), it could take longer (6-8+ hours).
Look for visual cues rather than strictly adhering to a timer. The dough should increase in volume by roughly 50-75% and feel airy and bubbly. It should also show some strength and tension when you perform the final fold before shaping. This flexible timing is why monitoring the dough, not just the clock, is essential for a successful easy sourdough sandwich loaf.
Step 5: Shaping the Sourdough Sandwich Loaf
Shaping is the process of forming the fermented dough into the desired structure for its final rise and bake. For an easy sourdough sandwich loaf, this means creating a compact, tensioned log that fits neatly into a loaf pan. Proper shaping builds surface tension, which helps the loaf hold its structure during proofing and baking, preventing it from spreading too much and ensuring a good rise.
The shaping process typically involves two stages: pre-shaping and final shaping. Pre-shaping helps to organize the dough and build initial tension, while final shaping creates the specific form that will proof and bake. Taking care during this step contributes significantly to the structure and aesthetics of your homemade sandwich sourdough.
Pre-Shaping for Tension
After bulk fermentation, gently turn the dough out onto a lightly floured surface. Avoid degassing the dough too much; you want to preserve the gases created during fermentation. For a sandwich loaf, you might gently form the dough into a rough rectangle or log shape. This initial step helps to develop some surface tension and makes the final shaping easier.
Allow the pre-shaped dough to rest for 15-20 minutes, uncovered. This resting period, called the bench rest, allows the gluten to relax after handling, making the dough more pliable and less resistant for the final shaping step. This brief pause is simple but effective in preparing the dough for its transformation into an easy sourdough sandwich loaf shape.
Final Shaping Techniques for a Loaf Pan
For the final shape of your easy sourdough sandwich loaf, the goal is to create a tight log that will fit snugly into your prepared loaf pan. Gently flatten the rested dough into a rectangle. Fold the top third down to the center, then fold the bottom third up over the top fold, like folding a letter. Gently pat down any seams. Then, starting from one end, roll the dough into a tight log, tucking in the ends as you roll.
Pinch the final seam closed firmly along the bottom. The surface of the log should be taut and smooth. This tension is what helps the loaf rise upwards in the pan rather than spreading outwards. Place the shaped dough seam-side down into your greased and floured loaf pan. This careful shaping ensures your basic sourdough loaf bakes into a beautiful sandwich shape.
Step 6: Proofing the Dough
Proofing, or the final rise, is the last stage of fermentation before baking. During proofing, the shaped dough continues to ferment, increasing in volume within the confines of the loaf pan. This stage is crucial for achieving a light and airy crumb structure in your easy sourdough sandwich loaf. The timing and temperature of proofing significantly impact the final texture and rise.
Proofing can be done at room temperature for a faster rise or in the refrigerator for a slower, longer fermentation (cold proofing). Both methods have their advantages. Room temperature proofing is quicker, while cold proofing develops more complex flavors and makes the dough easier to handle for scoring (though scoring isn't typically done on a sandwich loaf baked in a pan).
Proofing in the Loaf Pan
Once shaped, the dough for your easy sourdough sandwich loaf is placed directly into the prepared loaf pan for proofing. Cover the pan loosely with plastic wrap or a damp towel to prevent the surface of the dough from drying out and forming a skin, which would inhibit its ability to rise smoothly. Place the pan in a warm, draft-free spot for room temperature proofing, or immediately into the refrigerator for a cold proof.
Proofing in the pan allows the dough to rise into the specific shape of the easy sourdough sandwich loaf you desire. As it rises, it will fill the pan, and the surface will become smooth and slightly domed. Monitor the dough's progress visually; it should increase noticeably in volume.
Proofing Time and Temperature: 2-4 Hours at Room Temperature or Overnight in the Refrigerator
The duration of the final proof depends heavily on temperature. At room temperature (70-75°F / 21-24°C), your easy sourdough sandwich loaf might be ready to bake in 2 to 4 hours. The dough should look significantly larger and feel airy. For a cold proof, refrigerate the dough for 8 to 12 hours, or even up to 24 hours. Cold proofing slows fermentation, allowing flavors to deepen and making the dough firmer and easier to handle (though less relevant for a pan loaf).
The flexibility in proofing time makes it easier to fit baking into your schedule. A cold proof is excellent for convenience, allowing you to bake the simple sourdough sandwich loaf the morning after shaping. Regardless of temperature, knowing when the dough is perfectly proofed is key to avoiding a flat or overly dense loaf.
The Poke Test: Knowing When It's Ready
The poke test is a reliable way to determine if your easy sourdough sandwich loaf is perfectly proofed and ready for the oven. Gently press your lightly floured finger into the side of the dough about half an inch deep. Observe how quickly the indentation springs back.
If the indentation springs back immediately and completely, the dough is under-proofed. It needs more time to ferment. If the indentation remains completely and doesn't spring back at all, the dough is likely over-proofed and might collapse during baking. If the indentation springs back slowly, only partially filling the mark, the dough is perfectly proofed and ready to bake. This is the ideal stage for your basic sourdough loaf.
Step 7: Baking Your Sourdough Sandwich Loaf
Baking is the culmination of all your hard work. High heat and potentially steam are used to achieve maximum oven spring and develop a beautiful crust and tender interior in your easy sourdough sandwich loaf. Preheating your oven thoroughly is essential to provide the initial burst of heat needed for a good rise.
The baking process involves two main phases: the initial phase where the loaf expands rapidly (oven spring) and the later phase where the crust develops and the interior cooks through. Getting the temperature and timing right ensures your homemade sandwich sourdough is cooked perfectly from edge to edge.
Oven Temperature and Baking Time
For baking an easy sourdough sandwich loaf in a pan, a common oven temperature range is 400-425°F (200-220°C). Preheat your oven with the loaf pan inside (if using cast iron or a pan that benefits from preheating) or simply preheat to the desired temperature. Once the oven is ready and the dough is proofed, place the pan in the oven.
Baking time typically ranges from 40 to 55 minutes for a standard 9x5 inch loaf. The exact time will vary depending on your oven and the desired crust color. The loaf is done when the crust is a deep golden brown and the internal temperature reaches 200-210°F (93-99°C) when measured with an instant-read thermometer inserted into the center of the loaf.
Baking with and without Steam
While not strictly necessary for a pan loaf (as the pan provides some structure), adding steam during the initial part of baking can still benefit your easy sourdough sandwich loaf. Steam keeps the surface of the dough moist, allowing it to expand fully before the crust sets. This results in a better oven spring and a thinner, crisper crust.
Methods for adding steam include placing a tray of hot water on the bottom rack of the oven when you put the bread in, or using a baking stone or steel with a pan of water below it. If you don't add steam, the crust will set earlier, potentially restricting the loaf's rise slightly and resulting in a thicker crust. For a basic sourdough loaf in a pan, baking without added steam is also perfectly acceptable and yields a softer crust more typical of sandwich bread.
Achieving a Golden-Brown Crust
The beautiful golden-brown crust on your easy sourdough sandwich loaf develops through the Maillard reaction and caramelization on the surface during baking. To achieve this, ensure your oven is adequately preheated and the baking time is sufficient. If the crust is browning too quickly before the interior is cooked, you can loosely tent the loaf with aluminum foil for the last 10-15 minutes of baking.
Conversely, if the loaf is cooked through but the crust is too pale, you can remove it from the pan and place it directly on the oven rack for the last 5-10 minutes of baking to encourage further browning. A well-developed crust not only adds visual appeal but also contributes significantly to the flavor and texture of your homemade sandwich sourdough.
Step 8: Cooling and Slicing
The final, crucial step after baking your easy sourdough sandwich loaf is allowing it to cool completely. This step is just as important as any other in the process and ensures the best possible texture and flavor. Resist the urge to slice into the warm loaf immediately, as tempting as it may be!
Proper cooling allows the internal structure of the bread to set and moisture to redistribute evenly throughout the loaf. Slicing too early can result in a gummy interior texture because the starches haven't fully gelatinized and cooled. Patience here is rewarded with a perfect slice.
Cooling Completely Before Slicing
Once your easy sourdough sandwich loaf is removed from the oven, immediately transfer it from the hot loaf pan to a wire cooling rack. This allows air to circulate around all sides of the loaf, preventing condensation that could make the bottom crust soggy. Let the loaf cool completely at room temperature.
For a standard-sized sandwich loaf, this cooling process typically takes at least 2 to 3 hours. A larger or denser loaf might take longer. The loaf should feel cool to the touch, even in the center, before you attempt to slice it. This waiting period is essential for the crumb structure to stabilize, ensuring you get clean, well-defined slices from your basic sourdough loaf.
Best Methods for Slicing Sourdough
Once your easy sourdough sandwich loaf is fully cooled, use a good quality bread knife with a serrated blade for slicing. A sharp serrated knife is designed to saw through the crust and crumb without crushing the delicate interior. Place the loaf on a stable surface.
Hold the loaf firmly but gently with one hand while using a back-and-forth sawing motion with the bread knife. Avoid pressing down too hard, which can compress the loaf. Slice the bread to your desired thickness, perfect for making sandwiches, toast, or enjoying as is. Proper cooling and a sharp knife make slicing your homemade sandwich sourdough a breeze.
Troubleshooting Common Sourdough Sandwich Loaf Problems

Even with a simple sourdough sandwich loaf recipe, you might encounter issues. Understanding common problems and their causes can help you diagnose what went wrong and improve your results on the next bake. Sourdough baking is a learning process, and troubleshooting is a natural part of mastering it.
Don't be discouraged if your first few loaves aren't perfect. Analyze the outcome – the crust, the crumb, the rise, the flavor – and compare it to what you were expecting. This comparison provides valuable clues for adjusting your technique or timing for your next easy sourdough sandwich loaf attempt.
Dense or Gummy Crumb
A dense or gummy crumb in your easy sourdough sandwich loaf is a common issue with several potential causes. One primary reason is under-proofing during bulk fermentation or the final proof. If the dough hasn't fermented enough, the yeast won't have produced enough gas to create an open structure, leading to a tight, heavy crumb. Similarly, if the starter wasn't active enough to begin with, it won't provide sufficient leavening power.
Another significant cause is slicing the loaf before it has completely cooled. As mentioned earlier, the internal structure is still setting as the bread cools, and slicing too early traps steam and prevents the crumb from firming up properly, resulting in a gummy texture. Ensure your starter is vigorous, allow adequate fermentation/proofing time based on temperature, and practice patience during the cooling stage for a lighter crumb in your basic sourdough loaf.
Flat or Collapsed Loaf
A flat or collapsed easy sourdough sandwich loaf can be incredibly frustrating. This often happens due to over-proofing. If the dough ferments for too long, the gluten structure weakens, and it can no longer hold the gas produced by the yeast. The dough essentially runs out of energy and collapses under its own weight, either before or during baking.
Other causes include a weak starter (again, not enough leavening power) or insufficient gluten development during mixing and folding. If the dough lacks strength, it won't be able to support its rise. Ensure your starter is active, develop the dough adequately through kneading and folding, and learn to recognize the signs of perfectly proofed dough using the poke test to prevent your simple sourdough sandwich loaf from going flat.
Sourness Issues: Too Sour or Not Sour Enough
The level of sourness in your easy sourdough sandwich loaf is primarily controlled by fermentation time and temperature. The lactic acid bacteria in the starter produce the tangy flavor. A longer, cooler fermentation (like a cold proof in the refrigerator) encourages the bacteria to produce more acid, resulting in a more pronounced sour flavor. Conversely, a shorter, warmer fermentation leads to a milder flavor profile.
If your loaf is too sour, try reducing the overall fermentation time, especially the cold proof, or increasing the ratio of flour in your starter feedings (e.g., 1:2:2 or 1:3:3 starter:water:flour) to encourage yeast activity over bacterial activity. If it's not sour enough, try extending the bulk fermentation slightly or incorporating an overnight cold proof to allow more time for acid development in your basic sourdough loaf.
Crust Too Thick
A crust that is too thick or hard on your easy sourdough sandwich loaf can be influenced by several factors, including baking temperature, time, and the presence of steam. Baking at too high a temperature or for too long can result in an overly hard crust before the interior is fully cooked. Lack of sufficient moisture on the dough surface during the initial phase of baking can also cause the crust to set too quickly and become thick.
To achieve a thinner crust more suitable for a sandwich loaf, consider slightly lowering the oven temperature (e.g., from 425°F to 400°F) and potentially increasing the baking time slightly to ensure the interior is cooked. You can also experiment with adding a tray of hot water to the oven for the first 15-20 minutes of baking to create steam, which helps keep the crust pliable longer, allowing for better expansion and a thinner final crust on your simple sourdough sandwich loaf.
Storing Your Homemade Sourdough Sandwich Bread
Once you've baked and cooled your delicious easy sourdough sandwich loaf, proper storage is key to maintaining its freshness and preventing it from drying out or becoming stale too quickly. Unlike commercial breads filled with preservatives, homemade sourdough has a shorter shelf life but stores remarkably well when handled correctly.
The best storage method depends on how quickly you plan to consume the bread. For short-term storage, different techniques work better than for keeping the bread fresh for a week or longer. Knowing how to store your basic sourdough loaf ensures you can enjoy its wonderful flavor and texture for as long as possible.
Keeping Your Loaf Fresh
For keeping your easy sourdough sandwich loaf fresh for 2-3 days at room temperature, storing it wrapped in a linen bread bag or a clean kitchen towel is an excellent method. This allows the crust to remain relatively crisp while protecting the interior from drying out too quickly. Avoid storing it in a plastic bag at room temperature, as this can trap moisture and cause the crust to soften and potentially become moldy, especially in humid conditions.
If you need to store it for up to 4-5 days, a paper bag inside a plastic bag, or a dedicated bread box, can help balance moisture retention and air circulation. Always store your homemade sandwich sourdough at room temperature; refrigeration actually accelerates the staling process by changing the starch structure.
Freezing Sourdough for Later
Freezing is the best option for long-term storage of your easy sourdough sandwich loaf. Sourdough freezes beautifully and can be kept for several months (typically up to 3-4 months) without significant loss of quality. To freeze, ensure the loaf is completely cooled. You can freeze the whole loaf, half a loaf, or slice it before freezing.
Wrap the loaf (or portions/slices) tightly in plastic wrap, ensuring no air pockets, then wrap again in aluminum foil or place in a freezer-safe bag. When you want to enjoy it, thaw a whole loaf at room temperature for several hours. For slices, you can often pop them directly into a toaster or under a broiler from frozen. Freezing allows you to bake multiple easy sourdough sandwich loaves and enjoy fresh-tasting bread whenever you like.
Reviving Stale Sourdough
Even if your easy sourdough sandwich loaf has gone a bit stale, it can often be revived or used in delicious ways. If the loaf is just slightly dry, you can often refresh it by quickly running it under cool water (yes, really!) and then reheating it in a preheated oven at 350°F (175°C) for 10-15 minutes. The water turns to steam, rehydrating the crumb and softening the crust.
For bread that is too stale to revive, it's perfect for making croutons, bread crumbs, or using in dishes like French toast or Panzanella salad. The sturdy structure and tangy flavor of a basic sourdough loaf make it particularly well-suited for these purposes. Don't let any part of your homemade sandwich sourdough go to waste!
Variations on the Easy Sourdough Sandwich Loaf Recipe
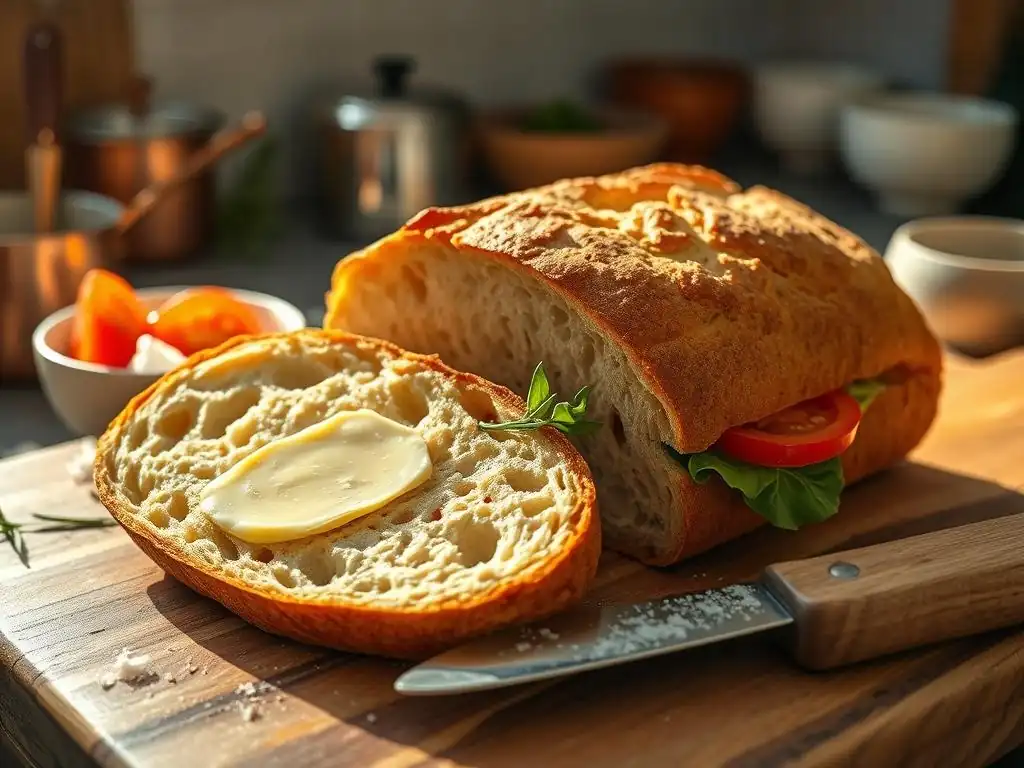
Once you've mastered the basic easy sourdough sandwich loaf, the fun doesn't stop there! The simple base recipe is incredibly versatile and can be adapted to create a variety of delicious variations. Adding different flours, seeds, herbs, or other ingredients can transform the flavor and texture of your basic sourdough loaf, opening up a world of possibilities for your homemade sandwich sourdough.
Experimenting with these variations allows you to customize your bread to your personal taste and explore different flavor profiles. Each addition changes the dough handling slightly, but the core process for making an easy sourdough sandwich loaf remains the same, making these variations accessible and fun to try.
Whole Wheat Sourdough Sandwich Loaf
Incorporating whole wheat flour into your easy sourdough sandwich loaf adds nutritional value, a deeper flavor, and a slightly denser texture. You can substitute a portion of the bread flour with whole wheat flour, starting with 20-30% whole wheat and gradually increasing up to 50% or more as you become comfortable with whole wheat dough, which absorbs more water and can be less extensible than white dough.
When using whole wheat, you might need to slightly increase the hydration (add a little more water) as whole wheat flour is thirstier. A longer autolyse (up to 2 hours) can also be beneficial to allow the bran to soften. The resulting loaf will have a richer, nuttier flavor and a heartier crumb, perfect for robust sandwiches. This variation of the easy sourdough sandwich loaf offers a wholesome twist.
Seeded Sourdough Sandwich Loaf
Adding seeds is a fantastic way to boost the flavor, texture, and nutritional content of your easy sourdough sandwich loaf. Common additions include sesame seeds, poppy seeds, sunflower seeds, pumpkin seeds, flax seeds, or a combination like a "everything bagel" mix. You can incorporate seeds into the dough during the mixing phase (e.g., 10-20% of the total flour weight in seeds) or roll the shaped loaf in seeds before placing it in the pan.
Soaking tougher seeds like flax or chia seeds in a small amount of hot water for 30 minutes before adding them to the dough can improve their texture and digestibility. Seeds add a delightful crunch and nutty flavor that complements the tang of the sourdough beautifully. A seeded easy sourdough sandwich loaf is not only delicious but also visually appealing.
Rosemary and Garlic Sourdough Sandwich Loaf
For a flavorful savory variation of your easy sourdough sandwich loaf, try adding fresh rosemary and roasted garlic. Finely chop a few sprigs of fresh rosemary and mince a few cloves of roasted garlic (roasting mellows the garlic's bite). Incorporate these additions into the dough during the final stages of mixing or during the first set of folds.
Start with modest amounts, perhaps 1-2 tablespoons of chopped rosemary and 1-2 cloves of roasted garlic per loaf, and adjust in future bakes based on your preference. These aromatic additions infuse the basic sourdough loaf with wonderful savory notes, making it perfect for serving alongside soups or salads, or simply enjoying with olive oil. This variation transforms the simple sourdough sandwich loaf into a gourmet treat.
Enjoying Your Delicious Sourdough Sandwich Bread
You've put in the effort, followed the steps, and now you have a beautiful, homemade easy sourdough sandwich loaf cooling on your rack. This is the most rewarding part! Sourdough bread, especially one baked into a convenient sandwich shape, is incredibly versatile and can be enjoyed in countless ways. The tangy flavor and chewy texture make it a perfect base for a wide variety of meals and snacks.
From the simplest slice with butter to elaborate culinary creations, your basic sourdough loaf is ready to be the star. Sharing it with family and friends is also a wonderful experience, showcasing your newfound baking skills with this simple sourdough sandwich loaf.
Serving Suggestions and Pairings
Your easy sourdough sandwich loaf is perfect for classic pairings. Serve thick slices alongside a hearty soup or stew, where the crust can be used to soak up every last drop. It's also wonderful with a cheese board, complementing both mild and strong cheeses. Consider serving it toasted with avocado and a sprinkle of red pepper flakes for a popular and satisfying snack.
For a more substantial meal, use your homemade sandwich sourdough as the base for open-faced sandwiches or bruschetta topped with fresh tomatoes and basil. The tangy flavor cuts through rich ingredients and stands up well to bold flavors. The simple sourdough sandwich loaf is truly a versatile staple in any kitchen.
Making Perfect Sourdough Toast
Sourdough makes arguably the best toast due to its sturdy structure and tangy flavor that intensifies when browned. Slice your easy sourdough sandwich loaf to your preferred thickness, typically about half an inch to an inch. Toast the slices in a toaster, under a broiler, or in a hot pan with a little butter or oil until golden brown and crispy on the edges while remaining slightly chewy in the center.
Perfect sourdough toast needs minimal toppings – a smear of good quality butter is divine. You can also add jam, honey, or a simple sprinkle of cinnamon sugar. The robust nature of the basic sourdough loaf holds up beautifully to various toppings without becoming soggy.
Grilled Cheese Sandwich Idea
Elevate your grilled cheese game using slices from your easy sourdough sandwich loaf. The tangy flavor of the sourdough pairs exceptionally well with melted cheese, and the crust toasts up beautifully golden and crisp in the pan. Use your favorite cheese – cheddar, gruyere, or a blend work wonderfully.
Butter the outside of two slices of your homemade sandwich sourdough, fill with cheese, and grill in a skillet over medium heat until the bread is golden brown and the cheese is melted and gooey. The slight tang of the sourdough cuts through the richness of the cheese, creating a perfectly balanced and incredibly satisfying meal. This easy sourdough sandwich loaf is truly ideal for this classic comfort food.
Conclusion: Mastering the Art of Easy Sourdough Baking with BakeWithEase
The Satisfaction of Baking Your Own Bread
There is a unique and profound satisfaction that comes from baking your own bread, especially a beautiful and functional easy sourdough sandwich loaf. From nurturing the starter to shaping the dough and finally slicing into the finished loaf, each step is a connection to a timeless craft. The aroma filling your home, the feel of the dough in your hands, and the taste of the warm bread are rewards that go beyond simply purchasing a loaf.
Successfully baking a basic sourdough loaf builds confidence in the kitchen and encourages further exploration into the world of baking. It's a skill that, once learned, provides endless opportunities for creativity and delicious results. You've created something nourishing and wonderful with just a few simple ingredients and your own effort.
Encouragement for Sourdough Beginners
If this is your first time attempting an easy sourdough sandwich loaf, congratulations on taking the leap! Sourdough baking can seem daunting at first, but by following a clear, simple approach like the one outlined here, you'll find it's an achievable and deeply rewarding process. Don't worry about perfection on your first try. Focus on understanding each step and observing how the dough behaves.
Every loaf is a learning experience. Pay attention to what worked well and what didn't, and use that knowledge to refine your technique for the next bake. With practice, making a delicious homemade sandwich sourdough will become second nature. Embrace the journey and enjoy the process!
Further Resources for Sourdough Baking on BakeWithEase.com
This easy sourdough sandwich loaf recipe is just the beginning of your sourdough adventure with BakeWithEase. Our website offers a wealth of resources designed to help bakers of all levels master sourdough. Explore our articles on starter maintenance, understanding baker's percentages, troubleshooting common issues, and adapting recipes.
You'll find guides on shaping different types of loaves, baking in various types of ovens (like Dutch ovens for round loaves), and exciting variations to try beyond the basic sourdough loaf. Continue to explore BakeWithEase.com for more recipes, tips, and techniques to expand your sourdough skills and bake with ease and confidence.
Frequently Asked Questions
What makes this sourdough recipe "easy"?
This recipe focuses on a straightforward process with clear instructions and uses readily available ingredients. It avoids complex techniques, making it ideal for beginner sourdough bakers.
Can I use a different type of flour for this sourdough sandwich loaf?
While all-purpose or bread flour is recommended for optimal structure, you can experiment. However, expect variations in texture and rise if you use a different flour.
How long does it take to make this sourdough sandwich loaf from start to finish?
The entire process, including starter feeding, mixing, bulk fermentation, shaping, proofing, and baking, can take around 24-36 hours. Most of this time is hands-off.
What is the best way to store a sourdough sandwich loaf to keep it fresh?
Wrap the cooled loaf tightly in plastic wrap or store it in an airtight container at room temperature. Slicing only when needed also helps maintain freshness and prevent drying.
What if my sourdough starter isn't very active?
An inactive starter will result in a flat, dense loaf. Ensure your starter is doubled in size after feeding before using it in the recipe. A strong starter is crucial for success.
Final Reflection: The Humble Loaf, A Testament to Patience
The enduring appeal of sourdough bread, particularly in its easily achievable sandwich loaf form, speaks volumes about our desire for simple pleasures and the rewarding nature of hands-on cooking. In a world of instant gratification, the slow fermentation and gentle rise of a sourdough starter offer a powerful counterpoint, a reminder that sometimes the most satisfying results require time and care. This simple recipe, designed for even the most novice baker, proves that crafting delicious, artisanal bread is within everyone's reach.
The journey of making sourdough, from nurturing the starter to shaping the final loaf, is a deeply meditative process. It's a tangible connection to culinary traditions spanning centuries, a quiet rebellion against the fast-paced modern world. Bread is the staff of life,
a proverb often repeated, yet its truth resonates even more profoundly when you've experienced the satisfaction of creating it yourself. The aroma alone, that yeasty, tangy scent filling your kitchen, is a reward in itself. This recipe aims to make that experience accessible to all, fostering a deeper appreciation for the craft and the simple joy of homemade bread.
Now, I invite you to take this recipe and make it your own. Experiment with different flours, add seeds or herbs, and most importantly, savor the process. Don't be discouraged by imperfections; each loaf, regardless of its appearance, represents a step forward in your baking journey. The true reward lies not just in the delicious sandwich you'll create, but in the connection you forge with the ancient art of bread making. So, gather your ingredients, embrace the process, and experience the magic of a perfectly risen, homemade sourdough sandwich loaf.
Unleash Your Inner Baker: Craft the Perfect Sourdough Loaf!
Thanks for taking the time to explore the world of sourdough baking with us! We hope you now feel empowered to tackle this classic bread. Ready to get your hands doughy?
- Bake your own masterpiece! Use the recipe we've provided to create your very own perfectly-crusted sourdough sandwich loaf. Don't be afraid to experiment with different flours or additions!
- Share your sourdough journey! Snap a picture of your beautiful loaf and tag us on social media – we'd love to see your baking success.
- Dive deeper into sourdough secrets! Explore our other sourdough recipes and guides on BakeWithEase.com to master more techniques and varieties.
What unique ingredient will you add to your next sourdough creation? Let us know in the comments below!