
Basic Sourdough: The Art of Folding and Stretching Simply


Welcome to BakeWithEase, where the magic of baking unfolds!
Ready to elevate your sourdough game? Discover the secrets to achieving that perfect airy crumb and tangy flavor with our guide to simple sourdough folding techniques. Unravel the mystery behind this crucial step and unlock the potential of your starter. Curious to know how these techniques can transform your bread? Let's get started!
- Introduction to No-Knead Sourdough Bread Folding Techniques
- Understanding Dough Strength in No-Knead Sourdough
- No-Knead Sourdough Folding Techniques: A Step-by-Step Guide
- Popular No-Knead Sourdough Folding Methods Explained
- Tips for Successful No-Knead Sourdough Folding
- Troubleshooting Common No-Knead Sourdough Folding Issues
- The Benefits of No-Knead Sourdough Stretching Techniques
- Basic No-Knead Sourdough Recipe with Folding
- Variations: Adding Whole Wheat and Other Flours [Optional: Advanced Folding for Specific Flours]
- Conclusion: Creating Exceptional No-Knead Sourdough Through Effective Folding
- Frequently Asked Questions
- Final Reflection: The Humble Fold: A Gateway to Sourdough Mastery
- Unleash Your Inner Baker: Master the Sourdough Fold!
Introduction to No-Knead Sourdough Bread Folding Techniques
Embarking on the journey of baking sourdough bread can feel daunting, but with the right approach, it's incredibly rewarding. For many who prefer minimal handling and a simpler process than traditional kneading, the no-knead method is a revelation. At its heart lies a technique that replaces vigorous kneading: folding and stretching. These simple sourdough folding techniques are fundamental to building the necessary structure in your dough without the physical effort of kneading, allowing gluten to develop gradually and naturally over time.
Understanding how and why to apply these simple sourdough folding techniques is key to achieving that beautiful open crumb structure and chewy texture that sourdough is known for. It's less about brute force and more about gentle persuasion and patience, allowing the dough's own enzymatic activity and the magic of fermentation to do much of the work. This introduction will guide you through the basic principles, setting the stage for mastering these essential steps in your no-knead sourdough baking.
Why Folding Matters in No-Knead Sourdough Baking
In traditional bread making, kneading vigorously develops the gluten network, trapping gases produced by yeast and creating structure. With no-knead dough, especially high-hydration doughs common in sourdough, aggressive kneading can be difficult and messy. Folding and stretching offer a gentler, yet highly effective, alternative. Each fold realigns the gluten strands, strengthening the network and building tension within the dough. This tension is crucial for the dough to hold its shape during proofing and baking, contributing significantly to oven spring and the final loaf structure.
Beyond just gluten development, folding incorporates air into the dough, which helps create a lighter, more open crumb. It also helps to equalize the temperature throughout the dough mass and redistribute the yeast and bacteria (your sourdough starter) for more even fermentation. Think of it as giving the dough a gentle workout; just a few sets of simple sourdough folding techniques over a couple of hours can transform a shaggy, unstructured mass into a smooth, elastic foundation ready for baking.
BakeWithEase: Simplifying Sourdough with Minimal Handling
At BakeWithEase, our philosophy is centered around making the art of baking accessible and enjoyable for everyone, regardless of experience level. This is particularly true for sourdough, which can sometimes be perceived as complex. Our approach to no-knead sourdough emphasizes minimal handling, leveraging simple sourdough folding techniques that are easy to learn and execute. We believe that you don't need to spend hours kneading to produce exceptional bread.
Our guides break down the process into manageable steps, focusing on understanding the why behind each action, especially the folding. Instead of complicated maneuvers, we highlight basic yet effective folds that build dough strength efficiently. By focusing on these simple sourdough folding techniques and trusting the long fermentation process, you can achieve fantastic results with significantly less effort, fitting sourdough baking more easily into a busy schedule. It's about smart baking, not hard baking.
Understanding Dough Strength in No-Knead Sourdough
Dough strength refers to the ability of the dough to resist stretching and hold its shape. It's directly related to the development of the gluten network, a web of proteins that forms when flour is mixed with water and manipulated. In traditional bread, this manipulation is primarily achieved through kneading. In no-knead sourdough, particularly with higher hydration levels (like 75% water relative to flour), the dough is often too wet to knead effectively in the conventional sense.
Building sufficient dough strength is paramount for a successful sourdough loaf. Without adequate strength, the dough will collapse during proofing or baking, resulting in a dense, flat bread. The gluten network needs to be strong enough to capture the carbon dioxide gas produced by the starter during fermentation, allowing the dough to rise and expand. Simple sourdough folding techniques are the primary method for achieving this crucial strength in a no-knead context.
Autolyse: The Foundation for Gluten Development
Autolyse is a simple, yet incredibly powerful technique that involves mixing just the flour and water from your recipe and letting it rest for a period, typically from 30 minutes up to several hours, before adding the salt and starter. During this rest period, two key things happen: the flour becomes fully hydrated, and enzymatic activity begins to break down proteins, making gluten development much easier. The gluten network starts to form on its own without any mechanical action.
This initial hydration and protein breakdown through autolyse lay a crucial foundation for subsequent dough handling. It makes the dough more extensible (stretchy) and less sticky, which in turn makes the simple sourdough folding techniques much more effective and manageable. A proper autolyse reduces the total time and effort needed to build strength, allowing you to achieve a well-developed dough with fewer folds compared to starting without this rest period.
How Folding Replaces Kneading in Gluten Development
While kneading uses continuous mechanical action to align gluten strands, folding achieves a similar result through periodic manipulation and rest. When you perform a fold, you are stretching and layering the dough, which brings the gluten strands closer together and encourages them to bond. Then, during the rest period between folds (usually 30-60 minutes), the gluten network relaxes and extends, preparing for the next fold. This cycle of folding and resting gradually builds a strong, elastic structure.
Each set of simple sourdough folding techniques you perform increases the dough's tension and elasticity. Imagine the gluten strands as tiny elastic bands; folding helps organize and strengthen these bands, creating a robust network capable of trapping gas and supporting the dough's structure. Over the course of the bulk fermentation, typically involving 3-5 sets of folds, the dough transforms from a shaggy, loose mass into a smooth, supple, and significantly stronger dough.
No-Knead Sourdough Folding Techniques: A Step-by-Step Guide
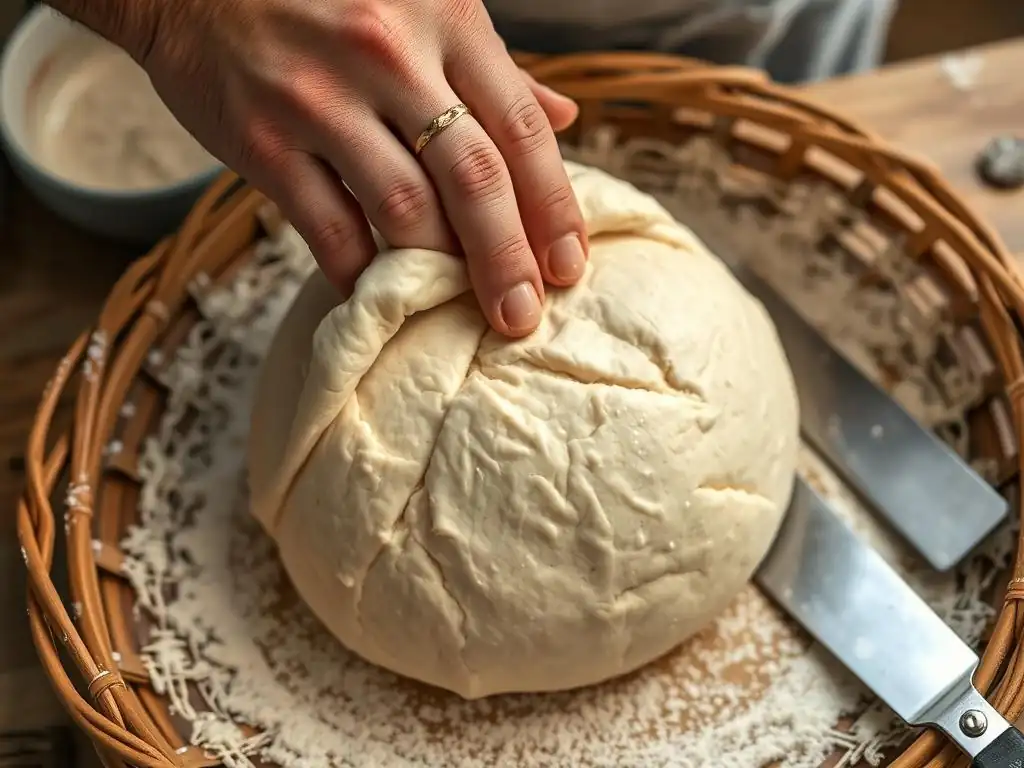
Mastering simple sourdough folding techniques is key to achieving excellent results with minimal effort. The process involves a few repetitions of gentle handling over the first few hours of bulk fermentation. Here's a breakdown of the typical steps involved in incorporating folds into your no-knead sourdough process.
Step 1: Preparing Your High-Hydration Dough
The first step is combining your flour, water, and sourdough starter according to your recipe, often after an initial autolyse period. For a typical no-knead sourdough, you might be working with a hydration level around 75% or even higher. This high water content is what makes traditional kneading impractical and folding essential.
Mix until just combined – there's no need for extensive mixing at this stage; a shaggy mass is perfectly fine. Let the dough rest for 30-60 minutes after incorporating the starter and salt (if added separately from the autolyse). This initial rest allows the dough to relax slightly and makes the first fold much easier.
Ensure your dough is in a clear container or bowl so you can observe its development. A straight-sided container is particularly helpful for tracking volume increase during bulk fermentation. Having your dough in a suitable vessel makes performing the simple sourdough folding techniques directly in the container convenient, minimizing mess and extra handling.
Step 2: The First Fold: Initial Strengthening after Autolyse
After the initial rest period following the mix (or after adding starter and salt to an autolysed dough), it's time for the first fold. This fold is crucial for beginning to build strength in the slack, high-hydration dough. Wet your hands thoroughly before handling the dough to prevent sticking. Gently slide your wet hand under one side of the dough, lift it, stretch it upwards gently, and fold it back over the center of the dough mass.
Rotate the bowl 90 degrees and repeat the lift, stretch, and fold motion. Continue rotating and folding until you have completed folds from all four sides (like folding an envelope). After the first set of simple sourdough folding techniques, the dough will still be quite loose, but you should notice a slight increase in tension. Cover the dough and let it rest again for 30-60 minutes.
Step 3: Subsequent Folds: Building Structure During Bulk Fermentation
Following the first fold, you will perform several more sets of folds throughout the bulk fermentation period. The exact number of folds and the timing between them can vary depending on the dough's hydration, temperature, and the strength of your starter, but a common schedule is 3-5 sets of folds performed every 30-60 minutes during the first 2-3 hours of bulk fermentation. Each subsequent set of simple sourdough folding techniques will feel different as the dough gains strength.
As you progress through the folds, you'll notice the dough becoming smoother, more elastic, and holding its shape better after each fold. The resistance you feel when stretching will increase, and the dough will become less sticky. Continue using wet hands and performing the same lifting, stretching, and folding motion from four sides. These repeated actions are systematically developing the gluten network and building significant structure in your no-knead dough.
Step 4: Assessing Dough Strength and Adjusting Folding Frequency
Knowing when to stop folding is an important skill that comes with practice. As you perform the simple sourdough folding techniques, pay close attention to the dough's feel and appearance. Initially, it will be very slack and tear easily. After several folds, it should feel more elastic, resist stretching more, and be able to hold a more rounded shape. A common test is the "windowpane test," where you gently stretch a small piece of dough; if it can be stretched thin enough to see light through it without tearing, the gluten is well-developed.
However, for high-hydration no-knead doughs, a full windowpane might not be achievable or necessary. A simpler assessment is observing how well the dough holds its shape after a fold and how easily it stretches without tearing.
If the dough feels significantly stronger and more elastic after 3-4 folds over 2-3 hours, you can likely stop folding and let the remainder of the bulk fermentation proceed undisturbed. If the dough is still very slack after this point, you might consider one or two additional folds, spaced further apart (e.g., after 60-90 minutes), depending on the total length of your bulk fermentation.
Popular No-Knead Sourdough Folding Methods Explained
While the basic principle of folding is consistent – lift, stretch, and fold over – different methods offer slight variations in execution and impact. Understanding these popular simple sourdough folding techniques can help you choose the best approach for your dough and desired outcome. Each method contributes to building tension and strength in unique ways.
The Envelope Fold: Creating Tension and Structure
The envelope fold is perhaps the most common and straightforward simple sourdough folding technique. It involves folding the dough from four sides towards the center, much like folding an envelope. To perform it, you gently stretch one side of the dough upwards and fold it over the middle. Then, you rotate the bowl or dough and repeat from the other three sides.
This method is excellent for building overall dough strength and creating layers. It's particularly effective in the early stages of bulk fermentation when the dough is still quite slack. The repeated folding from different directions helps to align the gluten network throughout the entire dough mass, creating even tension and structure. It's a fundamental technique that forms the basis for many no-knead sourdough recipes.
The Box Fold: Strengthening and Shaping Simultaneously
The box fold is a variation that can be particularly useful for building structure and also beginning to create a somewhat rectangular or square shape, which can be helpful later during pre-shaping. Instead of folding all four sides towards the center sequentially, you might fold one side over about two-thirds of the way, then fold the opposite side over the top of the first fold. Then, you would rotate the dough 90 degrees and repeat the two folds.
This method creates distinct layers and can build significant tension across the dough. It's another effective simple sourdough folding technique, often used interchangeably with the envelope fold or in later stages of bulk fermentation to prepare the dough for shaping. It helps consolidate the dough mass and contributes to a strong structure capable of supporting a good oven spring.
The Slap and Fold (Modified): Gentle Aeration and Strengthening
While the traditional slap and fold is a vigorous kneading technique, a modified, much gentler version can sometimes be used with lower-hydration no-knead doughs or very carefully with higher hydration ones. This isn't a typical method for most high-hydration no-knead sourdoughs but is worth mentioning as a possibility in some recipes. It involves lifting the dough, letting it stretch down, gently slapping a portion onto the counter, and folding the hanging part over the slapped part.
This modified simple sourdough folding technique helps incorporate air while building strength. It's less common than the envelope or box fold for very wet doughs on BakeWithEase because it can be messier and requires more practice to avoid tearing the dough. However, in specific contexts or for slightly lower hydration sourdoughs (e.g., 70%), a few gentle slap and folds might be incorporated early in the process.
Tips for Successful No-Knead Sourdough Folding
Achieving great results with no-knead sourdough hinges on performing the simple sourdough folding techniques effectively. Here are some essential tips to help you get the most out of each fold and build a strong, beautiful dough. These small details can make a significant difference in your final loaf.
Wet Hands and a Wet Work Surface: Preventing Sticking
One of the biggest challenges when working with high-hydration dough is stickiness. The simplest and most effective way to combat this is by keeping your hands and, if you're folding outside the bowl, your work surface wet. Before you touch the dough for each set of simple sourdough folding techniques, dip your hands in water. This creates a barrier that prevents the dough from adhering to your skin.
Similarly, if you decide to perform folds on a counter or cutting board instead of in the bowl, lightly wet the surface first. Avoid using flour, as adding dry flour at this stage can change the dough's hydration and create dry pockets. A thin film of water provides enough lubrication for you to handle and stretch the dough without it becoming a sticky mess.
Gentle but Firm Handling: Maximizing Tension
The key to effective folding is finding the balance between gentleness and firmness. You need to be gentle enough not to tear the developing gluten network, but firm enough to stretch the dough adequately and create tension. When lifting the dough, slide your wet hand underneath and lift from the bottom or side, allowing gravity to help stretch it slightly before folding it over.
Don't force the stretch. If the dough resists significantly or feels like it's about to tear, stop stretching and fold it where it's comfortable. As the dough gains strength with subsequent simple sourdough folding techniques, you'll be able to stretch it further. The aim is to extend the dough just to the point of resistance before folding, layering it to build strength and structure gradually.
Understanding Bulk Fermentation: Folding Based on Dough Activity
Folding is an integral part of bulk fermentation, the initial rise period where the dough develops flavor and structure. The frequency and number of simple sourdough folding techniques you perform should ideally be guided by the dough's activity, which is influenced by temperature and the strength of your starter. In a warm environment (around 24°C), dough will ferment and gain strength faster than in a cool one (around 20°C).
Typically, folds are performed more frequently in the early stages of bulk fermentation (e.g., every 30 minutes for the first 2 hours) when the dough is slackest. As the dough gains strength and the fermentation slows down slightly, the intervals between folds can increase (e.g., 60-90 minutes), or you can stop folding altogether once sufficient strength is achieved. Learn to observe your dough: if it spreads out significantly between folds, it likely needs more or more frequent folding. If it's holding its shape well and feels airy, you're on the right track and may need fewer subsequent folds.
Troubleshooting Common No-Knead Sourdough Folding Issues

Even with simple sourdough folding techniques, you might encounter challenges. Understanding common issues and how to address them will help you troubleshoot problems and improve your results. Don't be discouraged if your first few attempts aren't perfect; learning to read your dough takes practice.
Dough Spreading Too Thin: Increasing Folding Frequency
If your dough seems to spread out excessively between folds and remains very flat and slack even after several sets, it's a sign that it hasn't built enough strength. This can happen if your hydration is very high, your starter isn't very active, or the ambient temperature is cool. The solution is often to increase the frequency of your simple sourdough folding techniques or perform more sets.
Instead of folding every 60 minutes, try folding every 30-40 minutes during the first 2-3 hours of bulk fermentation. You might also need to perform 4 or 5 sets of folds instead of just 3. More frequent manipulation helps to accelerate gluten development and build tension more quickly. Ensure you are stretching the dough sufficiently during each fold to build maximum tension without tearing.
Dough Tearing During Folding: Reducing Folding Intensity
If your dough is tearing rather than stretching smoothly when you attempt a fold, it indicates that the gluten network is either underdeveloped and weak, or it's overly tight and hasn't had enough time to relax. If it's tearing early in the process and feels weak, you might need to give it a longer rest period (e.g., 45-60 minutes) before the next fold to allow the gluten to relax and enzymes to work.
If tearing occurs later and the dough feels very resistant, it might be too tight, possibly from too many previous folds or insufficient rest between them. In this case, reduce the intensity of your simple sourdough folding techniques – don't stretch as far – and increase the rest time between subsequent folds to 60-90 minutes. Ensure your hands are wet, as sticky hands can also cause tearing.
Uneven Gluten Development: Ensuring Consistent Folding
Sometimes, you might notice that parts of your dough feel stronger and more elastic than others. This can lead to an uneven crumb structure in the final loaf. Uneven gluten development is often a result of inconsistent simple sourdough folding techniques, where some sections of the dough are handled more effectively than others during the folding process.
To promote even development, ensure you are folding from all sides of the dough each time (e.g., completing a full set of 4 envelope folds before resting). If you're folding in a round bowl, make sure you rotate the bowl completely to work the dough from all angles. Pay attention during each fold to stretch and layer the dough consistently throughout the entire mass. Gentle, even handling during each set of simple sourdough folding techniques is key to building uniform strength.
The Benefits of No-Knead Sourdough Stretching Techniques
Adopting simple sourdough folding techniques in your no-knead baking offers numerous advantages beyond just avoiding messy kneading. These benefits contribute significantly to the quality of your final loaf, making the process worthwhile for both beginners and experienced bakers seeking a simpler method.
Improved Open Crumb Structure
One of the most sought-after characteristics of artisan sourdough is an open, airy crumb. Simple sourdough folding techniques are highly effective at developing the strong gluten network needed to trap fermentation gases, leading to those desirable large holes and irregular structure. As you fold, you incorporate small amounts of air, and the developing gluten creates pockets that expand during proofing and baking.
Compared to some minimal-handling methods that might result in a tighter crumb, the systematic process of stretching and layering through folding actively builds the structure required for a more open crumb. Each fold strengthens the dough's ability to hold its shape and expand upwards and outwards in the oven, preventing collapse and promoting a lighter texture.
Enhanced Flavor Profile Through Extended Fermentation
No-knead sourdough methods typically involve a longer bulk fermentation period compared to recipes that rely solely on vigorous kneading. Since the simple sourdough folding techniques are spread out over several hours, the dough has a longer time to ferment slowly. This extended fermentation allows the wild yeast and lactic acid bacteria in your sourdough starter to produce more complex organic acids.
These acids are responsible for the characteristic tangy flavor of sourdough. A longer, slower fermentation facilitated by the folding schedule gives these microorganisms ample time to work their magic, resulting in a more nuanced and developed flavor profile in your baked bread. It's a prime example of how patience and simple techniques lead to superior taste.
Simpler Workflow and Less Hands-On Time
Perhaps the most appealing benefit of using simple sourdough folding techniques in a no-knead process is the simplified workflow. Instead of spending 10-20 minutes of continuous, strenuous kneading, you perform short bursts of gentle folding (maybe 1-2 minutes per set) interspersed with long rest periods. The total hands-on time is significantly reduced.
This makes sourdough baking much more manageable and less physically demanding. You can easily fit the folding schedule around other tasks at home. The passive nature of the bulk fermentation, with periodic brief interactions for folding, contrasts sharply with the intensity of traditional kneading, making sourdough accessible even on busy days. It's a truly simple approach to creating complex and delicious bread.
Basic No-Knead Sourdough Recipe with Folding
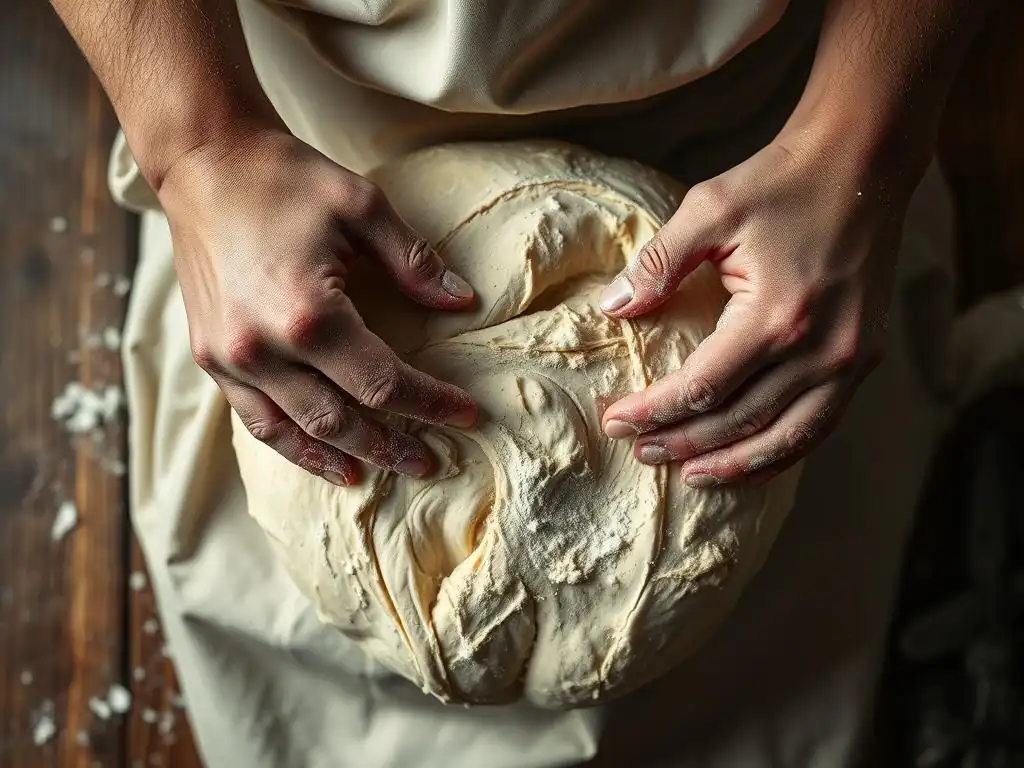
Ready to put these simple sourdough folding techniques into practice? Here is a basic recipe designed for beginners, focusing on the no-knead method and incorporating the folding steps discussed. This recipe uses a relatively common hydration level to make handling manageable while still achieving a great crumb.
Ingredients for a 75% Hydration No-Knead Sourdough
Here's a straightforward ingredient list for a standard loaf:
- Active Sourdough Starter: 100 grams (fed and active, ideally doubled in size 4-8 hours after feeding)
- Warm Water: 375 grams (around 28-30°C is ideal for starting fermentation)
- Bread Flour: 500 grams (high protein content helps with gluten development)
- Fine Sea Salt: 10 grams
Note: This yields a total dough weight of 985 grams, perfect for a standard loaf.
Step-by-Step Recipe with Detailed Folding Instructions
Follow these steps, paying close attention to the simple sourdough folding techniques:
- Mix: In a large bowl, whisk together the warm water and active sourdough starter until the starter is mostly dissolved. Add the bread flour and salt. Mix with a spatula, spoon, or your hand until no dry flour remains. It will be a shaggy, sticky mass.
- Autolyse (Optional but Recommended): Cover the bowl and let the dough rest for 30-60 minutes. This allows the flour to hydrate and gluten development to begin.
- First Fold: After the rest, wet your hands. Perform the first set of envelope folds. Grab one side of the dough, stretch it up, and fold it over the center. Rotate the bowl 90 degrees and repeat. Do this a total of 4 times. The dough will still be loose. Cover and rest for 45 minutes.
- Subsequent Folds: Repeat the set of 4 envelope folds every 45 minutes for the next 2-3 hours (total of 3-4 sets of folds after the first). With each set of simple sourdough folding techniques, you'll notice the dough becoming smoother, more elastic, and holding its shape better.
- Assess Strength: After the last set of folds (approximately 3-4 hours into bulk fermentation), the dough should feel significantly stronger, appear smoother, and have some visible bubbles. If it still feels very weak, you can perform one more fold after another 60 minutes.
- Rest: Allow the dough to rest undisturbed for the remainder of the bulk fermentation, which might be another 2-4 hours depending on temperature and starter activity. The dough should increase significantly in volume (by 50-80%) and show plenty of bubbles.
Task List for Folding Schedule (Example):
- [ ] Mix Ingredients (approx. 8:00 AM)
- [ ] Autolyse Rest (8:00 AM - 8:45 AM)
- [ ] First Fold (8:45 AM)
- [ ] Rest (8:45 AM - 9:30 AM)
- [ ] Second Fold (9:30 AM)
- [ ] Rest (9:30 AM - 10:15 AM)
- [ ] Third Fold (10:15 AM)
- [ ] Rest (10:15 AM - 11:00 AM)
- [ ] Fourth Fold (11:00 AM)
- [ ] Rest (11:00 AM onwards - until bulk fermentation is complete, e.g., 2:00 PM)
Adjust times based on your schedule and kitchen temperature.
Baking Your No-Knead Sourdough Loaf
Once bulk fermentation is complete and your dough has significantly increased in volume and shows signs of activity, it's time to shape and bake. Gently turn the dough out onto a lightly floured surface (use minimal flour). Perform a gentle pre-shape, forming it into a loose ball or rectangle depending on your final shape. Let it rest for 20-30 minutes. Then, perform your final shape and place the dough seam-side up in a floured banneton or proofing basket.
Allow the dough to proof in the refrigerator for 12-24 hours (cold proofing develops more flavor and makes the dough easier to score). Preheat your oven with a Dutch oven or baking stone to 230°C (450°F). Carefully turn the cold dough into the hot Dutch oven or onto the baking stone.
Score the top with a sharp razor or knife. Bake covered (or with steam) for 20-25 minutes, then uncover (or remove steam) and bake for another 20-30 minutes until the crust is deep golden brown and the internal temperature reaches 96-100°C (205-210°F). Let it cool completely on a wire rack before slicing.
Variations: Adding Whole Wheat and Other Flours [Optional: Advanced Folding for Specific Flours]
While the basic recipe focuses on bread flour, you can easily incorporate other flours like whole wheat or rye into your no-knead sourdough. Adding different flours changes the dough's hydration needs and gluten development characteristics, which might subtly affect how you apply the simple sourdough folding techniques.
For example, whole wheat flour absorbs more water than white bread flour and contains bran particles that can interfere with gluten development. When using a significant percentage of whole wheat (say, 20-30% or more), your dough might feel less extensible initially. You might find that slightly longer rest periods between the initial simple sourdough folding techniques are beneficial, or you might need one or two extra folds to achieve sufficient strength compared to a purely white flour loaf.
Pay attention to the dough's feel; if it tears easily, give it more rest before folding again. Conversely, rye flour develops very little gluten, so dough with a high percentage of rye relies less on folding for structure and more on other starches and the overall fermentation process. For mixed flour doughs, continue to rely on observing the dough's strength rather than sticking rigidly to a set number of folds.
Conclusion: Creating Exceptional No-Knead Sourdough Through Effective Folding
Mastering simple sourdough folding techniques is a cornerstone of successful no-knead baking. These gentle yet powerful manipulations replace the need for strenuous kneading, allowing you to develop a strong, elastic dough with minimal effort. By consistently applying methods like the envelope or box fold during the initial hours of bulk fermentation, you build the internal structure necessary for a beautiful oven spring and that coveted open crumb.
Remember that baking is also about observation and adaptation. Pay attention to how your dough feels after each fold and adjust the frequency or intensity of your simple sourdough folding techniques based on its development. With practice, you'll learn to read the dough and know exactly what it needs. By embracing these straightforward techniques, you unlock the potential to create truly exceptional sourdough loaves right in your own kitchen, proving that simple methods can yield extraordinary results. Happy baking!
Frequently Asked Questions
What is sourdough folding and why is it important?
Sourdough folding, also known as stretching and folding, is a technique used to develop strength in the dough. It helps to build gluten, creating a more structured and airy loaf.
How often should I fold my sourdough?
Generally, you should fold your sourdough dough 3-4 times during the bulk fermentation process. This is usually done every 30-60 minutes after the initial mix.
What is the best technique for folding sourdough?
Wet your hands slightly to prevent sticking, then gently lift one side of the dough, stretch it upwards, and fold it over onto itself. Rotate the bowl and repeat until you've folded all four sides. This gentle handling is key.
Can I over-fold my sourdough dough?
Yes, you can. Over-folding can cause the dough to become too tough and dense, leading to a less airy final product. Watch for the dough to feel strong but still extensible.
What if my sourdough dough is too sticky to fold?
If your dough is very sticky, try using a little bit of water on your hands or a dough scraper. Also, ensure your flour has adequate protein content to build good gluten structure.
Final Reflection: The Humble Fold: A Gateway to Sourdough Mastery
The art of sourdough baking, often perceived as intimidatingly complex, hinges on surprisingly simple techniques. Mastering the fold, far from being a mere technicality, unlocks the potential for a truly exceptional loaf. This seemingly small action is the foundation upon which flavour, texture, and overall bread quality are built. It's a testament to the power of mindful practice in achieving culinary excellence.
The consistent folding of sourdough dough is more than just a process; it's a meditative practice that connects the baker to the ancient art of bread making. It's a tangible reminder of the patience and care required to nurture life, mirroring the slow fermentation process itself. The best bread is made with love and patience,
a wise baker once said, and this sentiment rings truer than ever when considering the simple yet profound act of folding. The impact of this technique extends beyond the individual baker, influencing the wider appreciation for handcrafted, naturally leavened bread and the growing movement towards mindful food production.
Now, consider your own baking journey. Will you embrace the simplicity and elegance of the fold? Try it. Feel the dough yield to your touch, witness the subtle changes in its structure, and taste the difference it makes in the final product. The journey to sourdough mastery begins with a single fold, a single step towards a deeper connection with the ingredients, the process, and ultimately, yourself. Let the humble fold be your guide.
Unleash Your Inner Baker: Master the Sourdough Fold!
Thanks for taking the time to explore the art of sourdough folding! You've now unlocked a key skill to creating beautifully risen, flavorful loaves. Ready to put your newfound knowledge into practice?
- Master the perfect sourdough fold: Practice your technique with your next batch – even small improvements will make a noticeable difference in your bread's texture and rise. Try different timing and folding methods to find what suits you best!
- Share your sourdough journey: Post a picture of your freshly baked masterpiece on social media using #BakeWithEaseSourdough and inspire others to embrace the magic of sourdough.
- Join our Baking Community: Head over to the BakeWithEase forums (this is a fictional forum) and share your experiences, ask questions, and learn from other passionate bakers!
What unique folding technique will you try next to elevate your sourdough game?