
Get Started with Sourdough: Your Essential Basic Recipe

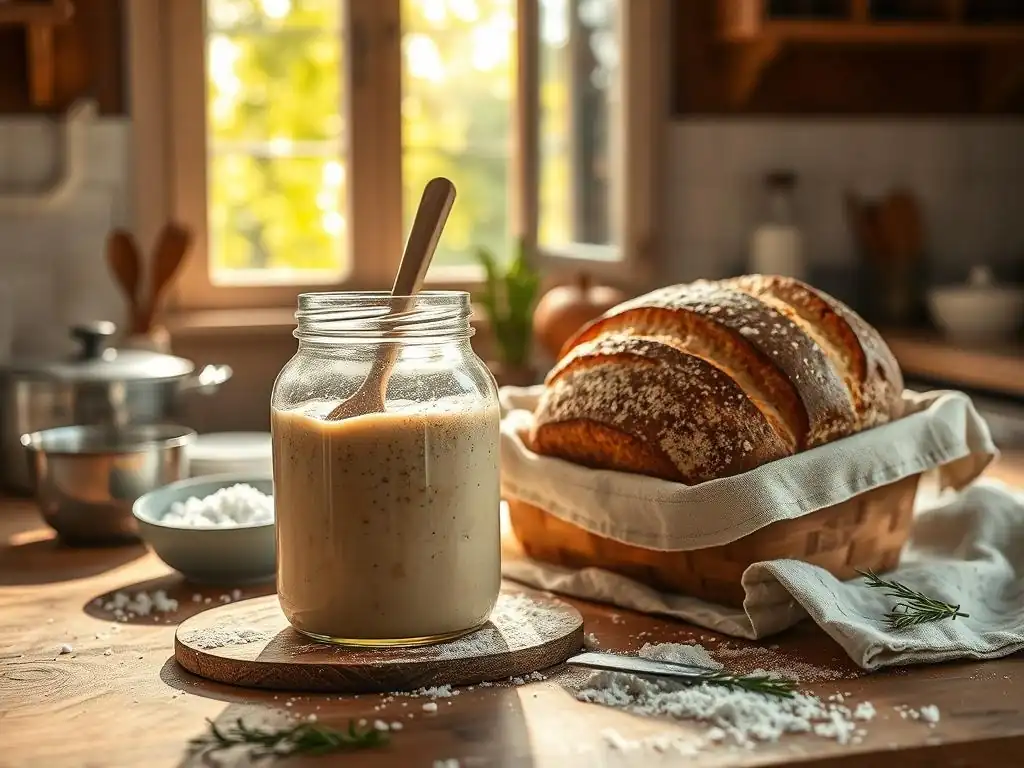
Welcome to BakeWithEase, your haven for all things baking! Ever dreamt of crafting that perfect loaf of sourdough, but felt intimidated by the process? Unlocking the secrets to a thriving sourdough starter is easier than you think. Dive in and discover our easy beginner sourdough starter recipe, and embark on a delicious journey to baking mastery. Are you ready to cultivate your own bubbly companion and create unforgettable bread? Let's get started!
- BakeWithEase Presents: Your Guide to Easy Sourdough Baking
- Why Bake Sourdough? Unlocking the Magic of Homemade Bread
- Essential Ingredients for Your First Sourdough Loaf
- Creating Your Easy Beginner Sourdough Starter Recipe
- The Basic Sourdough Recipe: Step-by-Step Instructions
- Baking Your Sourdough: Achieving the Perfect Crust and Crumb
- Troubleshooting Your Sourdough: Common Problems and Solutions
- Sourdough Baking Tips for Beginners: Achieving Consistent Results
- Storing Your Sourdough Bread: Keeping it Fresh Longer
-
Frequently Asked Questions
- What exactly is a sourdough starter, and why is it important?
- How long does it take to make a sourdough starter from scratch?
- What ingredients are needed for an easy beginner sourdough starter recipe?
- How often should I feed my sourdough starter?
- How do I know when my sourdough starter is ready to bake with?
- Final Reflection: The Humble Loaf and the Journey Within
- Unleash Your Inner Baker: Start Your Sourdough Journey Today!
BakeWithEase Presents: Your Guide to Easy Sourdough Baking
Welcome to the wonderful world of sourdough baking! At BakeWithEase, we believe that everyone can experience the joy of creating their own rustic, flavorful loaf right in their kitchen. While it might seem intimidating at first glance, especially the idea of cultivating a living starter, our goal is to demystify the process and provide you with an easy beginner sourdough starter recipe and a straightforward path to your first successful bake.
This guide is specifically designed for newcomers, breaking down each step into manageable parts, ensuring that even if you've never touched a bread dough before, you can confidently embark on this rewarding journey. We'll cover everything from the fundamental ingredients to nurturing your very own starter, mixing your first dough, and achieving that coveted crust and crumb.
This article serves as your comprehensive introduction to baking sourdough, focusing on simplicity and clarity. We understand that starting out can feel like navigating a complex maze of terms like 'autolyse', 'bulk fermentation', and 'proofing'. Our friendly approach cuts through the jargon, offering practical advice and actionable steps.
By the end of this guide, you'll not only have the knowledge to bake a delicious loaf using an easy beginner sourdough recipe but also a foundational understanding of the sourdough process that will allow you to explore more complex recipes in the future. Let's get ready to fill your home with the incredible aroma of freshly baked sourdough bread!
Why Bake Sourdough? Unlocking the Magic of Homemade Bread
The Allure of Sourdough: Flavor, Texture, and Health Benefits
Baking sourdough offers a unique experience that goes beyond just making bread. The distinctive tangy flavor, chewy texture, and crispy crust are results of the natural fermentation process powered by wild yeast and bacteria present in your sourdough starter. This fermentation breaks down starches and gluten, which can make the bread easier to digest for many people compared to loaves made with commercial yeast. Furthermore, the slow fermentation process can increase the bioavailability of certain nutrients in the flour, such as B vitamins and minerals, and may even lower the bread's glycemic index.
Beyond the sensory and potential health advantages, there's an immense satisfaction in nurturing a sourdough starter and transforming simple flour and water into a beautiful loaf. It connects you to a centuries-old tradition of bread making. Each loaf is a testament to your patience and care, offering a depth of flavor and complexity that is difficult to replicate with quick-rise methods. The aroma that fills your kitchen as a sourdough loaf bakes is simply unparalleled, making the entire process, from feeding your starter to slicing the warm bread, a truly magical experience.
Sourdough Baking for Beginners: Debunking the Myths
Many beginners are hesitant to try sourdough baking because they perceive it as overly complicated or requiring expert-level skills. Common myths include needing a special environment, requiring constant attention, or that failure is inevitable. This couldn't be further from the truth! While sourdough is a living process and requires some understanding and patience, it is entirely accessible to beginners. An easy beginner sourdough starter recipe is surprisingly simple, typically involving just flour and water and a consistent feeding schedule for a week or two.
Another myth is that you need expensive equipment. While certain tools like a Dutch oven can certainly help achieve a great crust, you can start with very basic kitchen items: a bowl, a scale, a jar for your starter, and your regular oven. The most crucial 'ingredient' is often just patience and a willingness to learn. Millions of home bakers successfully create delicious sourdough every day with minimal fuss. By following a clear, step-by-step guide like this one, you'll find that baking sourdough is a rewarding and achievable skill, not a daunting task.
Essential Ingredients for Your First Sourdough Loaf
Flour Power: Choosing the Right Flour for Sourdough Bread
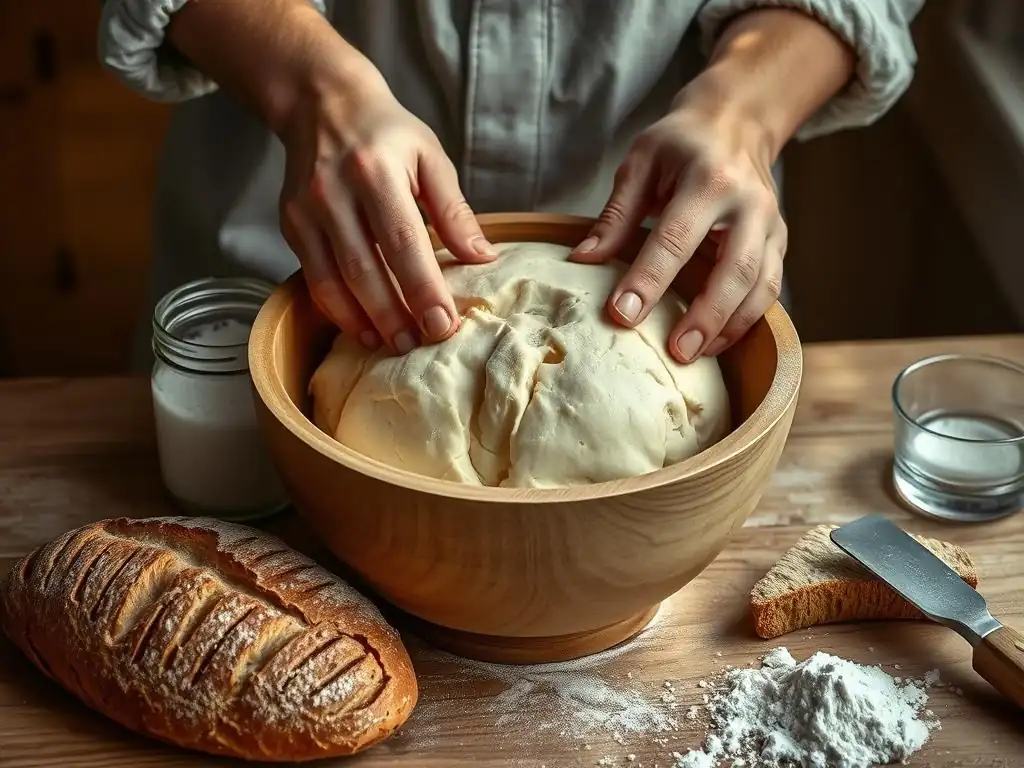
Choosing the right flour is crucial for both your sourdough starter and your bread. For building and maintaining your easy beginner sourdough starter recipe, a mix of all-purpose and whole wheat or rye flour is often recommended initially. Whole grain flours contain more natural yeast and bacteria, which can help kickstart fermentation. Once the starter is active, you can typically maintain it with just all-purpose or bread flour. Aim for unbleached flours, as the bleaching process can sometimes interfere with microbial activity.
For the bread itself, bread flour is often preferred due to its higher protein content (typically 12-14%). This higher protein develops stronger gluten networks, which are essential for trapping the gases produced by the starter, resulting in a well-risen loaf with a good crumb structure. All-purpose flour (around 10-12% protein) can also be used, but it might result in a slightly less structured loaf. Experimentation is key; different flours absorb water differently, which affects hydration levels, so be prepared to make slight adjustments based on the flour you use.
Water Quality Matters: The Importance of Filtered Water
The water you use plays a significant role in the health of your sourdough starter and the outcome of your bread. Tap water often contains chlorine or chloramines, which are added to kill bacteria in the water supply. While safe for drinking, these chemicals can inhibit or even kill the beneficial wild yeast and bacteria you are trying to cultivate in your starter. Using filtered water is a simple yet effective way to avoid this issue.
If you don't have a water filter, you can leave tap water out in an open container for 24 hours. This allows the chlorine to evaporate. However, chloramines do not evaporate as readily, so filtered water is the safest bet, especially when starting your easy beginner sourdough starter recipe. Aim for room temperature water (around 70-80°F or 21-27°C) for feeding your starter and mixing your dough, as extreme temperatures can shock the microbes.
Salt: The Key to Sourdough Flavor and Structure
Salt is more than just a flavor enhancer in sourdough bread; it plays a critical role in the dough's structure and fermentation rate. Salt tightens the gluten network, making the dough stronger and easier to handle. Without enough salt, the dough can be slack and difficult to shape, and the resulting bread will likely be flat. Salt also helps control the fermentation speed by slowing down the activity of the yeast and bacteria. This is important because it allows the dough to develop more complex flavors over a longer period.
Typically, salt is added at about 1.8% to 2% of the total flour weight in a sourdough recipe. For example, if your recipe uses 500 grams of flour, you would use 9 to 10 grams of salt. It's usually added after the autolyse phase (a period where flour and water rest) to allow the flour to fully hydrate first. Using a good quality non-iodized salt, like sea salt or kosher salt, is recommended, as iodine can sometimes interfere with yeast activity, similar to chlorine in water.
The Star of the Show: Your Sourdough Starter
The heart and soul of any sourdough bread is the starter. It's a living culture of wild yeast and lactic acid bacteria, cultivated from just flour and water. This culture is what leavens the bread and gives it its characteristic tangy flavor. Creating an easy beginner sourdough starter recipe involves mixing equal parts flour and water by weight and feeding it regularly. Over time, wild microbes from the environment and the flour colonize this mixture, creating a bubbly, active culture ready to leaven your bread.
A healthy, active starter will typically double or triple in size after being fed, have a pleasant, tangy aroma, and be full of bubbles. It's often referred to by affectionate names like 'levain' or 'mother'. Maintaining your starter is a bit like caring for a pet – it needs regular feeding to stay vibrant. A well-maintained starter can last indefinitely, becoming a continuous source for your sourdough baking adventures. Our easy beginner sourdough starter recipe section will guide you through the simple steps to bring yours to life.
Creating Your Easy Beginner Sourdough Starter Recipe
Day 1-7: Nurturing Your Sourdough Starter from Scratch
Creating your own sourdough starter is a simple process that requires just two ingredients: flour and water, plus a little patience. For an easy beginner sourdough starter recipe, you'll typically start with equal parts flour and water by weight. A common starting point is 50 grams of unbleached all-purpose flour mixed with 50 grams of filtered room temperature water in a clean jar.
Mix thoroughly until there are no dry spots, scrape down the sides, and loosely cover the jar (a lid screwed on lightly or cloth with a rubber band works). Leave it at room temperature, ideally between 70-80°F (21-27°C).
For the first few days (Day 1-3), you might not see much activity. You might notice some small bubbles or a slight sour smell developing. On Day 3 or 4, you'll typically start feeding it daily. To feed, discard half of the starter (about 50 grams in our example) and add 50 grams of fresh flour and 50 grams of fresh water to the remaining starter.
Mix well. Continue this daily feeding routine. Around Day 5-7, you should start seeing more significant activity – larger bubbles, more noticeable rising after feeding (perhaps doubling within 12-24 hours), and a distinctly tangy aroma. This daily feeding and discarding process helps to build a strong, active culture by providing a consistent food source and managing the microbial balance.
Feeding Your Starter: The Key to a Lively Culture
Consistent feeding is fundamental to maintaining a vigorous sourdough starter, which is essential for an easy beginner sourdough starter recipe to succeed. The standard feeding ratio for a healthy starter is 1:1:1 by weight: 1 part starter, 1 part fresh water, and 1 part fresh flour. For example, if you keep 50 grams of starter, you would feed it with 50 grams of water and 50 grams of flour. This ratio provides enough food for the microbes to become active and produce carbon dioxide (for leavening) and organic acids (for flavor) before they run out of food.
How often you feed depends on where you store your starter. If kept at room temperature (around 70-80°F), it generally needs to be fed once every 24 hours. If your kitchen is warmer, it might need feeding twice a day. If you store your starter in the refrigerator, its activity slows down significantly, and it might only need feeding once a week. Before baking, you'll typically take your refrigerated starter out and feed it at room temperature for 1-2 days to ensure it's very active. Always use a clean jar for feeding to prevent mold or undesirable bacteria growth.
Recognizing Readiness: Signs Your Starter is Active and Ready to Bake
Knowing when your sourdough starter is mature and active is crucial before attempting your first loaf using an easy beginner sourdough recipe. A young starter (less than 1-2 weeks old) might show some bubbles but may not have enough leavening power yet. A mature, active starter will consistently double or even triple in volume within 4-8 hours after being fed at room temperature. This rapid rise indicates a healthy, thriving population of yeast capable of leavening bread.
Other signs of readiness include a bubbly, airy texture throughout the starter, not just on top, and a pleasant, tangy aroma that isn't overwhelmingly vinegary or like nail polish remover. The float test is a common way to check activity: drop a small spoonful of starter into a glass of water. If it floats, it's generally ready to bake with, as the trapped gas makes it buoyant. If it sinks, it likely needs more time or more consistent feeding to build strength. Using an active starter is the first critical step towards a successful easy beginner sourdough recipe bake.
The Basic Sourdough Recipe: Step-by-Step Instructions
Autolyse: Preparing the Dough for Optimal Hydration
The autolyse phase is a simple but powerful technique used in many bread recipes, especially sourdough. It involves mixing just the flour and water from the recipe and letting it rest for a period, typically from 30 minutes to 1 hour, sometimes even longer. During this rest period, the flour fully hydrates, and enzymes naturally present in the flour begin to break down proteins. This process starts the gluten development without any mechanical mixing or the presence of salt, which can tighten the gluten structure prematurely.
Performing an autolyse makes the subsequent mixing much easier and helps create a more extensible and less sticky dough. It allows the dough to develop strength and structure more efficiently. For an easy beginner sourdough recipe, incorporating a 30-minute autolyse after mixing the flour and water is a great way to improve your dough handling and the final texture of your bread. Simply combine the water and flour in your mixing bowl, mix until just combined and no dry flour remains, cover, and let it rest.
Mixing the Dough: Combining Ingredients for Sourdough Success
After the autolyse, it's time to add the remaining ingredients: your active sourdough starter and salt. Gently fold the starter into the dough until it's mostly incorporated. Then, add the salt. The salt will feel like it's making the dough stiffer initially, but continue mixing. You can mix by hand in the bowl, on a counter, or using a stand mixer with a dough hook on a low speed. The goal is to fully incorporate the starter and salt and start developing the gluten network.
Mixing time will vary depending on the method. By hand, it might take 5-10 minutes of gentle kneading or folding. In a stand mixer, it could be 3-5 minutes on low speed. Don't overmix; the goal at this stage is just to get everything combined and begin the gluten development. The dough might still be quite shaggy or sticky at this point, which is normal. Further strength will be built during the bulk fermentation through a series of folds, which is a less intensive method perfect for an easy beginner sourdough recipe.
Bulk Fermentation: The First Rise and Flavor Development
Bulk fermentation, also known as the first rise, is the period after mixing the dough until it's shaped. This is where the magic of sourdough truly happens. Your active starter works to ferment the sugars in the flour, producing carbon dioxide gas (which makes the dough rise) and organic acids (which contribute to the characteristic sourdough flavor and help strengthen the gluten). The duration of bulk fermentation is highly variable and depends significantly on the temperature of your kitchen and the activity of your starter.
Typically, bulk fermentation for an easy beginner sourdough recipe at a comfortable room temperature (around 70-75°F or 21-24°C) can take anywhere from 4 to 6 hours. You're looking for the dough to increase in volume by about 30-50%, become noticeably gassier and puffier, and feel lighter. This phase is crucial for developing flavor and strength. During bulk fermentation, you'll perform a series of 'stretch and folds' to build structure, which we detail next.
Stretch and Folds: Strengthening the Dough for a Better Rise
Stretch and folds are a gentle technique used during bulk fermentation to develop the gluten structure without intensive kneading. This process aligns the gluten strands, making the dough stronger and more elastic, which helps it hold its shape and rise better during baking. It's a simple technique perfect for an easy beginner sourdough recipe. To perform a stretch and fold, lightly wet your hands, grab one side of the dough, stretch it up gently, and fold it over onto itself. Rotate the bowl and repeat this process 3-4 times until you've stretched and folded each side.
You'll typically perform 3-5 sets of stretch and folds during the first 2-3 hours of bulk fermentation, with 30-45 minutes of rest time between each set. As you progress through the sets, you'll notice the dough becoming smoother, stronger, and holding its shape better. By the last set, the dough should feel quite taught. After the final set of folds, let the dough rest undisturbed for the remainder of the bulk fermentation period until it has reached the target volume increase.
Shaping the Dough: Creating a Beautiful Sourdough Loaf
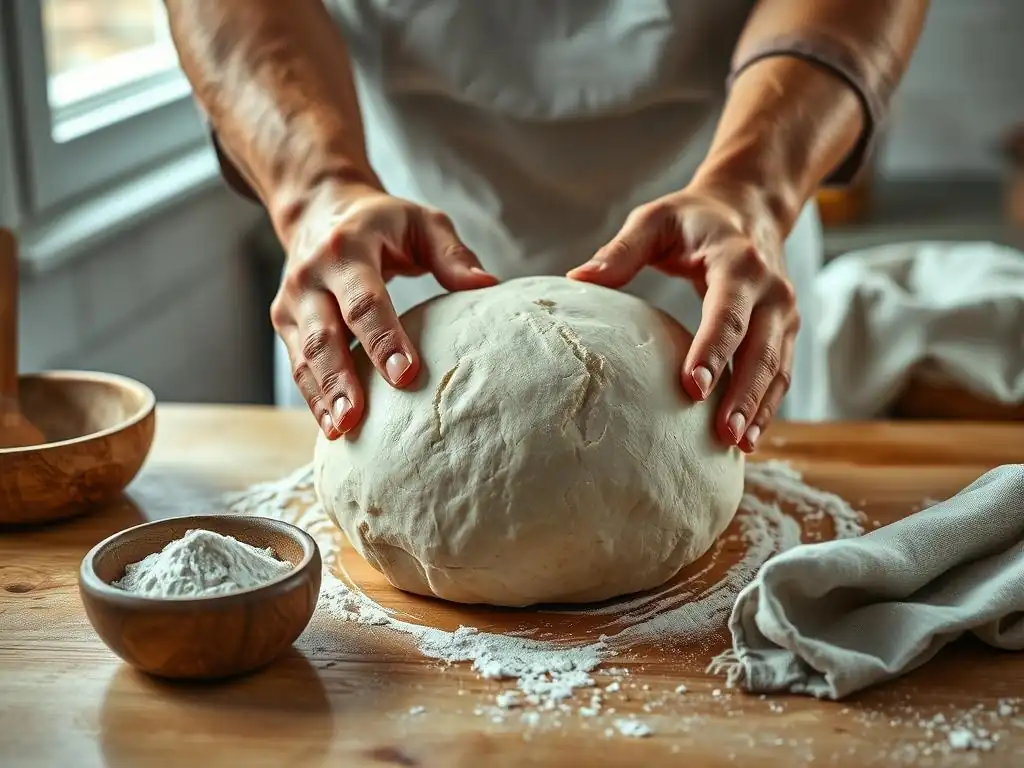
Once bulk fermentation is complete, it's time to shape your dough. Shaping builds tension in the dough, which helps it hold its structure during proofing and baking and encourages a good 'oven spring' (the final burst of rising in the oven). Gently turn the dough out onto a lightly floured surface. Be careful not to degas it completely. For an easy beginner sourdough recipe, a simple boule (round) or batard (oval) shape is recommended. The goal is to create a taut surface on the dough.
There are many shaping techniques, but a basic method involves gently pre-shaping the dough into a rough ball and letting it rest for 10-20 minutes (this is called the bench rest). This allows the gluten to relax slightly.
Then, perform the final shape by gently stretching the edges of the dough outwards and folding them into the center, creating tension on the underside, before flipping it over and using your hands to create a smooth, taut surface by gently pulling the dough towards you across the surface. Place the shaped dough seam-side up into a floured proofing basket or bowl lined with a floured cloth.
Proofing: The Final Rise Before Baking
Proofing is the final rise of the shaped dough before it goes into the oven. This period allows the dough to lighten up and increase in volume, preparing it for baking. The length of the proofing time is flexible and significantly impacts the final flavor and texture of your bread. Proofing can be done at room temperature or in the refrigerator (cold proofing). For an easy beginner sourdough recipe, understanding the proofing stage is key to controlling your bake timeline and flavor development.
At room temperature (around 70-75°F or 21-24°C), proofing typically takes 1-3 hours. The dough should look visibly puffier but should not have doubled in size (this indicates over-proofing). A good test is the 'poke test': gently poke the dough with a floured finger; if the indentation slowly springs back halfway, it's ready. If it springs back completely, it needs more time. If it stays indented, it might be over-proofed. Cold proofing, however, is often recommended for beginners as it's more forgiving and offers additional benefits.
Refrigerator Proofing: Extending Proof Time for Enhanced Flavor
Cold proofing, or retarding the dough in the refrigerator (typically 35-40°F or 2-4°C), is an excellent technique for an easy beginner sourdough recipe. It slows down fermentation significantly, allowing you to proof the dough for a much longer period, usually 8-24 hours. This extended, slow fermentation develops more complex flavors in the bread because the bacteria have more time to produce beneficial acids. It also makes the dough easier to handle when scoring and transferring to a hot oven, as it firms up in the cold.
Proofing in the refrigerator offers great flexibility; you can shape your dough in the evening and bake it the next morning or afternoon. The dough won't increase dramatically in size in the fridge, but it will continue to develop flavor and structure. The poke test is less reliable for cold dough, so you'll primarily rely on the time in the fridge and ensuring it looked properly proofed before chilling. Cold proofing is a simple step that can elevate your sourdough from good to great.
Baking Your Sourdough: Achieving the Perfect Crust and Crumb
Preheating Your Oven: Ensuring Optimal Baking Temperatures
Achieving a great sourdough crust and a good oven spring requires baking in a very hot environment. Properly preheating your oven, along with your baking vessel (like a Dutch oven or baking stone), is absolutely essential. Most sourdough recipes call for preheating the oven to a high temperature, typically between 450°F and 500°F (230°C to 260°C). This high initial heat is what causes the rapid expansion of gases in the dough, leading to that desirable oven spring and helping to set the crust quickly.
Preheating isn't just about reaching the target temperature; it's about ensuring that your baking surface or vessel is also fully heated through. This usually takes at least 30-60 minutes after the oven indicates it's reached temperature. Baking on a cold surface will prevent the dough from getting that initial burst of heat from underneath, resulting in a flatter loaf. For an easy beginner sourdough recipe baked in a Dutch oven, preheating the empty Dutch oven inside the oven is standard practice to ensure it's scorching hot when the dough goes in.
Scoring the Dough: Releasing Steam and Creating Beautiful Designs
Scoring is the act of cutting the surface of the dough just before it's placed in the oven. This isn't just for aesthetics; it serves a critical functional purpose. As the dough bakes and expands rapidly (oven spring), scoring provides a controlled weak point for the dough to expand through. Without scoring, the dough might burst unpredictably in weaker spots, resulting in a less attractive loaf. Scoring directs the expansion, allowing you to achieve a beautiful ear or bloom.
Use a sharp blade (like a razor blade or lame, a scoring tool) to make quick, confident cuts about a quarter to a half-inch deep into the surface of your cold, proofed dough. For an easy beginner sourdough recipe, a simple straight slash or a cross pattern is effective. Deeper cuts encourage more expansion along the score line. Practice makes perfect with scoring, but even simple scores will improve the oven spring and appearance of your loaf.
Baking Methods: Dutch Oven vs. Baking Stone
Two popular methods for baking sourdough at home are using a Dutch oven or a baking stone (often with added steam). The Dutch oven method is particularly recommended for an easy beginner sourdough recipe because it effectively traps steam released by the dough during the initial phase of baking. This moist environment prevents the crust from forming too quickly, allowing the dough to expand fully and achieve maximum oven spring. After the initial period (usually 20-25 minutes) with the lid on, removing the lid allows the crust to dry out and brown beautifully.
Baking on a preheated baking stone or steel requires creating steam in your oven using other methods, such as placing a tray of hot water or ice cubes on a rack below the stone. This method also aims to keep the crust soft initially for expansion. While both methods can yield excellent results, the Dutch oven simplifies the process of creating steam, making it often the preferred method for beginners. The high heat absorbed by both the Dutch oven and baking stone also provides crucial heat transfer to the bottom of the loaf, ensuring a well-baked base.
Cooling and Slicing: Patience is Key
Once your sourdough loaf is baked to a deep golden-brown color and has an internal temperature of around 200-210°F (93-99°C), it's time to take it out of the oven. However, the baking process isn't truly complete until the bread has cooled. This is perhaps the hardest part for enthusiastic bakers! Immediately transfer the loaf to a wire rack to cool completely. Cooling allows steam to escape, the internal structure of the bread to set, and the complex flavors developed during fermentation to fully mature.
Slicing into a hot loaf will result in a gummy, dense crumb, even if the bake was otherwise perfect. A standard-sized loaf needs at least 2-3 hours to cool completely at room temperature. Resist the urge to slice too early! Using a serrated knife is best for slicing sourdough, as it can easily cut through the crisp crust without crushing the soft interior. Patience during the cooling phase is rewarded with the best possible flavor, texture, and crumb for your easy beginner sourdough recipe loaf.
Troubleshooting Your Sourdough: Common Problems and Solutions
Starter Issues: Weak Starter, Mold, and More
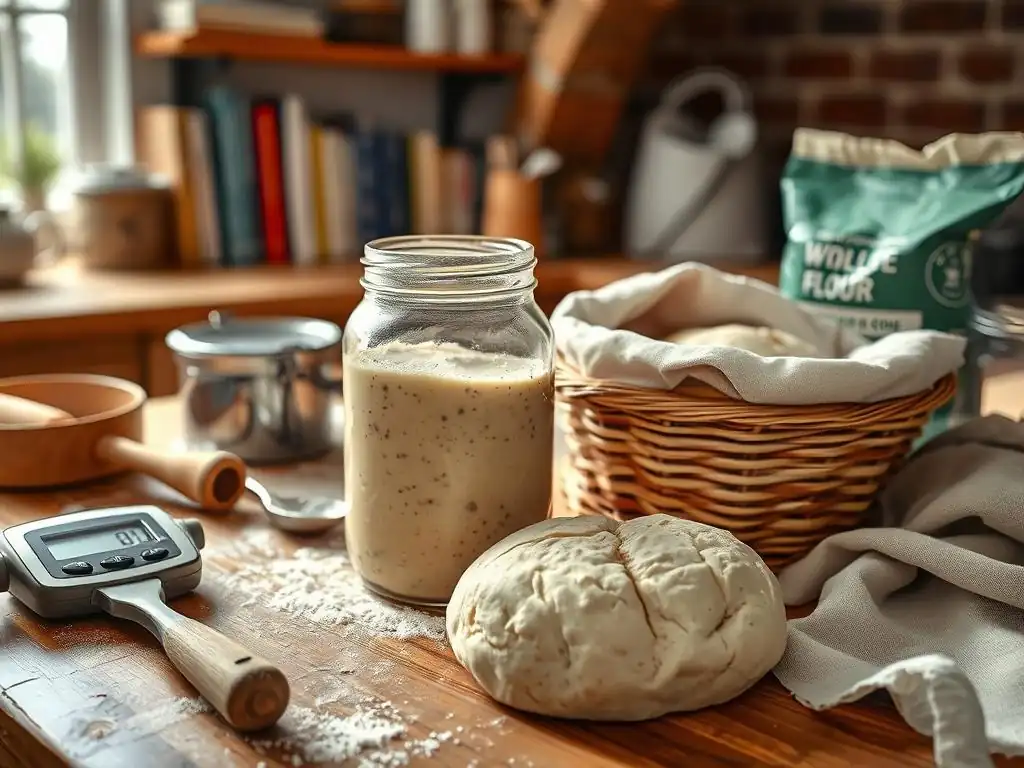
One of the most common challenges for beginners is managing their sourdough starter. A weak starter that doesn't double consistently after feeding is a primary culprit for flat bread. This is often due to inconsistent feeding, incorrect feeding ratios (e.g., feeding too little flour/water relative to the starter amount), or temperature fluctuations. Solution: Ensure you are feeding a consistent ratio (like 1:1:1 by weight), feed regularly at room temperature (every 24 hours is typical), and use filtered water and unbleached flour. It can take 1-2 weeks for a new starter to become consistently strong.
Mold appearing on your starter is usually a sign of contamination or infrequent feeding. Pink or orange streaks can indicate harmful bacteria. Solution: If you see fuzzy mold or pink/orange colors, it's generally safest to discard the starter and begin a new easy beginner sourdough starter recipe from scratch using clean equipment. Black spots might just be dried-out starter, which can sometimes be scraped off if the underlying starter looks healthy, but err on the side of caution. Always use clean jars and utensils.
Dough Problems: Too Wet, Too Dry, Not Rising
Dough consistency can be tricky, especially when starting out. If your dough feels too wet and impossible to handle, it might be due to inaccurate measurements (especially if not using a scale) or using a flour that absorbs less water than expected. Solution: Always measure ingredients by weight using a kitchen scale for accuracy. If the dough is still too wet during mixing or folding, you can add a small amount (a tablespoon at a time) of flour during the initial mixing or early folds.
If the dough feels too dry and stiff, it might need more water or the flour you used is very absorbent. Solution: Ensure accurate measurements. If the dough is stiff after the autolyse or mixing, you can add a small amount of water (a teaspoon at a time) and work it in during the initial stages.
If your dough isn't rising during bulk fermentation or proofing, the most likely cause is an inactive starter or the room temperature is too cold. Solution: Make sure your starter is consistently doubling after feeding. Place the dough in a warmer spot (like an oven with just the light on) to encourage fermentation.
Baking Issues: Dense Crumb, Burnt Crust
A dense, gummy crumb is a common disappointment. This can be caused by several factors: an inactive starter that didn't provide enough lift, insufficient bulk fermentation or proofing time, under-scoring, or slicing the bread before it has cooled completely. Solution: Verify your starter's activity with the float test. Ensure your bulk fermentation leads to at least a 30-50% increase in volume. Proof until the poke test indicates readiness. Score the dough adequately. Always let the bread cool completely on a wire rack for several hours before slicing.
A burnt or overly dark crust can happen if the oven temperature is too high, the baking time is too long, or if the bread is too close to a heating element. Solution: Ensure your oven temperature is accurate (an oven thermometer can help). If using a Dutch oven, make sure to remove the lid after the initial baking period to prevent the crust from getting too dark too soon.
If baking on a stone, you might need to cover the loaf loosely with foil partway through the bake if the top is browning too quickly. Adjust baking time based on your oven and desired crust color.
Sourdough Baking Tips for Beginners: Achieving Consistent Results
Measuring Ingredients Accurately: The Importance of a Kitchen Scale
One of the most significant factors in achieving consistent results with sourdough, especially when following an easy beginner sourdough recipe, is precise ingredient measurement. Unlike volume measurements (cups), which can vary significantly depending on how you scoop or pack the ingredient, measuring by weight using a digital kitchen scale provides exact amounts every time. Just 10-20 grams difference in flour or water can noticeably impact the dough's hydration and handling characteristics.
Most professional and reliable sourdough recipes are written using metric measurements (grams) because of this accuracy. Investing in an inexpensive digital scale is perhaps the single best thing you can do to improve your sourdough baking success and consistency. It eliminates guesswork and helps you replicate results or troubleshoot effectively when something goes wrong, as you can be confident your ingredient ratios were correct.
Understanding Hydration: Adjusting Water Content for Different Flours
Hydration refers to the ratio of water to flour in a bread dough, expressed as a percentage of the flour weight. For example, a recipe with 500g flour and 375g water has 75% hydration (375/500 * 100). Higher hydration doughs (75%+) are typically wetter and stickier but can yield a more open, airy crumb. Lower hydration doughs (60-70%) are easier to handle and shape, resulting in a tighter crumb. An easy beginner sourdough recipe might start with a moderate hydration (around 70-75%) to balance ease of handling with good results.
Different flours absorb water differently. Whole wheat and rye flours absorb significantly more water than white all-purpose or bread flour due to their higher fiber content. Even different brands of the same type of flour can vary. As you gain experience, you might need to slightly adjust the amount of water in a recipe based on the specific flour you are using and how the dough feels. Pay attention to the dough's texture described in recipes and compare it to what you are seeing and feeling.
Mastering Oven Spring: Achieving a Tall and Open Crumb
Oven spring is the final, rapid expansion of the dough when it's first placed in the hot oven. Maximizing oven spring is key to achieving a tall loaf with a beautiful, open crumb structure. Several factors contribute to good oven spring: a strong, active starter; proper dough development through mixing and folding; sufficient but not excessive proofing; effective scoring; and baking in a very hot, steamy environment.
Ensuring your starter is at its peak activity when you mix the dough is paramount. Developing good gluten strength allows the dough to hold onto the gases produced by the yeast. Don't over-proof the dough, as this can exhaust the yeast before it gets into the oven. Baking in a preheated Dutch oven or creating sufficient steam on a baking stone keeps the crust pliable initially, allowing the dough to expand freely. Finally, confident, adequate scoring provides the path for this expansion. Focusing on these elements will greatly improve your oven spring.
Storing Your Sourdough Bread: Keeping it Fresh Longer
Proper Storage Techniques: Maintaining Crust and Texture
Properly storing your homemade sourdough is essential to maintain its delicious flavor and texture. Unlike commercial bread with preservatives, sourdough has a relatively shorter shelf life for its peak quality, usually 2-3 days at room temperature. The best way to store a whole loaf is to leave it cut-side down on a cutting board. This helps protect the exposed crumb from drying out while keeping the crust relatively crisp. Avoid refrigerating sourdough, as this can actually make it stale faster due to a process called retrogradation of starches.
For longer storage or if the crust is a priority, you can store the cooled loaf in a paper bag, which allows some air circulation to maintain the crust. If you prefer a softer crust or need to store it for more than a couple of days, wrapping the cooled loaf tightly in plastic wrap or placing it in a bread box or airtight container will keep it fresh longer, though the crust will soften. For sliced bread, store slices in an airtight container or bag to prevent them from drying out.
Reviving Stale Sourdough: Tips and Tricks
Even with proper storage, sourdough can eventually become stale. However, its robust structure makes it excellent for reviving or transforming into other delicious dishes. If your sourdough is just a day or two old and slightly firm, you can refresh the crust and crumb by quickly running the loaf under cool water (yes, water!) and then placing it in a preheated oven (around 350°F or 175°C) for 5-10 minutes. The water turns to steam inside the crust, softening the crumb and reviving the crispness of the crust.
For bread that is truly stale, it's perfect for making croutons, breadcrumbs, or French toast. Cubed stale sourdough tossed with olive oil and herbs and baked makes fantastic croutons for salads or soups. You can also grind it into breadcrumbs for coating cutlets or topping casseroles. Its sturdy structure also holds up wonderfully in dishes like panzanella (Italian bread salad) or simply toasted and used for bruschetta. Don't let any part of your delicious easy beginner sourdough recipe loaf go to waste!
Frequently Asked Questions
What exactly is a sourdough starter, and why is it important?
A sourdough starter is a living culture of wild yeast and bacteria that replaces commercial yeast in sourdough bread. It's important because it gives sourdough its characteristic tangy flavor and chewy texture.
How long does it take to make a sourdough starter from scratch?
Creating a sourdough starter usually takes around 7 to 14 days of consistent feeding and care. Patience is key as you wait for the wild yeast to develop and become active.
What ingredients are needed for an easy beginner sourdough starter recipe?
The basic recipe requires only two ingredients: equal parts of unbleached flour and water. The type of flour can affect the starter's development.
How often should I feed my sourdough starter?
During the initial development phase, you should feed your starter once or twice a day, discarding a portion before each feeding. This ensures the microorganisms have enough food to thrive.
How do I know when my sourdough starter is ready to bake with?
A mature sourdough starter will be doubled in size within 4-8 hours after feeding and have a bubbly, active appearance. It should also pass the "float test" – a small amount will float in water.
Final Reflection: The Humble Loaf and the Journey Within
The seemingly simple act of baking sourdough bread connects us to a history of food production stretching back millennia, yet its enduring appeal lies in its accessibility and the profound satisfaction it offers. Today, in a world often characterized by fast-paced living and processed foods, the slow, deliberate process of nurturing a sourdough starter and crafting a loaf from scratch offers a powerful antidote to the frenetic energy of modern life. It's a reminder of the simple pleasures and the deep connection between our hands, our food, and the natural world.
The journey of making sourdough is more than just a recipe; it's a journey of patience, observation, and connection. It's a testament to the power of nurturing something living, watching it grow and change, and learning to adapt to its unique needs. This process mirrors our own personal growth, requiring us to be present, attentive, and willing to learn from both successes and failures. As the renowned baker, Chad Robertson, once said: Bread baking is a metaphor for life. You put in the work, you nurture it, and you reap the rewards.
This sentiment perfectly encapsulates the experience of creating sourdough, extending far beyond the delicious final product.
Now, consider your own journey. Will you embrace the challenge of creating your own sourdough starter? Will you experience the quiet satisfaction of kneading dough, the comforting aroma of baking bread, and the joy of sharing your creation with loved ones? The path to baking your own sourdough loaf begins with a single step – a step that holds the potential to transform not only your culinary skills, but also your relationship with food, time, and yourself. Take that step, and discover the rewarding journey that awaits.
Unleash Your Inner Baker: Start Your Sourdough Journey Today!
Thanks for taking the time to explore the wonderful world of sourdough with us! We hope you gained a solid foundation for baking your own delicious, naturally leavened bread. Now it's time to put your newfound knowledge into practice!
- Bake your first sourdough loaf: Use the recipe we provided as a starting point, and don't be afraid to experiment! The journey of a thousand miles begins with a single step (or rather, a single knead! ).
- Share your sourdough success (or even your sourdough struggles!) with us in the comments below. We love seeing your creations and are happy to help troubleshoot any questions.
- Explore other sourdough recipes on BakeWithEase.com (this would link to other relevant pages on the site in reality). Discover endless possibilities beyond this basic recipe!
Ready to transform your kitchen into a fragrant haven of homemade bread? What will be your first sourdough experiment?