
Basic Sourdough Recipe: The Importance of Resting Time

Welcome to BakeWithEase, your companion in the delightful world of baking! Ever wondered how crucial a seemingly simple step can be to achieving baking perfection? This article dives deep into the secret ingredient that separates good sourdough from extraordinary sourdough: resting time. Prepare to unlock the full potential of your starter and discover why mastering resting time is essential for a truly tangy and flavorful loaf. Keep reading to elevate your sourdough game!
- The Art of Sourdough Baking: Mastering Fermentation Time
- Understanding the Importance of Fermentation Time in Sourdough
-
Sourdough Recipe: Step-by-Step Guide with Fermentation Times
- Ingredients for a Classic Sourdough Loaf
- Step 1: Mixing the Dough - The Autolyse Stage
- Step 2: Bulk Fermentation - Developing Flavor and Strength
- Step 3: Shaping the Dough and Cold Proofing - Retarding Fermentation
- Step 4: Baking the Sourdough Loaf
- Step 5: Cooling and Slicing Your Homemade Sourdough
- Troubleshooting Sourdough: Fermentation Issues and Solutions
- The Science Behind Sourdough Fermentation
- Mastering Sourdough: Advanced Fermentation Techniques
- Conclusion: Embracing Fermentation for Exceptional Sourdough
-
Frequently Asked Questions
- How crucial is resting time for a sourdough starter in your basic recipe?
- What happens if I skip or shorten the resting time for my sourdough starter?
- How long should I typically rest my sourdough starter when following your recipe?
- Can I over-rest my sourdough starter, and if so, what are the consequences?
- What are the visual cues I should look for to determine if my sourdough starter has rested sufficiently?
- Final Reflection: The Unexpected Power of Patience in Sourdough
- Unleash Your Inner Baker: Master the Art of Sourdough Resting!
The Art of Sourdough Baking: Mastering Fermentation Time
Understanding the Importance of Fermentation Time in Sourdough
The journey to a perfect sourdough loaf is deeply intertwined with understanding and controlling fermentation time. Unlike commercial yeast breads that rely on a single, fast-acting leavening agent, sourdough uses a complex ecosystem of wild yeasts and lactic acid bacteria living in a starter. This starter, often nurtured over days or weeks, requires its own careful management, including specific resting times between feedings to reach peak activity.
When this active starter is mixed into dough, the subsequent fermentation periods – bulk fermentation and proofing – are where the magic truly happens, developing the structure, flavor, and signature airy crumb of sourdough bread. Getting the resting time sourdough starter needs right before using it is crucial, as its activity directly dictates the fermentation speed of your dough.
Properly managing the fermentation time is arguably the most critical skill in sourdough baking. It's not just about making the dough rise; it's about allowing the microbes in the starter to transform the simple ingredients – flour and water – into something complex and delicious. During these crucial resting periods, acids are produced that contribute to the tangy flavor and help preserve the bread, while enzymes break down starches into sugars that feed the yeast.
The yeast, in turn, produces carbon dioxide gas, which leavens the dough. Too short a fermentation, and your loaf will be dense and lack flavor. Too long, and the dough can become overly acidic, difficult to handle, and potentially collapse.
Achieving Optimal Sourdough Flavor Through Proper Fermentation
The characteristic tangy flavor of sourdough is a direct result of the lactic acid bacteria (LAB) activity during fermentation. These bacteria produce lactic acid and acetic acid, with the ratio of these acids significantly influenced by time and temperature. Longer, cooler fermentation periods, particularly during cold proofing in the refrigerator (often at temperatures around 4°C or 40°F), tend to favor the production of acetic acid, which imparts a sharper, more vinegary tang. Shorter, warmer fermentations (like bulk fermentation at room temperature, say 24°C or 75°F) typically produce more lactic acid, resulting in a milder, yogurt-like tang.
Controlling the duration and temperature of fermentation allows bakers to fine-tune the flavor profile of their sourdough. A bulk fermentation of 4-6 hours at room temperature followed by a cold proof of 12-24 hours is a common strategy to develop both complex flavors and a good rise. For a milder loaf, you might shorten the cold proof or increase the proportion of lactic acid by keeping the bulk fermentation slightly warmer.
Conversely, pushing the cold proof towards 36-48 hours can yield an intensely sour loaf, though care must be taken to avoid over-acidification, which can degrade the gluten structure. The resting time sourdough starter has before being used also impacts flavor; a starter fed recently and used at its peak will contribute different enzymatic activity than one that has been resting longer since its last feed.
How Fermentation Affects Gluten Development and Dough Structure
Beyond flavor and leavening, fermentation time is fundamental to developing the gluten network within the dough, which provides structure and allows the bread to hold its shape and trap the gases produced by the yeast. As the dough rests during bulk fermentation, enzymes called proteases, present in both the flour and the sourdough starter, begin to break down the protein chains in the flour. This enzymatic activity, combined with the physical manipulation of the dough through folding, allows the gluten strands to relax and align, creating a strong yet extensible network.
A typical bulk fermentation involves several rounds of stretching and folding over a period of 3-6 hours. Each fold strengthens the gluten, while the resting time between folds allows the gluten to relax. Insufficient fermentation time means the gluten network won't be fully developed, resulting in a dense crumb.
Over-fermentation, particularly in warmer conditions, can lead to excessive protease activity, which degrades the gluten structure, making the dough weak, sticky, and difficult to shape. This can result in a loaf that spreads rather than rises in the oven. Monitoring the dough's development through techniques like the windowpane test is crucial to ensure the gluten is adequately strong before moving to shaping and proofing.
Sourdough Recipe: Step-by-Step Guide with Fermentation Times
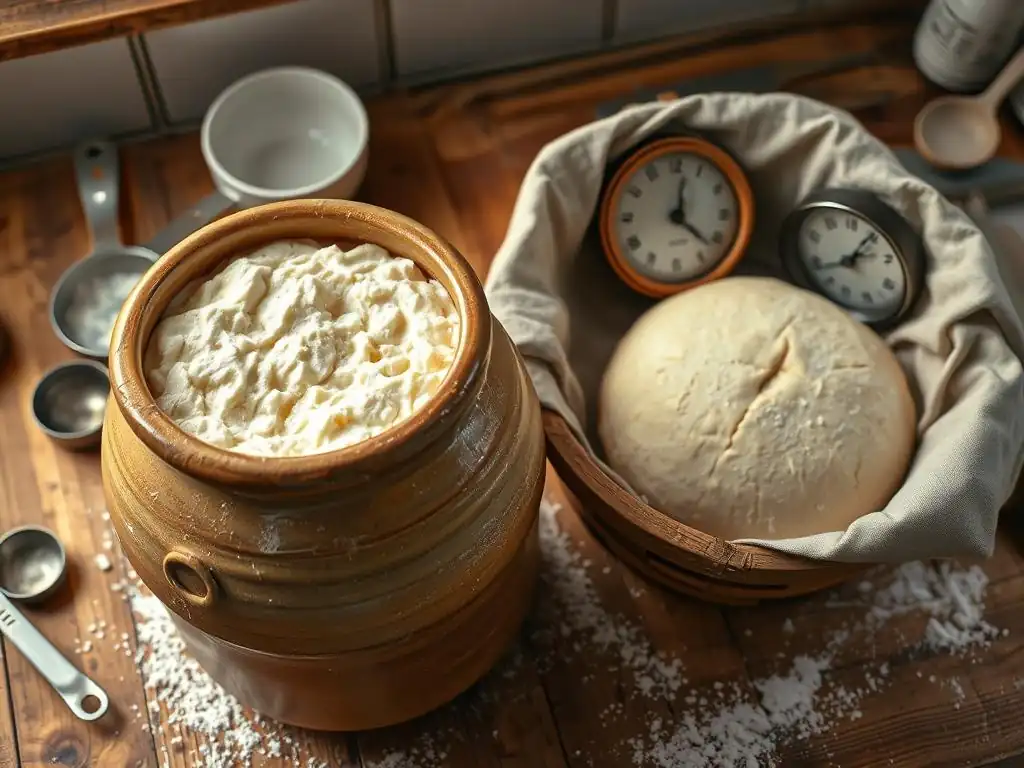
Making sourdough is a process that requires patience and attention to the dough's development over time. This guide outlines a basic recipe focusing on the crucial resting and fermentation periods.
Ingredients for a Classic Sourdough Loaf
- 100g active sourdough starter (fed 4-12 hours prior and doubled in size)
- 350g warm water (around 28-30°C or 82-86°F)
- 500g strong bread flour (around 12-13% protein content is ideal)
- 10g fine sea salt
- Note: Ensure your resting time sourdough starter had adequate time to become active and bubbly after its last feeding before beginning this recipe.
Step 1: Mixing the Dough - The Autolyse Stage
Combining flour and water and letting it rest before adding the starter and salt is a technique called autolyse. This initial resting period allows the flour to fully hydrate and enzymes to begin breaking down starches, which helps in smoother dough development later.
Autolyse: Hydrating Flour for Gluten Development
Combine the 500g of strong bread flour and 350g of warm water in a large mixing bowl. Mix with a spoon or your hands until no dry flour remains. The dough will look shaggy and unformed. Cover the bowl with a damp towel or plastic wrap and let it rest for 30 minutes to 1 hour. This resting time is critical for the flour to absorb the water evenly and for gluten development to begin without the interference of salt, which can tighten the gluten network prematurely.
During this 30-60 minute autolyse rest, the enzymes naturally present in the flour become active, starting the process of breaking down complex carbohydrates. This pre-hydration and enzymatic activity make the dough more extensible and easier to work with during subsequent steps like mixing in the starter and performing folds. It also contributes to a better crumb structure in the final loaf. Ensure the dough is covered well to prevent a skin from forming on the surface during this initial resting period.
Step 2: Bulk Fermentation - Developing Flavor and Strength
After the autolyse, the active sourdough starter and salt are added, and the dough is mixed thoroughly. This marks the beginning of bulk fermentation (also known as the first rise or primary fermentation), the longest and most critical resting period where the dough develops significant volume, strength, and flavor.
Bulk Fermentation: Allowing the Dough to Rise and Acidify
Add the 100g of active sourdough starter and 10g of salt to the autolysed dough. Mix by hand or with a stand mixer on low speed for 5-10 minutes until everything is fully incorporated and the dough starts to show some initial strength. The dough will likely still be sticky. Transfer the dough to a lightly oiled clean bowl or a clear container marked with volume measurements (this helps track the rise).
Cover tightly. The dough will now undergo bulk fermentation at room temperature, ideally between 22-26°C (72-79°F). This process typically takes 4-6 hours, but the exact time depends heavily on the ambient temperature and the activity of your starter.
During bulk fermentation, the yeast in the starter actively produces CO2, causing the dough to rise. Simultaneously, lactic acid bacteria produce organic acids, contributing to flavor and lowering the dough's pH, which strengthens the gluten and inhibits undesirable microorganisms. Over this period, perform a series of stretch and folds every 30-60 minutes for the first 2-3 hours. This involves gently stretching a portion of the dough up and folding it back over itself, rotating the bowl each time.
Typically, 3-5 sets of folds are sufficient. These folds help build structure and equalize the dough's temperature. The resting time between folds allows the gluten to relax, making subsequent folds easier and preventing tearing.
Monitoring Dough Volume and Activity During Bulk Fermentation
Monitoring the dough's progress during bulk fermentation is key. Don't rely solely on the clock; look for visual cues. The dough should increase significantly in volume, typically by 50-100%, depending on the desired outcome and temperature. As fermentation progresses, you'll notice bubbles forming on the surface and throughout the dough. The dough should feel lighter, airier, and more extensible. A good indicator is when the dough passes the "jiggle test" – if you gently shake the container, the dough should jiggle like jelly.
Another way to monitor is using a small piece of dough placed in a clear container or glass of water (the "float test" can indicate readiness, though it's not foolproof for bulk fermentation ending). The most reliable method is observing the volume increase and the dough's texture and feel. If your kitchen is cooler, bulk fermentation might take longer, perhaps 6-8 hours or even more below 20°C (68°F).
In warmer conditions above 26°C (79°F), it could be as short as 3-4 hours. Understanding how your resting time sourdough starter behaves at different temperatures will give you a good baseline for predicting dough fermentation times.
Step 3: Shaping the Dough and Cold Proofing - Retarding Fermentation
Once bulk fermentation is complete, the dough is gently shaped and then typically placed in a proofing basket (banneton) for its final rest before baking. This final resting period is called proofing, and for sourdough, it often involves a long, cool rest in the refrigerator – cold proofing.
Cold Proofing: Slowing Down Fermentation for Flavor Enhancement
After shaping, place the dough seam-side up in a floured banneton. Cover the banneton and immediately transfer it to the refrigerator for cold proofing. The cold temperature significantly slows down the yeast activity but allows the lactic acid bacteria to continue working, albeit at a slower pace. This extended, cool resting time is crucial for developing deeper, more complex flavors and tang. It also firms up the dough, making it much easier to score before baking.
A standard cold proofing period in the refrigerator (around 4°C or 40°F) ranges from 12 to 24 hours. Some bakers prefer shorter cold proofs (8-12 hours) for a milder flavor and softer crumb, while others go for longer periods (24-48 hours) for maximum tang and a more structured crumb. The minimum recommended time is usually around 8 hours to allow the dough to firm up properly for scoring. This long resting time sourdough benefits from allows organic acids to permeate the dough, contributing to better keeping qualities as well.
Determining Optimal Cold Proofing Duration
The optimal duration for cold proofing depends on several factors: the desired flavor intensity, the temperature of your refrigerator, the strength of your dough, and how long the bulk fermentation ran. If bulk fermentation was slightly shorter, a longer cold proof might be beneficial. If bulk fermentation went long, a shorter cold proof might be necessary to prevent over-acidification and gluten degradation.
Observe the dough in the banneton (if possible) or gently poke it (the poke test). The dough should look slightly increased in volume from its shaped size, though not necessarily doubled. A dough that springs back slowly when gently poked is usually ready. If it springs back immediately, it needs more time. If the poke leaves a permanent indentation, it might be over-proofed. Experimentation is key here; try 12 hours, then 18, then 24 hours on different loaves to see what results you prefer in terms of flavor and handling.
Step 4: Baking the Sourdough Loaf
Baking sourdough typically involves a hot oven, often preheated with a Dutch oven inside. The intense heat and trapped steam in the initial phase of baking allow for maximum oven spring before the crust sets.
Preheat your oven to a high temperature, usually 230-250°C (450-480°F), with a Dutch oven or baking stone inside for at least 30-60 minutes. Carefully turn the cold-proofed dough out of the banneton onto parchment paper. Score the top of the dough with a sharp razor blade or knife. Carefully lower the dough into the preheated Dutch oven using the parchment paper. Place the lid on the Dutch oven.
Bake covered for 20-25 minutes. The lid traps steam released from the dough, keeping the crust soft and allowing the dough to expand rapidly (oven spring). After this initial period, remove the lid and continue baking uncovered for another 20-30 minutes, or until the crust is deep golden brown and the internal temperature reaches around 96-99°C (205-210°F). The total baking time is typically 40-55 minutes, but can vary based on the size and shape of the loaf and your oven.
Step 5: Cooling and Slicing Your Homemade Sourdough
Once baked, immediately transfer the loaf to a wire rack to cool completely. This step is just as important as the fermentation times!
Resist the urge to slice into your sourdough loaf while it's still hot. As the bread cools, internal moisture redistributes, and the structure sets. Slicing too early can result in a gummy, dense texture. Allow the loaf to cool on a wire rack for at least 2-3 hours, or preferably longer, especially for larger loaves. This resting period allows the crumb to fully develop and stabilize.
[ ] Allow loaf to cool completely (2-3 hours minimum).
[ ] Admire your masterpiece.
[ ] Slice and enjoy!
Troubleshooting Sourdough: Fermentation Issues and Solutions

Issues with sourdough often stem from problems with fermentation time or temperature. Recognizing the signs of under- or over-fermented dough is crucial for successful baking.
Over-Fermentation: Recognizing and Addressing Excessive Activity
Over-fermented dough, also known as "proofed out" dough, has gone past its peak. Signs include:
- The dough may have initially risen significantly but then started to flatten or even collapse slightly.
- It feels very fragile, gassy, and might tear easily when handled.
- Large, uneven bubbles might be visible on the surface.
- The smell can be strongly acidic or boozy (like alcohol).
- The poke test results in a permanent indentation.
If you catch over-fermentation early during bulk fermentation, you might be able to salvage the dough by shaping it immediately and potentially doing a shorter, warmer proof (or even baking straight away if it's severely over-proofed). If over-proofed during cold proofing, you can try baking it directly from the refrigerator, being extra gentle during scoring and transfer. The resulting loaf might have less oven spring, a denser crumb in some areas, and a very tangy flavor.
Preventing over-fermentation is easier than fixing it; pay close attention to temperature and time, and learn to read the dough's visual cues. Ensuring your resting time sourdough starter wasn't overly acidic or weak when you mixed it can also help prevent runaway fermentation.
Under-Fermentation: Addressing Insufficient Activity
Under-fermented dough hasn't had enough time for the yeast and bacteria to do their work. Signs include:
- The dough hasn't increased sufficiently in volume during bulk fermentation (less than 50-75% increase).
- It feels dense, tight, and lacks extensibility.
- Few bubbles are visible on the surface or through the container.
- The poke test springs back immediately.
- The baked loaf is dense, has poor volume, a tight crumb, and lacks the characteristic sourdough flavor.
If you realize your dough is under-fermented during bulk fermentation, simply continue the bulk fermentation longer, keeping it warm if necessary, until it shows the desired signs of activity and volume increase. If you've already shaped and started cold proofing, you can sometimes take the dough out of the refrigerator and let it warm up and continue proofing at room temperature for an hour or two before baking.
Addressing under-fermentation is generally easier than over-fermentation. Ensure your resting time sourdough starter was truly active and at its peak when you used it, as an inactive starter is a primary cause of under-fermented dough.
Adjusting Fermentation Time Based on Temperature and Starter Activity
Temperature is the single biggest factor influencing fermentation speed. A difference of just a few degrees can significantly alter the required time. For example, a bulk fermentation that takes 4 hours at 25°C (77°F) might take 6-8 hours at 20°C (68°F) and potentially 10-12 hours or more at 18°C (64°F). Similarly, cold proofing time will vary depending on your refrigerator's exact temperature. Knowing the ambient temperature of your kitchen and refrigerator is key to predicting and adjusting fermentation times.
The activity level of your sourdough starter is the other critical variable. An exceptionally vigorous starter might ferment dough faster than average, while a less active one will take longer. Factors affecting starter activity include its age, the flour it's fed, the feeding ratio (e.g., 1:1:1 vs. 1:2:2 starter:water:flour), and the temperature it's maintained at.
The resting time sourdough starter has since its last feeding impacts its peak; typically, a starter is most active 4-12 hours after being fed, depending on temperature. Using a starter past its peak can lead to slower, less predictable fermentation. Learn to read your starter's behavior – how quickly it doubles or triples after feeding – to better estimate its impact on dough fermentation times.
The Science Behind Sourdough Fermentation
Understanding the microbiology and biochemistry at play demystifies the sourdough process and helps bakers make informed decisions about fermentation time and conditions.
Microbial Activity During Sourdough Fermentation
Sourdough starter is a symbiotic culture of wild yeasts and lactic acid bacteria (LAB), primarily Lactobacillus species. When this culture is introduced to dough, these microbes begin to consume the sugars available in the flour. The wild yeasts (often Saccharomyces cerevisiae, but other species can be present) ferment sugars into ethanol and carbon dioxide (CO2), which leavens the bread. The LAB ferment sugars into lactic acid and acetic acid.
The balance and activity of yeast and bacteria are influenced by temperature, hydration level, flour type, and the feeding schedule of the starter. For instance, warmer temperatures (above 25°C) tend to favor lactic acid production and yeast activity, leading to faster bulk fermentation and a milder tang.
Cooler temperatures (below 20°C) slow down yeast but relatively favor acetic acid production by some LAB species, resulting in slower bulk fermentation and a more pronounced tang, especially during long cold proofs. The specific resting time sourdough starter experiences between feedings affects the microbial population balance before it's even added to the dough.
The Role of Acids and Enzymes in Dough Development
The acids produced by the LAB do more than just provide flavor. They lower the pH of the dough, which has several beneficial effects. Lower pH strengthens the gluten network, making the dough more resilient and capable of trapping more CO2, leading to better volume and crumb structure. The acidity also inhibits the growth of spoilage organisms, contributing to sourdough's natural preservation qualities.
Furthermore, both the flour and the sourdough starter contain enzymes, notably amylases and proteases. Amylases break down complex starches into simpler sugars that the yeast and bacteria can consume. Proteases break down protein chains, which, in moderation, helps relax the gluten network, improving extensibility and facilitating the development of the open crumb structure characteristic of sourdough. However, excessive protease activity, often due to very long or warm fermentation or an overly acidic starter (resulting from too long a resting time sourdough starter had between feedings), can degrade the gluten and lead to a gummy, weak dough.
Mastering Sourdough: Advanced Fermentation Techniques
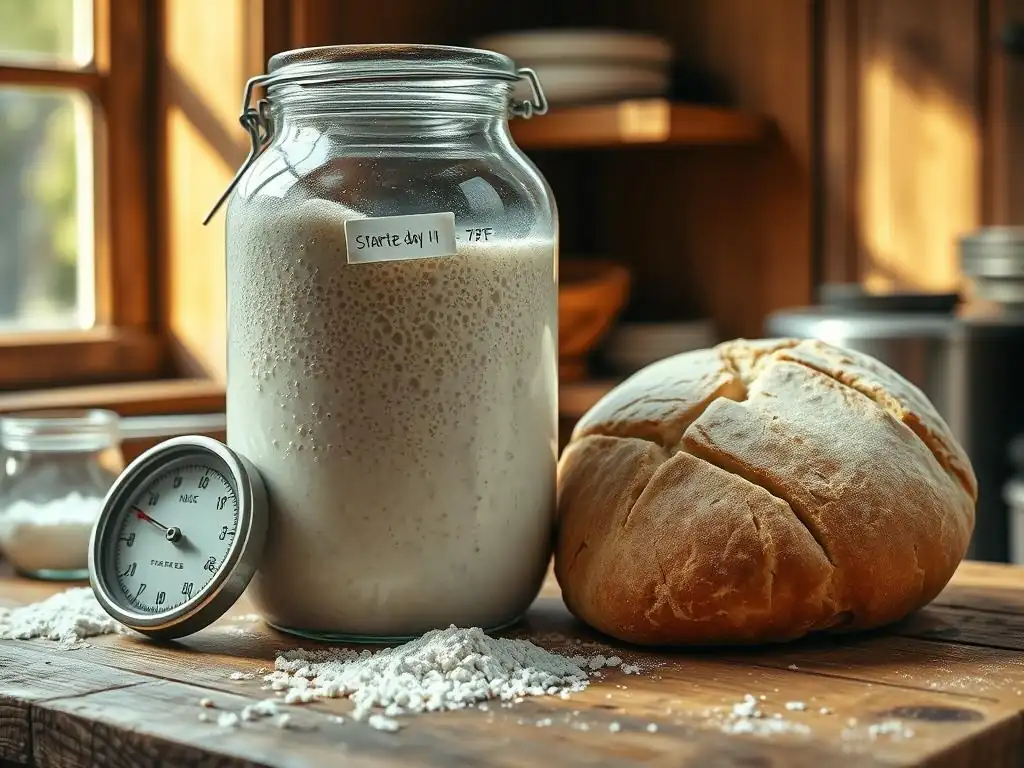
Once you've mastered the basics, you can experiment with advanced techniques to further control fermentation and tailor your sourdough results.
Using a Starter Ratio to Control Fermentation Speed
The ratio of starter to flour and water in your recipe significantly impacts fermentation speed. A higher percentage of starter (e.g., 20-30% of the total flour weight) will ferment the dough much faster than a lower percentage (e.g., 10-15%). For instance, using 100g starter in a dough with 500g flour (20% starter) will ferment faster than using just 50g starter (10% starter) under the same conditions.
Bakers can use this to their advantage. If you need a faster bulk fermentation because your kitchen is cool or you're short on time, use a higher starter percentage. If you want a slower, longer bulk fermentation for convenience or flavor development, use a lower percentage.
The hydration of your starter (typically 100%, meaning equal parts flour and water by weight) also plays a role, as a wetter starter introduces more water into the dough, affecting its consistency and potentially fermentation kinetics. The resting time sourdough starter had before use is also part of this equation; using a starter slightly past its peak can mimic the effect of a lower starter percentage by effectively having fewer active microbes.
Utilizing Different Flour Types to Impact Fermentation
The type of flour used in both the starter and the dough affects fermentation speed and characteristics. Flours with higher enzymatic activity, such as whole wheat or rye flour, will ferment faster than white bread flour because they contain more amylases that break down starch into fermentable sugars. Using even a small percentage of whole grain flour (e.g., 10-20%) in your dough can noticeably accelerate bulk fermentation.
Experimenting with different flour blends allows you to influence flavor and texture, as well as fermentation pace. A starter maintained with rye flour will often be more vigorous and acidic than one fed only white flour. Incorporating some rye or whole wheat into your dough will not only speed up fermentation but also add nutritional value and a distinct earthy flavor profile. Be mindful that flours like rye have weaker gluten, so while they speed up fermentation, they can also make the dough stickier and harder to handle if used in large quantities.
Experimenting with Levain Builds for Specific Flavor Profiles
A levain (or leaven) is essentially an offshoot of your main sourdough starter, built specifically for a particular bake. By adjusting the flour type, hydration, and fermentation time of your levain build, you can influence the microbial balance and metabolic products it contributes to the final dough, thereby tailoring the flavor profile.
For example, building a levain with a higher proportion of water (e.g., 1:2:2 starter:water:flour ratio) and letting it ferment at a slightly warmer temperature might favor lactic acid production and yeast activity, leading to a faster, milder dough fermentation. Conversely, building a stiffer levain (e.g., 1:1:1 ratio with less water) and letting it ferment longer at a cooler temperature before use might encourage more acetic acid production, resulting in a tangier loaf.
The resting time sourdough starter (or levain) has from mixing to peak activity is a critical factor in these specific builds, allowing bakers precise control over the fermentation inoculum.
Conclusion: Embracing Fermentation for Exceptional Sourdough
Mastering sourdough baking is largely about developing an intuition for fermentation. While recipes provide a valuable starting point, understanding how factors like time, temperature, starter activity, and ingredients influence the dough's development is key to consistent success. Each batch of sourdough will be slightly different, a reflection of the dynamic microbial activity within the dough and the environment of your kitchen.
Final Thoughts on Sourdough Baking and Fermentation
Embrace the process of learning to read your dough – its look, feel, smell, and how it responds to touch. Pay close attention to how the resting time sourdough starter needs affects its peak readiness and subsequent dough fermentation. Keep a baking journal to track variables like temperatures, times, and outcomes; this data will be invaluable as you refine your technique.
Sourdough baking is a rewarding journey of experimentation and discovery, leading to loaves with unparalleled flavor, texture, and character. By understanding and controlling fermentation time, you unlock the full potential of your sourdough starter and elevate your bread baking to an art form.
Frequently Asked Questions
How crucial is resting time for a sourdough starter in your basic recipe?
Resting time is absolutely essential for a well-developed flavor and proper rise. It allows the starter to ferment and produce the necessary gases.
What happens if I skip or shorten the resting time for my sourdough starter?
Skipping the resting time often results in a dense, flat loaf with little to no sour flavor. The starter needs time to become active.
How long should I typically rest my sourdough starter when following your recipe?
Our basic sourdough recipe recommends a resting time of approximately 4-12 hours depending on the room temperature and starter activity. Look for signs of doubling in size.
Can I over-rest my sourdough starter, and if so, what are the consequences?
Yes, over-resting can cause the starter to collapse and become acidic. This can lead to a weak, sour flavor and a poor dough structure.
What are the visual cues I should look for to determine if my sourdough starter has rested sufficiently?
The ideal rested starter will have doubled in size, be bubbly and airy, and have a slightly tangy aroma. These are key indicators of readiness.
Final Reflection: The Unexpected Power of Patience in Sourdough
The seemingly simple act of resting your sourdough starter, a crucial element often overlooked, is in fact the cornerstone of its vibrant health and the delicious bread it produces. This isn't just about following a recipe; it's about understanding the delicate balance of nature at work, a balance that mirrors the patience and mindfulness required in many aspects of life.
The influence of this "resting time" extends far beyond the kitchen. It's a metaphor for the slow, deliberate processes that often yield the most rewarding results. We live in a culture that prizes speed and instant gratification, but the art of sourdough reminds us that true excellence often requires a willingness to wait, to observe, and to allow for the natural unfolding of events. Slow is smooth, smooth is fast
– a phrase often used in military and tactical contexts, perfectly encapsulates the wisdom embedded in the sourdough process. The patience required to nurture a starter and allow it to rest translates to a deeper appreciation for the craft and the final product.
Consider the lessons learned here. You've discovered that the seemingly insignificant periods of rest are, in reality, periods of intense activity at a microscopic level. This translates to all areas of life – take the time to rest, to reflect, to allow your own "starter" – be it a project, a relationship, or even your own well-being – to develop at its own pace. Don't rush the process; embrace the wait, and you'll be rewarded with something truly remarkable.
Unleash Your Inner Baker: Master the Art of Sourdough Resting!
Thanks for taking the time to explore the world of sourdough with us! We hope you gained a deeper understanding of the crucial role resting time plays in achieving perfectly tangy, flavourful loaves. Ready to put your new knowledge into practice?
- Bake your own masterpiece: Try our recipe today – notice the difference a proper rest makes! Experiment with different resting times to find your perfect balance.
- Share your sourdough journey: Post a picture of your loaf on social media and tag us – we’d love to see your baking success! #BakeWithEaseSourdough
- Explore our other sourdough guides: Discover even more tips and techniques to elevate your baking game on our website.
What unique flavour profile are you aiming for in your next sourdough creation? Let's discuss!