
Basic Sourdough Baking Temperature & Time Guide

Welcome to BakeWithEase, your trusted guide to the delicious world of baking! Are you ready to unlock the secrets of perfect sourdough? Many struggle with the nuances of sourdough baking temperature time, but fear not! We've compiled a comprehensive guide to help you achieve that perfect crust and chewy crumb. Discover the ideal temperatures and baking times for your sourdough loaves, and prepare to impress with your newfound baking prowess. Let's get started – the aroma of freshly baked sourdough awaits! Dive in and elevate your sourdough game today!
- Basic Sourdough Baking Temperature & Time Guide: BakeWithEase
- Understanding Sourdough Baking Temperature and Time
- Recommended Sourdough Baking Temperatures
- Standard Sourdough Baking Times
- Sourdough Baking Temperature and Time Chart
- Troubleshooting Sourdough Baking Temperature and Time Issues
- Advanced Sourdough Baking Techniques: Temperature and Time
- Mastering Sourdough: Achieving Consistent Results with Temperature and Time
- Sourdough Baking Time & Temperature: Recipe Examples
- Final Thoughts on Sourdough Baking Temperature and Time
- Frequently Asked Questions
- Final Reflection: Mastering the Art of Sourdough Through Temperature and Time
- Unleash Your Inner Baker: Master the Art of Sourdough!
Basic Sourdough Baking Temperature & Time Guide: BakeWithEase
Understanding Sourdough Baking Temperature and Time
Why Temperature and Time Matter for Sourdough Success
Achieving that perfect sourdough loaf with a crackling crust and airy interior hinges significantly on getting the sourdough baking temperature and time just right. Temperature dictates the rate of oven spring, crust development, and the overall structure of the crumb. Too low a temperature, and your loaf might spread excessively without rising properly; too high, and the crust could burn before the inside is fully cooked. Precision here is key to unlocking the full potential of your fermented dough.
Furthermore, the duration of baking, the sourdough baking time and temperature working in tandem, determines the final moisture content and color of the loaf. An underbaked loaf will be dense and gummy, potentially with a pale crust, while an overbaked one can become dry and hard throughout. Understanding how these two factors interact allows bakers to troubleshoot common issues and consistently produce beautiful, delicious sourdough bread. It's a fundamental skill in mastering this rewarding craft.
The Impact of Oven Temperature on Sourdough Crumb and Crust
The initial high temperature burst in sourdough baking is crucial for oven spring. When the dough hits a hot environment, the water inside rapidly turns to steam, causing the dough to expand dramatically before the crust sets. A typical starting temperature might be around 450°F (230°C). This intense heat helps create a thin, crispy crust by quickly drying the surface. Without sufficient heat, the crust forms too slowly, restricting expansion and resulting in a denser loaf.
As the baking progresses, often the temperature is reduced to around 400°F (200°C). This lower temperature allows the interior of the loaf to cook through evenly without the crust burning. The high initial heat sets the structure, and the subsequent lower heat finishes the bake, developing flavor and ensuring the crumb is fully set and airy. The interplay of these temperatures directly impacts the texture – a properly managed bake yields a light, open crumb and a robust, golden-brown crust.
How Baking Time Affects Sourdough Texture and Flavor
The total baking time is a critical factor in achieving the desired texture and depth of flavor in your sourdough. For a standard 750g loaf baked at typical temperatures (e.g., 20 mins at 450°F, 20-25 mins at 400°F), the duration allows sufficient time for the starches to gelatinize, the proteins to set, and the complex flavors developed during fermentation to concentrate and deepen. Underbaking leaves the crumb gummy and potentially with a slightly raw taste, as the internal structure hasn't fully solidified.
Conversely, extending the sourdough baking time can lead to a drier crumb and a very hard crust. While a dark crust often indicates good flavor development (Maillard reaction), pushing it too far can make it tough to chew. The baking duration also affects the loaf's keeping quality; a properly baked loaf has the right moisture balance to stay fresh longer. Monitoring the bake, often by checking the internal temperature, is essential to hit that sweet spot where texture and flavor are perfectly balanced.
Recommended Sourdough Baking Temperatures
Ideal Baking Temperature for a Crispy Crust
To achieve that coveted, crackling, blistered crust on your sourdough, starting with a high oven temperature is essential. Many bakers find an initial temperature of 450°F to 475°F (230°C to 245°C) ideal. This intense heat provides the rapid burst of steam needed for maximum oven spring and quickly sets the outer layer of the dough, initiating the crust formation. Baking in a preheated Dutch oven often helps maintain this high temperature effectively around the loaf.
This high heat phase is typically maintained for the first 15-20 minutes of baking, especially if using steam or a covered vessel like a Dutch oven. The goal is to get significant oven spring and a good head start on crust development before reducing the heat. The high sourdough baking temperature and time during this initial period directly contribute to the depth of color and the crispness that defines great sourdough.
Lower Temperature Baking for a Softer Crumb
After the initial high-heat burst and oven spring have occurred, reducing the oven temperature is crucial for the remainder of the bake. Dropping the temperature to around 400°F to 425°F (200°C to 220°C) allows the inside of the loaf to cook thoroughly without the crust becoming too dark or hard. This phase ensures the crumb structure fully sets, resulting in a light, airy, and moist interior.
This lower temperature baking phase typically lasts for another 20-30 minutes, depending on the size of the loaf and your desired crust color. It allows the internal temperature to reach the target range (usually 200-210°F or 93-99°C) for a fully cooked loaf. Balancing the initial high heat with this subsequent lower heat is key to achieving the perfect equilibrium between a crispy crust and a soft, well-structured crumb, optimizing the overall sourdough baking time and temperature profile.
Adjusting Temperature Based on Sourdough Hydration
The hydration level of your sourdough dough significantly impacts the ideal baking temperature and time. Higher hydration doughs (e.g., 80% hydration or more) contain more water, which requires more energy (heat) and potentially more time to fully cook through and set the crumb. For these wetter doughs, maintaining a slightly higher temperature for a longer portion of the bake, or ensuring a very high initial temperature, can help compensate for the extra moisture.
Conversely, lower hydration doughs (e.g., 65-70% hydration) are less prone to being gummy and may cook through faster. You might find you can use a slightly lower temperature overall or reduce the total baking time slightly. Experimentation is key; if your high-hydration loaves consistently come out gummy, try increasing the initial temperature or extending the bake time by 5-10 minutes at the lower temperature. Adjusting your sourdough baking temperature and time based on hydration is a sign of an advanced baker.
Standard Sourdough Baking Times
Typical Baking Time for a 750g Sourdough Loaf
For a standard 750g (approximately 1.5 lb) sourdough loaf, a typical baking time in a preheated oven, often utilizing a Dutch oven or baking stone with steam, is around 40-45 minutes total. This duration is usually split into two phases: a covered or steamed phase at a higher temperature for the first 15-20 minutes, followed by an uncovered phase at a slightly lower temperature for the remaining 20-25 minutes.
This total time allows the loaf to achieve significant oven spring, develop a deep golden-brown crust, and ensure the interior crumb is fully cooked with an internal temperature reaching the optimal range of 200-210°F (93-99°C). Factors like your specific oven's calibration, the dough's hydration, and desired crust color can cause slight variations, but 40-45 minutes serves as a reliable starting point for this loaf size when considering sourdough baking time and temperature.
Baking Time Variations Based on Loaf Size and Shape
The size and shape of your sourdough loaf significantly influence the required baking time. Larger loaves, such as a 1kg (2.2 lb) bâtard or boule, will naturally require more time in the oven for the heat to penetrate to the center and cook the crumb thoroughly. A 1kg loaf might need 50-60 minutes of total baking time, potentially with an extended period at the lower temperature phase.
Smaller loaves, like baguettes or rolls, have a higher surface area to volume ratio and will bake much faster. Sourdough rolls might only need 20-25 minutes total baking time. The shape also matters; a flatter focaccia-style sourdough will bake quicker than a tall boule of the same weight. Always consider the mass and geometry of your dough when determining the appropriate sourdough baking time after setting your temperature.
Signs Your Sourdough is Properly Baked: Internal Temperature Check
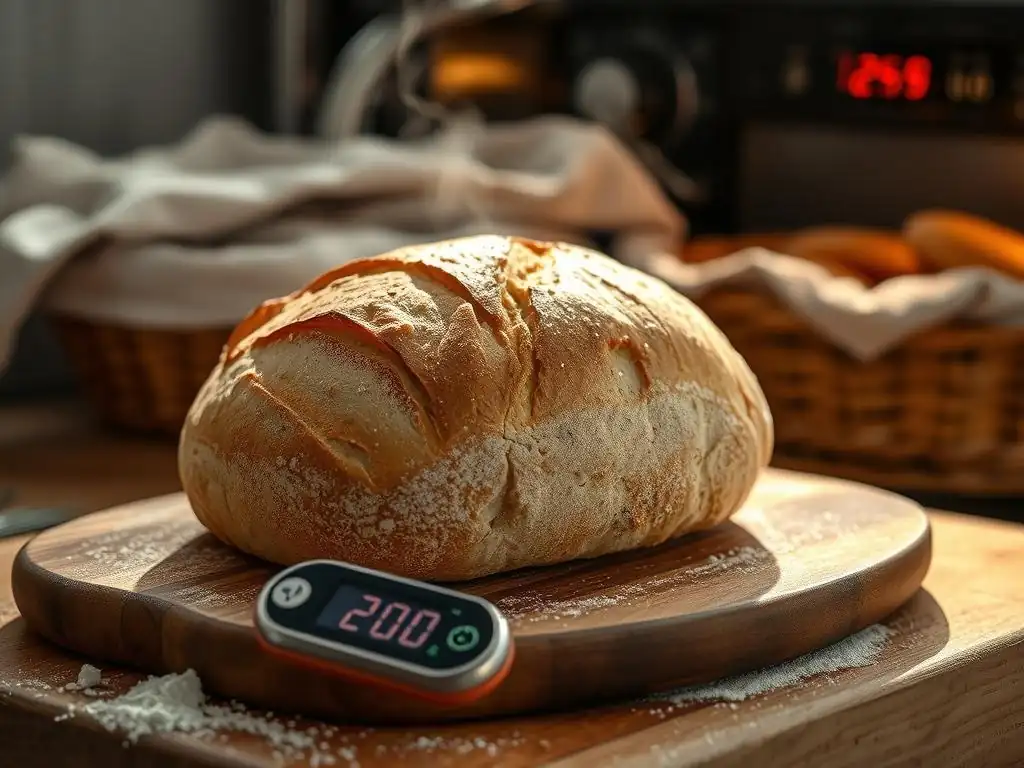
The most reliable way to know if your sourdough is fully baked is by checking its internal temperature. A properly baked sourdough loaf should register between 200°F and 210°F (93°C and 99°C) when an instant-read thermometer is inserted into the center of the loaf. This temperature range indicates that the starches have fully gelatinized and the crumb structure is set.
Another common indicator, though less precise, is the sound the loaf makes when tapped on the bottom. A well-baked loaf will sound hollow. However, this can be subjective. Relying on the internal temperature combined with visual cues (deep golden-brown crust) is the best approach. Don't be afraid to pull the loaf out briefly to check the temperature during the final minutes of the sourdough baking time – it's the definitive test for doneness.
Sourdough Baking Temperature and Time Chart
Temperature & Time Chart for Different Sourdough Recipes
Below is a general chart providing starting points for sourdough baking temperature time based on common loaf sizes and types. Remember these are guidelines; your oven may require adjustments.
| Loaf Size/Type        | Initial Temp (°F/°C) | Initial Time (Covered/Steam) | Second Temp (°F/°C) | Second Time (Uncovered) | Total Approx. Time | Internal Temp Target (°F/°C) |
| :-------------------- | :------------------- | :--------------------------- | :------------------ | :---------------------- | :----------------- | :--------------------------- |
| Standard Boule/Bâtard (750g) | 450-475 / 230-245    | 15-20 minutes                | 400-425 / 200-220   | 20-25 minutes           | 40-45 minutes      | 200-210 / 93-99              |
| Large Loaf (1kg)      | 450-475 / 230-245    | 20-25 minutes                | 400-425 / 200-220   | 30-35 minutes           | 50-60 minutes      | 200-210 / 93-99              |
| Small Rolls/Baguettes | 425-450 / 220-230    | 10-15 minutes (with steam)   | N/A                 | 10-15 minutes           | 20-30 minutes      | 200-210 / 93-99              |
| High Hydration Loaf   | 475-500 / 245-260    | 20-25 minutes                | 425-450 / 220-230   | 25-30 minutes           | 45-55 minutes      | 200-210 / 93-99              |
Note: Initial time is typically covered in a Dutch oven or with steam injection. Second time is uncovered.
This chart provides a quick overview. Always consider your specific dough, oven, and desired result. Use an oven thermometer to verify your oven's actual temperature, as they can be inaccurate by 25°F (15°C) or more. Adjusting the sourdough baking temperature time based on your observations is part of the learning process.
Quick Reference Guide for Sourdough Baking
Think of sourdough baking temperature time in phases. Phase 1: High Heat (450-475°F / 230-245°C) for 15-20 minutes. Purpose: Maximum oven spring and initial crust set. Use steam or a covered pot. Phase 2: Lower Heat (400-425°F / 200-220°C) for 20-25 minutes. Purpose: Cook interior, develop crust color and flavor. Uncover the pot or remove steam. Phase 3: Optional Finishing (400°F / 200°C or lower) for 5-10 minutes. Purpose: Darken crust further if desired, ensure crispness. Watch closely to prevent burning.
- Check internal temperature: Aim for 200-210°F (93-99°C).
- Listen for hollow sound when tapping the bottom.
- Observe crust color: Deep golden-brown is usually a good sign.
This quick guide simplifies the process, allowing you to focus on the key stages and indicators of a successful bake. Mastering these phases improves your control over the final outcome of your sourdough.
Troubleshooting Sourdough Baking Temperature and Time Issues
My Sourdough is Burning on Top: Solutions
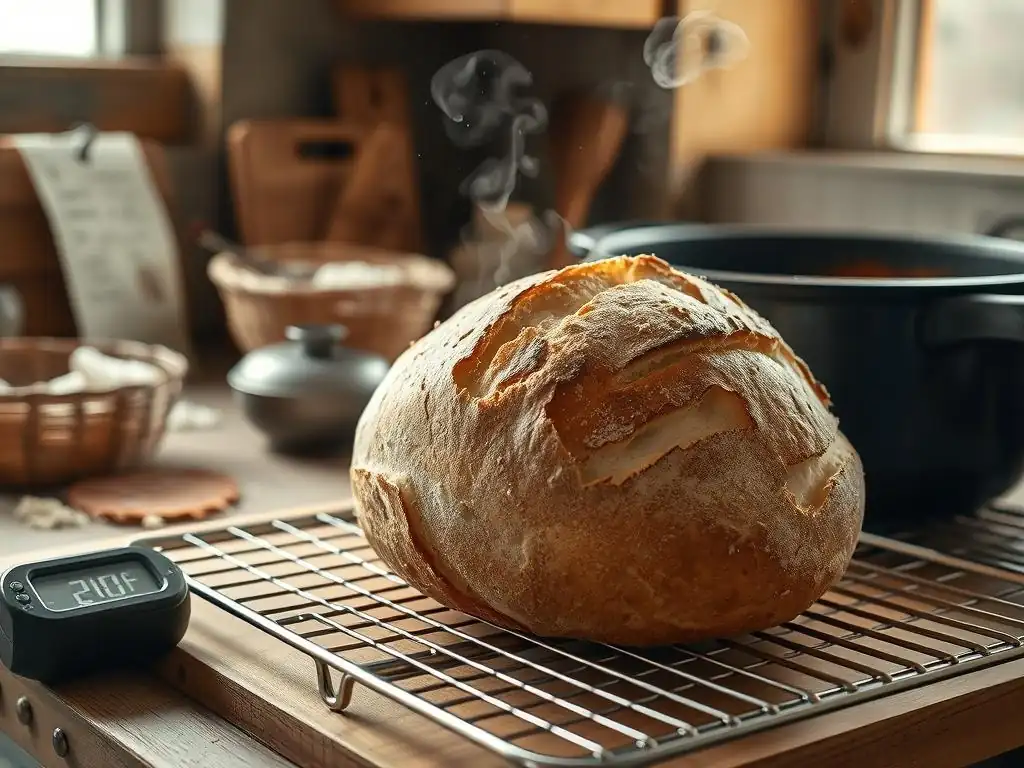
If the top crust of your sourdough is burning before the rest of the loaf is done, your oven temperature might be too high, especially during the uncovered phase, or the loaf might be too close to the top heating element.
Here are some solutions:
- [ ] Reduce the oven temperature slightly during the second, uncovered phase (e.g., from 400°F to 380°F or 200°C to 190°C).
- [ ] Place the oven rack lower in the oven.
- [ ] If using a Dutch oven, keep the lid on for a few extra minutes (e.g., 25 mins covered instead of 20).
- [ ] If the top starts to darken too quickly, loosely tent the loaf with aluminum foil for the remainder of the baking time.
- [ ] Ensure your oven thermometer is accurate; your oven might be running hotter than the dial indicates, affecting the sourdough baking temperature time.
My Sourdough is Doughy Inside: What to Do
A doughy or gummy interior is a common issue and almost always means the loaf is underbaked. The internal temperature did not reach the point required to set the crumb structure.
Steps to address a doughy interior:
- [ ] Extend the baking time, particularly during the lower temperature phase. Add 5-10 minutes and check the internal temperature.
- [ ] Ensure your oven is accurately preheated to the correct sourdough baking temperature time settings. Use an oven thermometer.
- [ ] Check the internal temperature (aim for 200-210°F / 93-99°C). Bake until this temperature is reached.
- [ ] For high-hydration doughs, consider a slightly higher temperature in the second phase (e.g., 425°F / 220°C) or a longer bake.
- [ ] Make sure you are allowing the loaf to cool completely before slicing. Slicing too early traps steam and can make the crumb seem doughy even if properly baked. Wait at least 1-2 hours, preferably longer.
Adjusting Baking Time for Different Oven Types
Different oven types require adjustments to sourdough baking temperature time. Conventional ovens often have hot spots and less even heat distribution compared to convection ovens. Convection ovens circulate air, which can lead to faster baking and quicker crust development.
For convection ovens:
- Reduce the temperature by about 25°F (15°C) compared to conventional oven temperatures.
- Monitor the bake closely as the time may be slightly shorter. The circulating air can also dry out the crust faster, so steam or a Dutch oven is highly recommended.
For conventional ovens:
- Ensure adequate preheating time (at least 30-60 minutes) to saturate baking surfaces (stone, steel, Dutch oven) with heat.
- Consider rotating the loaf halfway through the uncovered bake to ensure even browning.
- Using a baking stone or steel can help provide a consistent heat source from below.
Understanding your specific oven's behavior is crucial for consistent results.
Advanced Sourdough Baking Techniques: Temperature and Time
Baking Sourdough in a Dutch Oven: Temperature and Time Adjustments
Baking sourdough in a preheated Dutch oven is a popular technique because it effectively traps the steam released by the dough, mimicking professional bakery ovens. This trapped steam keeps the crust soft initially, allowing for maximum oven spring. The heavy cast iron also retains heat exceptionally well, providing consistent, high temperatures.
For a standard 750g loaf in a Dutch oven:
- Preheat the oven with the Dutch oven inside to 450-475°F (230-245°C) for at least 30-60 minutes.
- Carefully place the dough inside, score it, and cover with the lid. Bake for 15-20 minutes.
- Remove the lid, reduce the temperature to 400-425°F (200-220°C), and bake for another 20-25 minutes until the desired crust color and internal temperature (200-210°F / 93-99°C) are reached.
This method simplifies managing the sourdough baking temperature time and steam.
Baking Sourdough on a Baking Stone: Temperature and Time Considerations
Baking sourdough directly on a preheated baking stone or steel requires manually adding steam to the oven environment. The stone provides excellent heat transfer to the base of the loaf, promoting a good bottom crust.
For baking on a stone:
- Preheat the oven with the stone inside to 450-475°F (230-245°C) for 60 minutes to ensure the stone is fully heated.
- Place the dough on the stone using a peel or parchment paper.
- Immediately create steam in the oven. This can be done by pouring hot water into a preheated tray on the bottom rack or using lava rocks soaked in water. Be cautious of steam burns.
- Bake with steam for 15-20 minutes at the high temperature.
- Carefully remove the steam source, reduce the temperature to 400-425°F (200-220°C), and continue baking for another 25-30 minutes until the internal temperature is 200-210°F (93-99°C).
Managing steam is the key difference and adds a layer of complexity to the sourdough baking time and temperature process compared to a Dutch oven.
Using Steam in Sourdough Baking: Temperature and Time Effects
Steam is vital in the initial phase of sourdough baking, regardless of whether you use a Dutch oven or a stone with a separate steam setup. Steam prevents the surface of the dough from forming a hard crust too quickly, allowing the loaf to expand fully during oven spring. It also contributes to a thinner, crispier crust later in the bake.
The presence of steam affects the sourdough baking temperature time slightly. In a steamy environment, heat transfer is more efficient, but the steam also keeps the surface cooler initially. You maintain the high initial temperature (450-475°F / 230-245°C) with steam for the first 15-20 minutes. Once the steam source is removed (or the Dutch oven lid comes off), the crust can then rapidly brown and crisp up at the reduced temperature. Without sufficient steam, oven spring can be restricted, and the crust might become thick and tough.
Mastering Sourdough: Achieving Consistent Results with Temperature and Time
Tips for Consistent Sourdough Baking Every Time
Consistency in sourdough baking, especially regarding sourdough baking temperature time, comes from controlling variables. Beyond temperature and time, factors like the strength of your starter, dough hydration, fermentation times, and shaping technique all play a role.
Here are some tips for consistency:
- [ ] Use a digital scale for accurate ingredient measurements.
- [ ] Maintain consistent bulk fermentation and proofing temperatures.
- [ ] Always preheat your oven and baking vessel/stone thoroughly.
- [ ] Use an independent oven thermometer to verify your oven's temperature.
- [ ] Bake similar-sized loaves each time if practicing a specific recipe.
- [ ] Take detailed notes on your process, including actual oven temperature and bake times.
By minimizing variability in other steps and focusing on precise temperature and time control, you'll see more predictable and satisfying results.
The Importance of Accurate Oven Thermometers
Relying solely on your oven's built-in thermostat can lead to inconsistent baking results because oven temperatures can fluctuate significantly and the dial might be inaccurate. An inexpensive oven thermometer placed inside your oven will show you the actual temperature, allowing you to make necessary adjustments.
For example, if your oven dial is set to 450°F (230°C) but the thermometer reads only 425°F (220°C), you know to set the dial higher next time or extend the baking time. This simple tool is indispensable for mastering sourdough baking temperature time and ensuring your oven is truly at the temperature your recipe requires.
Documenting Your Sourdough Baking: Tracking Temperature and Time
Keeping a baking journal is an invaluable practice for improving your sourdough. Record details about each bake, focusing on the sourdough baking temperature time used. Note the following:
- Date and loaf details (size, hydration, recipe variations)
- Oven preheating time and temperature (verified with thermometer)
- Initial baking temperature and time (covered/steam)
- Second baking temperature and time (uncovered)
- Total baking time
- Internal temperature of the finished loaf
- Observations on crust color, crumb structure, oven spring, and flavor
Reviewing these notes helps you identify patterns and understand how changes in temperature or time affect the final outcome. Did lowering the temperature slightly reduce crust charring? Did adding 5 minutes fix a gummy crumb? This data-driven approach accelerates your learning and helps you consistently achieve the perfect sourdough baking time and temperature for your setup.
Sourdough Baking Time & Temperature: Recipe Examples
Example 1: Classic Sourdough Loaf - Temperature & Time Breakdown
Let's break down the sourdough baking temperature time for a common classic sourdough loaf (approximately 750g, ~72% hydration) baked in a Dutch oven:
- Preheat: Oven and Dutch oven to 475°F (245°C) for 1 hour.
- Phase 1 (Covered): Carefully transfer dough to hot Dutch oven. Bake at 475°F (245°C) with lid on for 20 minutes. This high heat encourages maximum oven spring and steam retention.
- Phase 2 (Uncovered): Carefully remove lid. Reduce oven temperature to 425°F (220°C). Continue baking for 20-25 minutes. This lower temperature allows the crust to brown beautifully and the interior to cook through.
- Check Doneness: Internal temperature should be 205°F (96°C). Crust should be deep golden-brown.
- Cooling: Remove from Dutch oven and cool on a wire rack for at least 2 hours.
This specific sourdough baking time and temperature profile is a reliable starting point for many classic recipes, producing a loaf with good rise, a crisp crust, and a well-cooked interior.
Example 2: High-Hydration Sourdough - Temperature & Time Breakdown
High-hydration doughs (e.g., 85% hydration, 750g loaf) can be trickier due to their stickiness and higher moisture content. They often benefit from slightly different sourdough baking temperature time settings to ensure the interior cooks properly.
- Preheat: Oven and Dutch oven to 475°F (245°C) for 1 hour. Some bakers go up to 500°F (260°C) initially.
- Phase 1 (Covered): Bake at 475-500°F (245-260°C) with lid on for 20-25 minutes. The extra moisture requires a slightly longer initial steam phase to allow the structure to set before the crust hardens.
- Phase 2 (Uncovered): Reduce oven temperature to 425-450°F (220-230°C). Continue baking for 25-30 minutes. The slightly higher temperature or longer duration in this phase helps ensure the center is not gummy.
- Check Doneness: Internal temperature should be 205-210°F (96-99°C). Crust will be dark and robust.
- Cooling: Crucial for high-hydration loaves. Cool for at least 3-4 hours before slicing.
Adjusting the sourdough baking time and temperature profile for higher hydration is key to avoiding a dense or wet crumb.
Example 3: Sourdough with Added Ingredients (Seeds, Herbs) - Temperature & Time Breakdown
Adding ingredients like seeds, nuts, or herbs can slightly alter the dough's thermal properties and moisture content. While the core sourdough baking temperature time often remains similar to a classic loaf, minor adjustments might be needed.
For a 750g loaf with seeds (e.g., 10-15% of flour weight in seeds):
- Preheat: Oven and Dutch oven to 475°F (245°C) for 1 hour.
- Phase 1 (Covered): Bake at 475°F (245°C) with lid on for 20 minutes.
- Phase 2 (Uncovered): Reduce oven temperature to 425°F (220°C). Continue baking for 20-25 minutes.
- Potential Adjustment: If using a large quantity of very moist ingredients (like olives or roasted garlic), you might need to extend the second phase by 5-10 minutes or slightly increase the temperature to ensure the interior cooks through. Seeds typically don't require significant changes unless used in very high percentages.
- Check Doneness: Internal temperature 200-210°F (93-99°C).
Monitor loaves with additions closely. The extra ingredients can sometimes cause the crust to brown faster or retain more moisture in the crumb, requiring slight tweaks to the standard sourdough baking temperature time protocol.
Final Thoughts on Sourdough Baking Temperature and Time
The Journey to Perfect Sourdough: Patience and Practice
Mastering sourdough is a journey, and understanding the interplay between sourdough baking temperature time is a significant milestone. Don't expect perfection on your first few tries. Every oven is different, every starter behaves uniquely, and environmental factors like ambient temperature and humidity play a role. The key is to be patient, observe your loaves, and learn from each bake.
Embrace the process of trial and error. If a loaf isn't exactly what you hoped for, analyze what might have gone wrong, consult resources, and adjust your approach for the next bake. Consistent practice, combined with careful attention to detail, especially regarding temperature and time, will steadily improve your results and build your intuition as a sourdough baker.
Further Resources for Sourdough Baking Mastery
To continue refining your skills in controlling sourdough baking temperature time and other aspects of sourdough, explore reliable resources. Look for detailed guides on oven calibration, the science of baking (like the Maillard reaction and starch gelatinization), and specific recipes that match your desired style of bread.
Many experienced bakers share their temperature and time strategies online or in books, often explaining the why behind their methods. Comparing different approaches can help you find what works best with your equipment and baking environment. Remember to cross-reference information and be willing to experiment. The more you learn about how temperature and time influence the complex reactions happening inside your oven, the closer you'll get to baking your perfect loaf consistently.
Frequently Asked Questions
What is the ideal oven temperature for baking sourdough bread?
The ideal oven temperature for sourdough baking is typically between 450°F (232°C) and 500°F (260°C). Starting with a higher temperature helps create a good oven spring and crust, then it is often lowered.
How long should I bake sourdough bread?
Baking time varies depending on the size and hydration of your loaf, but generally, sourdough bread bakes for 30-50 minutes. Check for an internal temperature of 205-210°F (96-99°C).
Why is baking sourdough in a Dutch oven recommended?
A Dutch oven traps steam, creating a humid environment that allows the bread to fully expand during the initial baking phase, resulting in a better crust and crumb.
What happens if I bake my sourdough at too low a temperature?
Baking at too low of a temperature can result in a dense, gummy crumb and a pale, soft crust. The bread may also spread out instead of rising properly.
Can I adjust the baking time and temperature for a darker or lighter crust?
Yes, adjusting baking time and temperature allows you to control the crust color. For a darker crust, bake slightly longer or at a slightly higher temperature (monitor closely). For a lighter crust, reduce the baking time or temperature.
Final Reflection: Mastering the Art of Sourdough Through Temperature and Time
The precise dance between temperature and time is the cornerstone of successful sourdough baking, a truth as relevant today as it was centuries ago. Understanding this delicate balance unlocks not just a perfectly risen loaf, but a deeper appreciation for the artistry and patience required in this ancient craft. The seemingly simple act of baking sourdough becomes a journey of discovery, where subtle shifts in temperature and timing yield dramatically different results.
This exploration of sourdough's thermal intricacies has profoundly impacted my own baking journey, transforming it from a frustrating process into a deeply rewarding one. The consistent application of the principles outlined in this guide has led to consistently delicious results, proving that even the most complex techniques can be mastered with careful observation and practice. The best bread is made with love, patience, and a good thermometer.
- (A quote you can adapt or replace with a relevant quote). The journey of mastering sourdough is a testament to the power of understanding fundamental principles and the beauty of slow, deliberate creation.
Now, it's your turn. Take the knowledge gained here and apply it to your own baking adventures. Experiment with different temperatures and timings, observe the subtle changes in your dough, and don't be afraid to deviate from the prescribed guidelines. Embrace the imperfections, learn from your mistakes, and most importantly, enjoy the process of creating something truly special with your own two hands. The perfect sourdough loaf awaits – begin your journey today.
Unleash Your Inner Baker: Master the Art of Sourdough!
Thanks for taking the time to explore the world of sourdough baking with us! We hope you now feel empowered to tackle those perfectly tangy loaves. Ready to put your new knowledge into practice?
- Bake your first sourdough masterpiece! Use the temperature and time guides from the article to create your own amazing loaf. Remember, practice makes perfect!
- Share your baking journey! Post a picture of your sourdough creation on social media and tag us – we’d love to see your results!
- Explore advanced sourdough techniques. Dive deeper into our other articles on sourdough starters, shaping techniques, and advanced baking methods to further enhance your skills.
So, what unique flavor profile will you experiment with in your next sourdough bake? Let's hear your plans in the comments below!