
Troubleshooting Basic Sourdough: Common Issues Solved Simply


Welcome to BakeWithEase, where delicious baking becomes achievable for everyone!
Is your sourdough starter acting up? Don't despair! We've all been there. This guide dives deep into sourdough starter troubleshooting problems solved, offering practical solutions to common issues that can plague even experienced bakers. Curious about how to revive a sluggish starter or identify the telltale signs of over-fermentation? Let's unlock the secrets to a thriving sourdough culture and bake incredible loaves together!
- Troubleshooting Basic Sourdough: Common Issues Solved Simply | BakeWithEase
- Introduction to Sourdough Starter Troubleshooting for Beginners
- Common Sourdough Starter Problems and Solutions
- Troubleshooting Common Sourdough Bread Issues
- Advanced Sourdough Troubleshooting Tips
- Maintaining a Healthy Sourdough Starter for Long-Term Success
- Conclusion: Mastering Sourdough Troubleshooting for Consistent Baking
-
Frequently Asked Questions
- What is the most common problem people encounter when starting a sourdough starter?
- How do I know if my sourdough starter is ready to bake with?
- What can I do if my sourdough starter smells bad?
- My sourdough starter is developing a dark liquid on top. What does this mean?
- What is the best type of flour to use for feeding my sourdough starter?
- Final Reflection: The Ever-Evolving Journey of Sourdough
- Unleash Your Inner Sourdough Baker!
Troubleshooting Basic Sourdough: Common Issues Solved Simply | BakeWithEase
Introduction to Sourdough Starter Troubleshooting for Beginners
Why Sourdough Troubleshooting is Essential for Baking Success
Embarking on the sourdough journey is incredibly rewarding, but it often comes with a unique set of challenges. Unlike commercial yeast, a sourdough starter is a living ecosystem of wild yeast and bacteria, making its behavior less predictable. Understanding common sourdough starter troubleshooting problems solved is key to consistent baking results. When your starter isn't behaving as expected – maybe it's not rising, smells off, or seems too watery – knowing how to diagnose and fix the issue prevents frustration and wasted ingredients. It transforms potential failures into learning opportunities, building your intuition as a baker.
Mastering sourdough starter troubleshooting is also crucial because the health and activity of your starter directly impact your final loaf. A weak starter leads to flat, dense bread, while a vigorous one provides excellent rise and a beautiful crumb structure. By learning to identify and address common issues, you gain confidence and control over the process. This article aims to demystify these problems, offering simple, actionable solutions to help you achieve that perfect tangy loaf you've been dreaming of. Think of it as learning the language of your starter so you can respond effectively to its needs.
The Most Frequent Sourdough Baking Problems and How to Avoid Them
Many new sourdough bakers encounter similar hurdles, often related to starter activity, dough handling, or baking technique. One of the most frequent issues is an inactive or sluggish starter, which fails to provide the necessary lift for the dough. This often stems from inconsistent feeding, incorrect water temperature, or unsuitable ambient temperature. Another common problem is dense or gummy bread, frequently caused by under-proofing, insufficient gluten development, or incorrect baking temperature. These basic sourdough starter troubleshooting problems solved are often simpler to fix than they seem, requiring minor adjustments rather than a complete overhaul.
Avoiding these pitfalls starts with understanding the fundamentals. For instance, maintaining a consistent feeding schedule (like a 1:1:1 ratio of starter:water:flour by weight, fed every 24 hours at room temperature) can prevent many starter issues. Proper dough handling involves gentle mixing and folding techniques to develop gluten without tearing the structure. Baking technique, such as ensuring sufficient steam in the oven, is critical for crust development and oven spring. By paying attention to these details from the outset, many common sourdough starter troubleshooting problems can be avoided entirely, leading to more successful bakes and less need for troubleshooting.
Common Sourdough Starter Problems and Solutions
Inactive Sourdough Starter: Identifying the Issue
An inactive sourdough starter is perhaps the most common frustration for new bakers. You'll notice this if your starter doesn't significantly increase in volume after feeding, lacks bubbles, or doesn't pass the "float test" (where a small dollop floats in water). The primary reason for inactivity is often insufficient food (flour), an imbalanced feeding ratio, or incorrect temperature. Wild yeast and bacteria thrive within specific temperature ranges, typically between 70°F and 80°F (21°C-27°C). If your kitchen is too cold, the microorganisms become dormant; if too hot, they can become overactive and exhaust their food supply too quickly.
Another factor contributing to an inactive starter is the type of flour or water used. Chlorinated tap water can inhibit microbial activity, so using filtered or bottled water is often recommended. Different flours have varying nutritional content; using a mix of all-purpose and whole wheat or rye flour can sometimes boost activity due to the higher nutrient levels in whole grains.
If your starter is several weeks or months old and suddenly becomes sluggish, it might simply need a more frequent or larger feeding to regain its vigor. Identifying which of these factors is the culprit is the first step in sourdough starter troubleshooting problems solved.
Troubleshooting a Sluggish Sourdough Starter: Step-by-Step Guide
When faced with a sluggish starter, a systematic approach to sourdough starter troubleshooting problems is best.
Feeding Schedule Adjustments for a Weak Starter
If your starter is weak, increasing the feeding frequency and/or the feeding ratio can help. Instead of feeding every 24 hours, try feeding every 12 hours for a few days. Also, consider a richer feeding ratio, such as 1:2:2 (1 part starter: 2 parts water: 2 parts flour) or even 1:3:3 by weight, to provide more food for the microorganisms.
For example, if you were feeding 25g starter with 25g water and 25g flour, try feeding 25g starter with 50g water and 50g flour. This extra food gives the yeast and bacteria more fuel to multiply and become more active.
Consistency is key when adjusting the feeding schedule. Ensure you are discarding a portion of the starter before each feed to maintain a manageable amount and concentrate the active microbes. Continue these more frequent, richer feedings until you see reliable doubling or tripling in volume within 4-6 hours after feeding at room temperature (around 75°F or 24°C). This indicates the starter is gaining strength. Once vigorous, you can gradually return to your usual feeding routine, perhaps starting with 1:1:1 and adjusting based on your needs.
Temperature Control for Sourdough Starter Activity
Temperature is a critical factor in starter activity. If your kitchen is cooler than the ideal 70-80°F (21-27°C) range, find a warmer spot. This could be on top of the refrigerator, inside a microwave (with the door ajar), or in a turned-off oven with the light on (which usually provides a gentle warmth around 80-85°F or 27-29°C). Using slightly warmer water (around 80-85°F or 27-29°C, not hot) during feeding can also give the starter a boost, especially in a cooler environment.
Conversely, if your kitchen is very warm, your starter might peak and fall quickly, appearing inactive when it's actually just passed its peak. In this case, feeding with cooler water (around 70°F or 21°C) or finding a slightly cooler spot can help slow down fermentation. Aim for a stable temperature range for your starter, as wild yeast and bacteria are sensitive to fluctuations. Monitoring the temperature with a simple thermometer can be very helpful in diagnosing and solving sourdough starter troubleshooting problems related to temperature.
Mold in Sourdough Starter: Is it Safe?
Discovering mold in your sourdough starter is a worrying sight, and it's crucial to know whether it's safe.
Identifying Safe vs. Unsafe Mold Growth
The vast majority of mold that appears on sourdough starter is not safe. Mold typically appears as fuzzy or dusty patches of various colors – green, black, orange, or sometimes bright white. This indicates contamination by undesirable fungi. A healthy starter should smell pleasant and yeasty-sour, and its surface should be free of any fuzzy growth. The only exception might be a very thin, powdery white layer that some mistake for mold, which could potentially be Kahm yeast, a harmless but undesirable surface growth. However, any fuzzy or colored mold is a definite sign of spoilage.
Kahm yeast, if present, usually forms a thin, wrinkled film on the surface and smells alcoholic or like nail polish remover, not fuzzy like mold. While not harmful, it can negatively impact the starter's flavor and activity. True mold, however, is a serious issue. Because the mold spores and their root structures (mycelia) permeate the entire starter, even if you scrape off the visible mold, the rest is likely contaminated. This is why most experts advise caution when dealing with moldy starters.
Salvaging a Moldy Sourdough Starter (When Possible)
In most cases, if you see any fuzzy or colored mold, it is safest to discard the entire starter and begin anew. The mold spores have likely spread throughout the mixture, and consuming them can be harmful. While some anecdotal accounts suggest scraping off mold, this is risky and generally not recommended by food safety experts. Starting a new starter from scratch is a relatively quick process (often taking 5-10 days) and ensures you have a safe, healthy culture.
However, if you are absolutely certain it is not mold but perhaps a thick layer of hooch with some discoloration or Kahm yeast, you might attempt to salvage it. Carefully scrape off the entire top layer (at least an inch deep) where the issue is visible. Transfer a small, clean portion from the very bottom or middle of the jar to a clean container. Feed this small portion with fresh flour and water, then continue regular feedings.
Watch it closely for a few days. If any fuzzy growth reappears, discard it immediately. This salvage attempt is only for non-mold issues or in rare, questionable cases; for clear fuzzy mold, discard and restart.
Watery or Separated Sourdough Starter: The Hooch Phenomenon

Seeing a layer of liquid on top of your sourdough starter is very common and is known as "hooch."
Understanding Hooch and its Implications
Hooch is a liquid that forms on top of an unfed sourdough starter. It's a byproduct of fermentation, specifically when the yeast and bacteria have consumed most of the available food (sugars in the flour). The alcohol and acids produced by the microbes separate from the thicker flour and water mixture. A thin, clear layer of hooch is usually nothing to worry about and simply indicates your starter is hungry. A thicker, darker hooch (sometimes black or greyish) indicates the starter has been neglected for a longer period.
While hooch isn't inherently harmful, its presence means the starter needs attention. A persistent, thick hooch can make the starter very acidic, potentially inhibiting yeast activity over time. The flavor of the hooch itself is usually strong and alcoholic or acidic, which can affect the taste of your bread if incorporated. Understanding hooch is a key part of sourdough starter troubleshooting problems solved related to feeding frequency and storage.
How to Correct a Watery Sourdough Starter
To correct a watery starter with hooch, you have two main options when feeding:
- Pour off the hooch: This is common, especially if the hooch is dark or you want to reduce acidity. Discard the hooch, then stir down the remaining starter and feed as usual (e.g., 1:1:1 ratio).
- Stir the hooch back in: If the hooch is clear and thin, you can simply stir it back into the starter before discarding and feeding. This incorporates some of the acidity and alcohol back into the starter, which some bakers prefer for flavor development.
After addressing the hooch, consider adjusting your feeding schedule or ratio. If hooch appears quickly (within 12-24 hours), your starter might be very active or not getting enough food. Try increasing the feeding ratio (e.g., from 1:1:1 to 1:2:2) or feeding more frequently. If storing in the refrigerator, hooch will form more slowly; just stir it in or pour it off before taking a portion to activate for baking.
Sour or Vinegar Smell: Adjusting the Acidity
A sourdough starter should have a pleasant, tangy aroma, but sometimes it can develop an overwhelmingly sour or vinegary smell.
Balancing Acidity in Your Sourdough Starter
The characteristic sourness of sourdough comes from lactic and acetic acids produced by the bacteria (Lactobacillus) in the starter. Lactic acid is milder, producing a yogurt-like tang, while acetic acid is sharper, contributing a vinegar-like smell, especially noticeable just after feeding or in older starters. An overly vinegary smell often indicates an imbalance, where acetic acid production is dominant, usually due to a hungry starter or one kept at cooler temperatures (acetic acid bacteria are often more active at slightly cooler temperatures than lactic acid bacteria).
Balancing the acidity involves adjusting the feeding routine and temperature. More frequent feedings with a higher ratio of flour to starter (e.g., 1:2:2 or 1:3:3) provide more food, encouraging yeast activity and preventing the starter from becoming excessively acidic too quickly. Feeding the starter when it's at or just past its peak, rather than waiting until it's collapsed and very hungry, also helps maintain a more balanced microbial population and less intense acidity.
Signs of Excessive Acidity and Corrective Measures
An extremely sour or vinegary smell is the primary sign of excessive acidity. The starter might also look very liquidy or separated even shortly after feeding, and its rising power might diminish over time. The texture might also become weaker or "ropey" in extreme cases, though this is less common. This is a key area in sourdough starter troubleshooting problems solved by adjusting care routines.
To correct an overly acidic starter, try a series of "refreshment" feedings. Discard most of the starter, leaving just a small amount (e.g., 10-15g). Feed this small amount with a generous ratio of fresh flour and water (e.g., 10g starter + 50g water + 50g flour). Repeat this process every 12 hours for a couple of days. Using slightly warmer water (78-80°F or 26-27°C) can also favor lactic acid bacteria over acetic acid bacteria. This dilutes the acidity and encourages a healthier balance of microbes, resulting in a sweeter, less pungent aroma and improved activity.
Troubleshooting Common Sourdough Bread Issues
Dense or Gummy Sourdough Bread: Reasons and Remedies
One of the most disappointing outcomes in sourdough baking is a loaf that is dense, heavy, and has a gummy texture inside. This is a very common issue requiring specific sourdough starter troubleshooting problems solved techniques for the dough itself. Several factors can contribute to this, often related to the dough's structure and fermentation process. Identifying the specific cause is key to fixing it in future bakes.
The most frequent culprits are insufficient gluten development, under-proofing, or issues during the baking process. Each of these impacts the dough's ability to trap gases produced by the yeast, resulting in a tight, heavy crumb instead of an open, airy one. Understanding how fermentation and gluten work together is crucial for preventing this common sourdough starter troubleshooting problem solved by adjusting dough handling and timing.
Insufficient Gluten Development: Techniques to Improve
Gluten is the protein network that gives bread dough its structure and elasticity, allowing it to capture carbon dioxide bubbles and rise. If the gluten isn't sufficiently developed, the dough won't hold its shape or volume during fermentation and baking. This can happen if the initial mixing isn't thorough, if the flour has low protein content, or if the dough isn't given enough time and manipulation (like folding) during the bulk fermentation phase.
To improve gluten development, ensure you mix the dough until it comes together smoothly. Techniques like autolyse (mixing flour and water and letting it rest for 20-60 minutes before adding the starter and salt) can help hydrate the flour and start gluten development. During bulk fermentation, perform a series of stretch and folds (typically 3-6 sets spaced 30-60 minutes apart) in the first few hours. This gently strengthens the gluten network without tearing it. Using a bread flour (which typically has 12-14% protein) instead of all-purpose flour can also provide a stronger gluten structure.
Under-Proofed Dough: Identifying and Correcting
Under-proofing occurs when the dough hasn't fermented long enough before baking. The yeast hasn't produced enough gas to adequately expand the gluten network. This results in a dense crumb, often with large, irregular holes surrounded by very tight areas. An under-proofed loaf might also have a thick, pale crust and limited oven spring. The dough might feel dense and not very airy when handled before baking.
Identifying under-proofing involves observing the dough's behavior during bulk fermentation and proofing. The dough should significantly increase in volume (often doubling or close to doubling, depending on the recipe and temperature) and feel light and airy. The "poke test" can help: gently poke the dough with a wet finger; if the indentation springs back immediately, it's likely under-proofed.
To correct, simply allow the dough more time to ferment at room temperature. Temperature is key; dough ferments slower in cooler conditions and faster in warmer ones. Pay attention to the dough's feel and volume increase rather than strictly adhering to times listed in recipes, as ambient temperature varies.
Oven Temperature and Baking Time Adjustments
Incorrect oven temperature and baking time can also contribute to dense or gummy bread, although often this is a secondary issue after proofing problems. If the oven temperature is too low, the loaf won't get sufficient oven spring before the crust sets, leading to a denser structure. If the baking time is too short, the internal moisture might not evaporate properly, resulting in a gummy texture.
Ensure your oven thermostat is accurate, perhaps by using an oven thermometer. Preheat your oven thoroughly, often for 30-60 minutes, especially if using a baking stone or Dutch oven. Baking at a high initial temperature (often 450-500°F or 230-260°C) helps achieve good oven spring. Baking time is also critical; ensure the internal temperature of the loaf reaches 205-210°F (96-99°C). If the crust is browning too quickly, you can tent the loaf with foil for the latter part of the bake while ensuring the inside cooks through.
Flat Sourdough Bread: Achieving Proper Rise
A flat sourdough loaf is another common disappointment, often linked to issues with the starter's strength or the dough's ability to hold its shape. This is a frequent sourdough starter troubleshooting problem solved by focusing on the fermentation process and dough handling. A loaf that spreads out rather than rising upwards indicates a lack of internal structure or insufficient leavening power.
Achieving a good rise requires a balance between the starter's activity, the dough's hydration level, and the shaping technique used. These elements work together to create a dough that is both airy from fermentation and strong enough to maintain its form during the final proof and initial moments in the hot oven (oven spring).
Weak Sourdough Starter: Testing and Strengthening
The foundation of a well-risen loaf is a strong, active sourdough starter. If your starter isn't consistently doubling or tripling in volume within 4-8 hours after feeding at room temperature, or if it fails the float test, it's likely too weak to leaven a loaf effectively. Using a weak starter is a primary reason for flat sourdough bread, making it a crucial point in sourdough starter troubleshooting problems solved.
Test your starter's strength by feeding it and observing its activity. Does it become bubbly and peak predictably? Does a small piece float in water when it's at its peak? If not, focus on strengthening it with consistent, regular feedings (perhaps 1:1:1 or 1:2:2 every 12-24 hours) at a warm temperature (75-80°F or 24-27°C) for several days until it shows consistent, vigorous activity. Only bake when your starter is active and at its peak.
Dough Hydration Levels: Achieving the Right Balance
Dough hydration refers to the ratio of water to flour in the dough. Higher hydration doughs (e.g., 75% hydration or more) can yield a more open crumb but are also more difficult to handle and shape. If a dough is too high in hydration for the flour type, the gluten development, or the baker's skill level, it can become a slack, unmanageable mass that spreads rather than holds its shape, leading to a flat loaf.
Finding the right hydration level is key. Beginners might start with lower hydration doughs (65-70%) which are easier to handle. If your dough consistently spreads into a pancake, consider reducing the hydration slightly in your next bake. Alternatively, if you're working with high hydration, ensure your flour is suitable (high protein bread flour) and that you are performing sufficient stretch and folds during bulk fermentation to build strength. A strong gluten network is essential to support higher hydration.
Shaping Techniques for Optimal Rise
Even with a strong starter and good gluten development, poor shaping can result in a flat loaf. The goal of shaping is to create tension on the surface of the dough (the "skin") while creating an internal structure that encourages vertical rise. If the shaping is too loose, the dough won't have the necessary surface tension to hold its structure during proofing and baking.
Practice shaping techniques like the boule (round loaf) or batard (oval loaf). Ensure you are creating a taut surface by gently pulling the dough towards you or tucking it underneath. For boules, rotating and pulling the dough can build tension. For batards, folding and rolling creates layers and surface tension. Proper shaping helps the loaf hold its form and directs the oven spring upwards. Using a well-floured banneton or proofing basket helps the dough maintain its shape during the final proof.
Over-Proofed Sourdough Dough: Recognizing and Rectifying
Over-proofing is the opposite of under-proofing; it occurs when the dough has fermented for too long. The yeast consumes all the available sugars, runs out of energy, and the gluten structure starts to break down from the prolonged acid exposure and gas expansion. This is a common sourdough starter troubleshooting problem solved by careful timing and observation.
An over-proofed dough loses its elasticity and strength. It might look very puffy initially but then starts to deflate or spread out. The resulting bread often has a poor structure, can be dense or gummy, and might have a pale crust because the sugars needed for browning have been depleted. Recognizing the signs is crucial to prevent a wasted bake.
Signs of Over-Proofing in Sourdough
Several indicators point to over-proofed dough. The dough's volume might have increased dramatically, but it might also show signs of collapsing or spreading in the proofing basket. The poke test is a reliable indicator: if you gently poke the dough and the indentation remains completely without springing back at all, it's likely over-proofed. The surface might appear slack and lack the tautness of a properly proofed dough.
The dough might also smell strongly acidic or alcoholic. When you turn it out of the proofing basket, it might spread out quickly rather than holding its shape. Scoring might be difficult, as the dough lacks tension, and the cuts might not open up cleanly. These signs collectively suggest that the fermentation has gone too far, and the dough's structure has been compromised.
Rescuing Over-Proofed Dough (If Possible)
Rescuing severely over-proofed dough for a standard loaf is challenging, as the gluten structure is often too degraded to support a good rise. However, you might be able to salvage it for other uses. If it's only slightly over-proofed, you can try baking it anyway; the resulting loaf might be flatter but still edible. Ensure your oven is very hot to give it the best chance of oven spring.
For significantly over-proofed dough, transforming it into something else is often the best approach. It can be gently degassed, shaped into flatbreads, pizza dough, or even incorporated (in small amounts) into a new batch of dough as an "old dough" or pâte fermentée to add flavor. Alternatively, it can be used to make sourdough crackers or fried dough. While you won't get a lofty loaf, these methods prevent waste and still utilize the fermented flavor.
Tough or Chewy Sourdough Crust: Finding the Sweet Spot
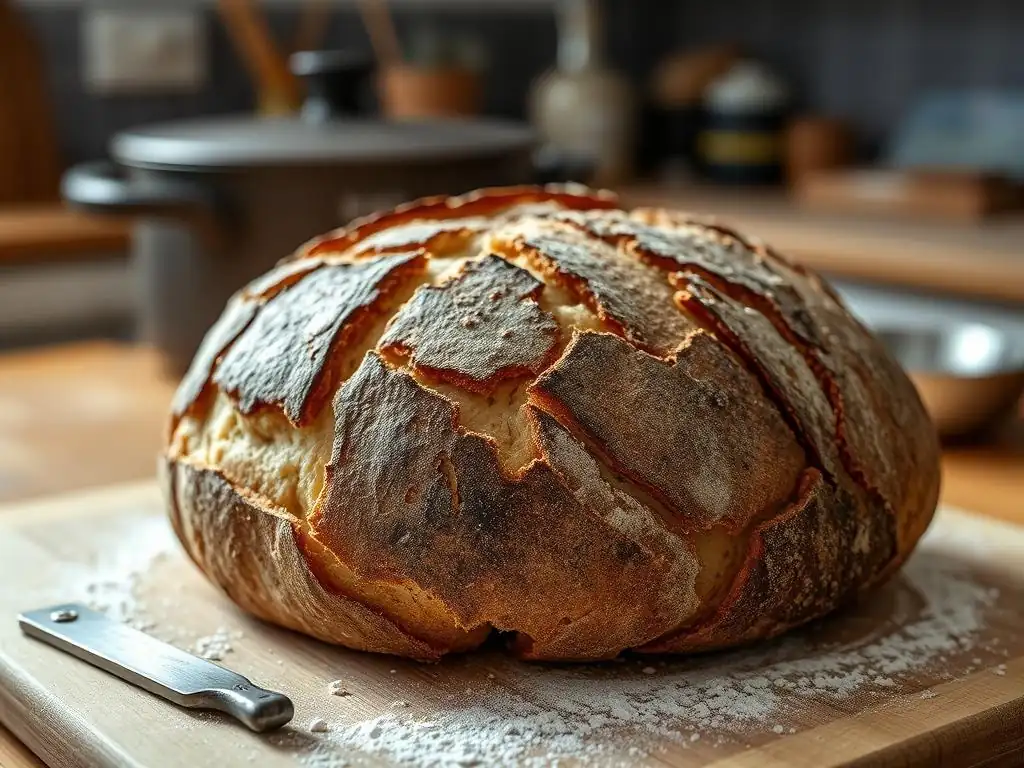
A signature of sourdough bread is its crispy, crackly crust. However, sometimes the crust turns out excessively thick, tough, or unpleasantly chewy. This is a sourdough starter troubleshooting problem solved by adjusting the baking environment and method. Achieving the perfect crust involves managing moisture and heat during the bake.
The primary factors influencing crust development are the presence of steam in the oven during the initial phase of baking and the method used to bake the loaf (e.g., on a stone or in a Dutch oven). Both play a significant role in how the crust forms and hardens.
Steam in the Oven: Creating a Perfect Crust
Steam is crucial for achieving a thin, crispy crust. In the hot oven, steam keeps the surface of the dough moist for the first 15-20 minutes. This prevents the crust from setting too quickly, allowing the dough to expand freely (oven spring). Once the crust sets prematurely without steam, it becomes rigid and restricts expansion, resulting in a denser loaf and a thicker, tougher crust.
There are several ways to create steam in a home oven. The most effective is often baking in a preheated Dutch oven with the lid on for the first part of the bake. The Dutch oven traps the moisture released by the dough itself, creating a steamy micro-environment.
If baking on a stone or baking steel, you can place a tray of hot water or ice cubes on a rack below the stone, or spray the oven walls with water (use caution!). Maintaining a steamy environment for the first 15-20 minutes at high heat is key before removing the steam source to allow the crust to dry and brown.
Baking Stone or Dutch Oven: Which is Best?
Both baking stones/steels and Dutch ovens can produce excellent sourdough crusts, but they achieve it differently and often require slightly different techniques.
- Dutch Oven: This is widely considered the easiest method for beginners to achieve a great crust and oven spring. The preheated Dutch oven provides intense radiant heat from all sides and, crucially, traps steam released by the dough. Bake with the lid on at a high temperature (e.g., 450-475°F or 230-245°C) for 20-30 minutes, then remove the lid and continue baking at a slightly lower temperature (e.g., 425-450°F or 220-230°C) until the crust is golden brown and the internal temperature is reached. This method reliably prevents a tough crust by ensuring sufficient steam.
- Baking Stone/Steel: Baking directly on a preheated stone or steel provides excellent heat transfer to the base of the loaf, promoting good oven spring. However, you must manually create steam in the oven environment (using water trays, spraying, etc.). Without adequate steam, the crust can set too quickly and become tough. This method offers more flexibility in loaf shape and size but requires more effort to manage the oven environment for crust development.
Experimenting with both methods can help you determine which works best with your oven and preferred results for solving sourdough starter troubleshooting problems related to crust.
Burnt Sourdough Bread: Preventing Over-Browning
While a deep, golden-brown crust is desirable, a burnt crust is not. This usually happens when the loaf is exposed to high heat for too long, or if parts of the loaf are too close to a heating element. This is a sourdough starter troubleshooting problem solved by managing oven temperature and placement.
Preventing over-browning requires attention to oven settings and potentially shielding the loaf as it bakes. The sugars in the crust caramelize and then burn at high temperatures.
Adjusting Oven Temperature for Even Baking
Ensure your oven temperature is accurate. An oven thermometer is invaluable here, as built-in thermostats can be off by 25-50°F (15-30°C). While a high initial temperature is good for oven spring, you often need to reduce the temperature after the initial steamy phase (e.g., dropping from 475°F to 425°F or 245°C to 220°C) to allow the inside to cook fully without burning the outside.
If the top crust is browning too quickly while the sides or bottom are still pale, your oven might have hotspots or the top heating element might be too powerful. Try lowering the rack position in your oven. If baking on a stone, ensure it's not too close to the top element. Using a Dutch oven helps mitigate this issue as the loaf is enclosed for the first part of the bake.
Using a Crust Shield to Prevent Burning
If specific parts of your loaf consistently burn (often the top), you can use a crust shield. After the initial browning is achieved (typically after removing the Dutch oven lid or the steam source), loosely tent the loaf with aluminum foil. This reflects radiant heat away from the crust, slowing down the browning process while allowing the interior to continue baking.
For loaves baked directly on a stone, you might also notice the bottom crust burns before the top is done. In this case, you can try placing a baking sheet on the rack below the stone for the latter part of the bake to shield the bottom from excessive heat. Monitoring the loaf's color throughout the bake and making timely adjustments with temperature or shielding are effective ways to prevent a burnt crust.
Advanced Sourdough Troubleshooting Tips
Dealing with Sticky Sourdough Dough
Sticky dough is a common challenge, especially with higher hydration recipes. While a certain level of stickiness is normal in well-hydrated dough, excessively sticky dough that is difficult to handle can be frustrating. This sourdough starter troubleshooting problem solved by understanding flour properties and dough handling techniques.
The stickiness is influenced by the flour used, the hydration level, and how the dough is handled during mixing and fermentation. It's not just about adding more flour, which can lead to a dry, dense loaf.
Flour Selection and its Impact on Dough Consistency
The type and quality of flour significantly affect dough consistency and stickiness. Different flours absorb water differently. High-protein bread flour can typically handle higher hydration levels than all-purpose flour because it forms a stronger gluten network capable of absorbing more liquid without becoming an unmanageable mess. Whole wheat and rye flours also absorb more water due to the bran and germ content, but they also contain enzymes and components that can interfere with gluten development, sometimes resulting in stickier doughs despite higher absorption.
If your dough is consistently too sticky, consider the flour you're using. If using all-purpose, try switching to a bread flour. Ensure your flour is relatively fresh, as older flour might absorb less water. Experimenting with different flour brands can also reveal differences in water absorption. Ultimately, the "right" hydration is relative to the flour you use and your comfort level handling stickier doughs.
Autolyse Technique: Enhancing Dough Hydration
The autolyse technique can be a powerful tool for managing sticky dough and improving hydration without making the dough harder to handle. Autolyse involves mixing just the flour and water from the recipe and letting it rest for 20-60 minutes (or sometimes longer) before adding the starter and salt.
During the autolyse rest, the flour becomes fully hydrated, and enzymes naturally present in the flour begin to break down proteins, kickstarting gluten development without any mechanical mixing. This initial gluten development makes the dough smoother, more extensible, and less sticky once the starter and salt are added and mixing/folding begins. It allows you to potentially use higher hydration levels more effectively or make your standard dough easier to work with, addressing a common sourdough starter troubleshooting problem solved by this simple rest period.
Diagnosing and Correcting Sourdough Bread Scoring Problems
Scoring (lame) the dough before baking is not just for aesthetics; it serves a crucial purpose. It controls where the loaf expands during oven spring, allowing the dough to rise upwards predictably instead of bursting unevenly. Problems with scoring, such as cuts that don't open or cuts that tear the dough, indicate issues with the dough's proofing or the scoring technique itself. This is a sourdough starter troubleshooting problem solved by technique and timing.
Poor scoring can lead to a misshapen loaf, reduced oven spring, and a less attractive crust. Diagnosing the issue involves looking at the dough's surface tension and the tool used.
Proper Scoring Techniques for Oven Spring
Proper scoring is performed on the dough just before it goes into the hot oven. The goal is a quick, clean cut that is about 1/2 inch deep. The angle of the blade matters: holding the blade at an angle (around 30-45 degrees) creates a "ear" or flap of crust that bakes up beautifully. Scoring too shallowly might not provide enough release for the dough to expand, while scoring too deeply can cause the loaf to spread too much.
If your scores aren't opening properly, the dough might be under-proofed (too much spring, causing the score to seal) or over-proofed (not enough tension to force the score open). The dough's surface tension is also key; ensure you've created a taut surface during shaping. Cold proofing the shaped dough in the refrigerator for several hours (or overnight) firms up the surface, making it much easier to score cleanly.
Choosing the Right Scoring Blade
The sharpness of your scoring blade is paramount. A dull blade will drag and tear the dough's surface instead of making a clean cut. This inhibits proper oven spring and results in ragged, unattractive scores. The traditional tool for scoring is a lame (pronounced "lahm"), which is a handle fitted with a razor blade.
Ensure you are using a sharp razor blade, preferably a new one for every few loaves. Double-edged razor blades are common and can be used on both sides. There are different types of lames: straight lames are good for single, deep cuts (like a baguette), while curved lames are better for creating the ear on a boule or batard. Using a sharp blade, moving confidently and quickly, and practicing on scrap dough are the best ways to master scoring and solve this sourdough starter troubleshooting problem.
Understanding Sourdough Bread Crumb Structure
The crumb structure refers to the interior texture of the bread – the size and distribution of the air pockets (alveoli). Bakers often aim for an open, airy crumb with irregular holes, characteristic of well-fermented sourdough. However, sometimes the crumb is tight and uniform, or dense and gummy. Understanding crumb structure is part of solving sourdough starter troubleshooting problems related to fermentation and handling.
The crumb is a direct reflection of the dough's fermentation, gluten development, and hydration. Achieving a desired crumb requires controlling these factors throughout the process.
Open Crumb vs. Tight Crumb: Achieving Your Desired Result
An open crumb is characterized by large, irregular air pockets. It typically results from a strong, active starter, sufficient gluten development in a well-hydrated dough, and proper bulk fermentation and proofing that allows gas to expand the network. An open crumb is often sought after for its texture and appearance.
A tight crumb has smaller, more uniform holes. This can result from lower hydration doughs, less active starters, insufficient gluten development, or degassing the dough too much during shaping. While less dramatic than an open crumb, a uniform, moist crumb is still desirable and appropriate for many bread types. The goal isn't always the most open crumb possible, but rather a crumb that matches your preference and the dough's potential.
Factors Affecting Crumb Development
Several factors collectively influence crumb structure:
- Starter Activity: A vigorous starter produces more gas, leading to a more open crumb.
- Hydration: Higher hydration doughs generally facilitate a more open crumb because the wetter environment allows for more gas expansion and makes it easier to achieve extensibility with less mixing.
- Gluten Development: A strong, well-developed gluten network is essential to trap the gases produced during fermentation and support the structure of large alveoli.
- Bulk Fermentation: Allowing sufficient bulk fermentation time is critical. This is when most of the gas production and initial structure development occurs. Dough that hasn't fermented enough during bulk will have a tight crumb.
- Shaping: Gentle handling during shaping is important. Excessive degassing can collapse the internal structure built during bulk fermentation, leading to a tighter crumb.
- Proofing: Proper final proofing is also necessary. Under-proofed dough has a tight crumb; over-proofed dough can collapse, leading to a dense, gummy crumb.
- Baking: High oven temperature and sufficient steam contribute to good oven spring, which expands the crumb structure.
By controlling these variables, you can influence whether you achieve a more open or tighter crumb, solving sourdough starter troubleshooting problems related to the final texture.
Maintaining a Healthy Sourdough Starter for Long-Term Success

Consistent, successful sourdough baking relies fundamentally on a healthy, active sourdough starter. Think of your starter as a pet that needs regular feeding and care. Proper maintenance is the best way to avoid many common sourdough starter troubleshooting problems solved before they even happen.
Keeping your starter happy ensures it always has the vigor needed to leaven your bread effectively, providing reliable results batch after batch. It's a simple routine that pays dividends in your baking.
Regular Feeding and Refreshing
Regular feeding is the cornerstone of a healthy starter. The frequency depends on how you store it. A starter kept at room temperature (around 70-75°F or 21-24°C) needs to be fed at least every 24 hours, ideally when it has peaked or just started to fall. A common feeding ratio is 1:1:1 (starter:water:flour by weight), though 1:2:2 or 1:3:3 can be used to build strength or if feeding less frequently. For example, discarding down to 50g and feeding with 50g water and 50g flour.
If you don't bake frequently, storing your starter in the refrigerator is a great option. Cold temperatures slow down microbial activity significantly. A refrigerated starter typically only needs to be fed once a week or even every two weeks. Before baking, take a small amount of the refrigerated starter and perform 1-3 feedings at room temperature over 12-24 hours until it becomes active and bubbly again. This "refreshing" process wakes up the microbes and ensures your starter is ready to work.
Proper Storage Techniques
Choosing the right storage method depends on your baking habits. For daily or every-other-day baking, keep your starter at room temperature in a clean jar with a loose-fitting lid or covered with plastic wrap secured with a band. This allows gases to escape but prevents the starter from drying out.
For less frequent baking (weekly or less), refrigeration is best. Store your starter in a clean jar with a lid in the back of the refrigerator where the temperature is most stable. Ensure the starter is well-fed before refrigerating. Some bakers keep a smaller amount (e.g., 25-50g) in the fridge to minimize discard. You can also dry a portion of your starter or freeze it for long-term storage and backup, which are excellent safeguards against needing to restart if something goes wrong with your working starter (like mold).
Recognizing Signs of a Healthy Starter
A healthy sourdough starter exhibits predictable behavior after feeding. At room temperature (70-75°F), it should become visibly bubbly and increase significantly in volume (often doubling or tripling) within 4-8 hours, depending on the ratio. It should have a pleasant, tangy, slightly yeasty or yogurt-like aroma, not strong acetone or vinegar. When it's at its peak activity, a small dollop of the starter should float in a cup of water (the float test).
Observing these signs regularly helps you understand your starter's rhythm and health. Consistency in its behavior after feeding is a strong indicator that it's robust and ready to leaven bread. If you notice deviations – less rise, unusual smells, or lack of bubbles – it's a signal to troubleshoot using the methods discussed earlier for sourdough starter troubleshooting problems solved by adjusting feeding or temperature.
Conclusion: Mastering Sourdough Troubleshooting for Consistent Baking
Embarking on the sourdough journey is a rewarding process that teaches patience and observation. While challenges like flat loaves, dense crumbs, or sluggish starters are common, they are rarely insurmountable. The key to consistent sourdough baking lies in understanding the fundamental principles behind fermentation and dough handling, and knowing how to apply simple sourdough starter troubleshooting problems solved techniques when things don't go exactly as planned.
By learning to read your starter, understand dough development, and control your baking environment, you gain the confidence to tackle issues head-on. Every "failed" loaf or inactive starter is a valuable learning experience that brings you closer to baking consistently beautiful and delicious sourdough bread. Don't be discouraged by setbacks; they are part of the process.
Key Takeaways for Successful Sourdough Baking
To consistently bake great sourdough and effectively handle sourdough starter troubleshooting problems solved:
- Maintain a Healthy Starter: Feed it regularly, store it appropriately, and pay attention to its activity and smell. A strong starter is the foundation.
- Understand Dough Development: Learn about gluten development, hydration, and the stages of fermentation (bulk fermentation and proofing). Observe your dough's feel and volume increase.
- Master Baking Techniques: Control oven temperature, use steam effectively, and practice shaping and scoring for optimal rise and crust.
- Be Patient and Observe: Sourdough is a living process influenced by variables like temperature and flour type. Learn to adjust based on what your starter and dough are telling you, rather than strict recipe times.
- Troubleshoot Systematically: When a problem arises, identify the likely cause (starter, dough, or bake) and apply targeted solutions.
Further Resources for Sourdough Expertise on BakeWithEase.com
Solving sourdough starter troubleshooting problems is an ongoing learning process. BakeWithEase.com offers a wealth of resources to help you deepen your sourdough knowledge. Explore our collection of beginner-friendly sourdough recipes, detailed guides on starter maintenance, and articles specifically addressing various baking techniques like stretching and folding, shaping, and baking in a Dutch oven.
We provide step-by-step tutorials and tips to guide you through every stage of the sourdough process. Whether you're looking to refine your starter feeding routine, understand the nuances of dough hydration, or troubleshoot specific baking issues, you'll find the information you need to improve your skills and bake with confidence. Keep practicing, keep learning, and enjoy the delicious rewards of mastering sourdough.
Frequently Asked Questions
What is the most common problem people encounter when starting a sourdough starter?
The most common issue is lack of activity - the starter doesn't rise or bubble. This often happens because the wild yeasts are still establishing themselves and need more time to develop.
How do I know if my sourdough starter is ready to bake with?
A ready sourdough starter will have doubled in size within a few hours after feeding and have a bubbly, airy texture. It should also have a slightly sour, tangy aroma.
What can I do if my sourdough starter smells bad?
A bad smell, like rancid butter or vinegar, usually indicates the presence of undesirable bacteria. Try discarding most of the starter and feeding it regularly with fresh flour and water.
My sourdough starter is developing a dark liquid on top. What does this mean?
This liquid, called hooch, is a sign that the starter is hungry. It means you need to feed it more frequently or increase the amount of flour and water you are using in each feeding.
What is the best type of flour to use for feeding my sourdough starter?
While you can use all-purpose flour, rye or whole wheat flour often gives the starter a boost due to their higher nutrient content. Experiment to see what works best for your specific starter and environment.
Final Reflection: The Ever-Evolving Journey of Sourdough
The seemingly simple act of nurturing a sourdough starter mirrors the complexities of life itself; its unpredictable nature demands patience, understanding, and a willingness to adapt. From the initial excitement of bubbling activity to the occasional disheartening slump, the journey of sourdough baking is a testament to the power of perseverance and the rewards of mindful practice. This article has explored some common hurdles, offering practical solutions to guide you through the process, but the true mastery lies in understanding the underlying principles.
The enduring appeal of sourdough extends far beyond the delicious bread it produces; it's a connection to a time-honored tradition, a tangible link to the past. It's a process that fosters a deep appreciation for the natural world and the intricate balance of its ecosystems. Bread making is a metaphor for life. You put in the work, you nurture the ingredients, and you reap the rewards.
This quote, though not directly about sourdough, perfectly encapsulates the essence of this baking journey, highlighting the patience and dedication required. The ongoing exploration and sharing of knowledge within the sourdough community further underscores its cultural significance, a testament to the enduring power of simple ingredients and shared experience.
Now, consider your own sourdough journey. Have you experienced the highs and lows? What lessons have you learned from your successes and failures? Don't be afraid to experiment, to embrace the unexpected, and to learn from every rise and fall. Your sourdough starter, much like your own personal growth, is a dynamic entity constantly evolving. Embrace the process, celebrate the successes, and learn from the setbacks. The journey itself is the reward, and the bread, a delicious testament to your perseverance.
Unleash Your Inner Sourdough Baker!
Thanks for taking the time to explore the world of sourdough baking! We hope you now feel more confident tackling those tricky sourdough issues. Ready to put your newfound knowledge into practice?
- Bake your best loaf yet! Try out the techniques we discussed, and see the difference it makes in your next sourdough creation. Even a small tweak can yield incredible results!
- Share your sourdough journey! Show off your beautiful loaves (or even your bloopers!) on social media and tag us – we’d love to see them!
- Consider journaling your baking process. Track your starter activity, hydration levels, and fermentation times to further refine your technique over time. It's surprisingly rewarding!
What unique sourdough adventure will you embark on next?