
Bake a Beautiful Basic Sourdough Loaf Today with This Recipe

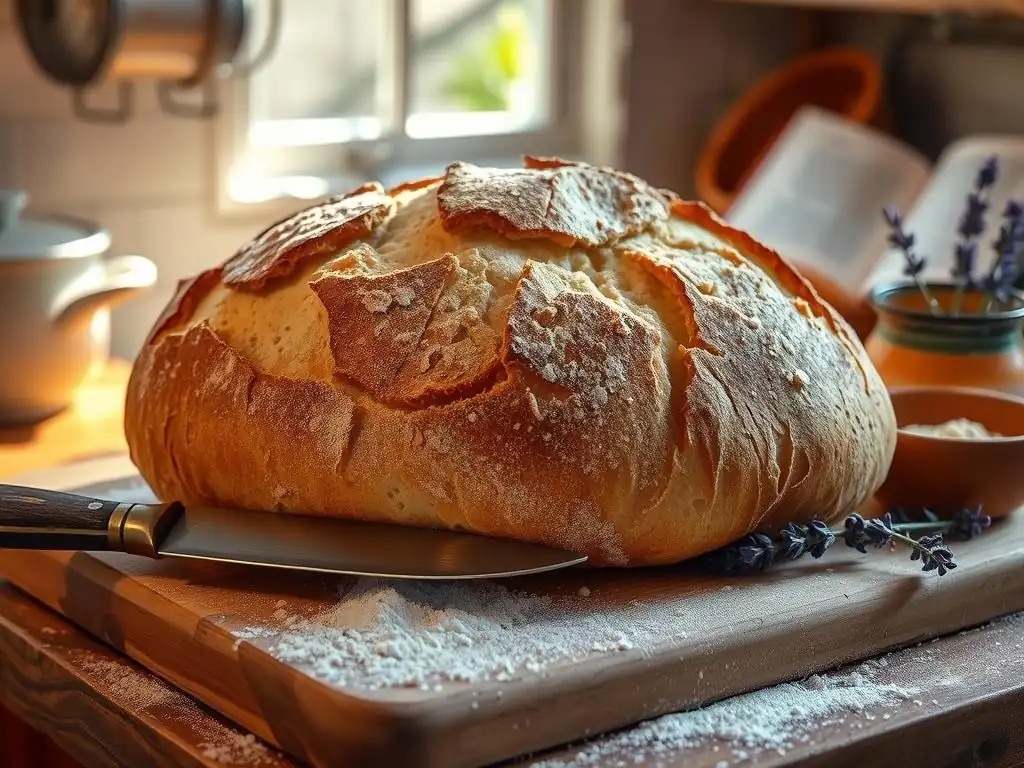
Welcome to BakeWithEase, your guide to unlocking the joy of baking! Ever dreamt of creating that perfect, crusty loaf? While this article dives into an intermediate baking journey, specifically our easy beginner sourdough bread recipe, don't be intimidated! We'll guide you through each step, demystifying the process and setting you on the path to sourdough success. Ready to experience the magic of homemade sourdough? Let's get baking!
- Introduction to Easy Beginner Sourdough Bread Baking
- Gathering Your Ingredients for Sourdough Success
-
Step-by-Step: Baking Your Easy Beginner Sourdough Bread
- Step 1: Preparing Your Sourdough Starter for Baking
- Step 2: Autolyse - Hydrating the Flour
- Step 3: Mixing the Dough - Combining Ingredients
- Step 4: Bulk Fermentation - The First Rise
- Step 5: Shaping Your Sourdough Loaf
- Step 6: Proofing - The Second Rise
- Step 7: Scoring Your Sourdough Loaf
- Step 8: Baking Your Sourdough Bread
- Step 9: Cooling and Enjoying Your Freshly Baked Sourdough
- Troubleshooting Common Sourdough Baking Problems
- Tips for Mastering Your Easy Sourdough Bread Recipe
- Conclusion: Enjoying the Journey of Sourdough Baking
- Frequently Asked Questions
- Final Reflection: The Humble Loaf, A Gateway to Greater Things
- Unleash Your Inner Baker: Start Your Sourdough Journey Now!
Introduction to Easy Beginner Sourdough Bread Baking
Baking your own bread can seem like a daunting task, especially when you hear terms like "starter," "autolyse," and "bulk fermentation." But crafting a delicious loaf of sourdough from scratch is incredibly rewarding, and it's more accessible than you might think. This guide is specifically designed to walk you through an easy beginner sourdough bread recipe, breaking down each step into manageable parts so you can bake with confidence.
We believe that everyone can bake fantastic bread at home. This easy beginner sourdough bread recipe focuses on simple techniques and clear instructions, making the process enjoyable rather than intimidating. Forget the complex jargon for a moment; we're here to help you mix, shape, and bake a truly beautiful and tasty loaf that you'll be proud to share (or keep all to yourself! ).
Why Sourdough? The Benefits of Baking Your Own Bread
Baking sourdough offers a multitude of benefits beyond just the incredible taste and aroma. For starters, it can be more digestible for some people compared to bread made with commercial yeast. The slow fermentation process helps to break down gluten and phytic acid, potentially making nutrients more available and reducing digestive discomfort. Many individuals find that switching to sourdough improves their gut health.
Furthermore, baking your own sourdough is a deeply satisfying creative process. From nurturing your starter to watching the dough transform and bloom in the oven, each stage is a small victory. It's also often more economical in the long run than buying artisanal loaves regularly. Plus, you have complete control over the ingredients, ensuring your bread is free from additives or preservatives often found in store-bought varieties. Mastering an easy beginner sourdough bread recipe is a skill that keeps on giving.
This Easy Sourdough Recipe: Perfect for Beginners
This particular easy beginner sourdough bread recipe has been refined to simplify the process without sacrificing quality. We've focused on clear timing suggestions and straightforward techniques that don't require years of baking experience. Instead of complex folds or multiple proofing stages, we guide you through the essential steps needed to achieve a great result on your first few attempts.
The goal is to build your confidence with sourdough baking. We'll explain the why behind each step, from feeding your starter to scoring the loaf, using simple language. By following this easy beginner sourdough bread recipe, you'll learn the fundamental principles of sourdough baking, setting a solid foundation for future baking adventures and more advanced techniques should you choose to explore them.
Gathering Your Ingredients for Sourdough Success
Before you dive into the mixing bowl, let's talk about what you'll need. Sourdough baking relies on just a few key ingredients, but their quality and preparation are crucial. Having everything measured and ready before you begin will make the process much smoother.
Think of this stage as setting the stage for your baking performance. Gathering your ingredients isn't just about having them present; it's about understanding their role in the dough's development. Using a kitchen scale for precise measurements is highly recommended for consistent results in any easy beginner sourdough bread recipe.
Essential Ingredients for a Basic Sourdough Loaf
Making a basic sourdough loaf requires surprisingly few items: active sourdough starter, flour, water, and salt. The magic comes from the interaction of these simple components under the right conditions. While the list is short, understanding each ingredient is key.
Using high-quality ingredients can make a noticeable difference in the final flavor and texture of your bread. For this easy beginner sourdough bread recipe, we'll focus on readily available types of flour that are suitable for novice bakers.
Sourdough Starter: The Heart of Your Bread
Your sourdough starter is a living culture of wild yeast and bacteria, responsible for leavening your bread and providing its characteristic tangy flavor. For this easy beginner sourdough bread recipe, it's essential that your starter is active and bubbly. An active starter should have been fed within the last 4-12 hours and roughly doubled in size.
To check if your starter is ready, perform the float test: drop a small spoonful into a glass of water. If it floats, it's active and ready to bake! If it sinks, it might need another feeding or more time to become active. A good starter for baking typically has a pleasant, slightly tangy aroma, not an overly strong, vinegary smell.
Flour Power: Choosing the Right Flour for Sourdough
For a basic sourdough loaf, a strong bread flour is often recommended due to its high protein content (typically 12-14%). This protein forms gluten, which provides the structure needed to trap the gases produced by the starter, giving your bread its rise and open crumb. All-purpose flour (around 10-12% protein) can also work, especially for an easy beginner sourdough bread recipe, but it might result in a slightly less lofty loaf.
Using a mix of bread flour and a small percentage of whole wheat or rye flour (say, 10-20%) can add depth of flavor and nutritional value. However, for your first easy beginner sourdough bread recipe, sticking primarily to white bread flour is a good way to simplify things and focus on the process. Ensure your flour is fresh and stored properly.
Water Temperature: Crucial for Sourdough Development
The temperature of your water significantly impacts the dough's temperature, which in turn affects the fermentation rate. For sourdough, using lukewarm water is generally best, typically between 75°F and 85°F (24°C to 30°C). This temperature range is ideal for activating the wild yeast and bacteria in your starter, encouraging them to work efficiently.
Water that is too cold will slow fermentation down significantly, potentially leading to a dense loaf. Water that is too hot can kill the microorganisms in your starter, stopping fermentation altogether. Using a thermometer to check your water temperature can help ensure consistency, especially when you're starting out with an easy beginner sourdough bread recipe.
Salt: Enhancing Flavor and Controlling Fermentation
Salt is more than just a flavor enhancer in bread; it also plays a critical role in controlling the fermentation rate and strengthening the gluten structure. Without salt, the dough can ferment too quickly and become sticky and difficult to handle. The salt helps to slow down the yeast activity, allowing the desirable flavors to develop over a longer period.
For most sourdough recipes, including this easy beginner sourdough bread recipe, fine sea salt or kosher salt is preferred over iodized table salt, as iodine can sometimes interfere with yeast activity. The typical salt percentage in sourdough is around 1.8% to 2.2% of the total flour weight. For example, using 500g of flour would mean adding about 9-11g of salt.
Equipment You'll Need for Your Sourdough Bake
You don't need a professional bakery setup to make great sourdough, but a few key tools will make the process much easier and more successful. A reliable kitchen scale is arguably the most important piece of equipment for precise measurements. A large mixing bowl, preferably clear so you can observe the dough's development, is also essential.
Other useful tools include a dough scraper for handling the sticky dough, a proofing basket (banneton) or a bowl lined with a floured towel for the second rise, and a sharp razor blade or lame for scoring. For baking, a Dutch oven is highly recommended as it creates a steamy environment that helps the loaf achieve maximum oven spring and a beautiful crust. While you can bake on a baking stone, a Dutch oven is often considered the easiest method for beginners.
Step-by-Step: Baking Your Easy Beginner Sourdough Bread
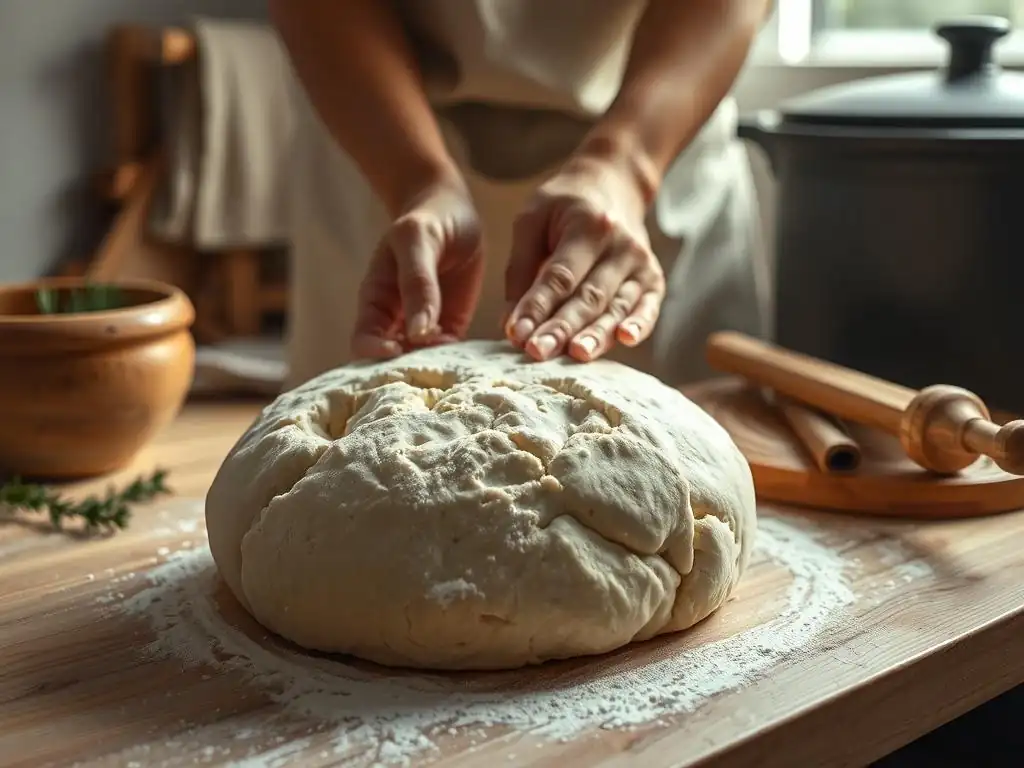
Now that you have your ingredients and equipment ready, let's get started on the baking process. Follow these steps carefully, and you'll be well on your way to baking your first beautiful sourdough loaf using this easy beginner sourdough bread recipe. Remember, patience is key in sourdough baking!
Don't be discouraged if your first loaf isn't perfect. Sourdough baking is a skill that improves with practice. Pay attention to how the dough feels and behaves at each stage; this sensory feedback is invaluable.
Step 1: Preparing Your Sourdough Starter for Baking
The first step is ensuring your sourdough starter is active and ready to leaven your bread. This usually involves feeding it 4-12 hours before you plan to mix your dough. Feed your starter with equal parts (by weight) of starter, flour, and water. For example, if you want 100g of active starter for your recipe, feed 20g of your mature starter with 40g of flour and 40g of water.
Leave the freshly fed starter in a warm spot (around 75-80°F or 24-27°C) until it has at least doubled in size and looks bubbly and airy. This is typically 4-8 hours depending on the temperature and the starter's vigor. Using a jar with straight sides and marking the level after feeding can help you easily track its rise.
Assessing Starter Activity: Ensuring a Good Rise
An active starter for baking should show significant signs of life. As mentioned, it should double or even triple in volume within a few hours of feeding. You'll see numerous bubbles throughout the starter, not just on the surface. The surface itself will often be domed.
The float test is a simple and effective way to confirm readiness. Gently scoop a small amount of starter (about a teaspoon) and drop it into a glass of room-temperature water. If the starter floats on the surface, it's full of gas and ready to leaven your dough. If it sinks, it needs more time to ferment or perhaps another feeding to become more active.
Step 2: Autolyse - Hydrating the Flour
Autolyse is a simple technique where you mix just the flour and water from your recipe and let it rest before adding the starter and salt. This step allows the flour to fully hydrate, which helps in the development of gluten without the need for intensive kneading. For this easy beginner sourdough bread recipe, a rest period of 30 to 60 minutes is usually sufficient.
Simply combine the measured flour and water in your mixing bowl and mix them together with your hands or a spoon until no dry bits of flour remain. The mixture will look shaggy and rough. Cover the bowl and let it rest at room temperature. This resting period makes the dough much easier to work with later on.
Why Autolyse? Improved Texture and Flavor
The autolyse step allows enzymes in the flour to begin breaking down starches into sugars, which provides food for the yeast during fermentation. More importantly for dough handling, it allows the gluten proteins to start aligning and hydrating on their own. This passive development means less kneading is required later to achieve a strong gluten network.
A proper autolyse leads to a dough that is more extensible (stretchy) and elastic, making shaping easier and contributing to a better crumb structure in the final loaf. While not strictly mandatory for an easy beginner sourdough bread recipe, incorporating a 30-minute autolyse significantly improves the dough's handling and the bread's texture.
Step 3: Mixing the Dough - Combining Ingredients
After the autolyse period, it's time to incorporate your active sourdough starter and the salt into the dough. Add the measured starter and salt on top of the shaggy dough. The easiest way to mix these in is by hand using a technique called "pinching and folding."
Dip your hand in a little water to prevent sticking, then pinch sections of the dough and stretch them up and fold them back over the starter and salt. Repeat this motion, rotating the bowl, until the starter and salt are evenly distributed throughout the dough. This might take 3-5 minutes. The dough will become smoother but still sticky.
Gentle Mixing Techniques for Sourdough
Unlike conventional bread dough that often requires vigorous kneading, sourdough benefits from gentler techniques that build strength gradually. After incorporating the starter and salt, you can perform a few sets of "stretch and folds." Wet your hands slightly, grab one side of the dough, stretch it upwards gently, and fold it back over the center. Rotate the bowl and repeat this 3-4 times.
This initial mixing and a few gentle stretch and folds help to fully integrate all the ingredients and begin developing the gluten network. The dough might feel a bit resistant at first, but as you repeat the stretch and folds during bulk fermentation, it will become more pliable and smooth.
Step 4: Bulk Fermentation - The First Rise
Bulk fermentation, also known as the first rise, is the most crucial stage for flavor and structure development in sourdough. This is the period from when you finish mixing all ingredients until you divide and shape the dough. During this time, the yeast produces carbon dioxide gas, causing the dough to rise, and the bacteria produce organic acids, creating the characteristic sourdough tang.
For an easy beginner sourdough bread recipe, bulk fermentation typically takes 3-6 hours at room temperature (around 70-78°F or 21-26°C), but timing is highly dependent on temperature and starter activity. The dough should increase significantly in volume, ideally by 50-75%. You'll also notice bubbles on the surface and around the edges.
Understanding Bulk Fermentation and its Importance
During bulk fermentation, you'll perform several sets of stretch and folds to build strength and structure in the dough. These folds redistribute the yeast and bacteria, equalize the temperature, and develop gluten. For this easy beginner sourdough bread recipe, performing 3-4 sets of stretch and folds during the first 2-3 hours of bulk fermentation is recommended.
Perform a set of stretch and folds every 30-45 minutes. After the final set of folds, let the dough rest undisturbed for the remainder of the bulk fermentation period. Observing the dough's volume increase and texture is more important than sticking rigidly to a time; it should feel airy and slightly puffy.
Stretch and Folds: Building Strength and Structure
Stretch and folds are a simple yet effective way to develop gluten without kneading. With slightly wet hands, lift the dough from one side, stretching it upwards, and fold it back over the rest of the dough. Rotate the bowl about a quarter turn and repeat the process. Do this 3-4 times per set.
These movements help to align the gluten strands, creating a stronger network capable of holding the gas produced by the yeast. As you perform subsequent sets, you'll notice the dough becoming smoother, more elastic, and holding its shape better. Stop doing folds when the dough feels strong and holds tension.
Step 5: Shaping Your Sourdough Loaf
Once bulk fermentation is complete, it's time to shape your dough into a loaf. This step is crucial for creating tension on the surface, which helps the bread hold its shape during proofing and baking and contributes to a good oven spring. Gently turn the dough out onto a lightly floured surface.
For an easy beginner sourdough bread recipe, simple shaping techniques are best. You can shape the dough into a round loaf (a boule) or an oval loaf (a batard). The key is to create a taut surface on the dough while building some internal tension. Avoid using too much flour on your surface, as this can prevent the dough from gripping and developing tension.
Shaping Techniques for Beginners
For a boule, gently pre-shape the dough into a rough circle or rectangle, let it rest for 15-20 minutes (this is called a bench rest), and then perform the final shape. For the final shape, gently stretch the dough into a rough rectangle. Fold the top third down to the center, then the bottom third up over that. Gently fold the dough in half lengthwise and use your hands to gently pull and tuck the dough underneath, creating a taut skin on top.
For a batard, follow a similar process but fold the dough into a tighter cylinder or oval shape during the final shaping. The goal is to create a smooth, tight surface. Place the shaped dough seam-side up into your floured proofing basket or bowl.
Creating Tension for a Beautiful Round Loaf
Creating surface tension is vital. As you perform the final shaping, imagine pulling the dough towards you slightly while tucking the bottom edge underneath. This action stretches the top surface, making it smooth and taut. This tension helps the loaf maintain its structure during the final rise and bake.
A well-shaped loaf will hold its form better. If the dough is too relaxed or spreads out quickly after shaping, it might need more bulk fermentation or more effective shaping techniques. Don't worry if your first few shaping attempts aren't perfect; it takes practice to get the feel for it.
Step 6: Proofing - The Second Rise
Proofing, also known as the second rise or final fermentation, is the period after shaping the dough and before baking. During proofing, the shaped dough continues to ferment, developing more flavor and accumulating gas. The most common method for an easy beginner sourdough bread recipe is cold proofing in the refrigerator.
Place the shaped dough in its proofing basket (seam-side up if using a banneton) and cover it with plastic wrap or a towel. Refrigerate for 8 to 18 hours. Cold proofing slows down fermentation significantly, allowing flavors to deepen and making the dough easier to score and handle when cold.
Proofing Basket (Banneton) Recommendation for Beginner Sourdough
A proofing basket, or banneton, is a baker's best friend for proofing sourdough. These baskets, typically made of rattan or cane, are lined with linen or heavily floured to prevent sticking. They support the dough during proofing, helping it maintain its shape and creating a lovely pattern on the crust.
If you don't have a banneton, you can use a regular bowl lined with a clean linen or cotton towel. Make sure to flour the towel generously with rice flour (which is less likely to stick than wheat flour) or a mix of rice and wheat flour. Place the shaped dough seam-side up into the floured towel-lined bowl.
Cold Proofing vs. Room Temperature Proofing
Cold proofing in the refrigerator (around 38-40°F or 3-4°C) is highly recommended for beginners. It provides a wide window of time (8-18 hours or even longer) for the final rise, reducing the risk of over-proofing. The cold dough is also firmer and easier to score just before baking.
Room temperature proofing is faster (typically 1-3 hours) but requires more careful timing to avoid over-proofing, which can cause the loaf to collapse in the oven. For your first easy beginner sourdough bread recipe, stick with the cold proofing method for more predictable results and better handling properties.
Step 7: Scoring Your Sourdough Loaf
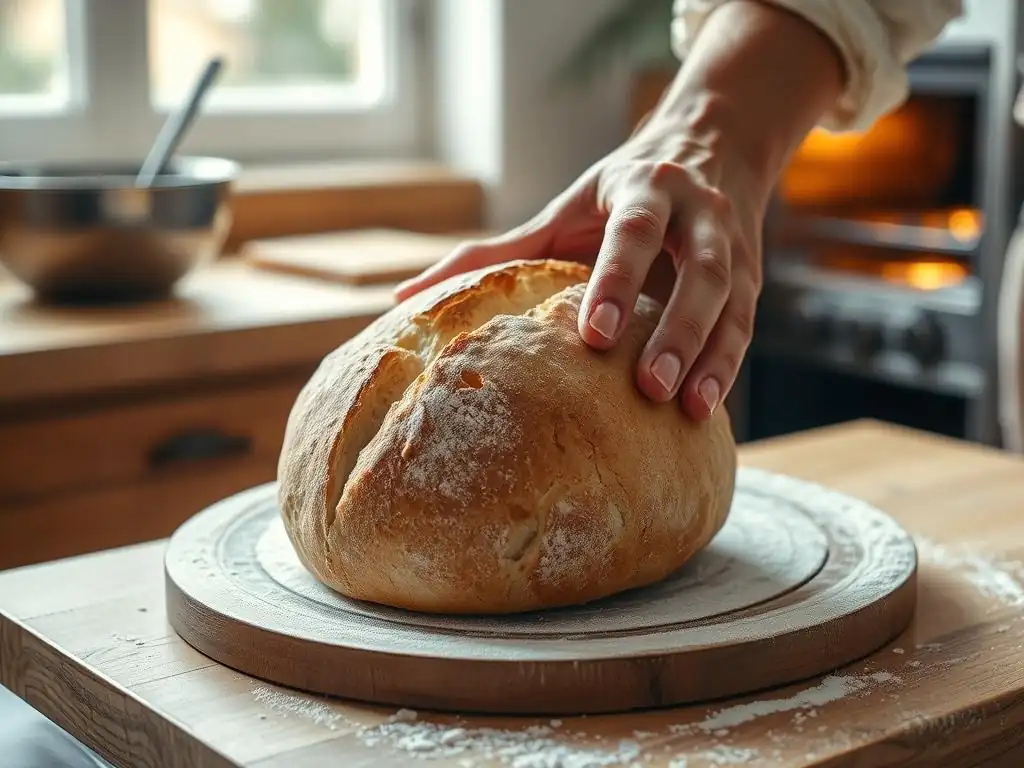
Scoring involves making cuts on the surface of your dough just before it goes into the hot oven. This isn't just for aesthetics; it serves a crucial purpose. As the bread bakes and expands rapidly in the initial heat (oven spring), the scores act as controlled vents, directing the expansion and preventing the crust from tearing randomly.
Scoring also allows you to influence the shape of the final loaf. A single, deep score down the center will encourage a large "ear" or flap of crust. Multiple parallel scores will result in a rounder loaf with several smaller openings. For an easy beginner sourdough bread recipe, simple scores are best.
Why Scoring Matters: Controlling the Oven Spring
Without scoring, the rapidly expanding gases inside the dough would burst through the weakest point in the crust, resulting in an unpredictable shape and potentially a less appealing appearance. Scoring allows you to decide where that expansion happens, resulting in a more controlled rise and often a taller loaf.
The depth and angle of your score matter. A score made with a sharp blade held at a slight angle (around 30-45 degrees) will create a flap that can develop into an "ear." A score made straight down (90 degrees) will result in the dough opening up more evenly along the cut.
Simple Scoring Patterns for Beginners
For your first few loaves using this easy beginner sourdough bread recipe, keep the scoring simple. A single score across the top of a round loaf or a long score down the center of an oval loaf is easy to execute and effectively controls the oven spring.
Another simple pattern is a crosshatch: make several shallow parallel cuts in one direction, then several more parallel cuts perpendicular to the first set. Use a sharp razor blade (a dedicated lame is ideal) and make quick, confident cuts about 1/4 to 1/2 inch deep. The cold dough from refrigeration makes scoring much easier.
Step 8: Baking Your Sourdough Bread
Baking is where the magic happens! For the best results with an easy beginner sourdough bread recipe, baking in a preheated Dutch oven is highly recommended. The Dutch oven traps the steam released by the dough as it bakes, creating a humid environment similar to a professional steam oven. This steam keeps the crust soft initially, allowing the loaf to expand fully before the crust sets.
Preheat your oven with the empty Dutch oven inside to a high temperature, typically 450-475°F (230-245°C), for at least 30-45 minutes. This ensures the Dutch oven is screaming hot. Carefully transfer the scored loaf from the proofing basket into the hot Dutch oven (you can use parchment paper as a sling).
Oven Temperature and Baking Time for Optimal Results
Baking sourdough typically involves two stages: a covered bake and an uncovered bake. The first stage, covered, is done at a high temperature (450-475°F) for 20-25 minutes. This is when you get maximum oven spring thanks to the trapped steam.
After the covered bake, remove the lid and reduce the oven temperature slightly (to around 425-450°F or 220-230°C). Bake uncovered for another 20-25 minutes, or until the crust is a deep golden brown and the internal temperature reaches 205-210°F (96-99°C). The total baking time is usually around 40-50 minutes.
Using a Dutch Oven for Sourdough Baking
Using a Dutch oven creates the perfect environment for baking sourdough at home. The sealed pot traps the moisture released by the dough, which is essential for achieving a good rise and a thin, crispy crust. Without adequate steam, the crust forms too quickly, restricting the loaf's expansion.
Carefully placing the dough into the preheated Dutch oven is important. Using parchment paper makes this much easier – just lift the dough (still on the paper) from the proofing basket and lower it into the pot. Be extremely cautious as the Dutch oven is very hot.
Step 9: Cooling and Enjoying Your Freshly Baked Sourdough
Once your sourdough loaf is baked to a beautiful golden brown, resist the urge to slice into it immediately! This is a critical step for the bread's internal structure and flavor development. Carefully remove the loaf from the Dutch oven and place it on a wire rack to cool completely.
Cooling allows the internal steam to dissipate and the starches to set. Slicing too early will result in a gummy texture inside. The crust will also continue to crisp up as it cools.
Allowing the Bread to Cool Completely
Your sourdough loaf needs to cool for at least 2 hours on a wire rack before slicing. For larger loaves, 3-4 hours is even better. During this time, the internal temperature drops, the crumb structure stabilizes, and the flavors mature.
While the aroma of fresh-baked bread is enticing, patience here is rewarded with a better texture and taste. A loaf that is properly cooled will have a more open crumb and a satisfying chew.
Storing Your Sourdough Bread for Maximum Freshness
Once completely cool, your sourdough loaf is best stored at room temperature. Avoid refrigerating sourdough, as this can actually stale the bread more quickly. For short-term storage (1-2 days), simply place the cut side down on a cutting board or store it in a paper bag to maintain crust crispness.
For longer storage, a linen bread bag or a dedicated bread box works well. If you won't finish the loaf within 2-3 days, it's best to slice it and freeze the slices. Thaw individual slices as needed by toasting or warming them.
Troubleshooting Common Sourdough Baking Problems
Even with an easy beginner sourdough bread recipe, you might encounter issues. Don't get discouraged! Sourdough baking involves working with living organisms and environmental factors. Understanding common problems can help you diagnose and improve your technique.
Most issues relate to starter activity, fermentation time, or dough handling. Keep notes on your bakes – temperature, times, how the dough felt – to help identify what might be going wrong.
My Sourdough Didn't Rise: Potential Causes and Solutions
If your sourdough loaf turned out dense and didn't rise much during baking, the most likely culprit is an inactive starter. Ensure your starter is consistently doubling or tripling after feeding before you attempt to bake with it. Feed it regularly and keep it in a warm spot (75-80°F is ideal).
Another common reason is insufficient bulk fermentation or proofing. The dough didn't develop enough gas before baking. Ensure your bulk fermentation goes for long enough – aim for a 50-75% volume increase. Over-proofing can also cause collapse, but for beginners, under-proofing is more common. Check your dough's activity, not just the clock.
My Sourdough is Too Sour: Tips for Balancing Flavor
A very sour sourdough loaf is usually a sign of prolonged fermentation, particularly at cooler temperatures, or a starter that is very acidic. While some tang is desirable, overwhelming sourness can be adjusted.
To reduce sourness, try shortening the bulk fermentation time slightly or increasing the temperature during bulk fermentation (fermenting warmer favors yeast activity over bacterial acid production). You can also feed your starter more frequently (once or twice a day) leading up to a bake, using a higher ratio of fresh flour and water (e.g., 1:3:3 starter:flour:water) to dilute the acidity before using it in your dough.
My Sourdough is Dense and Gummy: Improving Texture
A dense or gummy crumb can result from several factors. One is insufficient gluten development; make sure you are performing enough stretch and folds during bulk fermentation to build strength. Another cause is under-proofing, where the dough didn't develop enough internal structure and gas before baking.
Slicing into the loaf before it has completely cooled is a major reason for a gummy texture. The internal structure hasn't set properly. Always let your loaf cool on a wire rack for at least 2-4 hours. Finally, using a lower protein flour might contribute to a denser crumb; try using a strong bread flour (12-14% protein) for better structure.
Tips for Mastering Your Easy Sourdough Bread Recipe
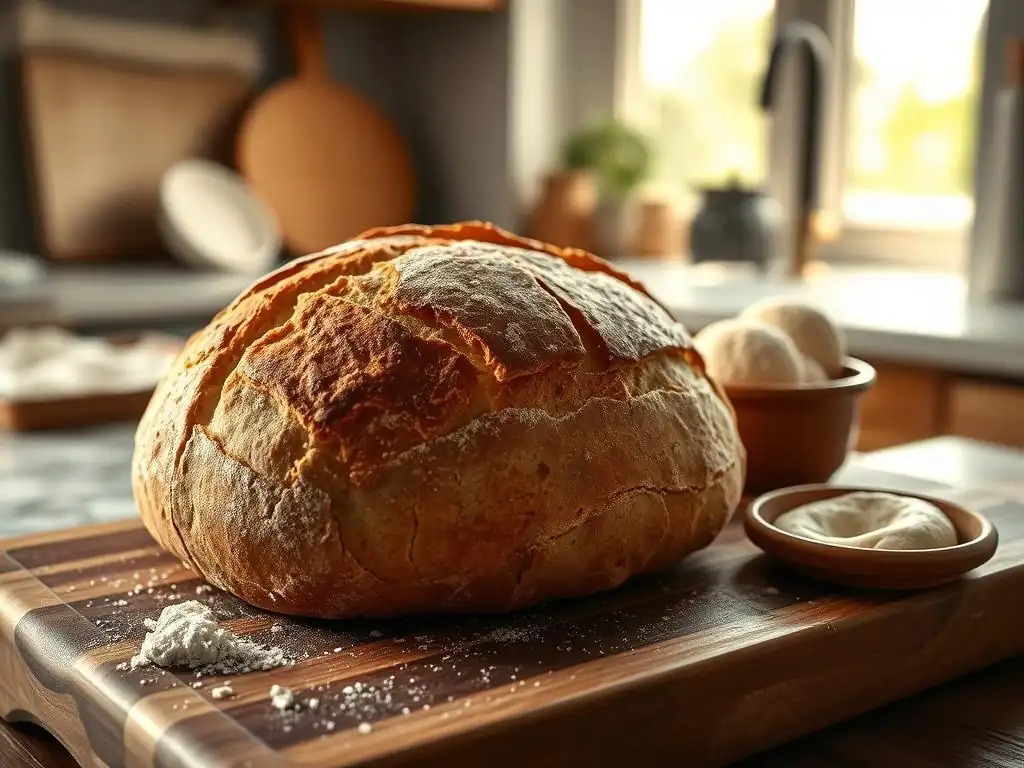
As you become more comfortable with this easy beginner sourdough bread recipe, you might want to experiment and refine your technique further. Sourdough baking is a journey of continuous learning and adaptation. These tips can help you take your skills to the next level.
Don't be afraid to try small variations once you feel confident with the basic process. Baking is both a science and an art, and personalization is part of the fun.
Experimenting with Different Flours and Hydration Levels
Once you've successfully baked a basic loaf with white bread flour, try incorporating other flours. Swapping out 10-20% of the white flour for whole wheat or rye flour will significantly change the flavor profile and can add nutritional benefits. Be aware that whole grain flours absorb more water, so you might need to slightly increase the water (hydration level) when using them.
Adjusting the hydration level (the ratio of water to flour) is another way to experiment. A higher hydration dough (more water) can lead to a more open crumb but is stickier and harder to handle. A lower hydration dough is easier for beginners. Start with a moderate hydration (around 70-75%) and adjust gradually as you gain experience.
Developing Your Own Unique Sourdough Flavor Profile
The flavor of your sourdough is influenced by many factors, including your starter's unique microbial community, the types of flour you use, and the fermentation time and temperature. To develop a tangier loaf, try a longer, colder bulk fermentation or proofing period.
If you prefer a milder flavor, ferment at slightly warmer temperatures for shorter periods, and ensure your starter is fed regularly with a higher ratio of fresh flour before baking. Using different flours, like a portion of rye in your starter feeding, can also subtly alter the flavor profile over time. Consistency in feeding and observation are key to understanding how your starter and dough behave.
Advanced Sourdough Techniques for Confident Bakers
Once you've mastered this easy beginner sourdough bread recipe, you might be ready to explore more advanced techniques. Laminating the dough, where you gently stretch it into a thin sheet and fold it, can further strengthen the gluten and incorporate additions like seeds or herbs.
Coil folds are another popular technique used during bulk fermentation to build tension and structure. Playing with higher hydration doughs (80% or more) can lead to incredibly open crumbs but require more advanced handling skills. Experimenting with different scoring patterns for decorative effects is also a fun way to advance your skills.
Conclusion: Enjoying the Journey of Sourdough Baking
Baking your own sourdough bread is a rewarding experience that connects you to a timeless craft. From the simple act of mixing flour and water to the incredible aroma of a freshly baked loaf, each step offers satisfaction. This easy beginner sourdough bread recipe is just the beginning of your sourdough journey.
Don't be discouraged by setbacks; every bake is a learning opportunity. Embrace the process, pay attention to your dough, and celebrate your successes. The community of sourdough bakers is vast and supportive!
There's nothing quite like sharing a slice of warm, homemade sourdough with friends and family. The effort and care you put into baking are evident in every bite. Whether it's served with butter, used for sandwiches, or simply enjoyed on its own, your easy beginner sourdough bread recipe loaf is sure to be a hit.
Consider taking photos of your loaves and sharing them online! Connecting with other bakers can provide encouragement and new ideas. The joy of baking often lies just as much in the sharing as it does in the making.
Further Exploration of Sourdough Baking Recipes on BakeWithEase.com
This easy beginner sourdough bread recipe is designed to build your foundation. Once you're comfortable with the basics, BakeWithEase.com offers a variety of other sourdough recipes to explore. From enriched doughs like brioche sourdough to recipes incorporating different grains, seeds, or flavors, there's a whole world of sourdough waiting for you.
Keep practicing, keep learning, and most importantly, keep baking! Your confidence and skill will grow with every loaf. We're here to support your baking journey with more easy-to-follow guides and delicious recipes.
Frequently Asked Questions
What makes this sourdough recipe easy for beginners?
This recipe emphasizes simple steps and readily available ingredients, minimizing the complexity often associated with sourdough baking. We focus on a forgiving process for consistent results.
How long does it really take to make this sourdough bread?
While the active baking time is minimal, sourdough requires a long fermentation process. Expect around 24-48 hours total, including bulk fermentation and proofing.
What if I don't have a Dutch oven? Can I still bake this bread?
Yes, you can! While a Dutch oven promotes even heat distribution and crust formation, you can use a baking stone or sheet pan with a roasting pan filled with water for steam.
Can I substitute different flours in this recipe?
Yes, you can experiment! However, using different flours will affect the hydration and texture of the bread. Start by substituting small amounts and adjust the water accordingly.
What are some common sourdough starter problems, and how can I fix them?
Common problems include lack of activity or mold growth. Ensure you are feeding your starter regularly with the correct ratio of flour and water and keep it in a clean environment.
Final Reflection: The Humble Loaf, A Gateway to Greater Things
The enduring appeal of sourdough bread lies not just in its delicious taste, but in the journey it represents. Learning to bake a sourdough loaf, even a simple one, is a testament to patience, precision, and the rewarding connection between effort and outcome. It's a skill that transcends mere culinary proficiency; it's a gateway to a deeper understanding of food, process, and the natural world.
The act of nurturing a sourdough starter, feeding it and watching it grow, mirrors the cyclical nature of life itself. It's a humbling experience, reminding us of the delicate balance required for growth and the unexpected joys that can arise from consistent care. The best things in life are not things.
This quote, often attributed to various sources, perfectly encapsulates the satisfaction derived not from the final product alone, but from the process of creating it. The journey of baking sourdough, with its unpredictable rises and occasional failures, teaches valuable lessons in resilience and the acceptance of imperfection.
Now, I invite you to take what you've learned here and embark on your own sourdough adventure. Don't be afraid to experiment, to adjust the recipe to your taste, and to embrace the learning process. The beauty of sourdough lies in its adaptability and the unique character each loaf develops. More than just a recipe, this is an invitation to connect with the ancient art of bread making, to find joy in the simple act of creation, and to savor the fruits – or rather, the loaves – of your labor.
Unleash Your Inner Baker: Start Your Sourdough Journey Now!
Thanks for taking the time to explore the world of sourdough baking! We hope this recipe has ignited your passion for creating delicious, homemade bread. Ready to take the next step?
- Bake your own sourdough loaf today! Use the recipe as your guide, and don't be afraid to experiment—sourdough is all about the journey.
- Share your baking triumph (or even your struggles!) with our community on social media using #BakeWithEaseSourdough. We love seeing your creations!
- Try a variation: Experiment with different flours, add-ins, or shaping techniques to create your own signature sourdough.
What unique twist will you add to your first (or next!) sourdough masterpiece?