
Simple & Delicious Basic Sourdough Loaf Recipe

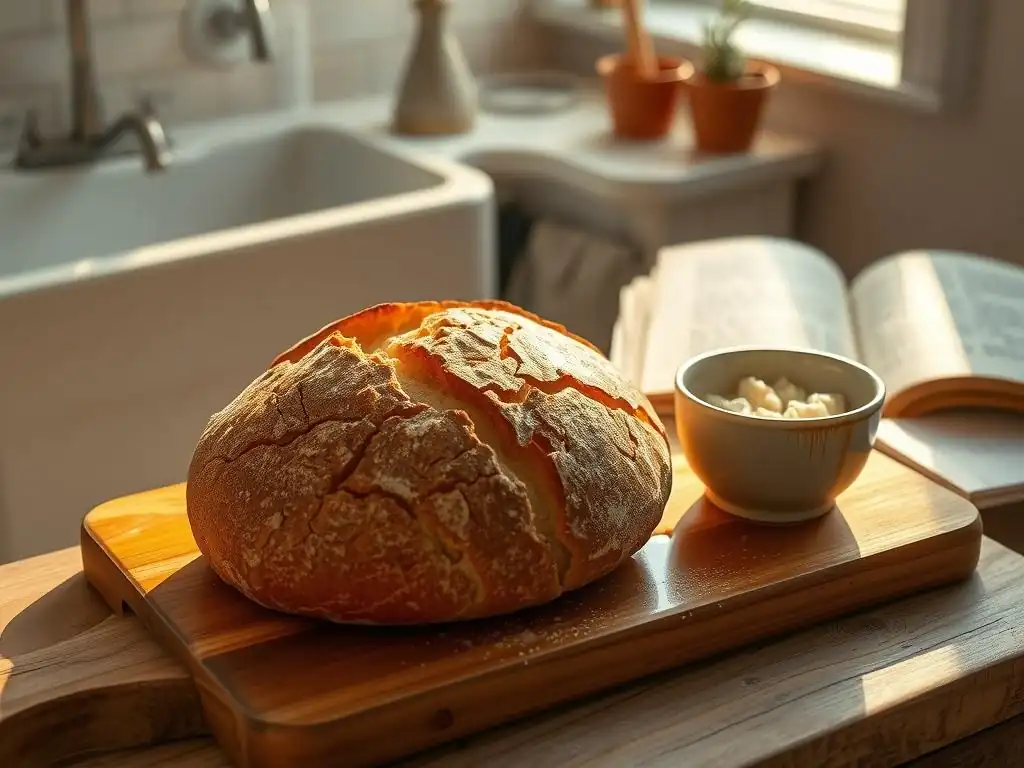
Welcome to BakeWithEase, where delicious baking becomes effortlessly achievable! Ever dreamt of crafting your own artisan bread but felt intimidated? Discover the secrets to baking a flavourful sourdough with our guide to an easy beginner sourdough loaf. Unlock the magic of sourdough with simple steps and watch as your kitchen transforms into a bakery. Ready to embark on this exciting baking adventure? Let's get started!
- Bake Your First Easy Beginner Sourdough Loaf
- Ingredients for a Simple Sourdough Bread
-
Step-by-Step Guide: Baking an Easy Beginner Sourdough Loaf
- Phase 1: Preparing Your Sourdough Starter
- Phase 2: Mixing the Dough for Your Basic Sourdough
- Phase 3: Bulk Fermentation and Folding Techniques
- Phase 4: Shaping Your Sourdough Loaf
- Phase 5: Proofing Your Sourdough Dough
- Phase 6: Baking Your First Sourdough Bread
- Phase 7: Cooling and Enjoying Your Homemade Sourdough
- Troubleshooting Common Sourdough Baking Problems
- Tips & Tricks for Perfecting Your Easy Sourdough Loaf
- Variations and Additions to Your Basic Sourdough Recipe
- Enjoy Your Journey into Easy Sourdough Baking with BakeWithEase!
- Frequently Asked Questions
- Final Reflection: The Humble Loaf, A Gateway to Baking Joy
- Unleash Your Inner Baker: Start Baking Today!
Bake Your First Easy Beginner Sourdough Loaf
Welcome to BakeWithEase! Your Guide to Simple Sourdough Baking
Embarking on your sourdough journey can feel daunting, but with BakeWithEase, we're here to simplify the process and make it incredibly rewarding. This guide focuses on creating a delicious and easy beginner sourdough loaf, breaking down each step into manageable parts. We understand that the world of sourdough might seem complex with terms like 'autolyse' and 'bulk fermentation', but our goal is to demystify these concepts, allowing you to confidently bake your first beautiful loaf right from your kitchen.
Our passion is helping you discover the joy of baking, and there's perhaps no greater satisfaction than pulling a warm, crusty sourdough loaf from your oven. This specific recipe for an easy beginner sourdough loaf has been designed with simplicity and success in mind. We'll walk you through everything, from understanding your starter to achieving that perfect golden crust, ensuring your initial foray into sourdough baking is a positive and tasty experience.
Why This Easy Sourdough Loaf Recipe is Perfect for Beginners
Many sourdough recipes online can be intimidating with complex schedules and techniques. This easy beginner sourdough loaf recipe cuts through the noise, focusing on the fundamental steps that yield great results without requiring advanced skills or equipment. We prioritize clarity and ease of execution, making it accessible for anyone new to the world of wild yeast baking.
This recipe is structured to build your confidence with each stage. We use straightforward mixing methods and provide clear visual cues for fermentation, so you're not left guessing. Unlike some intricate methods, our approach to this easy beginner sourdough loaf minimizes handling while still developing excellent structure and flavor, proving that simple techniques can indeed produce professional-looking and tasting bread.
Ingredients for a Simple Sourdough Bread
Essential Ingredients for Your First Sourdough Loaf
Creating a simple sourdough bread requires surprisingly few ingredients, highlighting the magic of fermentation powered by your starter. At its core, you only need four main components: active sourdough starter, flour, water, and salt. The quality of these ingredients can influence the final result, but don't feel pressured to use highly specialized items for your first easy beginner sourdough loaf.
For this easy beginner sourdough loaf recipe, we recommend starting with readily available ingredients. Using a reliable active starter is crucial, as it's the leavening agent. Choosing a good quality flour provides the structure, while water hydrates the flour and activates the starter. Salt is essential for flavor development and controlling the fermentation rate.
Understanding Sourdough Starter for Beginners
A sourdough starter is a living culture of wild yeast and bacteria, typically a mixture of flour and water, that ferments over time. It's what gives sourdough its unique flavor and enables the bread to rise naturally without commercial yeast. For your easy beginner sourdough loaf, having a healthy, active starter is paramount – it should be bubbly, have a pleasant tangy aroma, and ideally double in size a few hours after feeding.
Think of your starter as a pet; it needs regular feeding (usually flour and water) to stay active and strong. Before baking your easy beginner sourdough loaf, you'll need to ensure your starter is "ripe" or active, meaning it's at its peak of leavening power after being fed. This typically happens within 4-12 hours after a feeding, depending on the temperature and your starter's activity level.
Types of Flour for Sourdough Bread Making
While many flours can be used in sourdough, for an easy beginner sourdough loaf, a good quality all-purpose flour or bread flour is recommended. Bread flour has a higher protein content (typically 12-14%) compared to all-purpose (around 10-12%), which helps develop a stronger gluten network, resulting in a loaf with better structure and chew.
Using a blend of flours is also common in sourdough baking, but for your first easy beginner sourdough loaf, sticking to one type, like bread flour, simplifies the process. You can certainly experiment later with whole wheat, rye, or spelt flours, but mastering the basics with a simpler flour type will build a solid foundation for future adventures.
Other Key Ingredients: Water and Salt
Water plays a critical role in hydrating the flour and activating the gluten and starter. For baking an easy beginner sourdough loaf, filtered or unchlorinated tap water is generally best, as chlorine can potentially inhibit the beneficial microbes in your starter. The temperature of the water can also affect dough temperature and fermentation speed; lukewarm water is often used to encourage activity.
Salt is not just for flavor; it also strengthens the gluten structure and regulates the yeast activity, preventing the dough from fermenting too quickly. Most sourdough recipes, including this easy beginner sourdough loaf, use fine sea salt or kosher salt. Avoid using iodized salt, as it can sometimes interfere with fermentation. Precision in measuring salt is important, typically around 2% of the total flour weight.
Step-by-Step Guide: Baking an Easy Beginner Sourdough Loaf
Phase 1: Preparing Your Sourdough Starter
Ensuring your sourdough starter is active and ready is the first critical step for a successful easy beginner sourdough loaf. You'll need to feed your starter 4-12 hours before you plan to mix your dough. This feeding process involves discarding a portion of the existing starter and mixing the remainder with fresh flour and water. A common feeding ratio is 1:1:1 (starter:flour:water by weight), for example, 50g starter, 50g flour, 50g water.
After feeding, leave your starter at room temperature in a clear jar or container. Watch for signs of activity: bubbles forming on the surface and throughout the mixture, and the starter significantly increasing in volume. For this easy beginner sourdough loaf, aiming for the starter to at least double in size within a few hours indicates it's vigorous enough for baking.
Feeding Your Starter for Optimal Rise
To feed your starter for this easy beginner sourdough loaf, measure out the desired amount of starter you want to keep (e.g., 50g). Discard the rest (or use it in other recipes like pancakes or crackers). In a clean jar, combine the kept starter with equal parts by weight of lukewarm water and the flour you typically feed your starter with (e.g., 50g water, 50g flour). Mix until smooth, scrape down the sides, and cover loosely.
The timing for optimal rise depends on temperature. At room temperature around 70-75°F (21-24°C), your starter might be ready in 4-6 hours. In cooler kitchens, it could take 8-12 hours. A ripe starter for an easy beginner sourdough loaf will look bubbly, domed on top, and smell yeasty and slightly tangy.
Checking Starter Activity: The Float Test
A simple way to check if your starter is active enough for your easy beginner sourdough loaf is the float test. Gently take a small spoonful of your ripe starter (make sure it's bubbly and peaked, not past its peak and falling) and drop it into a glass of room temperature water.
If the starter floats on the surface, it's generally considered active and ready to leaven your dough. If it sinks, it might not be active enough yet. This could mean it needs more time, or your starter might need a few more consistent feedings to regain vigor. While not foolproof, the float test is a quick indicator for your easy beginner sourdough loaf preparation.
Phase 2: Mixing the Dough for Your Basic Sourdough
Mixing is the first step in bringing your ingredients together for your easy beginner sourdough loaf. We'll use a technique called autolyse initially, which helps hydrate the flour and makes subsequent mixing easier. This phase is relatively hands-off to start, perfect for beginners.
After the autolyse, you'll incorporate the starter and salt. This is where the magic begins, as the starter introduces the leavening power and the salt starts to control fermentation and enhance flavor. Don't worry about achieving perfect smoothness immediately; the subsequent folding steps will develop the dough's structure.
Autolyse: Hydrating the Flour
Autolyse is a simple technique where you mix just the flour and water from your recipe together and let them rest. For your easy beginner sourdough loaf, measure out your flour and water into a large mixing bowl. Mix with your hands or a spatula until no dry flour remains. The mixture will look shaggy and rough – this is normal.
Cover the bowl and let it rest for 30 minutes to 1 hour. During this rest period, the flour absorbs the water, gluten development begins naturally, and the dough becomes more pliable and less sticky. This step makes it much easier to incorporate the starter and salt smoothly later for your easy beginner sourdough loaf.
Incorporating the Starter and Salt
After the autolyse period, add your ripe, active sourdough starter and the measured salt to the dough. The dough will likely feel a bit stiff after the autolyse, but adding the starter and salt will change its texture.
Use your hands to gently squeeze and fold the starter and salt into the dough. It might feel messy at first, but keep mixing until the starter and salt are evenly distributed throughout the dough. This process might take 5-10 minutes of gentle kneading or squeezing. The dough will become slightly more cohesive as you work.
Phase 3: Bulk Fermentation and Folding Techniques
Bulk fermentation is the first rise of your dough, and it's a crucial stage for developing flavor and structure for your easy beginner sourdough loaf. This period allows the wild yeast to start working, producing carbon dioxide that makes the dough rise, while bacteria produce organic acids that give sourdough its characteristic tang.
During bulk fermentation, you'll perform a series of 'folds'. These folds help to strengthen the gluten network, build tension in the dough, and redistribute the yeast and bacteria, leading to a more even rise and better crumb structure in your final easy beginner sourdough loaf.
Understanding Bulk Fermentation
Bulk fermentation begins immediately after you've mixed in the starter and salt. Place the dough in a lightly oiled container or bowl, cover it, and let it rest at room temperature. The duration of bulk fermentation for an easy beginner sourdough loaf is highly variable, typically ranging from 4 to 8 hours at average room temperature (around 70-75°F or 21-24°C).
Signs that bulk fermentation is progressing well include the dough increasing significantly in volume (aiming for a 30-50% increase for beginners), the surface looking bubbly, and the dough feeling lighter and slightly jiggly. Don't wait for it to double, as sourdough ferments slower than commercial yeast dough.
The Importance of Sourdough Folding
Performing folds during bulk fermentation is a simple yet powerful technique for improving your easy beginner sourdough loaf. Folds help develop gluten without intensive kneading, build structure and tension, and equalize the temperature and nutrient distribution within the dough.
Regular folding, typically every 30-60 minutes during the first 2-3 hours of bulk fermentation, helps create a strong, elastic dough that can hold its shape and trap gasses produced by the starter, leading to a well-risen loaf with an open crumb structure. For an easy beginner sourdough loaf, aiming for 3-4 sets of folds is usually sufficient.
How to Perform Sourdough Folds
To perform a fold for your easy beginner sourdough loaf, wet your hands slightly to prevent sticking. Imagine the dough has four sides. Gently grab the edge of the dough farthest from you, stretch it upwards, and fold it back over towards the center. Rotate the bowl 90 degrees and repeat this process with the new farthest edge.
Repeat this folding and rotating motion two more times, completing one 'set' of folds for all four sides. The dough will become tighter and smoother with each set. After performing a set of folds, cover the dough and let it rest until the next scheduled fold.
Phase 4: Shaping Your Sourdough Loaf
After bulk fermentation, your dough should be noticeably increased in volume and feel alive and airy. Shaping is the process of forming the dough into the desired loaf shape (usually a boule or a batard) and creating surface tension, which is crucial for oven spring and maintaining the loaf's structure during proofing and baking. For your easy beginner sourdough loaf, gentle handling is key.
Proper shaping helps the dough hold its form and prevents it from spreading out too much. This tension on the surface also helps the loaf expand upwards when it hits the hot oven. Don't worry about achieving perfection on your first few attempts; practice makes perfect when shaping your easy beginner sourdough loaf.
Gentle Shaping Techniques for Beginners
Turn your dough out onto a lightly floured surface. For an easy beginner sourdough loaf, excessive flour can prevent tension from building, so use just enough to prevent sticking. Gently pre-shape the dough into a rough ball by pulling the edges towards the center from underneath. Let it rest, uncovered, for 15-20 minutes. This rest period, called the bench rest, allows the gluten to relax, making the final shaping easier.
For the final shape (a boule, or round loaf), gently flatten the dough into a rough circle. Fold the top edge down to the center, then the bottom edge up to the center. Fold the left side over to the right, and the right side over to the left, creating a package. Then, flip the dough over and use your hands to gently cup and pull the dough towards you, rotating slightly, to create surface tension and form a tight ball.
Preparing Your Banneton Basket
A banneton is a proofing basket that helps your shaped dough hold its form during the final rise and imparts a lovely pattern on the crust. For your easy beginner sourdough loaf, liberally flour your banneton basket with rice flour (which is less likely to stick than wheat flour) or a 50/50 mix of rice flour and all-purpose flour.
Once shaped, gently place your dough seam-side up into the floured banneton basket. The seam-side up position means that when you invert the dough onto your baking surface, the smooth, tensioned side will be facing up, ready for scoring. This step is simple but effective for your easy beginner sourdough loaf.
Phase 5: Proofing Your Sourdough Dough
Proofing, also known as the final rise, is the period after shaping where your dough rests before baking. This allows the yeast to produce more gas, causing the dough to expand further. For your easy beginner sourdough loaf, proper proofing is essential for achieving a light and airy crumb.
You have options for proofing: at room temperature for a shorter, faster rise, or in the refrigerator (cold proofing) for a longer, slower rise. Cold proofing is often recommended for beginners as it develops more flavor and makes the dough easier to score.
Cold Proofing vs. Room Temperature Proofing
Cold proofing involves placing your shaped dough in the floured banneton into the refrigerator for an extended period, typically 8-12 hours, or even up to 24 hours for your easy beginner sourdough loaf. The cold temperature slows down fermentation significantly, allowing flavors to deepen and making the dough firmer and easier to handle and score directly from the fridge.
Room temperature proofing is faster, usually taking 1-3 hours depending on kitchen temperature. The dough will expand more rapidly. While quicker, dough proofed at room temperature can be softer and trickier to score for beginners. For a reliable easy beginner sourdough loaf, cold proofing is often the preferred method.
Signs of a Properly Proofed Sourdough Loaf
Determining if your easy beginner sourdough loaf is properly proofed is key. If cold proofing, the dough might not look dramatically larger, but it should feel slightly expanded and soft. If room temperature proofing, the dough should look visibly larger and feel airy.
A common test is the 'poke test'. Gently press a floured finger about half an inch into the side of the dough. If the indentation springs back slowly, but not completely, the dough is likely well-proofed. If it springs back immediately, it needs more time. If it leaves a deep indentation that doesn't spring back at all, it might be over-proofed. Aim for the sweet spot for your easy beginner sourdough loaf.
Phase 6: Baking Your First Sourdough Bread
Baking is the grand finale for your easy beginner sourdough loaf! The goal is to achieve maximum oven spring, a beautiful golden crust, and a well-cooked interior. Using a very hot oven and creating steam in the initial baking phase are crucial for these results.
We'll discuss baking with a Dutch oven, which is a highly recommended method for beginners as it effectively traps steam around the loaf. We'll also cover alternative methods if you don't have a Dutch oven, ensuring you can bake your easy beginner sourdough loaf successfully.
Preparing Your Oven for Sourdough Baking
Preheat your oven to a high temperature, typically 450-500°F (230-260°C). If using a Dutch oven, place it in the oven during the preheating phase so it gets screaming hot. This ensures the dough gets an immediate burst of heat when placed inside, promoting good oven spring for your easy beginner sourdough loaf.
Allow the oven (and Dutch oven, if using) to preheat for at least 30-60 minutes after it reaches the set temperature. This ensures the heat has fully saturated the baking vessel and the oven cavity. A thoroughly preheated oven is essential for a successful bake.
Scoring Your Sourdough Loaf
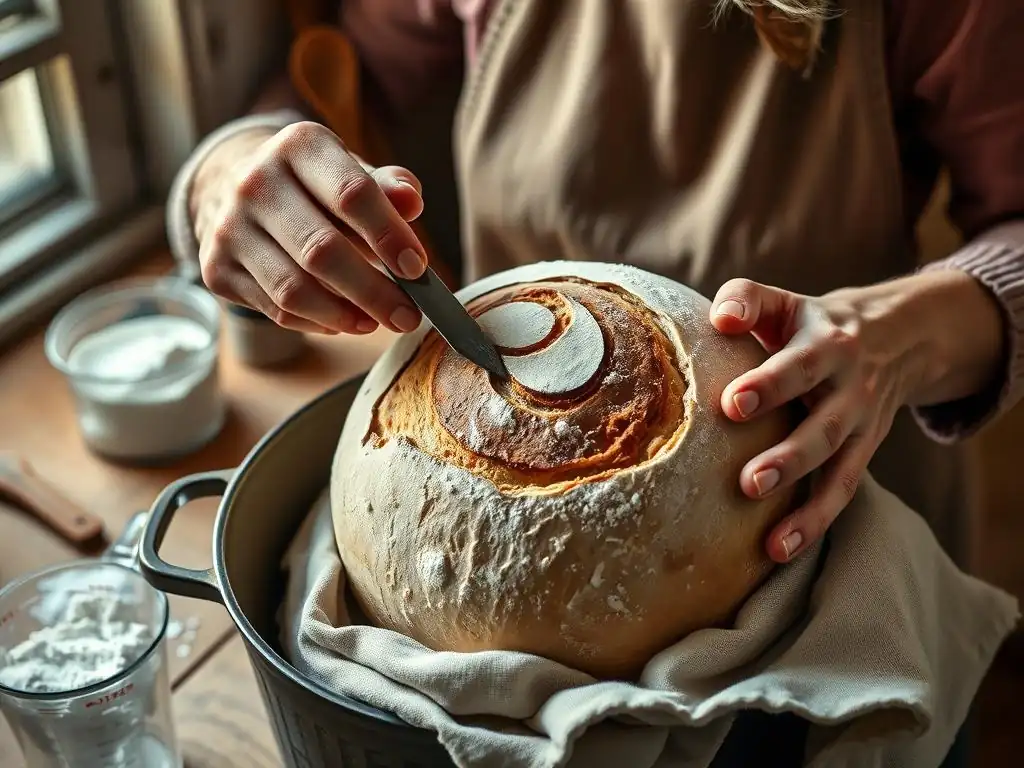
Scoring is cutting the surface of the dough just before baking. This allows the dough to expand in a controlled manner during oven spring, preventing it from bursting unpredictably. It also creates a decorative element on your easy beginner sourdough loaf.
Using a sharp razor blade (a 'lame') or a very sharp knife, make one or more cuts on the surface of your dough. For a simple loaf, a single deep slash across the top is common. For beginners, simple scores are best. Aim for a depth of about half an inch. Speed and confidence in your cut are more important than perfection for your easy beginner sourdough loaf.
Baking with a Dutch Oven
Baking your easy beginner sourdough loaf in a preheated Dutch oven is one of the most reliable methods for achieving a great crust and oven spring. Carefully remove the hot Dutch oven from the oven. Gently invert your proofed dough from the banneton directly into the hot Dutch oven.
Quickly score the dough if you haven't already, place the lid back on the Dutch oven, and return it to the oven. Bake covered for the first 20-25 minutes. This trapped steam is crucial; it keeps the crust soft initially, allowing the loaf to expand fully before the crust sets. After this time, remove the lid and continue baking for another 20-30 minutes, or until the crust is deep golden brown and the internal temperature reaches around 200-210°F (93-99°C).
Baking Without a Dutch Oven: Alternative Methods
If you don't have a Dutch oven, you can still bake a fantastic easy beginner sourdough loaf. Preheat your oven with a baking stone or steel inside if you have one. Place a tray on the bottom rack of your oven. Just before baking, carefully slide your scored dough onto the hot baking stone/steel or a baking sheet lined with parchment paper.
Immediately pour a cup of hot water into the tray on the bottom rack (be careful of the steam!). Close the oven door quickly. This creates steam in the oven, mimicking the Dutch oven environment. Bake at the high temperature for 20 minutes with the steam, then carefully remove the steam tray and reduce the heat slightly (e.g., to 425°F or 220°C) for the remaining 25-35 minutes until the loaf is golden and sounds hollow when tapped on the bottom.
Phase 7: Cooling and Enjoying Your Homemade Sourdough
You've done it! You've baked your first easy beginner sourdough loaf. The smell filling your kitchen is one of the most rewarding parts of the process. However, resisting the urge to slice into it immediately is perhaps the hardest step. Proper cooling is crucial for the texture and flavor of your bread.
Allowing the loaf to cool completely on a wire rack lets the internal structure set and the moisture redistribute evenly. This patience will be rewarded with a perfectly textured crumb.
Cooling Your Sourdough Properly
Once your easy beginner sourdough loaf is baked to a beautiful golden-brown and reaches the correct internal temperature, carefully remove it from the oven (and Dutch oven, if used). Transfer the loaf immediately to a wire cooling rack.
It is absolutely essential to let the bread cool completely, ideally for at least 2-3 hours, before slicing. While the loaf cools, it continues to cook internally, and moisture travels from the center to the crust, helping it crisp up. Slicing too early will result in a gummy, dense crumb.
Slicing and Serving Your Delicious Sourdough
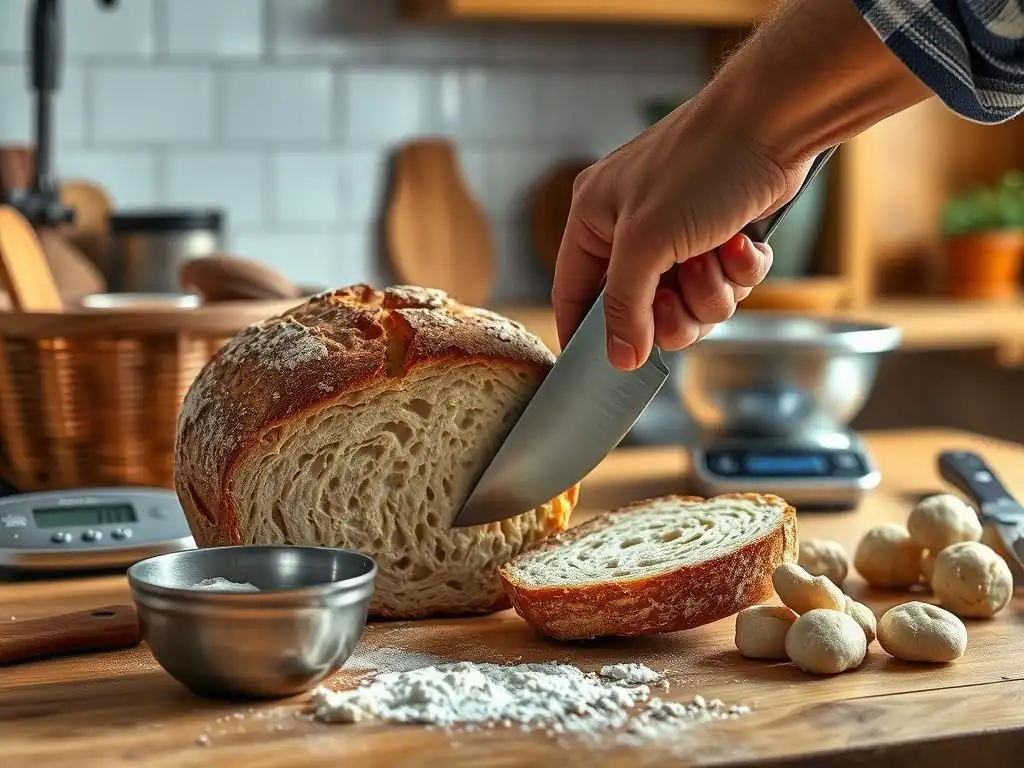
After the long wait, your easy beginner sourdough loaf is ready to be enjoyed! Use a serrated bread knife for clean slices. Admire the crust and the open, airy crumb you've created through your baking efforts.
Serve your homemade sourdough with butter, olive oil, or use it for sandwiches or toast. Sharing your first easy beginner sourdough loaf with friends and family is a wonderful way to celebrate your baking achievement.
Troubleshooting Common Sourdough Baking Problems
Even with an easy beginner sourdough loaf recipe, you might encounter challenges. Don't be discouraged! Sourdough baking is a learning process, and many common issues have simple explanations and solutions.
Understanding why something went wrong is the first step to improving your next bake. We'll address some of the most frequent problems beginners face with their sourdough.
Common Sourdough Issues and Solutions
- Dense or Gummy Crumb: Often caused by under-proofing, under-baking, or slicing the loaf before it has fully cooled.
- Lack of Oven Spring: Can result from an inactive starter, under-proofed or over-proofed dough, or insufficient steam during baking.
- Crust Not Crispy: Typically due to not enough steam in the oven during the initial bake or not baking long enough.
- Dough is Too Sticky: May be due to high hydration, insufficient gluten development (needs more folds), or not enough flour on your work surface/hands during shaping.
- Loaf Spreads Out: Can be caused by insufficient surface tension during shaping or over-proofing.
Why Isn't My Sourdough Rising?
Lack of rise in an easy beginner sourdough loaf is usually related to your starter or the fermentation process.
- Inactive Starter: Your starter might not have been ripe or active enough when you mixed the dough. Ensure it's consistently doubling after feedings before baking.
- Under-Proofing: The dough simply didn't have enough time at temperature for the yeast to produce sufficient gas. Allow more time for bulk fermentation and final proofing, monitoring the dough's volume increase and feel.
- Temperature: Sourdough activity is highly dependent on temperature. Colder temperatures slow fermentation significantly. If your kitchen is cool, fermentation will take much longer than stated in typical recipes.
My Sourdough is Too Sour! What to Do?
While tang is a hallmark of sourdough, excessive sourness in an easy beginner sourdough loaf can be overwhelming. This is typically related to the fermentation time and temperature.
- Longer Fermentation: Extended bulk fermentation or cold proofing develops more organic acids, increasing tang. For a milder flavor, reduce fermentation times slightly or proof at a slightly warmer temperature to speed things up while still achieving rise.
- Starter Acidity: A starter that hasn't been fed regularly or is kept in the fridge for extended periods can become very acidic. Try feeding your starter more frequently (daily or twice daily) at room temperature for a few days before baking to make it less acidic.
Dealing with a Sticky Sourdough Dough
Sticky dough is common with higher hydration sourdough recipes, but it can be manageable for your easy beginner sourdough loaf.
- Hydration Level: This recipe likely uses moderate hydration (e.g., 70-75%). Higher hydration doughs are naturally stickier. As you gain experience, you can try slightly lower hydration recipes if stickiness is a major issue.
- Gluten Development: Insufficient folding during bulk fermentation means the gluten network hasn't developed enough to handle the hydration. Ensure you perform the recommended sets of folds.
- Flour and Technique: Use a light dusting of flour on your work surface and hands during shaping, but avoid excessive flour, which prevents the dough from sticking to itself and building tension. Wetting your hands slightly during folds can also help manage stickiness without adding flour.
Tips & Tricks for Perfecting Your Easy Sourdough Loaf
Beyond the basic steps, a few simple tips can elevate your easy beginner sourdough loaf from good to great. These techniques address common goals like achieving a crackling crust or maximizing the loaf's rise.
Incorporating these small adjustments can make a significant difference in the final appearance and texture of your bread.
Achieving a Crispy Crust on Your Sourdough
A hallmark of great sourdough is a thin, crispy crust. For your easy beginner sourdough loaf, ensuring sufficient steam during the initial bake is the most critical factor. Baking in a preheated Dutch oven is excellent for trapping steam.
If not using a Dutch oven, using a baking stone/steel and creating steam by adding hot water to a tray on the bottom rack is key. Additionally, ensure you bake the loaf long enough after removing the lid (if using a Dutch oven) or after the steam phase to allow the crust to fully dry out and crisp up. Baking until the crust is a deep golden-brown is a good visual indicator.
Getting a Beautiful Oven Spring
Oven spring is the rapid expansion of the dough in the first 10-15 minutes of baking. To maximize oven spring in your easy beginner sourdough loaf:
- Use an Active Starter: A strong, vigorous starter is essential for providing the lift needed.
- Proper Proofing: Avoid under or over-proofing. An under-proofed loaf is too dense to expand fully, while an over-proofed loaf has exhausted its leavening power. Cold proofing often leads to better oven spring as the dough is firmer and easier to score.
- High Oven Temperature & Steam: Baking at a high temperature ensures a rapid burst of activity from the yeast before the crust sets, and steam keeps the crust pliable, allowing for maximum expansion.
Storing Your Sourdough for Maximum Freshness
Once your easy beginner sourdough loaf has cooled completely, proper storage will help keep it fresh. Avoid refrigerating sourdough, as this can actually make it go stale faster.
Store the loaf at room temperature. For short-term storage (1-2 days), simply placing the cut side down on a cutting board works well. For longer storage, wrap the loaf in a linen bread bag or a clean kitchen towel. You can also store it in a bread box. If you won't finish the loaf within 2-3 days, slice it and freeze the slices in an airtight bag. To enjoy, simply toast frozen slices.
Variations and Additions to Your Basic Sourdough Recipe
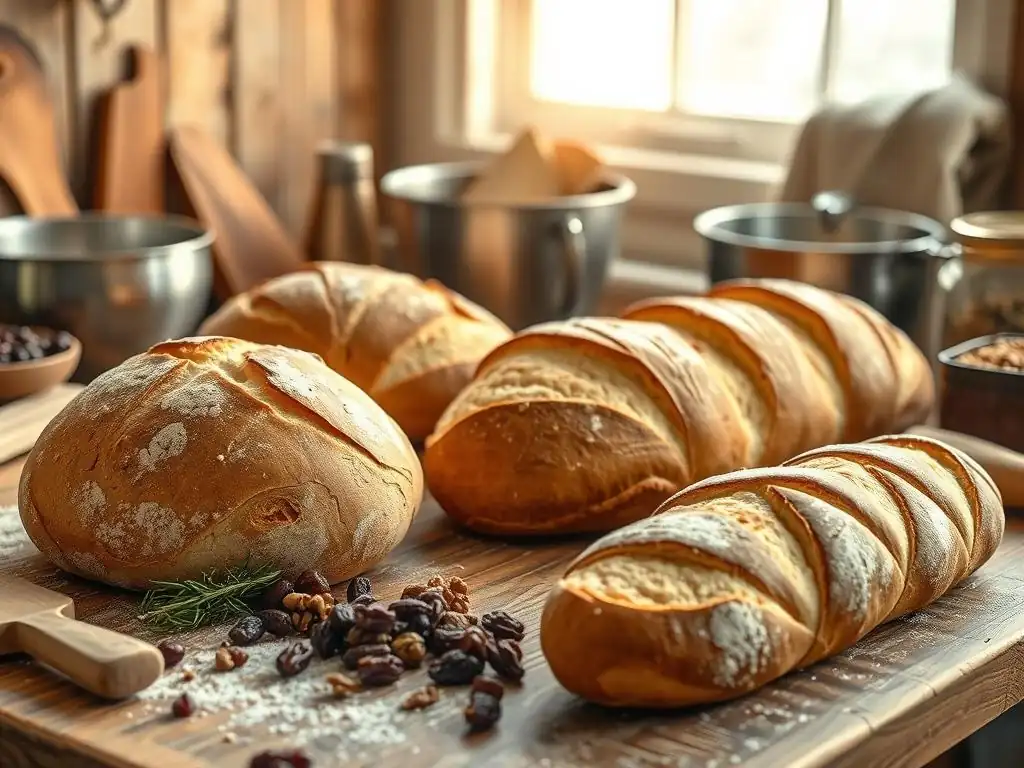
Once you've mastered the easy beginner sourdough loaf, you might want to experiment! The basic recipe provides a fantastic foundation for adding different flavors or incorporating other types of flour to change the texture and taste.
Simple additions can transform your basic loaf into something new and exciting, expanding your sourdough repertoire.
Adding Flavors to Your Sourdough Bread
You can easily add flavorings to your easy beginner sourdough loaf dough during the mixing phase. Popular additions include:
- Herbs: Fresh or dried rosemary, thyme, or chives. A common ratio might be 1-2 tablespoons of dried herbs per loaf.
- Garlic: Roasted garlic cloves or granulated garlic.
- Cheese: Cubes of cheddar, Gruyere, or Parmesan. Add about 50-100g of cheese per loaf.
- Olives: Chopped olives, about 50-75g per loaf.
- Seeds: Sesame seeds, poppy seeds, sunflower seeds, or a seed blend. You can mix them into the dough or sprinkle them on the exterior before baking.
Experimenting with Different Flours
After successfully baking your easy beginner sourdough loaf with white flour, try substituting a portion of the white flour with whole grains.
- Whole Wheat: Substituting 10-20% of the white flour with whole wheat flour will add nutty flavor and nutritional benefits. Whole wheat absorbs more water, so you might need a tiny bit more water in the dough.
- Rye: Adding a small percentage of rye flour (5-10%) can significantly impact flavor and crumb texture, making it slightly denser and tangier.
- Spelt: Spelt is an ancient grain that adds a slightly sweet, nutty flavor. You can substitute 10-25% of the white flour with spelt.
Remember that adding whole grains or other flours can affect the dough's hydration and handling characteristics, so be prepared for slight differences compared to your basic easy beginner sourdough loaf.
Enjoy Your Journey into Easy Sourdough Baking with BakeWithEase!
Frequently Asked Questions
What makes this sourdough loaf recipe suitable for beginners?
This recipe focuses on simple techniques and easy-to-find ingredients, minimizing complexity for those new to sourdough baking. It also provides clear, step-by-step instructions.
How long does it take to make this "Easy beginner sourdough loaf"?
While active baking time is minimal, sourdough requires patience. Expect a total process of around 24-36 hours, including fermentation and proofing.
What if I don't have a sourdough starter?
You'll need to create or obtain a mature sourdough starter before you can bake this loaf. BakeWithEase.com offers resources on creating and maintaining a starter.
Can I substitute ingredients in this recipe?
While minor substitutions are possible, it's best to stick to the recipe for your first attempt. This ensures the best chance of success for beginners.
What equipment do I need to bake this sourdough loaf?
You'll need basic baking tools such as a mixing bowl, a banneton basket (or similar), and a Dutch oven. A kitchen scale is also highly recommended for accurate measurements.
Final Reflection: The Humble Loaf, A Gateway to Baking Joy
The resurgence of sourdough baking isn't just a trend; it's a testament to our desire for connection, both with our food and with a simpler way of life. This simple recipe, designed for the absolute beginner, offers a tangible pathway into the rewarding world of sourdough. It's a world that transcends mere bread-making; it's about nurturing a living culture, understanding fermentation, and experiencing the profound satisfaction of creating something delicious from scratch.
The journey of making sourdough, from the initial anticipation of the starter's bubbling activity to the satisfying thud of the loaf hitting the cooling rack, is a deeply personal one. It's a journey that connects us to generations of bakers past, a legacy passed down through simple acts of fermentation and kneading. Bread is the staff of life,
they say, and in making your own sourdough, you truly grasp the weight and wonder of that statement. It's more than just sustenance; it's a connection to history, to process, and to the very earth from which the flour comes.
Now, I invite you to take this recipe, this simple starting point, and make it your own. Don't be afraid to experiment, to adjust the hydration, to add your own unique flair. The beauty of sourdough lies in its adaptability, its capacity to evolve with your skills and preferences. Embrace the process, enjoy the journey, and savor the incredible taste of a loaf you've crafted with your own two hands. The reward isn't just a delicious bread; it's a newfound appreciation for the art of baking and the simple pleasures of life.
Unleash Your Inner Baker: Start Baking Today!
Thanks for taking the time to explore the world of sourdough with us! We hope you found this recipe both simple and inspiring. Ready to take your baking skills to the next level?
- Bake your own sourdough loaf! Use the recipe above as a springboard – experiment with different flours, hydration levels, or even add some exciting seeds and nuts.
- Share your baking journey! Post a picture of your creation on social media and tag us – we’d love to see your results.
- Dive deeper into sourdough mastery! Explore our other articles on sourdough starters, shaping techniques, and troubleshooting common baking problems.
What unique twist will you add to your first sourdough loaf? Let's hear your ideas in the comments below!