
Basic Sourdough: The Secret to Consistent Results Revealed

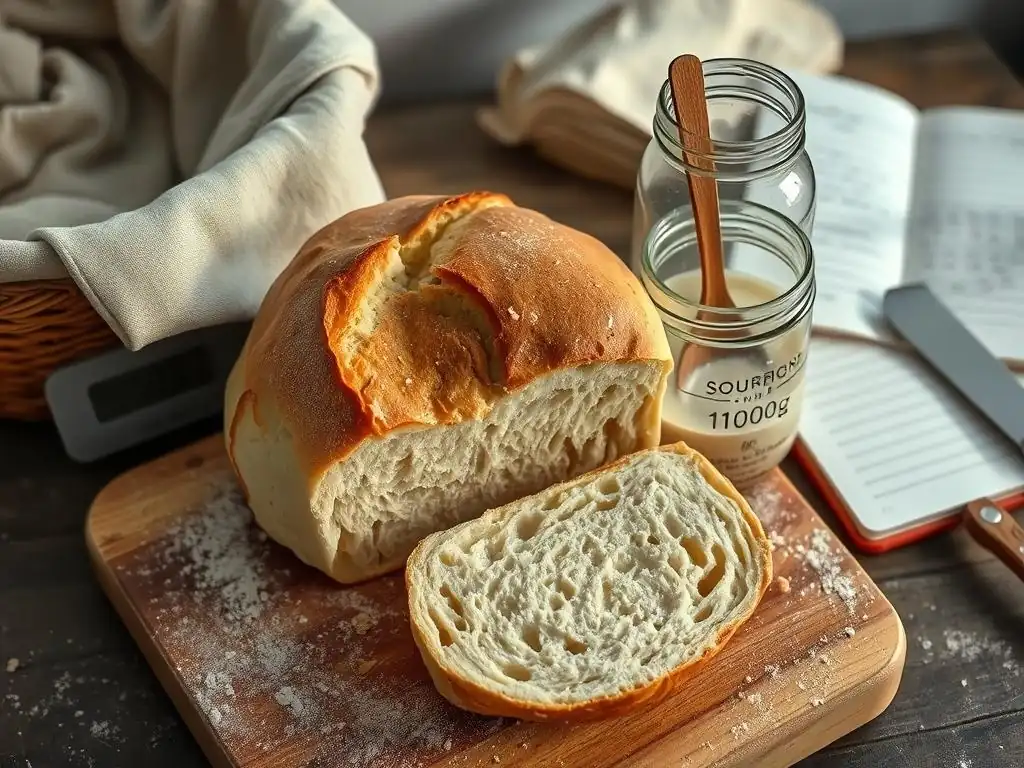
Welcome to BakeWithEase, your trusted companion on your baking journey! Are you ready to unlock the secret to perfecting your sourdough? Discover the key to consistent sourdough starter recipe results and elevate your baking game. Intrigued? Let's dive in and uncover the techniques that will transform your sourdough from unpredictable to utterly reliable.
- Introduction to Consistent Sourdough Baking with BakeWithEase
- Achieving Consistent Sourdough Starter: The Foundation for Success
- The Ultimate Consistent Sourdough Starter Recipe for BakeWithEase Users
- Troubleshooting Common Sourdough Starter Issues for Consistent Results
- Mastering the Sourdough Dough for Consistent Loaves
- Baking Your Sourdough for a Consistently Perfect Crust and Crumb
- Tips and Tricks for Consistently Great Sourdough Bread
- Advanced Techniques for Enhanced Sourdough Consistency
- Beyond the Basics: Maintaining Consistent Sourdough Quality Long-Term
- Conclusion: Enjoying Consistently Delicious Sourdough Bread at Home
-
Frequently Asked Questions
- What is a sourdough starter, and why is it important for consistent sourdough starter recipe results?
- How do I feed my sourdough starter to ensure consistent sourdough starter recipe results?
- What factors can affect the consistent sourdough starter recipe results I get?
- How can I troubleshoot problems with my sourdough starter if I'm not getting consistent sourdough starter recipe results?
- What are some common mistakes that lead to inconsistent results when using a sourdough starter recipe, and how can I avoid them?
- Final Reflection: The Enduring Allure of Consistent Sourdough
- Unleash Your Inner Baker: Master Sourdough Today!
Introduction to Consistent Sourdough Baking with BakeWithEase
Welcome to the wonderful world of sourdough baking! At BakeWithEase, we believe that making delicious, artisanal bread at home should be an enjoyable and rewarding process. While sourdough can sometimes feel intimidating with its wild yeasts and unpredictable nature, achieving consistently excellent results is absolutely within your reach.
The key lies in understanding the fundamental principles, starting with the heart of any sourdough loaf: the starter. A truly consistent sourdough starter recipe is the cornerstone upon which all successful sourdough baking is built. This guide will walk you through the essential steps, from nurturing a vibrant starter to mastering the dough and bake, ensuring you can reliably produce beautiful, flavorful loaves time after time.
Many bakers find themselves frustrated by inconsistent outcomes – one week, a perfectly risen loaf with a beautiful crumb, the next, a dense brick. This variability often stems from fluctuations in the sourdough starter's health and activity. By focusing on consistency in your starter care and baking process, you can demystify sourdough and build confidence. We'll share practical tips and techniques, drawing on common baking experiences, to help you troubleshoot issues and build a routine that delivers reliable and consistent sourdough starter recipe results, ultimately leading to consistently delicious bread.
Achieving Consistent Sourdough Starter: The Foundation for Success
The journey to consistent sourdough baking begins with a healthy, active, and, most importantly, consistent starter. Think of your starter as a living ecosystem; its health directly impacts the dough it leavens. Without a reliable starter, achieving predictable rises and flavors in your bread is incredibly challenging. Focusing on consistency here is paramount.
Developing and maintaining a consistent sourdough starter recipe requires attention to detail and a regular routine. Fluctuations in temperature, feeding times, or ingredient ratios can all lead to varying levels of activity. Our goal is to minimize these variables to create a predictable culture ready to perform when you need it. This section will delve into the biology of your starter and the critical factors that influence its behavior, setting you up for consistent sourdough starter recipe results.
Understanding the Sourdough Starter Ecosystem
A sourdough starter is a dynamic community primarily composed of wild yeasts and lactic acid bacteria (LAB). These microorganisms work in synergy: the yeasts produce carbon dioxide, which makes your dough rise, and alcohol, which contributes to flavor. The LAB produce various organic acids, predominantly lactic acid and acetic acid, which give sourdough its characteristic tangy flavor and help preserve the starter and dough. The exact balance of yeasts and bacteria can vary widely depending on factors like flour type, hydration level, and ambient temperature.
Understanding this ecosystem is crucial for achieving consistent sourdough starter recipe results. When you feed your starter, you are providing food (the carbohydrates in flour) for these microbes. They consume the sugars, multiply, and produce gas and acids.
The peak of activity, often marked by the starter doubling or tripling in size and becoming bubbly, indicates a healthy, thriving community. If the balance is off – perhaps too much acid inhibits yeast activity, or the yeast population isn't robust – your starter won't perform consistently, leading to unpredictable bread outcomes. A typical mature starter might contain millions of yeast cells and billions of LAB per gram.
Key Factors for Consistent Sourdough Starter Activity
Consistency in your sourdough starter's activity is directly linked to consistency in its environment and feeding. The four main factors to control are temperature, feeding ratio, flour type, and water quality. Temperature significantly impacts microbial activity; warmer temperatures (around 75-80°F or 24-27°C) generally lead to faster fermentation and more acidic starters, while cooler temperatures slow things down. Maintaining a relatively stable temperature helps ensure predictable rise and fall cycles. For example, a starter fed and kept at a consistent 75°F will likely peak at a similar time each day, unlike one exposed to large temperature swings.
The feeding ratio (the proportion of starter, flour, and water) is also critical. A common ratio is 1:1:1 by weight (e.g., 50g starter, 50g flour, 50g water). Feeding a smaller amount of starter with a larger amount of fresh flour and water (like 1:5:5) provides more food relative to the microbial population, resulting in a longer, slower fermentation that can build strength and acidity.
Conversely, a 1:1:1 ratio leads to faster fermentation. Using the same ratio consistently for your regular feedings helps predict when your starter will be ready to use. The type of flour (all-purpose, bread flour, rye, whole wheat) and water (filtered is often best to avoid chlorine) also impact microbial health and activity, making consistency in these ingredients essential for reliable results and a consistent sourdough starter recipe.
The Ultimate Consistent Sourdough Starter Recipe for BakeWithEase Users
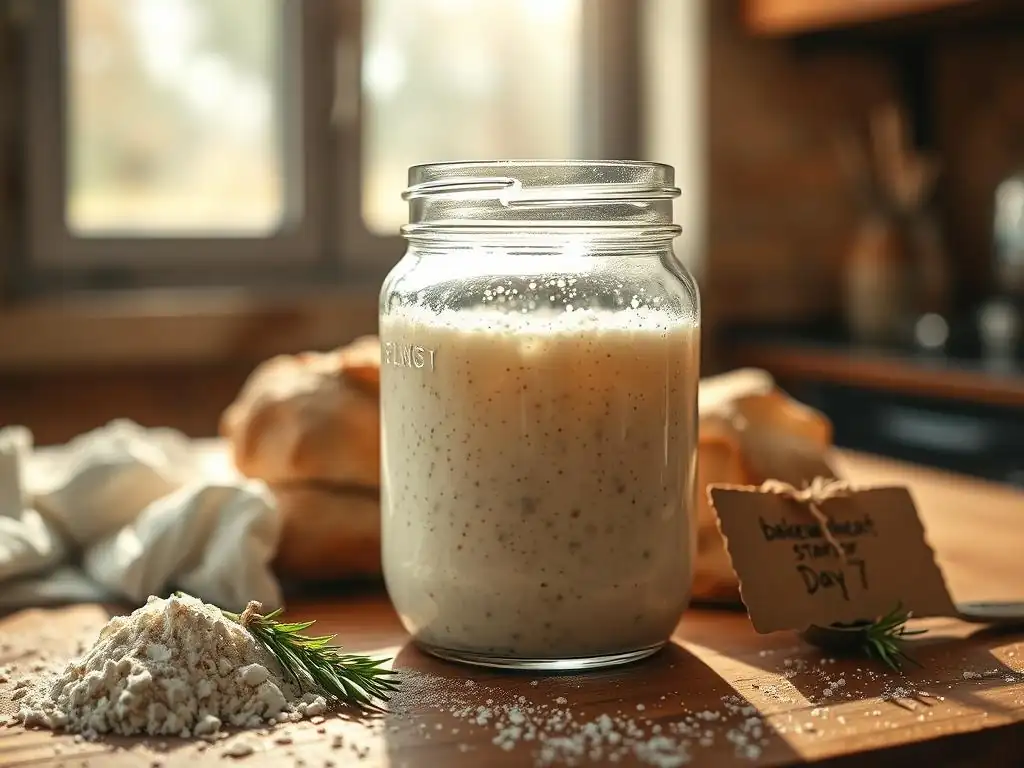
Creating a reliable sourdough starter from scratch is a rewarding process. While there are many methods, this recipe focuses on simplicity and consistency to help you achieve predictable results right from the start. Follow these steps diligently, and you'll be well on your way to having a robust culture ready for baking. This specific approach is designed to nurture a balanced ecosystem, aiming for optimal health and activity that translates into consistent sourdough starter recipe results.
This method uses equal weights of flour and water (100% hydration), which is a common and easy-to-manage consistency. Using filtered water helps avoid potential inhibitors like chlorine. The choice of flour can influence flavor and speed; a mix of all-purpose and whole wheat or rye often gives a good boost initially due to higher nutrient content, but consistency is key – once established, you can transition to feeding with the flour you plan to use for your bread.
Ingredients for a Reliable Sourdough Starter
To begin your consistent sourdough starter recipe journey, you will need just two simple ingredients:
- Flour: Use unbleached flour. A good starting point is a mix of 50% unbleached all-purpose flour and 50% unbleached whole wheat or rye flour. The whole grain flours provide more nutrients for the microbes initially. Once your starter is mature (typically after 7-10 days), you can transition to feeding it solely with the type of flour you intend to use for your bread (e.g., unbleached bread flour). Consistency in the type and brand of flour used for feeding is vital for consistent sourdough starter recipe results.
- Water: Use non-chlorinated water. Filtered water or bottled spring water are excellent choices. If you use tap water, let it sit uncovered for 24 hours to allow chlorine to dissipate. The temperature of the water matters; using lukewarm water (around 70-80°F or 21-27°C) can help kickstart activity, especially in cooler environments.
You will also need a clean glass jar or container with a loose-fitting lid or cover, a digital scale for accurate measurements (essential for consistency! ), and a rubber spatula or spoon for mixing. Avoid metal containers or tools during the initial stages, as some believe metal can react with the acidic starter, though this is debated. Glass is always a safe bet.
Step-by-Step Guide to Creating a Consistent Sourdough Starter
Creating your starter is a process that requires patience and observation. Don't be discouraged if you don't see dramatic results immediately; the microbial community takes time to establish. This step-by-step guide outlines a common and effective method designed for consistent development.
Following these steps precisely, day by day, and observing the changes will help you understand your starter's progress and contribute significantly to achieving consistent sourdough starter recipe results down the line. Remember, environmental factors play a role, so the timeline might vary slightly.
Day 1: Initial Mix and Fermentation Kickstart
On day one, you will combine your initial flour and water to create the base for your starter. This first mix provides the necessary food and hydration for the wild yeasts and bacteria present in the flour and the environment to begin colonizing.
Combine 50 grams of your chosen flour mix (e.g., 25g all-purpose, 25g whole wheat) and 50 grams of non-chlorinated water in your clean jar. Stir thoroughly with a rubber spatula or spoon until no dry flour remains and the mixture is smooth and pasty. It will be quite thick. Scrape down the sides of the jar to keep things tidy. Loosely cover the jar – a lid resting on top, plastic wrap secured with a rubber band but poked with holes, or a clean cloth will work.
This allows air exchange but prevents drying out or contaminants entering. Place the jar in a warm spot, ideally between 70-80°F (21-27°C). A microwave with the light on or near a warm appliance can work. Leave it undisturbed for 24 hours. You might not see much activity yet, and that's perfectly normal.
Day 2-7: Feeding Schedule and Observations
From day two onwards, you will establish a regular feeding schedule. Consistency in timing is important here. Aim to feed your starter around the same time each day. Before feeding, you'll "discard" a portion of the starter. While this might seem wasteful, it's essential for managing the volume and acidity levels, ensuring the microbes have enough fresh food to thrive without the starter becoming overly acidic too quickly. Discarding also concentrates the microbial population in the portion you keep, promoting more vigorous activity.
On Day 2, discard about half of the starter (you can discard by weight for precision, aiming to leave about 50g). Add 50 grams of your flour mix and 50 grams of non-chlorinated water to the remaining starter. Mix well, scrape down the sides, cover loosely, and return it to your warm spot. Repeat this discard and feeding process daily. Observe your starter each day before feeding.
Look for small bubbles, a slightly sour or yeasty smell, and perhaps a slight increase in volume. Activity might be sporadic initially (Days 2-4 often show little change, sometimes even a layer of liquid called "hooch" appears, indicating it's hungry). Around Days 5-7, you should start seeing more consistent bubbling and rising activity within a few hours of feeding, potentially doubling in size. This increased activity is a sign your consistent sourdough starter recipe is developing well.
Day 8+: Maintaining a Stable and Consistent Starter
By Day 8 or usually within 10-14 days, your starter should be showing consistent signs of maturity. This means it reliably doubles or even triples in size within 4-8 hours after feeding (at room temperature), has a bubbly, airy texture, and smells pleasantly tangy and yeasty, like yogurt or ripe fruit. It should also pass the float test: drop a small spoonful into a glass of water; if it floats, it's ready to use for baking.
To maintain this stable and consistent starter, continue feeding it daily if kept at room temperature. Use your desired feeding ratio (1:1:1 is common for daily feeding, but 1:2:2 or 1:3:3 can be used if you need it to last longer between feedings). Once mature, you can transition to feeding it solely with the flour you bake with (e.g., 50g starter, 50g bread flour, 50g water). For less frequent baking, you can store your mature starter in the refrigerator.
Feed it until it's active and bubbly, then place it in the fridge. To use it, take it out, let it come to room temperature, and feed it 1-3 times over 1-3 days until it's consistently active again. Regular feeding, whether daily at room temp or weekly from the fridge, is key to maintaining a consistent sourdough starter recipe that yields predictable results.
Troubleshooting Common Sourdough Starter Issues for Consistent Results
Even with the best intentions and a consistent feeding schedule, you might encounter issues with your sourdough starter. Don't panic! Most problems are easily fixable and part of the learning process. Recognizing the signs and knowing how to react will help you get back on track towards achieving consistent sourdough starter recipe results.
Common issues include slow activity, the appearance of mold, or off-putting smells. These are usually indicators that the microbial balance is temporarily out of whack or that environmental conditions aren't ideal. Patience and consistent corrective action are your best tools here.
Addressing Slow Starter Activity
Slow or sluggish activity is perhaps the most common issue, especially in cooler environments or during the initial days of creating a starter. If your mature starter isn't doubling within its usual timeframe after feeding, it could be due to several factors. The most likely culprits are a too-cool temperature, infrequent feeding, or an unfavorable feeding ratio. For example, a starter kept at 65°F (18°C) will ferment much slower than one at 75°F (24°C).
To boost activity, first, ensure your starter is in a warm spot (75-80°F or 24-27°C is ideal for rapid activation). You can also try a stronger feeding ratio, such as 1 part starter to 2 or 3 parts flour and water (e.g., 25g starter, 50g flour, 50g water). This provides a larger food source relative to the starter volume, encouraging more robust growth.
Feeding twice a day for a couple of days can also help, as it provides more frequent access to fresh food. Sometimes, switching to a flour with higher nutrient content, like rye or whole wheat, for a few feedings can give the microbes a boost needed to return to consistent sourdough starter recipe activity.
Dealing with Mold or Unpleasant Odors
While a healthy starter should smell pleasantly tangy and slightly alcoholic or fruity, certain off-putting smells or the appearance of mold indicate a problem. A strong, pungent smell resembling nail polish remover or strong alcohol (hooch) is usually a sign the starter is very hungry and has produced a lot of alcohol as a byproduct. This isn't necessarily harmful, but it means your feeding schedule might need adjustment, or the starter needs more frequent feeding or a larger feeding ratio.
Mold, which can appear as fuzzy or colored spots (green, black, pink), is a sign that undesirable microorganisms have taken hold. Unfortunately, if you see mold, it's best to discard the entire starter and start fresh. Do not try to scrape the mold off, as the hyphae (roots) are likely throughout the culture.
To prevent mold, always use clean jars and utensils, cover the starter loosely to allow airflow but prevent contaminants, and maintain a regular feeding schedule to keep the beneficial microbes dominant. Avoiding overly cool, damp environments also helps. A healthy, active starter is naturally resistant to mold due to its acidity.
Adjusting Feeding Ratios for Optimal Performance
The feeding ratio you use significantly impacts your starter's fermentation speed and acidity. A 1:1:1 ratio (starter:flour:water by weight) is common for daily feeding at room temperature, resulting in a relatively fast peak (typically 4-8 hours). This is great for baking frequently. However, if you need your starter to last longer between feedings or want to develop more complex acidity, you might adjust the ratio.
Using a higher ratio, like 1:2:2 (e.g., 25g starter, 50g flour, 50g water) or even 1:5:5, provides significantly more food for the microbes relative to their initial population. This slows down the fermentation process, meaning the starter will take longer to peak (potentially 8-12+ hours or even longer depending on temperature and ratio). This is useful if you can only feed once a day or are keeping the starter in a slightly cooler environment.
Experimenting with ratios and observing the peak time will help you find what works best for your schedule and environment, ensuring consistent sourdough starter recipe results tailored to your needs. Always measure precisely using a scale when adjusting ratios for consistency.
Mastering the Sourdough Dough for Consistent Loaves
Once you have a healthy, active, and consistent sourdough starter, the next step towards consistently great bread is understanding the dough itself. Sourdough dough behaves differently than commercial yeast dough due to the unique microbial activity and the acids produced by the starter. Mastering hydration, gluten development, and fermentation is key to achieving predictable oven spring and crumb structure.
Consistency in your dough handling techniques is just as important as consistency in your starter care. Small variations in mixing, folding, or resting times can impact the final loaf. This section will cover the fundamental aspects of sourdough dough handling to help you create a reliable process.
Hydration Levels and Their Impact on Dough Consistency
Hydration refers to the ratio of water to flour in your dough, typically expressed as a percentage of the flour weight. For example, a dough made with 500g flour and 350g water has 70% hydration (350/500 = 0.7, or 70%). The hydration level significantly affects the dough's consistency, handling properties, and the final loaf's characteristics. Higher hydration doughs (75%+) are wetter, stickier, and more challenging to handle but often result in a more open, airy crumb. Lower hydration doughs (60-65%) are stiffer, easier to manage, and produce a tighter crumb.
For consistent results, especially when starting out, it's best to stick to a moderate hydration level, perhaps 68-72%. This range is manageable for most bakers and yields good results.
Using the exact same hydration percentage each time you make a specific recipe ensures consistent dough feel and predictable fermentation times (assuming other factors like temperature and starter activity are consistent). Factors like flour type (some absorb more water than others) and ambient humidity can slightly affect how wet the dough feels, so some minor adjustments might be needed over time, but starting with a fixed percentage is crucial for learning consistency.
Kneading Techniques for Strong Gluten Development
Gluten development is essential in sourdough baking as it provides the structure needed to trap the carbon dioxide produced by the yeast, allowing the dough to rise and hold its shape. Sourdough acids also help strengthen the gluten network over the long fermentation period. While traditional kneading on a counter works, many sourdough bakers use gentler, less labor-intensive techniques like stretch and folds or coil folds during the bulk fermentation.
These techniques involve periodically stretching or lifting the dough and folding it back on itself over several hours. This builds strength gradually without tearing the delicate gluten strands. For example, performing 3-4 sets of stretch and folds at 30-45 minute intervals during the first few hours of bulk fermentation is a common practice.
This systematic approach ensures consistent gluten development from batch to batch, leading to more predictable dough structure and oven spring. The goal is to develop a dough that is smooth, elastic, and passes the "windowpane test" (you can gently stretch a small piece thin enough to see light through it without tearing).
Bulk Fermentation: Achieving Consistent Dough Rise
Bulk fermentation, or the first rise, is the crucial period where the dough develops flavor, acidity, and gas. It begins after mixing the ingredients and ends when you divide and shape the dough. Consistency during bulk fermentation is key to achieving predictable leavening and crumb structure. The duration of bulk fermentation is highly dependent on temperature and the activity of your starter. A dough might take 4-6 hours to double at 75°F (24°C), but 8-12 hours or longer at 68°F (20°C).
Instead of relying solely on time, learn to judge the dough's readiness by its appearance and feel. The dough should increase significantly in volume (often 50-100%, depending on hydration and desired outcome), feel airy and bubbly, and show signs of surface tension.
Using a clear container with volume markings or placing a small piece of dough in a straight-sided container (" aliquot jar") can help you track the rise accurately and consistently. Paying attention to the dough's state, rather than just the clock, will help you achieve consistent bulk fermentation results regardless of minor variations in temperature or starter strength.
Baking Your Sourdough for a Consistently Perfect Crust and Crumb
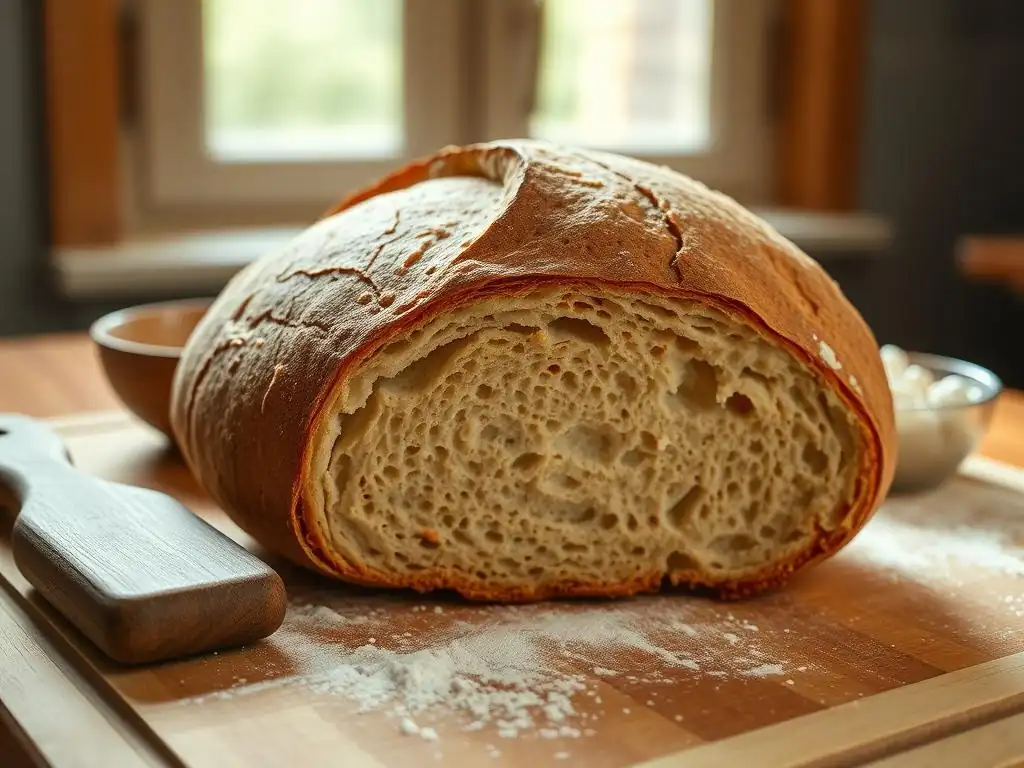
The final stage in achieving consistently great sourdough is the bake itself. The oven environment plays a critical role in how your loaf expands, the crust develops, and the crumb structure sets. Controlling heat and steam is paramount for achieving that coveted golden crust and open, airy interior.
Consistency in your baking setup and process will eliminate variables that can lead to flat loaves or tough crusts. From preheating your oven correctly to managing steam and cooling, each step contributes to the final result.
Oven Temperature and Steam Injection for Optimal Baking
Sourdough loaves benefit immensely from a hot oven and a steamy environment during the initial phase of baking. High heat (typically 450-500°F or 230-260°C) provides the necessary thermal energy for oven spring – the rapid expansion of the dough before the crust hardens. Steam keeps the surface of the dough moist, allowing it to expand fully without forming a hard crust too early. This is why baking in a Dutch oven or using a baking stone with a steam setup is popular among home bakers seeking consistent results.
When using a Dutch oven, you preheat the Dutch oven inside the oven to the target temperature, then carefully place the shaped dough inside, cover it, and bake for 20-25 minutes with the lid on (creating its own steam). Then, you remove the lid and continue baking for another 20-30 minutes to allow the crust to brown and crisp.
If using a baking stone, you can create steam by placing a tray of hot water or ice cubes on a rack below the stone just as you load the bread. Consistent preheating time (often 45-60 minutes for a stone or Dutch oven) and consistent temperature settings are vital for predictable oven spring and crust development.
Scoring Techniques for Controlled Expansion
Scoring, or slashing, the surface of your shaped dough just before baking serves a functional purpose: it provides a controlled escape route for the expanding gases within the loaf. Without scoring, the crust would likely crack in unpredictable places as the dough expands. Scoring also adds a beautiful, artisanal touch to your bread.
Using a sharp blade (like a razor blade or lame) is essential for clean cuts that open up nicely in the oven. Common scoring patterns include a single long slash down the center, multiple parallel slashes, or decorative patterns. The depth and angle of your score will influence how the dough expands. A deeper cut encourages more dramatic oven spring along that line. For consistent loaf shape and appearance, practice making quick, confident cuts of consistent depth and pattern each time you bake a similar loaf. This ensures the bread expands predictably along the scores.
Cooling and Storage for Maintaining Freshness
Once your sourdough loaf emerges from the oven, it's crucial to let it cool completely on a wire rack before slicing into it. This step is not just about preventing burns; the internal structure of the bread is still setting, and moisture is redistributing throughout the crumb. Cutting into a hot loaf can result in a gummy texture. Allowing the bread to cool for at least 2-3 hours (or longer for larger loaves) ensures the crumb sets properly, contributing to a consistent texture.
For storing your freshly baked sourdough to maintain freshness and that wonderful crust, avoid airtight plastic bags, especially when the bread is still warm, as they can trap moisture and make the crust soft and chewy. Store the cooled loaf cut-side down on a cutting board or in a paper bag at room temperature for a day or two.
For longer storage, you can wrap it tightly in plastic wrap or foil and store it at room temperature for a few more days, or slice and freeze it for up to a few months. Proper cooling and storage techniques help preserve the consistent crust and crumb you worked hard to achieve.
Tips and Tricks for Consistently Great Sourdough Bread
Beyond the core steps of starter maintenance, dough handling, and baking, several smaller details can significantly impact the consistency of your sourdough results. Paying attention to these finer points can help eliminate variables and refine your process, leading to reliably delicious loaves every time.
These tips are often learned through experience, but incorporating them into your routine from the start can fast-track your journey to consistent sourdough starter recipe results and overall baking success.
Using a Dough Thermometer for Accurate Baking
Temperature is one of the most influential factors in sourdough fermentation and baking. A dough thermometer can be an invaluable tool for achieving consistent results. During bulk fermentation and proofing, knowing the actual internal temperature of your dough allows you to predict fermentation times more accurately than relying solely on ambient temperature. For example, a dough at 78°F will ferment much faster than one at 70°F. Monitoring dough temperature helps you adjust your schedule or environment to ensure consistent fermentation rates batch after batch.
You can also use an instant-read thermometer to check the internal temperature of your baked loaf. A fully baked sourdough loaf typically reaches an internal temperature of 205-210°F (96-99°C). Baking to a consistent internal temperature ensures the crumb is properly set and cooked through, contributing to a consistent texture. Relying on visual cues alone can be misleading; a thermometer provides an objective measure of doneness.
The Importance of Consistent Measurements
Baking is a science, and precision in measurements is crucial for consistent results. While cooking often allows for improvisation, baking recipes rely on specific ratios of ingredients. Using a digital scale to weigh your ingredients – flour, water, salt, and starter – is far more accurate than using volume measurements (cups and spoons), which can vary depending on how the ingredient is packed. For instance, a cup of flour can weigh anywhere from 120g to 150g depending on how densely it's packed.
Weighing ingredients ensures you are using the exact ratios specified in a recipe every time. This consistency in ingredient ratios directly impacts the dough's hydration, the starter's feeding ratio, and the overall balance of the recipe, leading to more predictable outcomes for your consistent sourdough starter recipe and the final bread. Get into the habit of weighing everything; it's a simple step that makes a huge difference.
Adjusting Your Recipe Based on Environmental Factors
While aiming for consistency, it's also important to acknowledge that environmental factors like ambient temperature and humidity can influence your sourdough process. A recipe that works perfectly in a warm, humid kitchen in the summer might behave differently in a cool, dry kitchen in the winter. Learning to make slight adjustments based on these conditions is key to maintaining consistency year-round.
For example, in a warmer environment, your starter might peak faster, and your dough will ferment more quickly. You might need to reduce fermentation times, use cooler water for mixing, or even slightly reduce the amount of starter used. In a cooler environment, you might need to increase fermentation times, use warmer water, or find a warmer spot for your dough.
Similarly, very dry air can cause dough surfaces to dry out quickly, requiring more attention to keeping the dough covered. By observing how your starter and dough behave under different conditions and making small, informed adjustments, you can continue to achieve consistent sourdough starter recipe results and consistently great bread regardless of the weather outside.
Advanced Techniques for Enhanced Sourdough Consistency
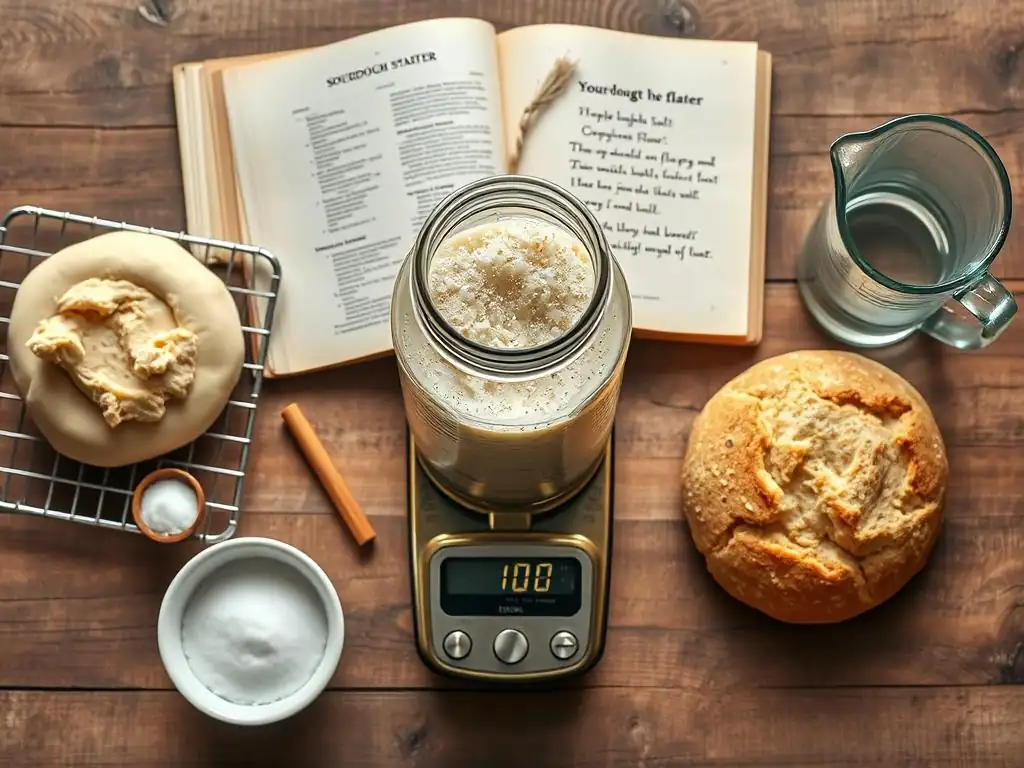
Once you've mastered the basics and are consistently producing good loaves, you might be interested in exploring techniques that can further enhance the flavor, texture, and consistency of your sourdough bread. These methods add layers of control and can help refine your process and results.
While not strictly necessary for basic consistent sourdough starter recipe results, these techniques are widely used by experienced bakers to elevate their bread and achieve specific characteristics, such as a stronger rise or a more complex flavor profile.
Utilizing a Levain Build for Improved Flavor and Rise
A levain (also sometimes called a leaven or preferment) is essentially a small, specifically built batch of active starter used to inoculate your final dough. Instead of using your main, often refrigerated, "mother" starter directly, you take a small amount of mother starter and feed it with a specific ratio of flour and water (often 1:2:2 or 1:5:5 starter:flour:water) several hours before mixing your dough. You then use this freshly peaked levain in your recipe.
Building a levain ensures you are using your starter at its peak activity, leading to a more predictable and vigorous rise in your dough. It also allows you to adjust the flour type and hydration of the levain to suit the specific bread recipe you are making. For example, you might build a rye levain for a rye bread or a stiff levain for a less tangy loaf. This controlled step guarantees that the leavening power is consistent for each bake, contributing significantly to consistent sourdough starter recipe results in terms of dough rise.
Autolyse for Increased Dough Hydration and Workability
Autolyse is a simple technique where you mix just the flour and water from your recipe and let it rest for 20 minutes to several hours before adding the salt and starter. This initial resting period allows the flour to fully hydrate and the gluten network to start developing on its own through enzymatic activity.
The benefits of autolyse include easier mixing, improved dough extensibility (stretchiness), and potentially increased water absorption. For instance, a dough that feels stiff at 70% hydration when mixed all at once might feel much more pliable and manageable after a 30-minute autolyse with the same hydration. This technique reduces the amount of manual kneading or folding required and can lead to a smoother, more consistent dough texture, which translates to a more uniform crumb in the final loaf. It's a simple step that enhances dough consistency.
Cold Retarding for Flavor Development and Schedule Flexibility
Cold retarding, or proofing the shaped dough in the refrigerator for an extended period (typically 8-24 hours), is a technique widely used for flavor development and scheduling convenience. The cold temperature significantly slows down fermentation, allowing enzymes in the dough to break down starches into sugars, resulting in a more complex flavor profile and a crust that browns more deeply.
Furthermore, cold retarding provides immense schedule flexibility. You can mix and shape your dough one day and bake it directly from the fridge the next morning or evening, fitting baking around your daily life. The cold also firms up the dough, making it easier to handle and score. While it changes the speed of fermentation, performing cold retarding consistently for a given recipe (e.g., always cold retarding for 12 hours at 38°F) helps achieve consistent flavor and crust development batch after batch.
Beyond the Basics: Maintaining Consistent Sourdough Quality Long-Term
Achieving consistent sourdough starter recipe results and baking success isn't just about the initial steps; it's also about establishing a sustainable routine for long-term starter health and adapting your process as you gain experience. A well-cared-for starter can last for years, providing a continuous source of leavening and flavor.
Maintaining consistency in your starter care and being open to adapting to different flours or conditions are key to enjoying consistently delicious sourdough bread for the long haul.
Proper Storage of Your Sourdough Starter
How you store your sourdough starter depends primarily on how often you bake. If you bake frequently (daily or every couple of days), keeping your starter at room temperature with daily feedings is ideal for ensuring it's always active and ready. Store it in a glass jar with a loose lid or cloth cover in a consistent spot away from direct sunlight or drafts.
If you bake less often (weekly or less), storing your starter in the refrigerator is the most practical solution. Feed your starter until it's active and bubbly, then place it in the fridge. The cold temperature dramatically slows down microbial activity, allowing you to feed it much less frequently, typically once a week. When you want to bake, take it out, let it warm up, and feed it 1-3 times over 1-3 days until it's vigorously active again. Consistent storage methods help maintain a stable and consistent sourdough starter recipe culture.
Regular Feeding and Maintenance Schedule
Whether stored at room temperature or in the fridge, maintaining a regular feeding schedule is crucial for your starter's health and consistency. For room temperature starters, daily feeding at roughly the same time keeps the microbes well-fed and active. For refrigerated starters, aim for a weekly feeding. Discard most of the starter, feed it with fresh flour and water, let it sit at room temperature for 1-2 hours until you see signs of activity, and then return it to the fridge.
Neglecting your starter by going too long between feedings can weaken the microbial population, lead to excessive acidity, and make it slower to become active when you need it. Establishing and sticking to a routine – whether daily or weekly – ensures your starter remains vibrant and reliable, providing consistent sourdough starter recipe results whenever you're ready to bake.
Adapting to Different Flour Types
As you become more comfortable with sourdough, you might want to experiment with different types of flour beyond standard bread flour, such as whole wheat, rye, spelt, or even gluten-free blends. Each flour type behaves differently due to variations in protein content, starch composition, and absorption rates. Whole grain flours, for example, often absorb more water and ferment faster than refined flours.
When switching the primary flour you feed your starter or use in your dough, be prepared for changes in hydration needs and fermentation times. You might need to adjust the amount of water slightly to achieve a similar dough consistency or expect the starter to peak sooner.
For instance, a starter fed with 100% rye flour will typically peak much faster than one fed with 100% bread flour. Observing how your starter and dough react to the new flour and making small, consistent adjustments to your process will help you achieve consistent sourdough starter recipe results and delicious loaves regardless of the grain you choose.
Conclusion: Enjoying Consistently Delicious Sourdough Bread at Home
Achieving consistent sourdough starter recipe results and baking consistently delicious bread is a journey that combines understanding microbial science with developing tactile baking skills. It requires patience, observation, and a commitment to routine. By focusing on the core principles – nurturing a healthy starter, mastering dough handling, and controlling the bake – you can significantly improve the predictability of your sourdough outcomes.
Remember that every batch is a learning opportunity. Pay attention to what works and what doesn't, keep notes if helpful, and don't be afraid to troubleshoot. With practice and consistency in your methods, you'll build confidence and develop an intuitive feel for the process. Soon, you'll be regularly pulling beautiful, flavorful loaves from your oven, enjoying the immense satisfaction of baking consistently great sourdough bread right at home with BakeWithEase. Keep feeding your starter, keep baking, and enjoy the delicious rewards of your efforts!
Frequently Asked Questions
What is a sourdough starter, and why is it important for consistent sourdough starter recipe results?
A sourdough starter is a living culture of wild yeasts and bacteria used to leaven bread. It's important for consistent results because it provides the necessary rise and flavor for sourdough bread.
How do I feed my sourdough starter to ensure consistent sourdough starter recipe results?
Feed your starter regularly with equal parts flour and water by weight, not volume. Discarding some of the starter before feeding helps maintain a healthy and consistent culture.
What factors can affect the consistent sourdough starter recipe results I get?
Temperature, flour type, and water quality can all significantly impact your starter's activity and, therefore, the final outcome of your sourdough. A stable environment is crucial.
How can I troubleshoot problems with my sourdough starter if I'm not getting consistent sourdough starter recipe results?
Look for signs of activity like bubbling and doubling in size. If it's sluggish, try feeding it more frequently or adjusting the temperature. Patience and observation are key.
What are some common mistakes that lead to inconsistent results when using a sourdough starter recipe, and how can I avoid them?
Using incorrect ratios of ingredients, neglecting to discard before feeding, and inconsistent feeding schedules are common pitfalls. Accurate measurements and regular feeding are essential for success.
Final Reflection: The Enduring Allure of Consistent Sourdough
The quest for a reliable sourdough starter isn't just about baking; it's about mastering a living organism, a testament to patience and precision in a fast-paced world. This article explored the often-overlooked nuances of creating and maintaining a consistently active sourdough starter, highlighting the importance of factors like temperature control, feeding schedules, and recognizing the subtle signs of a healthy culture. The techniques discussed are not merely recipes; they are keys to unlocking a deeper understanding of the fermentation process.
The journey of baking sourdough is a deeply personal one, a testament to the interconnectedness between nature and nurture. It's a process that demands respect for the living organism at its heart, a humbling experience that teaches us the value of observation and adaptation. The best bread is made with love and patience.
– This simple adage encapsulates the essence of successful sourdough baking, emphasizing the emotional investment and the rewards of consistent effort. The impact of sourdough extends beyond the kitchen; it fosters a connection to traditional food practices, encouraging a mindful approach to food production and consumption.
Now, consider your own baking journey. What have you learned about consistency, not just in sourdough, but in other aspects of your life? Perhaps this exploration of precise measurements and attentive observation can inspire you to approach other challenges with the same dedication and patience. Embrace the art of the slow rise, the subtle nuances of fermentation, and the profound satisfaction of creating something beautiful and delicious from simple ingredients. The journey to consistent sourdough results is a journey of self-discovery, a testament to the power of perseverance and the enduring magic of a simple starter.
Unleash Your Inner Baker: Master Sourdough Today!
Thanks for taking the time to explore the world of sourdough baking with us! We hope you gained valuable insights into achieving consistently delicious results. Ready to put your new knowledge into practice?
- Start your sourdough journey today! Begin by mixing your first levain – we've given you all the tools you need to succeed. This is your first step toward amazing bread.
- Share your baking triumphs (and challenges!) with our community. We'd love to see your creations and hear your feedback. Let's learn together!
- Consider experimenting with different flours – the possibilities are endless! What unique flavor will you discover?
What unique twist will you add to your first sourdough loaf? Let us know in the comments below!