
The Ultimate Basic Sourdough Recipe for Home Bakers

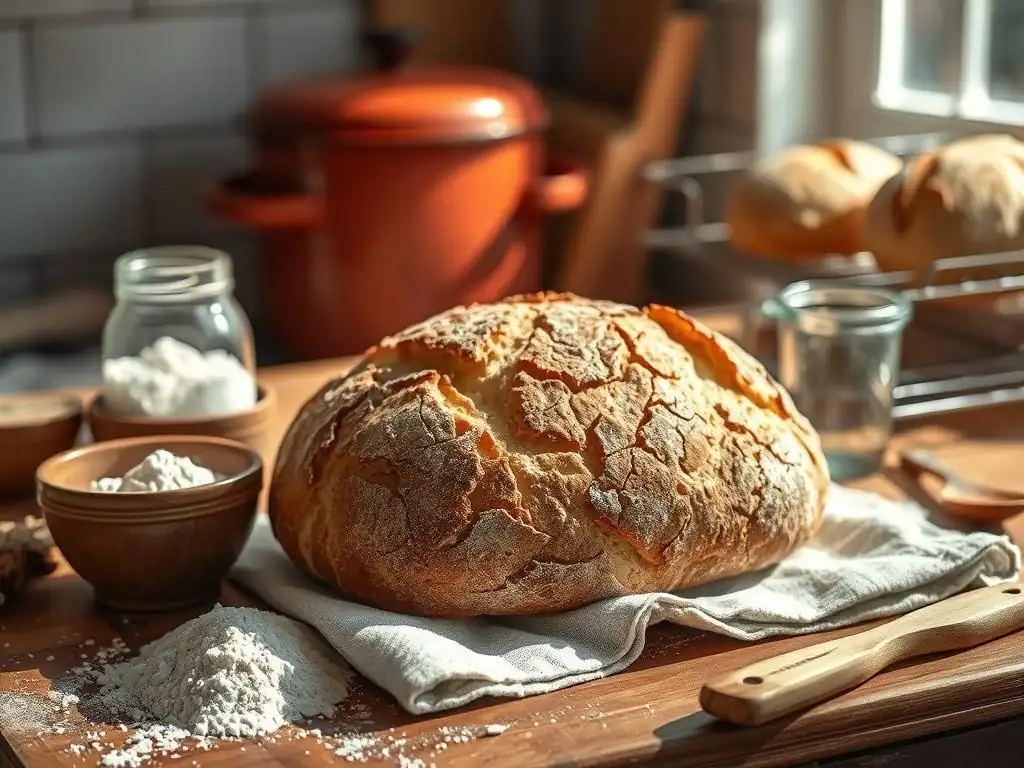
Welcome to BakeWithEase, your haven for all things baking! Curious about crafting your own artisan bread but intimidated by the process? Dive in and discover our easy beginner sourdough recipe, demystifying the secrets of sourdough and guiding you towards that perfectly tangy, crusty loaf. Prepare to unlock the magic of naturally leavened bread and embark on a rewarding baking journey, one delicious slice at a time. Let's get baking!
- Our Signature Sourdough Recipe: A Guide for Home Bakers
- Understanding Sourdough: What Makes It Special?
- Essential Equipment for Your First Sourdough Loaf
-
Sourdough Bread Recipe: Step-by-Step Instructions
- Sourdough Starter: The Heart of Your Bread
- Sourdough Dough Recipe Ingredients:
- Mixing the Dough: The Autolyse and Initial Mix
- Bulk Fermentation: The Secret to Sourdough Flavor
- Shaping Your Sourdough Loaf: Techniques
- Proofing Your Sourdough: Achieving the Perfect Rise
- Baking Your Sourdough: Oven Temperature and Techniques
- Cooling and Slicing: The Final Steps
- Troubleshooting Your Sourdough Bread Recipe
- Storing Your Sourdough Bread: Keeping It Fresh
- Variations and Adaptations: Beyond the Basic Sourdough
- Mastering the Sourdough Bread Recipe: Tips and Tricks
-
Frequently Asked Questions
- What makes this sourdough recipe "easy" for beginners?
- How long does it take to make this easy sourdough recipe from start to finish?
- Can I use a different type of flour for this beginner sourdough recipe?
- What if my sourdough starter isn't very active?
- What's the best way to store my homemade sourdough bread?
- Final Reflection: The Enduring Allure of Sourdough
- Unleash Your Inner Baker: Craft Your Perfect Sourdough!
Our Signature Sourdough Recipe: A Guide for Home Bakers
Welcome to the wonderful world of sourdough baking! If you've been curious about creating that beautifully rustic, tangy loaf at home, you're in the right place. Many bakers believe sourdough is complex, but with a clear, easy beginner sourdough recipe and a little patience, you can achieve fantastic results right in your own kitchen. This guide is designed to walk you through every step, demystifying the process and setting you up for success.
We've crafted this ultimate sourdough bread recipe specifically for home bakers. It focuses on foundational techniques and understanding the dough, ensuring that even if this is your first attempt, you can bake a delicious loaf. Forget intimidating professional jargon; we'll break down each stage into simple, manageable steps, making your journey to baking perfect sourdough bread as enjoyable as possible.
Understanding Sourdough: What Makes It Special?
Sourdough stands apart from commercial yeast breads due to its unique leavening agent: a live fermented culture of flour and water, known as a sourdough starter. This starter contains wild yeasts and beneficial bacteria, primarily lactic acid bacteria. Unlike commercial yeast, which provides a rapid, uniform rise, sourdough starter works more slowly, producing a dough with complex flavors and a distinct texture.
The magic of sourdough lies in this symbiotic relationship between the wild yeast and bacteria. The yeast produces carbon dioxide, which makes the bread rise, while the bacteria produce lactic and acetic acids. These acids not only contribute to the signature tangy flavor but also improve the texture, keeping quality, and potential digestibility of the bread. Mastering an easy beginner sourdough recipe starts with understanding this living culture.
The Science Behind Sourdough Fermentation
Sourdough fermentation is a fascinating microbiological process driven by the organisms within the starter. When you feed your starter with fresh flour and water, the wild yeasts consume the sugars in the flour and produce ethanol and carbon dioxide gas. This gas is what creates the bubbles in your starter and makes your bread dough rise. Simultaneously, the lactic acid bacteria ferment carbohydrates and produce lactic acid and acetic acid.
Lactic acid contributes a milder, yogurt-like tang, while acetic acid provides a sharper, vinegar-like note, especially noticeable in colder fermentation environments. The balance of these acids, influenced by factors like temperature and feeding ratios, dictates the final flavor profile of your sourdough loaf.
For example, a starter fed with a 1:1:1 ratio (starter:water:flour by weight) and kept warm around 75°F (24°C) might develop a balanced flavor, whereas a colder bulk fermentation might enhance acetic acid production, leading to a more pronounced tang. This complex interplay is what gives sourdough its depth of flavor, far beyond that of commercially yeast-leavened bread.
Benefits of Baking with Sourdough: Flavor and Health
Beyond its incredible taste and texture, baking with sourdough offers several potential benefits. The long fermentation process breaks down complex carbohydrates and phytic acid, an anti-nutrient found in grains that can inhibit mineral absorption. While research is ongoing, this breakdown may make sourdough bread easier for some people to digest compared to conventionally leavened bread. The fermentation process can also potentially lower the glycemic index of the bread, meaning it may cause a slower rise in blood sugar levels.
From a flavor perspective, nothing compares to the nuanced tang and aroma of a properly fermented sourdough loaf. The specific balance of lactic and acetic acids, combined with the caramelization of the crust during baking, creates a flavor profile that is both complex and deeply satisfying. Once you bake your first successful loaf using an easy beginner sourdough recipe, you'll understand why so many home bakers fall in love with this process. The flavor improves significantly with longer fermentation, particularly during a cold proofing stage in the refrigerator, which can last anywhere from 8 to 24 hours.
Essential Equipment for Your First Sourdough Loaf
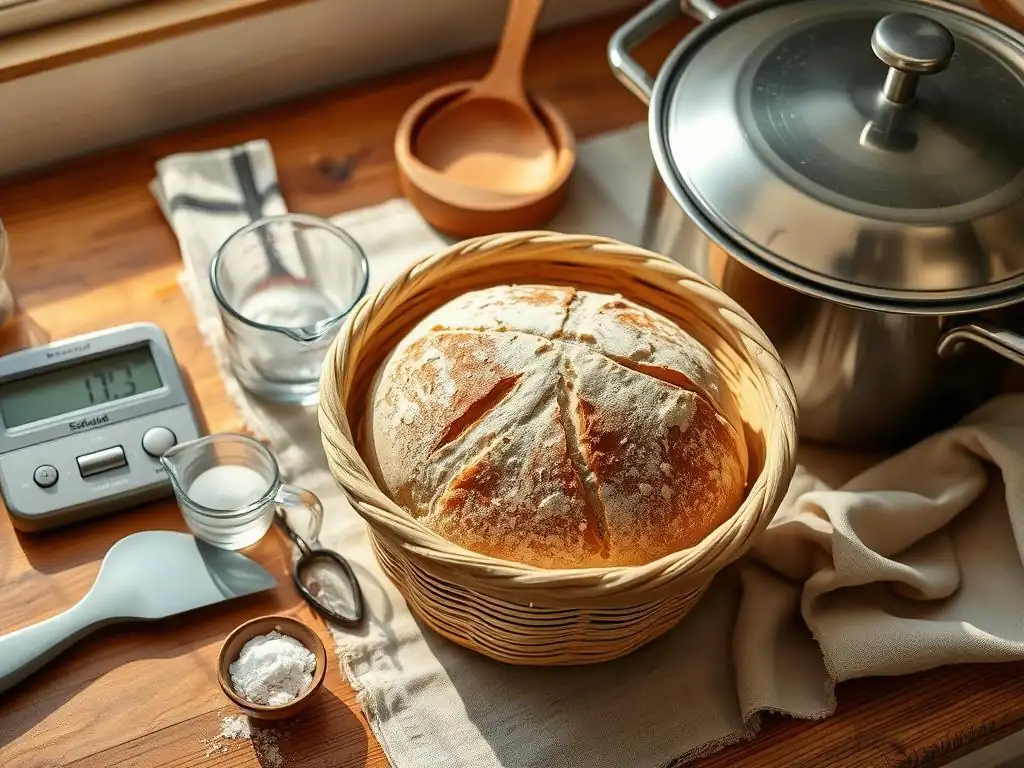
Getting started with sourdough doesn't require a professional bakery setup, but a few key tools will make the process much smoother and significantly increase your chances of success with an easy beginner sourdough recipe. Having the right equipment ensures accuracy and efficiency.
Must-Have Tools for Sourdough Baking
A digital kitchen scale is arguably the most crucial piece of equipment. Baking with sourdough, especially for beginners, requires precise measurements by weight (grams are standard) to ensure consistent results. Unlike volume measurements (cups), weight is always accurate regardless of how tightly you pack the flour.
You'll also need a couple of sturdy mixing bowls (glass or plastic are fine), a flexible dough scraper for handling the sticky dough, and a proofing basket, often called a banneton. Bannetons, typically made of rattan, help the dough hold its shape during the final rise and wick away surface moisture, which contributes to a better crust.
Finally, a Dutch oven is highly recommended. Baking sourdough in a preheated Dutch oven traps steam released by the dough, allowing the loaf to achieve maximum oven spring and develop a beautiful, crispy crust in the initial baking phase (usually the first 20-25 minutes at high heat, around 475°F or 245°C).
Using a digital scale ensures your hydration levels are correct. For example, a common beginner recipe might use 400g water for 500g flour, resulting in 80% hydration – a sticky but manageable dough for a beginner sourdough recipe. Trying to measure this accurately by volume would be nearly impossible. A standard round banneton, around 8-9 inches (20-23 cm) in diameter, is perfect for proofing a loaf made with 500g of flour.
Optional Equipment for Advanced Sourdough Bakers
While not strictly necessary for your first loaf, some tools can enhance your sourdough baking experience as you progress. A bread lame, which is a razor blade on a handle, allows for precise scoring (cutting the surface of the dough before baking), which helps control expansion and creates beautiful patterns. A dough whisk is excellent for efficiently incorporating the starter and salt into the autolysed flour and water mixture without overworking the dough initially.
A bench scraper with a sturdy metal blade is invaluable for dividing dough and cleaning your work surface. An oven thermometer is also a good investment to ensure your oven is accurately reaching the high temperatures required for sourdough baking, often between 450°F and 500°F (230°C and 260°C).
While these tools aren't essential for an easy beginner sourdough recipe, they can certainly make the process smoother and offer more control as you refine your technique. For instance, using a lame allows you to create a clean, deep score, ensuring the loaf expands correctly along the cut, rather than bursting randomly.
Sourdough Bread Recipe: Step-by-Step Instructions
Now for the exciting part – baking the bread itself! This section provides a detailed, step-by-step guide for our easy beginner sourdough recipe. We'll cover everything from getting your starter ready to the final bake.
Sourdough Starter: The Heart of Your Bread
Your sourdough starter is the living culture that gives your bread its rise and signature flavor. Think of it as a pet you need to feed and care for! A strong, active starter is absolutely essential for a successful loaf when following any sourdough bread recipe, especially an easy beginner sourdough recipe where you want predictable results.
Maintaining a Healthy Sourdough Starter for Baking Success
Maintaining a healthy starter involves regular feeding. If you keep your starter at room temperature, you'll typically need to feed it once or twice a day. If you store it in the refrigerator, feeding once a week is usually sufficient. The key is consistency and using the correct ratio of starter, water, and flour. A well-maintained starter will be active, bubbly, and have a pleasant, slightly tangy aroma.
To keep your starter vigorous, especially if you plan to bake frequently using an easy beginner sourdough recipe, try to feed it at the same time each day when it's at room temperature. Discard a portion of the starter before each feeding (this prevents it from growing too large and keeps the culture active) and feed it with fresh flour and water.
Many bakers use a 1:1:1 ratio (1 part starter, 1 part water, 1 part flour by weight), but ratios can vary. For example, feeding 50g of starter with 50g of water and 50g of flour is a common maintenance amount.
Feeding Your Starter: A Simple Guide
Feeding your starter is straightforward: discard a portion, then add fresh flour and water. The ratio you use depends on how often you feed and your goals. A common ratio for maintaining a starter at room temperature is 1:1:1 by weight (starter:water:flour). For example, if you keep 50 grams of starter, you would discard all but 50 grams, and then feed it with 50 grams of water and 50 grams of flour. Mix it thoroughly until no dry flour remains, scrape down the sides of the jar, and mark the level with a rubber band or marker.
If you store your starter in the refrigerator and only bake occasionally with your easy beginner sourdough recipe, you can feed it once a week. When you're ready to bake, take it out of the fridge and feed it daily for a few days at room temperature until it becomes consistently active and doubles in size within 4-8 hours after feeding. Using warm water (around 80-85°F or 27-29°C) for feeding can help speed up the starter's activity.
Is My Starter Ready? Signs of a Vigorous Starter
A vigorous starter, ready to leaven your easy beginner sourdough recipe, will show several clear signs. It should have roughly doubled or even tripled in volume since its last feeding, reaching its peak activity typically 4-8 hours after being fed at room temperature (around 75°F/24°C). You'll see numerous bubbles throughout the culture, and the surface will likely be domed or slightly collapsed, indicating it peaked and is starting to fall.
Another common test for readiness, often referred to as the "float test," is to gently drop a small spoonful of starter into a glass of water. If it floats, it's generally considered ready to use. This indicates that it's sufficiently aerated with carbon dioxide. While the float test is a good indicator of activity, observing the starter's volume increase and bubble structure is equally important. A starter that consistently doubles within a predictable timeframe after feeding is a reliable partner for your sourdough bread recipe.
Sourdough Dough Recipe Ingredients:
This easy beginner sourdough recipe uses just four basic ingredients: active sourdough starter, flour, water, and salt. The quality and type of each ingredient play a significant role in the final outcome of your bread.
Flour Selection for Sourdough Bread
The type of flour you choose significantly impacts the dough's structure and texture. For an easy beginner sourdough recipe, bread flour is highly recommended. Bread flour has a higher protein content (typically 12-14%) compared to all-purpose flour (around 10-12%). This higher protein level means more gluten can develop, resulting in a stronger dough that can trap more gas produced by the starter, leading to a better rise and an open crumb structure.
While bread flour is ideal for beginners, you can certainly incorporate other flours as you become more comfortable. Adding a portion of whole wheat flour (e.g., 10-20% of the total flour weight) will add flavor and nutrients, though it absorbs more water and can make the dough slightly harder to handle initially. For this easy beginner sourdough recipe, sticking primarily to bread flour will give you the most predictable and successful results. A standard recipe might use 500g of strong bread flour.
Water Temperature for Optimal Fermentation
Water temperature is a critical, yet often overlooked, factor in sourdough baking. Using water that is too hot can kill the delicate wild yeasts and bacteria in your starter, while water that is too cold will significantly slow down fermentation. The ideal water temperature for mixing your dough is typically lukewarm, around 80-85°F (27-29°C). This temperature range is comfortable for the microorganisms in your starter and encourages active fermentation.
Adjusting your water temperature based on your ambient kitchen temperature can also be helpful. If your kitchen is cold (below 70°F/21°C), using slightly warmer water (closer to 85°F/29°C) can help kickstart fermentation. Conversely, if your kitchen is very warm (above 78°F/26°C), cooler water (around 75°F/24°C) can help prevent the dough from fermenting too quickly. A typical hydration for an easy beginner sourdough recipe might be 75-80% hydration, meaning for 500g of flour, you'd use 375g to 400g of water.
Salt's Role in Sourdough Baking
Salt is not just for flavor in sourdough bread; it plays several crucial roles. It helps control the rate of fermentation, slowing down both yeast and bacterial activity. This allows for a longer fermentation period, which contributes to more complex flavor development. Without salt, the dough would ferment too quickly and potentially become overly sour.
Furthermore, salt strengthens the gluten network in the dough. By tightening the gluten structure, salt helps the dough hold its shape and trap the gases produced during fermentation, resulting in a better rise and crumb structure. The typical amount of salt used in a sourdough bread recipe is around 2% of the total flour weight. So, for 500g of flour, you would use about 10g of salt. Using non-iodized salt, such as fine sea salt or kosher salt, is generally preferred as iodine can sometimes negatively impact fermentation.
Mixing the Dough: The Autolyse and Initial Mix
The mixing process in sourdough often begins with a technique called autolyse, followed by the incorporation of the starter and salt. These steps are designed to hydrate the flour, begin gluten development, and bring all the ingredients together into a cohesive dough.
Autolyse: Why it's Crucial for Sourdough Texture
Autolyse is a simple yet incredibly effective technique where you mix just the flour and water from your recipe and let it rest for a period before adding the starter and salt. This rest period, typically ranging from 30 minutes to an hour (though some bakers extend it), allows the flour to fully hydrate and enables enzymes within the flour to start breaking down proteins, which helps gluten development.
Performing an autolyse makes the dough easier to handle later on, improves its extensibility (stretchiness), and contributes to a more open crumb structure in the final loaf. For an easy beginner sourdough recipe, even a 30-minute autolyse can make a noticeable difference. Simply combine your measured flour and water in a bowl and mix until no dry flour remains. The mixture will look shaggy and rough; cover it and let it rest.
Combining Ingredients for a Smooth Dough
After the autolyse period, it's time to add your active sourdough starter and the salt to the dough. Gently incorporate the starter by dimpling it into the dough with wet fingers or a dough whisk, then fold the dough over itself to distribute it. Add the salt and knead or mix the dough until the starter and salt are fully incorporated and the dough starts to feel smoother.
This initial mixing phase might take 5-10 minutes of gentle kneading or mixing by hand or stand mixer. The dough will transition from a shaggy mass to a more cohesive, albeit still sticky, ball. The goal is to ensure all ingredients are evenly distributed before moving on to the bulk fermentation stage. Don't worry about developing full gluten strength at this point; that will happen during the bulk fermentation with folds.
Bulk Fermentation: The Secret to Sourdough Flavor
Bulk fermentation, also known as the first rise, is the period after mixing the dough and before shaping. This is where the magic happens – your starter gets to work, producing gas and developing the complex flavors characteristic of sourdough.
Understanding Bulk Fermentation Time and Temperature
Bulk fermentation is one of the most variable stages in the sourdough bread recipe, heavily influenced by temperature. At a warm room temperature, around 75°F (24°C), bulk fermentation might take 4 to 6 hours. If your kitchen is cooler (say, 70°F/21°C), it could take 6 to 8 hours or even longer. Conversely, in a warmer environment (above 78°F/26°C), it could be significantly shorter, perhaps 3-4 hours.
During this time, the dough should visibly increase in volume, ideally by about 50-80%. It will also become smoother, more aerated, and show signs of fermentation like bubbles on the surface and sides. The total time is less important than observing the dough's development. For an easy beginner sourdough recipe, aiming for around a 50-60% increase in volume is a good starting point.
Performing Folds: Strengthening Your Dough
Performing a series of "stretch and folds" or "coil folds" during the first 2-3 hours of bulk fermentation helps to develop the gluten network in the dough and build structure. Typically, you'll perform 3-4 sets of folds, spaced 30-45 minutes apart. For a stretch and fold, with wet hands, grab the edge of the dough, stretch it upwards gently without tearing, and fold it over the center. Rotate the bowl and repeat 3-4 times until all sides have been folded.
These folds strengthen the dough, making it easier to handle and shape later, and help distribute the yeast and bacteria evenly throughout the dough, leading to a more consistent crumb structure. After the last set of folds, let the dough rest undisturbed for the remainder of the bulk fermentation period. This allows the gluten to relax and fermentation to continue without interruption.
Signs Your Dough is Ready for Shaping
Knowing when bulk fermentation is complete is crucial for a successful easy beginner sourdough recipe. The dough should have increased significantly in volume (again, 50-80% is a good range). The surface should appear smoother and often show small bubbles. The dough should feel lighter and more aerated when you gently handle it.
A common test is the "windowpane test": gently stretch a small piece of dough. If you can stretch it thin enough to see light through it without it tearing, the gluten is well-developed. Another sign is that the dough should feel puffy and slightly jiggly. If it feels dense and hasn't grown much, it likely needs more time. If it's extremely bubbly and seems to be spreading out rapidly, it might be close to or slightly over-proofed.
Shaping Your Sourdough Loaf: Techniques
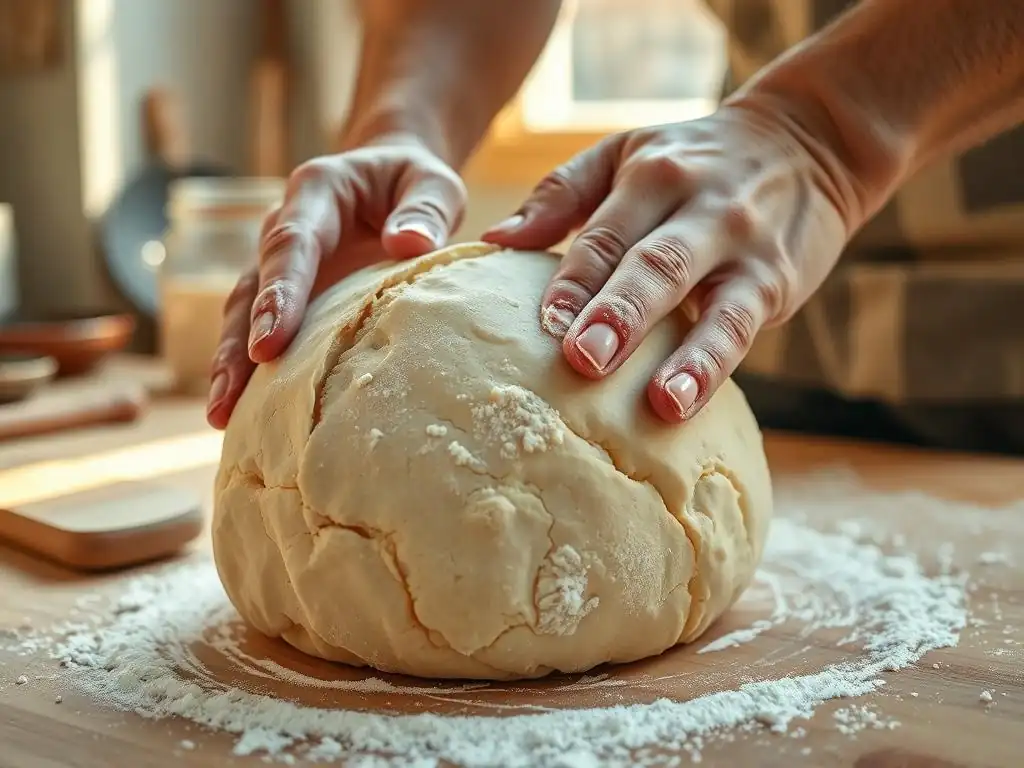
Shaping is where you prepare the dough for its final proof and bake, creating tension on the surface to help it hold its form and achieve good oven spring. Proper shaping is key to a beautiful loaf from your sourdough bread recipe.
Pre-Shaping: Preparing the Dough
After bulk fermentation, gently turn the dough out onto a lightly floured surface. The first step in shaping is pre-shaping. The goal here is to gently gather the dough into a rough ball or log shape, depending on your desired final loaf shape (boule for round, batard for oval). Avoid degassing the dough too much.
Using a dough scraper or your hands, gently pull the edges of the dough underneath itself to create a slightly taut surface on top. Let the pre-shaped dough rest, uncovered, for about 20-30 minutes. This rest period, called the bench rest, allows the gluten to relax, making the final shaping much easier and preventing the dough from resisting when you try to create tension.
Final Shaping: Creating a Taut Surface
The final shaping step is about building maximum surface tension. For a boule (round loaf), gently flatten the rested dough into a rough circle. Imagine folding a letter: fold the top third down, then the bottom third up over that. Then, fold the left side over to the right, and the right side over to the left. Finally, using your hands or a bench scraper, gently pull the dough towards you while tucking the bottom edge underneath, rotating the dough as you go, to create a tight, smooth ball.
For a batard (oval loaf), flatten the dough into a rectangle. Fold the top edge down to the middle, then the bottom edge up to the middle. Fold the dough in half lengthwise, pinching the seam shut. Then, roll the dough back and forth gently with your hands, applying slight pressure, to lengthen it into an oval shape with a taut surface. Place the shaped dough seam-side up into your floured proofing basket.
Common Shaping Mistakes and How to Avoid Them
Two common mistakes in shaping are being too rough and not creating enough surface tension. Being too rough can degas the dough excessively, leading to a dense crumb. Handle the dough gently, using just enough pressure to create tension. Not creating enough tension means the loaf won't hold its shape well during proofing and baking, resulting in a flat loaf with poor oven spring.
To avoid these issues, practice makes perfect! Use a light touch during pre-shaping and the bench rest. During final shaping, focus on sealing the seams well and building that taut surface. If the dough is very sticky, lightly flour your hands and the work surface, but avoid using too much flour, which can prevent the seams from sealing. Remember, even a slightly imperfect shape can still result in delicious bread from your easy beginner sourdough recipe.
Proofing Your Sourdough: Achieving the Perfect Rise
Proofing, or the final rise, is the period after shaping and before baking. During this time, the dough continues to ferment and develop flavor, expanding as it does. The goal is to achieve the optimal level of proofing – not under-proofed (too dense) or over-proofed (collapses).
Proofing Baskets (Bannetons): What You Need To Know
Proofing baskets, or bannetons, are traditionally used for the final proof of sourdough. They help the dough maintain its shape and develop a skin on the surface as moisture is wicked away by the basket material. This skin helps with scoring and contributes to a crisp crust. Bannetons come in various shapes (round for boule, oval for batard) and materials (rattan, cane, plastic, cloth-lined).
It's essential to flour your banneton generously before placing the shaped dough inside to prevent sticking. Rice flour is often recommended as it's less likely to be absorbed by the dough than wheat flour. You can also line the banneton with a floured linen cloth. Place the shaped dough seam-side up in the banneton (so that when you invert it onto your baking surface, the smooth, taut surface is facing up for scoring).
Proofing Time and Temperature: Finding the Sweet Spot
Proofing time is highly dependent on temperature. A common and highly recommended method for an easy beginner sourdough recipe is cold proofing in the refrigerator. This typically takes 8 to 12 hours, but can extend up to 24 hours or even longer. Cold proofing slows fermentation dramatically, allowing flavors to deepen and making the dough much easier to score straight from the fridge.
Alternatively, you can proof at room temperature, which is much faster, typically 1-3 hours depending on your kitchen temperature. Room temperature proofing requires vigilant watching as dough can over-proof quickly. For beginners, cold proofing is generally more forgiving and allows for more flexibility in your baking schedule. Place the banneton inside a plastic bag or cover it tightly with plastic wrap to prevent the dough from drying out during proofing.
The Float Test: Is Your Dough Proofed Enough?
While the "float test" is a good indicator for checking if your starter is active and ready to use, it is not a reliable test for whether your dough is properly proofed. For checking the final proof of your dough, the "poke test" is the standard method. To perform the poke test, lightly flour your finger and gently press it into the side of the dough about half an inch deep.
If the indentation springs back immediately, the dough is under-proofed and needs more time. If the indentation stays completely and doesn't spring back at all, the dough is likely over-proofed. If the indentation slowly springs back halfway, leaving a small mark, the dough is likely perfectly proofed and ready to bake. This is a crucial step to master for consistent results with your sourdough bread recipe.
Baking Your Sourdough: Oven Temperature and Techniques
Baking is the final stage where your dough transforms into a beautiful loaf of bread. High heat and steam are key to achieving that coveted crust and oven spring.
Preheating Your Oven: Achieving a Good Oven Spring
Achieving excellent oven spring – the rapid rise of the dough in the first few minutes of baking – requires a very hot oven. Preheat your oven, ideally with your Dutch oven inside, to a high temperature, typically between 450°F and 500°F (230°C and 260°C). Allow the oven and Dutch oven to preheat for at least 30-60 minutes after the oven reaches the target temperature.
This ensures that the baking vessel is uniformly hot, providing an immediate burst of heat to the dough when it's placed inside. This initial blast of heat is what causes the rapid expansion before the crust sets, resulting in a well-risen loaf. Skipping adequate preheating is a common reason for dense sourdough.
Scoring Your Loaf: Unleashing the Baker's Signature
Scoring involves making intentional cuts on the surface of the dough just before it goes into the oven. These cuts serve two main purposes: they allow the dough to expand in a controlled manner during oven spring, preventing random bursts, and they create beautiful patterns that are the baker's signature. Use a very sharp blade, like a bread lame or a razor blade, to make quick, confident cuts about half an inch deep.
For a simple score on an easy beginner sourdough recipe, a single deep cut down the length of an oval loaf or a cross pattern on a round loaf is effective. More intricate patterns can be created with multiple cuts. Scoring cold dough directly from the refrigerator is significantly easier than scoring dough proofed at room temperature, as the surface is firmer.
Baking in a Dutch Oven: The Best Method
Baking in a preheated Dutch oven is widely considered the best method for home bakers to replicate the conditions of a professional bread oven. The heavy lid traps steam released by the dough as it heats up. This steam keeps the surface of the dough moist longer, allowing it to expand fully before the crust hardens. This results in maximum oven spring and a thin, crispy crust.
To bake, carefully remove the hot Dutch oven from the preheated oven. Gently invert your proofed dough into the Dutch oven (you can use parchment paper as a sling). Score the dough, place the lid on, and return it to the oven. Bake with the lid on for the first 20-25 minutes at your high temperature (e.g., 475°F/245°C). Then, carefully remove the lid and continue baking for another 20-25 minutes at a slightly lower temperature (e.g., 450°F/230°C) until the crust is deeply golden brown and the internal temperature is correct.
Baking Without a Dutch Oven: Alternative Methods
If you don't have a Dutch oven, you can still bake excellent sourdough bread using alternative methods to create steam. One common approach is to use a baking stone or steel placed in the oven during preheating. When you're ready to bake, slide the scored dough onto the hot stone/steel using a peel or parchment paper.
To create steam, place a tray or cast iron pan on the bottom rack of the oven during preheating. Just before you load the bread, carefully pour a cup of hot water or a handful of ice cubes into the hot tray/pan (be cautious of the steam!). Quickly close the oven door to trap the steam.
Bake at a high temperature initially (e.g., 475°F/245°C) for 15-20 minutes with the steam, then remove the steam tray and continue baking at a slightly lower temperature (e.g., 450°F/230°C) for another 25-30 minutes until the loaf is golden brown. While not quite as effective as a Dutch oven, this method can still yield a good crust and decent oven spring for your easy beginner sourdough recipe.
Internal Temperature: Knowing When Your Sourdough Is Done
The best way to know if your sourdough loaf is fully baked is to check its internal temperature with an instant-read thermometer. A properly baked sourdough loaf should have an internal temperature between 205°F and 210°F (96°C and 99°C).
Insert the thermometer into the center of the loaf from the bottom or side, making sure not to hit the crust. Baking until the correct internal temperature is reached ensures that the crumb is fully cooked and not gummy. The crust color is also a good indicator; it should be a rich, deep golden brown, not pale. If the crust is browning too quickly but the internal temperature isn't reached, you can loosely tent the loaf with foil for the remaining baking time.
Cooling and Slicing: The Final Steps
You've done it! Your beautiful sourdough loaf is out of the oven. The final steps are crucial for developing the perfect crumb structure and flavor.
Allowing Your Sourdough to Cool Properly
This is perhaps the hardest step for an eager baker, but it's absolutely essential: you must allow your sourdough loaf to cool completely on a wire rack before slicing. While the bread is cooling, residual heat continues to cook the interior, and the steam redistributes throughout the loaf.
Slicing into a hot loaf will result in a gummy, dense crumb because the starches haven't set properly. Depending on the size of the loaf and your kitchen temperature, cooling can take anywhere from 1 to 3 hours. Resist the temptation! Letting it cool fully ensures the best possible texture and flavor from your sourdough bread recipe.
Best Bread Knives for Slicing Sourdough
Once your loaf is completely cool, you need the right tool to slice through that beautiful, crisp crust without crushing the soft interior. A long, sharp serrated bread knife is the best choice for slicing sourdough bread.
The serrations grip the crust and allow you to saw through it cleanly, while the sharpness prevents you from having to apply too much downward pressure, which would compress the crumb. Invest in a good quality serrated knife; it will make slicing your homemade sourdough a pleasure.
Troubleshooting Your Sourdough Bread Recipe
Even with an easy beginner sourdough recipe, you might encounter challenges. Don't get discouraged! Troubleshooting is part of the learning process.
Common Sourdough Problems and Solutions
Here are some common issues home bakers face and how to address them. Understanding the potential causes helps you improve with each bake.
Dense Sourdough: Why and How to Fix It
A dense loaf with a tight crumb is a common issue. Possible causes include an inactive or weak starter, under-proofed dough during bulk fermentation or final proofing, or insufficient gluten development during mixing and folding. Using too much flour during shaping can also lead to a dense area.
To fix this, ensure your starter is consistently doubling or tripling after feeding before you use it. Extend your bulk fermentation time until the dough shows significant volume increase (50-80%) and appears aerated. Make sure your final proof (poke test) is correct. Be diligent with your stretch and folds to build gluten strength. Practice gentle handling and minimal flour during shaping for your next sourdough bread recipe attempt.
Sour Sourdough: Adjusting the Acidity
If your sourdough is excessively sour, it's usually due to the balance of acids produced during fermentation, often favoring acetic acid. This can happen with very long or cold bulk fermentation periods, or if your starter isn't fed frequently enough, leading to a buildup of acidity.
To adjust the tang, try shortening your bulk fermentation time slightly, especially if fermenting at room temperature. Feed your starter more frequently, perhaps twice a day if kept at room temp, using a higher feeding ratio (e.g., 1:2:2 or 1:3:3 starter:water:flour). This dilutes the existing acid and encourages a faster, less acidic fermentation cycle. Experiment with these factors to find the flavor profile you prefer in your easy beginner sourdough recipe.
Flat Sourdough: Getting a Better Rise
A flat loaf can be disheartening. Reasons include a weak starter, over-proofed dough, poor shaping (not enough tension), or a lack of sufficient oven spring. If the dough spreads out significantly after being turned out for baking, it's likely over-proofed or lacked tension from shaping.
Ensure your starter is active and passes the float test (for activity) and consistently doubles after feeding. Adjust proofing times based on temperature and use the poke test for the final proof. Practice shaping techniques to create a taut surface. Make sure your oven and Dutch oven (if using) are thoroughly preheated to a high temperature (475-500°F / 245-260°C) to maximize oven spring. A well-shaped, properly proofed dough baked in a hot environment should get a good rise.
Gummy Sourdough: Avoiding a Sticky Crumb
A gummy or wet-looking crumb is almost always a sign of the bread being under-baked or sliced before it has fully cooled. The starches in the bread need time to gelatinize and set properly during baking and cooling.
Make sure you are baking your loaf until it reaches the correct internal temperature of 205-210°F (96-99°C). Use an instant-read thermometer to verify. Crucially, allow the loaf to cool completely on a wire rack for at least 1-2 hours (or longer for larger loaves) before slicing into it. Patience during cooling is key to avoiding a gummy texture in your sourdough bread recipe.
Storing Your Sourdough Bread: Keeping It Fresh
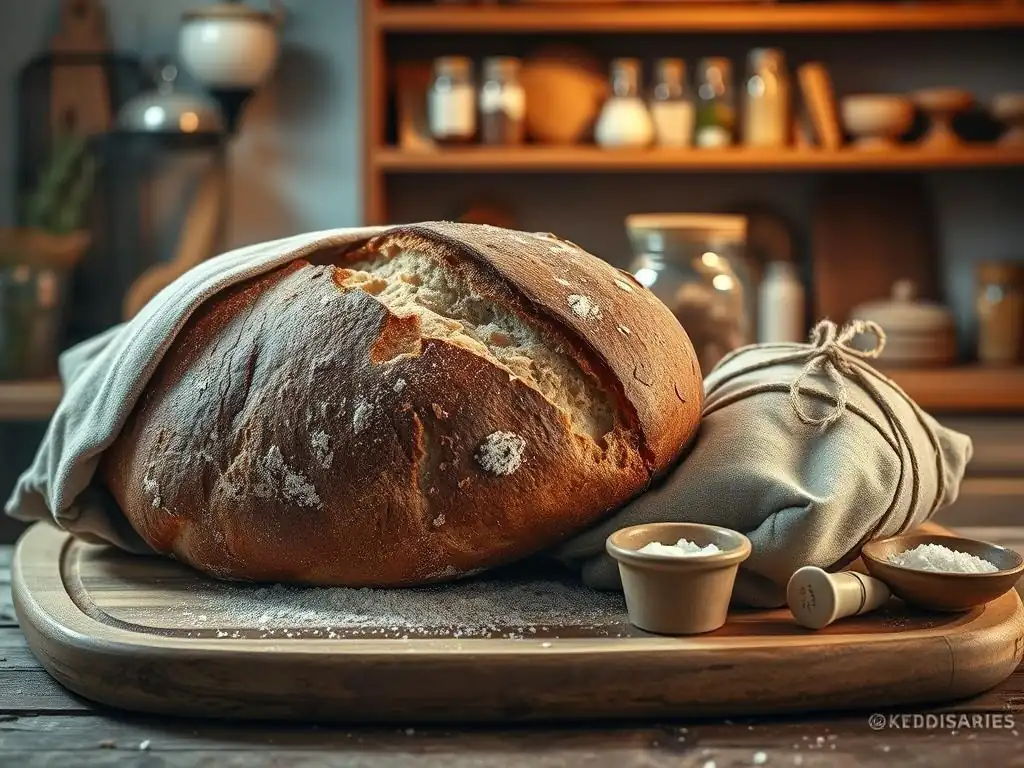
Proper storage helps maintain the crust and crumb quality of your delicious homemade sourdough.
Best Practices for Sourdough Storage
Sourdough bread is best stored at room temperature. Avoid refrigerating it, as this can actually cause it to stale faster by promoting starch retrogradation. To keep the crust crisp, store the loaf cut-side down on a cutting board, or loosely wrapped in a clean linen or cotton cloth. This allows the crust to breathe while protecting the cut surface.
For longer storage, sourdough freezes exceptionally well. Once the loaf has completely cooled, slice it first (makes it easy to grab a few slices at a time), then place the slices in an airtight freezer bag or container. Frozen sourdough can last for several months. To enjoy, simply take out slices as needed and toast them directly from frozen or let them thaw briefly.
How to Revive Stale Sourdough
If your sourdough loaf has gone a bit stale, you can often revive it. For a whole or partial loaf, quickly run the crust under tap water to lightly moisten it (don't soak it!). Then, place it directly on the oven rack in a preheated oven at around 300-325°F (150-160°C) for 5-10 minutes.
The moisture on the surface turns to steam, which helps re-crisp the crust and soften the interior slightly. This works best for loaves that are just a day or two old. Alternatively, stale sourdough makes excellent croutons, bread crumbs, or can be used in dishes like Panzanella or strata.
Variations and Adaptations: Beyond the Basic Sourdough
Once you've mastered this easy beginner sourdough recipe, the possibilities for variations are endless! Sourdough provides a fantastic base for incorporating other flavors and textures.
Adding Flavors to Your Sourdough
Incorporating herbs, cheese, olives, seeds, or dried fruits can take your sourdough to the next level. These additions are typically mixed into the dough during the final stages of mixing or during the first set of stretch and folds in bulk fermentation.
For instance, you could add roasted garlic and rosemary, sharp cheddar cheese and jalapeños, or a mix of seeds like poppy, sesame, and sunflower. Start by adding a moderate amount (e.g., 10-20% of the flour weight for seeds or cheese) and see how it affects the dough handling. Wet additions like olives or roasted vegetables might require slightly reducing the amount of water in the main dough. Experimenting with flavors keeps your sourdough baking journey exciting.
Sourdough with Whole Wheat Flour
Adding whole wheat flour to your sourdough bread recipe adds nutty flavor, nutrients, and a denser texture. Whole wheat flour absorbs more water than white bread flour, so you'll likely need to increase the hydration slightly when incorporating it.
Start by substituting a small percentage of the bread flour with whole wheat, perhaps 10-20% of the total flour weight (e.g., using 400g bread flour and 100g whole wheat flour for a 500g total). Increase the water by 20-30g initially and see how the dough feels. Whole wheat doughs can be a bit stickier and require more careful handling and potentially longer bulk fermentation as the bran can interfere with gluten development. It's a rewarding variation once you're comfortable with the basic sourdough bread recipe.
Sourdough Pizza Crust
Your active sourdough starter or even sourdough discard (the portion you remove before feeding) can be used to make incredibly flavorful pizza crusts. Sourdough gives the pizza crust a wonderful tangy depth and a light, airy texture with crispy edges.
There are many sourdough pizza crust recipes available, some using active starter for a faster rise, others using discard for a longer, cold fermentation. A typical recipe might use around 100-150g of active starter per 500g of flour for a dough that ferments for several hours. Sourdough pizza dough often benefits from a long, cold proof in the refrigerator (1-3 days) to develop maximum flavor and makes it easy to handle when you're ready to make pizza.
Mastering the Sourdough Bread Recipe: Tips and Tricks
Becoming proficient in sourdough baking is a journey. Here are some final tips to help you along the way and truly master the easy beginner sourdough recipe.
Sourdough Baking Schedule: Planning Your Bake
Planning is key to fitting sourdough baking into your life. Develop a schedule that works for you. A common approach is to feed your starter in the morning, mix the dough in the afternoon when the starter is active, perform bulk fermentation and folds throughout the late afternoon/evening, shape the dough in the evening, and then cold proof it in the refrigerator overnight (8-12+ hours).
With an overnight cold proof, your dough is ready to bake straight from the fridge the next morning. This flexibility makes it much easier to bake fresh sourdough bread even on busy weekdays. Adjust the timing based on your starter's activity and your kitchen temperature. For an easy beginner sourdough recipe, having a predictable schedule reduces stress.
Developing Your Sourdough Intuition
While recipes provide a great starting point, truly mastering sourdough comes from developing intuition. Pay attention to how your dough feels at each stage: how it changes during bulk fermentation, how it responds to shaping, and how it feels during the poke test.
Observe your starter's behavior – how quickly it rises, how it smells. Learn to adjust your process based on these observations rather than blindly following times listed in a recipe, as ambient temperature and starter strength vary. Your kitchen's environment plays a huge role. Feeling the dough's tension, seeing the bubbles, and even smelling the fermentation are skills that develop with practice.
Embrace the Sourdough Journey
Most importantly, embrace the journey of sourdough baking! Your first loaf might not be perfect, and that's okay. Every bake is a learning experience. Keep notes on what you did, the temperatures, and the results. This will help you identify what works and what doesn't.
Sourdough is a living process, and its beauty lies in its variability. Enjoy the process of nurturing your starter, mixing and shaping the dough, and the incredible aroma that fills your home as your bread bakes. This easy beginner sourdough recipe is just the beginning of a rewarding and delicious baking adventure. Happy baking!
Frequently Asked Questions
What makes this sourdough recipe "easy" for beginners?
This recipe focuses on simplified steps and easily accessible ingredients, avoiding complex techniques often found in traditional sourdough baking. It also provides clear, step-by-step instructions.
How long does it take to make this easy sourdough recipe from start to finish?
The entire process, including starter feeding, mixing, bulk fermentation, shaping, proofing, and baking, takes approximately 24-36 hours, but requires very little active time. Most of the time is for natural fermentation.
Can I use a different type of flour for this beginner sourdough recipe?
While all-purpose flour can be used, bread flour is highly recommended for its higher gluten content, which results in a better rise and chewier texture. Using other flours may require adjustments.
What if my sourdough starter isn't very active?
An inactive starter will result in a flat, dense loaf. Ensure your starter is doubling in size within 4-8 hours of feeding before using it in the recipe for best results.
What's the best way to store my homemade sourdough bread?
Store your cooled sourdough in a bread box or a paper bag at room temperature to maintain its crust and texture. Avoid plastic bags, which can make it soggy.
Final Reflection: The Enduring Allure of Sourdough
The humble sourdough starter, once a niche pursuit, has exploded in popularity, transforming home kitchens into bustling bakeries. This simple, yet powerful, organism offers a gateway to a more mindful, hands-on approach to baking, connecting us to a tradition stretching back millennia. The ease of creating and maintaining a starter, coupled with the incredible flavour and texture of the resulting bread, makes it a truly rewarding experience for even the most novice baker.
The journey of sourdough baking is more than just a recipe; it's a process of discovery, patience, and connection. It's about understanding the subtle nuances of fermentation, the rhythm of rising and falling dough, and the satisfaction of creating something beautiful and delicious from such simple ingredients. Bread is the staff of life,
they say, and in the case of sourdough, it's a staff imbued with a deep sense of history and personal accomplishment. The act of nurturing a starter, watching it bubble and grow, mirrors the nurturing we need to cultivate within ourselves.
Now, armed with the knowledge and confidence gained from this recipe, I invite you to embark on your own sourdough journey. Don't be afraid to experiment, to adjust the recipe to your taste, and to embrace the occasional imperfection. The true magic of sourdough lies not in achieving perfect loaves every time, but in the process itself – the learning, the growing, and the sharing of this ancient craft. So, grab your flour, water, and a little patience, and discover the joy of baking your own delicious, homemade sourdough bread.
Unleash Your Inner Baker: Craft Your Perfect Sourdough!
Thanks for taking the time to explore the world of sourdough baking with us! We hope you've gained the confidence to tackle this rewarding craft. Ready to get your hands kneaded (pun intended! )?
- Bake your first loaf: Use the recipe from the article as your guide, and don't be afraid to experiment with the hydration levels to find what works best for you. This is where the magic happens!
- Share your sourdough journey: Snap a picture of your beautiful creation and share it on social media using #BakeWithEaseSourdough – let's inspire each other!
- Join our community forum: Connect with fellow sourdough enthusiasts on our forum (link removed as per instructions) for tips, troubleshooting, and friendly baking camaraderie.
What unique twist will you add to your first sourdough masterpiece? Let us know in the comments below!