
The Science of Basic Sourdough (Simplified for Beginners)

Welcome to BakeWithEase, your culinary companion on the journey to baking bliss!
Ever felt intimidated by sourdough? You're not alone! Many bakers find themselves facing unexpected challenges. Dive into " The Science of Basic Sourdough (Simplified for Beginners)" and discover how to conquer common hurdles. We're cracking the code on sourdough starter troubleshooting for beginners, providing clear, actionable steps to transform your baking experience. Curious about the secrets to a thriving starter? Let's get baking!
- Sourdough Starter Troubleshooting for Beginners: Common Problems and Solutions
-
Frequently Asked Questions
- What exactly is a sourdough starter and why is it so important?
- How do I know if my sourdough starter is actually active and ready to bake with?
- My sourdough starter isn't rising. What could be the problem and how can I fix it?
- How often should I be feeding my sourdough starter, and does the type of flour matter?
- Can I really revive a "dead" sourdough starter, and what are the steps involved?
- Final Reflection: The Ever-Rising Dough of Discovery
- Unleash Your Inner Baker: Start Your Sourdough Journey Today!
Sourdough Starter Troubleshooting for Beginners: Common Problems and Solutions
As you embark on your sourdough journey, encountering issues with your starter is a completely normal part of the process. Think of your sourdough starter as a living ecosystem; sometimes it thrives, and sometimes it needs a little help to find its balance. For beginners, understanding the signs of a struggling starter and knowing how to react is key to successful sourdough baking. This section focuses specifically on sourdough starter troubleshooting for beginners, addressing the most frequent hurdles you might face. We'll explore how to identify problems and provide practical, easy-to-follow solutions to get your starter back on track.
Don't be discouraged if your starter doesn't behave perfectly from day one. Most common issues can be resolved with simple adjustments to your feeding schedule, ratios, or storage. Mastering sourdough starter troubleshooting for beginners empowers you to build confidence and consistency in your baking.
Identifying Common Sourdough Starter Problems
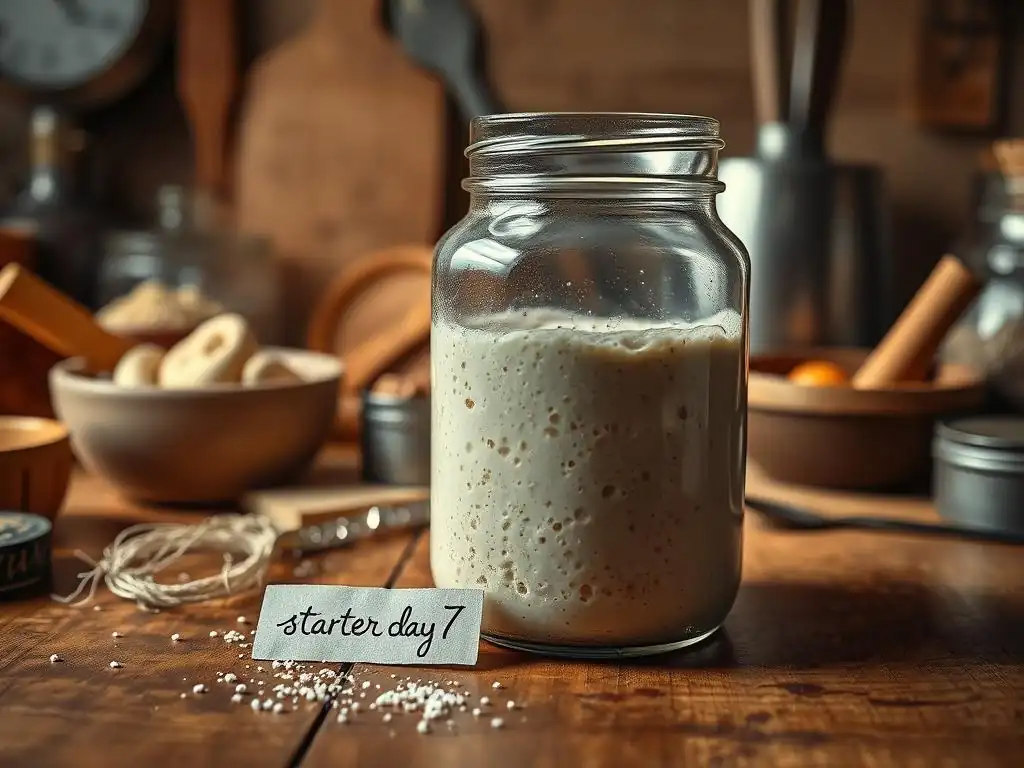
Recognizing the signs of a healthy versus an unhealthy sourdough starter is the first step in effective troubleshooting. A healthy, active starter typically doubles or triples in volume within a few hours of feeding (depending on temperature), has a pleasant, slightly tangy aroma, and exhibits bubbly activity throughout. It will also show clear signs of fermentation, like visible bubbles on the surface and throughout the jar, and a dome shape before it starts to fall back down.
Common problems for beginners often manifest as a lack of activity (no bubbles, no rise), unusual smells, or concerning visual cues like discoloration or fuzzy spots. For example, a starter that consistently fails to rise after feeding, even in a warm environment (around 75-80°F or 24-27°C), is likely sluggish. An off-putting smell, like strong acetone or a cheesy odor, also signals an imbalance in the microbial community. Learning to spot these indicators early is crucial for effective sourdough starter troubleshooting for beginners.
Sourdough Starter Troubleshooting: Addressing a Sluggish Starter
A sluggish sourdough starter is one of the most common issues beginners face. This usually means your starter isn't rising much, if at all, after being fed. Several factors can contribute to this lack of activity. One primary reason is insufficient warmth; wild yeast thrives in temperatures between 70-80°F (21-27°C). If your kitchen is cooler, try finding a warmer spot, such as near a warm appliance or inside a microwave with the light on (but not turned on!). Even a consistent temperature of 75°F (24°C) can make a significant difference compared to 68°F (20°C).
Another frequent cause for a sluggish starter is the feeding ratio or frequency. If you are feeding a small amount of starter with a large amount of fresh flour and water (e.g., a 1:5:5 ratio of starter:flour:water), but not feeding it often enough (like only once every 24 hours in a warm kitchen), the yeast might be running out of food before the next feeding.
For a slow starter, try increasing feeding frequency (maybe every 12 hours for a few days) or adjusting your ratio to include more starter (e.g., a 1:1:1 ratio) temporarily to give the yeast population a boost. Switching to a different type of flour, like a mix of all-purpose and whole wheat or rye, can also sometimes kickstart activity, as these flours provide more diverse nutrients for the microbes.
Mold in Sourdough Starter: Is it Safe?
Identifying mold in your sourdough starter is a critical step in sourdough starter troubleshooting for beginners. Mold typically appears as fuzzy, colored patches – often blue, green, black, or sometimes white – on the surface of the starter. Unlike the bubbly surface or the liquid "hooch" (a dark liquid that can form on top of hungry starters), mold has a distinct fuzzy or powdery texture.
Unfortunately, if you see mold in your sourdough starter, the consensus among experienced bakers is to discard it entirely and start fresh. While some molds on other fermented foods might be harmless, or even desirable, the types of mold that grow in a sourdough starter can produce harmful toxins that are not visible or easily removed.
Simply scraping off the mold is not sufficient, as the mold's roots (hyphae) extend throughout the culture, and the toxins are often present even where mold isn't visible. It's a frustrating experience, but for safety, it's best to err on the side of caution and begin cultivating a new starter.
Do not confuse mold with Kahm yeast, which is a common white, powdery, or film-like layer that can form on the surface; Kahm yeast isn't necessarily harmful but indicates an imbalance (usually too much exposure to air or not enough frequent feeding) and can be skimmed off, though it often affects the flavor.
Sourdough Starter Not Rising? Troubleshooting Tips

A sourdough starter that isn't rising after feeding is a classic sign it needs attention, and it's a frequent point of concern in sourdough starter troubleshooting for beginners. Beyond temperature, as mentioned earlier, the ratio of starter to fresh flour and water is paramount. If you are feeding a tiny amount of starter with a large amount of food (like 10g starter with 100g flour and 100g water), it will take a very long time for the yeast population to consume that much food and produce enough gas to show significant rise.
For a starter that's stubbornly refusing to rise, try a few targeted troubleshooting steps. First, ensure your water isn't chlorinated, as chlorine can inhibit microbial activity; filtered or bottled water is best. Second, verify your feeding ratio – feeding a 1:1:1 ratio (e.g., 50g starter, 50g flour, 50g water) for a few days, combined with feeding every 12 hours, can often boost a slow starter's activity much faster than a 1:5:5 ratio.
Third, consider the flour you are using; some flours are richer in nutrients that yeast loves. Try incorporating a small amount of whole wheat or rye flour into your mix (e.g., 80% all-purpose, 20% whole wheat) to see if it stimulates more activity. Consistency in feeding time and temperature is also vital; wild yeast thrives on routine.
Sourdough Starter Smells Bad: Identifying and Fixing Off-Putting Odors
Sourdough starters naturally have a tangy, sometimes slightly vinegary or yeasty smell, which is pleasant and indicates healthy fermentation. However, certain strong, unpleasant odors are red flags in sourdough starter troubleshooting for beginners. A very strong smell resembling acetone or nail polish remover is extremely common. This odor indicates that the starter is very hungry; the yeast has consumed all the simple sugars and is now producing alcohol as a byproduct, which then evaporates and smells like acetone.
To fix an acetone smell, increase the frequency of feeding or decrease the time between feedings. For instance, if you're feeding every 24 hours, switch to every 12 hours until the smell dissipates and the starter becomes more active. You might also increase the amount of flour and water relative to the starter (e.g., switch from 1:1:1 to 1:2:2 or 1:3:3) to provide more food for a longer period between feedings.
Another unpleasant smell can be cheesy, rancid, or like dirty socks. While less common, this often suggests that the bacteria in the starter are out of balance, possibly due to infrequent feeding or contamination.
Try discarding a larger portion of the starter before feeding (e.g., keep only 10-20g and feed it with fresh flour and water) and resume frequent feedings (every 12 hours) in a warm spot. If the bad smell persists after several days of diligent feeding, it might be best to start fresh to avoid potential contamination.
Frequently Asked Questions
What exactly is a sourdough starter and why is it so important?
A sourdough starter is a living culture of wild yeast and bacteria. It's essential because it's what makes sourdough bread rise and gives it its characteristic tangy flavor.
How do I know if my sourdough starter is actually active and ready to bake with?
An active starter will have doubled in size after feeding and be full of bubbles. It should also have a slightly sour, yeasty smell.
My sourdough starter isn't rising. What could be the problem and how can I fix it?
Possible issues include incorrect feeding ratios, the temperature being too cold, or the starter not being mature enough. Try adjusting the water/flour amounts or moving it to a warmer location.
How often should I be feeding my sourdough starter, and does the type of flour matter?
Feed your starter once or twice a day if kept at room temperature. The type of flour does matter; whole wheat or rye flour can help boost activity, especially in the beginning.
Can I really revive a "dead" sourdough starter, and what are the steps involved?
Yes, often! Continue regular feedings with a good flour (like rye), even if it seems inactive. It can take several days or even weeks, but patience and consistent care can often revive it.
Final Reflection: The Ever-Rising Dough of Discovery
The science behind sourdough baking, once shrouded in mystery, is now accessible to everyone, proving that even the most complex processes can be demystified with a little patience and understanding. This journey into the fascinating world of sourdough starters, specifically tackling common beginner problems, highlights the power of observation and iterative learning. Mastering sourdough isn't just about baking bread; it's about embracing the unpredictable nature of a living organism and finding joy in the process.
The impact of sourdough's resurgence in popularity is undeniable. It's more than just a culinary trend; it represents a return to slower, more mindful food production. Bread is the staff of life,
a simple phrase that speaks volumes about its importance throughout history. This renewed interest in sourdough reflects a growing desire for connection to our food, a deeper understanding of its origins, and a satisfaction derived from creating something beautiful and delicious with our own hands. It's a testament to the enduring power of tradition and the rewarding experience of mastering a challenging skill.
Now, it's your turn. Don't be intimidated by the initial challenges of sourdough baking. Embrace the failures, learn from the mistakes, and celebrate the successes. Each bubbly rise, each perfectly formed loaf, is a testament to your dedication and a delicious reward for your efforts. Remember the principles we've explored – understanding your starter's needs, observing its behavior, and adjusting your approach accordingly – and you'll be well on your way to baking your own perfect sourdough masterpiece. The journey is as rewarding as the destination, so embrace the process and enjoy the delicious results!
Unleash Your Inner Baker: Start Your Sourdough Journey Today!
Thanks for taking the time to explore the wonderful world of sourdough! We hope you’ve gained a new appreciation for this simple yet fascinating process. Now it’s time to put your knowledge into practice.
- Begin your first sourdough starter: The most important step is to create your own. Don’t be intimidated; it’s easier than you might think. Follow straightforward instructions, and you'll be bubbling with excitement in no time.
- Share your sourdough journey: We’d love to hear about your experiences. Join our community on social media and share photos of your starter’s progress or ask any questions you have.
- Try simple sourdough recipes: Once your starter is healthy, attempt baking a basic loaf with common ingredients. It’s more rewarding than you might expect!
Ready to enjoy the satisfaction of baking your own sourdough bread? What’s your biggest question about getting started?