
Basic Sourdough: From Starter to Slice (Complete Guide)

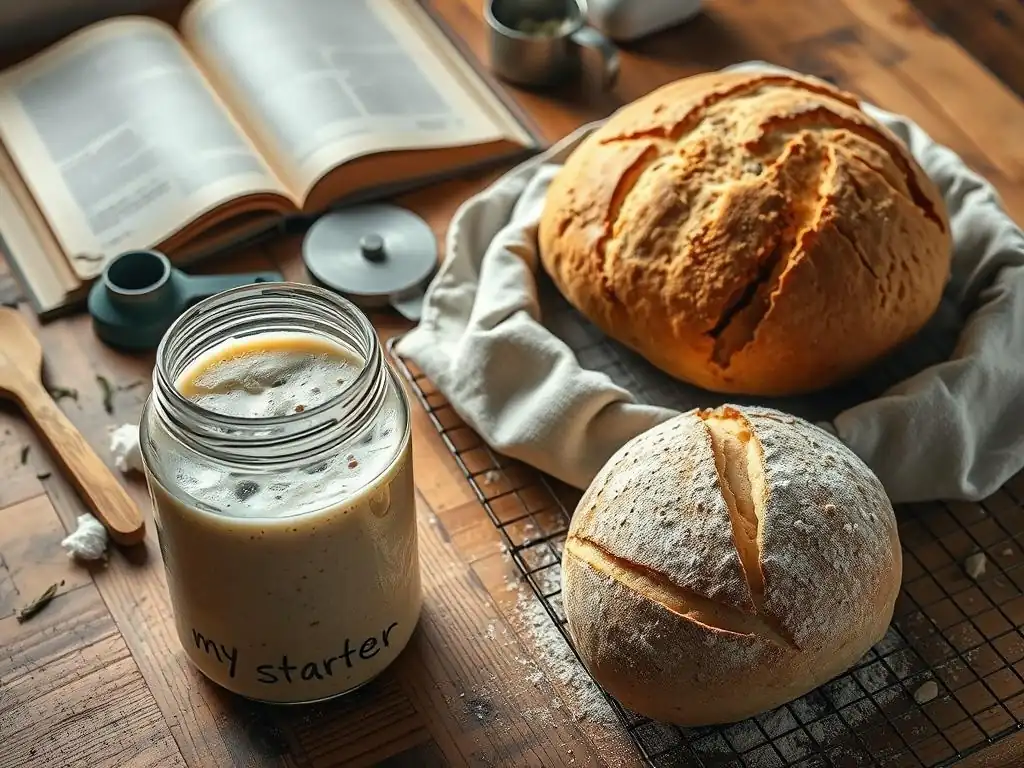
Welcome to BakeWithEase, your trusted companion in the delightful world of baking!
Ever felt intimidated by the mysteries of sourdough? Our Easy Sourdough Starter Troubleshooting Guide, part of our comprehensive " Basic Sourdough: From Starter to Slice" series, is here to demystify the process. Discover the secrets to cultivating a thriving starter and unleash the incredible flavor of homemade sourdough bread. Intrigued? Let's dive in and turn you into a sourdough artisan!
Easy Sourdough Starter Troubleshooting Guide: Common Problems and Solutions
Embarking on the sourdough journey is incredibly rewarding, but sometimes your bubbly friend, the sourdough starter, can be a bit temperamental. Don't worry! Most issues are common and easily fixable. This easy sourdough starter troubleshooting guide covers the most frequent hiccups you might encounter as you nurture your culture.
Sourdough Starter Not Rising? Potential Causes and Fixes
One of the most common concerns for new bakers is a sourdough starter that seems sluggish or isn't rising much after feeding. Several factors can contribute to this lack of activity. The most frequent culprit is often temperature; sourdough starters thrive in warmer environments, ideally between 75°F and 80°F (24°C - 27°C).
If your kitchen is cooler, say below 70°F (21°C), the fermentation process slows significantly, resulting in minimal or no visible rise. Another common issue, especially with young starters (under 2-3 weeks old), is simply that the culture is still establishing itself. The initial days often show some activity, but then a 'lull' period occurs as the beneficial bacteria and wild yeasts find their balance.
To address a non-rising starter, first, evaluate your kitchen temperature. Can you move the starter to a warmer spot, like near a window (but out of direct sun), on top of your refrigerator, or in an oven with just the light on (ensure it doesn't get too hot)? Aim for that 75-80°F range. If your starter is young, patience is key.
Continue feeding it consistently, discarding a portion (like half or more) and feeding it equal parts by weight of fresh flour and water (e.g., 50g starter, 50g water, 50g flour). Ensure you're using unbleached flour, as bleach can inhibit microbial activity. Sometimes, switching to a mix of all-purpose and whole wheat or rye flour can give it a boost, as these flours contain more nutrients for the microbes.
Dealing with a Slow-Rising Sourdough Starter
A starter that rises, but very slowly or doesn't quite double, is often just a slightly less active version of the non-rising problem. Again, temperature is a primary factor. If your kitchen is consistently cool, your starter will simply take longer to reach its peak activity. While a robust starter fed at a 1:1:1 ratio (starter:water:flour by weight) at 75°F might double in 4-6 hours, that same starter at 68°F (20°C) might take 8-12 hours or even longer. It's not necessarily 'wrong'; it's just slower.
Beyond temperature, the feeding ratio can impact speed. Feeding a starter a smaller amount of 'food' (flour and water) relative to the amount of starter (e.g., 1:0.5:0.5) will make it peak faster but also get hungry sooner. Feeding a higher ratio (e.g., 1:2:2 or 1:3:3) dilutes the culture more, giving it a larger meal, which can lead to a stronger rise over a longer period.
If your starter is consistently slow and you're feeding 1:1:1, try increasing your feeding ratio for a few cycles, perhaps to 1:2:2 (e.g., 25g starter, 50g water, 50g flour), while also ensuring warmth. This can help build up a larger, more active population of microbes. Patience and consistent feeding are your best tools in this easy sourdough starter troubleshooting guide section.
Identifying and Addressing Mold in Your Sourdough Starter
Mold is perhaps the most serious issue you can encounter with your sourdough starter, and unfortunately, it's usually a sign that the starter needs to be discarded. Mold typically appears as fuzzy patches on the surface, which can be various colors like green, black, pink, or even orange. Unlike the harmless layer of liquid called 'hooch' (which can be stirred in or poured off), mold is a living fungus that poses a health risk. It thrives in environments that are too dry on the surface or have been contaminated by airborne spores or unclean utensils.
If you see any sign of fuzzy mold on your starter, the safest course of action is to discard the entire contents of the jar and start fresh. While some sources suggest scraping mold off the surface, mold often has roots that extend deeper into the culture, and consuming it can be harmful.
Prevention is key: always use clean jars and utensils, keep the starter covered loosely (a lid resting on top or a cloth secured with a band allows airflow but prevents contaminants), and maintain a regular feeding schedule to keep the culture healthy and dominant, making it harder for mold to take hold.
Sourdough Starter Smells Off? Understanding the Aromas

A healthy sourdough starter has a distinct aroma that evolves over time. Young starters often smell like yeasty bread dough or even slightly cheesy or foot-like due to the initial bacterial activity. As the starter matures, the smell should become pleasantly sour, perhaps reminiscent of yogurt, vinegar, or even slightly fruity. A layer of liquid on top, known as 'hooch,' is a sign the starter is hungry and producing alcohol; hooch smells strongly of alcohol or nail polish remover (acetone). This is usually normal and means it's time to feed.
However, some smells indicate a problem covered in this easy sourdough starter troubleshooting guide. If your starter develops a truly foul, rotten, or putrid smell, beyond just sourness or acetone, it could indicate unwanted bacteria have taken over. This is rare in a healthy, active starter but can happen if it's neglected for a very long time or contaminated.
The acetone smell from hooch is generally harmless; you can stir it in (adding a tangier flavor) or pour it off before feeding. If the acetone smell is overwhelming even without a visible hooch layer, your starter is very hungry and needs more frequent or larger feedings to balance the microbial activity. A truly rotten smell warrants discarding the starter and starting over, just as with mold.
Reviving a Neglected Sourdough Starter
Life happens, and sometimes your sourdough starter gets left in the fridge for too long, forgotten and neglected. It might have a significant layer of hooch, look separated, or show very little activity when brought to room temperature. Don't despair! Most neglected starters can be revived with a little care and patience. This is a common scenario addressed in any easy sourdough starter troubleshooting guide.
To revive a neglected starter:
- Bring the starter out of the fridge and let it warm up slightly if very cold.
- Observe the hooch layer. You can stir it in or pour it off. Pouring it off reduces the sourness and alcohol smell, which can be preferable.
- Take a small amount of the starter from the middle of the jar, where it's less likely to have surface issues. Start with a small quantity, perhaps just 10-20 grams.
- Feed this small amount generously. Use a higher feeding ratio than usual, like 1 part starter to 2 or 3 parts water and 2 or 3 parts flour (e.g., 10g starter, 30g water, 30g flour). This provides plenty of fresh food and helps dilute the old, acidic environment.
- Mix well and place the starter in a warm spot (75-80°F).
- Watch for signs of activity (bubbles, slight rise). Once you see activity, repeat the feeding process (discarding most and feeding generously) every 12-24 hours, depending on how quickly it responds. Continue this until the starter is consistently doubling or tripling in volume within 4-8 hours after feeding. It might take several days or even a week to fully revive a very neglected starter, so be patient and consistent with the feedings.
Frequently Asked Questions
What is the most common reason a sourdough starter fails to rise?
The most frequent culprit is incorrect temperature. Sourdough starters thrive in a warm environment (ideally 70-75°F). Temperature fluctuations can significantly impact yeast activity and fermentation.
How often should I feed my sourdough starter?
Feeding frequency depends on factors like temperature and starter maturity. Generally, feeding once or twice a day is recommended, especially during the active phase. An established starter in the fridge can be fed less often.
What does "ripe" sourdough starter look like?
A ripe starter will exhibit increased volume (doubled or tripled), have a bubbly texture, and possess a slightly tangy, yogurt-like aroma. It indicates the microorganisms are active and ready for baking.
Can I revive a sourdough starter that appears dead?
Yes, often you can! Continue feeding it regularly, even if it seems inactive. Ensure the right temperature and be patient. It may take several days or even weeks to see signs of life.
What if my sourdough starter develops a layer of liquid on top (hooch)?
Hooch is a sign that the starter is hungry and needs feeding. Pour off the hooch (or stir it in) and feed the starter as usual. This is a normal byproduct of fermentation and not necessarily a sign of spoilage.
Final Reflection: The Unexpected Joys of Sourdough
The seemingly simple act of baking sourdough bread has become a powerful symbol of connection to tradition and a testament to the enduring power of patience. More than just a recipe, the journey from starter to slice reveals a deeper understanding of fermentation, mindful practice, and the surprising rewards of embracing imperfection. In a world increasingly dominated by instant gratification, the slow, deliberate process of sourdough offers a much-needed counterpoint.
The impact of sourdough's resurgence extends far beyond the kitchen. It represents a renewed interest in artisanal food production, a desire for connection to the origins of our food, and a growing appreciation for the intricate biological processes that shape our daily lives. This isn't just about bread; it's about reclaiming control over our food systems and fostering a deeper understanding of the natural world. Bread is the staff of life,
they say, and in the case of sourdough, it's a staff imbued with history, patience, and a surprising amount of joy.
Consider the lessons learned throughout this guide. You've tackled troubleshooting, understood the nuances of your starter, and ultimately, created something beautiful and delicious from simple ingredients. Now, I invite you to carry this spirit of mindful creation into other aspects of your life. Embrace the slow processes, celebrate the small victories, and don't be afraid to experiment. The journey, with all its unexpected turns and delightful discoveries, is just as rewarding as the final slice of perfectly risen sourdough.
Unleash Your Inner Baker: Craft Your Perfect Loaf!
Thanks for joining us on this sourdough journey! You've now got the knowledge to bake amazing bread from scratch. Ready to take the next step?
- Bake your first sourdough loaf today! Use what you've learned to transform simple ingredients into delicious, crusty bread. Don't be afraid to experiment – that's where the magic happens!
- Share your baking triumphs (and challenges!) with our community on social media using #BakeWithEaseSourdough. We love to see your creations!
- Explore our other recipes for even more baking inspiration. Discover new flavors and techniques to expand your culinary horizons.
What unique sourdough creation will you bake next? Let us know in the comments!