
Basic Sourdough Starter: How to Use It in Your First Loaf Effectively

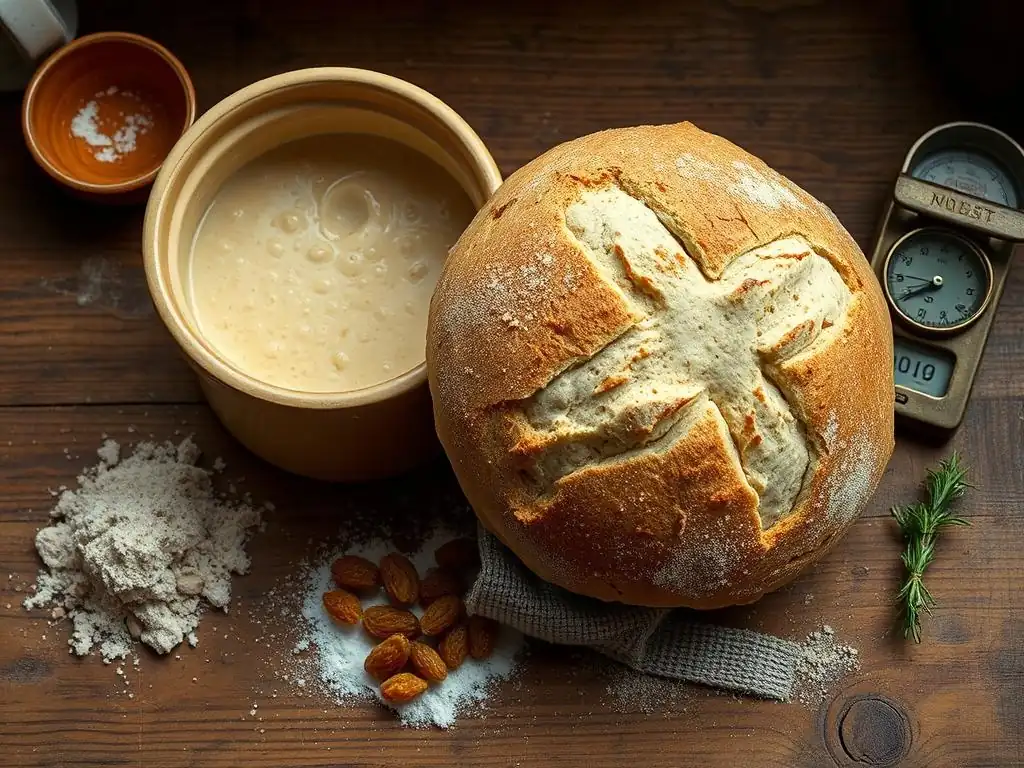
Welcome to BakeWithEase, your haven for all things baking! Ever wondered what makes sourdough bread so irresistibly tangy and chewy? This article dives deep into the heart of sourdough baking, exploring the secrets of using your sourdough starter effectively. Unlock the potential of your starter and transform it into your first incredible loaf. Intrigued? Let's get baking!
- Introduction to Using Sourdough Starter for Baking
- Understanding Your Sourdough Starter: A Beginner's Guide
- Activating Your Sourdough Starter for Baking
-
The First Sourdough Loaf: A Step-by-Step Guide
- Basic Sourdough Bread Recipe for Beginners
- Ingredients You'll Need: Flour, Water, Salt, and Starter
- Mixing the Dough: Autolyse and Initial Mixing
- Bulk Fermentation: Developing Flavor and Strength
- Shaping the Dough: Creating Tension and Structure
- Proofing the Dough: Achieving the Right Rise
- Baking Your First Sourdough Loaf
- Cooling and Slicing Your Sourdough Bread
- Tips and Tricks for Successful Sourdough Baking with Starter
- Maintaining Your Sourdough Starter for Future Bakes
- Conclusion: Enjoying Your Homemade Sourdough Bread
-
Frequently Asked Questions
- How do I know when my sourdough starter is ready to use?
- What's the best way to incorporate sourdough starter into my dough?
- Can I substitute different flours when feeding my sourdough starter?
- How often should I feed my sourdough starter if I'm not baking regularly?
- What are common issues I might encounter when baking with sourdough starter?
- Final Reflection: The Humble Starter, the Bountiful Loaf
- Unleash Your Inner Baker: Bake Your First Sourdough Masterpiece!
Introduction to Using Sourdough Starter for Baking
Welcome to the wonderful world of sourdough baking! If you've successfully cultivated a lively sourdough starter, you're already halfway to baking your first incredible loaf. Using a sourdough starter is a traditional method of leavening bread, relying on wild yeast and bacteria rather than commercial yeast. This process not only makes your bread rise but also imparts a unique, complex flavor and a wonderfully chewy texture that's hard to achieve otherwise. Learning how to use sourdough starter effectively is the key to unlocking these benefits and creating delicious, naturally leavened bread right in your own kitchen.
Embarking on your first sourdough bake can feel a little daunting, but with a healthy, active starter and a clear guide, it's an incredibly rewarding experience. This article will walk you through everything from understanding your starter's readiness to mixing, shaping, and baking your very first loaf. We'll cover the essential steps and provide practical tips on how to use sourdough starter to achieve a beautiful rise and a fantastic crust. Get ready to transform that bubbling jar of starter into artisanal bread!
Understanding Your Sourdough Starter: A Beginner's Guide
What is Sourdough Starter and Why Use It?
A sourdough starter, often called "levain" or "mother," is a living culture made from just flour and water. Over time, through regular feeding, this mixture captures wild yeasts and lactic acid bacteria from the environment and the flour itself.
These microorganisms work together to ferment the dough, producing carbon dioxide gas which makes the bread rise, and organic acids (primarily lactic and acetic acids) which give sourdough its characteristic tangy flavor and help preserve the bread. Using a sourdough starter is a return to ancient baking methods, offering a depth of flavor and a unique crumb structure that active dry yeast simply cannot replicate.
The symbiotic relationship between the wild yeast and bacteria in your starter is fascinating. The yeast consumes sugars in the flour, producing ethanol and carbon dioxide. The bacteria, on the other hand, consume some of the same sugars and also the ethanol produced by the yeast, creating lactic and acetic acids.
This acidic environment inhibits the growth of undesirable molds and bacteria, while also breaking down complex carbohydrates and proteins in the flour, making the nutrients more available and potentially making the bread easier to digest for some people. Understanding this process is fundamental to understanding how to use sourdough starter successfully in your baking endeavors.
Evaluating Your Sourdough Starter's Readiness
Knowing when your starter is ready to bake with is crucial for success. A ready-to-use starter should be active, bubbly, and have recently peaked or be near its peak activity after its last feeding. Visually, you should see many bubbles throughout the culture, not just on the surface. The volume should have significantly increased, typically doubling or even tripling since you fed it. The consistency should be light and airy, almost like a mousse, rather than a dense paste.
A simple and popular test for readiness is the "float test." Gently take a small spoonful of your starter and drop it into a glass of room-temperature water. If the starter floats, it's generally considered active enough to leaven bread.
This indicates that it contains enough carbon dioxide bubbles to be less dense than water. If it sinks, it may need more time to become active or might require another feeding before being ready to use. While not foolproof, the float test is a quick way to gauge your starter's leavening power before you commit to mixing a whole batch of dough, giving you confidence in how to use sourdough starter effectively.
Signs of an Active and Healthy Starter
An active and healthy starter exhibits several key characteristics that indicate its readiness for baking. One of the most obvious signs is significant volume increase after feeding. A robust starter fed at a 1:1:1 ratio (starter:water:flour by weight) at around 75°F (24°C) should typically double in size within 4 to 6 hours. At slightly cooler room temperatures (around 70°F or 21°C), this might take 6 to 8 hours. This consistent and predictable rise is a primary indicator of yeast activity.
Beyond volume, observe the texture and smell. A healthy starter will have a domed or flattened top when it peaks, and you'll see numerous bubbles on the surface and throughout the jar walls. When gently stirred or poured, it should have a light, airy feel.
The smell should be pleasantly tangy, perhaps slightly yogurty or acidic, but not overwhelmingly pungent like nail polish remover, which can indicate an excess of acetic acid or that it's gone too long without feeding. A sweet or yeasty aroma is also common. These sensory cues are vital in learning how to use sourdough starter at its optimal point of activity.
Troubleshooting Common Starter Problems
Even experienced bakers encounter issues with their starter sometimes. One common problem is a starter that isn't rising well. This could be due to inconsistent feeding, using chlorinated water (chlorine can harm the microbes), or the ambient temperature being too cold. Try feeding it more regularly, using filtered or bottled water, and finding a warmer spot in your kitchen (like inside a microwave or oven with the light on) to encourage activity. Increasing the feeding ratio (e.g., 1:2:2 or 1:5:5) can also help dilute the acidic environment and provide more food for the microbes to become active.
Another issue is mold or unusual colors (like pink or orange streaks). Mold is a sign that the starter has been contaminated, and unfortunately, it's best to discard the entire batch and start fresh. A strong, unpleasant smell (like acetone) usually means the starter is hungry and producing excess acetic acid. This isn't necessarily harmful, but it indicates the microbes are stressed. A few consistent feedings should bring it back to a balanced state. Learning to identify and address these issues is part of mastering how to use sourdough starter and keep it healthy long-term.
Activating Your Sourdough Starter for Baking
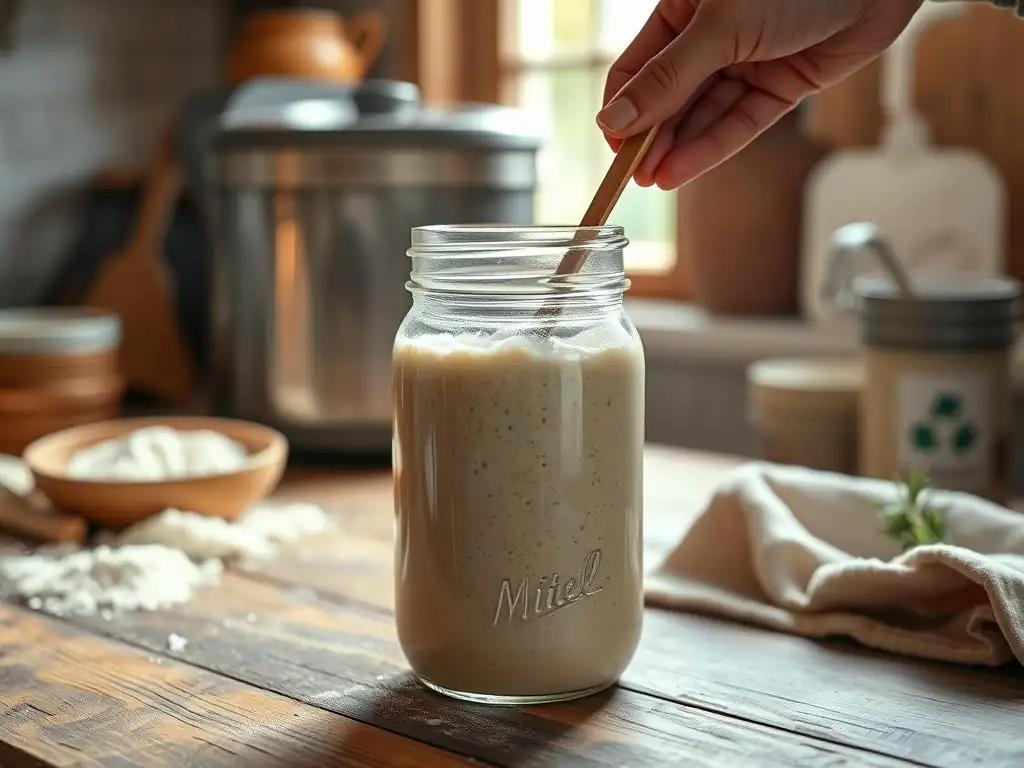
Feeding Your Starter Before Baking
To ensure your starter is vigorous and ready to leaven a loaf, you need to feed it specifically for baking. This usually involves taking a small amount of your mature starter and feeding it with a specific ratio of fresh flour and water. The goal is to create a portion of starter, often called the levain, that is at its peak activity when you are ready to mix your dough.
A common feeding ratio for a levain intended for baking is 1:2:2 (starter:water:flour by weight). For example, you might take 25 grams of your established starter and feed it with 50 grams of water and 50 grams of flour. This provides ample food for the microbes to become highly active within a predictable timeframe.
The amount of starter you build depends on how much your recipe calls for. If a recipe requires 100 grams of active starter, you'd need to feed enough to yield at least that amount plus a little extra for your main starter jar. Using the 1:2:2 ratio example, feeding 25g starter with 50g water and 50g flour yields 125g of levain.
This feeding is typically done 4-12 hours before you plan to mix your dough, allowing the starter to reach its peak rise and activity. This preparation step is fundamental to understanding how to use sourdough starter effectively for baking.
The Importance of Starter Ratio and Temperature
The ratio of starter, water, and flour you use for your pre-baking feeding significantly impacts the timing of its peak activity. A higher ratio of fresh flour and water to starter (like 1:5:5) means the starter will take longer to peak because the microbes have more food to work through. This is useful if you need the starter to be ready over a longer period, perhaps overnight.
A lower ratio (like 1:1:1) will cause the starter to peak faster, often within 3-6 hours at room temperature. Understanding these ratios allows you to time your starter's readiness precisely for when you plan to mix your dough.
Temperature also plays a critical role. Warmer temperatures accelerate microbial activity, causing the starter to rise and fall more quickly. Feeding your starter and keeping it at a consistent 75-80°F (24-27°C) will result in a faster peak than keeping it at 68-70°F (20-21°C). For many home bakers, simply leaving the fed starter on the kitchen counter is sufficient, but being aware of how your kitchen temperature fluctuates can help you predict when your starter will be ready. Using a consistent temperature is key to reliably knowing how to use sourdough starter at its optimal point for your baking schedule.
Determining Peak Activity for Optimal Results
The ideal time to use your starter for baking is when it has reached its peak activity, or just as it begins to slightly fall. This is when the yeast population is at its highest and the starter has the most leavening power. You'll recognize this point because the starter will have reached its maximum volume after feeding – it will look well-risen, domed, and full of bubbles. If you watch it closely, you might see the very top beginning to flatten or even dip slightly in the center.
Using the starter too early (before peak) means it may not have developed enough leavening power. Using it too late (well past peak and significantly deflated) means the yeast may have exhausted their food supply and started to die off, also resulting in less vigorous leavening. The float test mentioned earlier is a good indicator of peak activity.
Observing the volume increase and slight deflation is another reliable method. Aim to mix your dough when your starter is light, bubbly, and has roughly doubled or tripled in volume since feeding – this is how to use sourdough starter to give your loaf the best possible start.
The First Sourdough Loaf: A Step-by-Step Guide
Baking your first sourdough loaf using your active starter is an exciting milestone! This basic recipe is designed for beginners and focuses on the fundamental techniques that yield a delicious, rustic bread. It requires minimal kneading and relies on time and gentle handling to develop gluten and flavor. Remember that timing in sourdough baking is highly variable and depends on the temperature of your kitchen, water, and ingredients, as well as the specific activity of your starter. Pay attention to the dough's feel and appearance rather than sticking rigidly to times.
This guide will walk you through the process, from combining the simple ingredients to achieving that satisfying golden crust. We'll break down each stage, providing insights into why certain steps are important. Learning how to use sourdough starter in a recipe involves patience and observation, but the result – a warm, fragrant loaf of homemade sourdough – is well worth the effort.
Basic Sourdough Bread Recipe for Beginners
This recipe yields one medium-sized loaf.
- Yield: 1 loaf
- Prep time: ~30 minutes active, plus ~12-20 hours passive (fermentation/proofing)
- Bake time: ~40-50 minutes
Ingredients:
- Active Sourdough Starter: 100 grams
- Warm Water (around 80-85°F or 27-29°C): 350 grams
- Bread Flour (or All-Purpose Flour): 500 grams
- Fine Sea Salt: 9-10 grams
- Combine starter and water.
- Add flour and salt.
- Mix until just combined (Autolyse).
- Rest.
- Perform stretches and folds.
- Bulk ferment.
- Shape dough.
- Proof dough (cold or room temp).
- Bake.
- Cool.
Ingredients You'll Need: Flour, Water, Salt, and Starter
The beauty of traditional sourdough bread lies in its simplicity: just four core ingredients. The flour provides the structure (gluten) and the food source for the microbes. Bread flour is often preferred for its higher protein content (typically 12-14%), which helps develop strong gluten, resulting in a better rise and chew. All-purpose flour (around 10-12% protein) can also work, but may require slight adjustments to hydration. The quality and type of flour significantly impact the dough's behavior and the final crumb.
Water is essential for hydrating the flour and creating an environment for the yeast and bacteria to thrive. Using filtered or non-chlorinated water is recommended, as chlorine can inhibit microbial activity. The temperature of the water is also important; warmer water (around 80-85°F or 27-29°C) can help kickstart fermentation, especially in a cooler kitchen. Salt is crucial for flavor, controlling fermentation speed, and strengthening the gluten structure.
Fine sea salt or kosher salt are commonly used. And, of course, the star ingredient is your active sourdough starter – the living culture responsible for leavening and flavor. Knowing how to use sourdough starter alongside these simple ingredients is the foundation of this craft.
Mixing the Dough: Autolyse and Initial Mixing
The process often begins with an autolyse phase. This involves mixing just the flour and water from the recipe (excluding the salt and starter) until no dry flour remains. The mixture will look shaggy and rough. Cover the bowl and let it rest for 30 minutes to an hour. During this rest period, the flour absorbs the water, and enzymes naturally present in the flour begin to break down proteins, starting the gluten development process without any mechanical effort. This step makes the dough easier to handle later and can improve the texture of the final bread.
After the autolyse, add your active sourdough starter and the salt to the dough. Use your hands or a dough mixer to incorporate the starter and salt thoroughly. The dough might feel wet and sticky at this stage.
Knead or mix for a few minutes until the starter and salt are fully integrated and the dough starts to show a little more structure. Some bakers use the "Rubaud method," which involves lifting and stretching the dough upwards from the center of the bowl and letting it fall back on itself, repeating until the dough becomes more cohesive. This initial mixing is where your decision on how to use sourdough starter in terms of its readiness truly impacts the dough's initial fermentation speed.
Bulk Fermentation: Developing Flavor and Strength
Bulk fermentation (also known as the first rise) is arguably the most critical stage in sourdough baking. This is the period after initial mixing when the dough is left to ferment as a single mass before being divided and shaped. During bulk fermentation, the yeast in your starter produces carbon dioxide, causing the dough to rise, while the bacteria produce organic acids, developing the characteristic sourdough flavor. Simultaneously, gluten continues to develop, creating a strong network that will trap the gases produced by the yeast, leading to a well-risen loaf.
The duration of bulk fermentation is highly variable and depends primarily on the ambient temperature and the activity level of your starter. It typically ranges from 4 to 8 hours at average room temperature (around 70-75°F or 21-24°C). You're looking for the dough to increase in volume by about 50-75% and show signs of fermentation, such as bubbles on the surface and along the sides of the bowl. The dough should feel lighter and puffier. Understanding how to use sourdough starter's fermentation power during this stage is key to building structure and flavor.
Understanding Bulk Fermentation Time and Temperature
As mentioned, temperature is the most significant factor influencing bulk fermentation time. Warmer temperatures accelerate fermentation, while cooler temperatures slow it down. For example, at 80°F (27°C), bulk fermentation might only take 3-5 hours, whereas at 65°F (18°C), it could take 8-12 hours or even longer. It's more important to watch the dough than the clock. Look for the visual cues: significant volume increase (50-75%), a domed surface, and bubbles.
Another factor is the hydration level of your dough. Higher hydration doughs (those with a higher percentage of water relative to flour) often ferment faster than lower hydration doughs because the water makes the nutrients more accessible to the microbes. The type of flour also plays a role; whole wheat or rye flour ferments faster than white bread flour due to higher enzyme activity and nutrient content. Paying attention to these variables helps you predict and manage the bulk fermentation process effectively after deciding how to use sourdough starter in your mix.
Performing Folds: Strengthening the Dough
During bulk fermentation, you'll typically perform a series of "folds" or "stretch and folds." This technique helps to develop gluten structure, equalize the temperature throughout the dough, and redistribute the yeast and bacteria, giving them access to fresh food. For a typical sourdough recipe, you might perform 3-5 sets of folds during the first 2-3 hours of bulk fermentation, with 30-60 minutes of rest time between each set.
To perform a fold, lightly wet your hands to prevent sticking. Gently lift one edge of the dough from the bowl, stretch it upwards without tearing, and fold it over the center of the dough. Rotate the bowl and repeat this process 3-4 times until all sides have been folded towards the center, creating a taut package.
Cover the bowl and let it rest. These folds are crucial for building the internal structure that allows the loaf to hold its shape and achieve a good rise in the oven. They are an essential part of the process once you've learned how to use sourdough starter in your dough.
Shaping the Dough: Creating Tension and Structure
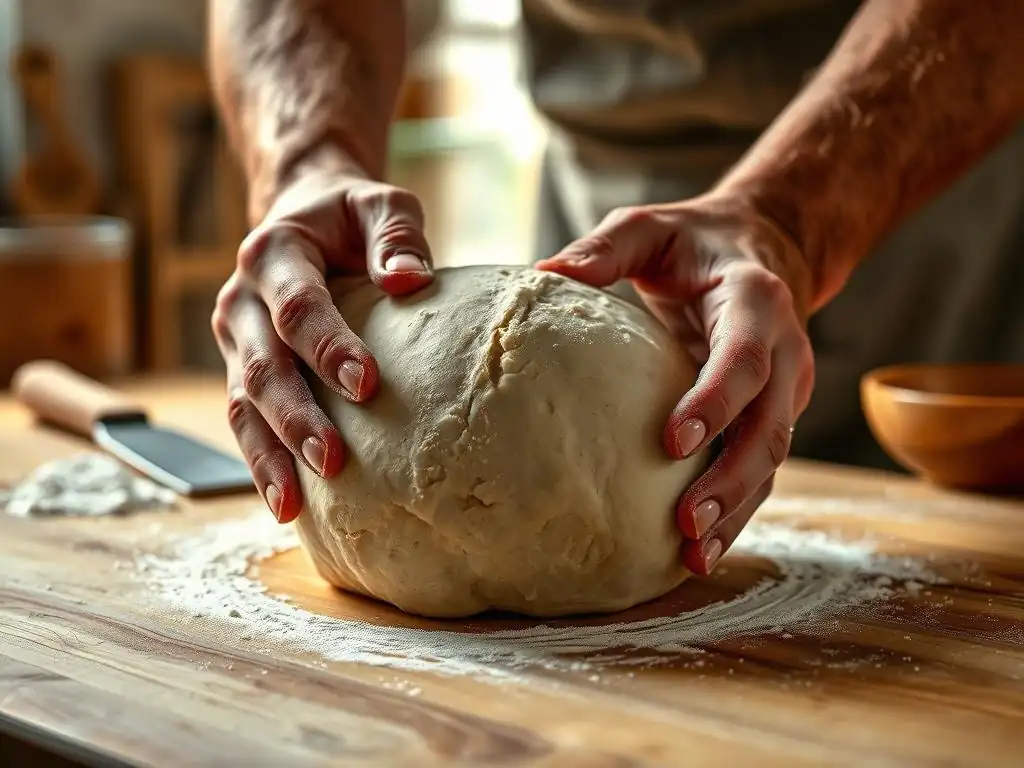
After bulk fermentation is complete, the dough is ready for shaping. The goal of shaping is to create tension on the surface of the dough, which helps it hold its form during proofing and gives it the necessary strength for oven spring (the final rise in the oven). First, gently turn the dough out onto a lightly floured surface. Be careful not to degas it too much, as you want to preserve the bubbles created during fermentation.
Allow the dough to rest for 15-20 minutes (this is called the bench rest). This allows the gluten to relax, making the dough easier to handle. Then, proceed with the final shaping.
There are various shaping techniques (e.g., boule or batard), but they all aim to create a smooth, taut surface. For a boule (round loaf), gently fold the edges of the dough towards the center, then flip it over and use your hands to gently pull and rotate it on the counter, creating surface tension. This skill is honed with practice and is a key step after successfully learning how to use sourdough starter to ferment your dough.
Proofing the Dough: Achieving the Right Rise
Proofing (also called the second rise or final fermentation) is the period after shaping when the dough rests before baking. This is where the shaped loaf develops its final volume and internal structure. Proofing can be done at room temperature or in the refrigerator (cold proof). The duration depends heavily on the temperature and the dough's activity level after bulk fermentation. A room temperature proof might take 1-4 hours, while a cold proof can take 8-16 hours or even longer.
The dough is sufficiently proofed when it has increased in volume (often by 20-50% depending on the method) and feels light and airy. A common test is the "poke test": gently press your finger into the dough. If the indentation springs back slowly but not completely, it's ready. If it springs back immediately, it needs more time. If the indentation remains completely, it's likely over-proofed. Proper proofing ensures your loaf has the potential for good oven spring and a desirable crumb structure, building upon the initial work of learning how to use sourdough starter to leaven the dough.
Proofing in the Refrigerator (Cold Proof)
Cold proofing in the refrigerator is a popular technique among home bakers, and for good reason. Retarding the dough in the cold significantly slows down fermentation. This extended, slow fermentation allows more complex flavors to develop in the bread, resulting in a tangier loaf. It also makes the dough firmer and easier to score (slash the surface) before baking. Cold proofing is incredibly flexible; you can typically proof a loaf in the refrigerator for anywhere from 8 to 24 hours, or sometimes even longer.
To cold proof, place the shaped dough into a proofing basket (banneton) lined with a floured cloth or directly into a bowl if you don't have a banneton. Cover it tightly with plastic wrap or a damp towel to prevent drying, and place it in the refrigerator.
When you're ready to bake, you can usually transfer the dough directly from the fridge to the hot oven. This method is particularly convenient for scheduling, allowing you to mix the dough one day and bake it the next, making it a practical way to learn how to use sourdough starter within a busy schedule.
Room Temperature Proofing: Considerations
Proofing at room temperature is faster than cold proofing but requires more attention to timing. The ideal room temperature for proofing is typically between 70-75°F (21-24°C). At this temperature, proofing might take anywhere from 1 to 4 hours, depending on how active your dough is (which, in turn, depends on your starter's activity and the bulk fermentation). You need to watch the dough closely using the poke test as your primary guide.
Room temperature proofing can be beneficial if you want to bake your loaf on the same day you mix the dough. However, it develops less sour flavor compared to a cold proof. It also requires more precise timing; over-proofing happens faster at room temperature, which can lead to a loaf that spreads rather than rises in the oven. While faster, mastering how to use sourdough starter with a room temperature proof requires a keen eye and understanding of fermentation cues.
Baking Your First Sourdough Loaf
The moment of truth! Baking is where all your hard work comes together to transform the proofed dough into a beautiful loaf of bread. For best results, a very hot oven is necessary to achieve a good oven spring and a crispy crust. Many home bakers use a Dutch oven to mimic the conditions of a professional bread oven.
Preheat your oven, preferably with a Dutch oven inside, to a high temperature, typically 450-500°F (230-260°C), for at least 30-60 minutes. This ensures the Dutch oven is scorching hot, which helps create steam and transfers heat efficiently to the dough. Carefully transfer your proofed dough into the hot Dutch oven. This step requires caution due to the high temperatures involved. Knowing how to use sourdough starter's leavening power is maximized by baking at these high temperatures.
Oven Temperature and Baking Time
A common baking method involves starting at a high temperature, often 475°F or 245°C, for the first part of the bake, and then reducing the temperature for the remainder. For a standard-sized loaf baked in a Dutch oven, you might bake it covered at 475°F (245°C) for 20 minutes. This initial covered period traps steam released by the dough, which keeps the crust soft and allows the loaf to expand rapidly (oven spring) before the crust sets.
After the initial covered bake, carefully remove the lid of the Dutch oven. The loaf should have significantly increased in size and look pale but set. Reduce the oven temperature to around 425-450°F (220-230°C) and continue baking uncovered for another 20-30 minutes, or until the crust is deep golden brown and the internal temperature reaches 200-210°F (93-99°C). The total baking time is usually around 40-50 minutes. This two-stage baking process, combined with the steam created by the Dutch oven, is highly effective when learning how to use sourdough starter for optimal results.
Scoring the Dough: Preventing Explosions and Enhancing Appearance
Before baking, you need to score the surface of your dough with a sharp blade (like a razor blade or a lame). Scoring serves two main purposes: it allows the dough to expand predictably during oven spring by providing weak points for the gas to escape, preventing uncontrolled ruptures, and it creates beautiful patterns and designs on the crust, adding to the artisanal appeal of your loaf.
The depth and pattern of your score affect how the loaf expands. A single deep slash down the center is a simple and effective score for a beginner. For more complex patterns, you can use multiple shallow cuts. Aim for a depth of about 1/2 inch (1-2 cm) for a deep score. Work quickly and confidently. Scoring is your last chance to influence the final shape and appearance of your bread after learning how to use sourdough starter to leaven it.
Baking with or without a Dutch Oven
While a Dutch oven is highly recommended for achieving a great sourdough crust at home, it's not strictly necessary. The primary benefit of the Dutch oven is trapping steam around the loaf during the initial bake, which is crucial for maximizing oven spring and creating a thin, crispy crust. If you don't have a Dutch oven, you can try to create a steamy environment in your oven using other methods.
One alternative is to place a baking stone or steel on a rack in your oven and preheat it. Place a tray or cast iron pan on the rack below the stone. Just before loading your dough onto the stone, pour a cup of hot water into the hot tray below to create steam. Quickly close the oven door to trap the steam.
You can also spray the oven walls with water a few times during the first 10-15 minutes of baking. While these methods can help, they are often less effective at trapping steam than a Dutch oven. Mastering how to use sourdough starter with steam is key to a good crust.
Cooling and Slicing Your Sourdough Bread
Once your loaf is baked to a deep golden brown, it's tempting to slice into it immediately. However, this is perhaps the most important step for achieving the best texture. You must let the bread cool completely on a wire rack before slicing. As the bread cools, internal moisture redistributes, and the structure sets. Slicing too early will result in a gummy interior because the starches haven't finished their transformation.
Allow the loaf to cool for at least 1-2 hours, or ideally longer, depending on its size. A large loaf might need 3-4 hours to cool fully. Resist the urge to cut it! This patience is rewarded with a proper crumb structure and a much better eating experience. Once fully cooled, use a serrated knife to slice your bread. Congratulations, you've successfully learned how to use sourdough starter to bake your first loaf!
Tips and Tricks for Successful Sourdough Baking with Starter
Achieving a Crispy Crust and Open Crumb
Achieving a crispy crust and an open, airy crumb are hallmarks of great sourdough bread, and both are influenced by several factors throughout the process. For a crispy crust, high baking temperatures and steam in the initial phase are crucial. As discussed, a preheated Dutch oven is excellent for this. Ensuring the loaf is baked long enough uncovered at a slightly lower temperature allows the crust to fully brown and crisp up. Don't be afraid of a dark crust; it often contributes to better flavor and texture.
An open crumb (large, irregular holes) is primarily developed during bulk fermentation and proofing through proper gluten development and gas production. Using an active starter, performing sufficient but gentle folds, and allowing the dough to ferment and proof adequately (but not over-proof) are key. The hydration level of your dough also plays a significant role; higher hydration doughs generally result in a more open crumb, though they can be trickier to handle. Learning how to use sourdough starter's potential requires attention to these details throughout the process.
Adjusting Hydration for Different Flour Types
The hydration of your dough (the ratio of water to flour by weight) significantly impacts its handling characteristics and the final bread texture. A standard beginner's recipe might use around 70-75% hydration (350g water / 500g flour = 0.70 or 70%). However, different flours absorb water differently. Whole wheat and rye flours absorb much more water than white bread flour due to the presence of the bran and germ.
If you're using a significant amount of whole wheat or rye flour, you may need to increase the hydration by 5-10% or even more to achieve a similar dough consistency to a white flour loaf. Conversely, if using a lower-protein all-purpose flour, you might need to slightly decrease the hydration or be prepared for a stickier dough. Experimentation is key here. Start with a recommended hydration for your flour type and adjust in future bakes based on how the dough feels. Understanding how to use sourdough starter with varying hydration levels expands your baking possibilities.
Common Mistakes to Avoid When Baking Sourdough
- Using an inactive starter: This is perhaps the most common pitfall. Ensure your starter is bubbly, has doubled/tripled, and passes the float test before mixing your dough. Learning how to use sourdough starter effectively starts with a healthy, active culture.
- Under-fermenting or over-fermenting: These are frequent issues during bulk fermentation and proofing. Under-fermented dough results in a dense crumb and poor oven spring. Over-fermented dough can collapse, spread, and have a weak structure. Pay attention to the dough's volume and feel, not just the clock.
- Not developing enough gluten: Insufficient folding or handling can lead to a dough without enough structure to hold its shape and trap gases, resulting in a flat, dense loaf.
- Slicing the bread too early: As mentioned, this is crucial. Patience is required to let the internal structure set.
- Not using enough steam during baking: Lack of steam prevents the crust from staying pliable long enough for maximum oven spring.
- Giving up too soon: Sourdough baking takes practice. Your first few loaves might not be perfect, and that's okay! Learn from each bake and adjust your process.
Maintaining Your Sourdough Starter for Future Bakes
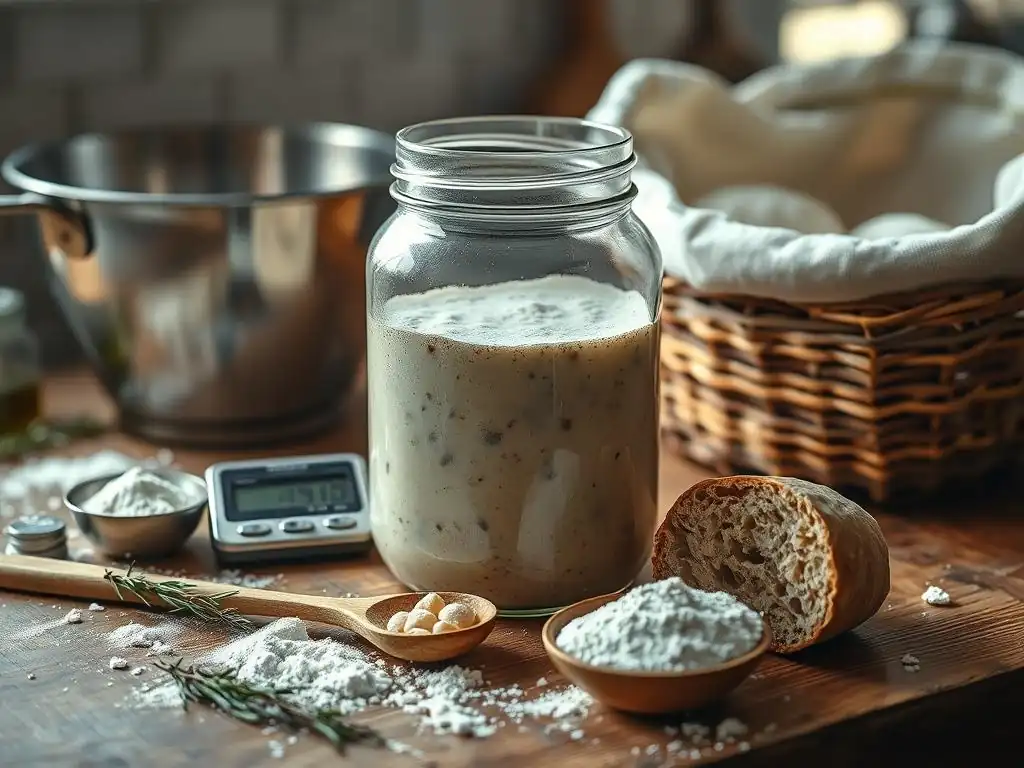
Successfully using your sourdough starter in a loaf is fantastic, but maintaining it is essential for continued baking adventures. A well-maintained starter is robust, predictable, and always ready when you are. Regular feeding is the cornerstone of starter health.
Long-Term Storage of Sourdough Starter
If you don't plan to bake frequently (less than once a week), storing your starter in the refrigerator is an excellent option. The cold temperatures significantly slow down microbial activity, meaning you don't need to feed it as often. You can store it in a jar with a loose-fitting lid to allow for any residual gas exchange.
When stored in the fridge, a starter typically only needs to be fed once a week or every two weeks. You might notice a layer of liquid (called "hooch") on top – this is a sign that the starter is hungry and has consumed most of its food. Simply stir it in or pour it off before discarding most of the starter and feeding it as usual.
To use a refrigerated starter for baking, take it out a day or two in advance, discard most of it, and feed it 1-3 times at room temperature until it becomes active and bubbly again, doubling or tripling in volume. This preparation is key to knowing how to use sourdough starter after refrigeration.
Reviving a Dormant Starter
Sometimes, a starter might become sluggish or seem dormant, perhaps after a long period in the fridge or inconsistent feeding. Don't despair! Most starters can be revived with consistent care. The best way to revive a sleepy starter is through a series of regular feedings at room temperature.
Discard most of the starter, leaving only a small amount (e.g., 20-30 grams). Feed it with fresh flour and water, perhaps at a 1:1:1 or 1:2:2 ratio. Place it in a warm spot (75-80°F or 24-27°C) if possible. Feed it again when it shows signs of activity or every 12-24 hours if it's very slow.
After 2-4 days of consistent feeding, you should see it become active and bubbly again, doubling or tripling predictably between feedings. Once it's showing consistent activity, it's ready to be used for baking or returned to a less frequent feeding schedule. Patience and consistent feeding are key to reviving and learning how to use sourdough starter again.
Feeding Schedules and Starter Maintenance
The ideal feeding schedule depends on where you store your starter and how often you bake. If you bake daily or every few days, keeping your starter at room temperature and feeding it once or twice a day (typically at a 1:1:1 ratio) is best to keep it consistently active.
If you bake less frequently, refrigeration is more practical. For a weekly baker, taking the starter out 1-2 days before baking, feeding it once or twice to activate it, using a portion for your dough, and then feeding the remainder before returning it to the fridge works well. Regular discarding (using or giving away the excess starter before feeding) is also important to keep the culture healthy and manageable. Maintaining this routine ensures you always have a vibrant starter ready when you decide how to use sourdough starter for your next bake.
Conclusion: Enjoying Your Homemade Sourdough Bread
Baking your first sourdough loaf using a homemade starter is a truly rewarding experience. From the bubbling activity of your starter to the aroma filling your kitchen as it bakes, each step is a connection to a timeless craft. You've learned the basics of how to use sourdough starter – understanding its readiness, activating it for baking, mixing and manipulating the dough, and finally, transforming it into a delicious loaf.
Don't worry if your first attempt isn't perfect. Sourdough baking is a journey of learning and requires practice. Each loaf will teach you something new about working with your starter and understanding the fermentation process. Embrace the learning curve, enjoy the process, and most importantly, savor the incredible taste and texture of your very own homemade sourdough bread. Keep feeding your starter, keep experimenting, and keep baking – the possibilities are endless!
Frequently Asked Questions
How do I know when my sourdough starter is ready to use?
Your sourdough starter is ready when it has doubled in size after feeding and has a pleasing, slightly tangy aroma. You should also see bubbles throughout the starter.
What's the best way to incorporate sourdough starter into my dough?
Add your active sourdough starter to your other ingredients, following your recipe's instructions. Ensure the starter is well-distributed for even fermentation. Use a scale for accuracy.
Can I substitute different flours when feeding my sourdough starter?
Yes, you can. Experiment with different flours like whole wheat or rye flour to influence the flavor of your starter and bread. However, ensure you use unbleached flour.
How often should I feed my sourdough starter if I'm not baking regularly?
If you're not baking often, store your starter in the refrigerator and feed it once a week. Remember to take it out a few hours before feeding to warm up.
What are common issues I might encounter when baking with sourdough starter?
Some common issues include a flat loaf, due to under-proofed dough, or an overly sour taste, potentially from an over-fermented starter. Adjust your recipe and timings accordingly.
Final Reflection: The Humble Starter, the Bountiful Loaf
The art of sourdough baking, once a niche pursuit, is experiencing a remarkable resurgence, driven by a renewed appreciation for traditional techniques and the unique flavor profiles only a living starter can provide. This renewed interest highlights a deeper desire for connection – a connection to the process, the ingredients, and even the history embedded within each bubbly rise. It's a testament to the enduring power of simple ingredients transformed through time and care.
The journey of nurturing a sourdough starter is more than just a recipe; it's a relationship. It's a daily commitment to feeding and tending to a living organism, a microcosm of the patience and dedication required for truly rewarding pursuits. The best things in life are not things, but experiences.
This rings true for sourdough baking; the satisfaction derived from a perfectly risen loaf, born from your own starter, is immeasurable. The process itself fosters a mindfulness that extends beyond the kitchen, influencing our approach to other aspects of life.
Now, consider your own starter. What will you bake next? Will you experiment with different flours, hydration levels, or even try a completely new recipe? Don't be afraid to embrace the imperfections; they are part of the journey. The true reward lies not just in the perfect loaf, but in the process of learning, adapting, and connecting with the ancient art of sourdough baking. Let your starter be a catalyst for creativity, patience, and a deeper appreciation for the simple pleasures in life.
Unleash Your Inner Baker: Bake Your First Sourdough Masterpiece!
Thanks for taking the time to learn about sourdough starters! You've now got the knowledge to embark on a delicious baking journey. Ready to put your new skills to the test?
- Bake your first sourdough loaf! Use the techniques you just learned to create a truly satisfying bread. Remember, practice makes perfect!
- Share your baking journey! Post a picture of your creation on social media and tag us – we’d love to see your results!
- Experiment with different flours and techniques. Once you've mastered your first loaf, explore the endless possibilities of sourdough baking. What will you create next?
What unique flavor will you infuse into your first sourdough loaf? Let us know in the comments!