
Your First Basic Sourdough Success Story Starts Here

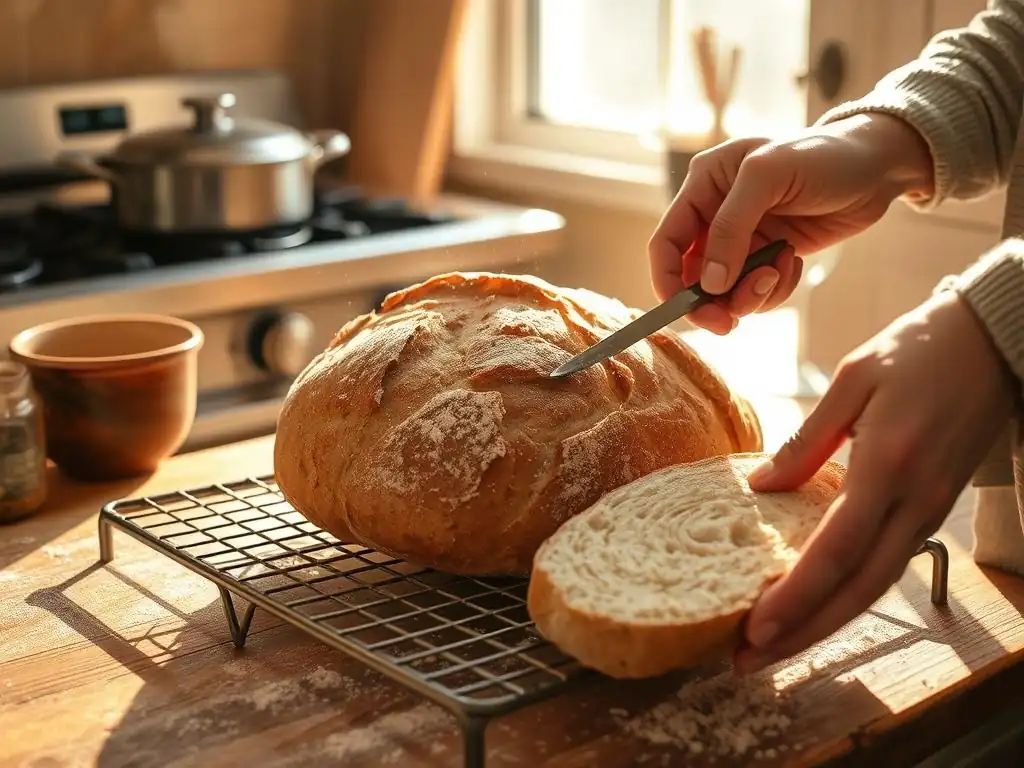
Welcome to BakeWithEase, your kitchen companion for unlocking baking brilliance! Ever dreamt of that perfectly tangy, crusty loaf? We understand. While this falls under our Intermediate Baking category, forget feeling intimidated! Dive in and discover how our easy beginner sourdough recipe can transform your kitchen into a sourdough haven. Curious about the secrets to a foolproof starter and a beautifully risen loaf? Let's bake!
- Mastering Sourdough: A Beginner's Guide to Baking Success
- Embrace Sourdough: Unlocking Flavor and Tradition
- Why Sourdough? Exploring the Art of Fermentation
- Simple Sourdough Recipe: A Comprehensive Guide
- Cultivating Your Sourdough Starter: The Foundation of Flavor
- Mixing and Kneading Your Sourdough Dough
- Bulk Fermentation: Nurturing Flavor and Texture
- Shaping Your Sourdough Loaf
- Proofing Your Sourdough: The Final Stage of Development
- Baking Your Sourdough Bread
- Cooling and Enjoying Your Homemade Sourdough
- Troubleshooting Sourdough: Addressing Common Challenges
- Advanced Sourdough Techniques: Elevating Your Baking Skills
- Resources for Continuing Your Sourdough Journey
-
Frequently Asked Questions
- What makes this sourdough recipe "easy" for beginners?
- What kind of flour is best for this easy beginner sourdough recipe?
- How long does it take to make this sourdough bread from start to finish?
- What if my sourdough starter isn't very active?
- Can I adjust this recipe to make a smaller loaf of sourdough?
- Final Reflection: The Unexpected Joys of Sourdough Simplicity
- Unleash Your Inner Baker: Start Your Sourdough Journey Today!
Mastering Sourdough: A Beginner's Guide to Baking Success
Embrace Sourdough: Unlocking Flavor and Tradition
Venturing into the world of sourdough baking might seem daunting at first, especially when you're searching for an easy beginner sourdough recipe. However, it's a rewarding journey that connects you with ancient baking traditions and yields bread with an unparalleled depth of flavor. Unlike commercial yeast, a sourdough starter is a living culture of wild yeasts and bacteria that leavens your bread and imparts its signature tang. This natural fermentation process not only transforms simple flour and water into a complex dough but also offers potential nutritional benefits.
Learning to bake sourdough is a process of patience and observation. It's about understanding the rhythm of fermentation, the feel of the dough, and the nuances of your starter. While there are many advanced techniques, starting with a straightforward approach is key to building confidence. Our aim with this guide is to provide you with an accessible, easy beginner sourdough recipe that demystifies the process, allowing you to create a delicious loaf right from your first attempt. Think of it as your first step towards becoming a confident sourdough baker, turning simple ingredients into a masterpiece.
Why Sourdough? Exploring the Art of Fermentation
Sourdough bread stands apart from loaves made with commercial yeast, primarily due to its unique fermentation process. This slow, natural leavening by wild yeasts and lactic acid bacteria creates a bread that is not only distinct in taste and texture but also potentially easier to digest for some people. The ecosystem within a sourdough starter works tirelessly, breaking down starches and proteins in the flour, which contributes to both the flavor development and the structure of the final loaf.
Choosing to bake sourdough is choosing a path that values natural processes and deep flavor. It's a return to a more traditional way of baking that has sustained communities for centuries. While an easy beginner sourdough recipe might focus on simplicity, the underlying principles of fermentation are the same as those used by seasoned bakers around the world. Embracing sourdough means welcoming a bit of science and a lot of patience into your kitchen, resulting in a bread that's truly alive.
The Tangy and Complex Flavors of Sourdough
The characteristic tang of sourdough comes from the lactic acid bacteria present in the starter. These bacteria produce lactic acid and acetic acid during fermentation, which contribute different notes to the bread's flavor profile. Lactic acid typically provides a milder, yogurt-like tang, while acetic acid offers a sharper, vinegar-like bite. The balance between these acids, influenced by factors like fermentation temperature, time, and starter hydration, dictates the final flavor complexity of your loaf. A longer, cooler fermentation, for instance, often encourages more acetic acid production, leading to a more pronounced tang.
Beyond the acidity, the slow fermentation process allows for the development of hundreds of volatile organic compounds. These compounds are responsible for the rich aroma and complex taste that distinguish sourdough from commercially yeasted bread. Studies have identified flavor compounds like diacetyl (buttery notes), acetoin (creamy notes), and various aldehydes and esters that contribute to the bread's unique character. This depth of flavor is something you simply cannot replicate with quick-rising yeast, making the effort of maintaining a starter and following an easy beginner sourdough recipe truly worthwhile for the sensory experience alone.
Nutritional Advantages of Sourdough Bread
Sourdough fermentation can potentially enhance the nutritional profile of bread compared to loaves made with commercial yeast. One key aspect is the reduction of phytic acid, an antinutrient found in grains that can bind to minerals like iron, zinc, and calcium, making them less available for absorption. The lactic acid bacteria in sourdough starters produce phytase, an enzyme that breaks down phytic acid. Fermentation times typically involved in a sourdough process can reduce phytic acid content by over 50%, sometimes even up to 90%, depending on the flour type and fermentation conditions.
Furthermore, the partial breakdown of gluten proteins during the long fermentation process may make sourdough bread easier to digest for some individuals who experience sensitivity to gluten, although it is not gluten-free and unsuitable for those with celiac disease. The fermentation also acts as a prebiotic, potentially supporting gut health by providing beneficial bacteria. While an easy beginner sourdough recipe focuses on the baking process, understanding these nutritional benefits adds another layer of appreciation for the bread you're creating from scratch.
Simple Sourdough Recipe: A Comprehensive Guide
Ready to bake your first loaf? This easy beginner sourdough recipe is designed to be approachable, guiding you through the essential steps without unnecessary complexity. We'll focus on a classic country-style loaf, perfect for slicing and enjoying in countless ways. Remember, practice makes perfect, and even your first loaf is a triumph!
Follow these steps closely, paying attention to the feel of the dough and the cues from your starter. Don't be discouraged by imperfections; each bake teaches you something new. This easy beginner sourdough recipe is your starting point for many delicious loaves to come.
Ingredients for a Classic Sourdough Loaf
To bake a standard ~900g loaf of sourdough using this easy beginner sourdough recipe, you'll need just a few core ingredients. The quality of these ingredients significantly impacts the final result.
- Active Sourdough Starter: 100 grams. Ensure your starter is active and bubbly, ideally fed 4-12 hours before use and showing significant rise.
- Warm Water: 350-375 grams (around 90-95°F or 32-35°C). The hydration level can be adjusted slightly based on your flour and environment, but 75-80% hydration is common for beginners.
- Bread Flour: 450-500 grams. High-protein bread flour (around 12-14% protein) is recommended as its gluten structure is strong enough to support the fermentation and provide good oven spring. All-purpose flour can work, but may yield a denser crumb.
- Fine Sea Salt: 9-10 grams (about 2% of the total flour weight). Salt is crucial for flavor, controlling fermentation speed, and strengthening the gluten network.
Using filtered water is often recommended as chlorine in tap water can potentially inhibit the activity of your starter. Weighing your ingredients using a digital scale is highly accurate and essential for consistent results in sourdough baking, especially when following an easy beginner sourdough recipe.
Essential Tools for Successful Sourdough Baking
Having the right tools can make the process of baking sourdough much smoother, particularly when you're just starting with an easy beginner sourdough recipe. You don't need everything all at once, but these items are highly recommended:
- Digital Scale: Absolutely essential for accurate ingredient measurements. Flour, water, and starter ratios are critical in sourdough.
- Large Mixing Bowl: A sturdy bowl, preferably clear so you can see the dough's development, with a capacity of at least 4-6 quarts.
- Dough Scraper (Bench Scraper): Useful for handling sticky dough, dividing, and cleaning your work surface.
- Proofing Basket (Banneton): Typically made of rattan, it gives the shaped dough structure during proofing and leaves a nice pattern on the crust. Round (boulé) or oval (batard) shapes are common. Line with a floured cloth if you don't want the pattern or are worried about sticking.
- Dutch Oven or Baking Stone: Essential for creating a hot, steamy environment in your oven, which is crucial for achieving good oven spring and a crispy crust. A 5-7 quart Dutch oven is ideal for a single loaf.
- Lame or Very Sharp Razor Blade: For scoring the dough before baking. A clean, sharp cut allows the bread to expand properly.
- Parchment Paper: Makes transferring the shaped dough into a hot Dutch oven much safer and easier.
Optional but helpful tools include a kitchen thermometer (for checking water and dough temperature), a spray bottle (for adding steam if not using a Dutch oven), and a cooling rack. Investing in these basic tools will significantly improve your results as you practice this easy beginner sourdough recipe.
Cultivating Your Sourdough Starter: The Foundation of Flavor
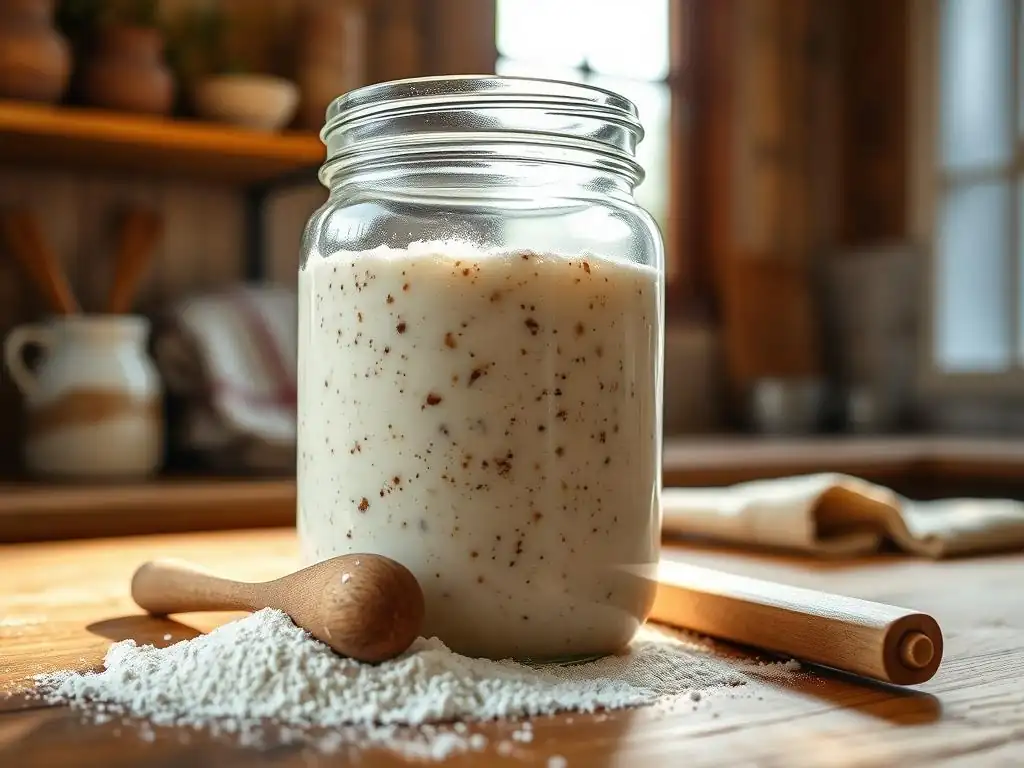
Before you can even begin an easy beginner sourdough recipe, you need a healthy, active sourdough starter. This living culture, a simple mixture of flour and water, is the heart and soul of your sourdough bread. It houses the wild yeasts and bacteria from your environment and the flour itself, which are responsible for leavening and flavor. Creating a starter from scratch takes about 7-14 days, requiring daily feeding with fresh flour and water to encourage the microbial community to thrive.
Once established, maintaining your starter is relatively simple. Regular feeding keeps the yeast and bacteria active and in balance. A healthy starter will consistently double or triple in size after feeding and will be full of bubbles. Think of it as a pet that needs regular nourishment; happy starter, happy bread!
Feeding Your Starter: Maintaining a Thriving Culture
Regular feeding is vital for keeping your sourdough starter vigorous and ready for baking an easy beginner sourdough recipe. The standard feeding ratio is typically 1:1:1 by weight (starter:water:flour). For example, you might discard down to 50 grams of starter, then feed it with 50 grams of warm water and 50 grams of flour. Using filtered water and organic flour can sometimes help maintain a healthier culture, though many starters thrive on regular tap water and all-purpose flour.
The frequency of feeding depends on where you store your starter. At room temperature (around 68-78°F or 20-26°C), a starter typically needs to be fed every 12-24 hours. If you bake less frequently, storing your starter in the refrigerator slows down fermentation significantly, allowing you to feed it just once a week. Remember to take it out and feed it at room temperature for 1-2 days before you plan to bake to ensure it's active and ready for your easy beginner sourdough recipe.
Identifying a Vigorous and Active Starter
Knowing when your starter is active enough to bake with is crucial for success with any easy beginner sourdough recipe. A healthy, active starter will show several key signs:
- Significant Rise: After feeding, it should visibly increase in volume, ideally doubling or tripling within 4-12 hours at room temperature.
- Bubbles: The surface should be covered in bubbles, and you should see bubbles throughout the culture when you look at the sides of the jar.
- Spongy Texture: The starter should feel light and airy, not dense or pasty.
- Pleasant Aroma: It should smell slightly tangy and yeasty, perhaps a bit like yogurt or ripe fruit, not strongly alcoholic or like nail polish remover (which can indicate it's hungry or needs a discard).
- The Float Test (Optional but helpful): Drop a small spoonful of starter into a glass of water. If it floats, it's generally considered active and ready to bake. If it sinks, it may need more time or another feeding.
Using a starter at its peak activity, typically when it has peaked in volume after feeding and is just starting to recede slightly, will give your easy beginner sourdough recipe the best chance for a good rise.
Mixing and Kneading Your Sourdough Dough
The initial mixing and kneading steps are where your ingredients come together and the gluten network begins to develop. Unlike commercial yeast doughs that often require vigorous kneading, sourdough often benefits from gentler techniques spread out over time. This allows the wild yeast and bacteria to start their work while the gluten naturally strengthens through rest and gentle handling.
For an easy beginner sourdough recipe, we'll focus on methods that are simple yet effective in building dough structure. Don't worry about achieving perfect windowpane tests right away; focus on creating a cohesive dough that feels smooth and elastic.
Autolyse: Enhancing Hydration and Dough Development
Autolyse is a simple technique that involves mixing just the flour and water from your recipe and letting it rest for 30 minutes to an hour before adding the starter and salt. This resting period allows the flour to fully hydrate and enzymes naturally present in the flour begin to break down proteins, which helps gluten development without any mechanical work. It makes the dough more extensible and easier to handle later.
For this easy beginner sourdough recipe, we recommend an autolyse of at least 30 minutes. Combine the water and flour in your mixing bowl and mix until no dry flour remains. It will look shaggy and rough. Cover the bowl and let it rest. This simple step significantly improves the dough's texture and manageability, setting you up for success.
Effective Kneading Methods for Sourdough
After the autolyse, you'll add your active starter and salt to the dough. Incorporating these thoroughly can be done with a few different methods suitable for an easy beginner sourdough recipe:
- Pinch and Fold: Wet your hands slightly. Grab a portion of the dough, lift it, and pinch it together repeatedly until the starter and salt are fully integrated. Continue for 2-3 minutes until the dough feels more cohesive.
- Stretch and Fold (Initial): Once mixed, you can perform a few initial stretch and folds right in the bowl. Wet your hand, grab the edge of the dough, stretch it upwards, and fold it back over itself. Rotate the bowl and repeat 3-4 times.
After this initial mixing, the dough can rest for 20-30 minutes before the bulk fermentation and subsequent sets of stretch and folds begin. This combination of autolyse and gentle incorporation helps develop the gluten structure needed for a well-risen loaf without the need for intense kneading.
Bulk Fermentation: Nurturing Flavor and Texture
Bulk fermentation, also known as the first rise, is the most critical phase in sourdough baking. This is when your starter works its magic, producing carbon dioxide gas to leaven the dough and developing complex flavors and aromas. The duration and temperature of this stage significantly impact the final bread.
During bulk fermentation, you'll also perform a series of stretch and folds to build strength and structure in the dough. Observing your dough's activity and increase in volume is key to knowing when bulk fermentation is complete. For an easy beginner sourdough recipe, we aim for clear signs of fermentation before moving to the next step.
Understanding Bulk Fermentation Time and Temperature's Impact
The ideal bulk fermentation time for an easy beginner sourdough recipe is highly dependent on the ambient temperature. At a warm room temperature (around 75-80°F or 24-27°C), bulk fermentation might take 4-6 hours. In a cooler room (around 68-72°F or 20-22°C), it could take 6-10 hours, or even longer. The dough should increase in volume by about 30-50% by the end of bulk fermentation.
Temperature is perhaps the single biggest factor influencing fermentation speed. A difference of just a few degrees can drastically alter the time required. For instance, dough fermenting at 78°F will develop much faster than dough at 68°F. Using a dough thermometer can be helpful, aiming for a dough temperature around 75-78°F (24-26°C) for predictable results in an easy beginner sourdough recipe. Watch the dough, not just the clock!
Stretch and Folds: Strengthening Dough Structure
Stretch and folds are performed during the first 2-3 hours of bulk fermentation to build strength and organize the gluten network. For this easy beginner sourdough recipe, you'll typically perform 3-5 sets of stretch and folds, spaced 30-45 minutes apart.
To perform a stretch and fold:
- Lightly wet your hands.
- Grab the dough from one side of the bowl.
- Gently stretch it upwards.
- Fold it back over the center of the dough.
- Rotate the bowl about a quarter turn and repeat the stretch and fold.
- Do this 3-4 times per set, effectively folding the dough onto itself from all sides.
As you progress through the sets, you'll notice the dough becoming smoother, more elastic, and holding its shape better. After the last set, let the dough rest undisturbed for the remainder of the bulk fermentation period. This technique is simple yet incredibly effective for developing structure in your easy beginner sourdough recipe.
Shaping Your Sourdough Loaf
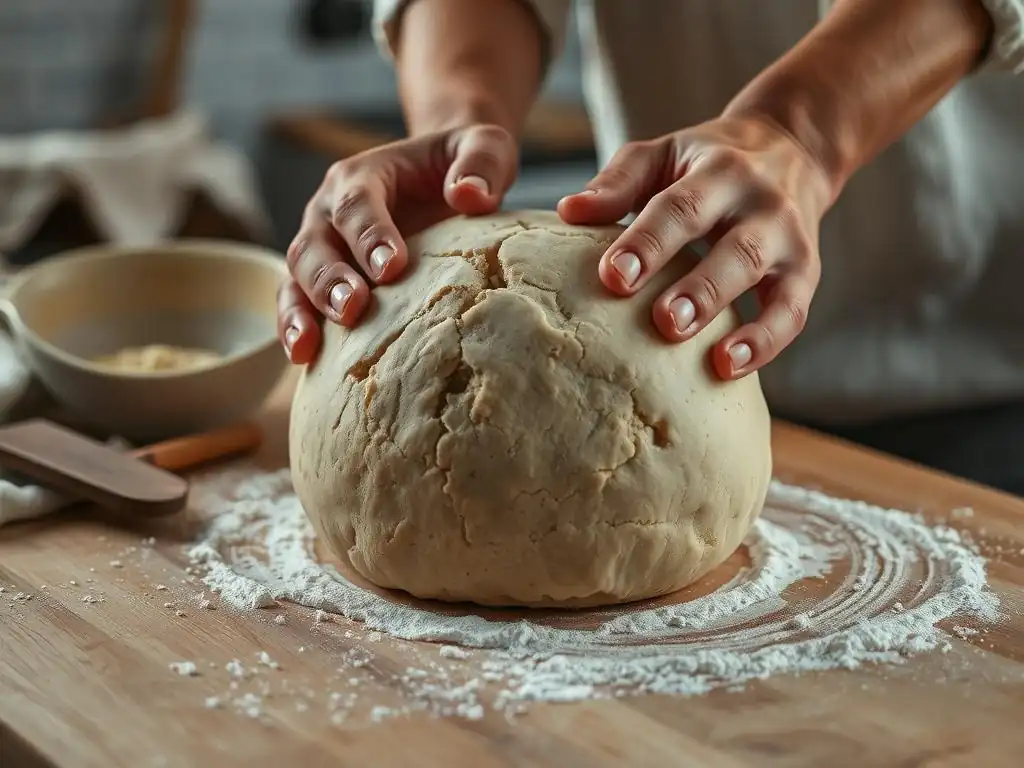
Once bulk fermentation is complete and your dough has increased in volume and feels airy, it's time to shape your loaf. Shaping builds tension on the surface of the dough, which helps it hold its form during proofing and contributes to a good rise in the oven.
Shaping involves two main steps: pre-shaping and final shaping. Don't worry if your first few shaping attempts aren't perfect; the key is to be gentle yet firm enough to create surface tension. This step is crucial for giving your easy beginner sourdough recipe loaf its final structure.
Pre-Shaping: Building Tension and Roundness
After bulk fermentation, gently turn the dough out onto a lightly floured surface. The goal of pre-shaping is to create a loose ball and build some initial surface tension. This allows the gluten to relax slightly before the final shaping.
Using a bench scraper or your hands, gently coax the dough into a round shape. Don't degas it aggressively. You can do this by using the scraper to pull the dough towards you in a circular motion, tucking the edges underneath. Let the dough rest on the counter, uncovered or lightly covered with a towel, for 20-30 minutes. This resting period, known as the bench rest, is essential for the dough to relax and become pliable enough for final shaping without tearing.
Final Shaping: Achieving Desired Loaf Shape
After the bench rest, the dough will have spread out slightly but should feel relaxed. Now it's time for the final shape, preparing the dough for its proofing basket. The technique varies slightly depending on whether you want a round loaf (boulé) or an oval loaf (batard), but the principle is the same: create a taut surface.
For a round loaf: Gently flatten the dough into a rough circle. Fold the top edge down to the center, then the bottom edge up to the center, overlapping slightly. Fold the left side over to the right, and the right side over to the left. Then, flip the dough over and use your hands or a bench scraper to gently pull it towards you on the counter, rotating slightly, until a tight surface is created.
Place it seam-side up into a well-floured proofing basket (banneton). For an oval loaf, you'll typically fold the top down, then roll the dough up tightly from the top to the bottom, sealing the seam. Place seam-side up in an oval banneton. This strong tension is vital for a good rise in your easy beginner sourdough recipe.
Proofing Your Sourdough: The Final Stage of Development
Proofing, or the second rise, is the final fermentation stage before baking. During this time, the dough continues to produce gas, increasing its volume, and the flavors continue to develop. Proofing can be done at room temperature or in the refrigerator (cold proofing).
The duration of proofing is critical – under-proofed dough won't rise well in the oven, while over-proofed dough can collapse. Learning to read the dough is key, and the poke test is a simple way to gauge readiness for your easy beginner sourdough recipe.
Cold Proofing vs. Room Temperature Proofing: Benefits and Considerations
- Room Temperature Proofing: Typically takes 1-4 hours, depending on temperature and dough activity. It's faster but requires closer monitoring to avoid over-proofing. Best for quick turnaround or when you need the bread ready the same day. The flavor development is less complex compared to cold proofing.
- Cold Proofing (Retarding): Proofing in the refrigerator (typically 38-40°F or 3-4°C) significantly slows down fermentation. This can take 8-24 hours, sometimes even longer.
- Benefits: Allows for deeper flavor development (more acetic acid production), makes the dough easier to handle and score when cold, and provides flexibility in your baking schedule. It also often results in a better oven spring and crust.
- Considerations: Requires planning ahead. Ensure your proofing basket is well-floured to prevent sticking after a long cold proof.
For an easy beginner sourdough recipe, cold proofing is often recommended because it's more forgiving and makes handling the dough for scoring much easier. A typical cold proof might be 12-16 hours in the refrigerator.
The Poke Test: Gauging Proofing Readiness
The poke test is a simple method to determine if your sourdough loaf is sufficiently proofed and ready for baking.
- Lightly flour your finger.
- Gently press your finger into the side of the dough, about half an inch deep.
- Observe how quickly the indentation springs back.
- Under-proofed: The indentation springs back immediately. The dough needs more time.
- Perfectly Proofed: The indentation springs back slowly, but not completely, leaving a small indent. The dough is ready to bake.
- Over-proofed: The indentation remains fully. The dough has gone too far and may collapse when scored or baked.
Mastering the poke test takes a little practice, but it's an invaluable skill for consistent results with your easy beginner sourdough recipe. Combine it with visual cues (dough looks airy and has expanded) for the best assessment.
Baking Your Sourdough Bread
This is the exciting part – transforming your proofed dough into a beautiful loaf with a golden crust and airy interior! Baking sourdough requires a hot oven and a way to create steam, especially during the initial phase, to allow the crust to remain pliable while the dough expands rapidly (oven spring).
Using a Dutch oven is a popular and effective method for home bakers tackling an easy beginner sourdough recipe, as it traps the dough's own steam around the loaf. Baking on a preheated stone with added steam is another approach.
Scoring Your Sourdough: Creating Art and Controlling Expansion
Scoring, or making cuts on the surface of your dough just before baking, serves both aesthetic and functional purposes. Functionally, scores act as vents, directing the expansion of the dough during oven spring. Without scoring, the crust would simply crack unpredictably. Aesthetically, scoring allows you to personalize your loaf and can create beautiful patterns.
Using a sharp lame or razor blade is essential for a clean cut that will open up nicely. Hold the blade at a slight angle (about 30-45 degrees) to the dough surface for a good "ear" (a flap of crust that lifts). For a simple score on your easy beginner sourdough recipe loaf:
- For a round loaf, a single deep cut down the center is common.
- For an oval loaf, one or two cuts lengthwise are typical.
Practice different patterns as you gain confidence!
Baking in a Dutch Oven: Maximizing Oven Spring
Baking in a preheated Dutch oven is highly recommended for beginners because it effectively mimics a professional bread oven's steamy environment.
- Preheat your oven with the empty Dutch oven inside to a high temperature, typically 450-500°F (230-260°C), for at least 30-60 minutes.
- Carefully remove the hot Dutch oven lid.
- Using parchment paper, gently lower the scored dough into the hot pot.
- Replace the lid immediately.
- Bake with the lid on for 20-25 minutes. This traps steam, allowing maximum oven spring.
- Remove the lid and continue baking for another 20-30 minutes, or until the crust is a deep golden brown and the internal temperature reaches 200-210°F (93-99°C).
This method consistently yields excellent results for an easy beginner sourdough recipe, promoting a great rise and a beautiful crust.
Baking on a Baking Stone: Achieving a Crispy Crust
Baking on a preheated baking stone or steel is another excellent method, particularly if you prefer a very crispy bottom crust. This requires creating steam in your oven separately.
- Place the baking stone on a rack in your oven and preheat to 450-500°F (230-260°C) for at least 60 minutes. Place a metal tray or cast iron pan on a rack below the stone.
- Carefully transfer the scored dough onto the hot baking stone using a peel or by sliding it off parchment paper.
- Quickly pour about a cup of hot water into the preheated tray below (be cautious of the steam!). Close the oven door immediately.
- Bake for 20-25 minutes with steam.
- Remove the steam tray and continue baking for another 20-30 minutes until golden brown and the internal temperature is 200-210°F (93-99°C).
While slightly more involved than the Dutch oven method for generating steam, baking on a stone can also produce fantastic results for your easy beginner sourdough recipe, especially if you're aiming for that classic super-crispy bottom.
Cooling and Enjoying Your Homemade Sourdough
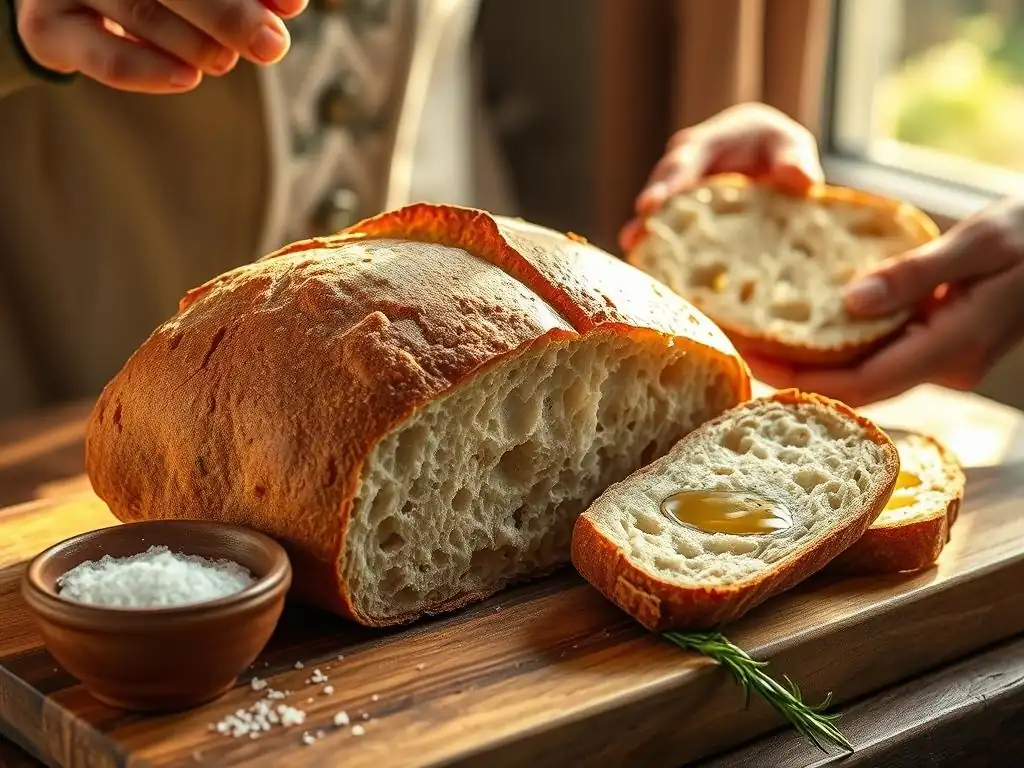
The smell of freshly baked sourdough is incredible, but resist the urge to cut into it immediately! Proper cooling is a crucial step that impacts the texture, flavor, and overall quality of your loaf.
Allowing the bread to cool completely allows the internal structure to set and moisture to redistribute evenly. Cutting into a hot loaf can result in a gummy texture. Patience is key after all your hard work following this easy beginner sourdough recipe!
The Importance of Cooling for Texture and Flavor
Once your sourdough loaf is out of the oven, transfer it immediately to a wire cooling rack. It should cool for at least 2-3 hours, and preferably longer, especially for larger loaves. During baking, the internal temperature reaches near boiling, and the starches are gelatinized. As the bread cools, these starches crystallize, and the internal structure stabilizes.
Cutting the bread too soon interrupts this process, leading to a dense, slightly wet, or gummy crumb instead of the desired open, airy texture. The flavors also continue to develop and meld as the bread cools. While the aroma is tantalizing, waiting ensures you experience the full glory of your easy beginner sourdough recipe.
Storing Your Sourdough Bread: Maintaining Freshness
Sourdough bread, with its natural acidity, tends to stay fresh longer than commercial yeast breads. However, proper storage is still important to maintain its quality.
- Room Temperature: For 1-2 days, store the cooled loaf cut-side down on a cutting board. This prevents the cut surface from drying out.
- Bread Bag/Box: For longer storage at room temperature (up to 3-4 days), a linen bread bag or a dedicated bread box works well, allowing some airflow while preventing excessive drying. Avoid airtight plastic bags or containers at room temperature, as they can soften the crust and encourage mold growth.
- Freezing: For longer-term storage (weeks to months), slice the cooled loaf and freeze the slices in an airtight container or freezer bag. Alternatively, freeze the whole loaf wrapped tightly in plastic wrap and then foil. Thaw slices as needed or thaw the whole loaf on the counter and refresh in a warm oven for a few minutes.
Following these simple storage tips will help you enjoy the delicious results of your easy beginner sourdough recipe for as long as possible.
Troubleshooting Sourdough: Addressing Common Challenges
It's rare for a beginner's first sourdough loaf to be absolutely perfect, and that's okay! Troubleshooting is a normal part of the learning process. Understanding common issues can help you identify what went wrong and adjust your technique for your next bake. Don't be discouraged if your easy beginner sourdough recipe doesn't turn out exactly as planned the first time.
Most problems relate back to the starter's activity, fermentation times/temperatures, shaping, or baking environment. Let's look at a few frequent challenges.
Dense Sourdough: Causes and Corrective Measures
A dense, heavy crumb with small, tight holes is a common issue for beginners. Several factors can contribute to this:
- Inactive Starter: If your starter wasn't active and bubbly at its peak when you used it, it didn't produce enough gas to leaven the dough properly. Correction: Ensure your starter is consistently doubling or tripling after feeding before baking. Use it when it's at its peak or just slightly past.
- Under-Proofing: Not allowing enough time for bulk fermentation or final proofing means the dough didn't develop enough gas. Correction: Pay close attention to the dough's volume increase (aim for 30-50% rise in bulk) and use the poke test during final proofing. Allow more time if needed, especially in cooler temperatures.
- Weak Gluten Development: Insufficient mixing or stretch and folds can result in a weak gluten network that can't trap the gas produced by the starter. Correction: Ensure you are performing enough sets of stretch and folds during bulk fermentation until the dough feels strong and elastic.
- Too Low Hydration: A very low hydration dough might be easier to handle but can result in a tighter crumb. Correction: Consider slightly increasing the water in your recipe in future bakes, maybe by 10-20 grams, once you are comfortable handling stickier dough.
Addressing these points will significantly improve the crumb structure of your easy beginner sourdough recipe loaves.
Overly Sour Sourdough: Balancing Acidity
While a pleasant tang is desirable in sourdough, sometimes the acidity can be overwhelming. This is usually due to the balance of lactic and acetic acid produced by the bacteria in your starter.
- Long, Cold Fermentation: Cold proofing encourages acetic acid production, which is sharper. While great for flavor depth, excessive cold fermentation can make it too sour. Correction: Try reducing the cold proofing time (e.g., from 24 hours to 12-16 hours).
- Infrequent Feeding/Hungry Starter: A starter that is fed infrequently or allowed to go too long between feedings at room temperature can develop more acidity. Correction: Increase feeding frequency if storing at room temperature (every 12 hours might be necessary in warm environments). Ensure you are discarding a significant portion before feeding (e.g., 80-90% discard) to keep the culture vigorous and less acidic.
- Warm Bulk Fermentation: While warmer temperatures speed up bulk fermentation, they can also favor lactic acid bacteria, leading to a tangier loaf. Correction: Experiment with slightly cooler bulk fermentation temperatures if your room is very warm.
Adjusting your starter maintenance and fermentation temperatures can help you achieve a tang level you enjoy in your easy beginner sourdough recipe.
Flat Sourdough: Enhancing Oven Spring
A loaf that spreads out rather than rising upwards in the oven is disappointing. This "flat" result is often linked to issues with dough structure and tension.
- Insufficient Surface Tension: Poor shaping is a primary cause. If you don't create a taut surface during final shaping, the dough lacks the structure to support its rise. Correction: Focus on building tension during both pre-shaping and final shaping. Watch videos demonstrating proper techniques.
- Over-Proofing: An over-proofed dough has exhausted its leavening power and the gluten structure may have started to break down, making it unable to hold its shape or rise in the oven. Correction: Use the poke test carefully and bake when the dough is perfectly proofed, not over. Cold proofing often helps prevent over-proofing.
- Weak Gluten Development: Similar to dense crumb, a weak gluten network cannot support the expansion. Correction: Ensure adequate stretch and folds during bulk fermentation.
- Insufficient Steam: Lack of steam in the initial baking phase causes the crust to harden too quickly, restricting expansion. Correction: Always bake in a preheated Dutch oven with the lid on for the first part of the bake, or use a baking stone with ample steam generated in the oven.
Addressing these factors will significantly improve the oven spring and volume of your easy beginner sourdough recipe loaves.
Advanced Sourdough Techniques: Elevating Your Baking Skills
Once you've mastered the basics with an easy beginner sourdough recipe and are consistently producing great loaves, you might be ready to explore more advanced techniques. The world of sourdough is vast and offers endless possibilities for experimentation and creativity.
These techniques often involve altering ingredients, fermentation processes, or incorporating additions to the dough to change the flavor, texture, and appearance of your bread.
Exploring Different Grains and Flours in Sourdough
While bread flour is excellent for beginners due to its strong gluten, incorporating other flours can add complexity and nutritional value.
- Whole Wheat Flour: Adds nutty flavor and nutrients. Can be used for 10-50% of the total flour. Whole wheat requires more water and ferments faster than white flour due to the bran.
- Rye Flour: Known for its distinctive flavor and ability to stay moist. Rye has weak gluten, so it's often used as a smaller percentage (5-20%) in wheat loaves, or in specific high-rye or 100% rye sourdoughs which have a different texture.
- Spelt, Einkorn, Kamut: Ancient grains offering unique flavors and slightly different handling properties. Spelt is a good entry point into ancient grains as it behaves somewhat similarly to wheat.
- High-Extraction Flours: Flours where some of the bran and germ are removed, but more remains than in typical white flour, offering a balance of flavor and strength.
Experimenting with different flour blends requires adjusting hydration and observing fermentation times, as different flours absorb water differently and ferment at varying speeds. Start by substituting a small percentage (e.g., 10-15%) of the bread flour in your easy beginner sourdough recipe and adjust from there.
Incorporating Flavors into Your Sourdough Bread [Examples: Olives, Cheese]
Adding inclusions is a fantastic way to customize your sourdough and create exciting variations beyond a simple loaf.
- Olives: Kalamata or green olives, roughly chopped, are a popular addition. Use about 10-20% of the flour weight in olives (e.g., 50-100g for a 500g flour loaf). Add them during the last set of stretch and folds or when incorporating the starter and salt. Rinsing salty olives can help manage overall saltiness.
- Cheese: Cubed or grated hard cheeses like Gruyère, cheddar, or Parmesan work wonderfully. Use a similar percentage to olives. Adding cheese later in the bulk fermentation prevents it from interfering with the initial gluten development.
- Herbs: Fresh or dried herbs like rosemary, thyme, or chives can be folded in.
- Seeds: Toasted seeds like sesame, poppy, or sunflower seeds can be mixed into the dough or coated on the exterior.
When adding inclusions to your easy beginner sourdough recipe, consider that they can affect dough hydration and fermentation slightly. It's often best to get comfortable with the plain loaf first before experimenting with additions.
Resources for Continuing Your Sourdough Journey
Frequently Asked Questions
What makes this sourdough recipe "easy" for beginners?
This recipe is designed for beginners because it uses a simplified process with clear, step-by-step instructions and readily available ingredients. It minimizes the complexity often associated with sourdough.
What kind of flour is best for this easy beginner sourdough recipe?
For best results, we recommend using bread flour due to its higher protein content, which helps develop the gluten structure needed for a good rise. You can also experiment with a mix of bread flour and all-purpose.
How long does it take to make this sourdough bread from start to finish?
The entire process, including feeding the starter, mixing, bulk fermentation, proofing, and baking, can take around 24-36 hours. However, most of this time is hands-off, allowing the dough to ferment.
What if my sourdough starter isn't very active?
An inactive starter can lead to a flat loaf. Make sure to feed your starter regularly and allow it to double in size before using it in the recipe. This ensures it has enough fermenting power.
Can I adjust this recipe to make a smaller loaf of sourdough?
Yes, you can easily halve the recipe to make a smaller loaf. Just ensure you adjust all ingredient quantities proportionally and monitor the baking time to prevent over-baking.
Final Reflection: The Unexpected Joys of Sourdough Simplicity
The seemingly simple act of baking sourdough bread has exploded in popularity, transforming from a niche hobby to a widely accessible culinary pursuit. This accessibility, however, often masks the profound satisfaction derived from nurturing a starter and coaxing a loaf from humble ingredients. This article aimed to demystify the process, proving that even beginners can experience the magic of sourdough.
The journey of sourdough baking is more than just a recipe; it's a connection to a centuries-old tradition, a testament to patience and the rewarding nature of slow food. It's a process that fosters mindfulness, requiring attention to detail and a willingness to embrace imperfection. As the renowned baker, Chad Robertson, once said, Bread baking is a meditation. It's a way to connect with something larger than yourself.
This sentiment resonates deeply, highlighting the therapeutic and enriching aspects of this seemingly simple act. The process itself, from feeding the starter to the satisfying thud of the loaf hitting the cooling rack, becomes a ritual, a quiet moment of creation in a busy world.
Now, I invite you to consider your own journey. Will you embrace the challenge of nurturing your own sourdough starter? Will you experience the tactile joy of kneading dough and the intoxicating aroma of freshly baked bread? The path to your first sourdough success begins with a single step – a decision to try. Don't be intimidated by the perceived complexity; embrace the simplicity, the patience, and the profound satisfaction that awaits you. Your first loaf might not be perfect, but the journey itself will be an invaluable lesson in perseverance and the unexpected rewards of slowing down.
Unleash Your Inner Baker: Start Your Sourdough Journey Today!
Thanks for taking the time to explore the wonderful world of sourdough baking! We hope you've gained valuable insights and feel inspired to create your own delicious loaf. Now it's time to put your knowledge into practice.
- Begin your sourdough adventure by mixing your first starter today! Follow the simple recipe outlined in the article for a foolproof start.
- Share your sourdough journey with our community! Post pictures of your progress on social media using #BakeWithEaseSourdough – we'd love to see your creations.
- Consider experimenting with different flours to discover your perfect sourdough blend. This unlocks a world of flavor variations!
So, what unique flour will you experiment with first to make your signature sourdough?