
Basic Sourdough Recipe: NoFail Steps for a Crusty Loaf

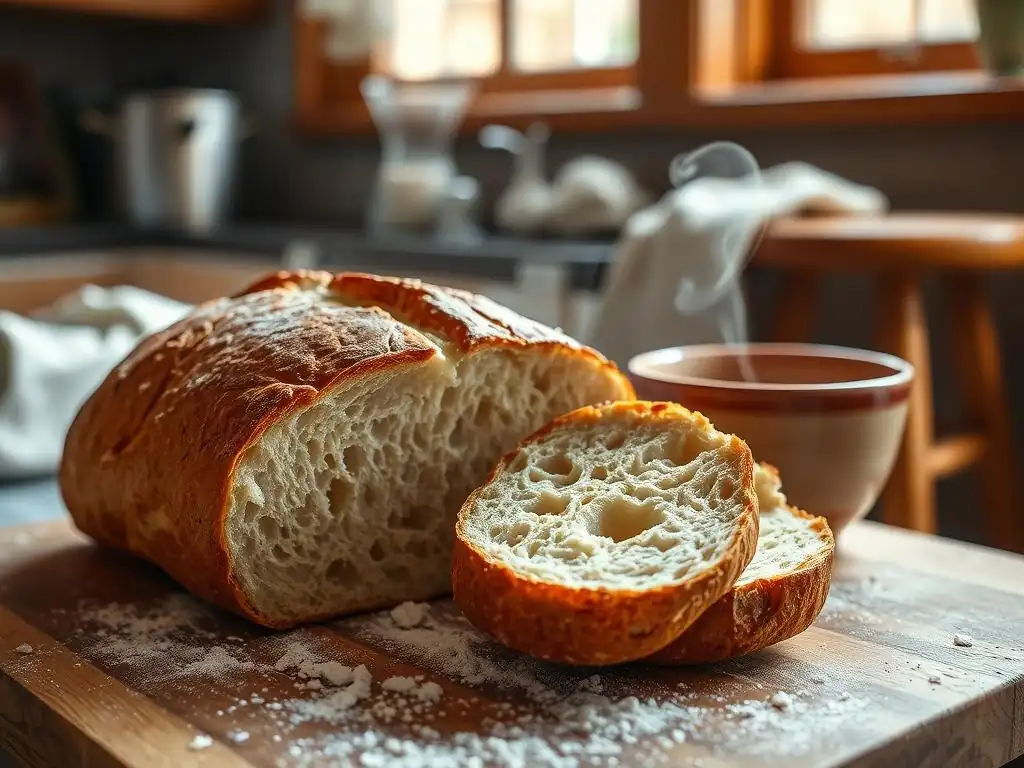
Welcome to BakeWithEase, your haven for effortless baking! Ever dreamed of crafting that perfect, crusty sourdough loaf? We understand the intimidation, which is why we're thrilled to unveil our Nofail sourdough loaf recipe. Forget finicky techniques and unpredictable results. Ready to unlock the secrets to a consistently delicious, beautiful loaf? Let's get baking!
- A Simple Approach to Homemade Sourdough
- Mastering Sourdough: From Starter to Slice
- Essential Ingredients for Your Sourdough Loaf
-
Step-by-Step: Baking Sourdough Bread
- Step 1: Feeding and Monitoring Your Sourdough Starter
- Step 2: Mixing the Dough: Combining Ingredients
- Step 3: Bulk Fermentation: The Primary Rise
- Step 4: Shaping the Dough: Preparing for the Final Proof
- Step 5: Proofing the Dough: The Final Rise
- Step 6: Baking Your Sourdough Loaf: Achieving a Golden Crust
- Step 7: Cooling and Enjoying Your Bread
- Troubleshooting Common Sourdough Issues
- Tips for Consistent Sourdough Baking
- Variations on the Basic Sourdough Recipe
- Storing Your Homemade Sourdough Loaf
- Conclusion: The Joy of Baking Sourdough
-
Frequently Asked Questions
- What makes this sourdough recipe "Nofail"?
- What kind of flour is best for this Basic Sourdough Recipe?
- How do I know when my sourdough starter is ready to use?
- How long does the entire process of making this Nofail sourdough loaf take?
- What if I don't have a Dutch oven for baking the sourdough loaf?
- Final Reflection: The Enduring Magic of a No-Fail Sourdough Loaf
- Unleash Your Inner Baker: Craft Your Perfect Sourdough!
A Simple Approach to Homemade Sourdough
Baking your own sourdough bread can seem daunting, but it doesn't have to be. With a reliable nofail sourdough loaf recipe and a bit of patience, you can achieve that coveted crusty exterior and airy interior right in your own kitchen. This guide breaks down the process into manageable steps, focusing on the fundamentals that lead to consistent success, even for beginners. Forget the myths of complex techniques; we're focusing on a simple, effective method designed to build your confidence and deliver delicious results every time.
This easy sourdough method demystifies the process, making it accessible. We'll cover everything from understanding your starter to mastering shaping and baking techniques. By focusing on key indicators like dough feel and visual cues rather than just strict timings, you'll learn to adapt to your environment and ingredients, paving the way for consistently great loaves. This approach aims to provide a nofail sourdough loaf recipe framework that you can rely on and eventually adapt as you gain experience.
Mastering Sourdough: From Starter to Slice
Introduction to Home Sourdough Baking
Home sourdough baking connects you to a tradition that spans centuries, using natural fermentation to leaven bread. Unlike commercial yeast, a sourdough starter is a living culture of wild yeasts and lactic acid bacteria, giving the bread its unique tangy flavor and chewy texture. Embarking on this journey requires understanding this symbiotic relationship and how it influences the dough throughout the process. It's less about following rigid rules and more about learning to read your dough and your starter.
Starting with a basic nofail sourdough loaf recipe is the best way to build foundational skills. You'll learn about hydration levels, fermentation signs, and the importance of temperature. For instance, many beginner recipes target a hydration level between 70% and 75%, which is manageable for new bakers. Achieving a beautiful, crusty loaf at home is incredibly rewarding, offering a depth of flavor and satisfaction that store-bought bread often can't match.
Understanding the Fundamentals for Success
Success in sourdough baking hinges on a few core principles: a healthy, active starter; proper dough development through mixing and fermentation; adequate proofing; and effective baking techniques. Each stage influences the final outcome, from the volume of the loaf to the texture of the crumb and the crispness of the crust. Ignoring any one of these steps can lead to less-than-ideal results, like a dense or gummy loaf.
Consider the impact of temperature: a dough fermented at 75°F (around 24°C) might take 4-6 hours for bulk fermentation, while the same dough at 65°F (around 18°C) could take 8-12 hours or even longer. Understanding these variables allows you to control the process. Learning to identify the signs of a well-fermented dough – increased volume, bubbles, and a jiggly texture – is crucial for achieving a nofail sourdough loaf recipe result. Patience is truly a key ingredient.
Essential Ingredients for Your Sourdough Loaf
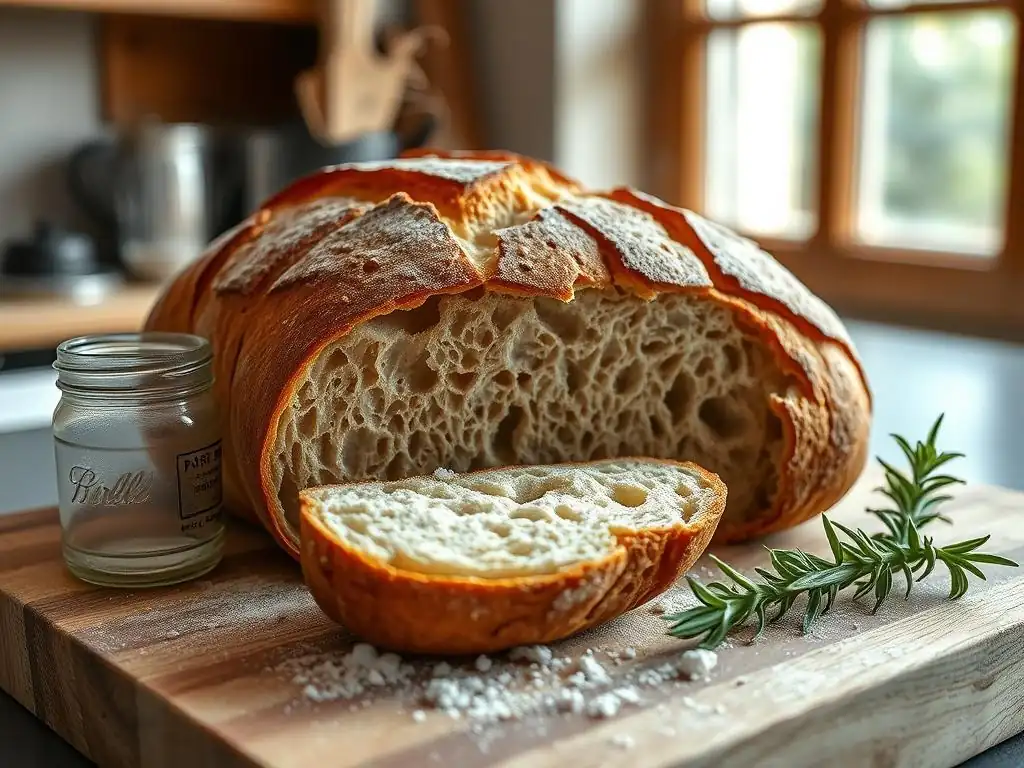
Bread Flour: The Key to Structure
Bread flour is specifically milled to have a higher protein content, typically ranging from 12% to 14%. This higher protein level is critical because it contains more gluten-forming proteins (glutenin and gliadin). When mixed with water and worked, these proteins develop into a strong, elastic network – the gluten structure – which traps the gases produced by the sourdough starter, allowing the bread to rise and maintain its shape.
Using a good quality bread flour is fundamental for a nofail sourdough loaf recipe. A common example is using a flour with 12.7% protein content. This level provides sufficient strength for fermentation and oven spring. Using a lower protein all-purpose flour (often 10-11.5% protein) might result in a weaker dough that struggles to hold its structure, leading to a flatter loaf with a denser crumb. Investing in a reputable brand of bread flour can significantly impact your baking success.
Water: Hydration and Dough Development
Water plays multiple vital roles in sourdough baking. It activates the gluten-forming proteins in the flour, allowing the gluten network to develop. It also dissolves the salt and helps distribute the sourdough starter throughout the dough. The ratio of water to flour, known as hydration, significantly affects the dough's handling properties and the final crumb structure. A higher hydration dough (e.g., 80% water relative to flour weight) is stickier and harder to handle but can yield a more open, airy crumb.
For a beginner-friendly nofail sourdough loaf recipe, many start with a hydration level between 68% and 75%. For example, in a recipe using 500g of flour, 70% hydration would require 350g of water. This range offers a good balance between manageability and achieving a nice crumb structure. Using filtered or non-chlorinated water is often recommended, as chlorine can potentially inhibit the activity of the delicate microorganisms in your sourdough starter.
Salt: Flavor and Gluten Control
Salt is more than just a flavor enhancer in bread baking; it's also crucial for controlling fermentation rate and strengthening the gluten network. Without salt, dough can ferment too quickly and spread excessively. Salt tightens the gluten structure, providing strength and elasticity, which helps the dough hold its shape during proofing and baking, contributing to a better rise and crumb.
Typically, salt is added at a concentration of 1.8% to 2.2% of the total flour weight in a nofail sourdough loaf recipe. For instance, using 500g of flour, you would add between 9g and 11g of salt. It's usually added after the initial mixing of flour and water (autolyse) to allow the flour to fully hydrate first, as salt can initially inhibit water absorption and gluten development. Using fine sea salt or kosher salt is common, as they dissolve easily.
The Sourdough Starter: The Living Leavening Agent
The heart of any sourdough bread is the starter. This active culture of wild yeasts and lactic acid bacteria is responsible for leavening the dough and providing that characteristic tangy flavor. A healthy, active starter is paramount for a nofail sourdough loaf recipe. It should be fed regularly (typically daily if kept at room temperature, or less often if refrigerated) and should double or triple in volume within a few hours after feeding, showing lots of bubbles.
To assess if your starter is ready for baking, you can perform the "float test." Drop a small amount of starter into a glass of water; if it floats, it's active and ready to use. This indicates it has enough gas production to leaven your dough. A starter fed with a 1:1:1 ratio (starter:water:flour by weight) and allowed to peak (usually 4-8 hours after feeding at room temperature, around 70-75°F or 21-24°C) is typically ideal for mixing dough. Using a starter that is past its peak or not yet active enough is a common reason for a dense loaf.
Step-by-Step: Baking Sourdough Bread
Step 1: Feeding and Monitoring Your Sourdough Starter
The first step in preparing for a nofail sourdough loaf recipe is ensuring your starter is active and ready. This involves feeding it with fresh flour and water and then monitoring its activity. A common feeding ratio is 1:1:1 by weight (e.g., 25g starter, 25g water, 25g flour). Mix these thoroughly in a clean jar and let it sit at room temperature.
Observe your starter over the next few hours. A healthy starter will begin to bubble, increase in volume, and develop a pleasant, slightly tangy aroma. It should reach its peak activity – typically doubling or tripling in size – within 4 to 8 hours if kept at a warm room temperature around 75°F (24°C). Using the starter at its peak ensures maximum leavening power for your dough.
Assessing Readiness: Volume and Activity
To be sure your starter is ready for your nofail sourdough loaf recipe, look for clear signs of activity. The most reliable indicator is its increase in volume. Mark the level of your starter immediately after feeding with a rubber band or marker on the jar. A starter that has at least doubled in volume and shows many bubbles throughout and on the surface is usually ready.
Another simple test is the float test, as mentioned earlier. Gently drop a small amount of the peak-activity starter into a glass of room-temperature water. If the starter floats, it means it is sufficiently aerated and active enough to leaven your bread dough. If it sinks, it likely hasn't built up enough gas yet and needs more time, or it may be past its peak and needs another feeding.
Step 2: Mixing the Dough: Combining Ingredients
Mixing the dough is where everything comes together. This step often starts with an autolyse phase to allow the flour to hydrate before the starter and salt are added. Precise measurement of ingredients, usually by weight using a kitchen scale, is crucial for consistency in a nofail sourdough loaf recipe.
Start by weighing your flour and water into a large mixing bowl according to your recipe's hydration level. Mix them just until no dry flour remains. The mixture will look shaggy and rough at this stage.
Autolyse: Flour and Water Pre-Hydration
The autolyse step involves mixing only the flour and water together and letting the mixture rest for a period, typically 20 minutes to an hour. During this rest, the flour absorbs the water more fully, and enzymatic activity begins to break down starches into sugars, which feeds the yeast. This process also allows the gluten network to start forming naturally without mechanical effort.
For a nofail sourdough loaf recipe, an autolyse of 30 minutes is often sufficient. It helps make the dough smoother and easier to handle later. After the autolyse, the dough will feel slightly more pliable and less shaggy than immediately after the initial mix.
Mixing: Incorporating Starter and Salt
After the autolyse, add your active sourdough starter and the pre-measured salt to the dough. Work these in thoroughly. This can be done by hand using a 'pinch and fold' method or in a stand mixer with a dough hook. The goal is to evenly distribute the starter and salt throughout the dough.
Continue mixing or kneading until the dough starts to come together and develop some initial strength. It might still be sticky, especially at higher hydration levels, but it should show signs of elasticity when gently stretched. This phase is critical for beginning the gluten development necessary for a successful nofail sourdough loaf recipe.
Step 3: Bulk Fermentation: The Primary Rise
Bulk fermentation, also known as the first rise, is a critical phase where the sourdough starter works to leaven the entire mass of dough. This period allows the dough to develop structure, flavor, and gas. The duration of bulk fermentation is highly dependent on temperature and the activity level of your starter, but a typical range at room temperature (around 70-75°F) is 4 to 6 hours.
During bulk fermentation, the dough should increase significantly in volume – aiming for a 30% to 50% increase is a common target for a nofail sourdough loaf recipe. You'll also notice bubbles forming on the surface and throughout the dough. This process builds strength and elasticity, preparing the dough for shaping and the final proof.
Stretch and Folds: Building Strength
To develop the gluten structure and build strength during bulk fermentation, bakers commonly perform a series of "stretch and folds." This involves wetting your hands, gently stretching a portion of the dough up, and folding it back over itself towards the center. Rotate the bowl and repeat this action 3-4 times around the dough.
Perform these stretch and folds every 30 to 60 minutes during the first 2-3 hours of bulk fermentation. For example, if your total bulk ferment is 5 hours, you might do sets of stretch and folds at the 30, 90, and 150-minute marks. This technique aligns the gluten strands, builds tension, and degasses the dough gently, resulting in a stronger dough that holds its shape better during baking – a key element of a nofail sourdough loaf recipe.
Evaluating Rise: Time and Texture
Monitoring the dough's increase in volume is the primary way to evaluate the progress of bulk fermentation. While time is a guideline, temperature fluctuations and starter activity mean you must also rely on visual cues and feel. The dough should look visibly larger, puffier, and have rounded edges.
A common test for sufficient bulk fermentation is the "jiggle test." Gently shake the bowl; the dough should jiggle like a large jelly. It should also feel airy and bubbly, and you might see significant bubbles on the surface. Over-fermenting can lead to a weak, sticky dough that's hard to shape, while under-fermenting results in a dense crumb. Aiming for that 30-50% volume increase and observing these signs is crucial for a nofail sourdough loaf recipe.
Step 4: Shaping the Dough: Preparing for the Final Proof
After bulk fermentation, the dough needs to be shaped into its final form before the final proof. Shaping creates tension on the surface of the dough, which helps it hold its structure during proofing and contributes to oven spring. This step is crucial for achieving a well-formed loaf with a good crust and crumb structure in your nofail sourdough loaf recipe.
Start by gently turning the dough out onto a lightly floured surface. Be careful not to degas the dough excessively. Use a bench scraper to help handle the dough.
Pre-Shape: Initial Rounding
The pre-shape is an intermediate step that helps to organize the dough's structure and make the final shape easier. Gently fold the edges of the dough towards the center to create a rough round or rectangle, depending on your desired final shape. Flip the dough over so the seam is underneath and gently cup your hands around it, rotating it slightly to create surface tension.
Let the pre-shaped dough rest for 20-30 minutes, uncovered. This allows the gluten to relax after handling, making the final shaping much easier without tearing the dough. This rest period is often called the "bench rest." It's a small but important detail in a nofail sourdough loaf recipe that improves the final loaf's structure.
Final Shape: Creating Tension
The final shape builds maximum tension on the dough's surface, which is vital for a good oven spring. For a boule (round loaf), gently flatten the dough into a circle, then fold the sides into the center like an envelope. Flip the dough over and use your hands to gently pull and tuck the dough under itself while rotating, creating a smooth, tight surface. The goal is to create a taut skin on the outside.
For a batard (oval loaf), gently flatten the dough into a rectangle, fold the top third down, then the bottom third up over it, pressing seams. Then, starting from the top, roll the dough down towards you, sealing the seam with your fingers as you go. Again, create tension. Place the shaped dough seam-side up into a floured banneton or bowl lined with a floured cloth – this orientation helps the dough expand upwards during proofing and makes scoring easier later, contributing to a beautiful nofail sourdough loaf recipe.
Step 5: Proofing the Dough: The Final Rise
Proofing is the final rise before baking. This allows the dough to lighten up and expand further. The duration and temperature of proofing significantly impact the final loaf. Over-proofing is a common issue that can lead to a flat loaf, while under-proofing results in a dense crumb.
Proofing can be done at room temperature for a shorter time (e.g., 1-3 hours) or in the refrigerator for a longer period (e.g., 12-18 hours). Refrigerated proofing, known as cold proofing, is often preferred for a nofail sourdough loaf recipe as it slows down fermentation, develops more complex flavors, and makes the dough much easier to score.
Banneton or Bowl: Supporting the Shape
A banneton (proofing basket) is traditionally used to support the dough during proofing and wick away a small amount of moisture from the surface, contributing to a better crust. Dust the banneton generously with rice flour (which is less likely to be absorbed by the dough) or a mix of bread flour and rice flour. Place the shaped dough seam-side up in the floured banneton.
If you don't have a banneton, you can line a bowl with a clean kitchen towel and dust it generously with flour. Place the shaped dough seam-side up into the floured towel-lined bowl. This provides essential support, preventing the dough from spreading outwards during proofing, which is vital for achieving a good shape in your nofail sourdough loaf recipe.
Refrigerated Proof: Developing Flavor
Cold proofing in the refrigerator is highly recommended for a nofail sourdough loaf recipe, especially for beginners. Place the banneton (or bowl) containing the shaped dough into the refrigerator for 12 to 18 hours. The cold temperature significantly slows down the yeast activity but allows the lactic acid bacteria to continue producing organic acids, which enhances the flavor and tang of the sourdough.
Cold proofing also firms up the dough, making it much easier to score cleanly just before baking. This controlled, slow rise helps develop a better structure and flavor compared to a quick room-temperature proof. It also adds flexibility to your baking schedule.
Step 6: Baking Your Sourdough Loaf: Achieving a Golden Crust
Baking is where the magic happens. High initial heat and steam are crucial for achieving maximum oven spring and developing that signature crispy crust on your nofail sourdough loaf recipe. Baking is typically done in a preheated oven, often inside a Dutch oven or on a baking stone with added steam.
Preheating your oven to a high temperature, usually between 450°F and 500°F (230°C and 260°C), is essential. The vessel you bake in, like a Dutch oven, should also be preheated inside the oven for at least 30 minutes, preferably an hour, to ensure it's scorching hot. This provides the necessary thermal mass for a strong initial burst of heat.
Oven Temperature: Optimal Heat for Baking
Starting at a high temperature is key for oven spring. A common method for a nofail sourdough loaf recipe is to bake the dough inside a preheated Dutch oven with the lid on at 475°F (245°C) for the first 20-25 minutes. This initial high heat causes the water in the dough to turn to steam, rapidly expanding the dough before the crust sets – this is oven spring.
After the initial covered bake, the temperature is typically reduced, often to 425-450°F (220-230°C), and the lid is removed for another 20-30 minutes. This allows the crust to brown and crisp up without the bread burning. Precise temperature control is vital for achieving the desired crust color and internal structure.
Scoring: Controlling Oven Spring
Scoring involves making cuts on the surface of the dough just before it goes into the hot oven. These cuts, made with a sharp blade (like a razor blade or lame), serve two main purposes: they allow the dough to expand in a controlled manner during oven spring, preventing blowouts in unwanted places, and they add a decorative element to the loaf.
For a nofail sourdough loaf recipe, simple scoring patterns are often best. A single long slash down the center of a batard or a cross shape on a boule are common and effective. The depth and angle of the score affect how the dough expands. A deep, angled cut encourages a large "ear" to form. Scoring cold dough (from a refrigerated proof) is much easier and yields cleaner cuts.
Baking with Steam: Creating Crust
Steam is crucial during the initial phase of baking. The moist environment prevents the surface of the dough from setting too quickly, allowing it to expand fully during oven spring. The steam also gelatinizes the starch on the surface of the dough, which later dries out to form a thin, crisp crust. Baking inside a covered Dutch oven is an excellent way to create a steamy environment around the loaf without needing to add external steam to your oven.
If not using a Dutch oven, you can create steam by placing a tray of hot water or ice cubes on the bottom rack of your oven just before loading the bread. However, baking in a preheated Dutch oven is generally considered the most effective method for a home baker to achieve consistent results and is highly recommended for a nofail sourdough loaf recipe.
Step 7: Cooling and Enjoying Your Bread
Once your sourdough loaf is baked to a deep golden-brown color and sounds hollow when tapped on the bottom, it's time to take it out of the oven. The internal temperature should ideally be around 205-210°F (96-99°C). However, resisting the urge to slice into it immediately is crucial for the final texture.
Transfer the loaf to a wire rack to cool completely. This step is non-negotiable for a nofail sourdough loaf recipe to ensure the best possible crumb and texture.
Cooling: Preventing a Gummy Texture
Allowing the bread to cool completely on a wire rack is essential. As the bread cools, residual heat continues to cook the interior, and moisture redistributes throughout the loaf. Cutting into hot bread traps steam, resulting in a gummy, dense texture.
A standard-sized loaf (made with ~500g flour) typically needs at least 2-3 hours to cool fully. Larger loaves may need longer. Be patient during this stage; it's a vital part of the nofail sourdough loaf recipe process that affects the final eating quality.
Slicing: Revealing the Crumb
Once completely cool, your beautiful homemade sourdough is ready to be sliced and enjoyed. Use a sharp bread knife with a serrated edge for the cleanest cuts through the crust. Slice the loaf to reveal the internal structure, known as the crumb.
A well-baked sourdough loaf from a successful nofail sourdough loaf recipe will typically have an open, airy crumb with varying sizes of holes, indicating good fermentation and oven spring. Enjoy the fruits of your labor with butter, olive oil, or alongside your favorite meal!
Troubleshooting Common Sourdough Issues
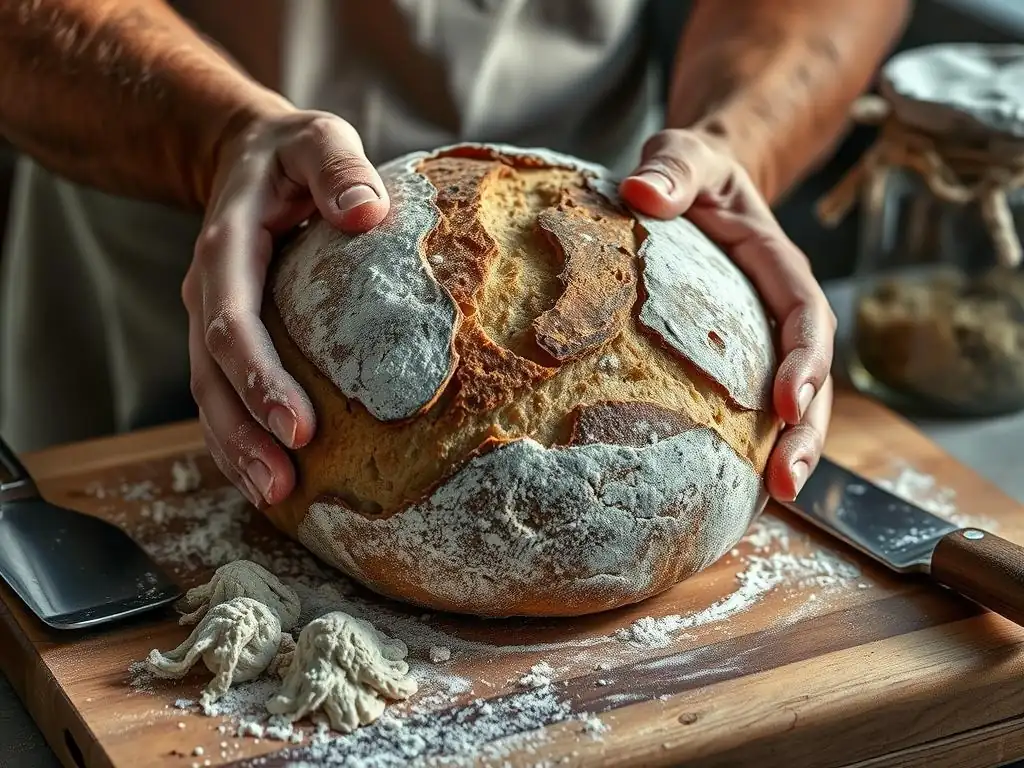
Even with a nofail sourdough loaf recipe, you might encounter challenges. Understanding common problems and their causes is key to improving your technique and achieving consistent results. Don't be discouraged by less-than-perfect loaves; each bake is a learning opportunity.
Starter Issues: Inactivity and Weakness
A common problem is a starter that isn't active enough to properly leaven the dough, leading to a dense loaf. This can happen if the starter isn't fed regularly, is kept at too cold a temperature, or is used before it reaches its peak activity. For example, a starter stored in the fridge and not fed for a week might need 2-3 consecutive daily feedings at room temperature to become vigorous again.
If your starter isn't doubling within 4-8 hours after a feeding at 75°F (24°C), try adjusting your feeding ratio (e.g., feeding a smaller amount of starter with more flour and water, like 1:2:2 or 1:3:3) or increasing the feeding frequency. Ensure you're using unbleached flour and non-chlorinated water. Patience and consistent feeding are the cure for a weak starter and vital for a nofail sourdough loaf recipe.
Dough Problems: Stickiness and Lack of Strength
Excessive stickiness and dough that lacks strength (doesn't hold its shape) are often related to hydration levels, insufficient gluten development, or over-fermentation. A very high hydration dough (above 80%) is inherently sticky and requires practice to handle. If your recipe is 70% hydration but the dough feels unmanageably sticky, check your measurements or consider reducing the water slightly on your next attempt.
Lack of strength can result from not performing enough stretch and folds or bulk fermenting for too short a time. Conversely, over-fermentation breaks down the gluten structure, making the dough weak and gooey. If your dough feels like it's melting or tearing easily during shaping, it might be over-fermented. Adjusting bulk fermentation time based on temperature and dough feel, and ensuring sufficient stretch and folds (e.g., 3-4 sets in the first 2-3 hours), helps build strength for a nofail sourdough loaf recipe.
Baking Problems: Dense Crumb and Pale Crust
A dense, gummy crumb is often caused by under-proofing, under-baking, or slicing the bread before it's fully cooled. If your loaf is relatively flat with a tight, even crumb, it might have needed more time during bulk fermentation or final proofing. Slicing hot bread also creates a gummy texture.
A pale crust indicates insufficient heat or baking time. Ensure your oven is accurately calibrated and preheated thoroughly, including your Dutch oven or baking stone, to 475-500°F (245-260°C). Baking with sufficient steam for the first portion of the bake is also crucial for crust development. If the crust is still pale after the initial covered bake, increase the temperature slightly or extend the uncovered baking time until a deep golden-brown color is achieved. These adjustments are key to perfecting your nofail sourdough loaf recipe.
Over-Proofing
Over-proofing occurs when the dough is left to rise for too long during the final proof. The yeast consumes most of the available sugars, and the gluten structure begins to break down from the prolonged acid production. Signs of over-proofing include dough that looks significantly inflated but may start to deflate slightly, feels very fragile and airy, and doesn't spring back readily when gently poked.
Baking an over-proofed loaf typically results in poor oven spring, potentially leading to a flat loaf that spreads outwards rather than rising upwards. The crumb may be dense or uneven, and the flavor can be excessively sour. If you suspect your dough is over-proofed, you can try shaping it more gently and baking it immediately in a very hot oven to try and salvage some rise. Preventing over-proofing, especially during a long cold proof, requires knowing your refrigerator's temperature and monitoring the dough's appearance.
Under-Proofing
Under-proofing happens when the dough hasn't had enough time to rise during the final proof. The yeast hasn't produced enough gas to properly aerate the dough before baking. Signs of under-proofing include dough that looks dense, feels firm and tight, and springs back very quickly when gently poked.
Baking an under-proofed loaf results in a loaf with significant, uncontrolled oven spring (sometimes bursting at weak points if not scored deeply enough) and a dense, tight crumb structure with few large holes. The flavor may be less developed. If you realize your dough is under-proofed before baking, you can leave it at room temperature for an additional 30-60 minutes (or longer, depending on the temperature) to allow it to finish proofing before scoring and baking. Recognizing the feel and appearance of properly proofed dough is essential for a nofail sourdough loaf recipe.
Tips for Consistent Sourdough Baking
Achieving consistent results with a nofail sourdough loaf recipe comes with practice and attention to detail. While the basic steps are straightforward, mastering the nuances of sourdough requires observation and learning from each bake.
Practice and Observation
Every batch of sourdough is a little different, influenced by ambient temperature, flour type, starter strength, and even humidity. The most important tip is to practice regularly and observe your dough at each stage. Pay attention to how the dough feels during mixing and stretch and folds, how much it rises during bulk fermentation, and how it behaves during shaping and proofing.
Keep a baking journal! Note down ingredients, timings, temperatures, and observations about the dough's behavior. Also, note the results of the bake (oven spring, crust, crumb, flavor). Reviewing past entries helps you understand what worked and what didn't, allowing you to make informed adjustments for your next nofail sourdough loaf recipe.
Starter Care: Regular Feeding
A healthy, consistently active starter is the foundation of a nofail sourdough loaf recipe. If you bake frequently (several times a week), keeping your starter at room temperature with daily feedings is ideal. If you bake less often, storing your starter in the refrigerator and feeding it once a week is sufficient. Remember to take it out a day or two before baking and feed it 1-3 times at room temperature to ensure it's vigorous.
A typical maintenance feeding ratio is 1:1:1 (starter:water:flour by weight), but you can adjust this based on how quickly your starter becomes active. Discarding a portion before feeding helps maintain a manageable amount and keeps the culture healthy. A robust starter is your biggest asset in sourdough baking.
Understanding Hydration
Hydration level is a key factor influencing dough handling and crumb structure. Higher hydration doughs (e.g., 75-85%) are stickier and more challenging but can yield a more open, airy crumb. Lower hydration doughs (e.g., 60-70%) are easier to handle and result in a tighter crumb. For a nofail sourdough loaf recipe, starting in the 70-75% range is recommended.
Experimenting with hydration once you are comfortable with the basic process can help you find your preference. If a recipe calls for 75% hydration and your flour seems to absorb less water, you might need to slightly reduce the water amount or increase it if your flour is very absorbent. Learning how different hydration levels feel and behave is part of mastering sourdough.
Variations on the Basic Sourdough Recipe
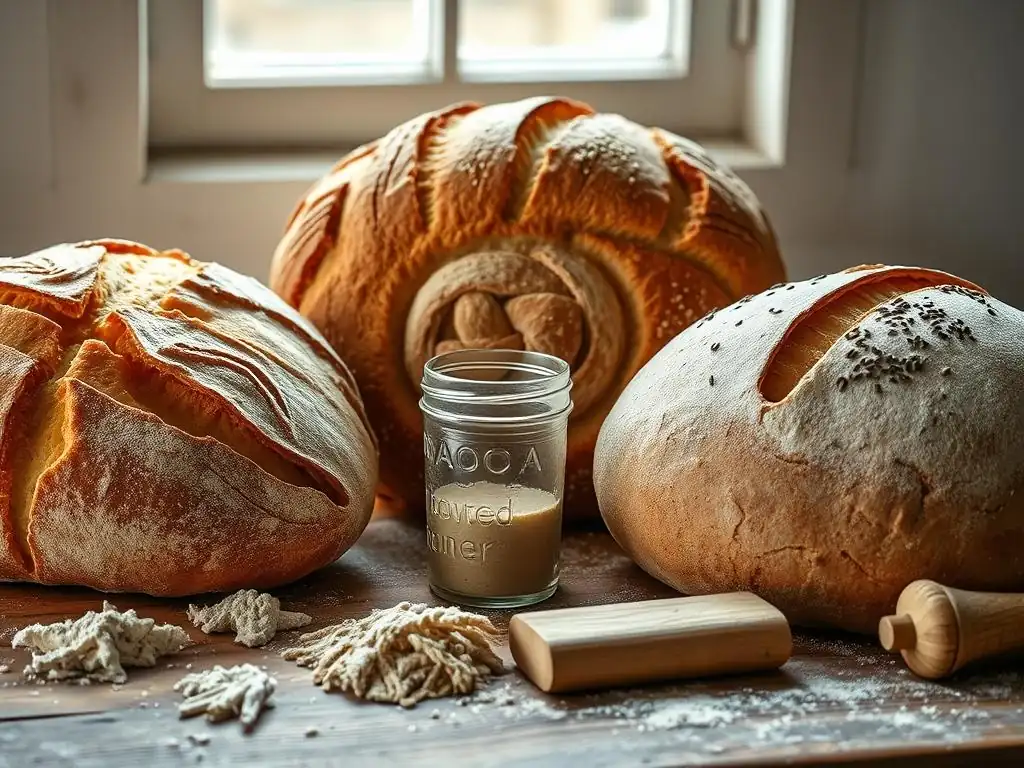
Once you've successfully baked a basic nofail sourdough loaf recipe, you can explore exciting variations by adding different flours, seeds, or flavorings. These additions can significantly change the texture, flavor, and appearance of your bread.
Whole Wheat Sourdough: Adding Nutty Flavor
Substituting a portion of the white bread flour with whole wheat flour adds a nutty flavor and increases the nutritional value of your loaf. Start by substituting a small percentage, perhaps 10-20% (e.g., for 500g total flour, use 400g white bread flour and 100g whole wheat flour). Whole wheat flour absorbs more water than white flour, so you might need to slightly increase the total water amount or adjust the hydration level for your nofail sourdough loaf recipe variation.
Whole wheat also affects gluten development; doughs with a high percentage of whole wheat can be less elastic. You might need slightly longer bulk fermentation or additional stretch and folds. Baking a loaf with 20% whole wheat can result in a denser crumb than a pure white loaf but offers a richer flavor profile.
Seeded Sourdough: Sunflower, Flax, and Sesame
Adding seeds introduces texture and flavor. Common additions include sunflower seeds, flax seeds, sesame seeds, or a mix of several. You can add seeds directly to the dough during the mixing phase or soak them first (a 'soaker') to prevent them from absorbing water from the dough during fermentation. A typical addition might be 10-15% of the total flour weight in seeds (e.g., 50-75g of seeds for a 500g flour recipe).
To make a soaker, combine the seeds with an equal weight of hot water and let them sit for a few hours or overnight. Add the soaker to the dough along with the starter and salt. Seeded sourdough is a delicious variation on the basic nofail sourdough loaf recipe.
Garlic Herb Sourdough: Infusing Flavor
Infusing your sourdough with flavors like garlic and herbs creates a wonderfully aromatic loaf perfect for savory dishes. Roasted garlic cloves (mashed), fresh or dried herbs like rosemary, thyme, or chives can be added to the dough during the mixing phase after the autolyse. A common amount might be 1-2 roasted garlic heads and a few tablespoons of chopped fresh herbs per 500g of flour.
Be mindful that adding inclusions can slightly affect dough handling and fermentation. Ensure they are evenly distributed during mixing. This variation transforms a standard nofail sourdough loaf recipe into something special, ideal for serving with soups or pasta.
Storing Your Homemade Sourdough Loaf
Proper storage is key to keeping your beautiful nofail sourdough loaf recipe fresh and preserving its crust. Unlike commercial bread with preservatives, homemade sourdough has a shorter shelf life at room temperature, typically 2-4 days before the crust softens significantly.
Bread Box Storage: Maintaining Crust
The best way to store sourdough at room temperature is in a bread box or a paper bag. A bread box allows for some air circulation, which helps maintain the crust's crispness while protecting the interior from drying out too quickly. A paper bag also allows the crust to breathe, preventing it from becoming soggy, although the interior might dry out slightly faster than in a bread box.
Avoid storing sourdough in plastic bags or airtight containers at room temperature, especially when it's still warm. This traps moisture, softening the crust and potentially encouraging mold growth. For slices, you can place the cut side down on a cutting board or wrap the cut end in beeswax wrap or plastic wrap while keeping the rest of the loaf exposed to air in a bread box.
Freezing: Preserving for Later
Sourdough freezes exceptionally well, allowing you to bake ahead or preserve a loaf you won't finish quickly. For best results, freeze the loaf whole or sliced. Ensure the bread is completely cool before freezing.
To freeze a whole loaf, wrap it tightly in plastic wrap, then in aluminum foil or place it in a freezer-safe bag. To freeze slices, first flash freeze them on a baking sheet until firm, then transfer to a freezer bag with parchment paper between slices to prevent sticking. Frozen sourdough can last for several months.
To thaw a whole loaf, remove all wrapping and let it thaw at room temperature, then refresh the crust in a warm oven (350°F/175°C for 10-15 minutes). Slices can often be toasted directly from frozen. Freezing is a great way to extend the enjoyment of your nofail sourdough loaf recipe.
Conclusion: The Joy of Baking Sourdough
Baking sourdough bread at home is a rewarding process that yields delicious results. Following a reliable nofail sourdough loaf recipe and understanding the basic principles of working with a sourdough starter empowers you to create beautiful, flavorful loaves. From the initial feeding of your starter to the final cooling of a perfectly baked loaf, each step contributes to the magic of natural fermentation.
Don't be discouraged by early challenges. Every bake is a learning experience that brings you closer to mastering this craft. With practice, observation, and patience, you'll develop the intuition needed to consistently produce crusty, airy sourdough bread that you can proudly share with friends and family. Embrace the journey, enjoy the process, and savor the incredible taste of your homemade nofail sourdough loaf recipe.
Frequently Asked Questions
What makes this sourdough recipe "Nofail"?
This recipe is designed to be "Nofail" because it provides detailed, step-by-step instructions and focuses on easy-to-find ingredients and manageable techniques. It aims to remove the common pitfalls of sourdough baking.
What kind of flour is best for this Basic Sourdough Recipe?
For best results, we recommend using a combination of bread flour for structure and whole wheat flour for flavor. Unbleached all-purpose flour can also be used, but the texture may vary.
How do I know when my sourdough starter is ready to use?
A ready sourdough starter should be active and bubbly, having at least doubled in size after feeding. It should also have a slightly sour, yeasty aroma.
How long does the entire process of making this Nofail sourdough loaf take?
The entire process, including starter feeding, autolyse, bulk fermentation, shaping, and baking, typically takes around 24-36 hours. The bulk fermentation time is the most variable.
What if I don't have a Dutch oven for baking the sourdough loaf?
While a Dutch oven is recommended for achieving a crispy crust and even bake, you can use a baking stone or baking sheet with a tray of water in the oven to create steam.
Final Reflection: The Enduring Magic of a No-Fail Sourdough Loaf
The pursuit of the perfect sourdough loaf is a journey, not a destination, but this recipe aims to make that journey significantly smoother. The seemingly simple act of baking sourdough bread connects us to a rich history of food production, while simultaneously offering a deeply satisfying creative outlet. Mastering this fundamental skill empowers us to create something truly special, from scratch, in our own kitchens.
The enduring appeal of sourdough lies not just in the delicious, tangy flavor and satisfyingly crusty texture, but also in the process itself. It's a testament to patience, precision, and the symbiotic relationship between human effort and the living culture of the starter. Bread is the staff of life,
they say, and in the case of sourdough, it's a staff imbued with a unique magic, born from a living organism and nurtured by our own hands. This recipe, while designed for simplicity, hopefully allows you to experience that magic firsthand.
Now, I invite you to consider your own baking journey. Perhaps you've already tackled this recipe, or maybe you're just beginning your sourdough adventure. Regardless, remember that every loaf, every rise, every crumb, is a step forward in understanding this ancient craft. Don't be afraid to experiment, to adjust the recipe to your own preferences, and most importantly, to enjoy the process. The reward is not just a delicious loaf of bread, but a deeper connection to the food you eat and the traditions that sustain us.
Unleash Your Inner Baker: Craft Your Perfect Sourdough!
Thanks for joining us on this sourdough journey! You've now unlocked the secrets to a consistently delicious, crusty loaf. Ready to put your new skills to the test?
- Bake your own masterpiece! Use this recipe as a springboard—experiment with different flours, hydration levels, and shaping techniques to discover your signature sourdough.
- Share your sourdough success! Post a picture of your beautiful loaf on social media and tag us—we’d love to see your creations!
- Join our baking community! Leave a comment below and share your baking tips or any questions you might have. What unexpected ingredient are you eager to try in your next sourdough bake?