
Basic Sourdough for Busy People: An Easy Approach

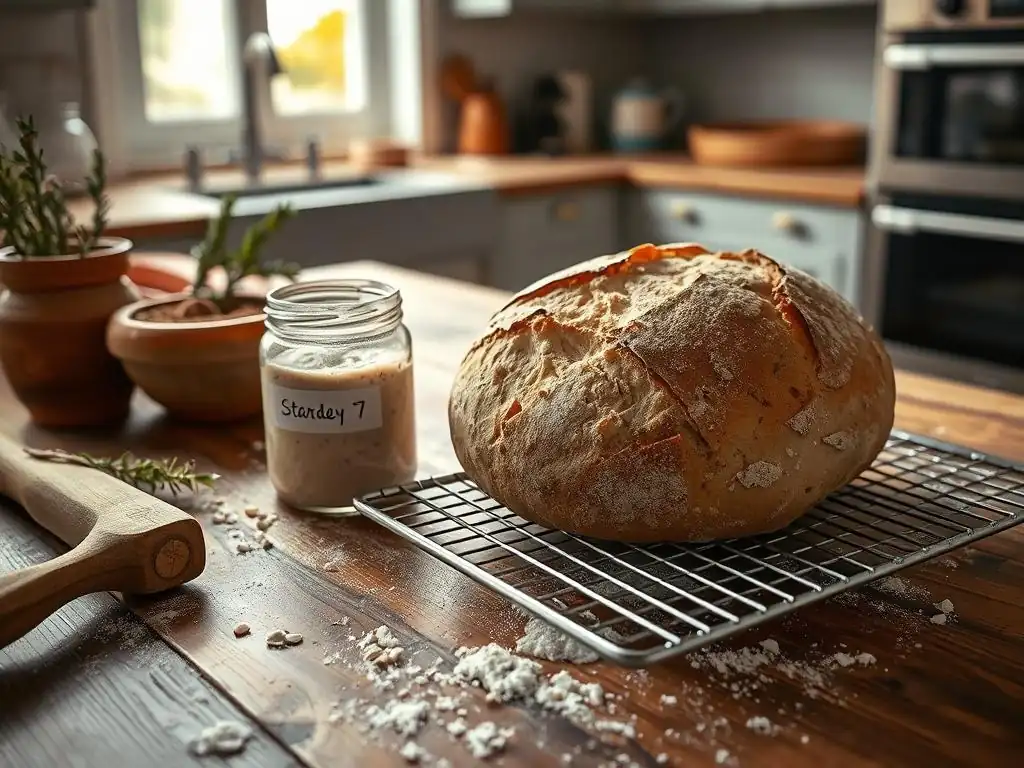
Welcome to BakeWithEase, your trusted guide to unlocking the delicious world of baking! Are you ready to conquer the seemingly complex world of sourdough? Then you're in the right place. Forget intimidating recipes and endless instructions – discover our Easy Sourdough Starter Recipe for Beginners, designed to get even the busiest bakers creating incredible loaves. But what's the secret to a consistently perfect starter? Read on to find out and embark on your sourdough adventure today!
- Basic Sourdough for Busy People: An Easy Approach | BakeWithEase
- Introduction: Sourdough Bread Baking Made Simple for Busy Bakers
- The Easy Sourdough Starter Recipe for Beginners
- Making Your First Easy Sourdough Loaf: A Beginner's Guide
- Baking Your Easy Sourdough Bread: Achieving the Perfect Crust and Crumb
- Troubleshooting Common Sourdough Issues (Beginner-Friendly Tips)
- Storing Your Sourdough Bread: Keeping It Fresh Longer
- Conclusion: Enjoying the Simplicity and Satisfaction of Homemade Sourdough
-
Frequently Asked Questions
- What exactly is a sourdough starter, and why is it important?
- How is the "Easy Sourdough Starter Recipe for Beginners" at BakeWithEase different from other recipes?
- What kind of flour works best for creating a sourdough starter, according to BakeWithEase?
- How long does it typically take to create a viable sourdough starter with the BakeWithEase method?
- What are some signs that my sourdough starter is ready to be used for baking bread?
- Final Reflection: The Unexpected Joys of Simple Sourdough
- Unleash Your Inner Baker: Start Your Sourdough Journey Today!
Basic Sourdough for Busy People: An Easy Approach | BakeWithEase
Introduction: Sourdough Bread Baking Made Simple for Busy Bakers
BakeWithEase Welcomes You to Easy Sourdough Baking
Welcome to BakeWithEase, your friendly guide to the wonderful world of baking! We understand that life is busy, but that doesn't mean you have to miss out on the incredible satisfaction of baking your own delicious sourdough bread. Many people think sourdough is complicated, requiring hours of dedicated attention, but we're here to show you that it's absolutely possible to fit this rewarding activity into a packed schedule. Our goal is to demystify the process and provide you with an easy, approachable method that yields fantastic results.
This guide focuses on simplifying each step, from creating your very own easy sourdough starter recipe beginners can master, to baking that first beautiful loaf. We'll break down the process into manageable chunks, offering tips and tricks specifically tailored for those who don't have unlimited time. You'll learn how to leverage techniques like overnight proofing in the refrigerator, which is a game-changer for fitting baking around work or other commitments. Get ready to bake with ease and discover the joy of homemade sourdough!
Why Sourdough? Benefits of Baking Your Own Bread
Beyond the incredible taste and chewy texture, baking your own sourdough offers numerous benefits. For starters, you have complete control over the ingredients, ensuring you're using high-quality flour and water without any commercial yeast or additives. This can be particularly appealing if you're mindful of what you eat. The fermentation process in sourdough also breaks down complex carbohydrates and gluten, potentially making it easier for some people to digest compared to commercially yeasted bread.
Furthermore, the process of baking sourdough, even using an easy approach, can be incredibly therapeutic and rewarding. There's a unique sense of accomplishment that comes from nurturing a starter and transforming simple ingredients into a fragrant, crusty loaf. It's a skill that builds confidence and connects you to a long tradition of bread making. Plus, imagine the aroma filling your kitchen and the proud moment you slice into your very first easy sourdough loaf – it's truly incomparable!
The Easy Sourdough Starter Recipe for Beginners
Understanding the Sourdough Starter: The Key to Flavor
A sourdough starter is essentially a living culture of wild yeast and beneficial bacteria cultivated in a mixture of flour and water. This mixture undergoes fermentation, where the wild yeast produces carbon dioxide (which makes bread rise), and the bacteria, primarily Lactic Acid Bacteria (LAB), produce organic acids like lactic and acetic acid. These acids are responsible for the characteristic tangy flavor and contribute to the unique texture and keeping qualities of sourdough bread. Think of it as a natural leavening agent and flavor enhancer all in one.
Creating a starter is a foundational step for any beginner sourdough baker. It requires patience and consistency, but it's far from complicated. Once established, your starter becomes a perpetual source of leavening for your easy sourdough recipes. It's a robust ecosystem that, with proper care (regular feeding), can last for years, becoming more complex in flavor over time. An active, healthy starter is crucial for successful bread baking, ensuring your dough rises properly and develops that signature sourdough tang.
Ingredients for Your Simple Sourdough Starter
Creating your easy sourdough starter recipe beginners can follow requires just two basic ingredients: flour and non-chlorinated water. The type of flour you start with can influence the initial activity and flavor profile. Many beginners find success starting with unbleached all-purpose flour or whole wheat flour, or a 50/50 mix of both. Whole wheat flour often contains more wild yeast and nutrients, which can help kickstart fermentation faster.
Using non-chlorinated water is important because chlorine can inhibit the growth of the beneficial microorganisms needed for fermentation. Tap water can often be left out on the counter for 24 hours to allow the chlorine to dissipate, or you can use filtered or bottled water. The ratio of flour to water is also key, typically a 1:1 ratio by weight is used for feeding, which creates a consistency similar to thick pancake batter. For example, using 50 grams of flour and 50 grams of water is a common starting point.
Step-by-Step: Creating Your Sourdough Starter
Day 1: Mixing Flour and Water for the Initial Fermentation
To begin your easy sourdough starter recipe beginners step-by-step journey, you'll need a clean glass jar or container. Weigh out your initial flour and water. A good starting point is 50 grams of unbleached all-purpose flour and 50 grams of non-chlorinated water. In your jar, combine the flour and water and mix thoroughly with a spoon or spatula until there are no dry bits of flour left. The mixture will be thick and paste-like.
Cover the jar loosely. A lid resting on top, cheesecloth secured with a rubber band, or plastic wrap with a few holes poked in it will work. This allows air exchange while preventing contaminants from entering. Place the jar in a warm spot in your kitchen, ideally somewhere that stays consistently between 70-80°F (21-27°C). A proofing box, oven with the light on (but oven off! ), or even a warm shelf can work. Now, you wait until Day 2.
Day 2-7: Feeding Your Sourdough Starter (Easy Daily Routine)
Starting on Day 2 (approximately 24 hours after mixing), you will begin the feeding routine. Discard about half of the starter mixture from the jar (this helps manage the volume and removes less active parts). Then, add fresh flour and water to the remaining starter. A standard feeding ratio is 1:1:1 by weight: 1 part starter, 1 part fresh water, 1 part fresh flour. For example, if you discarded down to about 50 grams of starter, you would add 50 grams of fresh water and 50 grams of fresh flour.
Mix well, cover loosely, and return the jar to its warm spot. Repeat this process daily. You might not see much activity for the first few days. This is normal. Around Day 3 or 4, you might start seeing small bubbles and a slightly sour smell. This is a good sign! Continue the daily feeding. The discard can be used in other recipes like pancakes, crackers, or muffins, so nothing goes to waste.
Knowing When Your Starter is Ready: Signs of Activity and Maturity
Your easy sourdough starter recipe beginners efforts will pay off when you see consistent, predictable activity. After about 7-14 days of daily feeding (sometimes sooner, sometimes later, depending on temperature and flour), your starter should consistently double or even triple in volume within 4-8 hours after feeding. You'll see numerous bubbles throughout the mixture, not just on the surface, and it will have a pleasant, tangy aroma, not like nail polish remover.
A simple test for readiness is the "float test." Take a small spoonful of starter that has recently peaked (doubled or tripled in volume) and gently drop it into a glass of water. If it floats, it's ready to use for baking!
If it sinks, it needs more time to develop strength, so continue daily feedings. Once your starter reliably passes the float test and shows consistent activity, you can transition to storing it in the refrigerator and feeding it less frequently (e.g., once a week) if you're not baking daily. Remember to feed it 4-12 hours before you plan to use it in a recipe, letting it get active at room temperature.
Making Your First Easy Sourdough Loaf: A Beginner's Guide

Ingredients for Basic Sourdough Bread
Crafting your first easy sourdough loaf requires just four core ingredients, building upon the starter you've diligently cultivated. You'll need your active sourdough starter, strong bread flour (which has a higher protein content, typically 12-14%, helping with gluten development), water, and salt. The ratio of these ingredients is crucial and often expressed using baker's percentages, where the flour is always 100%. For a beginner-friendly loaf, a hydration level (water percentage relative to flour) of around 70-75% is manageable.
A common ingredient list for a single loaf might look something like this: 500 grams strong bread flour, 350-375 grams water (70-75% hydration), 10 grams salt (2%), and 100 grams active, bubbly sourdough starter (20%). Using weights is highly recommended for accuracy in sourdough baking, as volume measurements can vary significantly. Having these simple ingredients on hand is the first step towards enjoying your homemade easy sourdough bread.
Dough Preparation: A Simplified Method for Busy Schedules
One of the ways to make sourdough baking easy for busy people is to simplify the mixing and kneading process. Traditional sourdough can involve extensive kneading, but modern methods leverage time and hydration to develop gluten with less manual effort. The autolyse method and a series of stretch and folds are perfect for achieving a well-developed dough without spending a lot of time kneading.
This simplified approach means you don't need a stand mixer, though you can use one if you prefer. The key is breaking the process into short, manageable steps spaced out over a few hours, allowing you to multitask in between. Embracing these techniques makes the prospect of baking an easy sourdough loaf much more achievable even on a busy day.
Autolyse: The Secret to a Better Dough with Less Effort
Autolyse is a technique where you mix just the flour and water from your recipe and let it rest for a period, usually 30 minutes to an hour. The salt and starter are added later. During this resting phase, the flour absorbs the water, and enzymes naturally present in the flour begin to break down proteins, starting the gluten development process. This makes the dough more extensible and easier to work with later.
For our easy sourdough loaf, combine the strong bread flour and the water in a large mixing bowl. Mix with a spoon or your hands until no dry flour remains. It will look shaggy and not very smooth, and that's perfectly fine. Cover the bowl with a damp towel or plastic wrap and let it rest at room temperature for 30-60 minutes while you attend to other tasks. This simple step significantly reduces the amount of kneading or folding required later.
Mixing the Dough: Incorporating Starter and Salt
After the autolyse period, the dough will be slightly smoother and more pliable. Now it's time to add your active sourdough starter and the salt. Add the 100 grams of bubbly starter and 10 grams of salt to the autolyse dough. Dimple the surface of the dough with wet fingers to help incorporate the starter and salt.
Mix everything together thoroughly. This can be done by hand within the bowl, squeezing and folding the dough until the starter and salt are fully integrated. It might feel a bit messy at first, but keep working it until you no longer see distinct pockets of starter or salt. This mixing phase usually takes just a few minutes. Once mixed, the dough is ready for the bulk fermentation stage, where the real magic happens.
Bulk Fermentation: Managing Time for Flavor Development
Bulk fermentation, also known as the first rise, is the period after mixing the dough but before shaping it. This is when the yeast in your easy sourdough starter begins to actively consume sugars and produce carbon dioxide, causing the dough to rise. It's also when the lactic acid bacteria produce acids that build flavor and improve the dough's structure. The duration of bulk fermentation is highly dependent on the ambient temperature and the activity of your starter.
For a typical room temperature of 72-75°F (22-24°C), bulk fermentation might take anywhere from 4 to 8 hours. You're looking for the dough to increase in volume by about 30-50% and show signs of activity like bubbles on the surface. This stage is crucial for developing both the structure and the characteristic tangy flavor of your easy sourdough bread. Managing this time is key for busy bakers – you can plan your day around the folding schedule.
Stretch and Folds: Strengthening the Dough Efficiently
Instead of traditional kneading, we use a series of "stretch and folds" during the first few hours of bulk fermentation to build gluten strength. This technique is gentle on the dough and requires minimal hands-on time per session. Typically, you perform 3-4 sets of stretch and folds within the first 2-3 hours of bulk fermentation, with 30-60 minutes rest time between each set.
To perform a stretch and fold, wet your hands slightly to prevent sticking. Gently grab one edge of the dough, stretch it upwards, and fold it over the opposite side. Rotate the bowl about a quarter turn and repeat this stretching and folding motion 3-4 times, until all sides have been folded towards the center. This process strengthens the gluten network, allowing the dough to hold its shape and trap gases produced during fermentation, leading to a lighter, airier crumb.
Shaping Your Sourdough Loaf: Simple Techniques for Beginners
Once bulk fermentation is complete, it's time to shape your dough into a loaf. The goal of shaping is to create surface tension on the dough, which helps it hold its form during proofing and baking and encourages a good oven spring. For beginners, simple shaping techniques are best. You can shape into a round loaf (boule) or an oval loaf (batard).
Lightly flour your work surface. Gently turn the dough out of the bowl. You can perform a pre-shape first: gently tuck the edges underneath to form a rough ball, cover, and let rest for 15-20 minutes (this helps the dough relax before the final shape). For the final shape, gently flatten the dough into a rough rectangle.
Fold the top edge down about two-thirds of the way, then fold the bottom edge up over the top fold. Turn the dough 90 degrees and roll it tightly from the top down, tucking the ends as you go to create tension. Place the shaped dough seam-side up in a floured proofing basket (banneton) or a bowl lined with a floured tea towel.
Proofing: The Final Rise Before Baking
Proofing, also known as the second rise, is the final fermentation period after shaping the dough and before baking. During proofing, the dough continues to rise slowly, developing a light and airy structure. The duration of proofing depends on the temperature and the desired outcome. Proofing can be done at room temperature or in the refrigerator.
Room temperature proofing is faster, often taking 1-3 hours, depending on how warm your kitchen is and how active your dough is. The dough should look visibly puffy and increase in volume, but should not double in size like in bulk fermentation. An easy test for readiness is the "poke test": gently poke the dough with a wet finger; if the indentation slowly springs back about halfway, it's ready. If it springs back completely, it needs more time. If it stays completely indented, it's overproofed.
Refrigerator Proofing: A Time-Saving Option for Busy Bakers
Refrigerator proofing is a fantastic technique for busy bakers and is a key component of making an easy sourdough loaf fit into your schedule. After shaping and placing the dough in its proofing basket, cover it tightly and place it in the refrigerator for anywhere from 8 to 48 hours. The cold temperature significantly slows down the fermentation process.
This extended, cold proof develops more complex flavors in the bread and makes the dough much easier to handle and score when cold. It also allows you to bake the bread whenever it's convenient within that timeframe. For example, you could shape the dough in the evening after work and bake it the next morning or even the day after. This flexibility is why refrigerator proofing is a game-changer for anyone trying an easy sourdough starter recipe beginners can use regularly.
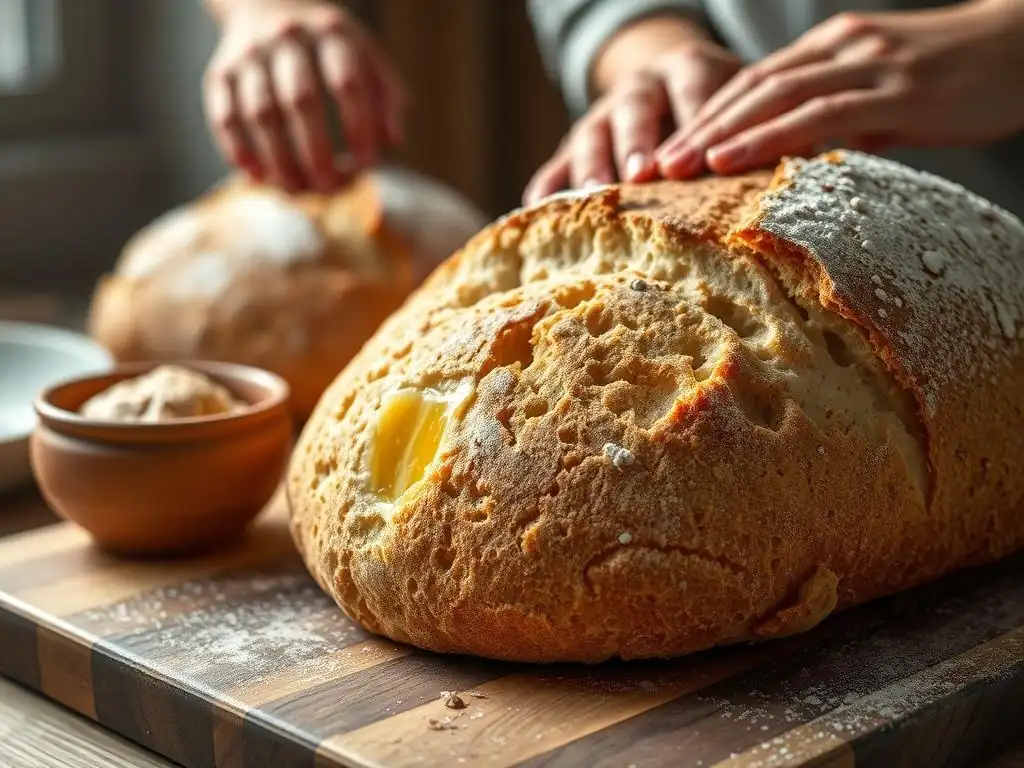
Baking Your Easy Sourdough Bread: Achieving the Perfect Crust and Crumb
Oven Setup: Preparing for the Bake
Proper oven setup is crucial for achieving that signature crust and crumb in your easy sourdough bread. Sourdough bakes best with initial high heat and steam. The steam helps keep the surface of the dough pliable, allowing it to expand fully during the first phase of baking (oven spring), and contributes to a thin, crispy crust. The most common way to achieve this home is by using a Dutch oven or a baking stone with added steam.
Preheat your oven with your baking vessel inside (Dutch oven with lid, or baking stone with a tray for water) to a high temperature, typically between 450-500°F (230-260°C). Allow the oven and the vessel to preheat for at least 30-60 minutes to ensure they are thoroughly heated. This high initial temperature gives the dough a rapid rise and sets the crust quickly.
Scoring the Dough: Preventing Explosions and Adding Visual Appeal
Scoring the dough, also known as slashing or cutting, is done right before the bread goes into the hot oven. This seemingly simple step serves several important purposes. Primarily, it provides controlled weak points on the surface of the loaf, allowing the dough to expand predictably during oven spring. Without scoring, the rapidly expanding gases inside the dough would find the weakest point and burst through, often resulting in an uncontrolled tear.
Beyond function, scoring allows you to add artistic flair to your easy sourdough loaf. Using a sharp razor blade (a 'lame' is ideal) or a very sharp knife, make quick, confident cuts about 1/2 inch deep into the surface of the cold, proofed dough. Simple patterns like a single long slash, a cross, or a few parallel lines are great for beginners. The cuts will open up beautifully as the bread bakes.
Baking Methods: Dutch Oven vs. Baking Stone (Pros and Cons)
Two popular methods for baking sourdough at home are using a Dutch oven or a baking stone. The Dutch oven method is often recommended for beginners because it effectively traps the steam released by the dough as it bakes, creating the ideal steamy environment without needing to add external steam. You preheat the Dutch oven, carefully drop the scored dough in, place the lid on, and bake for the first portion of the time. The lid is then removed to allow the crust to brown and crisp up.
Using a baking stone requires adding steam to the oven manually, often by placing a tray of hot water or ice cubes on a rack below the stone. While a stone can give a great crust and is versatile for other baked goods, managing external steam can be trickier for beginners. For an easy sourdough loaf, the Dutch oven method is generally simpler and more consistently delivers excellent results, especially for achieving a good oven spring and a beautiful crust.
Cooling and Enjoying Your Homemade Sourdough
Once your easy sourdough bread is baked to a deep golden-brown color and sounds hollow when tapped on the bottom, it's ready to come out of the oven. Carefully remove the loaf from the Dutch oven or baking stone and transfer it to a wire rack to cool completely. This cooling step is absolutely essential.
Allowing the bread to cool for at least 1-2 hours (preferably longer) allows the internal structure to set and the moisture to redistribute evenly throughout the loaf. Slicing into hot bread can result in a gummy texture. While the aroma might be tempting, patience here is key to enjoying the best possible texture and flavor from your homemade easy sourdough.
Troubleshooting Common Sourdough Issues (Beginner-Friendly Tips)
My Starter Isn't Rising: Possible Causes and Solutions
It's common for a new easy sourdough starter recipe beginners are working on to seem sluggish initially. The most frequent reasons for a lack of activity are insufficient warmth, inconsistent feeding, or using chlorinated water. Wild yeast and bacteria thrive in warmer temperatures, ideally between 70-80°F (21-27°C). If your kitchen is cool, find a warmer spot or create one.
Ensure you are feeding your starter regularly, ideally daily when you're trying to establish it, and using the correct ratio of flour and water. Make sure your water is non-chlorinated. If you're using tap water, let it sit out for 24 hours before using it. Sometimes, switching to a bit of whole wheat or rye flour for a few feedings can give it a boost, as these flours contain more nutrients for the microbes. Patience is key; some starters take longer than others to become robust.
My Dough is Too Sticky: Handling Hydration Challenges
Working with wet, sticky dough is a common challenge when making an easy sourdough loaf, especially with higher hydration levels. Stickiness is often related to hydration and gluten development. If the dough is excessively sticky and difficult to handle even after stretch and folds, it might be slightly too high in hydration for your flour or technique.
Ensure you are measuring your ingredients accurately using a scale. If you find your dough consistently too sticky, try reducing the water slightly in your next batch (e.g., use 340g instead of 350g water for 500g flour). Also, make sure you are performing enough stretch and folds to build adequate gluten strength, which helps the dough become less sticky and more manageable. Using wet hands instead of floured hands when handling the dough can also help prevent sticking and avoid adding too much extra flour.
My Bread is Dense: Improving Crumb Structure
A dense crumb (the interior texture of the bread) is disappointing after putting in the effort to bake an easy sourdough loaf. Density can stem from several factors: an inactive starter, insufficient bulk fermentation, inadequate shaping, or underproofing/overproofing. An active, bubbly starter is essential for leavening, so ensure yours is robust before baking.
Insufficient bulk fermentation means the dough hasn't developed enough gas or strength. It needs enough time at a suitable temperature to rise sufficiently (30-50% volume increase). Poor shaping can lead to a lack of tension, preventing a good oven spring. Finally, both underproofing (not enough final rise) and overproofing (the dough has risen and then started to collapse) can result in a dense loaf. Pay attention to the signs of readiness for both bulk fermentation and proofing, like volume increase and the poke test.
Storing Your Sourdough Bread: Keeping It Fresh Longer
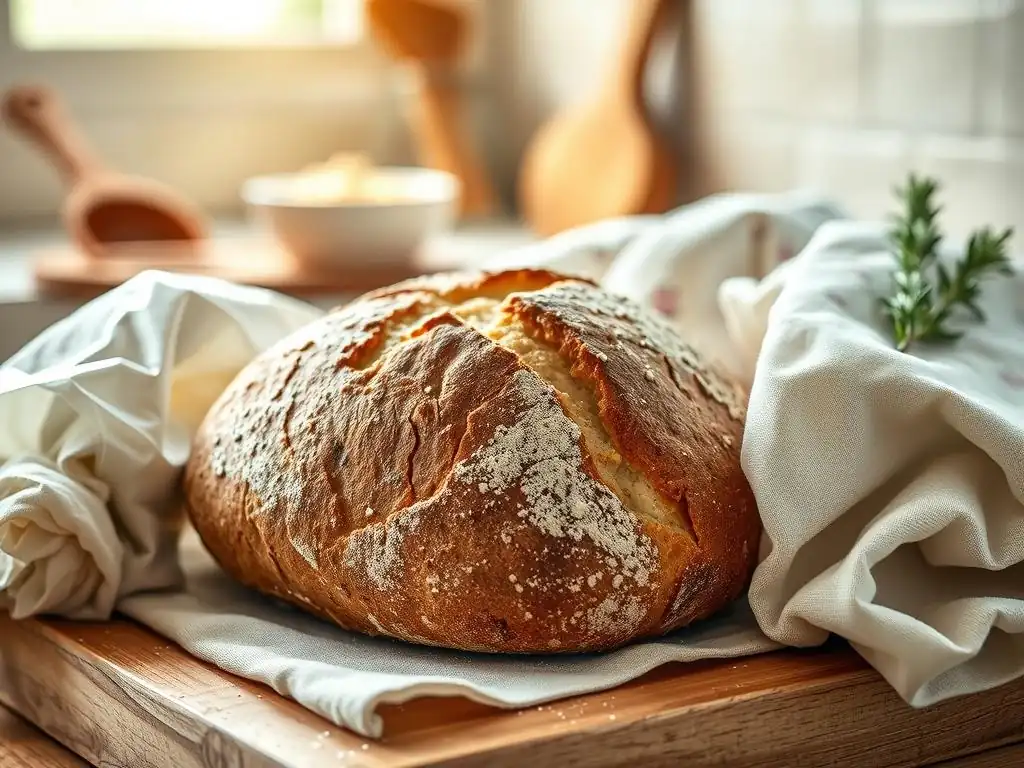
Proper storage is essential to keep your delicious, homemade easy sourdough bread fresh and maintain its wonderful crust and crumb. Unlike commercial bread with preservatives, sourdough will not stay soft and fresh on the counter for a week. The crust is best enjoyed on the day it's baked, but the interior will remain good for several days if stored correctly.
For short-term storage (1-2 days), simply storing the cooled loaf cut-side down on a cutting board can help. Alternatively, a paper bag works well, allowing the crust to stay relatively crisp. For longer storage (up to 4-5 days), a bread box is an excellent option, providing a balance of air circulation and moisture retention.
Avoid airtight plastic bags or containers on the counter, as they can soften the crust and encourage mold growth. For keeping your easy sourdough loaf fresh for weeks or months, slicing it and freezing the slices in an airtight bag or container is the best method. You can then toast slices directly from frozen.
Conclusion: Enjoying the Simplicity and Satisfaction of Homemade Sourdough
You've done it! You've navigated the steps, nurtured your easy sourdough starter recipe beginners could follow, and baked your very first (or maybe second or third!) easy sourdough loaf. The process might have seemed daunting at first, but by breaking it down into manageable steps and utilizing time-saving techniques like refrigerator proofing, it becomes a truly achievable and enjoyable activity, even for busy people.
The aroma filling your kitchen, the satisfying crunch of the crust, and the tangy, chewy interior are your rewards. Each loaf you bake will teach you something new about your starter, your kitchen's environment, and the subtle art of fermentation. Don't worry if your first loaf isn't perfect; sourdough baking is a journey of continuous learning and delicious discovery.
Embrace the Journey: Sourdough Baking is a Learning Experience
Baking sourdough is as much about the process as it is about the final loaf. Each time you feed your simple sourdough starter, perform stretch and folds, or shape your dough, you're building skill and intuition. Pay attention to how your starter behaves, how the dough feels, and how temperature affects the timing. These observations will help you adjust and improve with each bake.
Remember that every baker's environment, flour, and starter are unique. What works perfectly for one person might need slight adjustments for another. Use this easy sourdough guide as a foundation, but feel free to experiment and adapt as you gain confidence. The BakeWithEase community is here to support you on your sourdough adventure. Celebrate your successes, learn from any loaves that don't turn out exactly as planned, and most importantly, enjoy the process and the incredible taste of bread baked with your own hands.
Frequently Asked Questions
What exactly is a sourdough starter, and why is it important?
A sourdough starter is a fermented dough containing wild yeasts and bacteria, used instead of commercial yeast. It's important because it provides the unique flavor and texture characteristic of sourdough bread.
How is the "Easy Sourdough Starter Recipe for Beginners" at BakeWithEase different from other recipes?
Our recipe focuses on simplicity and convenience, using readily available ingredients and a straightforward feeding schedule. It’s designed to be less intimidating than traditional methods, perfect for busy individuals.
What kind of flour works best for creating a sourdough starter, according to BakeWithEase?
We recommend using unbleached all-purpose flour or whole wheat flour for your sourdough starter. These flours contain the necessary nutrients for the yeast and bacteria to thrive.
How long does it typically take to create a viable sourdough starter with the BakeWithEase method?
It generally takes 7-10 days to establish a viable sourdough starter using our easy recipe. The key is consistent feeding and monitoring for signs of activity and rise.
What are some signs that my sourdough starter is ready to be used for baking bread?
A ready starter will have doubled in size after feeding, be bubbly, and have a slightly tangy, sour aroma. It should also pass the "float test," where a small spoonful floats in water.
Final Reflection: The Unexpected Joys of Simple Sourdough
The accessibility of sourdough baking is transforming kitchens across the globe, proving that crafting delicious, artisanal bread doesn't require hours of dedicated time or advanced skills. This isn't just a culinary trend; it's a testament to the enduring power of simple pleasures and the rewarding connection between effort and delicious results. The ease with which even the busiest individuals can cultivate a thriving sourdough starter and bake their own bread is truly remarkable.
The journey of sourdough, from the initial bubbling of the starter to the satisfying crust of the finished loaf, is a microcosm of life itself – a process of nurturing, patience, and ultimately, immense satisfaction. It's a journey that connects us to a long tradition of bread making, reminding us of the simple, fundamental act of transforming flour and water into something nourishing and deeply fulfilling. Bread is the staff of life,
a simple phrase that holds profound truth, especially when considering the effort and reward inherent in making your own.
Now, I invite you to consider your own busy life. Can you carve out even a small amount of time to nurture a sourdough starter? The rewards – the taste, the aroma, the sense of accomplishment – far outweigh the minimal effort required. Don't be intimidated by the perceived complexity; embrace the simplicity and discover the unexpected joys of this ancient craft. Start small, be patient, and enjoy the journey. Your taste buds (and your soul) will thank you.
Unleash Your Inner Baker: Start Your Sourdough Journey Today!
Thanks for taking the time to explore the world of sourdough with us! We hope you gained valuable insights into making delicious bread without the fuss. Now it's time to put your newfound knowledge into practice.
- Bake your first loaf! Grab those ingredients and follow the recipe. We're confident you'll be amazed at the results. This is your chance to experience the joy of freshly baked sourdough.
- Share your sourdough success (or even your sourdough struggles!) with us on social media. Use #BakeWithEaseSourdough so we can see your creations.
- Consider experimenting with different flours or add-ins to personalize your loaves. What unique flavors will you create?
Ready to transform your kitchen into a sourdough haven? What's the first ingredient you're going to reach for?