
Basic Sourdough: Getting a Good Rise Explained Simply

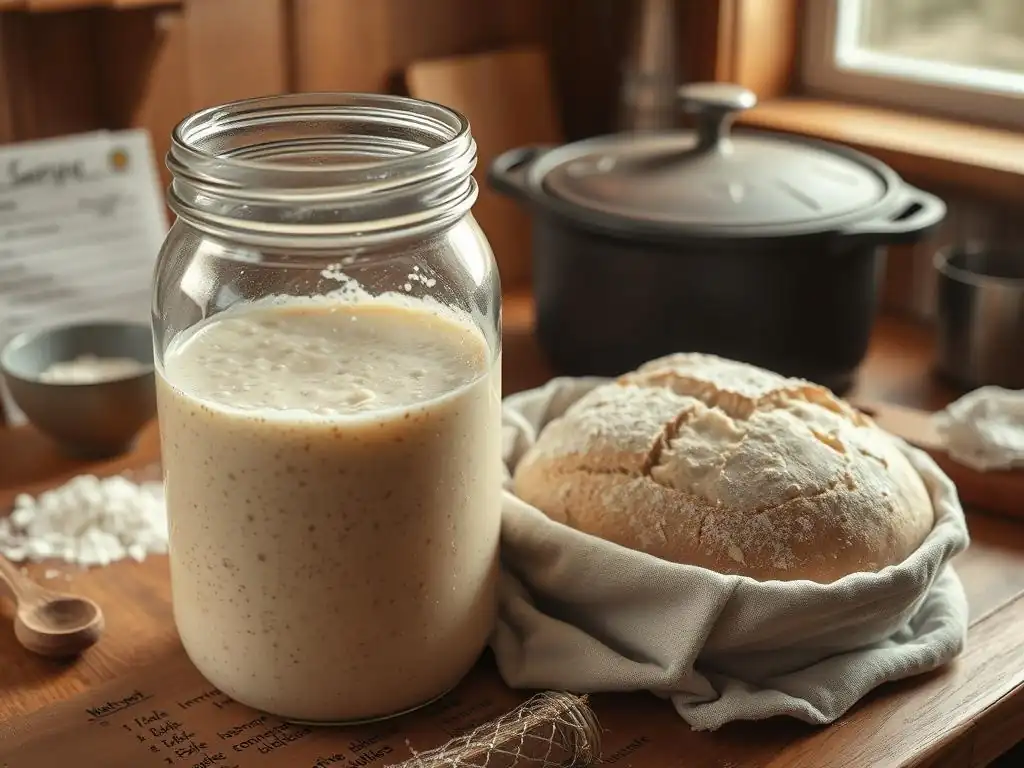
Welcome to BakeWithEase, your haven for all things baking! Feeling a little lost in the world of dough? You're not alone. Many bakers, especially beginners, face hurdles with their sourdough starters. This article, "Basic Sourdough: Getting a Good Rise Explained Simply", dives into sourdough starter troubleshooting for beginners, demystifying the process and offering practical solutions. Ready to unlock the secrets to a perfectly risen loaf? Let's get baking!
What is a Sourdough Starter and Why is it Important?
A sourdough starter is essentially a living culture of wild yeasts and beneficial bacteria, primarily Lactobacillus species, cultivated by mixing flour and water and allowing them to ferment over time. This dynamic ecosystem captures microorganisms from the environment and the flour itself, creating a natural leavening agent.
Unlike commercial yeast, which provides a rapid and predictable rise, sourdough starter works more slowly, producing carbon dioxide gas as the microbes consume sugars in the flour. This process not only makes the dough rise but also contributes unique flavors and textures to the finished bread through the production of organic acids like lactic and acetic acid.
The vitality of your sourdough starter is paramount to achieving a good rise in your bread. A healthy, active starter is teeming with vigorous microorganisms ready to consume sugars and produce gas. If your starter is weak or inactive, it won't produce enough gas to lift the dough, resulting in a dense, flat loaf. Therefore, understanding how to maintain and troubleshoot your starter is the absolute first step in sourdough starter troubleshooting for beginners and mastering the art of sourdough baking.
Active vs. Inactive Starter: Recognizing the Signs
Recognizing the difference between an active and an inactive sourdough starter is crucial for successful baking. An active starter, typically fed within the last 4-12 hours depending on temperature, will show significant signs of life. It will often double or even triple in volume after feeding, exhibiting numerous bubbles throughout the mixture and on the surface. It will also have a pleasant, tangy aroma, sometimes slightly yeasty or alcoholic. A simple float test can also indicate activity: drop a small spoonful into a glass of water; if it floats, it's generally ready to use for baking.
Conversely, an inactive or sluggish starter shows minimal to no rise after feeding. It might have only a few small bubbles, or none at all. The texture might be dense or gluey, and the aroma could be weak or even unpleasant, perhaps overly vinegary or like acetone. An inactive starter will likely sink immediately if tested in water. Identifying these signs early is key to effective sourdough starter troubleshooting for beginners, allowing you to take corrective steps before attempting to bake with it.
The Role of Fermentation in Sourdough Bread
Fermentation is the heart of sourdough baking, a complex biological process driven by the wild yeasts and bacteria in your starter. During fermentation, these microbes break down complex carbohydrates in the flour into simpler sugars. The yeasts then consume these sugars, producing ethanol (alcohol) and, critically for our purposes, carbon dioxide gas.
This gas gets trapped within the gluten network of the dough, causing it to expand and rise – this is the leavening effect. Simultaneously, lactic acid bacteria produce organic acids, which lower the pH of the dough. This acidic environment is essential; it inhibits the growth of undesirable microbes, helps break down phytic acid (improving nutrient availability), and contributes significantly to the characteristic sour flavor and aroma of sourdough.
Beyond simply making the bread rise, fermentation also plays a vital role in developing the dough's structure and flavor profile. The acids produced by bacteria help strengthen the gluten network, allowing it to trap more gas and achieve a better oven spring. The longer and slower fermentation processes often used in sourdough baking allow enzymes to break down proteins and starches, improving digestibility and creating more complex flavors. Understanding this interplay between yeast activity, bacterial acid production, and gluten development is fundamental to successful sourdough baking and a core part of effective sourdough starter troubleshooting for beginners.
- What is a Sourdough Starter and Why is it Important?
- Active vs. Inactive Starter: Recognizing the Signs
- The Role of Fermentation in Sourdough Bread
- How long does it usually take for a sourdough starter to become active enough for baking?
- What are some signs that my sourdough starter is not rising properly?
- What kind of flour is best for feeding my sourdough starter, especially when first starting?
- How often should I feed my sourdough starter, and what is the best ratio of starter, flour, and water?
- My sourdough starter smells strongly of acetone (like nail polish remover). Is this normal, and what should I do?
Common Sourdough Starter Problems for Beginners and Solutions
My Sourdough Starter Isn't Rising: Possible Causes
One of the most common frustrations in sourdough starter troubleshooting for beginners is a starter that refuses to rise. Several factors can contribute to this lack of activity.
The most frequent culprits include an inconsistent or insufficient feeding schedule, which starves the microbial population; incorrect temperature, as yeast and bacteria thrive within specific ranges; using tap water containing chlorine, which can harm the delicate microbial ecosystem; or even the type and quality of flour used, as some flours provide more readily available food for the microbes than others. Age is also a factor; very young starters (under 2-3 weeks) may not yet have established a robust enough microbial community to show significant activity.
Another reason for a lack of rise could be related to the starter's hydration level or the ratio of starter, flour, and water used during feeding. A very stiff starter (low hydration) might not show dramatic bubbling, though it can still be active.
Conversely, feeding with too little flour relative to the amount of starter can dilute the microbial population and exhaust their food source too quickly, leading to a short burst of activity followed by collapse rather than a sustained rise. Identifying which of these factors is affecting your starter is the first step in bringing it back to life.
Troubleshooting a Sluggish Sourdough Starter
Troubleshooting a sluggish sourdough starter often involves systematically addressing the most common issues. If your starter is not rising well, even after feeding, consider its environment and feeding routine.
Inconsistent Feeding Schedule: Adjusting Your Routine
An inconsistent feeding schedule is a primary reason for a sluggish starter. Wild yeasts and bacteria need regular meals to stay active and reproduce. If you're only feeding erratically, or leaving too much time between feedings, the microbes can become dormant or the less desirable ones might take over. For a starter kept at room temperature (around 70-75°F or 21-24°C), daily feeding, or even twice daily if it's very active and warm, is often necessary, especially in the first few weeks or when reviving a slow starter.
To adjust, commit to a consistent feeding time each day. Discard a portion (leaving just a small amount, say 50-100 grams), and feed with equal parts flour and water by weight (e.g., 1:1:1 ratio of starter:flour:water). Observe its activity over the next 24 hours. If you see minimal change, try feeding a larger ratio of new flour and water to starter (e.g., 1:2:2 or even 1:5:5) for a few days to provide a more abundant food source for the existing microbes to multiply.
Temperature Issues: Finding the Ideal Environment
Temperature significantly impacts microbial activity. Yeast and bacteria in sourdough starters thrive in warm environments, typically between 70°F and 80°F (21°C to 27°C). If your kitchen is too cold (below 65°F or 18°C), the microbes will become sluggish, leading to slow or no rise. Conversely, temperatures much above 85°F (30°C) can stress the culture, potentially favoring less desirable bacteria or even killing off the yeast.
To find the ideal environment, experiment with different locations in your home. An oven with the light on (but the oven off) can often provide a stable, warm spot. Placing the starter on top of the refrigerator or near a warm appliance might also work. Using a small proofing box or even a cooler with a warm water bottle can help maintain a consistent temperature. Tracking the temperature of your starter's environment for a few days while maintaining a consistent feeding schedule will help you determine if temperature is the limiting factor in your sourdough starter troubleshooting for beginners.
Flour Quality: Choosing the Right Type for Your Starter
The type and quality of flour you use to feed your starter directly impact its health and activity. All-purpose flour is common and works well for many, but starters often thrive on flours with higher nutrient content, particularly whole grain flours like rye or whole wheat. These flours contain more natural enzymes and sugars that the microbes can readily consume, often leading to more vigorous activity.
If your starter is sluggish, try incorporating some rye or whole wheat flour into its feeding routine. You don't need to switch entirely; you can use a mix, such as 50% all-purpose and 50% whole wheat. Ensure the flour is unbleached, as bleaching agents can harm the microbes. Experimenting with different brands or types of flour can sometimes make a significant difference in the starter's vitality and is a key part of effective sourdough starter troubleshooting for beginners focused on revitalizing a slow culture.
Water Quality: Filtering for Better Starter Activity
The water you use to feed your sourdough starter is just as important as the flour. Tap water in many areas contains chlorine or chloramine, disinfectants added to make it safe for drinking. Unfortunately, these chemicals can also inhibit or kill the beneficial microbes in your starter, leading to reduced activity or even a complete stall.
If you suspect your tap water might be affecting your starter, switch to filtered or bottled water. You can also leave tap water uncovered on the counter for 24 hours; chlorine will evaporate, though chloramine requires filtration. Using clean, chlorine-free water ensures that you're not inadvertently harming the very organisms you're trying to cultivate. This simple change can sometimes be the solution to a frustratingly inactive starter and is a fundamental tip in sourdough starter troubleshooting for beginners.
Identifying and Addressing Mold in Your Sourdough Starter
Mold is an unwelcome sign in your sourdough starter and, unfortunately, usually means you need to start over. Mold typically appears as fuzzy patches on the surface, which can be white, green, black, or even pink or orange. Unlike hooch (the liquid layer that can form on top), mold is not a sign of a healthy, albeit hungry, starter. It indicates that undesirable fungi have taken hold, often due to contamination, inconsistent feeding, or storing the starter in a way that allows mold spores to settle and grow.
If you see any signs of mold, discard the entire starter immediately. Do not try to salvage it by scooping off the moldy parts, as the mold's hyphae (root-like structures) can penetrate deep into the starter. Thoroughly clean the jar or container with hot, soapy water, rinse well, and dry completely before starting a new culture. Preventing mold involves keeping your starter container clean, feeding regularly to maintain a healthy microbial balance, and covering the starter loosely (allowing airflow but preventing airborne contaminants). While frustrating, encountering mold is a lesson learned in sourdough starter troubleshooting for beginners.
Dealing with Hooch: Is it a Problem?
Hooch is the liquid layer that sometimes separates and forms on top of your sourdough starter. It's usually clear, brownish, or greyish. Hooch is a sign that your starter is hungry; the yeast and bacteria have consumed most of the available sugars in the flour and are producing alcohol as a byproduct. While it might look unappealing, hooch itself is not harmful to your starter.
Dealing with hooch is straightforward. You have two main options: you can pour it off before feeding, which can make your starter more acidic over time, or you can stir it back in. Stirring it back in distributes the alcohol and nutrients throughout the starter and can help maintain its hydration level.
If you consistently see a thick layer of hooch, it's a strong indicator that your starter needs to be fed more often or with a higher ratio of flour and water. Addressing persistent hooch is a common part of sourdough starter troubleshooting for beginners and indicates it's time to adjust your feeding strategy.
Reviving a Weak Sourdough Starter: A Step-by-Step Guide

Reviving a weak or sluggish sourdough starter requires patience and a consistent approach. If your starter isn't showing much activity, don't despair – it's often possible to bring it back to life.
Step 1: Consistent Feeding and Observation
The first and most critical step in reviving a weak starter is establishing a consistent feeding schedule. For a starter kept at room temperature (around 70-75°F or 21-24°C), this means feeding it every 24 hours, or even every 12 hours if you can manage it, for several days. Discard a significant portion, leaving only a small amount (e.g., 25-50 grams), and feed it with fresh flour and water.
Observe its behavior closely after each feeding: note if you see any bubbles, any slight rise, or changes in aroma. Keep a small journal or notes if helpful. This consistent feeding provides the necessary food source for the dormant or sluggish microbes to multiply and regain strength.
Step 2: Adjusting the Feeding Ratio (Flour to Water)
If consistent feeding at a standard 1:1:1 ratio (starter:flour:water by weight) doesn't yield significant improvement after a few days, try adjusting the feeding ratio. Feeding with a higher ratio of fresh flour and water to starter provides a more abundant food source, which can help boost microbial activity. Try feeding with a 1:2:2 ratio (e.g., 50g starter, 100g flour, 100g water) or even 1:3:3 for several consecutive feedings.
Some bakers even go as high as 1:5:5 when aggressively trying to revive a very weak starter. This increased food supply gives the surviving microbes plenty to eat, encouraging them to reproduce more vigorously.
Step 3: Optimizing Temperature for Fermentation
As discussed earlier, temperature is a major factor in microbial activity. If your starter is sluggish, ensure it's being kept in an optimal temperature range, ideally between 75°F and 80°F (24°C to 27°C) during the revival process. This warmer temperature significantly speeds up fermentation and microbial growth. Use the techniques mentioned previously, such as placing it in a warm oven with the light on, on top of a refrigerator, or in a proofing box.
Keeping the starter consistently warm during this revival phase is crucial. Fluctuating temperatures can stress the culture. Monitor the temperature if possible to ensure it stays within the desired range. Providing this ideal environment alongside consistent, generous feeding gives your starter the best chance to regain its vigor.
Step 4: Patience and Persistence: Allow Time for Recovery
Reviving a weak sourdough starter requires patience. It likely won't become super active overnight. It might take several days, or even a week or two, of consistent feeding, optimal temperature, and ratio adjustments before you see significant signs of life, such as doubling in volume within 4-8 hours after feeding. Don't get discouraged if progress is slow.
Continue the consistent feeding routine and maintain the optimal temperature. You might see small improvements each day – a few more bubbles, a slight rise, a tangier smell. These are all signs that your efforts are working. Persistence is key in sourdough starter troubleshooting for beginners; many starters that seem dead can be brought back to robust health with the right care and enough time.
Tips for Maintaining a Healthy and Active Sourdough Starter
Once you've successfully revived your starter or established a new one, maintaining its health and activity is essential for consistent baking results.
Consistent Feeding Schedule for Optimal Starter Activity
Consistency is paramount. For a starter kept at room temperature, feeding it at the same time each day helps maintain a stable and active microbial population. If you bake frequently (several times a week), keeping a larger amount of starter and feeding it daily might be practical. If you bake less often, you can store your starter in the refrigerator after it's peaked from a feeding. Refrigerated starters only need to be fed about once a week, but they will need to be brought back to room temperature and fed a few times to become vigorous again before baking.
A standard feeding ratio is 1:1:1 (starter:flour:water by weight). For example, discarding down to 50g of starter and feeding it with 50g of flour and 50g of water. However, you can adjust this ratio depending on how quickly you want it to peak or how often you feed. A 1:2:2 or 1:3:3 ratio will keep the starter active for longer at room temperature before needing another feed.
Monitoring Temperature and Humidity
While not always easy to control, monitoring your starter's environmental temperature and humidity can help you anticipate its behavior. As mentioned, ideal temperatures are typically between 70-80°F (21-27°C). If your kitchen is warmer, your starter will ferment faster and need more frequent feeding. If it's cooler, fermentation will slow down.
High humidity can sometimes make your starter seem more liquidy, while very dry conditions can cause a crust to form on the surface. While you can't control the weather, being aware of these factors helps you understand why your starter might be behaving differently at various times of the year. Adjusting feeding frequency based on temperature is a crucial skill in sourdough starter troubleshooting for beginners focused on maintenance.
Recognizing Signs of Over or Under-Fermentation
Learning to recognize when your starter is perfectly ripe (at its peak activity), under-fermented (not ready), or over-fermented (past its peak) is vital for successful baking. An under-fermented starter will not have risen significantly and will have minimal bubbles. An over-fermented starter will have risen and then fallen significantly, often leaving streaks on the side of the jar, and may have a strong, acidic or alcoholic smell and a layer of hooch.
A perfectly ripe starter, ready for baking, will have typically doubled or tripled in volume (depending on hydration and temperature) and will be full of bubbles. It should pass the float test. Using your starter at its peak ensures maximum leavening power for your bread. Learning these visual and aromatic cues is a key part of moving beyond basic sourdough starter troubleshooting for beginners to confident starter management.
Long-Term Storage Solutions for Your Sourdough Starter
For bakers who don't bake daily or weekly, storing your starter in the refrigerator is a practical solution. After feeding your starter and letting it become active for a few hours at room temperature, place it in the refrigerator. The cold temperature significantly slows down microbial activity, meaning it only needs to be fed about once a week or even every two weeks.
To use a refrigerated starter for baking, take it out, let it come to room temperature for a few hours, discard most of it, and feed it as usual. Feed it one or two more times at room temperature until it is reliably doubling or tripling within 4-8 hours after feeding and passes the float test. This process revives its activity for baking. For even longer storage (months), a starter can be dried or frozen, though revival takes longer with these methods.
Ensuring a Good Rise in Your Sourdough Bread: Beyond the Starter
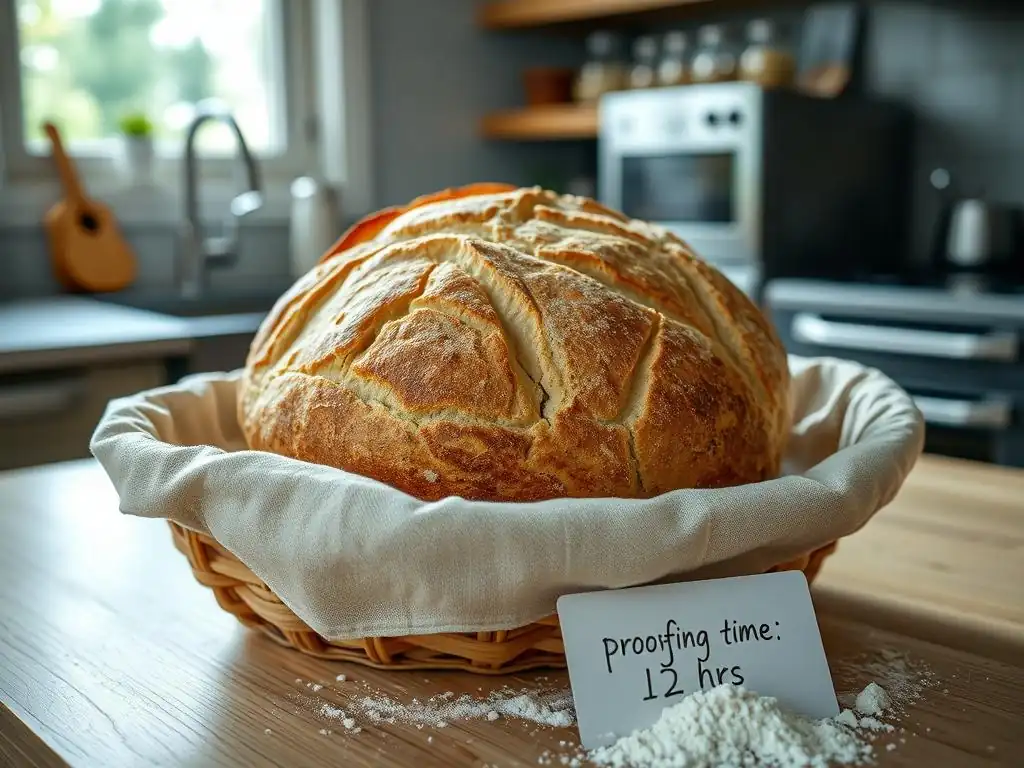
While a healthy, active starter is fundamental, achieving a good rise in your final sourdough loaf involves several other crucial steps in the bread-making process itself. Sourdough starter troubleshooting for beginners doesn't end with the starter; it extends to dough handling.
Autolyse: Hydrating the Flour for Better Gluten Development
Autolyse is a simple technique that significantly improves dough structure and extensibility, leading to a better rise. It involves mixing just the flour and water from your recipe and letting the mixture rest for 20 minutes to several hours before adding the starter and salt. During this rest period, the flour fully hydrates, and enzymes naturally present in the flour begin to break down proteins, making it easier for gluten to form.
This initial hydration allows the gluten network to start developing without the interference of salt or the starter's acidity. The result is a dough that is less sticky, easier to handle, and more elastic, allowing it to trap gases produced by the starter more effectively during fermentation and achieve a better oven spring.
Proper Kneading Techniques for Sourdough
Developing a strong gluten network is essential for capturing the carbon dioxide gas produced by the starter. Sourdough dough requires proper kneading or folding techniques to build this structure. Whether you use traditional kneading, stretch and folds, or coil folds, the goal is to align the protein strands in the flour to form gluten.
For beginners, techniques like stretch and folds or coil folds performed during the bulk fermentation stage are excellent alternatives to traditional kneading. These methods are less demanding and effectively build strength in the dough over time. Typically, you'll perform a series of these folds (e.g., 3-5 sets) over the first couple of hours of bulk fermentation, allowing the dough to rest for 20-45 minutes between sets. A well-developed gluten structure is key to preventing your dough from collapsing and ensuring a good rise.
Bulk Fermentation: Allowing the Dough to Rise Properly
Bulk fermentation (the first rise) is where the majority of gas production and flavor development occurs. This stage begins after you've mixed in your starter and salt and performed any initial kneading or folding, and it ends when you shape the dough. The duration of bulk fermentation is highly dependent on temperature and the activity of your starter.
During bulk fermentation, your dough should increase significantly in volume, typically by 50% to 100%, depending on the recipe and desired outcome. It should also become noticeably gassier and show signs of fermentation like bubbles on the surface and sides. Learning to read your dough – feeling its aeration, observing its growth – is crucial. Ending bulk fermentation too early means insufficient gas production; letting it go too long can lead to the gluten structure breaking down. This stage is where much of the 'magic' happens, and getting it right is paramount for a good rise.
Proofing Your Sourdough: The Final Rise
Proofing (the second rise) is the final fermentation period after the dough has been shaped and before it is baked. This stage allows the dough to lighten up and expand further, preparing it for the intense heat of the oven. Proofing can be done at room temperature or in the refrigerator (cold proofing).
Room temperature proofing is faster (often 1-4 hours) but requires careful monitoring to avoid over-proofing. Cold proofing in the refrigerator (typically 8-24 hours) is slower, develops more complex flavors, and makes the dough easier to handle and score. Properly proofed dough will have increased noticeably in size and feel airy but still have some structure. Over-proofed dough will feel very fragile and may collapse when scored; under-proofed dough will not rise much and might burst unexpectedly in the oven.
Scoring the Dough: Allowing for Expansion in the Oven
Scoring, or cutting the surface of the dough just before baking, is not just for aesthetics; it's a functional technique that directly impacts the bread's rise in the oven (oven spring). As the dough is exposed to the oven's heat, the yeast activity gets a final burst, and trapped gases expand rapidly. Scoring provides weak points on the surface, directing this expansion.
Without scoring, the crust would harden quickly and the expanding gases would burst through the weakest point, often unevenly and without control. A well-executed score allows the dough to expand upwards and outwards in a controlled manner, resulting in a higher, more beautifully shaped loaf. Different scoring patterns can influence the final shape and bloom of the loaf.
Achieving a High Rise Sourdough: Advanced Techniques

Once you've mastered the basics and feel comfortable with sourdough starter troubleshooting for beginners, you might aim for that impressive, high-rise loaf. Several techniques can help maximize oven spring.
Using a Dutch Oven for Maximum Oven Spring
Baking sourdough in a preheated Dutch oven is one of the most effective ways to achieve a high rise and a beautiful crust. The sealed environment of the Dutch oven traps the steam released from the dough as it bakes. This trapped steam keeps the surface of the dough moist for the initial phase of baking, allowing it to expand fully before the crust sets.
After about 20-25 minutes with the lid on (at temperatures often around 450-500°F or 230-260°C), the lid is removed, allowing the steam to escape and the crust to brown and crisp up. This initial steamy environment mimics professional deck ovens that inject steam, resulting in significantly better oven spring compared to baking on an open baking sheet.
Hydration Levels: Mastering High-Hydration Dough
Hydration level refers to the ratio of water to flour in your dough, expressed as a percentage (e.g., 70% hydration means 70g water for every 100g flour). Higher hydration doughs (75%+) can potentially achieve a more open crumb structure and a higher rise because there is more water to convert to steam in the oven, aiding expansion.
However, high-hydration doughs are much stickier and more challenging to handle and shape, especially for beginners. They require more developed gluten and specific handling techniques. While they offer the potential for impressive results, it's best to start with lower hydration doughs (65-70%) and gradually increase the hydration as you gain experience and confidence in your dough handling skills.
Experimenting with Different Flour Combinations
The type of flour used significantly impacts dough behavior and the final rise. Bread flour, with its higher protein content (typically 12-14%), forms a stronger gluten network capable of trapping more gas than all-purpose flour (10-12% protein). Incorporating a percentage of whole grain flours (like whole wheat or rye) adds nutrients that boost starter activity and flavor but can sometimes impede gluten development if used in very high proportions due to the presence of bran and germ.
Experimenting with blends of different flours can help you find the balance between structure, flavor, and rise that you prefer. For example, a mix of bread flour and a small percentage of whole wheat can offer a good balance of structure and enhanced flavor. Understanding how different flours behave is an advanced step after you've become comfortable with basic sourdough starter troubleshooting for beginners and standard recipes.
Conclusion: Sourdough Starter Troubleshooting for Beginners – Mastering the Rise
Mastering sourdough baking, particularly achieving that coveted rise, is a journey that begins with understanding and caring for your sourdough starter. From recognizing signs of activity to implementing effective sourdough starter troubleshooting for beginners, a healthy starter is the foundation. We've explored common issues like sluggishness, mold, and hooch, and provided actionable steps to revive and maintain your culture through consistent feeding, temperature control, and attention to flour and water quality.
Beyond the starter, the techniques employed during the bread-making process itself – autolyse, proper kneading/folding, mindful bulk fermentation and proofing, and strategic scoring – all play critical roles in developing the dough's structure and ensuring maximum oven spring. While challenges like a flat loaf or an inactive starter are common bumps in the road, approaching them systematically with the troubleshooting tips discussed here will build your confidence. Remember, patience, observation, and practice are your greatest tools on the path to baking beautiful, well-risen sourdough bread.
Frequently Asked Questions
How long does it usually take for a sourdough starter to become active enough for baking?
It typically takes between 5-14 days for a sourdough starter to become consistently active. Look for a consistent doubling in size within 4-8 hours after feeding.
What are some signs that my sourdough starter is not rising properly?
If your starter isn't rising, it could be due to insufficient warmth, the wrong flour, or lack of established yeast and bacteria. Check your feeding ratios and environment.
What kind of flour is best for feeding my sourdough starter, especially when first starting?
For beginners, a whole wheat or unbleached all-purpose flour blend often yields the best results. These flours provide the necessary nutrients for the starter to thrive.
How often should I feed my sourdough starter, and what is the best ratio of starter, flour, and water?
Feed your starter once or twice a day. A common ratio is 1:1:1 (one part starter, one part flour, one part water) though this can be adjusted based on environmental factors.
My sourdough starter smells strongly of acetone (like nail polish remover). Is this normal, and what should I do?
An acetone smell indicates that your starter is hungry and needs to be fed more frequently. Increase feeding to twice a day until the smell disappears.
Final Reflection: The Humble Rise of Sourdough, and Yours
Mastering the sourdough starter isn't just about baking bread; it's about understanding a living, breathing ecosystem. The seemingly simple act of feeding flour and water to a bubbly concoction reveals a complex dance of microorganisms, a testament to nature's power and our ability to harness it. This journey, fraught with potential pitfalls, ultimately rewards patience and observation with the most delicious, satisfying loaf.
The enduring appeal of sourdough lies not only in its unique flavor but also in the connection it fosters between baker and nature. It's a tangible link to centuries of baking tradition, a reminder of simpler times when food production was more intimately tied to the natural world. This process, with its unpredictable nature, teaches us humility and the importance of adapting to unforeseen circumstances. The best bread is made with love, patience, and a healthy disregard for the clock.
– Unknown. This quote perfectly encapsulates the sourdough experience, highlighting the emotional investment and the acceptance of the process's inherent variability.
Now, it's your turn. Don't be discouraged by initial setbacks; every failed attempt is a lesson learned, a step closer to that perfect rise. Embrace the unpredictability, celebrate the small victories, and remember the profound satisfaction of creating something delicious and meaningful from the simplest of ingredients. The journey of sourdough is a metaphor for life itself – a process of growth, adaptation, and ultimately, rewarding achievement. So, grab your flour and water, and let the rise begin!
Unleash Your Inner Baker: Master the Sourdough Rise!
Thanks for taking the time to explore the secrets of a perfect sourdough rise! We hope you now feel more confident in tackling this rewarding baking journey. Ready to put your new knowledge into practice?
- Bake your own sourdough loaf: Don't just read about it – do it! Try the recipe you learned today and experience the satisfaction of a perfectly risen loaf. Even a small success will boost your confidence!
- Share your baking adventures: Snap a picture of your sourdough creation and post it on social media – tag us if you like! Let's inspire each other's baking journeys!
- Join our baking community: Leave a comment below and share your tips, questions, or even your biggest sourdough fail! We're all here to learn and grow together.
What unexpected ingredient will you experiment with in your next sourdough bake?