
Simple Basic Sourdough: Achieving That Perfect Tang

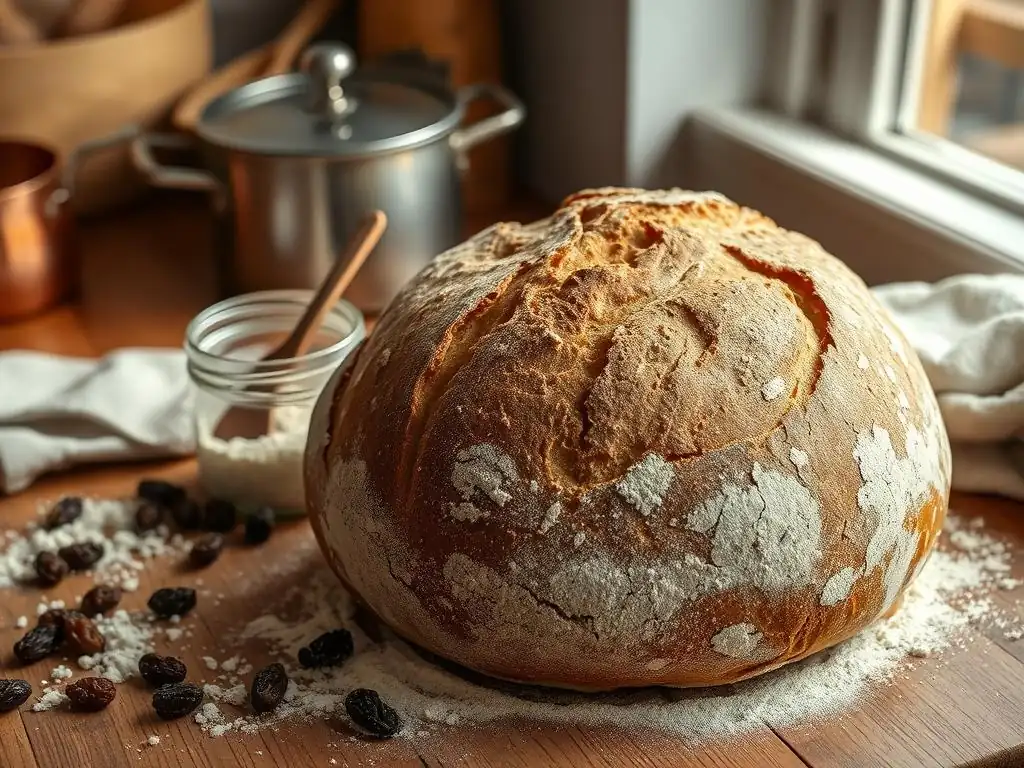
Welcome to BakeWithEase, your companion in the delightful world of baking! Are you ready to unlock the secrets to a truly exceptional bake? This week, we're diving deep into the art of sourdough, and you'll discover our perfect sourdough starter recipe tips to achieve that coveted tangy flavor. But that's just the beginning... Curious to learn how to nurture your starter and transform it into a masterpiece? Let's get baking!
- Sourdough Bread Baking: Achieving a Tangy Flavor
- Introduction to Sourdough: Flavor and Benefits
- Building and Maintaining a Sourdough Starter
- Basic Sourdough Bread Recipe
- Maximizing Tang: Tips and Techniques
- Troubleshooting Sourdough Bread
- Sourdough Bread Variations
- Storing Sourdough Bread
- Serving and Enjoying Sourdough
- Frequently Asked Questions
- Final Reflection: The Enduring Allure of the Perfect Sourdough Tang
- Unleash Your Inner Baker: Craft Your Perfect Sourdough Loaf!
Sourdough Bread Baking: Achieving a Tangy Flavor
Introduction to Sourdough: Flavor and Benefits
Sourdough baking is a rewarding journey into the world of natural leavening. Unlike commercial yeast, which provides a rapid rise, a sourdough starter relies on a symbiotic culture of wild yeasts and lactic acid bacteria. This microbial community is responsible for the characteristic tangy flavor, complex aroma, and unique texture that sets sourdough bread apart. The process takes patience and attention, but the result – a loaf with a crisp crust and chewy, open crumb – is truly worth the effort. Embracing the art of sourdough means connecting with ancient baking traditions and developing a deeper understanding of fermentation.
The distinctive tang of sourdough comes primarily from the lactic acid and acetic acid produced by the bacteria in the starter. Lactic acid provides a milder, yogurt-like tang, while acetic acid, often associated with vinegar, delivers a sharper, more pungent flavor. The balance between these acids, influenced by factors like feeding ratios, temperature, and flour type, determines the final flavor profile of your bread. Mastering this balance is key to achieving your desired level of tanginess, from a subtle hint to a pronounced sourness.
Benefits of Baking Sourdough at Home
Baking sourdough at home offers numerous advantages beyond just the delicious taste. Firstly, you have complete control over the ingredients, ensuring you're using high-quality flour and avoiding additives often found in commercial breads. This can be particularly beneficial for those with dietary sensitivities or preferences. You can experiment with different flours, grains, and hydration levels to tailor the bread exactly to your liking, something store-bought options rarely allow.
Furthermore, the fermentation process in sourdough can make the bread easier to digest for some people. The long fermentation breaks down complex carbohydrates and phytic acid, which can inhibit mineral absorption. While not a solution for celiac disease, many individuals find they tolerate sourdough better than conventional yeast breads. Plus, there's an immense sense of satisfaction that comes from nurturing a starter and transforming simple ingredients into a beautiful, nourishing loaf right in your own kitchen. It's a fulfilling craft that connects you to your food in a unique way.
The Sourdough Starter: Flavor and Leavening
The heart and soul of any sourdough loaf is the starter. It's a living ecosystem, typically a mixture of flour and water, that houses naturally occurring wild yeasts and lactic acid bacteria from the environment and the flour itself. These microorganisms work together: the yeasts produce carbon dioxide gas, which makes the dough rise, while the bacteria ferment sugars, producing acids that contribute to the flavor and help the dough develop structure. A healthy, active starter is crucial not only for leavening but also for developing that perfect tang.
The flavor profile of your sourdough starter is influenced by several factors. The type of flour used (rye, whole wheat, or bread flour each contribute different nutrients and microbial populations), the hydration level (the ratio of water to flour), the temperature at which it's stored, and the feeding schedule all play significant roles. A starter fed with warmer water and kept in a warmer environment tends to favor lactic acid production, resulting in a milder tang.
Conversely, a cooler environment and less frequent feeding can encourage acetic acid production, leading to a more pronounced sourness. Understanding these dynamics is part of achieving your perfect sourdough starter recipe tips.
Building and Maintaining a Sourdough Starter
Creating and maintaining a sourdough starter is a journey of patience and observation. It begins with mixing flour and water and then consistently feeding it over several days or weeks to cultivate a strong, active culture. Think of it as a pet that needs regular meals! A healthy starter will eventually become bubbly, double in size after feeding, and smell pleasantly acidic, sometimes described as yogurt-like, vinegary, or even slightly yeasty.
Maintaining your starter involves regular feeding, which replenishes the food source (flour) and removes waste products. This process keeps the microbial population balanced and active. Consistency is key, especially in the early stages. Once established, a starter can be quite resilient and can even be stored in the refrigerator to slow down activity, requiring less frequent feeding. Learning the nuances of feeding based on your starter's behavior and your baking frequency is among the essential perfect sourdough starter recipe tips.
Creating a Starter: Step-by-Step Guide
Creating your own starter from scratch is a simple process, though it requires daily commitment for about 7-14 days. You'll need just two ingredients: flour (unbleached all-purpose or whole wheat works well) and non-chlorinated water (filtered or tap water left out for 24 hours).
Here’s a basic guide:
- Day 1: Mix 50g flour and 50g water in a clean jar. Stir until no dry bits remain. Cover loosely (a lid resting on top or a cloth secured with a band) and leave at room temperature (around 70-75°F or 21-24°C).
- Day 2-4: You might see some bubbles or a thin liquid layer (hooch) on top. Discard half of the starter and feed it with 50g fresh flour and 50g fresh water. Repeat daily. The smell might be unpleasant initially, like cheese or gym socks – this is normal!
- Day 5 onwards: You should start seeing more consistent activity, with bubbles throughout and the starter rising after feeding. The smell should become more pleasant, acidic, and perhaps yeasty. Continue discarding half and feeding daily until the starter consistently doubles in size within 6-8 hours after feeding. This indicates it's ready to bake with.
This initial phase is critical for establishing a robust microbial community. Don't be discouraged by slow activity in the first few days; it takes time for the wild yeasts and bacteria to multiply and become dominant. Patience is your greatest tool here. Observing the changes daily – the smell, the texture, the rise – helps you understand the health and activity of your starter.
Feeding and Maintaining a Healthy Starter
Once your starter is active and reliably doubling, you've established a healthy culture. Maintaining it involves regular feeding to keep it strong. The feeding ratio (starter:flour:water) and frequency depend on how you store it. For a starter kept at room temperature, daily feeding is typically recommended. A common ratio is 1:1:1, meaning you take 50g of starter, discard the rest, and feed it with 50g flour and 50g water. This provides ample food for the microbes to thrive and keeps the acidity balanced.
If you don't bake frequently, storing your starter in the refrigerator is a convenient option. Refrigeration significantly slows down microbial activity, meaning you only need to feed it about once a week. When you want to bake, take it out, feed it once or twice at room temperature until it's active and bubbly again.
For example, take 50g from the fridge, feed with 50g flour and 50g water, let it sit at room temperature for 12-24 hours until active, then use or return to the fridge after feeding. This strategy is a key part of perfect sourdough starter recipe tips for busy bakers. Remember to use a jar large enough to accommodate the starter doubling or tripling in size after feeding.
Troubleshooting Common Starter Problems
Even with the best care, your sourdough starter might occasionally show signs of distress. One common issue is a thin layer of liquid on top, known as "hooch." This is alcohol produced by the yeasts when they've run out of food.
It's a sign your starter is hungry. You can pour it off or stir it back in (stirring it in adds a bit of tanginess). After removing or stirring the hooch, discard most of the starter and feed it as usual, perhaps with a slightly higher ratio of flour (e.g., 1:2:2 starter:flour:water) or more frequently if it's at room temperature.
Another issue is mold. If you see any fuzzy, colored mold (white, green, black, or pink), it's best to discard the entire starter and start fresh. This indicates contamination that can be harmful. A healthy starter is acidic enough to resist most harmful bacteria and mold.
Other problems include a lack of activity or a weak rise after feeding. This could be due to cold temperatures, infrequent feeding, or using chlorinated water. Try moving the starter to a warmer spot, feeding it more often, or switching to filtered water. Consistent feeding and a warm environment are crucial perfect sourdough starter recipe tips for reviving a sluggish starter.
Basic Sourdough Bread Recipe
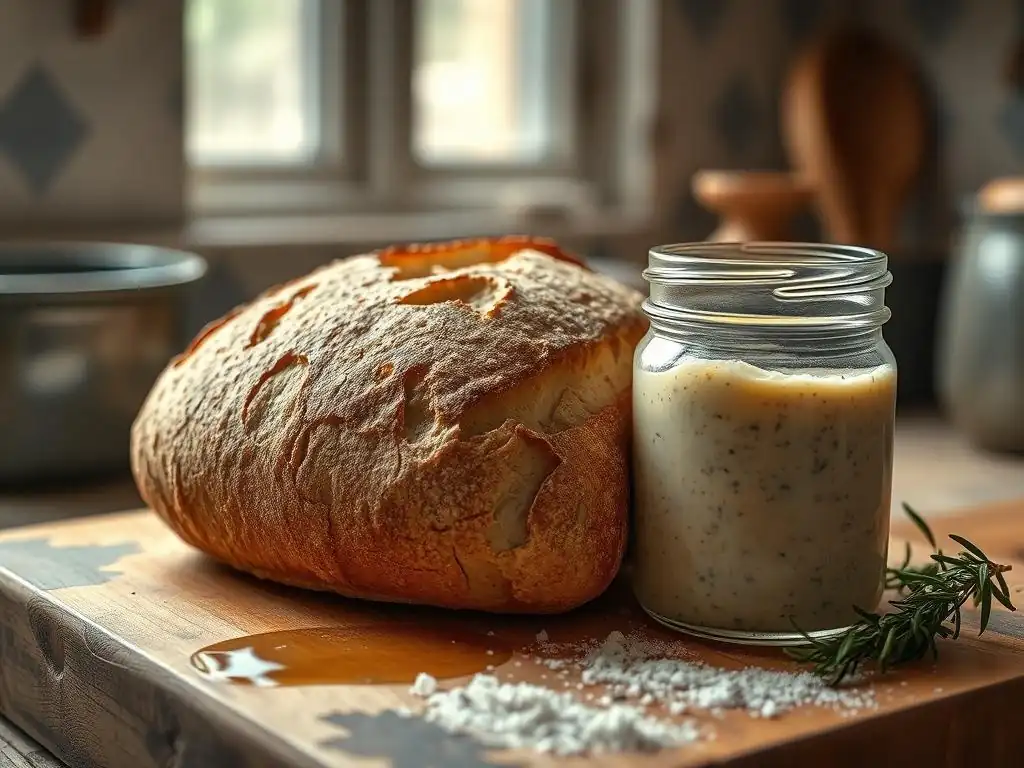
Once your starter is active and ready, you can embark on baking your first basic sourdough loaf. This recipe is designed to be straightforward, focusing on the fundamental steps. While variations exist, the core process involves mixing, fermentation, shaping, proofing, and baking. The beauty of sourdough lies in its simplicity – primarily flour, water, salt, and your starter.
This foundational recipe uses a relatively manageable hydration level, making the dough easier to handle for beginners. Mastering this basic technique provides a solid understanding before moving on to higher hydration doughs or more complex shaping methods. Remember that environmental factors like room temperature and humidity will affect fermentation times, so learning to read your dough is more important than strictly adhering to a clock.
Ingredients for a Sourdough Loaf
A standard basic sourdough loaf requires just four ingredients. The quality of these ingredients significantly impacts the final bread.
You will need:
- Active Sourdough Starter: Typically around 100-200 grams, depending on the recipe and desired fermentation time. It should be bubbly and have doubled in size within 4-8 hours after its last feeding.
- Flour: Strong bread flour (around 12-14% protein) is recommended for structure, but a blend of bread flour and all-purpose flour (around 10-11.5% protein) also works well. For this basic loaf, aim for 400-500 grams total flour.
- Water: Non-chlorinated water is essential, as chlorine can inhibit microbial activity in the starter. Lukewarm water (around 80-85°F or 27-29°C) is often used to encourage dough activity. You'll need approximately 300-350 grams, resulting in a hydration of 60-70%.
- Salt: Fine sea salt or kosher salt is preferred. Avoid iodized salt, which can negatively impact fermentation. About 8-10 grams (around 2% of the total flour weight) is standard for flavor and structure.
Using a kitchen scale to measure ingredients by weight is highly recommended for accuracy in baking, especially with sourdough where hydration ratios are critical. While volume measurements can work, grams provide consistency that is key to repeatable results and helps in troubleshooting.
Mixing and Kneading: Developing Gluten
The initial step after gathering your ingredients is mixing. Combine the active starter and water in a large bowl and stir to disperse the starter. Add the flour and mix with your hands or a spatula until no dry flour remains and a shaggy dough forms. This initial mix is often followed by an "autolyse" period, where the dough rests for 30-60 minutes before salt is added. This allows the flour to fully hydrate and gluten development to begin without the presence of salt, which can initially tighten the gluten structure.
After the autolyse (or immediately if skipping it), add the salt. Kneading or using stretch-and-fold techniques develops the gluten network, which traps the gases produced by the starter, giving the bread its structure and rise. For a basic dough, perform a series of stretch-and-folds over the first 2-3 hours of bulk fermentation. Every 30-45 minutes, wet your hands, grab one side of the dough, stretch it up gently, and fold it over the center. Rotate the bowl and repeat 3-4 times. This gentle handling helps build strength without tearing the delicate gluten strands.
Bulk Fermentation: Flavor Development
Bulk fermentation, also known as the first rise, is a crucial stage where the sourdough starter works its magic, leavening the dough and developing complex flavors. This phase begins immediately after mixing and continues until the dough has increased significantly in volume and feels airy. During this time, the yeasts produce carbon dioxide, and the lactic acid bacteria produce acids that contribute to the characteristic tang.
The duration of bulk fermentation is highly dependent on the ambient temperature and the activity of your starter. At a warm room temperature (around 75-80°F or 24-27°C), it might take 4-6 hours. In a cooler environment (around 68-72°F or 20-22°C), it could take 8-12 hours or even longer. The dough should look visibly larger (often 50-80% increase in volume), feel lighter, and show signs of fermentation like bubbles on the surface. Learning to judge the dough's readiness by feel and appearance rather than just the clock is essential for achieving a perfect sourdough loaf.
Time and Temperature Considerations
As mentioned, time and temperature are inextricably linked during bulk fermentation. A warmer environment accelerates fermentation, while a cooler environment slows it down. For example, a dough that takes 5 hours at 78°F (26°C) might take 10-12 hours at 68°F (20°C). Consistency in temperature helps predict fermentation times, but observing the dough is paramount.
If your kitchen is cold, you can use a proofing box, your oven with the light on (check the temperature first, as it can get too warm), or simply accept that fermentation will take longer. Conversely, if it's very warm, fermentation will proceed quickly, and you'll need to monitor the dough closely to prevent over-fermentation, which can lead to a slack dough and a less desirable crumb structure.
Aim for a temperature range that allows you to complete your stretch-and-folds comfortably within the first few hours and still have enough time to see the dough develop before it's ready for shaping.
Shaping the Dough
Once bulk fermentation is complete, the dough is ready for shaping. Gently turn the dough out onto a lightly floured surface. Be careful not to deflate it too much; you want to preserve the gases built during fermentation. The goal of shaping is to create tension on the surface of the dough, which helps it hold its structure during proofing and gives it a good oven spring.
There are various shaping techniques, but two common ones for a basic loaf are the boule (round) and the batard (oval). For a boule, gently fold the edges of the dough towards the center, then flip it over and use your hands to cup and gently pull the dough towards you, rotating it to create surface tension and a tight ball.
For a batard, fold the top down, the bottom up, and then roll the dough tightly from one end to the other, sealing the seam. Place the shaped dough seam-side up in a floured proofing basket (banneton) or a bowl lined with a floured cloth.
Proofing: Achieving Optimal Rise
Proofing, or the final rise, is the last stage before baking. The shaped dough is allowed to rest in a controlled environment to gain its final volume and structure. Proper proofing is critical; under-proofed dough results in a dense crumb, while over-proofed dough can collapse and bake flat. The dough should feel light and airy but still have some resistance when gently poked.
The duration of proofing depends heavily on the temperature and how long the bulk fermentation lasted. A dough that was slightly under-proofed during bulk might need a longer final proof, and vice versa. The poke test is a reliable indicator: gently poke the dough with a floured finger. If the indentation springs back immediately, it needs more time. If it springs back slowly but not completely, it's ready. If it stays indented, it's likely over-proofed.
Refrigerator vs. Room Temperature Proofing
You have two main options for proofing: at room temperature or in the refrigerator (cold proofing). Room temperature proofing is faster, typically taking 1-3 hours depending on the temperature. It's suitable if you want to bake the same day.
Cold proofing in the refrigerator is a popular technique, often lasting 8-12 hours or even up to 24-48 hours. This slow, cold fermentation has several benefits: it further develops flavor (enhancing the tang), makes the dough easier to score, and allows you to bake on your schedule. A cold dough also holds its shape better when transferred to a hot baking surface, often resulting in better oven spring. Most perfect sourdough starter recipe tips for maximizing flavor often recommend a cold proof.
Baking: Oven Temperature and Time
Baking sourdough requires a hot oven and initial steam to achieve that signature crisp crust and excellent oven spring. A Dutch oven is an ideal baking vessel for home bakers as it traps the steam released by the dough, mimicking the conditions of a professional steam-injected oven. Preheat your oven with the Dutch oven inside to a high temperature, typically 450-500°F (230-260°C), for at least 30-60 minutes.
Carefully transfer the proofed dough (often straight from the cold fridge) into the hot Dutch oven. Score the top of the loaf, cover the Dutch oven, and bake for 20-25 minutes. The lid traps steam, keeping the crust soft and allowing the dough to expand rapidly (oven spring). After this initial period, remove the lid and reduce the oven temperature slightly (to around 400-450°F or 200-230°C). Continue baking for another 20-30 minutes, or until the crust is deep golden brown and the internal temperature reaches 205-210°F (96-99°C).
Scoring: Creating Oven Spring and Aesthetics
Scoring the dough before baking is not just for aesthetics; it serves a vital purpose. As the dough hits the hot oven, it expands rapidly due to the steam and gas inside. Scoring provides a controlled weak point on the surface, allowing the dough to expand predictably in that direction. Without scoring, the crust would rupture randomly as it sets.
Use a sharp razor blade (lame) or a very sharp knife to make cuts about 1/4 to 1/2 inch deep. Common scoring patterns include a single long slash (for a batard) or a cross or geometric pattern (for a boule). Different patterns can influence the final shape of the loaf. Practicing scoring on dough scraps can help you get a feel for it. A cold-proofed dough is generally much easier to score cleanly than a warm, relaxed dough.
Maximizing Tang: Tips and Techniques
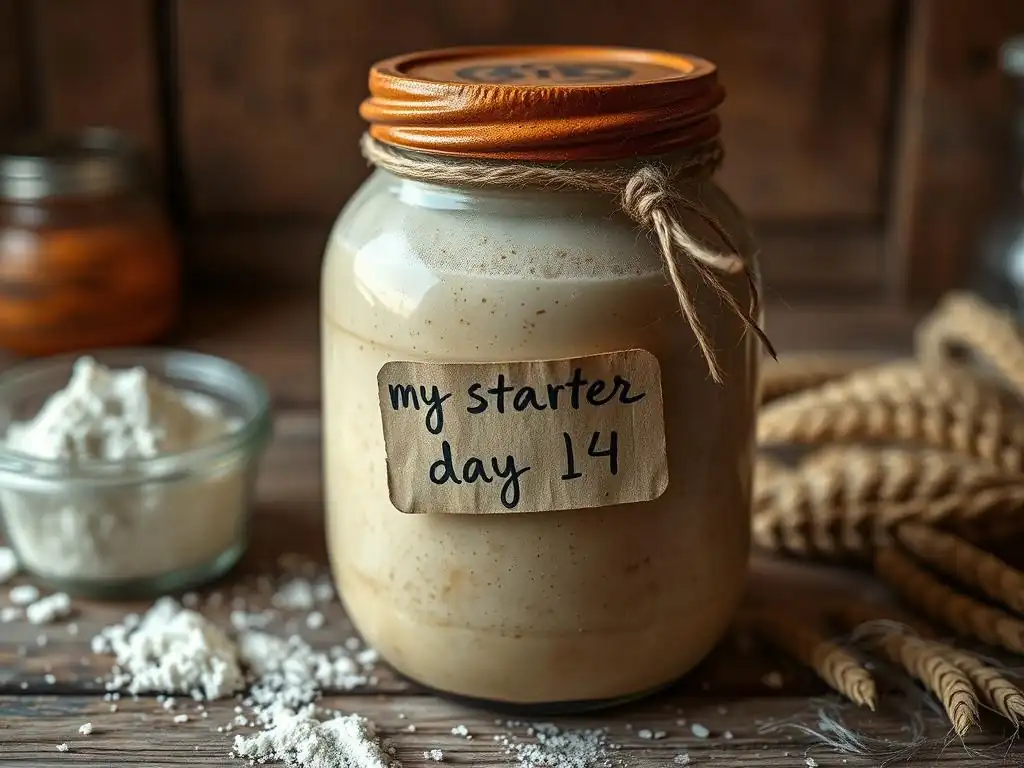
Achieving the perfect level of tanginess in your sourdough is a nuanced process that involves manipulating the conditions for your starter and dough. It's a balance between favoring lactic acid bacteria (milder tang) and acetic acid bacteria (sharper tang). While every starter is unique, several factors can be adjusted to influence the final flavor profile.
Experimentation is key here. Try adjusting one variable at a time to see how it impacts the tang. Keep notes on your process – temperatures, times, feeding ratios, and the resulting flavor – to help you replicate results. This iterative approach is fundamental to refining your perfect sourdough starter recipe tips and baking process.
Starter Acidity and Flavor
The starter itself is the primary source of flavor compounds. A young, frequently fed starter kept at warmer temperatures tends to produce more lactic acid, resulting in a milder, creamy tang. For example, a starter fed 1:1:1 and kept at 78°F might yield a less sour loaf.
To encourage a stronger, more vinegary tang (acetic acid), you can try feeding your starter with a higher ratio of flour to starter (e.g., 1:2:2 or 1:3:3 starter:flour:water), which means the microbes have to work harder and longer to consume the food, favoring acetic acid production. Also, keeping the starter at slightly cooler temperatures (e.g., 65-70°F or 18-21°C) can shift the balance towards acetic acid. Using a higher percentage of whole wheat or rye flour in your starter feedings can also contribute to a more complex and sometimes tangier flavor profile due to the different nutrients available.
Flour Selection: Impact on Flavor and Texture
The type of flour used in both your starter and your dough plays a significant role in flavor development, including tanginess. Different flours contain varying levels of sugars and nutrients that the wild yeasts and bacteria feed on.
Using a portion of whole wheat or rye flour in your dough (even just 10-20% of the total flour weight) can contribute a deeper, more complex flavor and often a more pronounced tang compared to using 100% white bread flour. These flours have more microbial life and more food sources available. Experimenting with heritage grains or different types of whole grain flours can unlock a wide spectrum of unique flavors in your sourdough, adding another dimension to your perfect sourdough starter recipe tips journey.
Fermentation Time: Controlling Tanginess
Longer fermentation times generally lead to more developed flavors and increased tanginess, as the bacteria have more time to produce acids. This applies to both bulk fermentation and the final proof, especially if using a cold proof.
A long, slow bulk fermentation at a cooler room temperature (say, 10-12 hours at 68°F) will develop more tang than a quick bulk fermentation at a warm temperature (4-6 hours at 78°F). Similarly, a cold proof in the refrigerator for 12-24 hours will significantly increase the tang compared to a 2-hour proof at room temperature. If you desire a very pronounced tang, consider extending your cold proof up to 36 or even 48 hours, monitoring the dough to ensure it doesn't over-proof and lose structure.
Salt: Flavor Enhancement and Fermentation Control
Salt is a critical ingredient in sourdough, not just for flavor but also for controlling the rate of fermentation and strengthening the gluten structure. Typically added after the autolyse period, salt slows down yeast activity, which can be beneficial in preventing the dough from fermenting too quickly, especially in warm conditions.
While salt doesn't directly create tanginess, it balances the flavors produced during fermentation. A dough without enough salt can taste bland despite having a good tang from the acids. The standard salt percentage is around 2% of the total flour weight (e.g., 10g salt for 500g flour). Using too little salt can result in a sticky, hard-to-handle dough that ferments too fast, potentially leading to a less desirable flavor balance. Using too much salt will significantly slow down fermentation and can inhibit the activity of your starter.
Troubleshooting Sourdough Bread
Even experienced bakers encounter issues with sourdough. It's a dynamic process influenced by many variables. Understanding common problems and their causes can help you diagnose and correct them in future bakes. Don't view failures as setbacks, but as learning opportunities to refine your technique and perfect your sourdough starter recipe tips and baking skills.
Common issues include dense bread, flat loaves, or a gummy crumb. Often, these problems stem from factors related to the starter's activity, fermentation times, shaping, or baking technique. Keeping a baking journal to track conditions and results can be incredibly helpful in pinpointing what went wrong.
Dense Bread: Causes and Solutions
Dense sourdough bread, lacking an open, airy crumb, is a common frustration. The primary cause is usually insufficient leavening. This can happen if your starter wasn't active enough when you mixed the dough. Ensure your starter is bubbly and has at least doubled after feeding before you use it.
Another major factor is under-proofing. If the dough doesn't ferment long enough during bulk fermentation or final proof, it won't develop enough gas to create an open structure. Make sure you're allowing adequate time for fermentation based on your kitchen temperature and observing the dough's volume increase and feel. Over-handling the dough during shaping, which deflates it too much, can also contribute to a dense crumb. Be gentle when shaping to preserve the trapped gases.
Flat Bread: Preventing and Correcting
A flat loaf, lacking height and structure, can be disheartening. This often results from a weak gluten structure or over-proofing. If your dough doesn't develop sufficient gluten during mixing and stretching/folding, it won't have the strength to hold its shape and rise upwards during baking. Ensure you're performing enough stretch-and-folds until the dough feels strong and can pass the windowpane test (stretching a small piece thin enough to see light through).
Over-proofing is another frequent culprit. If the dough ferments for too long, the gluten structure can weaken and collapse, and the yeast can exhaust its food supply. The dough will spread out rather than hold its tension. Pay attention to the poke test during proofing. Baking in a hot Dutch oven or using a baking stone with steam can help support the dough and encourage better oven spring, counteracting some issues with dough strength or slight over-proofing.
Gummy Bread: Addressing Moisture
Gummy or wet-looking crumb can occur even if the bread looks well-baked on the outside. This is usually related to moisture content and baking time. One cause is slicing into the loaf before it has cooled completely. As the bread cools, steam continues to escape, and the internal structure sets. Slicing too early traps this moisture, resulting in a gummy texture. Always let your sourdough cool on a wire rack for at least 2-3 hours, or even longer for larger loaves, before slicing.
Another reason can be insufficient baking time, especially if the oven temperature wasn't quite right or the loaf was particularly large or wet. Ensure the internal temperature reaches 205-210°F (96-99°C). Sometimes, a slightly higher hydration dough can feel gummier if not baked thoroughly. If you consistently get a gummy crumb, try reducing the hydration slightly in your next bake or extending the baking time by 5-10 minutes, ensuring the crust doesn't burn (you can tent it with foil).
Sourdough Bread Variations
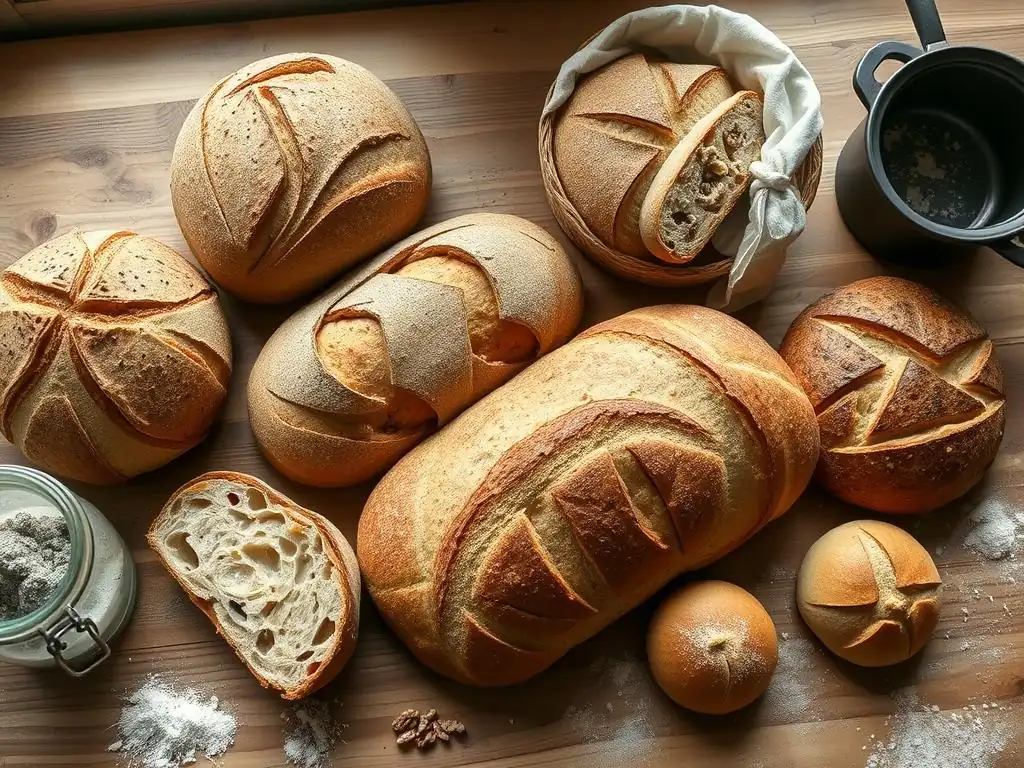
Once you've mastered the basic sourdough loaf, a world of variations opens up! You can alter the flour composition, add inclusions, or change the shaping to create different types of bread. These variations not only change the texture and flavor but also offer new ways to use your active sourdough starter.
Experimenting with additions like seeds, nuts, dried fruits, herbs, or cheese can transform a simple loaf into a gourmet experience. Adjusting the hydration or incorporating different grains allows you to explore different crumb structures and crust characteristics.
Whole Wheat Sourdough
Incorporating whole wheat flour into your sourdough is a popular variation. Whole wheat flour contains the bran and germ in addition to the endosperm, providing more fiber, nutrients, and flavor compared to white flour. Using 50% or more whole wheat flour will result in a denser loaf with a stronger, nuttier flavor and often a more pronounced tang due to the increased microbial food source.
Dough made with a high percentage of whole wheat flour can be less extensible and absorb more water, so you might need to adjust the hydration slightly upwards. It also ferments faster due to the higher nutrient content, so watch your dough closely during bulk fermentation. Whole wheat sourdough pairs wonderfully with hearty meals or simply butter.
Seeded Sourdough
Adding seeds brings fantastic flavor, texture, and nutritional benefits to sourdough. Common additions include sesame seeds, poppy seeds, sunflower seeds, pumpkin seeds, flax seeds, or a blend. Seeds can be incorporated directly into the dough during the mixing phase or used to coat the outside of the loaf before baking.
If mixing seeds into the dough, soaking them beforehand (e.g., overnight with an equal weight of water) can prevent them from absorbing moisture from the dough during fermentation, which could result in a drier loaf. Around 10-20% of the total flour weight in seeds is a good starting point. A seeded crust adds a delightful crunch and visual appeal to the finished loaf.
Flavored Sourdough
Beyond seeds, you can infuse your sourdough with a variety of flavors. Herbs like rosemary, thyme, or dill can be chopped and added during mixing. Roasted garlic, sun-dried tomatoes, olives, or grated cheese are other popular inclusions that add moisture and intense flavor bursts throughout the crumb.
For sweet variations, try adding cinnamon, raisins, cranberries, or nuts. When adding wet ingredients like olives or sun-dried tomatoes, drain them well to avoid adding too much excess moisture to the dough. Incorporate these additions during the final stages of mixing or during the first set of stretch-and-folds to ensure they are evenly distributed.
Storing Sourdough Bread
Proper storage is key to keeping your beautiful sourdough loaf fresh and preserving its texture. Sourdough bread, due to its natural acidity, tends to stay fresh longer than commercial yeast bread, but it can still dry out or lose its crisp crust if not stored correctly.
Avoid refrigerating sourdough, as this can actually accelerate staling. The ideal storage method depends on how quickly you plan to eat the loaf.
Maintaining Freshness
For the first day or two, simply store the loaf cut-side down on a cutting board. This is ideal for preserving the crust's crispness.
For longer storage (up to 3-4 days), wrap the cooled loaf in a linen bread bag or a clean tea towel. This allows the bread to breathe while protecting it from drying out too quickly. Avoid plastic bags or airtight containers at room temperature, as they can trap moisture and make the crust soft and potentially encourage mold growth. If the crust softens, you can often refresh it by briefly reheating the loaf in a hot oven (around 350°F or 175°C) for 5-10 minutes.
Freezing for Later Use
If you won't finish a loaf within a few days, freezing is the best way to preserve its quality. Once the loaf is completely cool, you can freeze it whole, in halves, or sliced.
To freeze, wrap the bread tightly in plastic wrap, then place it in a freezer-safe bag or wrap it again in aluminum foil to prevent freezer burn. Frozen sourdough can last for several months. To thaw, remove from the freezer and let it sit at room temperature, still wrapped, until thawed. For a crispier crust, you can unwrap the thawed loaf and reheat it in a 350°F (175°C) oven for 10-15 minutes. Sliced bread can be popped directly into a toaster from frozen.
Serving and Enjoying Sourdough
The moment of truth! After all your hard work, it's time to slice and enjoy your perfect sourdough loaf. Always use a sharp serrated knife for clean slices that don't compress the crumb. The sound of the crust crackling as you slice is one of the most satisfying parts of the sourdough journey.
Enjoy your bread plain to appreciate its flavor and texture, or use it as a base for countless delicious meals and snacks.
Serving Suggestions
Sourdough's tangy flavor makes it incredibly versatile. Here are a few ideas:
- Classic: Toasted with butter or high-quality olive oil.
- Bruschetta: Grilled or toasted slices topped with fresh tomatoes, basil, garlic, and a drizzle of balsamic glaze.
- Sandwiches: The sturdy structure holds up well to various fillings.
- Soups and Stews: Perfect for dipping into hearty bowls.
- Avocado Toast: A perennial favorite, enhanced by the tangy base.
- Croutons: Cube stale sourdough, toss with oil and herbs, and bake until crispy.
- Bread Pudding: A delicious way to use up slightly stale bread.
Experiment and find your favorite ways to enjoy the fruits of your labor. Each loaf baked is a step forward in mastering the craft and perfecting your sourdough starter recipe tips and baking skills.
Frequently Asked Questions
How long does it typically take to create a sourdough starter?
It usually takes between 5-12 days to create a sourdough starter. The exact timeframe depends on factors like room temperature and flour type.
What kind of flour is best for a sourdough starter?
While all-purpose flour can work, unbleached flour or whole wheat flour are often recommended. These flours provide more nutrients for the wild yeasts to thrive.
What does a "perfect tang" in sourdough actually mean?
A perfect tang refers to the distinct sour flavor in sourdough bread. This tang comes from the lactic and acetic acids produced by the bacteria in the starter.
How often should I feed my sourdough starter?
Initially, feeding should be done once a day. Once the starter is active and bubbly, you can feed it twice a day, especially before baking.
What are some signs that my sourdough starter is not healthy?
Signs of an unhealthy starter include mold growth, a foul odor, or a complete lack of activity and bubbling. Addressing these issues promptly is crucial.
Final Reflection: The Enduring Allure of the Perfect Sourdough Tang
The pursuit of the perfect sourdough loaf is more than just baking; it's a journey of patience, precision, and a deep connection to the ancient art of fermentation. The subtle nuances of tang, the satisfying rise, the complex flavors – these are the rewards that keep bakers returning to their starters, time and again. This quest for perfection, as explored in this article, remains incredibly relevant in today's world, where a growing appreciation for artisanal foods and mindful processes is taking hold.
The impact of sourdough baking extends far beyond the kitchen. It's a testament to the enduring power of simple ingredients transformed by time and care. The process itself fosters a sense of connection to the natural world, a mindful practice in a fast-paced society. Bread is the staff of life,
a simple phrase, yet it encapsulates the profound significance of this humble food, its ability to nourish not only the body but also the soul. The journey to that perfect tang, therefore, is a journey of self-discovery, a testament to our enduring fascination with the alchemy of baking.
Now, consider your own journey. What have you learned about patience and precision from your own sourdough adventures? Perhaps this article has inspired you to revisit your starter, to experiment with different flours, or to simply appreciate the magic that unfolds within that humble jar. Don't be afraid to embrace the imperfections; they are part of the process, part of the story. The pursuit of the perfect sourdough tang is ongoing, a continuous learning experience, and the rewards are well worth the effort. So, embrace the journey, and may your next loaf be your best yet.
Unleash Your Inner Baker: Craft Your Perfect Sourdough Loaf!
Thanks for joining us on this sourdough journey! We hope you now feel empowered to tackle the art of creating that perfect tangy loaf. Ready to put your newfound knowledge into practice?
- Bake your own sourdough masterpiece! Use the recipe and techniques outlined in this article to create a loaf you'll be proud of. Don't be afraid to experiment – sourdough is all about the journey!
- Share your baking triumph! Post a picture of your creation on social media and tag us – we'd love to see your results!
- Discover more sourdough secrets: Explore our other articles on BakeWithEase for tips on shaping, scoring, and even creating unique sourdough variations.
What unique flavor will you add to your next sourdough adventure?